Thursday, June 30, 2011

Recipe Revisit: Coq Au Vin

Good evening everyone. As promised, we're filling the recipe void with a classic recipe from last year's collection. Tonight's revisit - Coq Au Vin (chicken with wine) was one of the more complicated dishes we've ever tried on the blog (but then again, French cuisine isn't always easy - thus its well deserved reputation). 


Check out one of the most amazing (flavor wise) dishes we've ever cooked up in tonight's bonus recipe revisit. 


***


The Recipe: Coq Au Vin
Original Recipe Found In:  The Complete America's Test Kitchen TV Show Cookbook

What You'll Need:

6 Oz. Thick Cut Bacon (Chopped)
2 Lbs Bone In, Skin On Chicken Pieces (Your choice, breast, thighs or drumsticks - we chose thighs)
8 Oz. Frozen Pearl Onions
10 Oz. White Mushrooms
2 Garlic Cloves (Minced)
1 Tbs. Tomato Paste
3 Tbs. All Purpose Flour
1 Bottle Red Wine (Cheap one!)
2 1/2 Cups Low Sodium Chicken Broth
1/4 Tsp. Dried Thyme
2 Bay Leaves
2 Tbs. Unsalted Butter
2 Tbs. Fresh Parsley (1/2 tsp. dried)
-Serve with egg noodles.

The Recipe: Strawberries and Grapes with Balsamic and Red Wine Reduction
Original Recipe Found In: The Complete America's Test Kitchen TV Show Cookbook

What You'll Need:

3/4 Cup Balsamic Vinegar
1/4 Cup Dry Red Wine
1/4 Cup Sugar
1 Tbs. Lemon Zest
1 Tbs. Lemon Juice
1/4 Tsp. Vanilla Extract
1 Quart Strawberries
9 Oz. Red Grapes (about 2 cups)

It's easiest to begin with the fruit salad side dish, since you can keep in the the refrigerator for up to 4 hours.

Begin by simmering the vinegar, wine, sugar and a pinch of salt in a small sauce pan over high heat until the mixture becomes syrupy. This takes around 15 minutes. Next, remove the pan from the heat and add the lemon zest, lemon juice and vanilla extract and steep (AKA, allow to rest) for about 1 minute. This allows all the flavors to blend together nicely. Next, strain the sauce to remove any large impurities.


After you add the sugar, the powerful smell diminishes 

Now, don't allow the smell to throw you off here - and this will smell (at first) the combination of 3/4 cup vinegar and red wine makes for one potent - cough inducing - smelly pot. Once the lemon juice and vanilla are added, the smell fades - I promise.

This recipe also called for two whole cloves, which are dried flower buds of an Indonesian tree, and a fairly common spice around the world. Except in Des Moines, apparently, where we couldn't track any down. I'm sure Penzey's in Clive (a Des Moines suburb) carried the fragrant ingredient, but our early research showed that this particular item commanded saffron like prices. (Yikes!) We opted to simply skip the cloves in this recipe. If you do feel adventurous, or already have some cloves - add them with the lemon zest and lemon juice and allow them to steep for a full minute. Then strain them out.

Hull and halve your strawberries, and combine them in a medium bowl with the grapes. Pour your warm sauce over the fruit and toss until everything is well coated. You can serve this fruit salad at room temperature or you can cover it with plastic wrap and store it for up to 4 hours in the refrigerator before serving. Since we have another multi-step recipe to make tonight, I opted to make this first and store it away for later.

Halve your strawberries 

And pluck off the grapes 

Now, it's time to turn your attention to the main dish.

Begin by cutting up five slices of thick cut bacon into smaller sections (approximately 1/2 inch pieces) Place your chopped up bacon into a dutch oven or if you lack a dutch oven (as we do) simply use a large pot. Allow the bacon to crisp up for about 5 to 7 minutes. When the pieces are nice and crispy, transfer them to a paper towel lined plate. (Leave the grease in the pan!)


Next, lightly season your chicken pieces with salt and pepper. Place them into the pot and allow the skin to get nice in crispy. Cooking for about 5 minutes per side achieves this nicely. As all of your chicken is cooking (you may have to cook the chicken in shifts, if you do, simply set the cooked chicken aside while you add the uncooked chicken) chop up your onions and mince your garlic. If you have whole mushrooms, halve those as well.

Browning up nicely

Onions and mushrooms, chopped and ready to go


Once your chicken has finished cooking, evaluate the grease in the bottom of the pot. You want a light layer of grease and oils. If you are starting to accumulate a lot of excess fat, skim off the extra until you have just a thin layer of oil on the bottom of the pan. Alternatively, if you have next to nothing in the bottom of your pot - add a tablespoon of vegetable oil.

Next, add you onions and mushrooms. Allow these to get nice and golden brown (about 10 minutes) before adding your garlic and tomato paste. Stir in the garlic and tomato paste until everything is mixed well. Allow them to simmer until they are fragrant - and you will know when that happens. This wonderful aroma of tomatoes and garlic will rise up from the pot - it's almost intoxicating. For those of you who are more time oriented, less 'scent' oriented, cookers - this should take about 30 seconds.


Now, stir in your flour - mixing well until everything is blended. Allow this mixture to simmer for another minute. Add your chicken broth, wine (yes - the WHOLE bottle) along with your thyme, rosemary and bay leaves. Mix everything together and bring it up to a simmer.

Add the flour

And the broth

Next, the wine

Finally, all the spices

Finally, nestle in your cuts of chicken. Space them out evenly throughout the pot if you have the room. Cover the pan and reduce the heat to medium low. Allow them to simmer for about 40 minutes. This all depends on the pieces of chicken you are using. If you are using chicken breasts, it should take around 20 to 30 minutes. If you are using thighs or drumsticks, increase the cooking time to about 40 minutes to one hour. The best indicator, however, is temperature. Chicken breasts are done at 160 degrees while thighs and drumsticks are done at 170 to 175 degrees.


During this cooking time, you will want to start another pot of water boiling for your egg noodles. Check the bag for cooking instructions and start cooking your noodles when there is roughly that much time remaining on your chicken.


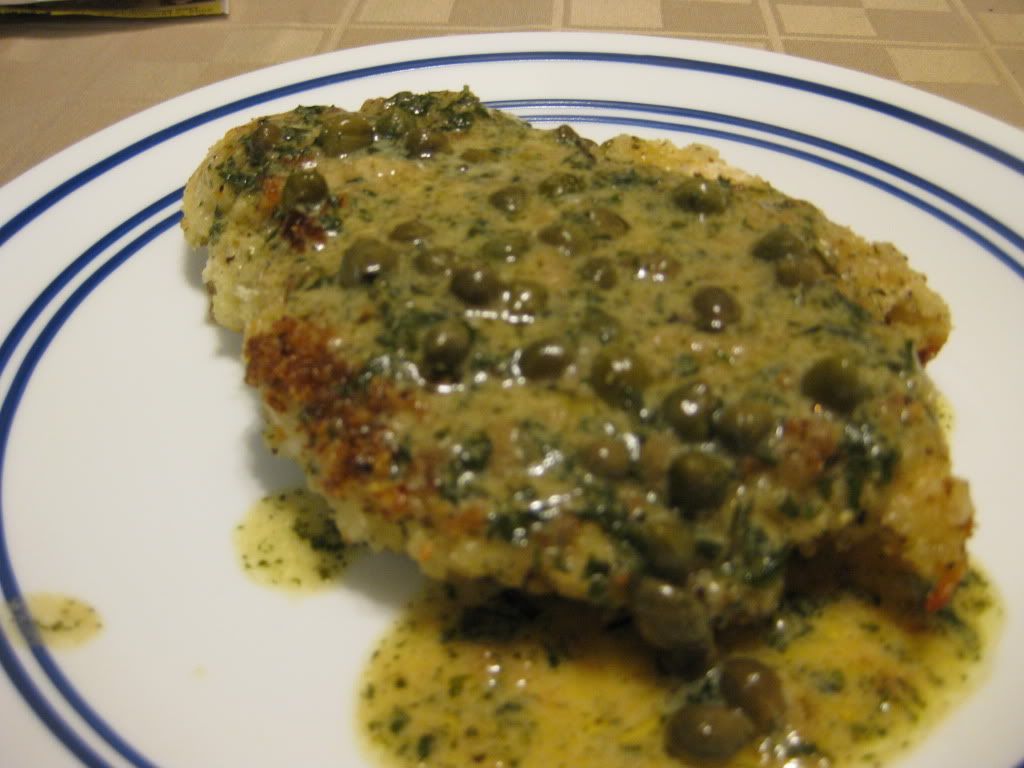
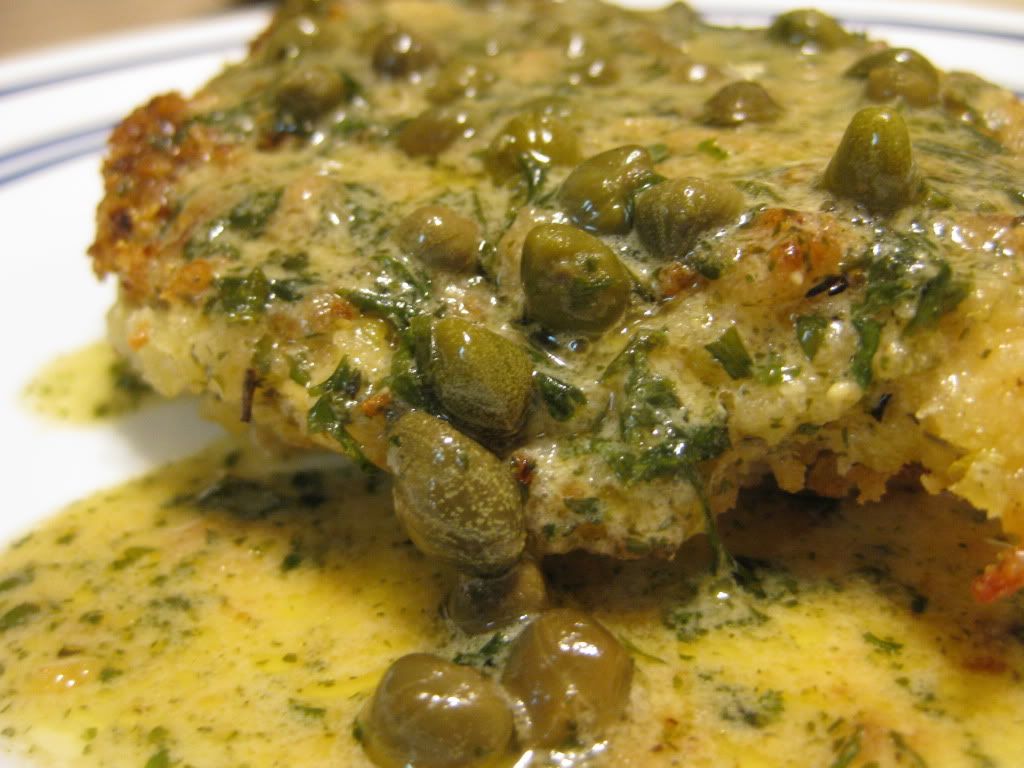
Once your chicken has reached the right temperature, remove them from the pot and set in your serving dish. Tent the dish with aluminum foil. You chicken should have an amazing purple or deep red color to it. (It peels off when you remove the skin - no worries if you don't want to eat purple food!)


Return the pot to medium heat and allow the remaining sauce to thicken. This should take another 20 minutes or so. After this time, remove the pot from heat - remove the bay leaves and whisk in the butter. I poured my sauce through a strainer to skin off some of the fat -(I simply added the vegetables back to the sauce after straining!) You should end up with about 2 cups of liquid after everything is said and done. Finally, simply pour the finished sauce over your chicken, sprinkle the bacon pieces on top and serve atop egg noodles!

The Results:


In a word...

WOW

In a lot of words - Oh my goodness! The flavors in tonight's recipes are unparalleled. The chicken packs a deep, rich flavor that is almost hard to describe. The first flavor that hits your tongue is a rush of chicken. Not just plain old 'regular' chicken though - amazing, deep POWERFUL chicken flavor. Next, you tongue is graced with the rich flavor combination of red wine, onion and mushrooms. All of these flavors blend into a fantastic symphony for your tongue. There might be something to this whole "French cuisine is the finest in the world" thing.

The fruit salad was no slouch either. While it started of very smelly, it ended up being slightly sweet and extremely delicious. The sauce complimented the natural flavors of the strawberries and grapes and acted as a great 'bridge' between the two. It's light enough that it doesn't overpower the fruit, but it's presence is certainly tasted in the dish.

In the end, both recipes have entered our top five recipes from this blog. That's right TWO top five recipes in one night. I know this blog is going up late (you can see now why it is - these are fairly intensive recipes - plus when you don't get home from work until 6:30...) but it was absolutely worth the wait.


***

That's all we have for you this week. As we said, we're off until Tuesday where I'll start the week off with a brand new dish. Maggie will close us out on Wednesday and then it's time to celebrate my birthday weekend! Until Tuesday, 

~Cheers

Wednesday, June 29, 2011

A Burger Worth Gobbling Up

Good evening everyone! Welcome to the second edition of 'cooking on wednesday'! With my new promotion, I have one day during the week off (in exchange for working that Saturday). This means that our typical schedule of Tuesday / Thursday recipes might be shaken up from time to time - this is one such time!

Tonight, we're cooking a summertime classic. The burger. We've shown through multiple recipes on the blog that the only limit to a great burger recipe is your imagination. We've tried BBQ sauces, different herbs, crackers, a load of cheeses and even apple slices - all in the name of spicing up the summertime staple. The only downside to a good burger is that red meat (I.E. beef) is not really that good for your health - no matter how lean. It doesn't hurt you to have one every now and again - but if you can substitute the red meat for something a little more healthy - why wouldn't you? Tonight, we're taking things in a new direction and combining the summertime classic with a leaner, healthier alternative.


The Recipe:  Grilled Turkey Burgers
Original Recipe Found In: Cooking for Two 2011

What You'll Need:

12 Ounces 93% Lean Ground Turkey
2 Ounces Whole Milk Ricotta Cheese (About 1/4 of a cup)
1 Teaspoon Worcestershire Sauce
1 Teaspoon Dijon Mustard
1/4 Teaspoon Salt
1/4 Teaspoon Pepper

* You'll want to use ground turkey - but not ground turkey breast. (They are usually labeled fairly clearly so you can tell them apart). Turkey breast is almost always 99% lean, which will result in an overly dry burger. Opt for the 93% ground turkey and you'll have a much juicier burger.


Begin by breaking the ground turkey into smaller sections (so it is easier to combine). In a medium bowl, add the ricotta cheese, Worcestershire sauce, dijon mustard and the salt and pepper. Using your hands, combine the ingredients until everything is well blended. Break the mixture into two separate patties and work the to about an inch thickness.

This recipe is (much like Maggie's dish last night) designed for an outdoor grill. We are still not allowed to grill indoors, so we opted to use a grill pan to cook the burgers. If you are using a gas grill or charcoal grill, you will have to adjust cooking times accordingly as the heat levels will vary between all cooking methods.

Place the burgers on the grill pan and allow to cook for 5 to 7 minutes before flipping. Cook for an additional 3 to 5 minutes on the second side. Using an instant read thermometer, check the burger's temperature. You are looking for 160 to 165 degrees. If your burgers have reached that magic temp - you are ready to serve.

Grilled to perfection (Sorry, Blogger doesn't want this picture to rotate apparently) 


Serve with a red onion, BBQ, lettuce, avocado, tomato or any other variation of vegetables you so desire. The nice part about this burger is that it has great flavor that pairs with almost anything you put on top of it.


The Results:


You have to love an easy recipe like this. Come home, throw it on the grill. 10 minutes to dinnertime. This burger packs a great, clean flavor that really shows how wide open burger recipes are. The turkey is much healthier, but you don't lose any of that classic 'summer' taste. This one is certainly worth a shot for those of you following along at home.

That's all we have for you this week. As a bonus, I'll be posting a recipe revisit sometime tomorrow evening. I haven't decided which classic recipe to feature as of yet - but it will be something from our catalog of dishes from last summer. After Thursday's recipe revisit, we're off until Tuesday, July 5th - and will have another short week as the 9th is MY birthday weekend. Busy, busy, busy around the Out Of The Culinary household lately! Thanks for sharing in our recipes for this week. As always,


~Cheers

Tuesday, June 28, 2011

Have Salsa, Will Grill

Good evening everyone!  This past weekend, an extended birthday celebration, was a great one.  One spent with many memories and loved ones.  Thank you to all who wished me a happy birthday!


During the weekend, I really didn't have time to think about what I would cook for this week's recipe (I'm being completely honest with you.)  As the festivities wore down on Sunday evening, I began a frantic search for our next [hopefully] tasty feature.  I found several recipes that looked incredibly satisfying, but alas, they took more than the usual time I allow for cooking.  When I settled on tonight's recipe, not only was it in the time frame I follow, but it has a very unique twist on several ingredients.

Tonight's Recipe:  Grilled Halibut with Mango-Avocado Salsa
Original Recipe Found In:  Bon Appetit Magazine, June 2011 Issue

What You'll Need:
1 Medium Ripe Avocado, peeled and cut into 1/2 inch cubes
1 Medium Ripe Mango, peeled and cut into 1/2 inch cubes
1 Cup Cherry Tomatoes, quartered
4 Large Basil Leaves, thinly sliced
3 Tablespoons Extra Virgin Olive Oil, divided
3 Tablespoons Fresh Lime Juice, divided
4 6 Ounce Halibut or Mahi-Mahi Fillets
4 Lime Wedges

Begin by preparing the mango-avocado salsa.  Gently combine the avocado, mango, tomatoes, basil, one tablespoon oil, and one tablespoon lime juice in a large mixing bowl.  For tonight's recipe, I'm trying something a little different.  Instead of preparing the salsa with a fresh avocado, I'm using a store bought, premade mashed avocado mix.  Not only will this ease my salsa making abilities, but make my salsa a bit more creamier than a fresh avocado.  After the ingredients are mixed, season with salt and pepper.  Let the mixture sit at room temperature, stirring once in awhile to ensure the ingredients stay incorporated.


Doesn't look that appealing...


Next, place the fillets in a glass baking dish.  Drizzle with two tablespoons of oil and two tablespoons of lime juice.  Season the fish with salt and pepper and marinate at room temperature for ten minutes, ensuring both sides of the fish are flipped occasionally.  Since halibut has a pretty neutral flavor, it's best that the oil and the lime juice get soaked in rather nicely.  Not only will this give a good soak for the fish, but a good matching flavor with the salsa.


Giving the halibut a good soak


In the original recipe, it calls for the fish to be cooked on a medium-high grill.  Since grilling indoors is frowned upon in our apartment complex, the next best thing will have to be used:  a grill pan.  We have used our grill pan to no end in many of our recipes.  Whether substituting for a grill or making panini's on this pan, there is, quite possibly, no end for uses for a grill pan.  This evening, we are cooking our halibut on it.


Nothing like fresh grill lines from a grill pan


Once the pan is almost done heating up, oil it with a dampened paper towel.  Grill the fish until the inside is almost opaque, about five minutes on each side.  Serve with a side of the mango-avocado  salsa and lime wedge and enjoy!

The End Result:


The creaminess of the avocado/guacamole, blended with the sweetness of the mango, and the tang of the lime somehow combine in the salsa to give the fish an extra kick.  I was really unsure how the salsa would taste on the fish, but it was actually quite tasty.  Tyler wanted to try the salsa on chips, unfortunately, the salsa is only good on the fish.  The marinating before the cooking really helped the fish in preparation for all these different flavors to come together.  The lime juice wasn't overpowering, like I had originally thought.  But cooked to perfection, the fish was a great, neutral flavor for the salsa.


Stop in tomorrow night for a brand new recipe with a new twist on a favorite.  Until then,

~Cheers!

Sunday, June 26, 2011

Around The Culinary World

Good evening everyone! First and foremost, happy birthday to my lovely wife! We've spent an enjoyable day with family and had one fantastic weekend to take it all in and relax. We're gearing up for another week, that means making grocery lists and (yuck) getting back to work. But as you well know, we can't start the week without sharing the best of the best from the culinary world. We've got a lot of stories to share this week, so we're going to post them 'bullet point' style and skip the commentary. (Frankly, I'm a little worn out after a busy weekend and the commentary just isn't going to be up to par!) Let's dive in:


A new study shows that the amount of sleep you are getting can greatly change the amount of weight you are losing. Apparently your body needs certain levels of sleep to maintain a higher energy. When it's tired, it is going to conserve you food (I.E. store fat) because it thinks you're low on energy and it will need to burn it (the fat) later. Read the full story about this study HERE


If you're trying to lose weight - what is the worst possible food you can eat? What about the best? A new study has found a direct tie between certain foods and weight gained throughout a year. Check this study our HERE


I'm sure glad we don't run into this problem stateside. Check out the STORY of a blogger who got in real hot water due to something he wrote about a local restaurant.


More and more studies are coming out in defense of coffee. It has been proven to be a great natural cure all for all sorts of ailments. Now, new studies are showing that coffee may have another added benefit. Check out what it is HERE


Have you noticed that ice cream prices are going up? HERE'S why.


THIS is why you always need to read into any 'nutrition studies' you may find online. Find two sources, check the story's origin. You just never know who may be behind the 'findings'.

This will buy you ANY result you want! 

That's all the news that's fit to blog about this week. We're working on a different schedule for the upcoming week. I have Wednesday off (new job - new schedule) so we'll be cooking on Tuesday and Wednesday of this week. With the 4th of July weekend, we wont be posting an Around The Culinary World on Monday. The rest of the schedule for the coming week (July 4th week) is being made up on the fly. Anywho - swing on by on Tuesday night to see what Maggie has cooking. Until then,

~Cheers

Wednesday, June 22, 2011

Versatility Is Tilapia's Middle Name

Good evening everyone! We're on a shortened schedule (read: compressed week) since it's Maggie's birthday weekend. We've got plans for the rest of the week, so that means your second dose of cooking goodness comes one whole day earlier. Hooray! Tonight, I'm jumping back into my favorite (of late) food group - fish. As we've said many, many times before - fish are so versatile that you simply cannot beat them as a mainstay in your diet. They are great for you (especially when compared to other meats) and they are so easily manipulated via flavors and other ingredients that the same cut of fish can be cooked five different ways and result in five different flavors. Tonight, we're returning to an old favorite - tilapia, but we're cooking it in a brand new way.


The Recipe: Oven Fried Fish
Original Recipe Found In: The Cook's Country Cookbook: Regional and Heirloom Favorites Tested and Reimagined for Today's Home Cooks


What You'll Need:

2 Tablespoons Vegetable Oil
4 Ounces Store bough Cornbread* (one 3 1/2 inch square piece)
3 Slices Of High Quality Sandwich Bread
2 Teaspoons Dry Mustard
1 Teaspoon Dried Thyme
1/4 Teaspoon Garlic Powder
1/4 Teaspoon Cayenne Pepper
3 Tablespoons Unsalted Butter (Melted)
1/2 Cup All Purpose Flour
1 Cup Buttermilk
2-4 Skinless Whitefish Fillets (Cod or Haddock preferred, we're using tilapia)
Lemon Wedges


*Rather than running out and buying a whole block of cornbread simply to grind up and use as crumbs, we opted to use cornmeal breading. This type of breading is more like fine breadcrumbs (Maggie used them for everything from pancakes to (duh) cornbread in the past and I've used them for waffles, but we've never tried them as a breading). It is essentially ground up cornbread (not quite, but close enough). You are free to use whatever method you like - if you have cornmeal lying around, I'd recommed using that.


Begin by adjusting you oven rack to the middle position and preheating the oven to 450 degrees. Pour the cooking oil onto a rimmed baking sheet and allow it to distribute evenly.

Pulse the cornbread in a food processor (only if you're using the bread - skip this step if you're using the 'meal) until it becomes coarse crumbs. Transfer the crumbs to a large bowl. Next, pulse the sandwich bread into fine crumbs. Transfer 1 1/2 cups of the bread crumbs to the bowl with the cornbread crumbs. Discard any extra breadcrumbs. Toss the crumbs with the mustard, thyme, garlic powder, cayenne, 1/2 teaspoon of salt and 1/4 teaspoon pepper. Drizzle the melted butter over the crumbs and toss until evenly coated.


Place the flour in a shallow baking dish and the buttermilk in a second shallow dish. Line up the dishes (flour, buttermilk and breadcrumbs in that order) assembly line style with wire rack or plate to place your finished product upon.

Place the oiled baking sheet in the oven while you are breading your fish. Be very careful to not leave the baking sheet in the oven for more than 10 minutes, however, as the vegetable oil will begin to reach its smoke point after 10 minutes. Then you'll be left with an oven full of smoke, a house full of smoke and a VERY unappetizing smell for the rest of the week.(And you'll probably never live the 'smokey' reputation down!)

Pat your fish dry with a paper towel and begin the breading process. Dip the fish into the flour, making sure it is evenly coated. Allow the excess flour to shake off. Next, coat the fish with the buttermilk, again allowing the excess to drip off. Finally, press the fish into the bread crumbs, making sure the entire fillet is completely covered. Repeat until all of the fillets are breaded.


Finally, place the breaded fish fillets on the warmed baking sheet and cook until the breading is golden and crispy and the fish is cooked. This takes about 12 to 14 minutes. Serve with lemon wedges and enjoy!


The Results:


There really is no limit to what a good whitefish fillet can do. This is probably the 10th or 11th recipe we've done now that featured tilapia, cod, haddock etc. and this dish is distinctly different from all of the other recipes we've tried. Simply put, it's a clean, flavorful finish with a very interesting twist (courtesy of the cornbread). Well worth a shot for those following along at home.


That's all we have for you this week. A happy early birthday to my lovely wife. We've got an eventful weekend planned for her to celebrate. We're off until Monday, have a great weekend everyone!

~Cheers

Tuesday, June 21, 2011

Crispy Chicken, with a Tangy Twist

Good evening everyone!  I am super glad to be back after last week.  I have no idea where I caught my little bug (doesn't help I work in a doctor's office, but in a small office, more illness will spread around faster.)  This little guy stuck with me until now, I'm still fighting a little cough - even though I am not hacking up a lung, like I was last week.  I'm glad to be back on the mend and feeling a lot better than I was.


Anyway, back to the food!  This recipe comes from our much loved "restaurant guide": Eat This, Not That.  I am always amazed at how many calories can be packed into one dish.  I'll reveal how many calories that this original recipe was based on, but it's almost unsightly.  Never the less, creating a great crispy chicken recipe involves some participation and not letting the chicken get too crispy.  Otherwise, you might have a blackened chicken disaster on your hands.  Let's begin!

The Recipe:  Crispy Chicken with Dijon-Caper Sauce
Original Recipe Found In:  Eat This, Not That, 2011 Edition

What You'll Need:
4 Boneless, Skinless Chicken Breasts (6 ounces each)
2 Tablespoons Olive Oil
3 Egg Whites, lightly beaten
1 1/2 Cup Bread Crumbs, preferably Panko
1/4 Cup Grated Parmesan
1 Tablespoon Dried Italian Seasoning
1/2 Cup Chicken Stock
2 Tablespoons Butter
1 Tablespoon Dijon Mustard
2 Tablespoons Capers
Juice of 1 Lemon
1/4 Cup Chopped Fresh Parsley

Start by covering the chicken breasts in either parchment paper or clear plastic wrap.  Using a meat mallet or meat tenderizer, pound the chicken until it is a 1/4 inch thickness.  As I stressed in the Chicken Pizzaioli recipe, it is very, VERY important to get the chicken to a uniform thickness.  This helps with the cooking process (to get it evenly cooked) and not burning the outside of the chicken.  Since this recipe does call for a crispy exterior, you don't want the chicken to look too brown or, even worse, black.  Not very appealing, if you ask me.


Next, heat the oil over medium high heat in a cast iron skillet.  In a shallow bowl, mix the egg whites until slightly beaten.  On a large plate, mix the bread crumbs, parmesan cheese, and Italian seasoning.  Carefully dip each of the chicken breasts into the egg whites and then into the crumb mixture, ensuring each breast is evenly coated.


Breadcrumbs, ready for the chicken


The oil should be heated at this point.  Add the chicken to the pan and cook for three to four minutes on each side.  The chicken should be a light golden brown and crunchy.  After the chicken is done cooking, transfer to a plate to let the chicken rest.  Letting the chicken rest will let the juices redistribute within the chicken, giving a more juicy flavor to the chicken.


While the pan is still hot, add the stock and reduce by half, no more than two minutes.  Stir in the butter, mustard, capers, and lemon juice - make sure that the browned bits at the bottom of the pan are also scraped up.  Turn off the heat and add the parsley.  Drizzle the sauce over the chicken breasts and enjoy!

The End Result:


Even though the sauce is rather runny, it is incredibly flavorful and a nice addition to this chicken.  The dish had a real strong tang to it.  The mustard and the capers combined really well to create this unforgettable sauce.  My tendency is to the add the ingredients to a hot pan and put away any remaining items in the kitchen.  But with this dish, you really had to watch the chicken and the sauce as well.  Again, cooked right, the chicken will be have a nice crunchy texture and will complement the sauce well.  And it really did!  I'm sure if I used real breadcrumbs, instead of panko breadcrumbs, the flavor would have been much different.


Since this recipe is out of Eat This, Not That, the book gives a dish similar to this.  That dish is the Chicken Picatta from Ruby Tuesday.  That dish is over 1400 calories - over 70 percent of the allotted amount of calories an average person should eat in a day.  The recipe I made this evening has only 395 calories and won't bust your calorie count for the day.  It's incredible that making a similar dish can be so vastly different in caloric value.  But this one is definitely more bang for your buck and won't cost a couple more inches to your waistline.


Stop in tomorrow (yes, I did say tomorrow) for Tyler's new twist on an old favorite.  Until then,

~Cheers!

Sunday, June 19, 2011

Around The Culinary World

Good evening everyone! The weekend is winding down, a new week is starting up. (I move into my new position on Monday - woo promotion!) that can only mean one thing - it's time for another edition of Around The Culinary World:


The first story this week has Maggie and I a little perplexed. Perhaps you've seen this particular Yoplait ad on TV. A woman is standing at the refrigerator debating if she can afford to eat the desert or not. I could run in place - she suggests. She rationalizes (or tries to) ways she can eat the tempting dish. Then a thinner coworker walks in (small talk ensues) and the first woman, now jealous of the thinner woman, opts to grab Yoplait instead of grabbing the cake.

Well, apparently this has some up in arms about the premise behind the ad. There are groups out there who are calling for Yoplait to pull the ad because they believe it encourages eating disorders. Maggie and I have talked this particular point over multiple times. We don't know where to land on this one. On one hand, we understand the pressures and the mental insecurity that comes with eating disorders. Having a commercial basically say "if you eat cake you are fat - eat yogurt instead" certainly isn't helping anything. On the other hand, we can't shake the feeling that this may be an overreaction to the actual point of the commercial - which lies somewhere closer to "Yoplait tastes like cake, but is better for you than cake" than "Eat Yoplait or you're a fatty". You can read the full argument HERE.

For what it's worth, Yoplait reacted by pulling the ad - what do you think readers? Overreacting or unnecessary advertising? Let us know in the comments.


There are many causes in the food/cooking world that are worth getting behind. Better food for our school systems, more transparent food production practices, better safety guidelines - the one that Maggie and I have become the most interested in (outside of Jamie Oliver's Food Revolution) is sustainable food production. I'll encourage you to go out and read everything you can on sustainable farming. It's a topic much too big to delve into in one blog post but I'll sum it up as concise as I can.

At this rate, the human population of this planet will eat itself out of resources in the not-as-distant-as-you-might-think future. Simply put, we're consuming more than we can produce. This has a nasty impact both on wildlife and vegetation. Entire populations of wild fish have been driven to near extinction due to overfishing. Habitats are destroyed and turned into farm fields so wheat, corn and bean production can expand in a (futile) attempt to keep up with demand.

Sustainable farming is (part of) the solution to this problem. Rather than saying, 'eat less' or 'don't eat this', sustainable farming looks at ways of keeping up production without the negative impact on the environment. Things such as fish farms allow entire schools of fish to be raised simply for the purpose of food - they are raised in tanks and never are placed into an ecosystem so their presence (or lack thereof) cannot impact the environment. The best part is it allows natural occurring animals to repopulate and return balance to the ecosystem. This doesn't even dive into crop production - but as I said, it's a big topic. Google it, read about it, it's an important concept.

My point with all of this is that Maggie and I make an active effort to buy sustainable fish, produce etc. whenever we can. Is it helping? Well, according to THIS story - it is.


Quick, name the most popular food in the world. This one actually isn't that hard if you stop and truly think about it. Remember, it's the world we're talking about - so you have to think in terms of readily available food for the entire planet. Not to mention something accessible - so the fancy steak you had at Outback last week probably wont show up on the list. That narrows it down doesn't it?  Like I said, not as hard as you might think. Do you think you have the answer? Did you guess rice? Well, you're wrong. I fell for this trap too, thinking in terms of quantity and less in terms of quality. So, what is the world's most popular food? Something exotic? Something special? Nope, THIS is the world's most popular food. (Makes sense after you think about the percentages doesn't it?) 


Our WTF story of the week revolves around a children's lemonade stand that was shut down and fined $500 for operating without a permit. (Read the details HERE). Of course, there was great public outcry and the city waived the $500 and allowed the stand to open again - but that leads to question - where the hell is the common sense the FIRST time around? Why does it take the general public crying "What is wrong with you!?" For city officials to stop and realize how moronic they're acting? I know there isn't an answer to this (it's called Government...) but still... it makes you wonder sometimes. 


My favorite story this week involves a very cool concept. What if you packed up your local grocery store, put in on a bus and took it to places of the world that didn't have access to grocery stores and couldn't survive on farming? Well, THIS is what you would get. Very cool indeed. 


That's all the news that's fit to blog about this week. We've got an accelerated week for you - Maggie cooks Tuesday, I'll take to the kitchen on Wednesday and we're off until next Monday. (It's Maggie's birthday weekend and we have plans on Thursday night). Stop back in Tuesday night to see what Maggie has cooking. Until then, 

~Cheers