Friday, August 29, 2014

Flautas - Fun to Say, Easy to Gobble Down

Good evening everyone!  On my never-ending quest to find (relatively) healthy, Mexican food, I stumbled upon this gem of a recipe.  While it could be reminiscent of a particular school dish (Crispitos, anyone?) these are far, far healthier and not mass produced for hundreds of hungry minds. I feel like this is an often overlooked Mexican dish, but will not be forgotten any time soon.

The Recipe:  Baked Chicken & Spinach Flautas
Adapted Recipe Found From:  www.pinterest.com

What You'll Need:
1 Pound boneless, skinless Chicken Thighs
16 Ounces Beer (or Chicken Broth)
2 Cups Water
1 Teaspoon Paprika
1 Teaspoon Kosher Salt
1 Teaspoon Garlic Powder
1 Teaspoon ground Cumin
1 Teaspoon Chili Powder
1 Jalapeño pepper, minced
3 Cups Baby Spinach, chopped
5 burrito-sized Flour Tortillas
6 Ounces Mexican Cheese, or other melting cheese, shredded

To start, place the chicken thighs in a deep-sided, non-stick skillet and cover with the beer and water. Cover with a lid and raise the temperature to medium-high heat.  Once at a boil, reduce the heat of the skillet to a simmer and cook the chicken for 10 minutes, keeping the lid on the skillet.  Once cooked, remove the chicken from the skillet and place on a cutting board.  Let the chicken cool for several minutes, then begin to shred the meat.  Place the meat in a large mixing bowl and add the paprika, salt, garlic, powder, cumin, and chili powder.  Mix all these ingredients together until well combined.

Next, preheat an oven to 450 degrees and spray a large cooking sheet with cooking spray.  Meanwhile, reserve 1/4 cup of the beer/water mixture and pour out the rest.  Bring the skillet back to medium-low heat and add the reserved liquid back to the skillet.  Add the jalapeño and spinach to the skillet and cook for three to five minutes, or until the spinach has wilted.

By now, all the ingredients have been cooked and are ready for assemble.  Cut the tortillas in half and set aside.  Place 1/2 tortilla on a clean preparing board and spoon a tablespoon of the chicken mixture on the inside straight edge of the tortilla.  Repeat with the spinach and cheese.  Roll the tortilla tightly and place seam-side down on the prepared baking sheet.  Repeat with the remaining tortillas.

Spray the flautas with cooking spray and place the baking sheet in the oven.  Bake for 10 minutes, then flip over and continue to cook for five minutes, or until crispy.  Serve with salsa and enjoy!
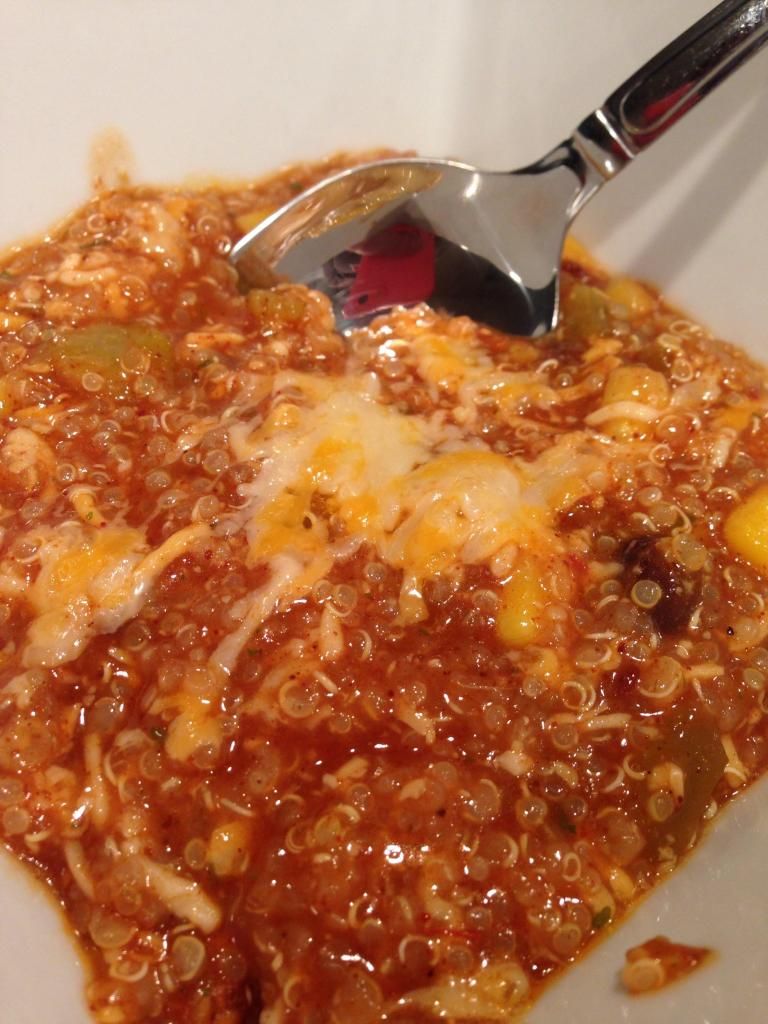
The End Result:


I'm quite pleased with the results of these flautas.  For the first time hearing about them, not to mention baking them, they were quite superb!  The seasonings of the chicken definitely mellowed out during the cooking process and you don't really notice the spinach.  It helps when the spinach has been cooked down and it's not much more than filler ingredient.  The cheese is definitely a binder and ties all the ingredients together.  Baking this dish, instead of frying it, makes it noticeably healthier too.  One flauta is about 180 calories, plus being delicious, is a win-win in my book!

Thanks for joining us tonight.  Check back on Sunday for a brand new recipe from Tyler.  Until then,

~Cheers!

Tuesday, August 26, 2014

16 Burgers of Summer: Hawaiian Burger

Good evening everyone! A slight technical glitch caused my recipe from last week to vanish into the ether of the internet. As such, last week’s post…never happened. Instead, you’re getting TWO burgers of summer this week! (Lucky ducks). We’ll get things started by sharing our take on a classic – the Hawaiian Burger.

Depending on the menu you’re looking at or the part of the world you hail from – the phrase “Hawaiian burger” can mean many different things. I knew when I started the burgers of summer series that I wanted to try at least one Hawaiian burger, but I quickly found the market was highly diversified and there was little in the way of consistency when it came to a true Hawaiian burger. Does it have ham? Does it have BBQ sauce? Do you season the pineapple? Grill the pineapple? There was nothing in the way of consensus – so I did the only logical thing. I made my own recipe. Let’s get cooking!

The Recipe: Hula-Hula Burger
This is an Out of the Culinary Original Creation

What You’ll Need:
1 Crackin’ Burger Recipe
1 Can Pineapple Rings (Whole slices)
2 Tablespoons Low Sodium Soy Sauce
1 Teaspoon Sriracha Chile Sauce
½ Teaspoon Garlic Powder
1 Tablespoon Pineapple Juice (From the canned slices)

Begin, as most of our burger recipes have, by preparing the crackin’ burger recipe. Once the patties are formed, open the pineapple rings and season each ring (one per burger) with a pinch of kosher salt.

Preheat your grill to 500 degrees, clean the grates and reduce the temperature to 300 degrees. Turn off one side of the grill and cook only over the side with the burners on. Next, add the pineapple to the grill – placing it directly on the grill grates. (We want the sugars to caramelize slightly, so the pineapple rings need a head start over the burgers). After about two minutes, add the burgers to the grill. Cook the burgers for 4 to 6 minutes per side, or until they’re cooked through. The Pineapple rings should take about 5 minutes per side to nicely caramelize (thus, the head start).

Shortly before you’re ready to remove the burgers, combine the soy sauce, Sriracha, garlic powder and pineapple juice in a small dish. Using a basting brush spread the mixture over the burgers (liberally covering them). Allow the sauce to thicken on the burgers (over the heat, this should only take about 30 to 45 seconds) before flipping the patties and basting again. Repeat this process twice for each side.

Once basted to perfection, transfer the patties to a bakery fresh bun and top with the grilled pineapple ring. Serve and enjoy!

The Results:


We opted to create a teriyaki style sauce for our burger patties in an attempt to bring out a little heat / spice to balance the pineapple. The soy sauce / sriracha combination did just that. It added a nice element of depth and complexity that balanced the especially sweet (since we caramelized the sugars) pineapple.

This burger provided just the right blending of summer time sweetness with savory seasons – it will certainly hit the spot on any summer day.

That’s all we have for you this evening. I’m back again tomorrow night with ANOTHER burger recipe. We’ll follow that up with a new dish from Maggie before closing the week with a product review. It’ll be a busy week here  - so be sure to stop back each night and see what we’ve got cooking. Until then,

~Cheers

Wednesday, August 20, 2014

Give Me the Dough, I'll Give You Endless Possibilities

Good evening everyone!  While ordering pizza to go is often a convenient and simple choice for many families, I much prefer making my own.  Once you've started on that journey, there's no way going back to regular pizza.  And while ordering and picking up (or delivery,) makes dinner time a snap, there's something to be said about creating and eating your own pizza.  Tonight, I'll create a unique, one of a kind pizza that is also super simple.

The Recipe:  Prosciutto-Mozza Pizza
Original Recipe Found In:  Cooking Light, September 2014 Issue

What You'll Need:
1 Pound refrigerated fresh Pizza Dough
1 Tablespoon Cornmeal
2/3 Cup lower-sodium Marinara Sauce
6 Ounces fresh Mozzarella Cheese, pre sliced or thinly sliced
2 Teaspoons Olive Oil
2 Ounces thinly sliced Prosciutto, torn into 1/2-inch-wide strips
1/4 Cup small fresh Oregano leaves

To start, let the dough stand at room temperature, in a greased bowl or pan, covered with plastic wrap for at least 30 minutes.  Next, place a pizza stone or heavy baking sheet in an oven.  Allow the oven to preheat to 500 degrees, keeping the pizza stone or baking sheet in the oven to preheat also.  

Once the dough has stood at room temperature, lightly dust a clean work area with flour and roll the dough into a 14-inch circle.  Pierce the entire surface liberally with a fork.  Once the pizza stone has been preheat, carefully remove from the oven.  Sprinkle the surface with cornmeal and place the pizza dough on the pizza stone.

Spoon the marinara sauce on the dough and spread evenly with the back of the spoon, leaving a 1/2-inch border.  Evenly top with the mozzarella cheese.  Place the stone back in the oven and bake at 500 degrees for 10-14 minutes, or until the crust is golden  and the cheese has lightly browned.  


Remove the pizza from the oven and brush the outer crust with the olive oil.  Arrange the prosciutto slices over the pizza and top with oregano.  Cut into even slices, serve, and enjoy!


The End Result:


I can't reiterate how much simplicity works in so many recipes.  There's (technically) only three ingredients topping this pizza, but there's so much flavor with the fresh mozzarella and the thin slices of prosciutto.  While the meat might still have a twinge of cold, don't let that deter you.  You'll be surprised and how much flavor can permeate from such a simply pizza.  The crust cooks up perfectly, without little to no effort.  Again, if it's easy to create it on your own, why not do it?  It's the whole concept behind this pizza.

Thanks for joining us tonight.  Tomorrow, Tyler crosses an ocean to bring you another Burger of Summer.  Until then,

~Cheers!

Friday, August 15, 2014

By Now, Zucchini Should Be No Surprise

Good evening everyone!  I am always intrigued with the way recipes are contorted to add or omit certain ingredients and it turns out just as good as the original.  Many of these dishes are vegetarian, and while I'm all for trying them, I like my meat too much to go Vegan.  Tonight showcases another great vegetarian dish that is quite delicious, with some really unique flavors.  While we've done a similar style recipe before, this one puts more emphasis on the veggies than anything else.

The Recipe:  Zucchini Parmesan
An Adaptation of a Recipe Found On:  www.pinterest.com

What You'll Need:
3 Medium Zucchini, washed and sliced into 1/3-inch pieces
1 (24 Ounce) Jar of Marinara Sauce (personal preference is up to you)
1 Pound fresh Mozzarella Cheese, sliced into 1/4-inch slices
1 Cup fresh grated Parmesan Cheese
1/4 Cup Butter
1/3 Cup All-Purpose Flour

To start, preheat an oven to 350 degrees and heat a large nonstick skillet over medium-high heat, melting the butter.  Arrange the zucchini slices on either plates or cutting boards.  Sprinkle with salt and pepper on both sides of the slices.  Place the flour in a shallow bowl and dredge the zucchini slices on both sides.  Shake to remove any excess and place back on the original plates or boards. 

By the time all zucchini slices are dredged, the butter will be melted and the skillet will be hot.  Arrange the slices in an even layer in the skillet and cook for three to five minutes per side, or until each side has browned.  Remove from the skillet and place in an even layer in two 9x13 inch baking pans.  Repeat with all slices until they are all cooked.


Next, spoon a tablespoon or less (depending on preference) of the marinara sauce on each slice of zucchini until all are covered.  Then, place a slice of mozzarella cheese on top of each sauce-topped zucchini slice.


Place the baking pans in the oven and bake for 20-25 minutes, or until the cheese has started to melt and the sauce is hot and bubbly around the edges.  Remove the pans from the oven and sprinkle with Parmesan cheese.  Return to the oven and bake for five minutes more, until the Parmesan cheese is melted.  Take the baking pans out of the oven and sprinkle with Parsley for garnish.  Serve and enjoy!

The End Result:


I've learned to enjoy zucchini as a stand alone ingredient and this dish didn't disappoint.  While the pieces of zucchini are quite thin, browning them added a bit more flavor than if they were to be cooked alone.  The marinara sauce I chose was a "vegetable variety" and I think it added more than the typical, plain marinara sauce.  The bubbly mozzarella was very tasty and really rounded out the dish.  Granted, this dish sets itself apart from the traditional Eggplant Parmesan, because the lack of pasta noodles, but I think this is great dish and something that should definitely be tried again!

Thanks for joining us this week.  Check back next week as we continue to showcase new recipes for you to try at home.  Until then,

~Cheers!

Thursday, August 14, 2014

16 Burgers of Summer: Western Turkey Burgers

Good evening everyone! Summer is winding down and so is our 16 burgers of summer series. Tonight marks the 11th entry to the summer long series that has featured a myriad of ways to cook up everyone’s favorite “on the grill” classic. Tonight, we dip into a territory that some people simply detest (honestly, I’m a bit surprised it took us this long to get here) the dreaded TURKEY BURGER!

Bum bum baaaaa

Why is the turkey burger so detested? I have a theory that involves the frozen variant found in many grocery store meat sections. Somewhere along the line, nearly everyone has tried one of these pre formed patties and nearly everyone has had the same experience.

“Bland”

That’s because the common prepackaged turkey burger is just that. Straight up plain ‘ol turkey. Turkey isn’t quite like chicken; it doesn’t carry the day on its own natural flavor. Turkey is, in fact, bland. That’s why you slow roast it on Thanksgiving and serve it alongside gravy and other veggies. It’s why sliced deli turkey is frequently accompanied by cheese, mustard or mayo. Yet, when folks take plain old ground turkey and turn it into a plain burger, they’re ‘disgusted’ with how bland it is.

You’ve got to help it along a bit to get the true potential of turkey to show itself. Tonight’s recipe will do just that. Inspired by a Bobbly Flay recipe, tonight’s dish will truly change the way America sees turkey burgers!

Or, it won’t. But you’ll have a tasty dish to try either way.

The Recipe: Western Turkey Burgers
Recipe Inspired by: Bobby Flay’s Cheyenne Burger

What You’ll Need:
(Serves 4)
1 Pound Ground Turkey (90%-92% lean)
8 Slices Hickory Smoked Bacon
1 Teaspoon Cayenne Pepper
Ancho Chile Powder (Pinch)
French Fried Onions
Sharp Cheddar Cheese

A brief note before we begin. This marks the third time a Bobby Flay recipe has been adapted for our burger series and this is the third time that I’ve entirely discarded his recipe in order to make my own. While I enjoy his concepts, his execution is overly cumbersome and needless complex for my liking. This is coming from the guy who likes to make everything from scratch if possible – so when a recipe has too much for ME, you know it’s gone a bit “off the rails”.  (Tonight’s recipe, for instance, has you making up your own fried onions along with the BBQ sauce – the sauce I can support – as we make our own too – but deep frying the onions? No thanks. Sure, frying your own onions would be a bit healthier, but we’re not using the fried onions as breakfast cereal – a small handful will do you no harm. He also didn’t season the turkey…which is sort of odd).

To begin, add the ground turkey into a large bowl along with the cayenne and ancho powder. Mix well, until the seasoning is evenly combined into the meat. Then, break the meat into four equal sized balls and work those balls into patties.

Turkey is a bit “stickier” than standard ground beef, so we don’t actually need to add binders like we do in our standard burgers. No eggs or breadcrumbs in this dish – but that doesn’t mean we can skip the refrigerate step. Place the patties on a plate and allow them to rest in the refrigerator for at least 10 minutes. This allows the meat to tighten up and makes things much easier to grill.

Speaking of the grill, preheat it to 500 degrees, clean the grates and turn off all but one burner. Lower that burner to medium (300 degrees) and then place your burgers directly over the remaining burner. Cook for 5 minutes per side, or until the meat is cooked through. Just before removing your burgers from the grill, top them with the sharp cheddar cheese and allow the cheese to melt slightly.

While your burgers are cooking, fry up your bacon slices and set them aside.

Once the burgers are cooked through, begin assembling your burgers. Add as much BBQ sauce as you desire to the bottom of a bakery fresh bun. Next add one slice of bacon (split in half) and top with the burger. Top the burger with another slice of bacon (split in half) and finish the whole thing off with a small handful of the French fried onions. Serve and enjoy!

The Results:


Once you try this burger, you’ll never think of turkey burgers as bland again. The seasonings alone bring the turkey burger to life as the ancho and cayenne add a touch of heat and complexity to the normally neutral turkey. Bacon, sharp cheddar and BBQ sauce make ANY burger better, so it should come as no surprise that they pair very well with our seasoned turkey as well.  This burger may not change America’s mind when it comes to turkey burgers (we simply don’t have that far of reach) but it will absolutely provide you with a great weeknight meal to enjoy during these waning weeks of summer.

That’s all we have for you this evening. Stop back later this week as Maggie shares a brand new recipe that blends brilliant flavors with some veggies that are hitting their peak this time of year. Until then,

~Cheers

Monday, August 11, 2014

Giving Quinoa a Good Name...Again

Good evening everyone!  I'm starting off this week where we left off from last week's theme of 'Mexican in different formats' with a unique take on an enchilada.  While the typical enchilada consists of lots of sauce, some sort of meat, and tortillas, mine has one of those things.  And while there's nothing wrong with that, it's definitely worth trying something different.  This Mexican dish is vegetarian friendly and you can gobble it up, without a guilty feeling about it.

The Recipe:  Quinoa Enchilada Casserole
Orignal Recipe Adapted From:  www.pinterest.com

What You'll Need:
1 Cup Quinoa
1 Can (10 Ounces) mild Enchilada Sauce
1 can (4.5 Ounces) chopped Green Chiles, drained
1/2 Cup canned Corn kernels, drained
1/2 Cup canned Black Beans, drained and rinsed
2 Tablespoons fresh Cilantro leaves, chopped
1/2 Teaspoon Cumin
1/2 Teaspoon Chili Powder
3/4 Cup shredded Cheddar Cheese, divided
3/4 Cup shredded Mozzarella Cheese, divided

To start, rinse the quinoa in a fine sieve until the water runs clean.  Place the quinoa in a medium saucepan and add two cups of water to pan.  Place the saucepan over high heat to bring to a boil, then cover and drop the temperature to medium-low.  Cook the quinoa for 15-20 minutes, then take off the heat.  Let the pan stand for five minutes and fluff with a fork.  Cover with the lid to the pan and set aside.  While the quinoa is cooking, preheat an oven to 375 degrees.  Lightly coat a 9x13 baking dish with nonstick spray and set aside.

Once the quinoa has cooled, combine it, along with enchilada sauce, green chiles, corn, black beans, cilantro, cumin, and chili powder, in a large mixing bowl.  Season with salt and pepper, if necessary.  Next, stir in 1/2 cup of the cheddar cheese and 1/2 cup of the mozzarella cheese until everything is well combined.


Transfer the quinoa mixture to the prepped baking dish and spread evenly.  Top with the remaining cheddar and mozzarella cheeses.  Place in the oven and bake until cooked through and the cheeses have melted and started to bubble, about 15 minutes.  After cooking, top with diced tomatoes and avocados (if desired,) serve, and enjoy!

The End Result:


While this dish lacks in meat, it does not lack in flavor.  All the flavor that's packed into tortillas, is out in the open and fully surrounds the quinoa.  While my quinoa didn't soak up as much water as it should have, made for a soupier end result.  The solution was found in tortilla chips.  The casserole ended up being a dip and the crunchy texture from the chips was perfect.  You could almost create a stacked dish with a layer of the casserole, topped with a layer of tortilla chips.  Either way, it's almost like these two were meant to be together.  If you're concerned by any heat potential, this dish is safe for mouths that light up from the slightest hint of fire.  The quinoa is also low in caloric value, so you don't have to feel bad about seconds (or thirds or fourths!)  Overall, a great, low-cal, vegetarian dish that is great to add to your Mexican arsenal!

Thanks for joining us tonight.  This week, we'll continue with another Burger of Summer and an Italian favorite turned vegetarian.  Until then,

~Cheers!

Thursday, August 7, 2014

Tacos AND Burgers!? How about BOTH!

Good evening everyone! It’s no secret that our favorite category is Mexican cuisine. I think if you look through our four years of archives, you’ll find Mexican dishes outweigh the rest by a near two to one ratio. It’s our favorite medium to experiment, cook and eat – so it should be no surprise that this week’s entry in our “burgers of summer” series is Mexican inspired.

I was browning up some hamburger meat last weekend (in the process of making tacos) and I wondered to myself “Why couldn’t I use ‘taco meat’ to form a burger?” I couldn’t find a reason that the idea wasn’t at least worth trying – so that’s just what I did. The result was one of the better burgers we’ve cooked up all summer.

The Recipe: Taco Burger
This is an Out of the Culinary Original

What You’ll Need:
(Serves 4)
1 Pound 80/20 Ground Beef
1 Egg
1 Packet Taco Seasoning
A handful of tortilla chips (Crushed into a fine powder)
Shredded Mexican Cheese
Hot sauce (Your choice of style)
Lettuce and or tomatoes as you desired


The premise of this burger is fairly straightforward. We’re building our favorite crackin’ burger recipe – but with a few tweaks. Begin by cracking the egg into a medium mixing bowl and beat with a fork until it’s well blended. Next, add in the crushed tortilla chips and give the mixture a few stirs to evenly blend everything.

A quick note on the tortilla chips – they’ve serving in place of our panko breadcrumbs for this recipe. I figured that using tortilla chips would help provide the binding aid that breadcrumbs normally add while also upping the final “taco” flavor. (To crush them easily, simply place a handful in a ziplock baggy and give them a few vigorous squeezes with your hands. Alternatively, if you have a bag of tortilla chips on it’s last legs (I.E. empty) simply pluck the crumbs from the bottom of the bag and give them a few whaps with your hand).

Next, add the beef to the bowl along with the packet of taco seasoning. Using your hands, work the mixture together until all of the ingredients are blended nicely. Finally, work the mixture into 4 equal balls, then work those balls into burger patties. Place the patties on a plate and refrigerate for 10 to 15 minutes to allow the mixture to tighten up before cooking.

Once you’re ready to cook, preheat your grill to 500, clean the grates and turn of all but one of the burners. Set that burner to medium (so the grill maintains a 300 degree temperature) and then place your patties directly over the heat. Allow them to cook for 3 to 5 minutes per side, or until the beef is cooked through and the juices run clear.

Turn off the burner and then top the burgers with your shredded Mexican cheese. Close the lid and allow the burgers to rest (still on the grill) for 1 to 2 minutes. This should allow most of the cheese to melt nicely. Transfer the finished burgers to a fresh from the bakery burger bun and top with your choice of traditional taco toppings (we opted for a bit of hot sauce) and enjoy!

The Results:


I set out to turn the traditional taco filling into a burger patty and I’m pleased to say that I achieved the end result. This burger was moist, just like our crackin’ burger recipes always are (thanks, Jamie Oliver!) but the flavor was decidedly taco. It’s a bit of mind warp when you tend to the burgers on the grill – you smell tacos when your around the grill, but your eyes certainly SEE burgers. All in all, this is one unique little burger recipe that makes the perfect weeknight meal. If you’re a fan of tacos and burgers, you should certainly give this one a shot.

That’s all we have for you this evening. Maggie will take to the kitchen tomorrow night to show off a brand new recipe. This one, to no one’s surprise, also follows a Mexican theme (we stumbled across an accidental theme this week!) Until then,
~Cheers