Tuesday, April 23, 2013

Fresh Grilled Fish and Potatoes

Good evening everyone!  More often than not, most recipes that use a grill, add extras (like a heavy sauce or other ingredients) that pack on the calories and make this summer time method of cooking not too calorically appealing.  Tonight, I'm going to show you a recipe that will show you that having a great tasting grill recipe that adds all those extras, without all those extra calories.

The Recipe:  Bacon-Wrapped Tilapia with New Potatoes
Original Recipe Found In:  HyVee Seasons Magazine, Spring Issue

What You'll Need:
8 small New Potatoes, halved
8 Sprigs fresh Thyme
4 (6 ounces each) Tilapia Fillets
8 Slices sweet smoked Bacon
2 Teaspoons Canola Oil
1 Teaspoon Onion Salt
1/2 Teaspoon Paprika
1/4 Teaspoon Black Pepper

To start, bring a grill up to temperature to medium-high heat.  Also, spray a grilling basket with nonstick cooking spray and set aside.  Next, over medium high heat, bring a pot of water of a boil.  Add the potatoes and boil for five to seven minutes, until they are cooked almost all the way through.  Drain the pot of potatoes through a colander and once the potatoes are cool enough to handle, pat them dry.

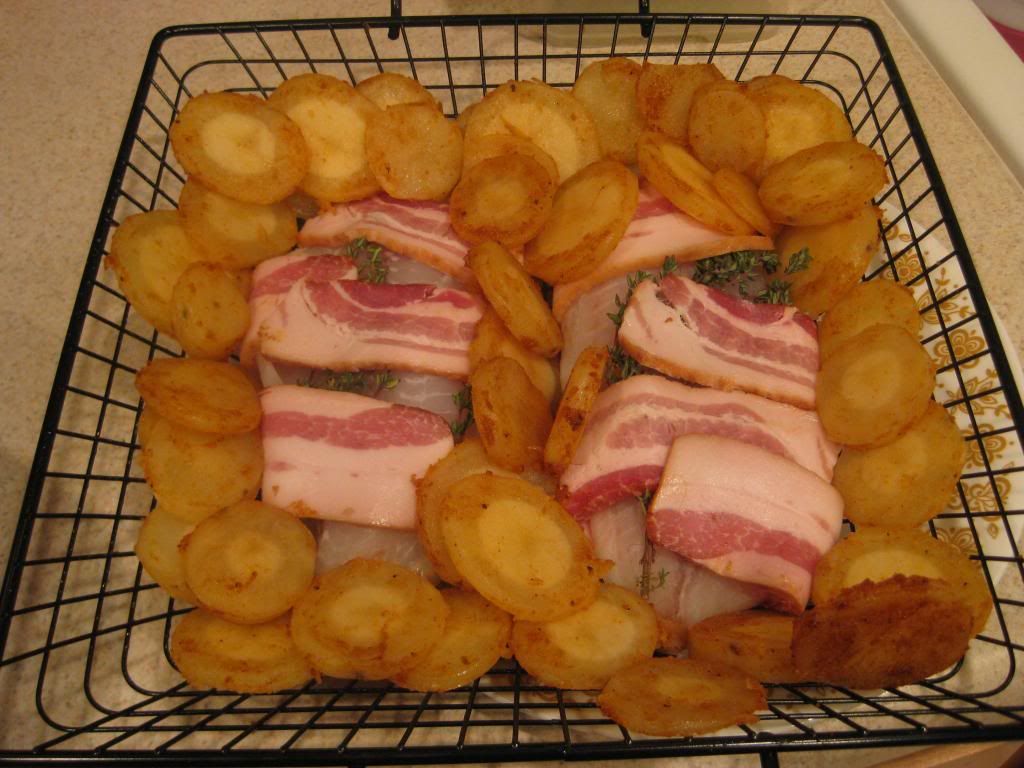
Next, prepare the fish:  wrap each fish with two slices of bacon, with two sprigs of thyme wrapped between the fish and the bacon.  Set these aside on a clean plate.  In a medium mixing bowl, combine the oil, onion salt, paprika, and black pepper until it is well combined.  Add the cooked potatoes and toss to coat.

In the grilling basket, arrange the fish and the potatoes and begin to cook.  Add the basket to the grill and cook for eight to ten minutes or until the bacon has browned.  Depending on what type of grilling basket you have, either flip the basket over or flip the fish and potatoes over and continue to cook for an additional eight to ten minutes, until the bacon is crisp and the potatoes are completely cooked through. Transfer onto plates, serve, and enjoy!


The End Result:


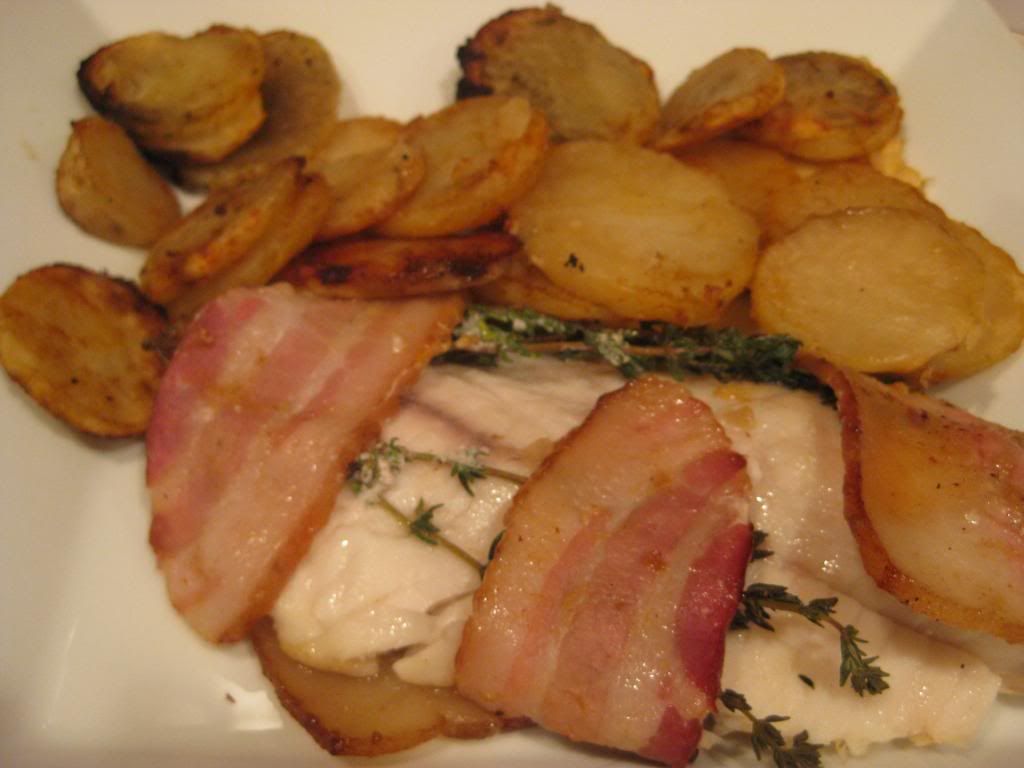
Tilapia is known for infusing any flavor it is cooked with, whether it's from seasonings or other foods.  Tonight is no exception:  the tilapia completely surrounds itself with a hearty, smokey flavor from the bacon.  But cooked from the grill makes the fish ever so tender and melts in your mouth with how flakey it tastes.  I, personally, love grilled potatoes - it doesn't matter how you grill them or with what seasonings, it just tastes good.  These potatoes are truly exceptional.  The slight additives of flavor from the onion salt, paprika, and black pepper is all you need to create fresh, flavorful grilled potatoes.  The best part about this dish?  A serving is only 280 calories - grilling light never tasted so good!

A couple of quick hints if you want to substitute any of the ingredients.  If you plan to use russet potatoes, instead of new potatoes, it's helpful to slice them up before boiling.  This will help cook the potatoes throughly before they hit the grill.  Also, if you want to use a thicker cut bacon, instead of a thinner version, the cook time will need to be adjusted.  It will take about 15 minutes per side.  The bacon will crisp up better, plus the flavor in the fish will be that much greater.

Thanks for joining us tonight.  Join us tomorrow as Tyler finally gets his hands on a recipe that he's been itching to try.  Until then,

~Cheers!

Thursday, April 18, 2013

Fresh off the Grill: Chipotle Orange Chicken


Good evening everyone! As Maggie mentioned last night, we’ve been waiting for a full sized grill for a long time. While we have a small camp style stove, it wasn’t easy to use at our apartment complex and the logistics of driving to a park just to make supper were too frustrating to tackle. So, for three years, while we lived in our little apartment, we waited.

Now that we own our very own house, we CAN grill and you better believe this summer we WILL grill. Maggie debuted our newest ‘kitchen’ gadget last night, choosing to feature a whole new variety of ingredients on the blog. Tonight, I’m returning to the grill but cooking up a much more traditional dish. Let’s get cooking!

The Recipe: Chipotle Orange Chicken
Original Recipe From: The Complete America’s Test Kitchen Cookbook

What You’ll Need:
(Serves 2-4)

2 to 4 Large, Bone In, Skin On Chicken Breasts
2/3 Cup Juice Plus 1 Teaspoon Grated Zest From 1-2 Large Oranges
1 Small Shallot (Minced)
1-2 Tablespoons Chipotle in Adobo Sauce*
2 Teaspoons Fresh Thyme Leaves (Minced)
1 Tablespoon Light Molasses
¼ Teaspoon Cornstarch

* You can find a few variants of chipotle in adobo sauce at your local grocery store. Some sauces have the chilies already minced in the sauce while other versions will have the entire chili. The minced version will be significantly hotter simply because you cannot avoid the chili. We had the version with the whole chili in the sauce. I’d encourage you to either mince or discard the whole chili in this sauce – otherwise your final dish (for whatever you use it for) will be VERY hot. I opted to leave the whole chili in while preparing the glaze, but I will not be serving the chili with the final dish.

Begin preparing the glaze by combining the shallots, orange juice, orange zest, thyme, chipotle sauce, molasses and cornstarch in a small sauce pan. Set the pan over medium heat and bring the mixture to a simmer, whisking constantly until the sauce thickens and reduces slightly. This should take about 5 minutes. Once the sauce is thickened, remove it from the heat and set it aside. You can prepare this sauce one to two days ahead of time if you’re pressed for time.

Bring your grill up to temperature and thoroughly clean the grate. If you have a two burner gas grill, leave one burner off while setting the other to medium heat. If you’re using a charcoal grill, set up a two zone system by arranging the coals on one half of the grill. This two zone grill system allows you to cook your food via indirect heat – which prevents the meat from drying out. This works by removing the direct heat from the cooking equation. Direct heat causes the proteins in the meat to shrivel up and squeeze all of the moisture from the meat. Indirect heat, meanwhile, allows the meat to warm up slowly – much like slow roasting a turkey in the oven. By using the direct heat as radiant heat, you can get great grill flavors without drying out the meat.

The downside to indirect heat cooking is the same downside as roasting anything in the oven – a crisp outer crust is near impossible to achieve. When you want a crispy exterior and you need to use the oven, you typically pan fry that item for a few minutes on each side. With the grill it’s no different.

Place the chicken breasts on the direct heat side of the grill for 6 to 8 minutes per side, or until the exterior is golden brown and grill marks appear on the meat. Next, lay a piece of aluminum foil over the grates that are serving as your indirect cooking zone (caution: just because the heat is off on ½ of the grill – that does NOT mean the grates are cool – use tongs to lay the foil in place). Transfer the chicken to the cooler side of the grill with the thicker portion of the breasts facing down towards the heat. Cover the chicken with a second sheet of aluminum foil (loosely tent it over the breasts) and close the grill. Allow the chicken to cook until the thickest of each breast registers 150 degrees on an instant read thermometer. This should take about 15 to 25 minutes.


Once your chicken reaches 150 degrees, you can begin applying the glaze equally to each side both on and below the skin (apply as much or as little of the glaze as you’d like). Transfer each breast back to the ‘hot’ side of the grill and allow the glaze fully cook into the breast this should take about 5 minutes. When the chicken is a nice golden brown (the glaze should be a deep, rich color) flip the breast and cook the other side for 3 to 5 minutes longer.  Check the thickest part of each breast with an instant read thermometer, once it reads 165 degrees, you’re ready to serve and enjoy! If you chicken isn’t quite up to temperature, move it back to the foil covered indirect heat zone and allow it to cook until it reaches 165 degrees.

The Results:


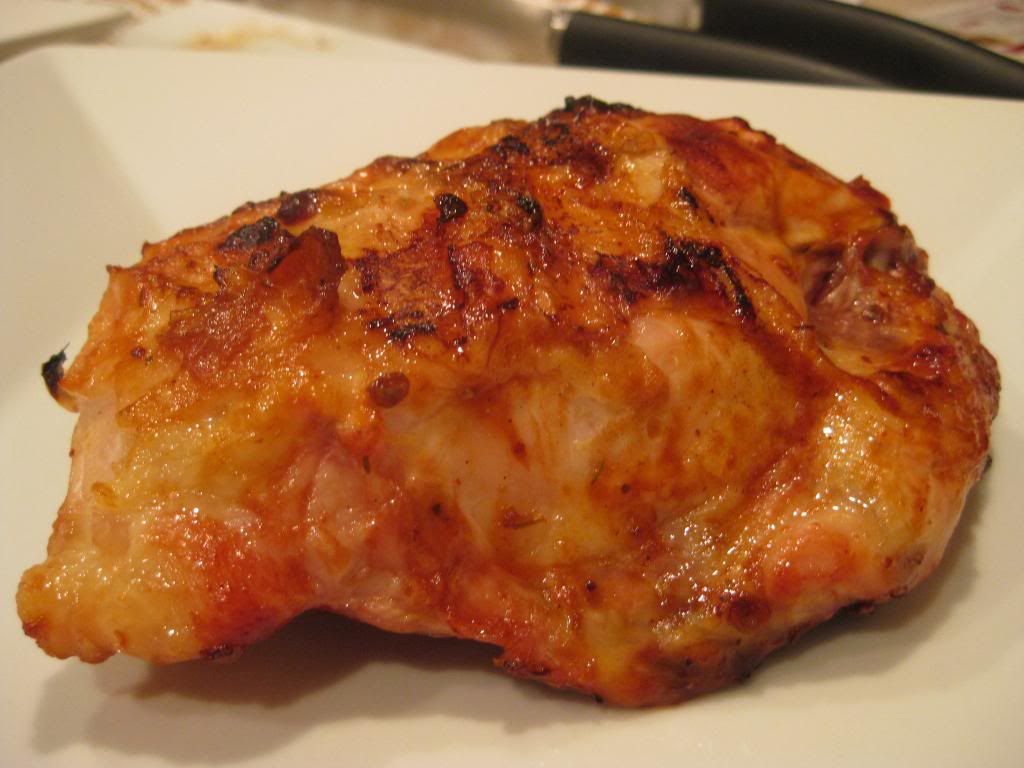
It was a cold, rainy (and occasionally snowy) day here in Iowa, but this recipe still made it feel like summertime despite the fact I was wearing a coat and using the grill as warmth when I checked on the food! Chicken breasts cooked on the grill carry this great, powerful flavor naturally. Grilling allows the moisture of the meat to stay within the breast and the smoky heat from the fire really penetrates the whole dish. The chipotle and orange glaze ends up taking on a flavor similar to a barbeque sauce – with subtle hints of sweet orange and an undertone of heat from the chipotle sauce.

This dish is simple, relatively quick and only registers at about 250 calories. Factor in the bonus of getting to grill and enjoy the outdoors while you’re cooking (even if it’s only 40 degrees and rainy) and you’ve got a dish that can’t lose!

That’s all we have for you this week. We’re back next week with two more brand new grilling recipes. Until then,

~Cheers

Wednesday, April 17, 2013

New Appliances, New Ingredients, Same Adventurous Spirit

Good evening everyone!

Before I turn the keyboard over to Maggie for her dish tonight, I'd like to share why we were absent over the past week.

We received word on Thursday, April 4th, that my grandmother was having some pain issues and was taken to the hospital.  By Friday, "pain issues" had been diagnosed as cancer of the kidneys (among other areas) and by Friday evening, my grandmother was moved to a Hospice facility.  We spent Friday and Saturday with her and almost every member of our entire family (20+ member strong.)  Grandma was fooling the nurses; who would look at the chart, look at her sitting in the chair in good spirits, sharing stories and cracking jokes, and they would wonder...is this the right chart?  We had two great days filled with stories, laughter, and lots of love.

By Sunday, the illnesses she was battling began to show themselves.  By Tuesday morning, she was gone.

My grandmother was an amazing woman of compassion, faith, and conviction.  She never has a cross word for anyone, and didn't have an enemy in the world.  I was fortunate enough to know her for 25 years of my life.  For that I will always be thankful.  She taught me many things, courage, following what you love, and never giving up.

That spark to follow what you love - to pursue your passion - is evident in the pages of this blog.  We love to cook, we love to write.  Out of those passions, this large portion of our lives was born.  For that reason, I dedicate this blog (not just tonight's post - but the entire concept of this blog) to my grandmother's memory.

I realize a large portion of our audience has never met my grandma and really could care less about how great of a lady she was.  I don't care.  This blog is my voice, and tonight, a portion of that voice is going out in tribute to a wonderful lady.

Love you always and forever Grandma.

- Tyler

I mirror what Tyler said - she was a great woman to know and someone to reflect your life upon.  Such a wonderful tribute to a wonderful lady, thank you Tyler.  Since Tyler has eagerly awaited the grilling season to arrive, I thought he would be the first one to blog about it, but it looks I am the first one to delve into the grill realm.  Not only am I grilling for the first time, I am also using two other ingredients that I have never used before: it's a bunch of firsts for the blog tonight!  If you want something completely unique, this the recipe for you:

The Recipe:  Coriander-Spiced Lamb Kebabs with Simple Lemon Yogurt Sauce and Pita Bread
Original Recipe Found In:  Relish Magazine, May 2013

What You'll Need:

For the Lamb Kebabs:
1 1/2 Tablespoon Olive Oil
1/2 Teaspoon Red Wine Vinegar
1 Large Garlic clove, minced
1 Teaspoon ground Cumin
1 Teaspoon ground Coriander
1/4 Teaspoon Cayenne
1/4 Teaspoon Salt
1 1/2 Pounds Lamb shoulder chops, trimmed, boned, cut into 1 inch pieces

For the Simple Lemon Yogurt Sauce:
1 Cup plain Greek Yogurt
1 Tablespoon chopped fresh flat-leaf Parsley
1 Garlic clove, crushed
1 Tablespoon Lemon Juice
1/2 Teaspoon finely grated Lemon Rind
1/4 Teaspoon Salt
1/4 Teaspoon Black Pepper

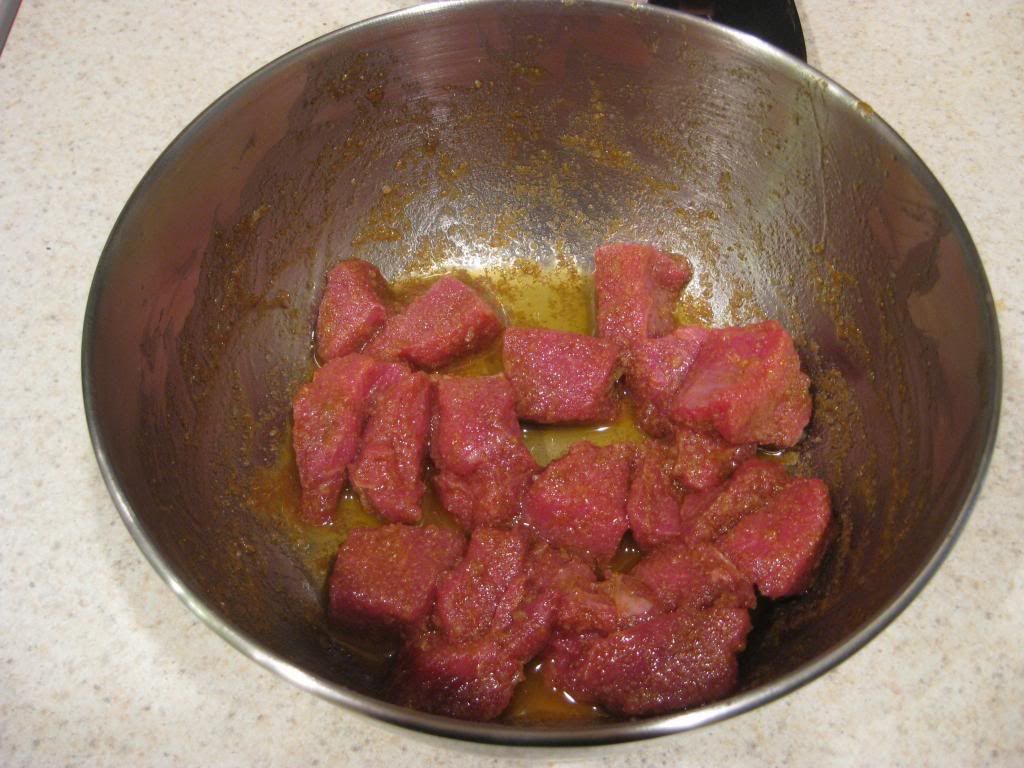
In a medium mixing bowl, whisk together the olive oil, red wine vinegar, garlic, cumin, coriander, cayenne, and salt, until everything is well mixed.  Add the lamb pieces and toss evenly to coat.  Let the pieces marinate up to two hours.

It might not look it, but the lamb is being prepared for one powerful, flavor punch

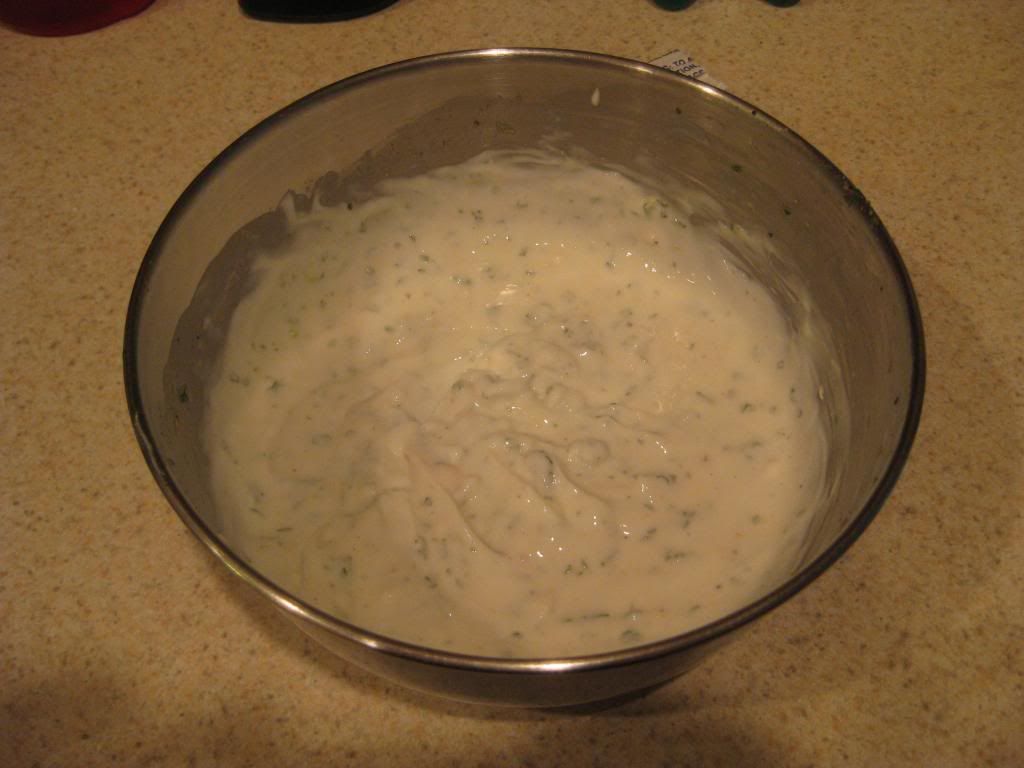
While the lamb marinates, you can prepare the yogurt sauce:  in another small mixing bowl, add the Greek yogurt, parsley, garlic, lemon juice, grated lemon rind, salt, and pepper.  Whisk all these ingredients until throughly blended.  You can keep this bowl out or place the bowl in the refrigerator until you're ready to serve, depending on how long you marinate the lamb.


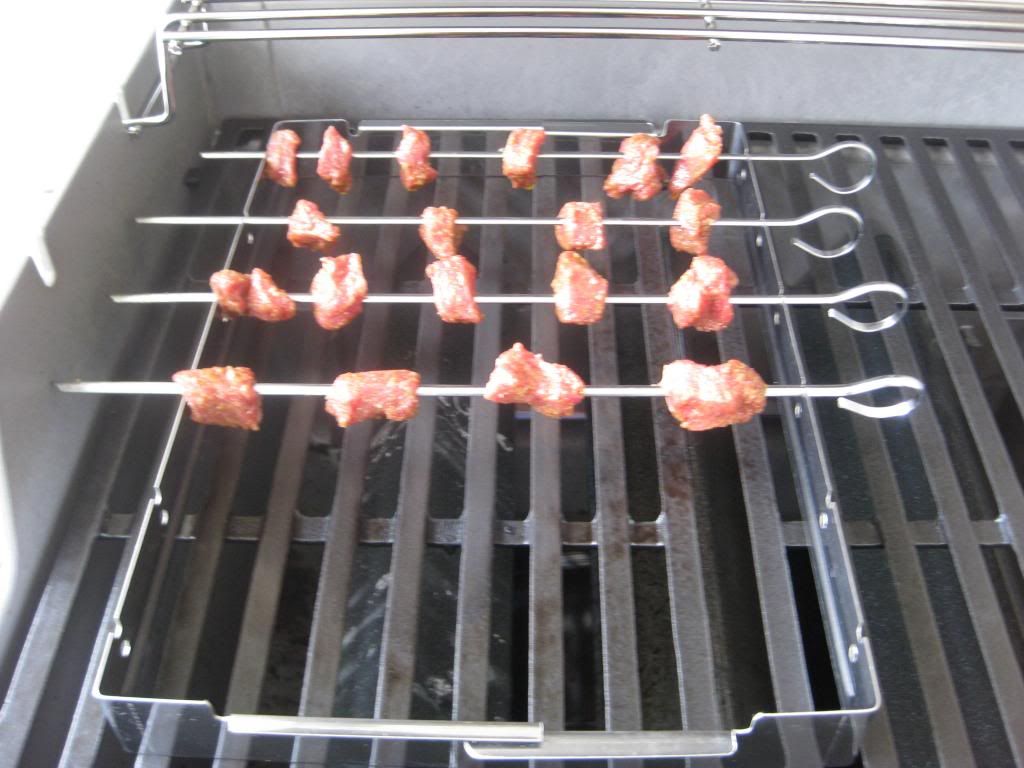
Also while the lamb marinates, prepare the grill to begin the cooking process.  Depending on the size of your grill, the time will depend on how long to preheat it for.  Once it maintains a steady 400 degree temperature, it is ready to cook.  After the grill is ready to use, pierce the pieces of lamb with metal skewers, keeping a small gap between the pieces of meat.  Place the skewers on a kebab holding plate and grill them for 12 minutes, rotating every three minutes to maintain a charred brown color and is no longer pink in the middle.

Lamb, ready to be grilled!

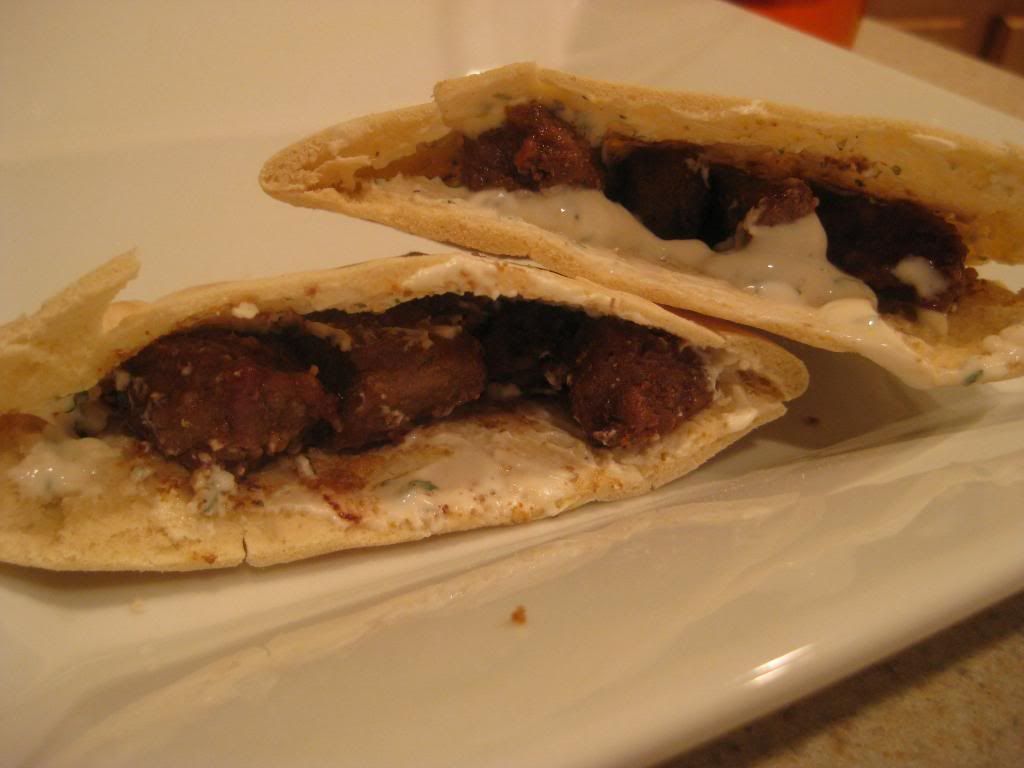
On a plate, slice open a pita bread pocket, to reveal two halves.  Spread the yogurt sauce in the pocket and layer the lamb inside.  Serve and enjoy!

The End Result:


The only lamb I've ever had has been in gyros, but this dish could be a very close second to one of my favorite dishes.  The lamb was cooked perfectly and was very moist.  The selection of spices gave it a good amount of heat, but not completely overwhelming.  The yogurt sauce helps cool down the heat and adds another flavor dimension to this dish.  If you like lemon flavor, the sauce is definitely for you. The pita pockets are perfect little capsules to hold the dish together and is a great even base for the spicy lamb and tangy sauce.  Overall, a great grilled dish, if you're feeling adventurous with your pallet.  

Tyler takes to the grill tomorrow night and tries his hand at an intensely flavored chicken.  Until then,

~Cheers!

Thursday, April 4, 2013

Good Grinds Yield Great Meatloaf


Good evening everyone! We’ve addressed the misconceptions that follow meatloaf previously on the blog, we’ve talked about, when done correctly, how meatloaf can be quite the culinary delight. We’re all on the same page here then, right? Meatloaf = good. If note, take a look HERE and revisit our last meatloaf foray.

I’ll wait.

Are we all square? Okay! Tonight we’re returning to meatloaf, not because I feel like the last iteration needs to be improved upon, but simply because it’s been a while since we’ve cooked up meatloaf. Plus,  we discovered a new recipe last weekend that just begged to be tested out. So, let’s get cooking!

The Recipe: Good Eats meatloaf
Original Recipe From: “Good Eats: A Grind is a Terrible Thing to Waste”

What You’ll Need:
8-12 Ounces Chuck Roast (Ground)*
8-12 Ounces Sirloin (Ground)*
6 Ounces Garlic Croutons
1 Teaspoon Chili Powder
1 Teaspoon Dried Thyme
½ Teaspoon Cayenne Pepper
½ Teaspoon Ground Black Pepper
½ Yellow Onion (Chopped)
1 Carrot (Peeled, chopped)
3 Garlic Cloves
½ Red Bell Pepper
1 Egg

For the glaze:
½ Cup Ketchup
1 Teaspoon Ground Cumin
Dash Worcestershire Sauce
Dash Hot Sauce
1 Tablespoon honey

* Don’t worry if you cannot find ground sirloin or ground chuck – in fact, the whole premise of this episode of Good Eats is that you shouldn’t buy the pre-ground meats. Instead, look simply for whole chuck steaks or roast and a whole sirloin steak and grind it yourself.
(Yes, it matters that the two meats are chuck and sirloin. You need a high quality meat if you want a high quality finished product – thus the sirloin – but you also need fat for moisture. Sirloin is lean, but chuck roast is higher quality, but contains about 30% fat per pound. That’s the secret to keeping your roast flavorful but not dry.)
I know what you’re thinking, “I don’t have a grinder!” or “I’m not taking the time to grind all of that meat!” Well, fear not dear reader, because those worries are both erroneous. You don’t need a fancy grinder; all you need is a food processor, which, if you do much cooking at all, you likely already have. As far as time, do you have 20 seconds? Because that’s about how long it takes to grind each cut of meat.
More on the grinding later. First, set your oven to 325 degrees and place the oven rack in the center slot.

In a food processor bowl, combine the croutons, black pepper, cayenne pepper, chili powder and thyme. Pulse this mixture until everything is ground to a fine texture. Transfer this mixture to a large bowl and set aside.

Next, combine the onion, carrot, garlic and red pepper in a food processor (you can even use the same bowl) and pulse until the contents are diced. Don’t over pulse to the point that the mixture becomes a puree, however. Transfer this mixture to the same large bowl that you placed the dry mixture in earlier.

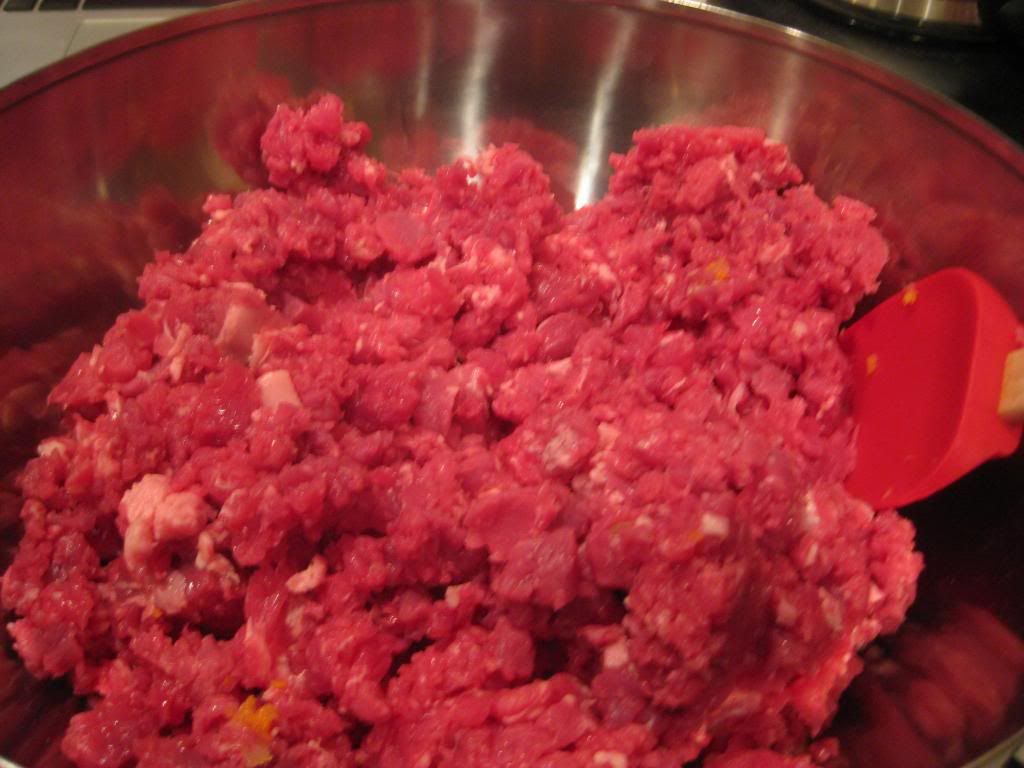
Now, turn your attention to grinding the meat. Begin by chopping your steaks into 1 inch cubes. Next, add the meat to a large food processor (you may have to work in smaller sections, don’t overload the bowl) and pulse, 10 times, in one second bursts. By the 10th pulse, you should have a nicely ground cut of meat. Transfer the completed grind to the large bowl with the other ingredients and repeat this process until all of the meat has been ground.


Crack your egg into the large bowl with all the ingredients and then begin mixture the contents by hand. Carefully turn or fold the ingredients until everything is evenly incorporated. Try to avoid grabbing, crushing or balling the meat here, you want the herbs and other ingredients to mix evenly throughout the meat, and clumping the meat up into balls here will prevent that even distribution.

Once everything is mixed, grab your loaf pan. Don’t worry about spraying it with cooking oil or otherwise prepping it for the oven – it’s not going in the oven. See, while a loaf pan is great for giving a meatloaf its shape, it allows the fat from the meat to simply sit and stew on the bottom of the pan. We don’t want that – so we don’t want to cook in the pan.

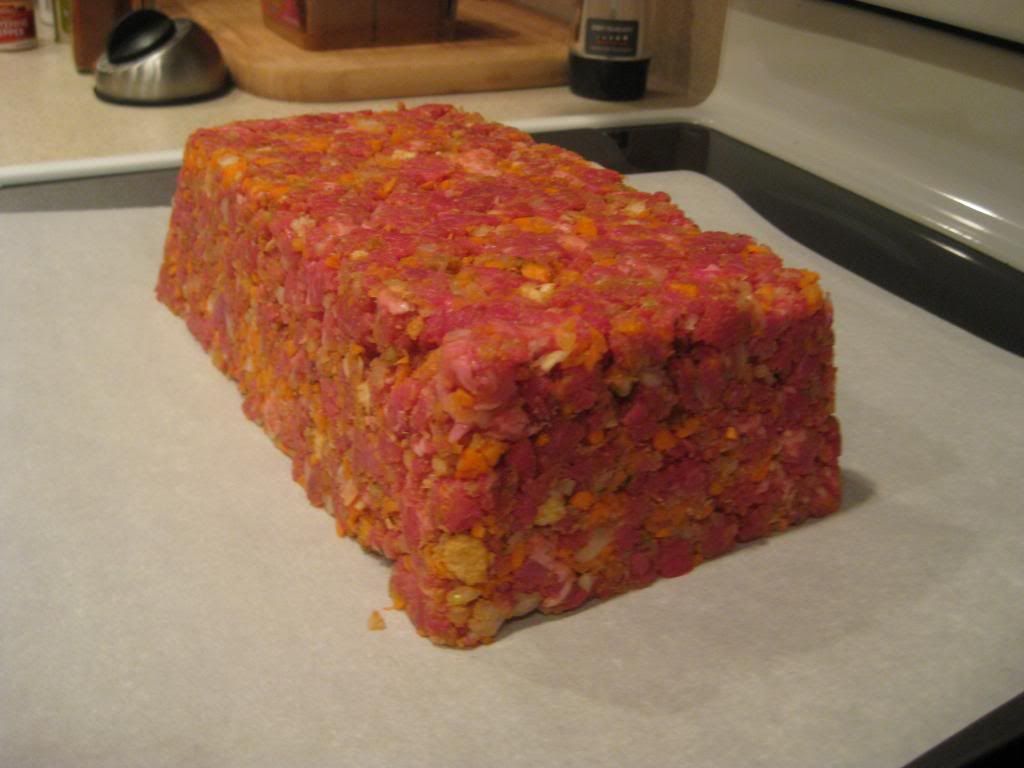
Press the meat mixture into the pan, now you can compact the meat – in fact, it’s important that you do. If you don’t compress the meat here, when you go to slice the loaf after cooking, it will simply fall apart (I’m speaking from experience here!) Once all of the meat is in your loaf pan and nicely compacted, you can prep your cooking surface by laying a piece of parchment paper on top of a rimmed baking sheet.

Turn the loaf pan over on the parchment paper and give the pan a solid tap. The loaf should drop out easily, leaving you with a beautiful loaf shape standing free on the baking sheet.


Pop the loaf into the oven for 10 minutes. During this time, you can begin working on your glaze. In a small bowl, add all of the glaze ingredients and stir until completely combined. Set this mixture aside until the first 10 minutes of cooking have passed.

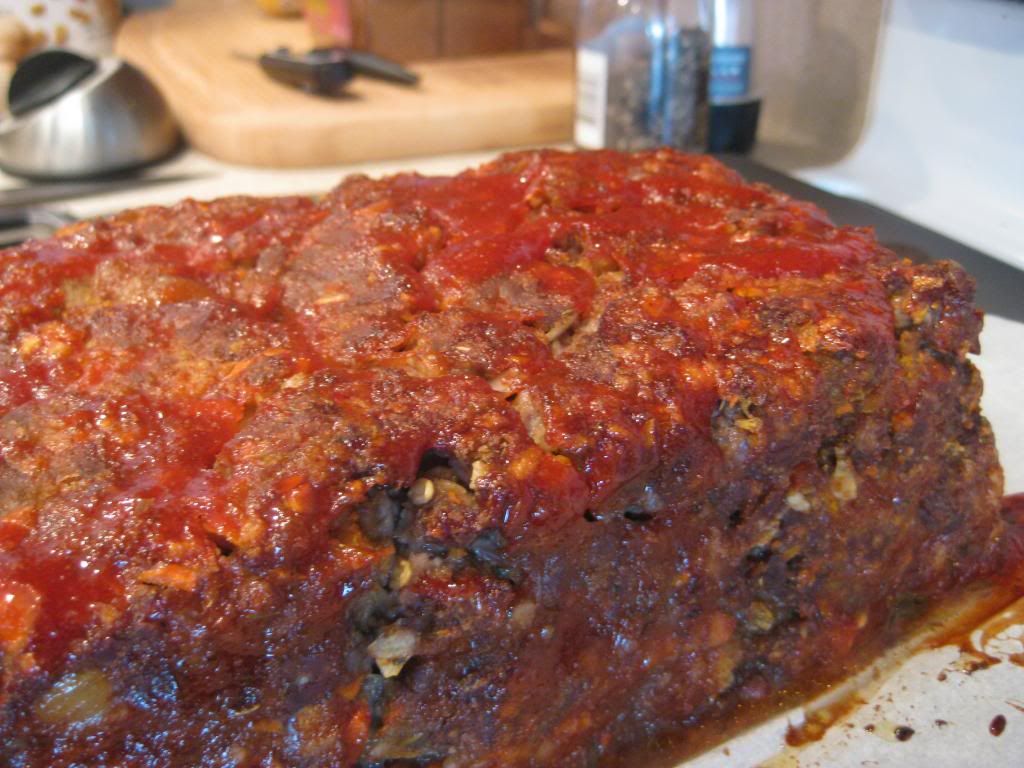
After 10 minutes, remove the meatloaf from the oven and brush the glaze over the top and sides until the loaf is completely covered. By letting the loaf cook for 10 minutes, you’re allowing the outside of the meatloaf to form a nice crust, which gives some great texture to the finished loaf. Return the loaf to the oven and allow it to roast until the internal temperature reaches 155 degrees. This can take anywhere between 45 to 90 minutes (depending on the density of your loaf).
Once your loaf reaches 155 degrees, remove it from the oven and allow it to rest for 10 minutes prior to serving. Slice and serve with a side of veggies or on a lightly toasted bun for a meatloaf sandwich. Enjoy!

The Results:


The entire point of the recipe is to show that final dish quality comes right down to which cuts of meat you choose. Simply using ground hamburger for your meatloaf isn’t doing it justice. Premium flavors come from grinding your own blend of chuck and sirloin.

Point proven! This meatloaf is simply delectable, juicy, savory and full of great flavors. The glaze is a welcome departure from most meatloaf glazes – the honey allows the glaze to crust up nicely while the ketchup hot sauce blend keeps the glaze from being overly sweet or overly spicy.

This dish clocks in a little higher on the caloric scale – around 300 calories per slice of meatloaf, but you’ll get about 8 to 12 servings out of it, so it can feed a whole family for a few days or a family of two for an entire week.

That’s all we have for you this week. Next week, we’ve breaking into new territory – a mode of cooking that we’ve previously been unable to harness. Stop in next week for brand new recipes and more culinary adventures. Until then,

~Cheers


Tuesday, April 2, 2013

Flavorful Springtime Soup

Good evening everyone!  Spring has (finally) arrived in the Des Moines metro and I think all residents can breath a sigh of relief.  Although the trees haven't budded and the grass hasn't turned green, warmer temperatures and stable weather has brought a calm to an usually rough winter.  With spring making a triumphant entrance, the return of spring ingredients has also arrived.  Tonight, I'm making the perfect springtime soup, filled with fresh flavors that are light to the pallet and the stomach too.

The Recipe:  Lemony Chicken and Orzo Soup
Original Recipe Found In: Bon Appetite Magazine, April 2013

What You'll Need:
1 Tablespoon Olive Oil
1 medium Leek, white and pale-green parts only, halved lengthwise, sliced crosswise 1/2 inch thick
1 Celery stalk, sliced crosswise 1/2 inch thick
12 Ounces boneless, skinless Chicken Thighs
6 Cups low-sodium Chicken Broth
1/2 Cup Orzo
1/4 Cup chopped fresh Dill
Lemon halves (for serving)

To start, heat the olive oil in a large heavy pot over medium heat.  Add the leak and celery and cook until softened and stirring often, about five to eight minutes.  Add the chicken and the broth to the pot, season with salt and pepper.  Bring the contents of the pot to a boil.  Once at a boil, reduce the heat to simmer and cover with a lid.  Simmer until the chicken is cooked completely through, about 15 to 20 minutes or, with a meat thermometer reads 165 degrees.  Transfer the chicken to a clean plate.  Let the chicken cool and shred into bite size pieces.

Meanwhile, return the broth in the pot to a boil.  Add the orzo and cook according to package directions or until al dente, about eight to ten minutes.  Once the orzo is done cooking, immediately remove the pot from the heat.  Stir the chicken back in and add the dill.  If you are using dried dill (in which you'll need a tablespoon of dried spice,) you may find you'll only need half of a tablespoon.  Of course, you can add more, if you want more dill flavor to your soup.  Serve, with the lemon halves to squeeze over the soup, and enjoy!

The End Result:


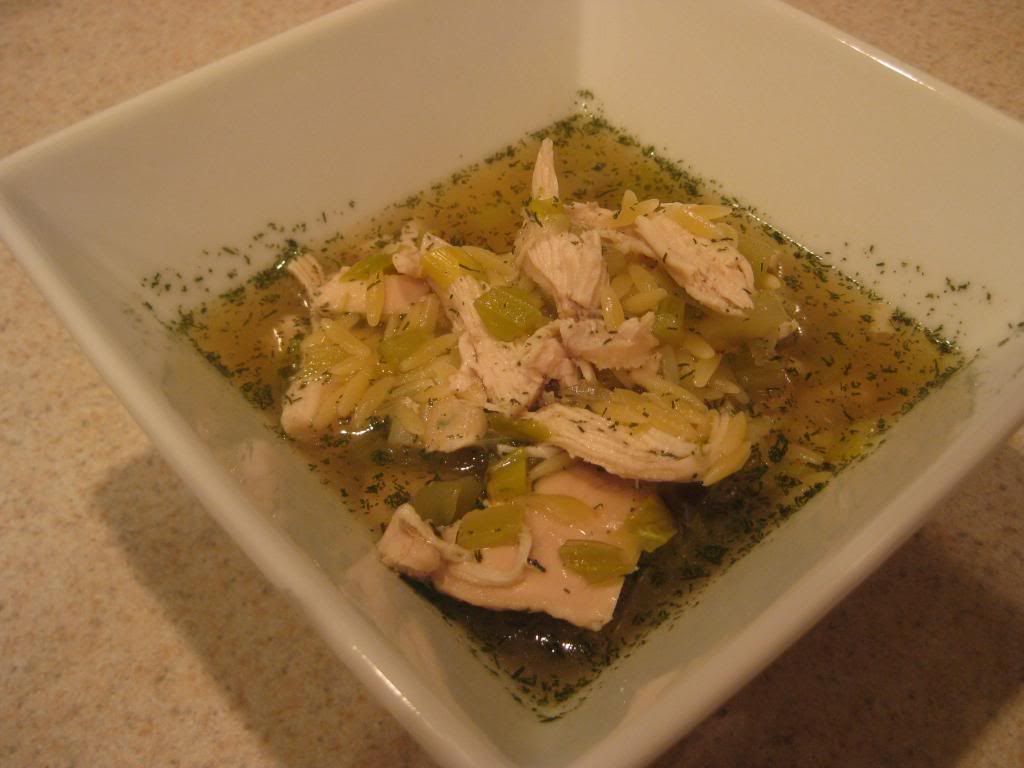
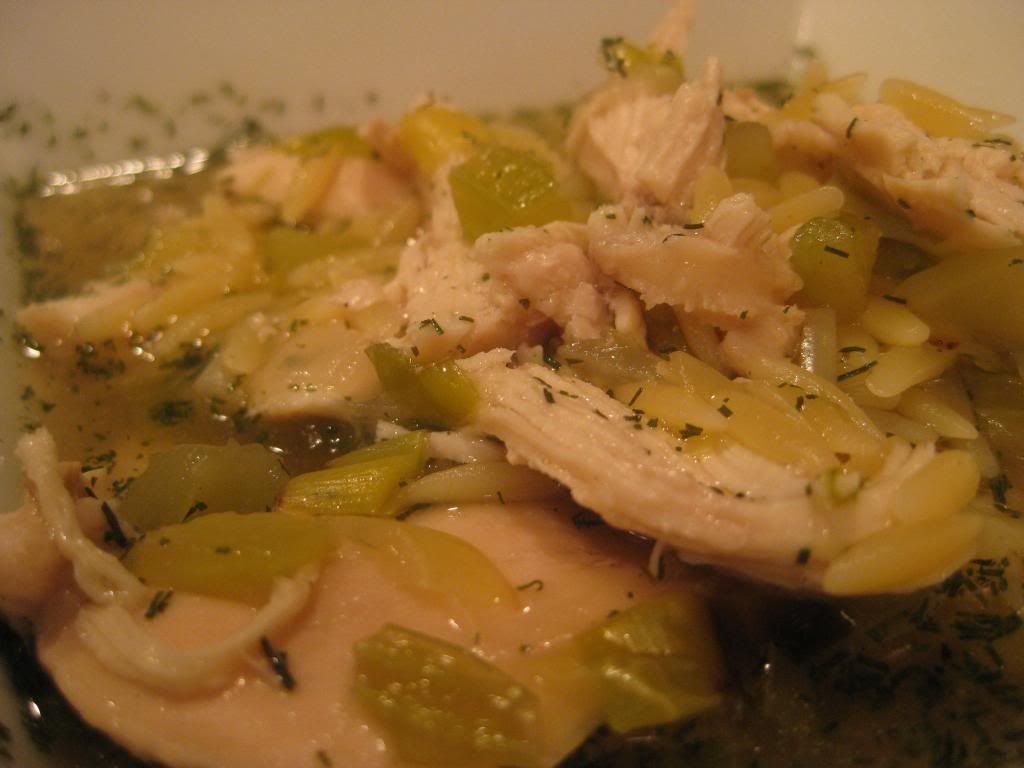
This might be the best and quintessential spring inspired soup.  All the ingredients are incredibly light, but they all work together harmoniously to give the soup a well rounded flavor.  The leeks and celery cook down, so as to not overpower with a vegetable flavor.  The chicken, infused with the broth, doesn't have a strong poultry flavor.  Also, the dill, surprisingly, won't hit your tastebuds with an herby punch.  The lemon might be the only ingredient that shines on its own in the soup.  While I preferred a hint of lemon in my soup, Tyler was squeezing the lemon dry and he loved it in his dish.  I would definitely recommend using the lemon at your discretion:  try the soup, if you want more flavor, add the lemon; if you enjoy that lemon flavor, add more until your hearts content.  Overall, a great soup that is perfect for any springtime evening.

That's all we have for you tonight.  Join us Thursday as Tyler cooks up a family favorite dish, but this recipe will be immediately added to your recipe book.  Until then,

~Cheers!

Thursday, March 28, 2013

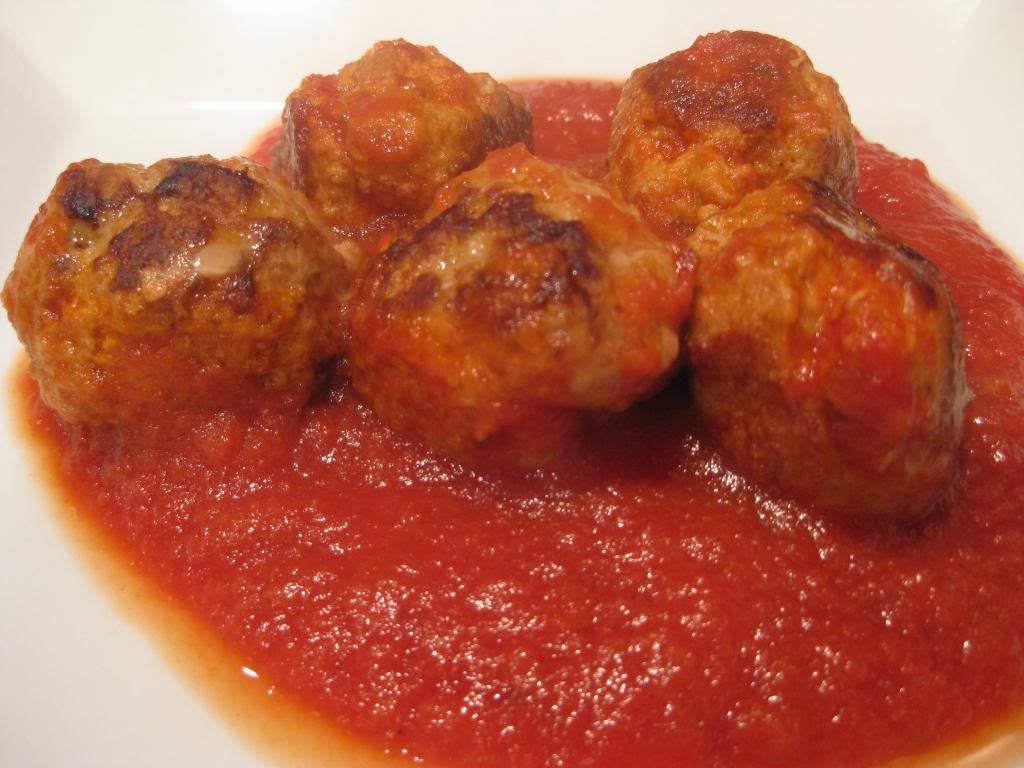
Incredibly Tasty Turkey Meatballs

Good evening everyone!  Although I am not officially part of the Live Healthy Iowa program, I've been following Tyler's lead and learning to live a healthier lifestyle.  I haven't lost 20 pounds like he has (but, needless to say, I am very, very proud that he has accomplished this goal,) I can say that I have lost some weight and toned up in some areas that I was unhappy with.  We are very happy with the results we've achieved and our bodies will thank us in years to come.  

Since we've started this program, it was always a goal to share great tasting recipes that won't be heavy on the calories.  With all these tasty low calorie recipes we've been creating, it's not tough to lose the weight with dishes this good.  Tonight is no exception:  turkey meatballs, served with a delicious tomato barbecue sauce, that will make you wanting more.

The Recipe:  Barbecue Turkey Meatballs
Original Recipe Found In:  Cooking Light Magazine, April 2013

What You'll Need:
2 Tablespoons Dark Brown Sugar
2 1/2 Tablespoons Apple Cider Vinegar
1 Teaspoon ground Cumin
1/4 Teaspoon Smoked Paprika
1/8 Teaspoon ground Cloves
1 (14.5 ounce) can diced Tomatoes with mild Green Chiles
1 1/4 Pounds ground Turkey
3 Tablespoons Italian-Seasoned dried Breadcrumbs
1 Tablespoon Chili Powder

To start, place the brown sugar, apple cider vinegar, ground cumin, paprika, ground cloves, and diced tomatoes with green chiles in a blender.  Blend all these ingredients until smooth.  Pour into a bowl and set aside.  In another bowl, combine the turkey, breadcrumbs, and chili powder until well mixed.  Rinsing your hands with cold water and keeping your hands wet, shape the mixture into 16-18 meatballs.  Place the meatballs on a clean plate.

Heat a large skillet over medium-high heat and lightly coat with cooking spray.  Once the pan is hot, add the meatballs.  Cook the meatballs for two minutes on each side, for a total of 10-12 minutes, until all sides turn brown.  Next, carefully add the tomato mixture to the skillet, not to splash any sauce on your hand.  Bring the heat to a simmer.  Cover the skillet and cook for 10-15 minutes or until the meatballs are done cooking, checking with a meat thermometer to see if they reach 165 degrees.  Serve with the tomato sauce and enjoy!

The End Result:


I can't quite put my finger on which style of barbecue this recipe derives from, but the sauce has an incredibly great smoky flavor.  It also has a nice kick of heat to it, thanks to the paprika and the green chiles in the tomato sauce.  Also, the chili powder in the meatballs gives it a nice boost of flavor that normally isn't in meatballs.  The turkey is a great substitute for beef and I wouldn't be afraid to use turkey in any meatball recipe.  Turkey has been a wonderful addition into our cooking and I'm sure this isn't the last you'll see turkey being used.  Overall, a very tasty meatball with a sauce that you can't help to lick up.

Thanks for joining us this week and sharing with us as we continue to explore the culinary world.  Until next time,

~Cheers!

Wednesday, March 27, 2013

Low Calorie Southwestern Pork

Good evening everyone! There's a program known as "Live Healthy America" that rolls out in the last week of January each year and runs to the first week in April. It's sponsored by a large collection of corporate sponsors, including Hy-Vee and other regional partners. The larger program is broken down into state specific groups (Live Healthy Iowa, Minnesota, Texas - etc.) and encourages local business to get their employees to form groups (teams) to get active and lose weight.

This year, my coworkers and I decided to join our employer's initiative and formed our own team. While Maggie and I have always championed eating healthy, I still found myself not quite where I wanted to be. Using the Live Healthy Iowa program and the My Fitness Pal app, I set out with a goal - to lose 20 pounds by the end of the program.

This morning, with 1 week to go in the program, I'm happy to report I've reached my goal. I'm 20 pounds lighter than I was 9 weeks ago, all done through eating healthy and making sure to stay active. (Our team combined has lost nearly 60 pounds in that time frame).

The nice part about this program is that it isn't a diet, it's a lifestyle change. You're not going to gain everything right back, because the program forces you to lose weight in small, reasonable steps. By changing your eating habits and activity, you lose weight in a natural, healthy way.

The long and short of it is this - if you have an opportunity to partake in this program next year, go for it. If you want to start losing weight now, find the My Fitness Pal app and stick too it. It's hard at first, but as you adjust and see results, you'll be delighted with your progress.

Tonight's recipe comes directly from the Live Healthy Iowa website. It blends southwestern flavors (one of our favorite mediums) with low calorie cooking. You can't go wrong with that combination!

The Recipe: Southwestern Pork
Original Recipe Found On: Livehealthyiowa.com

What You'll Need:
(Serves 8)

1.5 Pounds Pork Tenderloin (Trimmed of fat)
2 Teaspoons Ground Cumin
2 Teaspoons Vegetable Oil
1/4 Cup Cornmeal
1 Cup Low Sodium Chicken Broth
2 Tablespoon Red Wine Vinegar
3 Tablespoons Tomato Paste
1 Tablespoon Brown Sugar
1/2 Cup Frozen Corn
1/2 Red Bell Pepper, Diced

In a small bowl, combine the cornmeal and cumin. Blot your pork dry with a paper towel to remove excess moisture, then carefully roll each piece in the cornmeal mixture, making sure each piece is evenly covered. Repeat until all pieces are breaded.

Add the vegetable oil to a large (12 inch) non stick skillet over medium high heat. Once the oil is hot, add the pork and cook for 3 to 5 minutes on each side, or until the breading takes on a nice golden brown color.

While your pork is cooking, mix the chicken broth, vinegar, tomato paste, brown sugar and a pinch of salt and pepper. Add this mixture to the skillet with the browned pork, and bring the mixture to a boil. Once boiling, cover and reduce the heat to medium. Let the pork cook for 10 to 15 minutes.

Next, add the corn and red pepper to the skillet, stirring to evenly incorporate everything amongst the skillet. Return the lid and allow the mixture to cook for an additional 10 minutes. Slice the tenderloin into pieces and serve surrounded by the sauce. Enjoy!

The Results:


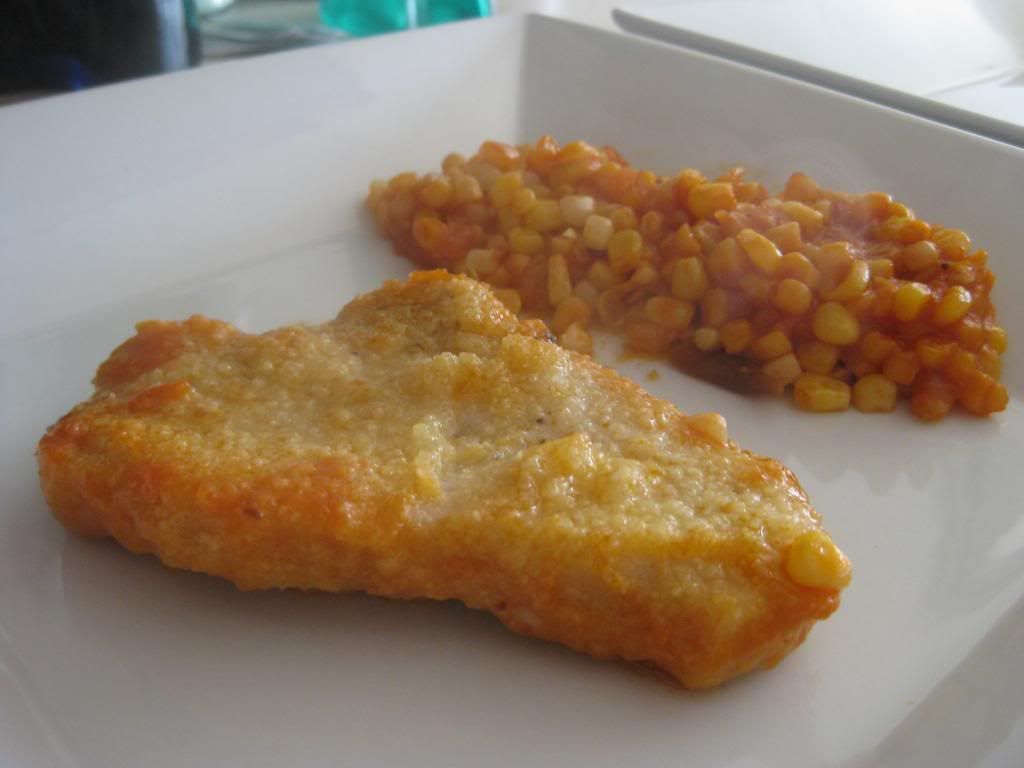
This dish lives up to the southwest name. I added a little bit of chipotle sauce to the dish while it was cooking - about 1 tablespoon (to give it a little kick) and would recommend you do so as well. The extra little layer of heat really adds to the depth of the sauce, which beautifully compliments the crunchy yet tender pork.

At just over 150 calories per serving, this light and tasty pork treat will be sure to please the whole family while keeping your healthy eating habits.

That's all we have for you this evening. Maggie takes to the kitchen tomorrow night with a brand new dish of her own.

Also, be sure to keep your eye on our blog in the next coming weeks, we're finally able to have a full size grill with our new home - and we're going to be able to pick one up sometime soon. That means that years worth of grilling recipes filed away until we had a grill are about to come to the blog. It's going to be a grilling summer! (Assuming summer ever gets here...)

~Cheers

Thursday, March 21, 2013

Not Your Average Grilled Cheese Sandwich

Good evening everyone!  After having such a delicious and filling meal last night, it's a nice switch of pace to have a sandwich that's considered a comfort food.  More often than not, comfort foods are high in calories and feature ingredients that are not that great for you.  But once in while, it's nice to find a comfort food that still tastes great, without feeling guilty after eating it.  Tonight, I tackle one of those classic dishes, tweak a few of the ingredients, and make it something you can create any night of the week.

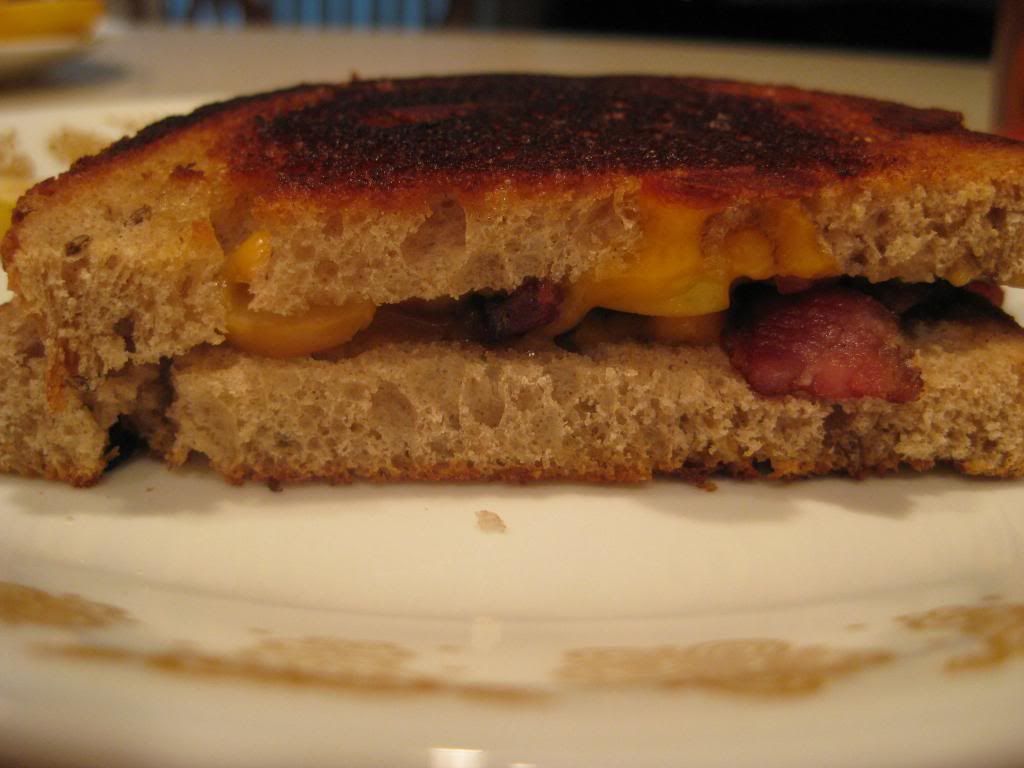
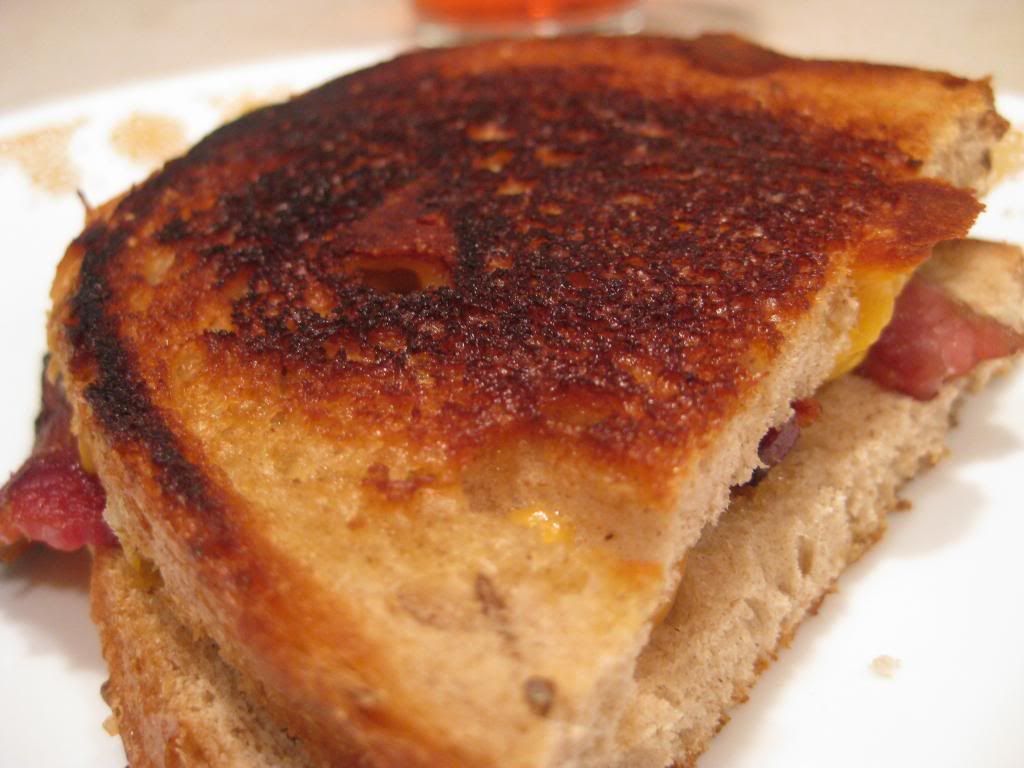
The Recipe:  Apple Cheddar Bacon Grilled Cheese Sandwiches
An Adaptation from a Eat This, Not That No-Diet Diet recipe
(Serves Two)

What You'll Need:
2 Slices Rye Bread
2 Tablespoons spreadable Butter
1/4 - 1/2 Cup Cheddar Cheese
4 Slices Bacon
1 Apple, cored and thinly sliced

To start, heat a nonstick skillet over medium-high heat.  Once the pan becomes hot, begin to cook the bacon, until each side is slightly crispy.  As with all things, everyone likes their bacon differently, so use discretion when cooking the bacon to your liking.  Once the bacon is cooked, transfer to a paper towel lined plate and let the bacon dry and cool.  

Meanwhile, heat another skillet over medium heat.  On a plate, cut each slice of bread in half and begin to prepare the sandwich:  Spread the butter on the outside sides of the bread until completely coated.  Flip the buttered sides out and sprinkle an even layer of cheese on both slices.  Line one slice with a layer of apple.  Line the other layer with the bacon.  Carefully, flip one slice onto the other and smoosh the sandwich together.

By this time, the skillet will be hot enough to cook the sandwich.  Place both sandwiches in the skillet, place a sandwich press, or another heavy skillet on top of the sandwiches.  Cook on one side for five to six minutes.  Remove the sandwich press and carefully flip the sandwiches over.  Cook this side between three to four minutes, until the cheese is melted.  Transfer to a plate, serve, and enjoy!

The End Result:


This makes any other grilled cheese obsolete.  The cheddar cheese makes it creamy, melty, and serves as a nice base for the sandwich.  The bacon is the star of all these ingredients, adding a smokey flavor that can't be duplicated.  Using rye bread, instead of whole wheat or white bread, adds a new, delicious flavor and is very hearty.  The surprise of the sandwich is the apple.  It's not usual to have apple in a sandwich, let alone a grilled cheese sandwich, but it's sweet, crunchy texture is something that makes this sandwich a league of its own.

Thanks for joining us this week.  Tune in next week as we continue in our journey in the culinary world.  Until then,

~Cheers!

Wednesday, March 20, 2013

Feast, Without Having To Fast

Good evening everyone! One of my favorite things to do in the kitchen is to prepare the "grand meal" a roast with all the sides, french onion soup, slow roasted chicken - I love the dishes that take time and attention because they're the dishes that feel the most satisfying for me. It's been awhile since I've tackled a "grand meal" on the blog - for two main reasons. I switched work locations about two years ago, and that schedule greatly reduced the number of free days I had during the week to cook up an ambitious dish. The biggest reason, however, was that we really committed ourselves to healthy cooking. It's hard to eat healthy when you're making up roasts and side dishes to feed a crowd (and there's only two people to eat it all).

Tonight, I've got the best of both worlds. I have dinner guests who will help us eat and I have a grand meal that only totals to 410 calories. A feast that doesn't attack your waistline? Sounds great!

The Recipes:

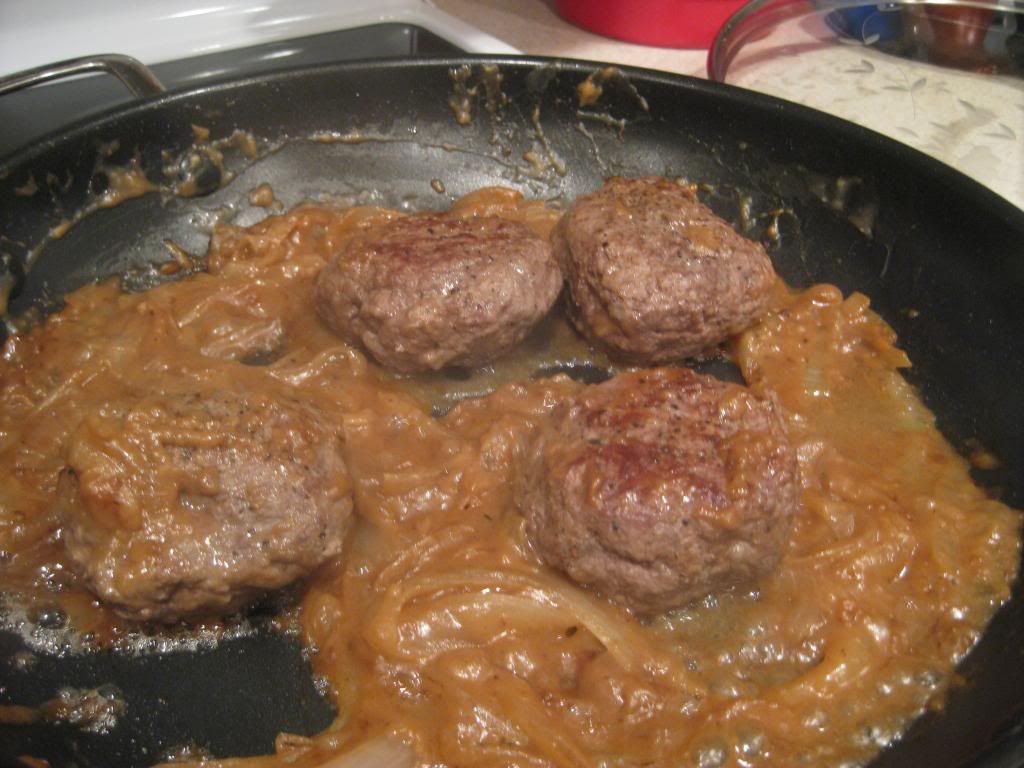
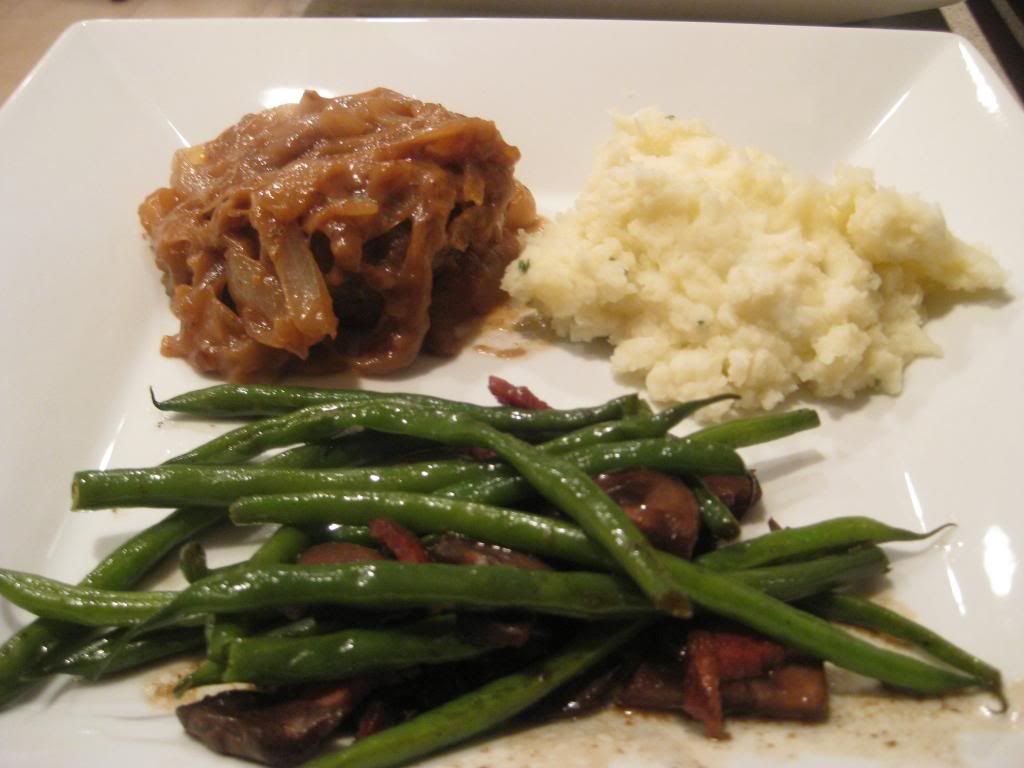
Hamburger Steak With Onion Gravy
Original Recipe Found In: Cooking Light Magazine, April 2013 Issue

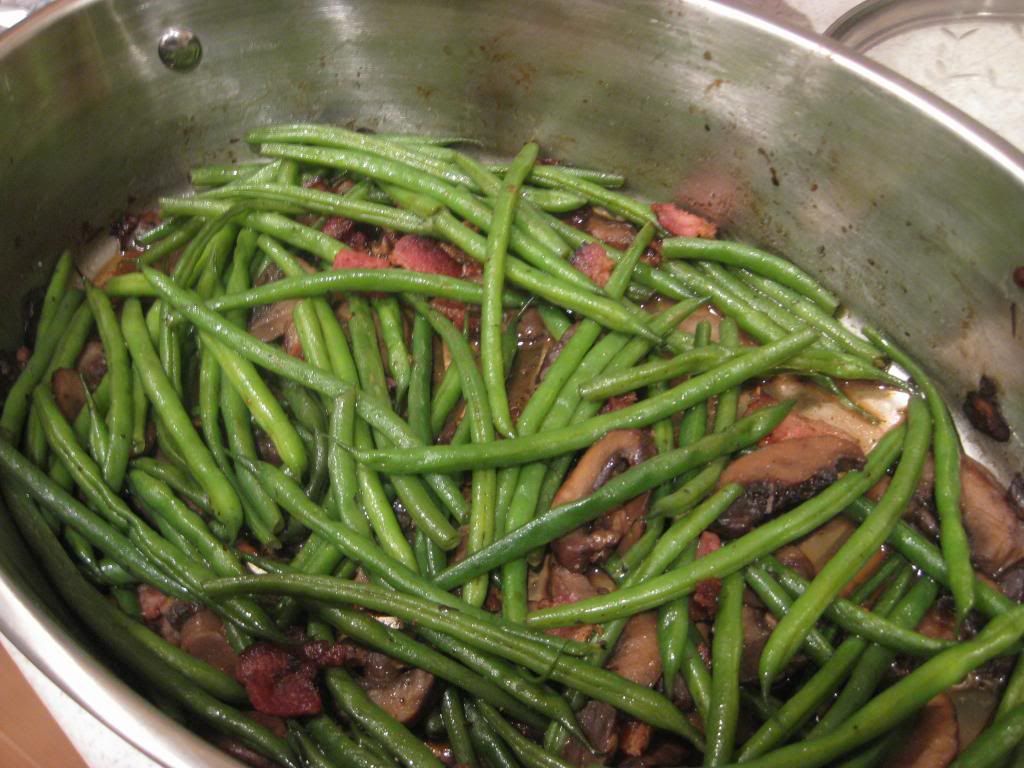
Smoky Haricots Verts and Mushrooms
Original Recipe Found In: Cooking Light Magazine, April 2013 Issue

Chive Mashed Potatoes
Recipe Inspired by, but heavily adapted from: Cooking Light Magazine, April 2013 Issue

What You'll Need
(Serves 4)

For The Hamburger Steak:

1 Pound Ground Sirloin (Or high quality ground beef)
1/2 Teaspoon Salt, 1/2 Teaspoon Pepper (Divided)
1 Tablespoon Canola Oil (Divided)
1 1/2 Cups Yellow Onion (Sliced vertically, into long strands)
2 Teaspoons All Purpose Flour
1 Cup Unsalted Beef Stock


For The Haricots Verts:

1-2 Slices Applewood Smoked Bacon
12 Ounces Trimmed Haricots Verts (French green beans)
2 Teaspoons Canola Oil
4 Ounces White or Bella Mushrooms
2 Tablespoons Chopped Flat Leaf Parsley
1 Garlic Clove (Minced)
Salt & Pepper

For The Chive Mashed Potatoes:

1.5 - 2 Pounds Russet Potatoes (Peeled & diced)
1 Tablespoon Butter
Low Fat Milk (Quantity will vary)
Non Fat Sour Cream (Quantity will vary)
Chives (Quantity will vary)


If you're looking to save time, you can prepare the mashed potatoes the night before and simply warm them in the oven 30 to 40 minutes prior to serving them. To prepare the potatoes, simply boil and mash the potatoes with a stand mixer until all the lumps have been worked out. Next, add in splashes of the low fat milk, the tablespoon of butter and 1 tablespoon of the sour cream. Allow the mixer to blend everything and give the potatoes a taste. If they still taste a little dry and bland, add another splash of milk, and another tablespoon of sour cream. Repeat this process until the potatoes have a creamy taste and smooth texture. Finally, add the chives in small portions, tasting the result until you find the desired blend of flavor. Season lightly with salt and pepper and set aside until you're ready to serve.

To prepare the hamburger steak:

Divide your beef into four equal balls and then work them into patties, each about 1/2 inch thick. Season each side of the patties with a pinch of salt and pepper. Next, add 2 teaspoons of canola oil to a large, non stick skillet over medium high heat. Once the oil begins to shimmer, add the patties and cook until they've browned, about 3 minutes per side.

Remove the patties from the pan and add the remaining teaspoon of canola oil. Bring the oil to a shimmer once again and then add the onions. Allow the onions to cook until they become lightly golden brown and soft, this takes about 3 to 5 minutes. Once golden, add the flour, a pinch of salt and pepper and allow the mixture to simmer for about a minute. Next, add the beef broth and bring the mixture to a light boil.


Once boiling, return the beef patties to the skillet and cover, leaving the lid slightly askew. Allow the patties to cook in the sauce for about 5 to 7 minutes, or until they're cooked through and the sauce has thickened. Serve the patties with the sauce drizzled on top.


To Prepare the haricots verts:

First and foremost, realize that haricots verts are simply a fancy way to say green beans. A good grocery store will have fresh haricots verts right next to their fresh green beans. If you cannot find haricots verts, substituting them for green beans is perfectly acceptable, just realize that the thicker bean will require a little longer cooking time.

Preheat your oven to 425 degrees. While the oven is heating up, place a roasting pan in the oven.

While you're waiting for your oven to come to temperature  cook up your bacon slices in a small skillet. Reserve the bacon grease in a small dish. Crumble the cooked bacon and set aside.

Once the oven is up to temperature, remove the roasting pan and add the reserved bacon grease along with the canola oil to the pan. Add the mushrooms to the roasting pan, stirring to evenly distribute them in the pan. Place the roasting pan in the oven for 8 minutes to begin cooking the mushrooms. After 8 minutes, add the haricots verts to the pan, stirring to evenly incorporate them amongst the mushrooms. Return the pan to the oven for an additional 8 minutes, or until the beans are lightly browned and crisp. Season the mixture with salt and pepper, and add the crumbled bacon pieces just before serving.


The Results:


The hamburger steak was rich and savory thanks to the simple yet delectable sauce. The quality of your beef is very important for this dish. With so little in the way of outside help, the beef has to stand on its own. Spring for the ground sirloin or the premium beef, look for anything with good marbling - the natural fat adds a great deal of flavor to the final dish.

The haricots verts were a delightful surprise. Roasting green beans is a great way to bring out their naturally sweet flavor, but roasting them in bacon grease and serving them with crumbled bacon bits takes that flavor to an entirely new planet. The mushrooms add a nice bit of texture and soak up quite a bit of bacon flavor as well, helping to create a fresh and flavorful side dish that might just be my new favorite way to eat green beans.

Finally, the chive mashed potatoes, as you might expect, tasted a lot like a baked potato (that's easy to accomplish with sour cream and chives as part of the ingredients). I prepared my potatoes the night before, which meant I had to pop them in the oven prior to serving. This created a 'twice baked' potato flavor that actually enhanced the overall quality of the dish. If you've got the extra time, I'd recommend preparing the potatoes the night before and then heating them in a 300 degree oven prior to serving. It really makes the flavor "pop".

Individually, all of these dishes were quite tasty - combined, they created a savory and delicious meal that reminds me why I love putting time and effort into cooking. The best part is, the cumulative calorie total for this feast is only 410. Light, healthy and full of flavor - my friends, it doesn't get any better than that!

That's all we have for you this evening, join us tomorrow night as Maggie takes a traditionally simple dish and flips it into something new and creative. Until then,

~Cheers

Wednesday, March 13, 2013

Guilt Free Chicken Parm


Good evening everyone! Italian cuisine might possibly be the most popular style of cuisine across the United States. Whether it’s authentic cuisine or the Americanized versions, the combination of pasta, sauce and a little meat and cheese seems to appease even the pickiest of palette. The obvious downside to Italian cuisine is that it is far from healthy. Pasta, cheese and tomato sauce do not exactly keep the calories low.

The challenge then rests on finding ways to cut down on the calories while still delivering the authentic flavor of Italian cuisine. Tonight’s recipe, a healthier version of chicken parmesan, manages to drop the calories by cutting out the breading, reducing the copious amounts of cheese and cooking up a lighter sauce that keeps all the flavors intact. Let’s get cooking!

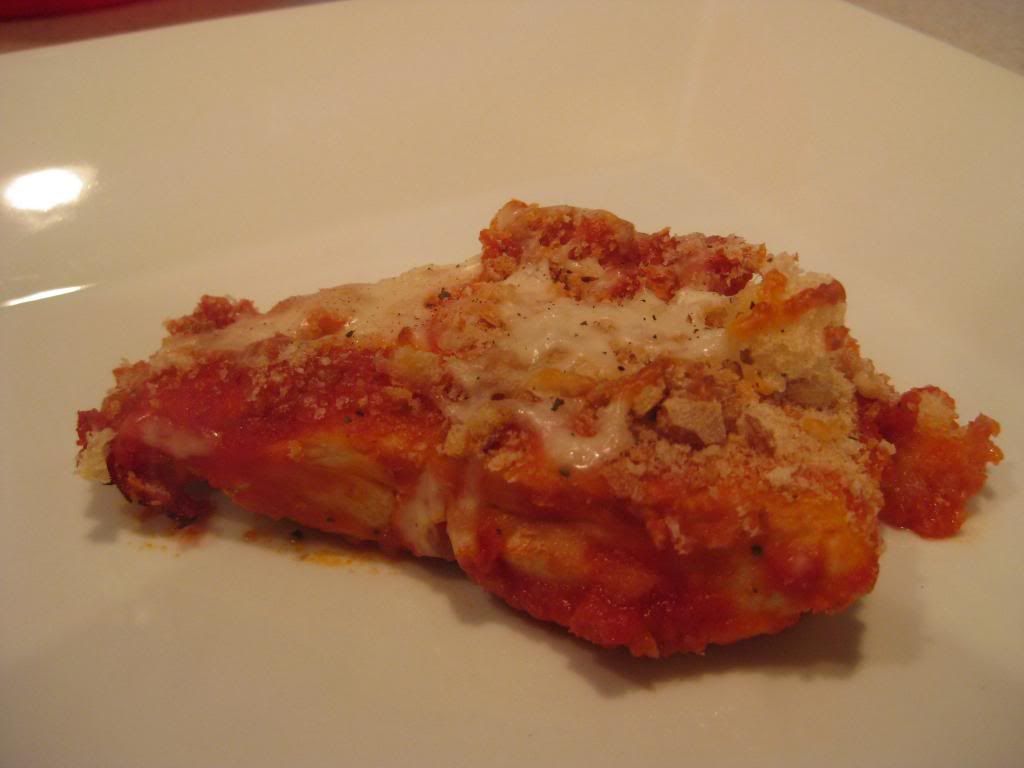
The Recipe: Light Chicken Parmesan
Original Recipe Found In: Food Network Magazine, March 2013 Issue

What You’ll Need:
(Serves 4)

2 Boneless, Skinless Chicken Breasts (8 to 10 Ounces each)
1 Small (6-8 inch) Baguette (Day old is okay if you’re looking to save on cost)
2 Tablespoons Extra Virgin Olive Oil
¼ Cup Grated Parmesan Cheese
¼ Cup (Plus 2 Tablespoons) Fresh Chopped Basil
1 15 Ounce Can Tomato Puree
1 Small Garlic Clove (Grated)
¼ Teaspoon Red Pepper Flakes
½ Cup Shredded Part Skim Mozzarella Cheese

Begin by slicing you chicken breasts in half, horizontally, to create four cutlets. Place each cutlet between two pieces of plastic wrap and use a meat tenderizer or heavy skillet to pound them to ¼ thickness. Season each cutlet with salt and pepper and set aside.

Using a serrated knife, slice your baguette into smaller cubes. Place these cubes in a small food processor and pulse them until they become coarse breadcrumbs. Be careful to avoid over processing the bread, too fine of a breadcrumb will simply be lost in the sauce and lose the ‘crunch’ that chicken parmesan is known for. Toss the breadcrumbs with 2 tablespoons of fresh basil and set aside.

Add 1 tablespoon of the olive oil to a large (12 inch) non stick skillet over medium high heat. Once the oil is hot, add the breadcrumbs and cook, stirring occasionally, until they become golden brown and crispy. This takes about 3 to 5 minutes. Once golden, transfer the breadcrumbs to a bowl and set aside.

Return the skillet to medium high heat and add the remaining tablespoon of olive oil. Once the oil begins to shimmer, add the chicken cutlets to the skillet and cook until golden brown and cooked through completely. The instructions say this takes 3 minutes, but, as recipes tend to do, they’re giving you the most optimistic time. I’d err on the cutlets taking 3 to 5 minutes per side, be sure to keep your instant read thermometer nearby so you can check the temperature (you’re looking for 165 degrees at the chicken’s thickest point) so you’ll know when the cutlets are done. Transfer the finished cutlets to a plate tented loosely with aluminum foil.

Preheat your broiler at this time, or set your oven temp to 400 degrees.

To prepare the sauce, add the tomato puree to the same skillet along with 1 cup of water, the garlic, red pepper flakes and 1 tablespoon of parmesan cheese. Reduce the heat to medium low and allow the mixture to simmer for about 10 minutes or until it begins to thicken. Once thickened, stir in the remaining basil and season the sauce lightly with salt and pepper.

Next, return the cutlets to the skillet and turn them to coat in the sauce. Add in the remaining basil, parmesan and reserved breadcrumbs. Top the mixture with the mozzarella cheese and place the skillet under the broiler or into the oven for 1 to 2 minutes (broiler) or 5-7 minutes (oven) until the cheese melts and becomes lightly golden brown. Serve and enjoy!

The Results:


This dish manages to create all the flavors of classic chicken parmesan, a hearty tomato sauce, crunchy crust and cheesy finish, all without adding up the calories. By creating your own sauce from the healthier tomato puree and eliminating a large quantity of cheese, this tasty treat clocks in at about 320 calories per serving. (For reference, standard chicken parmesan weighs in at 830 calories per serving). Full flavored Italian cuisine without the impact of a large calorie count on diet? I’d call that a win-win situation.
That’s all we have for you this week. We’re back next week with two new healthy and tasty recipes. Until then,

~Cheers

Tuesday, March 12, 2013

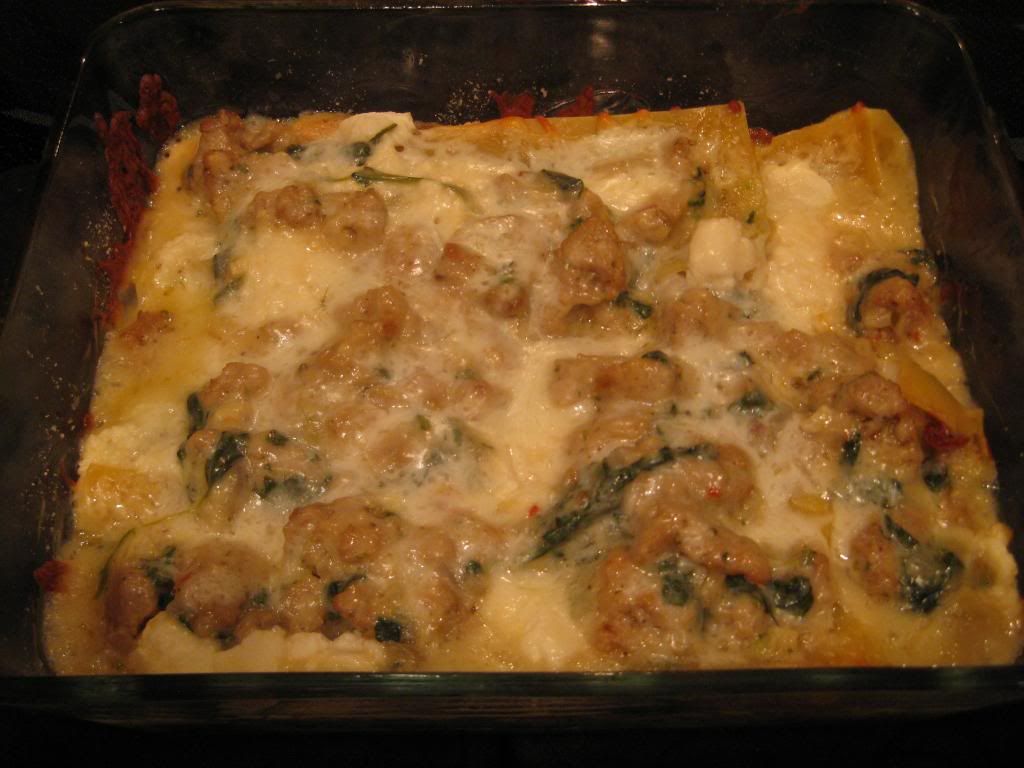
Lovable Low-Cal Lasagna

Good evening everyone!  It has always been a goal of mine to cook some variant of a lasagna dish here on the blog.  The lasagna I grew up on has lots of marinara sauce and uses ground beef, and while I love that particular version, Tyler has diverted from lasagna because of that reason.  So, I've tried to find a recipe that doesn't include lots of tomato sauce and can still be qualified as lasagna.  Tonight, I'm proud to say that I have found that particular recipe, it's relatively easy to cook, it's healthy - I may have hit this classic dish's perfect trifecta!

The Recipe:  Turkey Sausage and Spinach Lasagna
Original Recipe Found In:  Cooking Light, March 2013

What You'll Need:
1/4 Cup All-Purpose Flour
1 Cup 1% Low Fat Milk
1 Cup unsalted Chicken Stock
1 Tablespoon Canola Oil
1 Bay Leaf
1/4 Teaspoon Salt
1/2 Teaspoon Black Pepper
2 Tablespoons Water
1 (12 Ounce) package fresh Spinach
2 (4 Ounce) link hot Italian Turkey Sausage
1/2 Cup chopped Shallots
1 Tablespoon minced Garlic
6 No-Boil Lasagna noodles
1 1/2 Cups part-skin Ricotta cheese
1 Ounce shredded part-skim Mozzarella cheese
1 Ounce fresh Parmesan cheese, grated

To start, preheat an oven to 375 degrees and also preheat a skillet to medium heat.  In a 1/4 cup measuring cup, lightly spoon the flour in and level with a knife.  Combine the flour, milk, chicken stock, canola oil, and bay leaf in the skillet and stir with a whisk.  Cook this mixture for eight minutes or until the combination is thick and bubbly, stirring frequently.  Once this is done cooking, remove the skillet from the heat and stir in the salt and pepper.  Spray a 11x7 glass baking dish with cooking spray.  Measure one cup of the milk mixture and spread it along the bottom of the baking dish.  This will serve as the base of the lasagna.

Next, replace the milk mixture skillet with a clean skillet and heat again over medium heat.  If you don't have two skillets in your arsenal, pour the milk mixture in a bowl, cover to keep heated, and wipe out the original skillet.  Add two tablespoons of water and the spinach to the pan.  Cook for two minutes or until the spinach begins to wilt.  Drain the wilted spinach until the leaves are barely most.  If needed, you can press the spinach until liquid comes out.  Return the skillet to the stovetop and heat to medium-high heat.

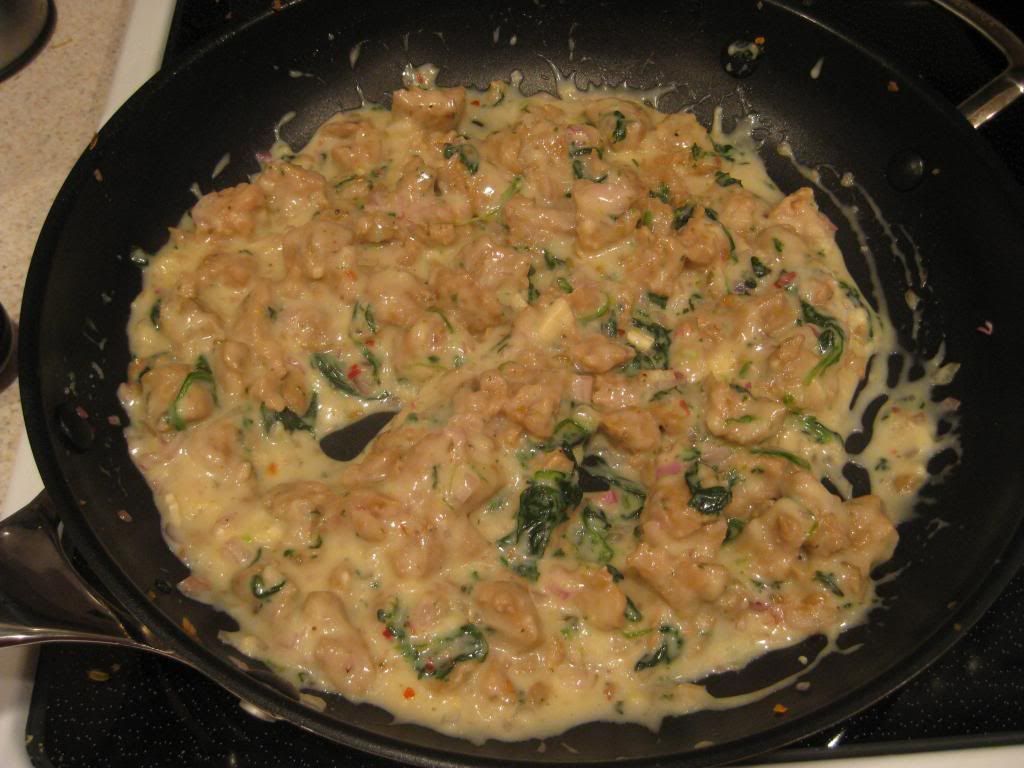
Remove the casings from the sausage and add the sausage to the pan, cooking for four minutes or until browned.  The heat will naturally break up the sausage, so be sure they begin to crumble when they are fully cooked.  Remove the sausage from the pan and keep warm in a small bowl.  Add the shallots and garlic to the skillet and sauté for two minutes.  Stir in the remaining milk mixture, cooked spinach and sausage and remove the skillet from the heat.

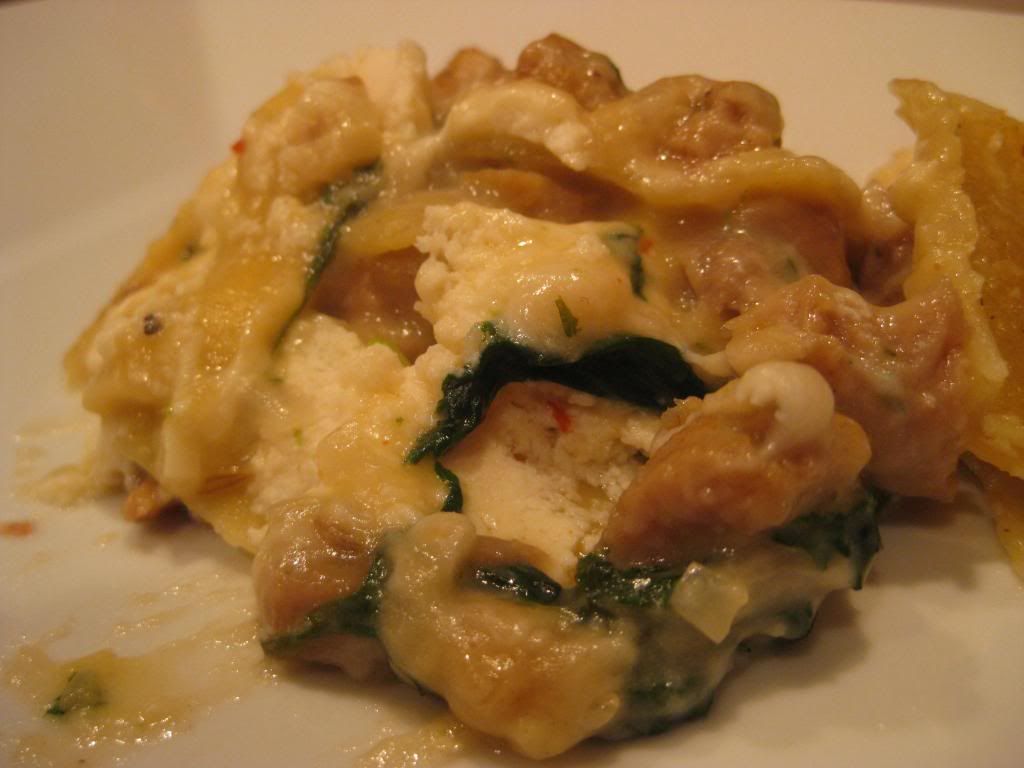
Creamy lasagna filling

Returning to the glass baking dish, arrange two noodles over the milk mixture.  Top with 1/2 cup of ricotta and 1/3 spinach mixture.  Repeat the layers twice.  Sprinkle the layers with mozzarella and Parmesan cheeses.  Cover the baking dish with foil that's been coated in cooking spray.  Place the dish in the oven and bake at 375 degrees for forty minutes.

After the lasagna has been cooked, remove the foil.  Continue to bake for four minutes, or until the cheese is golden brown.  Remove from the oven and let stand for 10 minutes.  Cut into six pieces, serve, and enjoy!


The End Result:


I'm used to lasagna with a hearty tomato sauce, with crumbles of meat sprinkled in, and cottage cheese intermittently throughout the whole dish.  This version of lasagna gives a completely different approach to the traditional lasagna I remember as a child.  The milk mixture, with the spinach and turkey sausage, is super creamy and replaces any kind of marinara sauce in a lasagna dish.  Using the spinach and the turkey sausage gives it a unique flavor, but definitely doesn't skimp out on taste.  The Parmesan and mozzarella cheeses give the top of the lasagna almost a melty crust and it is definitely worth not missing.  And since each serving is only 332 calories, it's a lasagna not to feel guilty about!

Thanks for joining us tonight.  Check back tomorrow as Tyler whips up a new recipe to try in your kitchen.  Until then,

~Cheers!

Wednesday, March 6, 2013

Very Veggie Risotto


Good evening everyone! Tonight, we’re returning to a favorite ingredient of the blog, risotto. This versatile little pasta has been the base in many dishes across our three years of cooking healthy and has shown great flexibility to fit into nearly any flavor combination we can throw at it.

The downside with risotto is that it is a bit of a kitchen diva. It needs attention while it cooks, as you balance out the right amount of liquid and allow it to simmer – but not rest – for 35 to 40 minutes. Too short and the result is a chewy, sticky mess, too long and you just created 40 minutes worth of mush.

Don’t get me wrong, it’s not difficult to cook, it’s just time consuming. Most of the time, it’s worth it, however. A few months back, I stumbled across a process of making risotto that involved an oven and 35 minutes of cook time…and that was it. No stirring, no babysitting, no fluid monitoring – just prep and let cook. Suddenly, risotto was easy and delicious.

Oh the possibilities!

Naturally, when I stumbled across a light and healthy risotto recipe last week, I was eager to try my new technique on a slightly more complicated dish. Does this quick and easy recipe work for a dish with a few  more components? Let’s find out!

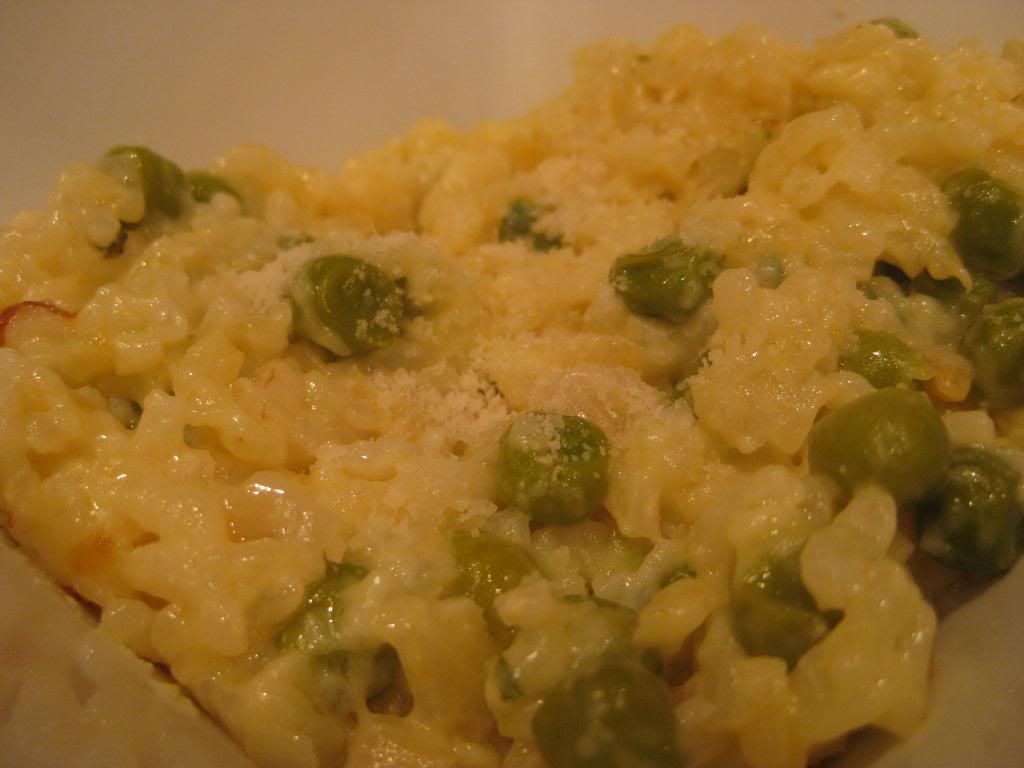
The Recipe: Risotto With Yogurt and Peas
Original Recipe Based On: Food Network Magazine March 2013 Issue

What You’ll Need:

2 Cups Low Sodium Chicken Broth
2 Tablespoons Unsalted Butter
½ Cup Finely Chopped Shallots
1 Cup Arborio Rice
1/3 Cup Dry White Wine
1 Cup Frozen Peas
3 Tablespoons Fresh Parsley (Minced)
3 Tablespoons Fresh Chives (Minced)
1 ½ Teaspoons Fresh Marjoram (Minced) or Thyme
½ Cup Grated Parmesan Cheese
¼ Cup Nonfat Plain Greek Yogurt

Note: I’m using the concept of the Food Network recipe, but applying our own cooking technique to the dish. As such, the instructions are note the same as the original recipe. If you’d rather follow that version, I’d encourage you to pick up the March 2013 issue of Food Network Magazine.

Preheat your oven to 425.

Add the butter into a large Dutch oven or baking dish and place it in the oven, covered for 3 to 4 minutes to allow the butter to melt.

Once the butter has melted, add the risotto, shallots, peas, chicken broth and white wine to the baking dish and stir well to evenly combine all of the ingredients. Once blended, return the baking dish to the oven and allow it to cook, covered, for 20 minutes.

Just add heat!


After the first 20 minutes, remove the baking dish and give the ingredients another stir. Return the dish to the oven, covered, for an additional 15 minutes. The risotto will look a little dry and sort of flat when you first remove it from the oven, however, resist the urge to add any additional liquid until you taste test the risotto. If the risotto is soft and creamy, you’re good to go. If you find it to be a little crunchy, add a splash of chicken broth, stir, and return to the oven for an additional 5 minutes.

In a small bowl, combine the parsley, chives and marjoram. Once your risotto is soft, add all but 1 tablespoon of the herb mixture along with the plain yogurt and the parmesan cheese. Stir vigorously until the mixture becomes creamy (this takes about 1 minute). Serve topped with the reserved herb mixture and a pinch of parmesan cheese. Enjoy!

The Results:


Typically, creamy risotto dishes feature mascarpone cheese as it melts beautifully and adds a great, rich flavor to the profile of a dish. This recipe cuts out the calories that mascarpone would deliver by substituting non-fat Greek yogurt. The result is the same creamy base, but you do lose a little bit of bonus flavor that mascarpone brought to the table.

That’s where the white wine and parmesan cheese come in. Combined, these two more than compensate for the missing mascarpone by adding a great layer of deep, rich flavor to the natural risotto. Blended with the bright flavorings of the herbs and peas, this dish morphs into a fresh, almost ‘summer salad’ tasting pasta dish that will warm you up on these cooler March nights without bogging you down like a traditional pasta salad would.
If you’re cooking for a full family, especially young ones who detest vegetables, this dish might be a tough sell. But the adults or those with a fondness for fresh veggie flavors will find a lot to love with this pasta.

That’s all we have for you this week. We’re back next week with another set of brand new dishes to share. Until then,

~Cheers
Tuesday, March 5, 2013

Not Your Daddy's Sloppy Joes

Good evening everyone!  Last week, we created delicious Mexican dishes that are also healthy for you.  But Mexican isn't the only style of food that we all crave.  The not-so traditional, yet always inviting, American style.  I'm sure these dishes have roots in another region, but we've come to know these recipes classified under American.  Tonight, I am taking a classic American dish, but giving it a healthy boost, so you can enjoy without the guilt.

The Recipe:  Turkey Sloppy Joes
Original Recipe From:  Eat This, Not That No-Diet Diet
(Serves Six)

What You'll Need:
1/2 Tablespoon Olive Oil
1 Large Onion, diced
1 Green Bell Pepper, diced
1 Pound lean Ground Turkey
1 1/2 Cups Tomato Sauce
2 Tablespoons Tomato Paste
2 Tablespoons Brown Sugar
1 Tablespoon Red Wine Vinegar
1 Tablespoon Worchestershire sauce
1/2 Tablespoon Chili Powder
10-12 shakes of Tabasco or other hot sauce
6 Whole Wheat or Sesame Buns, split and toasted

In preparation for this recipe, it's important to examine the ingredients and see what you can use without adding more calories to the dish.  This is especially true when it comes to the tomato sauce.  Unknowingly, you can pick up a jar of marinara sauce and not realize that it's not tomato sauce.  While marinara has that extra flavor that normal tomato wouldn't have.  It also has more sodium (and therefore more calories) than plain tomato sauce.  Also, we found out that there is lean and extra lean ground turkey.  Whenever you can find something better than what the original recipe calls for, it will make for a better tasting dish in the end.

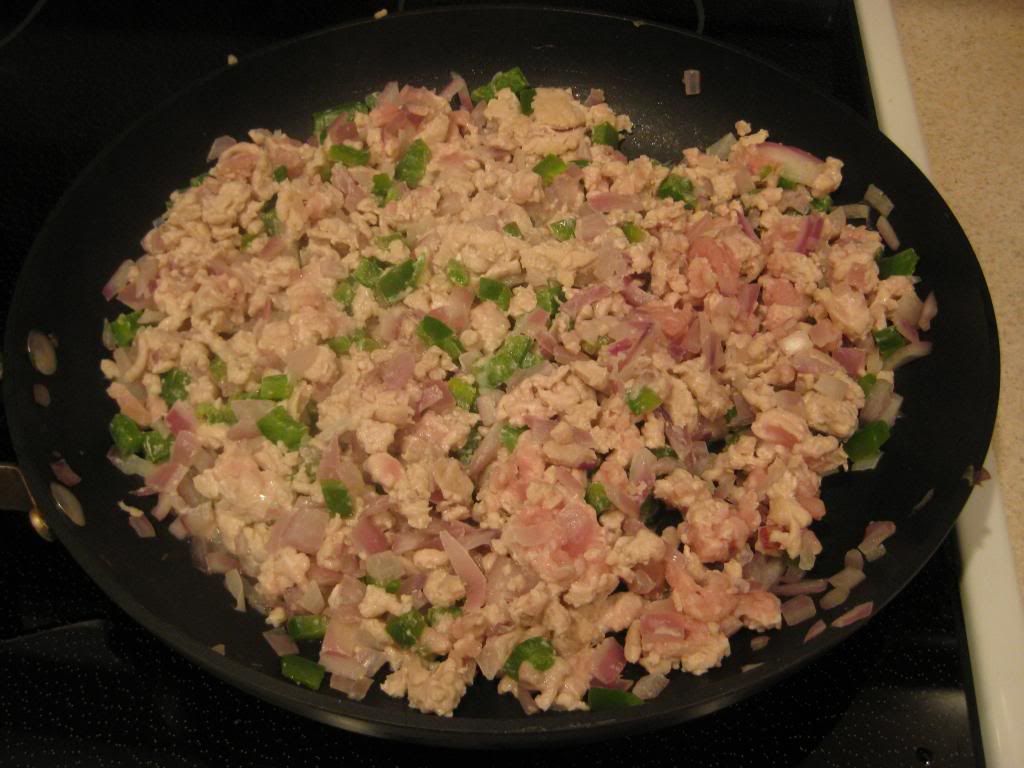
To start, in a large skillet, heat the olive oil over medium high heat, just until the oil is almost shimmering.  Add the chopped onion and green pepper and cook until just softened, about two minutes.  Once these are cooked, add the turkey, breaking it into smaller pieces.  Cook the turkey until it is lightly browned, about five minutes.  Turkey is a leaner meat, so it will cook in a shorter amount of time than ground beef or any other ground meat.

Joe, pre sloppy

Next, add the tomato sauce, tomato paste, brown sugar, red wine vinegar, Worchestershire sauce, chili powder, and hot sauce and stir until everything is well coated.  Season with salt and pepper to taste.  Reduce the heat of the skillet to low and simmer for ten minutes or until the liquid has reduced and the sauce has coated all the meat.  Remove the skillet from the heat and divide the meat mixture among the buns.  Serve and enjoy!

The End Result:


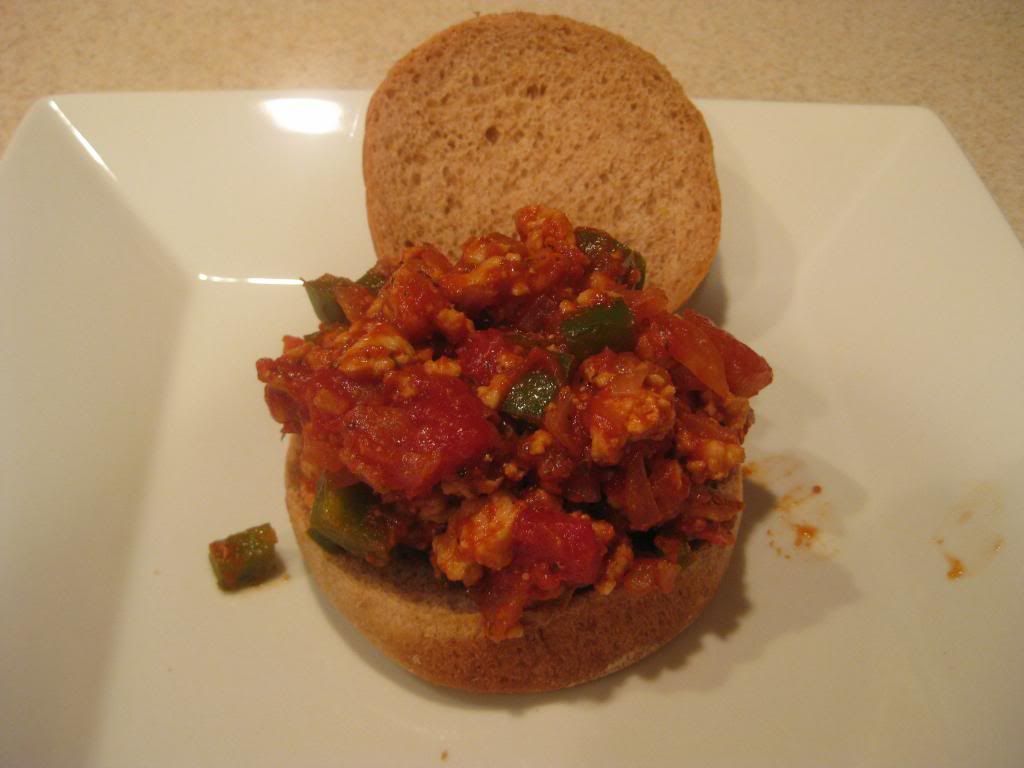
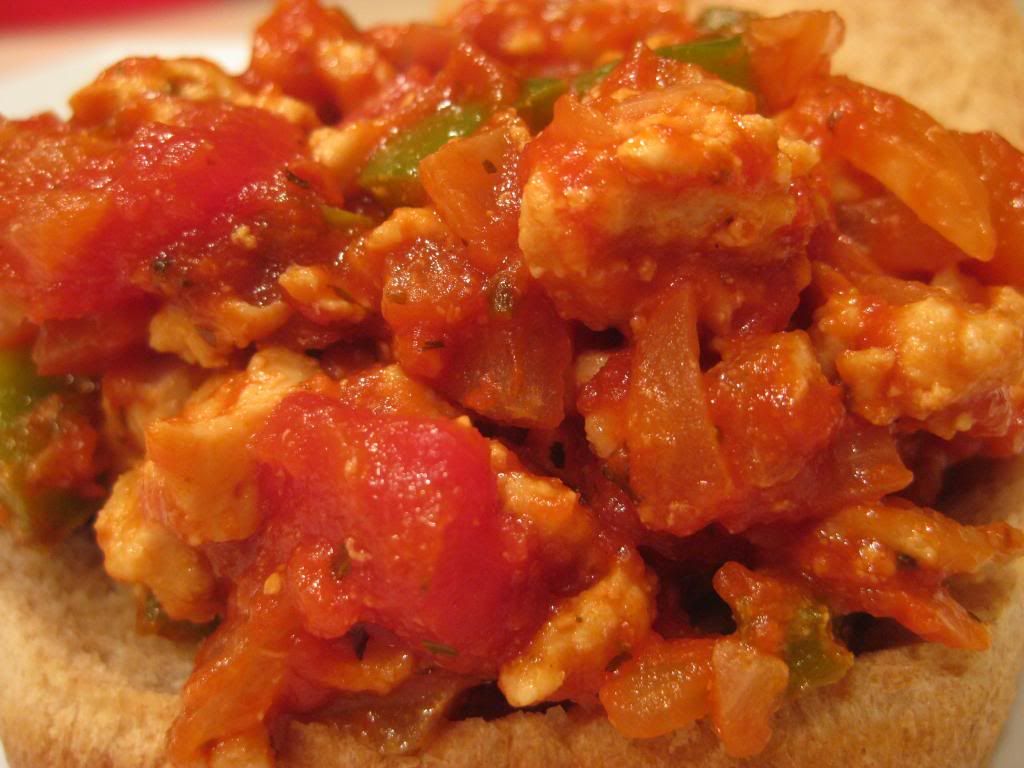
These little sandwiches pack the heat in all the right spots.  Between the green pepper, chili powder, and hot sauce, the meat gives a good heat flavor that might not be present in a traditional recipe.  While some sloppy joe recipes have more liquid than meat, this recipe is far from that concept.  The meat and the veggies definitely overtake the sauce, but it gives it a good, consistent quality that can't be beat.  If I were to take any sloppy joe recipe to a gathering, I would replace a traditional sloppy joe recipe with this one.  Not only is the flavor better, but it's also healthier for you too - at 307 calories (with the bun,) it's a great addition to any family's cookbook.

That's all we have for you this evening.  Join us tomorrow as Tyler visits another blog classic that will hit all the right notes.  Until then,

~Cheers!