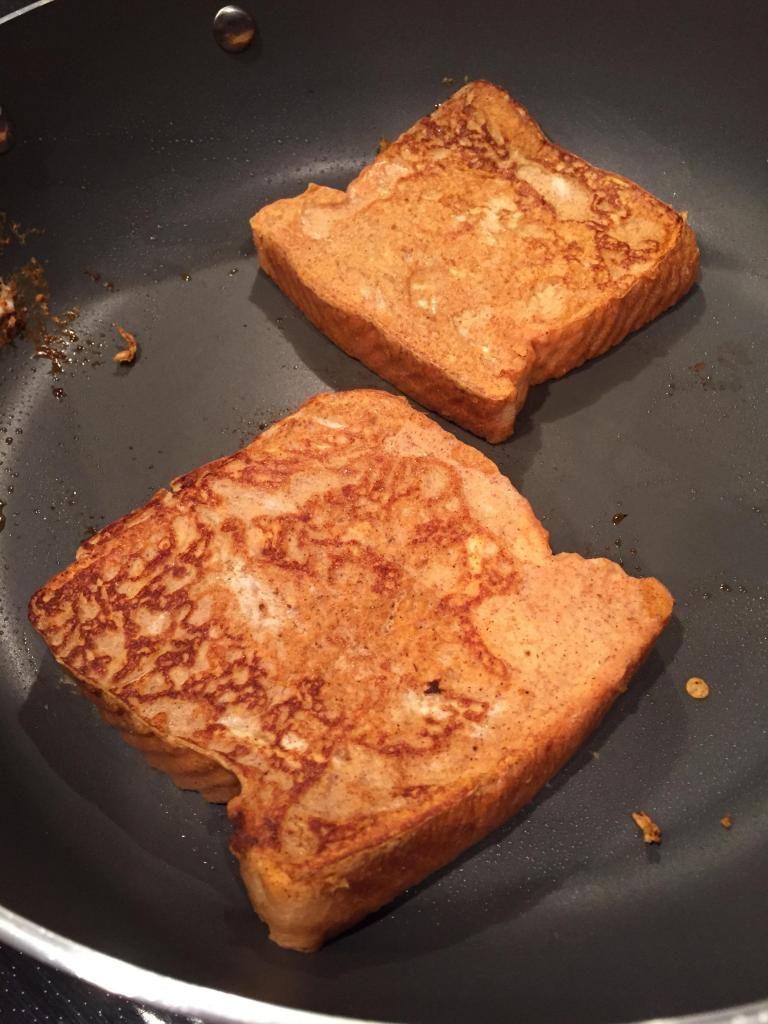
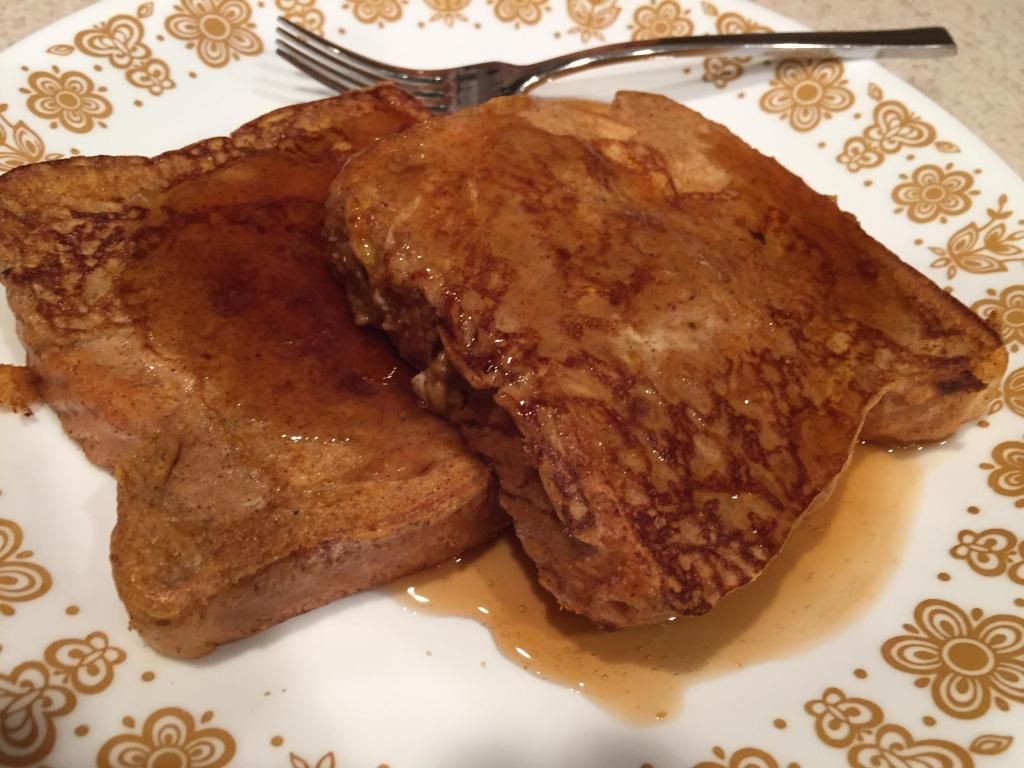
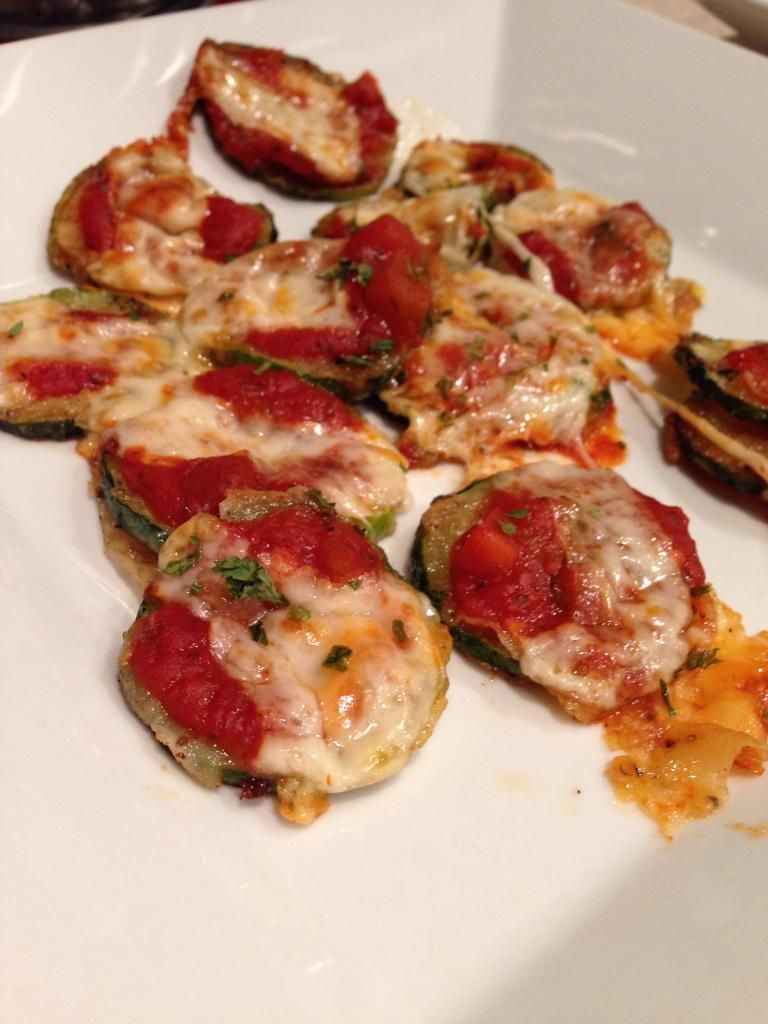
I suppose it was inevitable - pumpkin has made its way to breakfast food. While doughnuts are pretty standard fare for this, this french toast recipe will definitely make you want more.
What You'll Need:
2 Eggs
1/4 Cup Milk (skim, almond, whatever you have on hand)
1/4 Cup Pumpkin Puree
1 Teaspoon Pumpkin Pie Spice
1/2 Teaspoon Cinnamon
2 Tablespoons Brown Sugar
6-8 slices of Texas Toast Bread*
*This style of bread was made for french toast! While thicker than its regular sandwich bread counterpart, it soaks all the ingredients of the french toast mixture. Plus it makes it extra fluffy and delicious!
To start, heat a large, nonstick skillet over medium-high heat. While the skillet is heating up, you can make your french toast batter. In a small mixing bowl, whisk the eggs and milk together until well combined. Add the pumpkin pie spice, cinnamon, and brown sugar. Thoroughly mix until all the ingredients have formed a consistent batter. The pumpkin will be a little bit more tricky to mix in, but it will be essential to batter.
Next, dip two pieces of the bread, front and back in the batter. You can hang the bread over the bowl to drip any remaining excess. Once the skillet is heated, spray with cooking spray and lay the two pieces of bread flat on the skillet. After one side has cooked for two to three minutes, flip the pieces over and cook for another two minutes. Repeat with the other pieces of bread.
Serve the french toast with syrup and enjoy!
The End Result:
If you are a huge fan of pumpkin, like we are, this is probably one of the best recipes to showcase the flavor of pumpkin. The batter doesn't soak too deeply in the bread, so it doesn't have a gut-busting after feeling. We had three to four pieces each and we didn't feel weighed down by it. Instead, the toast is very light and fluffy, not to mention the great, non-overwhelming flavor of pumpkin. I will probably make this recipe again, because it's simplicity matches it's great taste.
Thanks for joining us tonight. Check back tomorrow as we present our final Pumpkin Week recipe. Until then,
~Cheers!
Wednesday, October 8, 2014
Monday, October 6, 2014
Pumpkin Week Recipe Two: Pumpkin Chocolate Chip Cookies
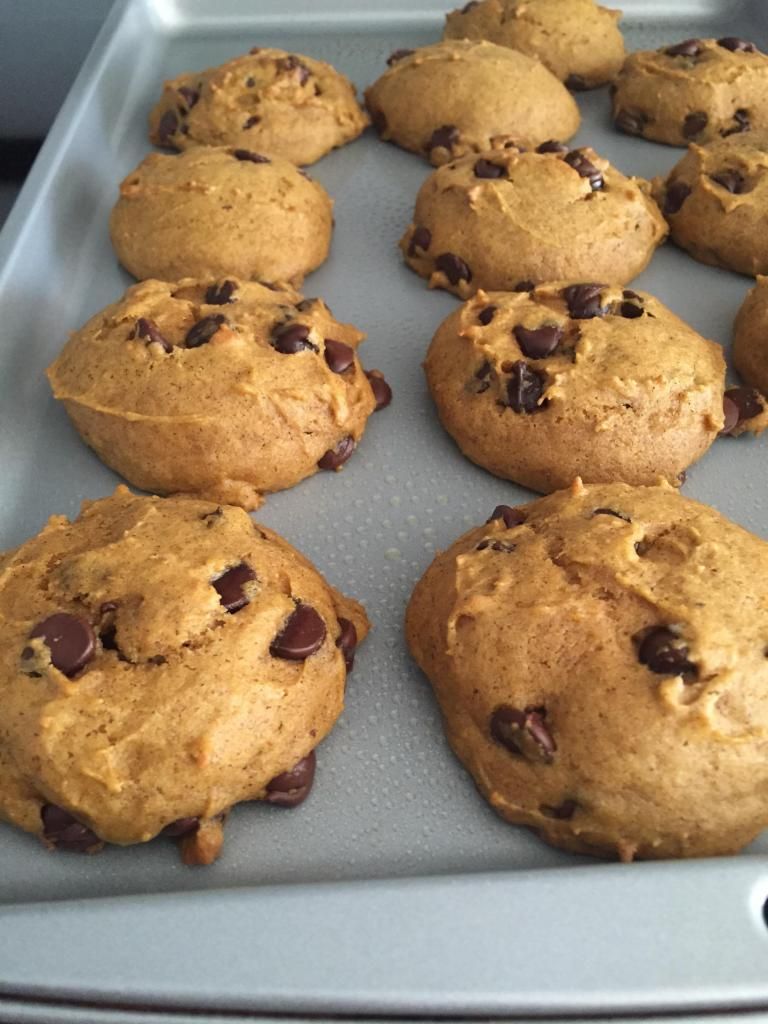
Good evening everyone! Tonight's cookie recipe will blow your socks off. Well, that might be an overstatement. But not everyone thinks of pairing pumpkin and chocolate together. It's a flavor combination that was meant to be together.
What You'll Need:
1/2 Cup Vegetable Oil
1 Cup 100% Pure Pumpkin
1 Cup White Sugar
1 Egg
1 Teaspoon Vanilla Extract
1 Teaspoon Baking Soda
1 Teaspoon Milk
2 Teaspoons Cinnamon
2 Teaspoons Baking Powder
1/2 Teaspoons Salt
2 Cups Flour
2 Cups Semisweet Chocolate Chips
To start, in a large mixing bowl, add the vegetable oil, pumpkin, sugar, egg, and vanilla extract. Whisk until all the ingredients have combined. In another large mixing bowl, sift together the flour, cinnamon, baking powder, and salt. In a small dish, combine the baking soda and milk until it becomes a sticky goo. Add to the pumpkin mixture and stir to combine. Add the flour mixture to the pumpkin mixture and stir until all ingredients are well combined. Fold the chocolate chips and let the batter sit for 15 minutes.
In the meantime, preheat an oven to 350 degrees and cover a large baking sheet with baking spray. Once the batter has sat and the oven is up to temperature, scoop out the batter using a cookie scoop. Place the balls of batter two inches apart on the baking sheet. Bake at 350 degrees for 12-13 minutes. Let cool for five minutes, serve, and enjoy!
The End Result:
While one doesn't normally think of pumpkin and chocolate going together, it's a great combination for this cookie recipe. The pumpkin flavor isn't too heavy in the batter and holds the chocolate chips in perfectly. It's actually a delicate cookie, without getting too heavy on the pallet. I was quite surprised at how delicious this cookie actually was and it's a great way to have pumpkin, without an explicit pumpkin taste.
Check back later this week for two more pumpkin recipes, one to take to your next fall outing, and one for home use only. Until then,
~Cheers!
What You'll Need:
1/2 Cup Vegetable Oil
1 Cup 100% Pure Pumpkin
1 Cup White Sugar
1 Egg
1 Teaspoon Vanilla Extract
1 Teaspoon Baking Soda
1 Teaspoon Milk
2 Teaspoons Cinnamon
2 Teaspoons Baking Powder
1/2 Teaspoons Salt
2 Cups Flour
2 Cups Semisweet Chocolate Chips
To start, in a large mixing bowl, add the vegetable oil, pumpkin, sugar, egg, and vanilla extract. Whisk until all the ingredients have combined. In another large mixing bowl, sift together the flour, cinnamon, baking powder, and salt. In a small dish, combine the baking soda and milk until it becomes a sticky goo. Add to the pumpkin mixture and stir to combine. Add the flour mixture to the pumpkin mixture and stir until all ingredients are well combined. Fold the chocolate chips and let the batter sit for 15 minutes.
In the meantime, preheat an oven to 350 degrees and cover a large baking sheet with baking spray. Once the batter has sat and the oven is up to temperature, scoop out the batter using a cookie scoop. Place the balls of batter two inches apart on the baking sheet. Bake at 350 degrees for 12-13 minutes. Let cool for five minutes, serve, and enjoy!
The End Result:
While one doesn't normally think of pumpkin and chocolate going together, it's a great combination for this cookie recipe. The pumpkin flavor isn't too heavy in the batter and holds the chocolate chips in perfectly. It's actually a delicate cookie, without getting too heavy on the pallet. I was quite surprised at how delicious this cookie actually was and it's a great way to have pumpkin, without an explicit pumpkin taste.
Check back later this week for two more pumpkin recipes, one to take to your next fall outing, and one for home use only. Until then,
~Cheers!
Sunday, October 5, 2014
Pumpkin Week Recipe One: Pumpkin Pie Cupcakes
Greetings everyone! As Tyler previously mentioned, this week, I will be highlighting Autumn's favorite gourd: the pumpkin. While some people celebrate its annual return by buying any (and all) pumpkin flavored drink, the pumpkin actually serves itself to be made in numerous ways. I have found four recipes to infuse the delicious flavor of pumpkin into every day recipes. Of course, you could make these recipes any time of the year, but there's something about fall that makes us crave this particular flavor. First up, Pumpkin Pie Cupcakes!
What You'll Need:
1 (15 Ounce) Can Pumpkin Puree
1/2 Cup White Sugar
1/4 Cup Brown Sugar
2 large Eggs
1 Teaspoon Vanilla Extract
3/4 Cup Evaporated Milk
2/3 Cup All-Purpose Flour
2 Teaspoons Pumpkin Pie Spice
1/4 Teaspoon Salt
1/4 Teaspoon Baking Powder
1/4 Teaspoon Baking Soda
To start, preheat an oven to 350 degrees. Prep a muffin tin by lightly spraying 12 to 15 silicone muffin liners with cooking spray and set aside. Silicone muffin liners will help pop the cupcakes out better than paper muffin liners. If you haven't invested in silicone liners, I would highly recommend it!
In a large bowl, add the pumpkin, white sugar, brown sugar, eggs, vanilla extract, and evaporated milk. Whisk until everything is combined. Next, add the flour, pumpkin pie spice, salt, baking powder, and baking soda into the pumpkin mixture. Slowly combine until all ingredients are mixed thoroughly.
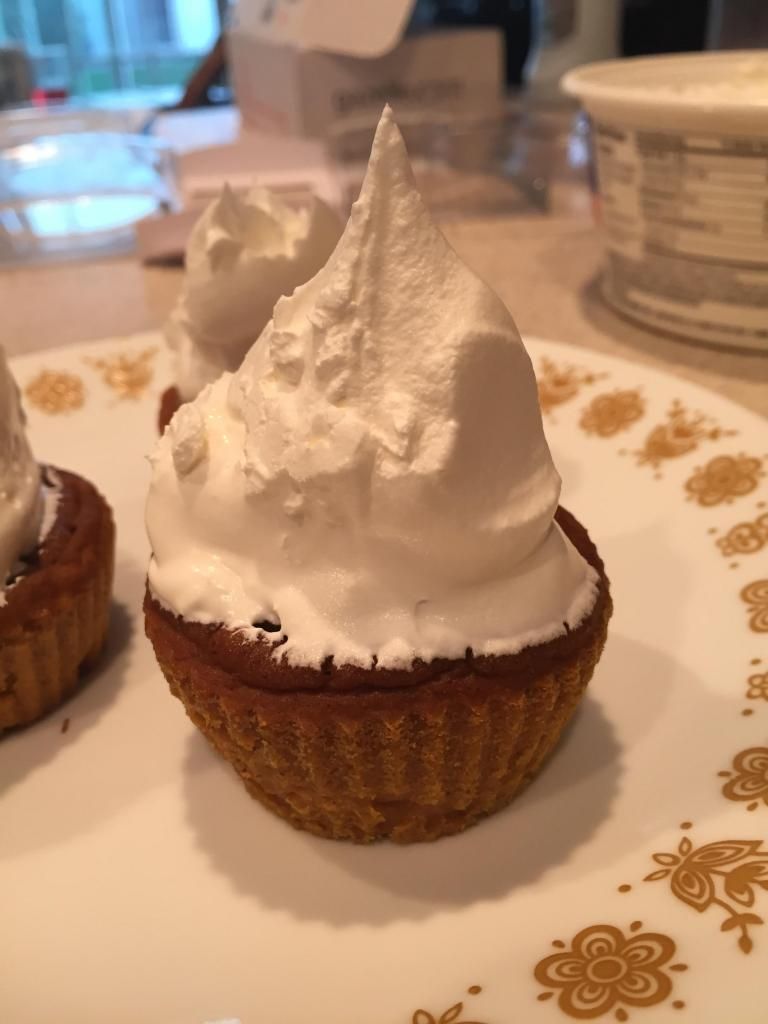
Next, fill each muffin liner with a 1/3 cup of the pumpkin mixture. Place the muffin tins in the oven and bake at 350 degrees for 20 minutes. Once baked, take the tins out of the oven and let cool for 20 minutes. After this, remove the cupcakes from the tins and chill in the refrigerator for 30 minutes. Serve with a dollop of whipped topping and enjoy!
The End Result:
If you are wanting pumpkin pie, but aren't willing to go through the effort of the entire process, these cupcakes are for you! They are just like little pumpkin pies, with the same consistency as pie, but without the crust and a third of less effort. Plus, it's easier to serve. While the notion of cold cupcakes might throw you for a loop, trust me, you won't think a thing about it.
Join us again tomorrow as I present a pumpkin cookie, with a unique twist. Until then,
~Cheers!
What You'll Need:
1 (15 Ounce) Can Pumpkin Puree
1/2 Cup White Sugar
1/4 Cup Brown Sugar
2 large Eggs
1 Teaspoon Vanilla Extract
3/4 Cup Evaporated Milk
2/3 Cup All-Purpose Flour
2 Teaspoons Pumpkin Pie Spice
1/4 Teaspoon Salt
1/4 Teaspoon Baking Powder
1/4 Teaspoon Baking Soda
To start, preheat an oven to 350 degrees. Prep a muffin tin by lightly spraying 12 to 15 silicone muffin liners with cooking spray and set aside. Silicone muffin liners will help pop the cupcakes out better than paper muffin liners. If you haven't invested in silicone liners, I would highly recommend it!
In a large bowl, add the pumpkin, white sugar, brown sugar, eggs, vanilla extract, and evaporated milk. Whisk until everything is combined. Next, add the flour, pumpkin pie spice, salt, baking powder, and baking soda into the pumpkin mixture. Slowly combine until all ingredients are mixed thoroughly.
Next, fill each muffin liner with a 1/3 cup of the pumpkin mixture. Place the muffin tins in the oven and bake at 350 degrees for 20 minutes. Once baked, take the tins out of the oven and let cool for 20 minutes. After this, remove the cupcakes from the tins and chill in the refrigerator for 30 minutes. Serve with a dollop of whipped topping and enjoy!
The End Result:
If you are wanting pumpkin pie, but aren't willing to go through the effort of the entire process, these cupcakes are for you! They are just like little pumpkin pies, with the same consistency as pie, but without the crust and a third of less effort. Plus, it's easier to serve. While the notion of cold cupcakes might throw you for a loop, trust me, you won't think a thing about it.
Join us again tomorrow as I present a pumpkin cookie, with a unique twist. Until then,
~Cheers!
Saturday, October 4, 2014
Country Beef Stew
Good evening everyone! With the cold winds of fall fully taking hold of the Midwest, we thought this week would be a great one to continue exploring stew recipes. I discovered a recipe for “Irish Penicillin” this week (AKA Lamb stew) that looked like it would be a fun one to try – so we set out to the grocery store to acquire all of the provisions…where we ran into a problem.
Apparently, unless it’s Easter or Christmas, lamb is tough to come by in your local grocery store. The friendly butcher at the Hy-Vee counter told us, “we just throw it out, unfortunately”. It seems that lamb just doesn’t sell unless it’s a major holiday, so the grocers just don’t stock it. Of course, they can special order it – but we politely declined.
If you’ve learned anything from this blog, I’d hope it’s this: adaptation and flexibility are the biggest tools in your kitchen arsenal. No lamb? No big deal. We’ll adapt. Now we’re making beef stew!
The Recipe: Country Beef Stew
What You’ll Need:
2 Pounds Stew Meat / Beef Tips*
1 Pound Baby Carrots
1 Pound Russet Potatoes (Peeled, diced into 1 – ½ inch cubes)
1 Large Leek (Diced, rinsed)
3 Celery Ribs (Diced)
15-18 Ounces Low Sodium Chicken Broth
½ Teaspoon Dried Thyme
1 Teaspoon Dried Parsley
* Most grocery stores will carry some form of stew meat in their meat department. The key is looking for the proper kind. Most stew meats are made from diced roast or steak tips, but some grocery stores can cut corners and serve ubiquitous “stew meat” from a unnamed source (I.E. leftover cow parts). Ideally you’re looking for a roast cut, that’s been cubed into 1 inch pieces for you – most of the time the price will be similar if not identical – even if there’s a slight premium, the time saved is typically worth the slight markup, in my opinion.
Some stew recipes call for all of the ingredients to be cooked in the pot – simply throw everything in and let it go. Depending on the recipe, this works just fine, but I’ve found that taking a few minutes of additional prep can go a long way in enhancing the flavor of a stew. As such, we’re browning our stew meat before adding it to the slow cooker.
Place a large (12 inch) skillet over medium high heat until it becomes roaring hot. Add the beef to the skillet and cook, stirring occasionally, until all edges are browned. We’re not cooking the beef through here, so don’t be concerned if there are still some pink spots on the beef – the high heat of the skillet will make a nice sear, however, and the browning of the beef enhances the flavor in a way that simply boiling the beef could not.
Once the beef is browned, add it to a large (5 to 6 quart) slow cooker (make sure to scrape all browned on bits from the skillet into the slow cooker as well – that’s flavor you don’t want to leave behind!). Add in the baby carrots, potatoes, celery and enough chicken broth to cover the entire mixture. Give it a good stir before covering and setting the slow cooker to “low”. Allow the stew to simmer for a good 8 hours before serving.
You may be asking, “If this is beef stew, why are we using chicken broth?” Good question! Beef broth carries a very strong and distinct flavor. For some soups and stews, it works well as a flavor enhancer or main component of the dish’s flavor. In this dish, however, the browned stew meat is the star of the show and brings a lot of flavor to the dish. Using beef broth would overwhelm our stew meat’s natural flavors and may make things a bit too…stout. Chicken broth, however, is relatively neutral. It brings flavors that enhance carrots and potatoes (thus why it’s so good in vegetable soup) but it won’t really disrupt the natural flavors of the dish. In this case, that’s a good thing.
After 8 hours, your stew should smell fantastic and the veggies should be delightfully tender and flavorful. Before serving, stir in the thyme and parsley and a salt and pepper as needed (to taste). Serve and enjoy!
The Results:
For a dish that’s designed to feature lamb, this beef “audible” worked quite nicely! The beef’s flavor was fantastic and after a full 8 hours in a slow cooker, it moved into the carrots, potatoes and broth evenly, creating a big warm bowl of beef goodness. This recipe makes for a fantastic weekend meal. Simply throw it together in the morning and reap the rewards that night. As a bonus – you’ll have leftovers for the next few days, and the stew seems to get better and better with each reheat!
That’s all we have for you this week. It was a short week (recipe wise) because we’ve been holding back a few recipes in order to present you with a theme week next week. Maggie has been busy over the past week and half, and she’s created stockpile of recipes featuring fall’s best flavor – PUMPKIN. We’ll have a week chocked full of pumpkin dishes coming your way, so be sure to stop back for that! Until then,
~Cheers
Friday, September 26, 2014
Giving Other Pork Chops a Run for Their Money
Good evening everyone! If I've said it once, I'll say it again: sometimes the best recipes are the most simplest. Simple ingredients and/or simple preparation often lead to the most delicious results. Tonight, I have another great example of this great cooking concept and will yield one great recipe!
The Recipe: Tuscan-Style Garlic-Herb Pork Chops
Original Recipe Found In: Cooking Light, October 2014 Issue
What You'll Need:
4 Teaspoons Olive Oil, divided
1/4 Cup chopped fresh flat-leaf Parsley
2 Tablespoons thinly sliced Sage Leaves
1 Tablespoon Balsamic Vinegar
1 Teaspoon finely chopped Rosemary
3 Garlic cloves, minced and divided
4 (6 Ounce) bone-in, center-cut loin Pork Chops
1/2 Teaspoon freshly ground Black Pepper
1/4 Teaspoon Salt
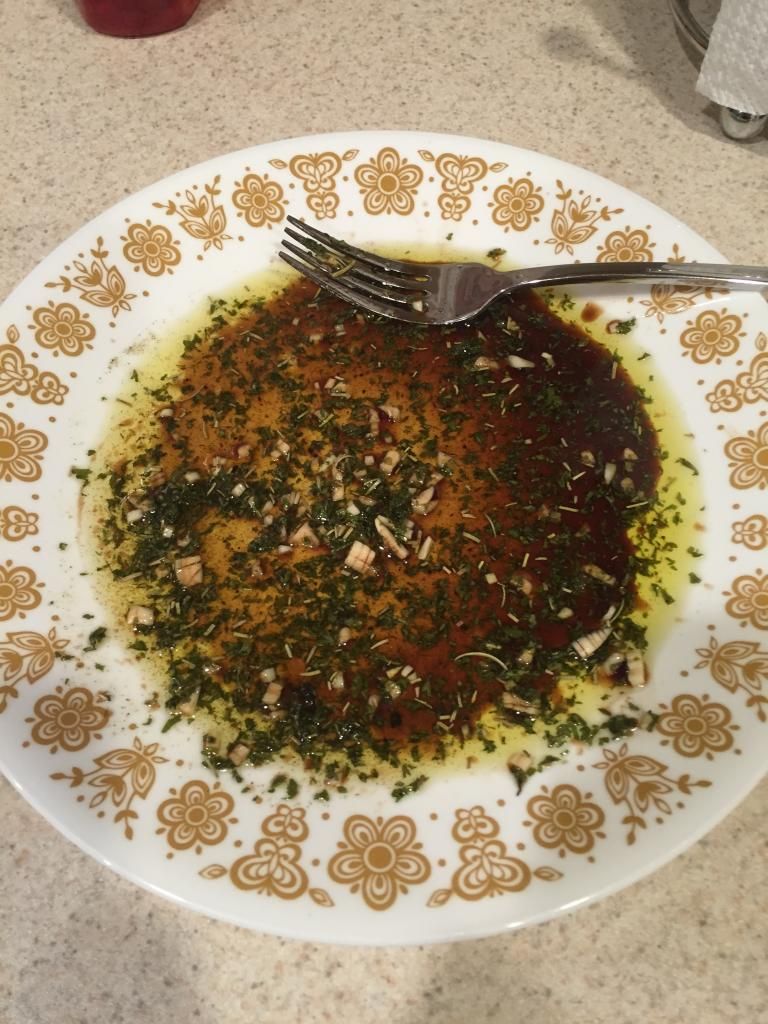
To start, preheat a grill pan to high heat. While the grill pan heats, combine two teaspoons oil, two tablespoons parsley, sage, balsamic vinegar, rosemary, and half the garlic on a clean plate. Stir until the oil and vinegar have just started to combine. Set the plate aside, combine the mixture only if the oil and vinegar start to separate.
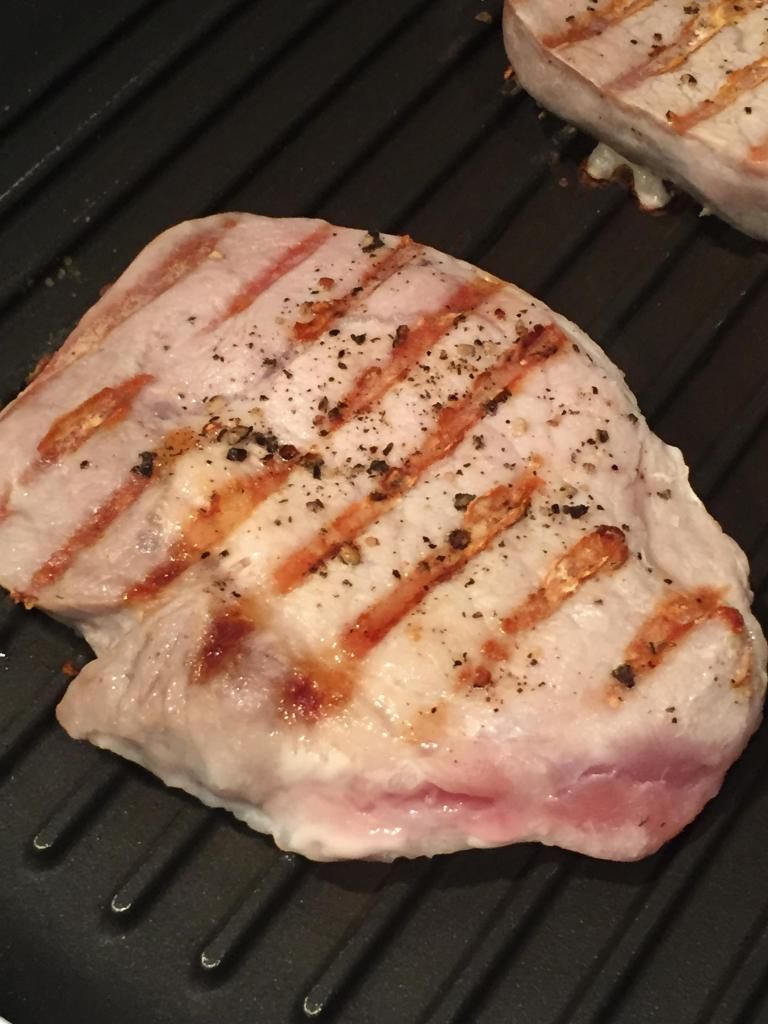
Next, sprinkle the pork chops on both sides with 1/4 teaspoon pepper and the salt. By this time, the the grill pan should be good and hot. Coat the grill rack with cooking spray and place the chops on the grill pan. Grill for five minutes on one side, then turn the chops over and continue to grill for three to five minutes, or until done or a meat thermometer reads 145 degrees.
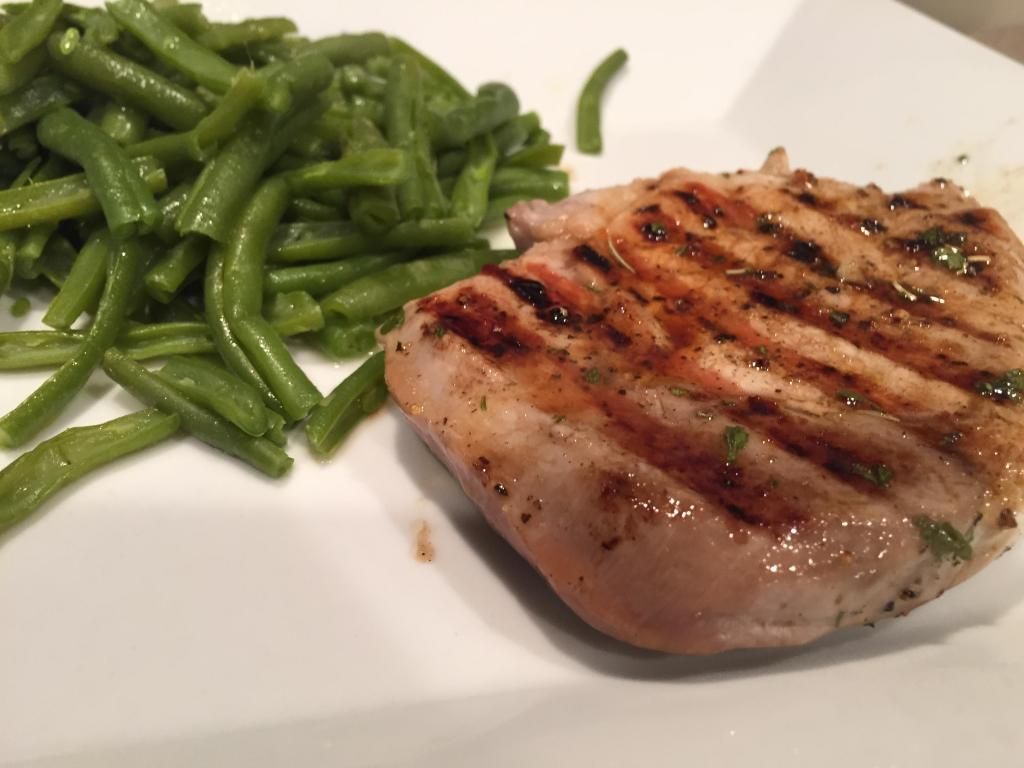
Transfer the chops to the plate with the oil, vinegar, and herbs and turn to coat in the herb mixture. If you want more of the herb mixture, you can spoon more of it on top of the chops. Serve the chops with your favorite side dish or vegetable and enjoy!
The End Result:
This is one flavorful chop! What normally is a "blah" pork chop is really enhanced by the fresh garlic and herb "marinade", although I can't call it a true marinade, since the chops didn't sit in it for any particular time. Obviously, the oil and vinegar help bind the herbs and garlic to the chops, and that always a good thing! While this might not be the most complicated recipe, the flavors certainly outdo the work and makes for one incredibly delicious dish!
Thanks for joining us tonight, check back frequently for brand new recipes heading your way! Until then,
~Cheers!
The Recipe: Tuscan-Style Garlic-Herb Pork Chops
Original Recipe Found In: Cooking Light, October 2014 Issue
What You'll Need:
4 Teaspoons Olive Oil, divided
1/4 Cup chopped fresh flat-leaf Parsley
2 Tablespoons thinly sliced Sage Leaves
1 Tablespoon Balsamic Vinegar
1 Teaspoon finely chopped Rosemary
3 Garlic cloves, minced and divided
4 (6 Ounce) bone-in, center-cut loin Pork Chops
1/2 Teaspoon freshly ground Black Pepper
1/4 Teaspoon Salt
To start, preheat a grill pan to high heat. While the grill pan heats, combine two teaspoons oil, two tablespoons parsley, sage, balsamic vinegar, rosemary, and half the garlic on a clean plate. Stir until the oil and vinegar have just started to combine. Set the plate aside, combine the mixture only if the oil and vinegar start to separate.
Next, sprinkle the pork chops on both sides with 1/4 teaspoon pepper and the salt. By this time, the the grill pan should be good and hot. Coat the grill rack with cooking spray and place the chops on the grill pan. Grill for five minutes on one side, then turn the chops over and continue to grill for three to five minutes, or until done or a meat thermometer reads 145 degrees.
Transfer the chops to the plate with the oil, vinegar, and herbs and turn to coat in the herb mixture. If you want more of the herb mixture, you can spoon more of it on top of the chops. Serve the chops with your favorite side dish or vegetable and enjoy!
The End Result:
This is one flavorful chop! What normally is a "blah" pork chop is really enhanced by the fresh garlic and herb "marinade", although I can't call it a true marinade, since the chops didn't sit in it for any particular time. Obviously, the oil and vinegar help bind the herbs and garlic to the chops, and that always a good thing! While this might not be the most complicated recipe, the flavors certainly outdo the work and makes for one incredibly delicious dish!
Thanks for joining us tonight, check back frequently for brand new recipes heading your way! Until then,
~Cheers!
Thursday, September 25, 2014
Stout Chicken Stew
Good evening everyone! Every once in a while, I look back on the recipes we cook and review the "season". The last time I did this for last fall / winter, I came to a conclusion - I didn't make enough stew and soup recipes. Fall, after all, is stew season and soups and stews are some of my favorite dishes to cook up. So, this fall I plan on focusing a lot more on soups, stews and "foods of the season". (Don't worry, we're not launching a "16 weeks of stews" feature).
We're getting the stew theme started this week by combining some of our favorite things: craft beer, fresh ingredients and easy preparation. Intrigued? You should be! Let's get cooking!
The Recipe: Stout Chicken Stew
Original Recipe Found on: Eatingwell.com
What You'll Need:
2 Pounds Boneless Skinless Chicken Thighs*
1 Cup All Purpose Flour (divided)
5 Slices Thick Cut Bacon (chopped)
1 Pound Baby Carrots (Cut into 1 inch pieces)
2 Cups White Onion (Diced)
3 Garlic Cloves (Minced)
2 Cups Frozen Peas
12 Ounces Stout Beer**
1 Cup Low Sodium Chicken Broth
* For this recipe you will NEED boneless, skinless thighs. Chicken thighs can take longterm cooking better than any other cut of chicken and this recipe intends to cook the chicken until it falls apart. Since we're cooking the pieces to that point, you don't want skin and bones to "gunk" up the works - boneless skinless is the only way to go.
** We're big fans of craft brewing and local brewing. As such, when we have a chance to feature a smaller brewery, we always want to "tip our cap" towards their efforts. We enjoy the entire portfolio of beers offered by Millstream Brewing - especially their ales and stouts. So, when this dish called for a stout beer, we knew exactly where to turn.
Begin preparing the dish by adding 1/2 cup of the flour to a plate with a pinch of salt and pepper. Dredge the chicken thighs through this mixture until all of the thighs are evenly covered in a thin layer of flour. Set the chicken aside until all pieces are covered.
Add 2 tablespoons of vegetable oil to a large (12 inch) non stick skillet over medium high heat. Bring the oil to a shimmer before adding the chicken and cooking for 5 minutes per side, or until the exterior turns a nice golden brown. Once all the pieces are evenly browned, transfer them to the bottom of a 5 quart slow cooker.
Using the same skillet (don't clean it out) add the bacon and cook for 3 to 5 minutes or until the bacon begins to brown. Next, add the remaining 1/2 cup of flour to the skillet and cook for an additional two minutes, stirring constantly. Once the mixture begins to thicken, stir in the stout beer. Use a spatula or wooden spoon to work up any browned on bits from the bottom of the skillet. Once the mixture thickens and you'e worked up all the browned on bits, carefully pour the mixture into the slow cooker over the chicken.
Add the carrots, onions and garlic to the slow cooker along with the chicken broth. Give the mixture a good stir before coving the slow cooker and setting it to low. Allow the stew to cook for 7 to 8 hours.
Roughly 15 minutes before serving, stir in the frozen peas and allow them to cook until heated through. Immediately before serving, use a spatula or wooden spoon to stir the stew a final time - this should break up any of the larger chicken pieces (that haven't already broken up during cooking).
Once you're satisfied all the chicken is broken up into manageable chunks, simply serve and enjoy!
The Results:
The base of this stew is bacon and beer...how do you think it tasted?!
The answer, obviously, is fantastic.
The base of the stew was deep and rich with flavor (no strong beer flavoring here) while the veggies added a bit of bright "fresh" flavors to the dish. The chicken's lovely neutral flavor tied the whole dish together and formed a delicious warming stew.
That's all we have for you this evening. Maggie takes to the kitchen tomorrow night with a fresh new take on a classic pasta recipe. Until then,
~Cheers

We're getting the stew theme started this week by combining some of our favorite things: craft beer, fresh ingredients and easy preparation. Intrigued? You should be! Let's get cooking!
The Recipe: Stout Chicken Stew
Original Recipe Found on: Eatingwell.com
What You'll Need:
2 Pounds Boneless Skinless Chicken Thighs*
1 Cup All Purpose Flour (divided)
5 Slices Thick Cut Bacon (chopped)
1 Pound Baby Carrots (Cut into 1 inch pieces)
2 Cups White Onion (Diced)
3 Garlic Cloves (Minced)
2 Cups Frozen Peas
12 Ounces Stout Beer**
1 Cup Low Sodium Chicken Broth
* For this recipe you will NEED boneless, skinless thighs. Chicken thighs can take longterm cooking better than any other cut of chicken and this recipe intends to cook the chicken until it falls apart. Since we're cooking the pieces to that point, you don't want skin and bones to "gunk" up the works - boneless skinless is the only way to go.
** We're big fans of craft brewing and local brewing. As such, when we have a chance to feature a smaller brewery, we always want to "tip our cap" towards their efforts. We enjoy the entire portfolio of beers offered by Millstream Brewing - especially their ales and stouts. So, when this dish called for a stout beer, we knew exactly where to turn.
Begin preparing the dish by adding 1/2 cup of the flour to a plate with a pinch of salt and pepper. Dredge the chicken thighs through this mixture until all of the thighs are evenly covered in a thin layer of flour. Set the chicken aside until all pieces are covered.
Add 2 tablespoons of vegetable oil to a large (12 inch) non stick skillet over medium high heat. Bring the oil to a shimmer before adding the chicken and cooking for 5 minutes per side, or until the exterior turns a nice golden brown. Once all the pieces are evenly browned, transfer them to the bottom of a 5 quart slow cooker.
Using the same skillet (don't clean it out) add the bacon and cook for 3 to 5 minutes or until the bacon begins to brown. Next, add the remaining 1/2 cup of flour to the skillet and cook for an additional two minutes, stirring constantly. Once the mixture begins to thicken, stir in the stout beer. Use a spatula or wooden spoon to work up any browned on bits from the bottom of the skillet. Once the mixture thickens and you'e worked up all the browned on bits, carefully pour the mixture into the slow cooker over the chicken.
Add the carrots, onions and garlic to the slow cooker along with the chicken broth. Give the mixture a good stir before coving the slow cooker and setting it to low. Allow the stew to cook for 7 to 8 hours.
Roughly 15 minutes before serving, stir in the frozen peas and allow them to cook until heated through. Immediately before serving, use a spatula or wooden spoon to stir the stew a final time - this should break up any of the larger chicken pieces (that haven't already broken up during cooking).
Once you're satisfied all the chicken is broken up into manageable chunks, simply serve and enjoy!
The Results:
The base of this stew is bacon and beer...how do you think it tasted?!
The answer, obviously, is fantastic.
The base of the stew was deep and rich with flavor (no strong beer flavoring here) while the veggies added a bit of bright "fresh" flavors to the dish. The chicken's lovely neutral flavor tied the whole dish together and formed a delicious warming stew.
That's all we have for you this evening. Maggie takes to the kitchen tomorrow night with a fresh new take on a classic pasta recipe. Until then,
~Cheers
Tuesday, September 23, 2014
16 Burgers of Summer: Latin Burger
Good evening everyone! We missed our official cutoff by a day – but hey, it’s our blog, so who cares!? I, of course, am speaking in regards to our burgers of summer series where from May through…well, today, we featured a brand new burger recipe every week. We’ve tried everything from the standard cheeseburger to making turkey burgers a dish they deserve. We wrap things up today with the most ambitious burger recipe to date. The grilled pork Latin burger. This baby is so packed full of spices I almost didn’t give it a shot. As our series drew to a close I thought “why not?” and decided to close out the feature with the most unique burger yet. The results? Well, we’ll get there.
The Recipe: Grilled Pork Latin Burger
Original Recipe Adapted From: Food Network: Our Favorite Meals
What You’ll Need:
1 Pound Ground Pork
3 Garlic Cloves (Chopped)
1 Tablespoon Dried Oregano
1 Tablespoon Ground Ancho Chile Powder
1 Tablespoon Sugar
1 Teaspoon Ground Coriander
½ Teaspoon Ground Cinnamon
¼ Teaspoon Ground Allspice
¼ Teaspoon Ground Cloves
1 Teaspoon Kosher Salt
3 Garlic Cloves (Chopped)
1 Tablespoon Dried Oregano
1 Tablespoon Ground Ancho Chile Powder
1 Tablespoon Sugar
1 Teaspoon Ground Coriander
½ Teaspoon Ground Cinnamon
¼ Teaspoon Ground Allspice
¼ Teaspoon Ground Cloves
1 Teaspoon Kosher Salt
Begin by combining all of the spices in a medium bowl (Yes, all) mix until well blended, then add the ground pork to the bowl and use your hands to work the pork and spices together until everything is well blended. There’s a lot of spice in this mixture, so don’t be alarmed if you only see a bit of actual pink pork when you’re done. There’s a lot to blend it and not a lot of room to get it done.
As we’ve done with nearly every burger recipe before, place the patties on a plate and store it in the refrigerator for at least 10 minutes. That will allow the patties to set up a bit before moving to the grill.
Speaking of the grill, preheat it to 500 degrees, clean the grates and then turn off one side of the grill. Lower the other side to medium (300 degrees). The 300 degree side is the side we’ll be using.
Place the patties on the grill and cook for 5 to 7 minutes per side, or until the burgers have browned nicely and the pork is evenly cooked through. If you’d like, check the center of the pork for 165 degrees (safe temperature for all ground meats, per the FDA) with an instant read thermometer.
To this point, we’ve followed the recipe very close – however, we’re about to go off the rails here. The original dish calls for jack cheese to top these burgers. BUT, as you’re cooking them and smell the spices, adding cheese just doesn’t seem to fit. As cinnamon, allspice and clove filled the air, my stomach actually churned at the notion of trying to add cheese to that blend. So, I bailed and turned to plan B.
In this case, B stood for BBQ sauce.
My theory was these intense spices needed a sweeter offset – thus BBQ sauce would be the perfect companion. I spread a thin layer of our favorite BBQ sauce (Sweet Baby Rays) on the bottom of a bakery fresh bun and topped with the burger. You can add other fixings as you see fit, but I opted to leave the burger as it stood.
The Results:
This is one intense burger. Allspice, cinnamon, ancho chile powder, cloves – there’s a lot of flavor competing for center stage with this dish and, served on its own, it’s almost too much. The BBQ sauce, however, was the savior of the dish. After trying a bit of the burger without the sauce, I moved on to eating it with the sauce and was amazed at the change. The sweet yet spicy sauce completely mellowed the rest of the spices and pulled all of the flavors into one cohesive unit. The end result was a perfectly OK burger. Of the 16 we tried, I think this one finishes 16th. That’s not to say it’s a BAD dish, there’s just a lot of spice that goes towards this dish and I don’t know that it’s really worth all the effort.
That’s all we have for you this evening, but we’ve got a jam PACKED week coming up. I have a new recipe to debut later in the week (it’s NOT a burger) that looks back to classic French cuisine. Maggie has a new dish featuring a brand new take with pork chops. I’ll follow that with ANOTHER new recipe (likely on Friday) and we’ll close out the week with a product review and maybe even a pumpkin cupcake recipe.
We’ve been busy this summer, so we’ve got a bit of a backlog to clean out, but rest assured we’ve still got lots of cooking to share. Until next time,
~Cheers
Saturday, September 13, 2014
Stay at Home & Make this Breakfast Sandwich
Good evening everyone! While last week I made a variation on the breakfast muffin, tonight I'll be making another variation of a different kind. While you don't typically think of breakfast sandwiches making their mainstay in the home realm, I've found a delicious dish that will change your mind on how you think this notion.
The Recipe: Banana-Almond Butter French Toast Sandwiches
Original Recipe Found In: Cooking Light, September 2014 Issue
What You'll Need:
2 Large Eggs
1/4 Cup Unsweetened Almond Milk
2 Teaspoons Vanilla Extract
1/4 Teaspoon Cinnamon
2 Tablespoons Almond Butter*
4 Teaspoons Maple Syrup
1 Banana
4 Slices Multigrain Bread
*If you've been in the supermarket the last year or so, you've probably seen several variations of nut butters. We're all familiar with the peanut variety, but almond, soy, and other nuts have hit the shelves. Some stores even have the option of making your own nut butter. This is definitely an untapped market for the blog. While almond butter isn't as sweet as standard peanut butter, it's creamier, smoother texture and consistency than peanut butter. This is why it is used in this recipe.
To start, make the french toast dipping mixture. In a small bowl, crack the eggs and discard the shells. Also add the almond milk, vanilla extract, and cinnamon. Whisk to combine and set aside. If the cinnamon starts to separate from the rest of the mixture before the cooking part, whisk again for consistency.
Next, in a small mixing bowl combine the almond butter and maple syrup until thoroughly mixed. Set this mixture aside. On a plate, cut the banana lengthwise into four thin slices then cut crosswise into halves. Set the banana slices aside also. Spread the almond butter evenly across all four slices of bread. Top two bread slices with four banana pieces. Place the remaining two bread slices over the banana, sandwiching the almond butter and bananas inside.
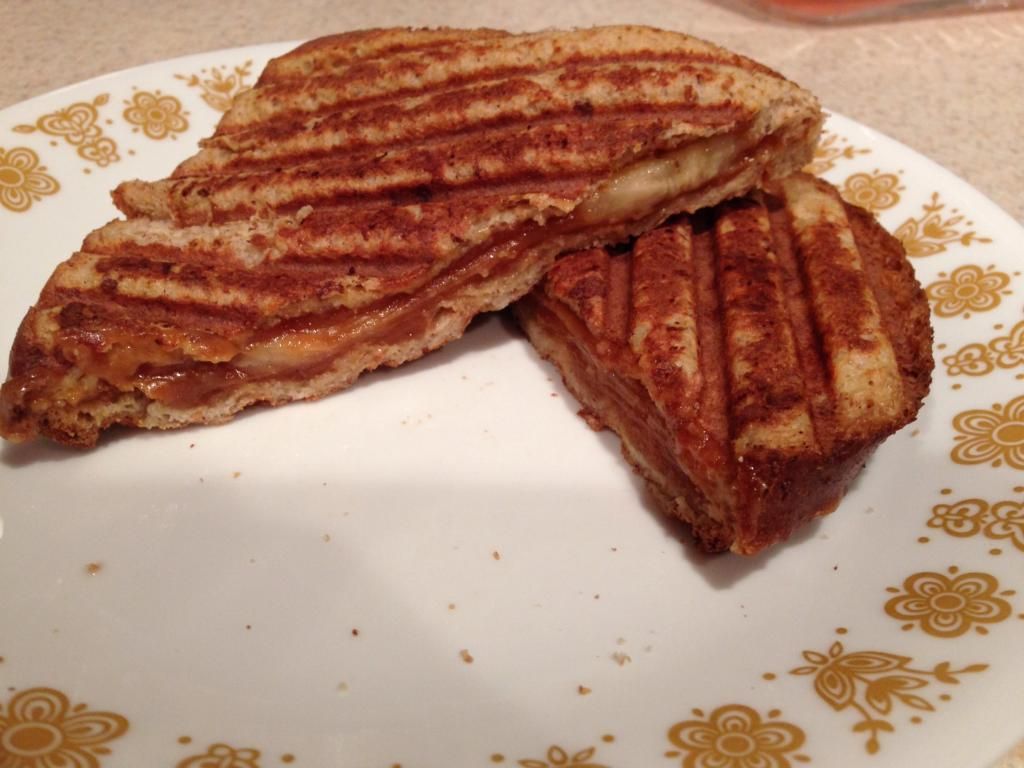
Using a grill pan and a sandwich press, you can speed up the process of making the french toast sandwiches. Heat a grill pan over medium-high heat. Meanwhile, very carefully dip the sandwiches in the egg mixture and let any excess drip off. Once the grill pan is heated, place one sandwich down and using the sandwich press, cover. Cook for three to four minutes on each side, until the egg has cooked and the bread as browned. Also, the almond butter should be heated inside the sandwich. Place sandwiches on a cutting board to cut in half, serve, and enjoy!
The End Result:
These "breakfast" sandwiches are delicious, melty, and gooey (and I wouldn't want it any other way!) The almond butter, combined with the maple syrup is an ingenious design. While the syrup doesn't shine completely in the butter, it adds a sweetness it definitely needs. The bananas hit the right notes also and don't weigh the sandwich down with mushiness. If I make any french toast in the future, I'll want to use the mixture from this recipe. The vanilla extract with the cinnamon are tasty additions in the standard "milk and egg" french toast mixture. Overall, another great breakfast for supper (or breakfast for breakfast) recipe that I highly recommend you check out.
Thanks for joining us tonight. Tyler will close out the week with another delicious burger recipe. Until then,
~Cheers!
The Recipe: Banana-Almond Butter French Toast Sandwiches
Original Recipe Found In: Cooking Light, September 2014 Issue
What You'll Need:
2 Large Eggs
1/4 Cup Unsweetened Almond Milk
2 Teaspoons Vanilla Extract
1/4 Teaspoon Cinnamon
2 Tablespoons Almond Butter*
4 Teaspoons Maple Syrup
1 Banana
4 Slices Multigrain Bread
*If you've been in the supermarket the last year or so, you've probably seen several variations of nut butters. We're all familiar with the peanut variety, but almond, soy, and other nuts have hit the shelves. Some stores even have the option of making your own nut butter. This is definitely an untapped market for the blog. While almond butter isn't as sweet as standard peanut butter, it's creamier, smoother texture and consistency than peanut butter. This is why it is used in this recipe.
To start, make the french toast dipping mixture. In a small bowl, crack the eggs and discard the shells. Also add the almond milk, vanilla extract, and cinnamon. Whisk to combine and set aside. If the cinnamon starts to separate from the rest of the mixture before the cooking part, whisk again for consistency.
Next, in a small mixing bowl combine the almond butter and maple syrup until thoroughly mixed. Set this mixture aside. On a plate, cut the banana lengthwise into four thin slices then cut crosswise into halves. Set the banana slices aside also. Spread the almond butter evenly across all four slices of bread. Top two bread slices with four banana pieces. Place the remaining two bread slices over the banana, sandwiching the almond butter and bananas inside.
Using a grill pan and a sandwich press, you can speed up the process of making the french toast sandwiches. Heat a grill pan over medium-high heat. Meanwhile, very carefully dip the sandwiches in the egg mixture and let any excess drip off. Once the grill pan is heated, place one sandwich down and using the sandwich press, cover. Cook for three to four minutes on each side, until the egg has cooked and the bread as browned. Also, the almond butter should be heated inside the sandwich. Place sandwiches on a cutting board to cut in half, serve, and enjoy!
The End Result:
These "breakfast" sandwiches are delicious, melty, and gooey (and I wouldn't want it any other way!) The almond butter, combined with the maple syrup is an ingenious design. While the syrup doesn't shine completely in the butter, it adds a sweetness it definitely needs. The bananas hit the right notes also and don't weigh the sandwich down with mushiness. If I make any french toast in the future, I'll want to use the mixture from this recipe. The vanilla extract with the cinnamon are tasty additions in the standard "milk and egg" french toast mixture. Overall, another great breakfast for supper (or breakfast for breakfast) recipe that I highly recommend you check out.
Thanks for joining us tonight. Tyler will close out the week with another delicious burger recipe. Until then,
~Cheers!
Thursday, September 11, 2014
16 Burgers of Summer: Classic Drive-In Burgers
Good evening everyone. We continue our burgers of summer series with a classic that, at one time, I thought would be difficult to duplicate. I'm not talking about the standard "off the grill" burger, but the true "burger joint" burger. If you've ever been to a true blue burger drive in or burger joint (note: not the chains - not a modern "burger bar" but a traditional, old school "burger joint") you know what I've talking about. There's something about a true burger joint's burger that makes them unbelievably savory and yet...difficult to duplicate at home.
Until tonight. I found an America's Test Kitchen recipe for "classic burgers" and an accompanying recipe for "burger sauce". With a few tweaks, I had the base for our own attempt at recreating the burger joint classic.
The Recipe: Drive In Burgers
Recipe Adapted From: Classic Cheeseburgers (America's Test Kitchen)
What You'll Need:
1 Crackin' Burger Recipe
4 Slices American Cheese
1 Small Onion (Diced fine)
For the burger sacue:
2 Tablespoons Mayonnaise
1 Tablespoon Sriracha
1 Teaspoon Sugar
1/2 Teaspoon Salt
1/2 Teaspoon Pepper
For the french fries:
2.5 Pounds Yukon Gold Potatoes (Sliced thin)
6 Cups Peanut Oil
You can make the burger sauce a day ahead of time (just keep it covered in the refrigerator). To make the sauce, simply add all of the ingredients to a small bowl and whisk until blended. Store in the refrigerator until needed.
The fries are the most time consuming part of this recipe - so if you're making every part of this dish - begin here. Add the potatoes into a large dutch oven and slowly add the peanut oil. Set the dutch oven on your stove over high heat and bring the oil to a rolling boil. Allow to potatoes to cook at this high temperature for 5 minutes before reducing the heat to medium high. Give the potatoes a light stir and then allow them to cook for 10 minutes before reducing the heat to medium, stirring gently once more and cooking for an additional 5 minutes. During this last 5 minutes, preheat your broiler and place a wire drying rack over a rimmed baking sheet.
Drain the oil from the potatoes and transfer them to the wire rack. Place the baking sheet in the oven under the broiler for 3 to 5 minutes, or until the potatoes are a deep golden brown and are nice and crispy. Serve with a sprinkle of salt alongside a burger or any dish of your choosing.
To prepare the burgers: add a tablespoon of oil to a large (12 inch) non stick skillet over medium high heat. Once the oil begins to shimmer, add the burgers and cook for 3 to 5 minutes per side until the burger has developed an even brown exterior and is cooked through. After the second 5 minute cooking phase, spoon some onions on the top of each patty before covering the patties (and onions) with a slice of American cheese. Reduce the heat to low and cover the skillet for 2 minutes or until the cheese is completely melted and has encased the burger.
Spread a thin layer of the burger sauce on a bakery fresh bun and top with the burger. Serve with the fries and enjoy!
The Results:
This is, without a doubt, the easiest way to duplicate that traditional "burger joint" flavor without even having to leave the house. The blending of raw onions with the melted cheese and skillet fried burger creates a great flavor - but the true "clincher" is the burger sauce, which when combined with the aforementioned flavors creates the best burgers you can make in your own kitchen. The fries are a nice crispy companion to the burger and are relatively low maintenance (as far as at home frying goes). All in all, this is one dish that's simple to create, but you'll have your family or friends thinking you're a culinary mastermind. That's a pretty good pairing in my opinion!
That's all we have for you this evening. Maggie takes to the kitchen later this week with a unique dish that is sure to please the whole family. I'll follow her with another burger recipe as we near the end of our summer burger series. Until then,
~Cheers
Until tonight. I found an America's Test Kitchen recipe for "classic burgers" and an accompanying recipe for "burger sauce". With a few tweaks, I had the base for our own attempt at recreating the burger joint classic.
The Recipe: Drive In Burgers
Recipe Adapted From: Classic Cheeseburgers (America's Test Kitchen)
What You'll Need:
1 Crackin' Burger Recipe
4 Slices American Cheese
1 Small Onion (Diced fine)
For the burger sacue:
2 Tablespoons Mayonnaise
1 Tablespoon Sriracha
1 Teaspoon Sugar
1/2 Teaspoon Salt
1/2 Teaspoon Pepper
For the french fries:
2.5 Pounds Yukon Gold Potatoes (Sliced thin)
6 Cups Peanut Oil
You can make the burger sauce a day ahead of time (just keep it covered in the refrigerator). To make the sauce, simply add all of the ingredients to a small bowl and whisk until blended. Store in the refrigerator until needed.
The fries are the most time consuming part of this recipe - so if you're making every part of this dish - begin here. Add the potatoes into a large dutch oven and slowly add the peanut oil. Set the dutch oven on your stove over high heat and bring the oil to a rolling boil. Allow to potatoes to cook at this high temperature for 5 minutes before reducing the heat to medium high. Give the potatoes a light stir and then allow them to cook for 10 minutes before reducing the heat to medium, stirring gently once more and cooking for an additional 5 minutes. During this last 5 minutes, preheat your broiler and place a wire drying rack over a rimmed baking sheet.
Drain the oil from the potatoes and transfer them to the wire rack. Place the baking sheet in the oven under the broiler for 3 to 5 minutes, or until the potatoes are a deep golden brown and are nice and crispy. Serve with a sprinkle of salt alongside a burger or any dish of your choosing.
To prepare the burgers: add a tablespoon of oil to a large (12 inch) non stick skillet over medium high heat. Once the oil begins to shimmer, add the burgers and cook for 3 to 5 minutes per side until the burger has developed an even brown exterior and is cooked through. After the second 5 minute cooking phase, spoon some onions on the top of each patty before covering the patties (and onions) with a slice of American cheese. Reduce the heat to low and cover the skillet for 2 minutes or until the cheese is completely melted and has encased the burger.
Spread a thin layer of the burger sauce on a bakery fresh bun and top with the burger. Serve with the fries and enjoy!
The Results:
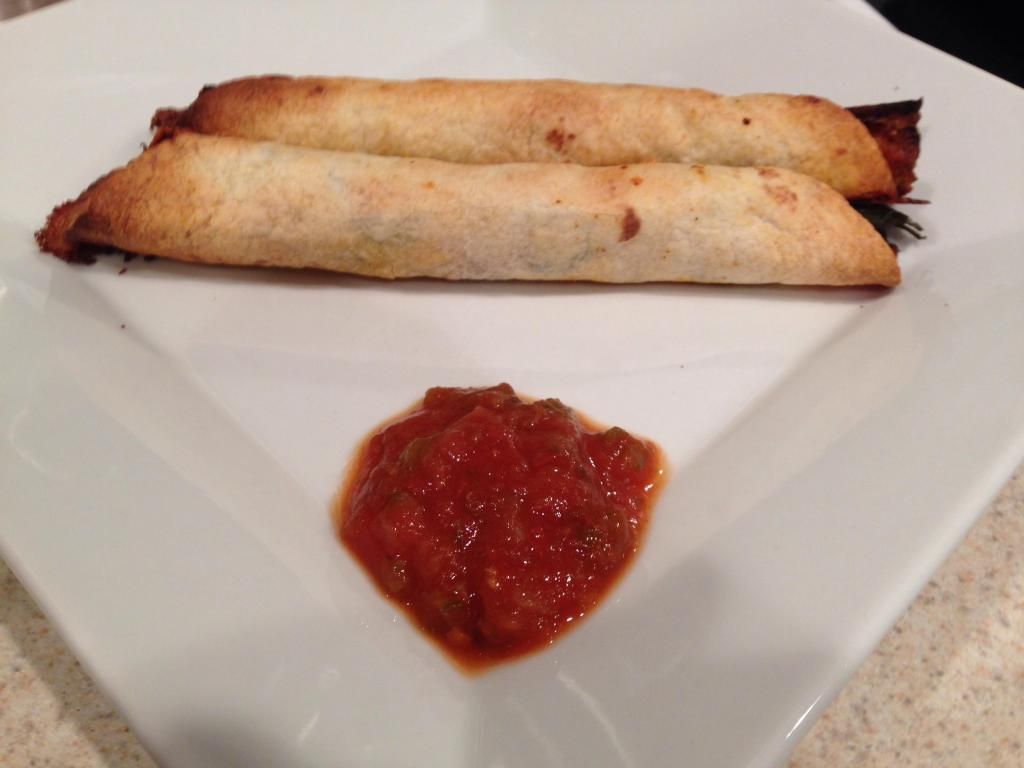
| It may look like a big goopy mess, but it holds together well (and tastes great!) |
This is, without a doubt, the easiest way to duplicate that traditional "burger joint" flavor without even having to leave the house. The blending of raw onions with the melted cheese and skillet fried burger creates a great flavor - but the true "clincher" is the burger sauce, which when combined with the aforementioned flavors creates the best burgers you can make in your own kitchen. The fries are a nice crispy companion to the burger and are relatively low maintenance (as far as at home frying goes). All in all, this is one dish that's simple to create, but you'll have your family or friends thinking you're a culinary mastermind. That's a pretty good pairing in my opinion!
That's all we have for you this evening. Maggie takes to the kitchen later this week with a unique dish that is sure to please the whole family. I'll follow her with another burger recipe as we near the end of our summer burger series. Until then,
~Cheers
Thursday, September 4, 2014
Not Your Momma's Muffins
Good evening everyone! As many followers know, we have many themes we rotate through here on the blog. With the general "healthy" and "good-for-you" overall theme, I often tend to shift between two different themes: Mexican and breakfast. As long as there are new recipes to try, I don't think I can ever exhaust recipes from these themes. Tonight, I present a new breakfast for dinner recipe, that is something completely new, and also completely delicious.
The Recipe: Savory Egg Muffins
Original Recipe Found From: www.cookinglight.com
What You'll Need:
1 1/2 Cups Water
2 Tablespoons unsalted Butter
1 (6-Ounce) package Stuffing mix for chicken (such as Stove-Top)
3 Ounces ground Pork Sausage
6 large Eggs, beaten
1/3 Cup Monterey Jack Cheese, shredded
1/2 Cup finely chopped Red Bell Pepper
1/4 Cup sliced Green Onions
To start, combine the water and butter in a medium saucepan. Bring the combination to a boil over medium-high heat and stir in stuffing mix. Cover with a lid and take the pan off the heat. Let the pan stand for five minutes, then fluff with a fork. Uncover the pan and let stand for 10 minutes, or until cool enough to handle. This might require fluffing additional times while uncovered, because the heat will retain its temperature in the pan!
Next, while the stuffing cools, cook the sausage in a small, nonstick skillet over medium-high heat. Cook for five to eight minutes, or until the sausage has browned lightly. Depending how fatty the sausage is, you might need to drain the excess fat.
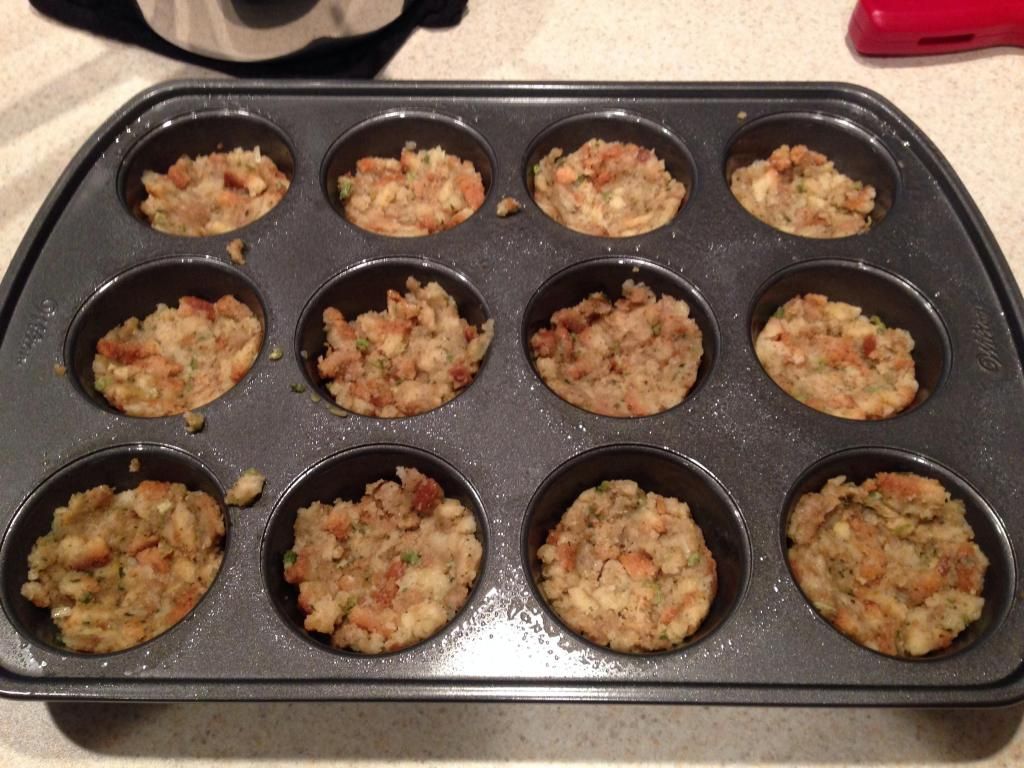
At this point, you can preheat an oven to 400 degrees and prepare a muffin tin, by heavily coating the bottom and sides with cooking spray. Give a quick spritz to your fingertips and press 1/4 cup of the stuffing into the bottom of each muffin cup.
Next, pour the egg mixture evenly into the stuffing cups.
Layer with cheese, sausage, bell pepper, and green onion evenly over the egg.
Once all the muffin cups have been filled, place the muffin tin in the oven and bake at 400 degrees for 18 to 20 minutes, or until the centers of the muffins have been set. Bring out of the oven and let stand for five minutes before serving. Lightly run a small knife around the edges of the muffin cups to loosen. Serve and enjoy!
The End Result:
These are definitely one-of-kind muffins! If you are expecting any sort of sweetness, you will not get it from these muffins. The stuffing gives a base to the muffins, without expanding them at all. The eggs are just fluffy enough, without too much weight. Also, the cheese, sausage, and veggies add their own pops of flavor to really harmonize the entire muffin. If you were to serve this as part of a breakfast meal, I would recommend adding something a bit sweet, to balance out the flavors, maybe a french toast? But these little morsels can definitely add to your next breakfast (or breakfast for dinner) meal!
That's all we have for you this week, but before we go, I wanted to take the time to wish my blog partner, my husband, Tyler, a happy 4th anniversary today. We started this blog several months before our wedding and continued through a wedding and moving into a house. There's been plenty of adventures (besides cooking) to had and there'll be much more to come. Tyler: I've been blessed to have you by my side through it all and through the many years ahead. You complete me and I'm "lucky in love with my best friend". Thank you for sharing your journey with me - I love you!
Join us next week as we continue our culinary adventures with brand new recipes and product reviews. Until then,
~Cheers!
The Recipe: Savory Egg Muffins
Original Recipe Found From: www.cookinglight.com
What You'll Need:
1 1/2 Cups Water
2 Tablespoons unsalted Butter
1 (6-Ounce) package Stuffing mix for chicken (such as Stove-Top)
3 Ounces ground Pork Sausage
6 large Eggs, beaten
1/3 Cup Monterey Jack Cheese, shredded
1/2 Cup finely chopped Red Bell Pepper
1/4 Cup sliced Green Onions
To start, combine the water and butter in a medium saucepan. Bring the combination to a boil over medium-high heat and stir in stuffing mix. Cover with a lid and take the pan off the heat. Let the pan stand for five minutes, then fluff with a fork. Uncover the pan and let stand for 10 minutes, or until cool enough to handle. This might require fluffing additional times while uncovered, because the heat will retain its temperature in the pan!
Next, while the stuffing cools, cook the sausage in a small, nonstick skillet over medium-high heat. Cook for five to eight minutes, or until the sausage has browned lightly. Depending how fatty the sausage is, you might need to drain the excess fat.
At this point, you can preheat an oven to 400 degrees and prepare a muffin tin, by heavily coating the bottom and sides with cooking spray. Give a quick spritz to your fingertips and press 1/4 cup of the stuffing into the bottom of each muffin cup.
Next, pour the egg mixture evenly into the stuffing cups.
Layer with cheese, sausage, bell pepper, and green onion evenly over the egg.
Once all the muffin cups have been filled, place the muffin tin in the oven and bake at 400 degrees for 18 to 20 minutes, or until the centers of the muffins have been set. Bring out of the oven and let stand for five minutes before serving. Lightly run a small knife around the edges of the muffin cups to loosen. Serve and enjoy!
The End Result:
These are definitely one-of-kind muffins! If you are expecting any sort of sweetness, you will not get it from these muffins. The stuffing gives a base to the muffins, without expanding them at all. The eggs are just fluffy enough, without too much weight. Also, the cheese, sausage, and veggies add their own pops of flavor to really harmonize the entire muffin. If you were to serve this as part of a breakfast meal, I would recommend adding something a bit sweet, to balance out the flavors, maybe a french toast? But these little morsels can definitely add to your next breakfast (or breakfast for dinner) meal!
That's all we have for you this week, but before we go, I wanted to take the time to wish my blog partner, my husband, Tyler, a happy 4th anniversary today. We started this blog several months before our wedding and continued through a wedding and moving into a house. There's been plenty of adventures (besides cooking) to had and there'll be much more to come. Tyler: I've been blessed to have you by my side through it all and through the many years ahead. You complete me and I'm "lucky in love with my best friend". Thank you for sharing your journey with me - I love you!
Join us next week as we continue our culinary adventures with brand new recipes and product reviews. Until then,
~Cheers!
Wednesday, September 3, 2014
16 Burgers of Summer: BBQ Pork Burger
Good evening everyone! Labor day unofficially marks the end of summer - which SHOULD have marked the end of our burgers of summer series. Of course, life happens and even the best laid plays go astray. As a result, today's burger entry is number 13 in our burgers of summer series. We've got another recipe on tap for this weekend and we'll look to close out our series NEXT week with two other burger recipes.
A week off isn't too bad in the big picture...right?
Either way, the series continues today with a take on a classic. I saw a recipe for a pulled pork sandwich last weekend that got me to thinking...why can't I turn a pulled pork sandwich into a burger? Now, I knew I couldn't just make a pulled pork sandwich and call it a burger. That'd be cheating by the very strict definition of what a burger really is...so, as I am often accused of doing when I hit the kitchen - I improvised. The result? A delicious take on a culinary classic!
The Recipe: BBQ Pork Burger
This is an Out of the Culinary Original Recipe
What You'll Need:
1 Pound Ground Pork
1 Cup Prepared Coleslaw
Sweet Baby Ray's BBQ Sauce
Sometimes the best recipes are the simplest recipes. In trying to duplicate a pulled pork dish, I decided to embrace the elements that make the sandwich great - mainly pork and BBQ sauce. I've seen fresh coleslaw used as a topping on BBQ pork sandwiches, so I wanted to add that element as well - after that, I decided to keep it simple.
To begin, work the pork with a pinch of salt and pepper until well blended. Break the mixture into 4 separate balls and work the balls into smaller, equally sized patties. Like we've done with every burger we've made this summer - pop the patties onto a plate and allow them to rest in the refrigerator for 10 minutes before moving them to the grill.
Speaking of the grill, preheat it to 500 degrees, clean the grates and reduce the temperature of one burner to 300 degrees. Prepare the burgers over this burner.
Cook the burgers for 3 minutes per side. Once each side has developed a nice crisp outer edge - pour on a helping of Sweet Baby Ray's BBQ sauce and spread it evenly with a basting brush. Allow the burgers to sit over heat for 1 minute (so the sauce "bakes" onto the surface) before flipping and repeating the process. Once the burger has developed a nice even sauce glaze, remove them from the grill and place them atop a bakery fresh bun. Serve with a helping of fresh coleslaw and enjoy!
The Results:
The simplest recipes have always been my favorite. This dish simply shines by keeping it simple. The blending of grilled pork with a sweet yet savory BBQ sauce duplicates the all day flavor of pulled pork nicely. The addition of the fresh coleslaw adds a bright element to the burger that standard lettuce simply couldn't bring to the table.
This simple dish is a surefire way to spice up any weeknight meal. Give it a try yourself!
That's all we have for you this evening. Maggie will take to the kitchen tomorrow night with a brand new recipe and I'll close out the weekend with a brand new burger of my own. Until then,
~Cheers
A week off isn't too bad in the big picture...right?
Either way, the series continues today with a take on a classic. I saw a recipe for a pulled pork sandwich last weekend that got me to thinking...why can't I turn a pulled pork sandwich into a burger? Now, I knew I couldn't just make a pulled pork sandwich and call it a burger. That'd be cheating by the very strict definition of what a burger really is...so, as I am often accused of doing when I hit the kitchen - I improvised. The result? A delicious take on a culinary classic!
The Recipe: BBQ Pork Burger
This is an Out of the Culinary Original Recipe
What You'll Need:
1 Pound Ground Pork
1 Cup Prepared Coleslaw
Sweet Baby Ray's BBQ Sauce
Sometimes the best recipes are the simplest recipes. In trying to duplicate a pulled pork dish, I decided to embrace the elements that make the sandwich great - mainly pork and BBQ sauce. I've seen fresh coleslaw used as a topping on BBQ pork sandwiches, so I wanted to add that element as well - after that, I decided to keep it simple.
To begin, work the pork with a pinch of salt and pepper until well blended. Break the mixture into 4 separate balls and work the balls into smaller, equally sized patties. Like we've done with every burger we've made this summer - pop the patties onto a plate and allow them to rest in the refrigerator for 10 minutes before moving them to the grill.
Speaking of the grill, preheat it to 500 degrees, clean the grates and reduce the temperature of one burner to 300 degrees. Prepare the burgers over this burner.
Cook the burgers for 3 minutes per side. Once each side has developed a nice crisp outer edge - pour on a helping of Sweet Baby Ray's BBQ sauce and spread it evenly with a basting brush. Allow the burgers to sit over heat for 1 minute (so the sauce "bakes" onto the surface) before flipping and repeating the process. Once the burger has developed a nice even sauce glaze, remove them from the grill and place them atop a bakery fresh bun. Serve with a helping of fresh coleslaw and enjoy!
The Results:
The simplest recipes have always been my favorite. This dish simply shines by keeping it simple. The blending of grilled pork with a sweet yet savory BBQ sauce duplicates the all day flavor of pulled pork nicely. The addition of the fresh coleslaw adds a bright element to the burger that standard lettuce simply couldn't bring to the table.
This simple dish is a surefire way to spice up any weeknight meal. Give it a try yourself!
That's all we have for you this evening. Maggie will take to the kitchen tomorrow night with a brand new recipe and I'll close out the weekend with a brand new burger of my own. Until then,
~Cheers
Friday, August 29, 2014
Flautas - Fun to Say, Easy to Gobble Down
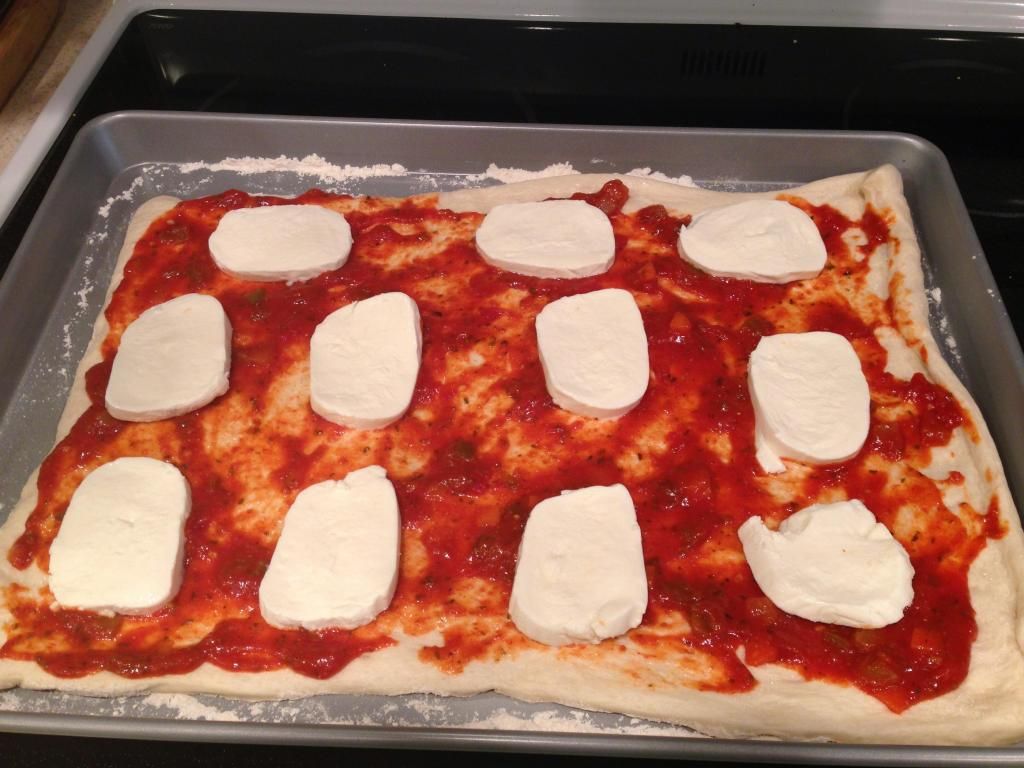
Good evening everyone! On my never-ending quest to find (relatively) healthy, Mexican food, I stumbled upon this gem of a recipe. While it could be reminiscent of a particular school dish (Crispitos, anyone?) these are far, far healthier and not mass produced for hundreds of hungry minds. I feel like this is an often overlooked Mexican dish, but will not be forgotten any time soon.
The Recipe: Baked Chicken & Spinach Flautas
Adapted Recipe Found From: www.pinterest.com
What You'll Need:
1 Pound boneless, skinless Chicken Thighs
16 Ounces Beer (or Chicken Broth)
2 Cups Water
1 Teaspoon Paprika
1 Teaspoon Kosher Salt
1 Teaspoon Garlic Powder
1 Teaspoon ground Cumin
1 Teaspoon Chili Powder
1 Jalapeño pepper, minced
3 Cups Baby Spinach, chopped
5 burrito-sized Flour Tortillas
6 Ounces Mexican Cheese, or other melting cheese, shredded
To start, place the chicken thighs in a deep-sided, non-stick skillet and cover with the beer and water. Cover with a lid and raise the temperature to medium-high heat. Once at a boil, reduce the heat of the skillet to a simmer and cook the chicken for 10 minutes, keeping the lid on the skillet. Once cooked, remove the chicken from the skillet and place on a cutting board. Let the chicken cool for several minutes, then begin to shred the meat. Place the meat in a large mixing bowl and add the paprika, salt, garlic, powder, cumin, and chili powder. Mix all these ingredients together until well combined.
Next, preheat an oven to 450 degrees and spray a large cooking sheet with cooking spray. Meanwhile, reserve 1/4 cup of the beer/water mixture and pour out the rest. Bring the skillet back to medium-low heat and add the reserved liquid back to the skillet. Add the jalapeño and spinach to the skillet and cook for three to five minutes, or until the spinach has wilted.
By now, all the ingredients have been cooked and are ready for assemble. Cut the tortillas in half and set aside. Place 1/2 tortilla on a clean preparing board and spoon a tablespoon of the chicken mixture on the inside straight edge of the tortilla. Repeat with the spinach and cheese. Roll the tortilla tightly and place seam-side down on the prepared baking sheet. Repeat with the remaining tortillas.
Spray the flautas with cooking spray and place the baking sheet in the oven. Bake for 10 minutes, then flip over and continue to cook for five minutes, or until crispy. Serve with salsa and enjoy!
The End Result:
I'm quite pleased with the results of these flautas. For the first time hearing about them, not to mention baking them, they were quite superb! The seasonings of the chicken definitely mellowed out during the cooking process and you don't really notice the spinach. It helps when the spinach has been cooked down and it's not much more than filler ingredient. The cheese is definitely a binder and ties all the ingredients together. Baking this dish, instead of frying it, makes it noticeably healthier too. One flauta is about 180 calories, plus being delicious, is a win-win in my book!
Thanks for joining us tonight. Check back on Sunday for a brand new recipe from Tyler. Until then,
~Cheers!
Tuesday, August 26, 2014
16 Burgers of Summer: Hawaiian Burger
Good evening everyone! A slight technical glitch caused my recipe from last week to vanish into the ether of the internet. As such, last week’s post…never happened. Instead, you’re getting TWO burgers of summer this week! (Lucky ducks). We’ll get things started by sharing our take on a classic – the Hawaiian Burger.
Depending on the menu you’re looking at or the part of the world you hail from – the phrase “Hawaiian burger” can mean many different things. I knew when I started the burgers of summer series that I wanted to try at least one Hawaiian burger, but I quickly found the market was highly diversified and there was little in the way of consistency when it came to a true Hawaiian burger. Does it have ham? Does it have BBQ sauce? Do you season the pineapple? Grill the pineapple? There was nothing in the way of consensus – so I did the only logical thing. I made my own recipe. Let’s get cooking!
The Recipe: Hula-Hula Burger
This is an Out of the Culinary Original Creation
What You’ll Need:
1 Crackin’ Burger Recipe
1 Can Pineapple Rings (Whole slices)
2 Tablespoons Low Sodium Soy Sauce
1 Teaspoon Sriracha Chile Sauce
½ Teaspoon Garlic Powder
1 Tablespoon Pineapple Juice (From the canned slices)
Begin, as most of our burger recipes have, by preparing the crackin’ burger recipe. Once the patties are formed, open the pineapple rings and season each ring (one per burger) with a pinch of kosher salt.
Preheat your grill to 500 degrees, clean the grates and reduce the temperature to 300 degrees. Turn off one side of the grill and cook only over the side with the burners on. Next, add the pineapple to the grill – placing it directly on the grill grates. (We want the sugars to caramelize slightly, so the pineapple rings need a head start over the burgers). After about two minutes, add the burgers to the grill. Cook the burgers for 4 to 6 minutes per side, or until they’re cooked through. The Pineapple rings should take about 5 minutes per side to nicely caramelize (thus, the head start).
Shortly before you’re ready to remove the burgers, combine the soy sauce, Sriracha, garlic powder and pineapple juice in a small dish. Using a basting brush spread the mixture over the burgers (liberally covering them). Allow the sauce to thicken on the burgers (over the heat, this should only take about 30 to 45 seconds) before flipping the patties and basting again. Repeat this process twice for each side.
Once basted to perfection, transfer the patties to a bakery fresh bun and top with the grilled pineapple ring. Serve and enjoy!
The Results:
We opted to create a teriyaki style sauce for our burger patties in an attempt to bring out a little heat / spice to balance the pineapple. The soy sauce / sriracha combination did just that. It added a nice element of depth and complexity that balanced the especially sweet (since we caramelized the sugars) pineapple.
This burger provided just the right blending of summer time sweetness with savory seasons – it will certainly hit the spot on any summer day.
That’s all we have for you this evening. I’m back again tomorrow night with ANOTHER burger recipe. We’ll follow that up with a new dish from Maggie before closing the week with a product review. It’ll be a busy week here - so be sure to stop back each night and see what we’ve got cooking. Until then,
~Cheers
Wednesday, August 20, 2014
Give Me the Dough, I'll Give You Endless Possibilities
Good evening everyone! While ordering pizza to go is often a convenient and simple choice for many families, I much prefer making my own. Once you've started on that journey, there's no way going back to regular pizza. And while ordering and picking up (or delivery,) makes dinner time a snap, there's something to be said about creating and eating your own pizza. Tonight, I'll create a unique, one of a kind pizza that is also super simple.
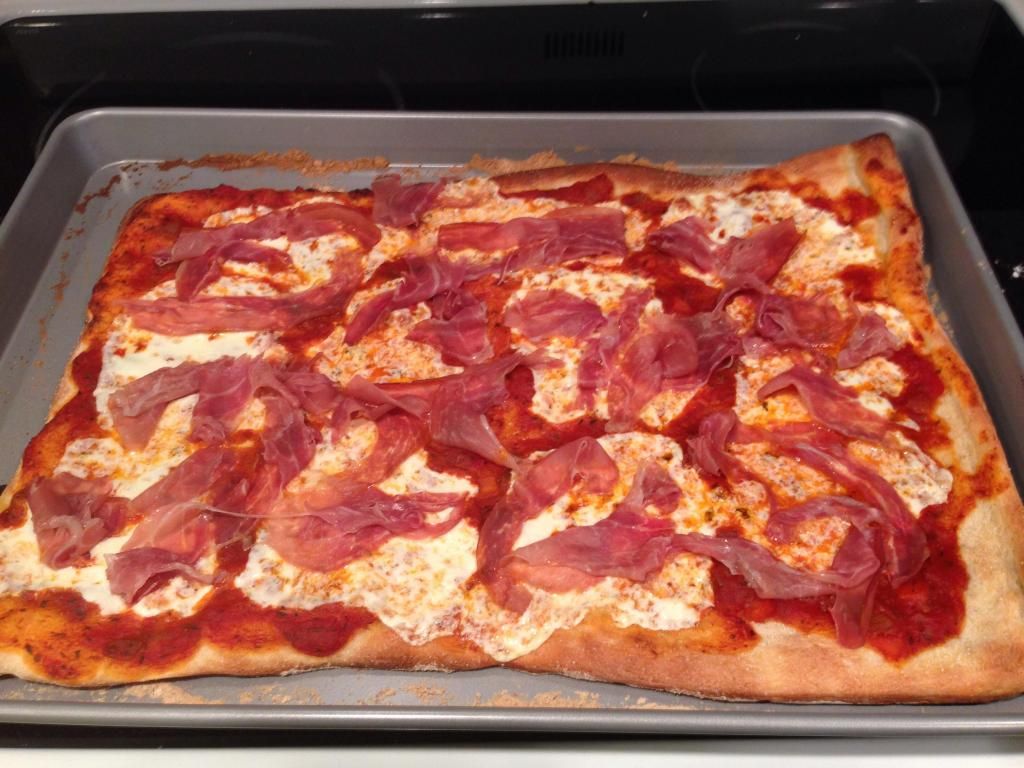
The Recipe: Prosciutto-Mozza Pizza
Original Recipe Found In: Cooking Light, September 2014 Issue
What You'll Need:
1 Pound refrigerated fresh Pizza Dough
1 Tablespoon Cornmeal
2/3 Cup lower-sodium Marinara Sauce
6 Ounces fresh Mozzarella Cheese, pre sliced or thinly sliced
2 Teaspoons Olive Oil
2 Ounces thinly sliced Prosciutto, torn into 1/2-inch-wide strips
1/4 Cup small fresh Oregano leaves
To start, let the dough stand at room temperature, in a greased bowl or pan, covered with plastic wrap for at least 30 minutes. Next, place a pizza stone or heavy baking sheet in an oven. Allow the oven to preheat to 500 degrees, keeping the pizza stone or baking sheet in the oven to preheat also.
Once the dough has stood at room temperature, lightly dust a clean work area with flour and roll the dough into a 14-inch circle. Pierce the entire surface liberally with a fork. Once the pizza stone has been preheat, carefully remove from the oven. Sprinkle the surface with cornmeal and place the pizza dough on the pizza stone.
Spoon the marinara sauce on the dough and spread evenly with the back of the spoon, leaving a 1/2-inch border. Evenly top with the mozzarella cheese. Place the stone back in the oven and bake at 500 degrees for 10-14 minutes, or until the crust is golden and the cheese has lightly browned.
Remove the pizza from the oven and brush the outer crust with the olive oil. Arrange the prosciutto slices over the pizza and top with oregano. Cut into even slices, serve, and enjoy!
The End Result:
I can't reiterate how much simplicity works in so many recipes. There's (technically) only three ingredients topping this pizza, but there's so much flavor with the fresh mozzarella and the thin slices of prosciutto. While the meat might still have a twinge of cold, don't let that deter you. You'll be surprised and how much flavor can permeate from such a simply pizza. The crust cooks up perfectly, without little to no effort. Again, if it's easy to create it on your own, why not do it? It's the whole concept behind this pizza.
Thanks for joining us tonight. Tomorrow, Tyler crosses an ocean to bring you another Burger of Summer. Until then,
~Cheers!
The Recipe: Prosciutto-Mozza Pizza
Original Recipe Found In: Cooking Light, September 2014 Issue
What You'll Need:
1 Pound refrigerated fresh Pizza Dough
1 Tablespoon Cornmeal
2/3 Cup lower-sodium Marinara Sauce
6 Ounces fresh Mozzarella Cheese, pre sliced or thinly sliced
2 Teaspoons Olive Oil
2 Ounces thinly sliced Prosciutto, torn into 1/2-inch-wide strips
1/4 Cup small fresh Oregano leaves
To start, let the dough stand at room temperature, in a greased bowl or pan, covered with plastic wrap for at least 30 minutes. Next, place a pizza stone or heavy baking sheet in an oven. Allow the oven to preheat to 500 degrees, keeping the pizza stone or baking sheet in the oven to preheat also.
Once the dough has stood at room temperature, lightly dust a clean work area with flour and roll the dough into a 14-inch circle. Pierce the entire surface liberally with a fork. Once the pizza stone has been preheat, carefully remove from the oven. Sprinkle the surface with cornmeal and place the pizza dough on the pizza stone.
Spoon the marinara sauce on the dough and spread evenly with the back of the spoon, leaving a 1/2-inch border. Evenly top with the mozzarella cheese. Place the stone back in the oven and bake at 500 degrees for 10-14 minutes, or until the crust is golden and the cheese has lightly browned.
Remove the pizza from the oven and brush the outer crust with the olive oil. Arrange the prosciutto slices over the pizza and top with oregano. Cut into even slices, serve, and enjoy!
The End Result:
I can't reiterate how much simplicity works in so many recipes. There's (technically) only three ingredients topping this pizza, but there's so much flavor with the fresh mozzarella and the thin slices of prosciutto. While the meat might still have a twinge of cold, don't let that deter you. You'll be surprised and how much flavor can permeate from such a simply pizza. The crust cooks up perfectly, without little to no effort. Again, if it's easy to create it on your own, why not do it? It's the whole concept behind this pizza.
Thanks for joining us tonight. Tomorrow, Tyler crosses an ocean to bring you another Burger of Summer. Until then,
~Cheers!
Friday, August 15, 2014
By Now, Zucchini Should Be No Surprise
Good evening everyone! I am always intrigued with the way recipes are contorted to add or omit certain ingredients and it turns out just as good as the original. Many of these dishes are vegetarian, and while I'm all for trying them, I like my meat too much to go Vegan. Tonight showcases another great vegetarian dish that is quite delicious, with some really unique flavors. While we've done a similar style recipe before, this one puts more emphasis on the veggies than anything else.
The Recipe: Zucchini Parmesan
An Adaptation of a Recipe Found On: www.pinterest.com
What You'll Need:
3 Medium Zucchini, washed and sliced into 1/3-inch pieces
1 (24 Ounce) Jar of Marinara Sauce (personal preference is up to you)
1 Pound fresh Mozzarella Cheese, sliced into 1/4-inch slices
1 Cup fresh grated Parmesan Cheese
1/4 Cup Butter
1/3 Cup All-Purpose Flour
To start, preheat an oven to 350 degrees and heat a large nonstick skillet over medium-high heat, melting the butter. Arrange the zucchini slices on either plates or cutting boards. Sprinkle with salt and pepper on both sides of the slices. Place the flour in a shallow bowl and dredge the zucchini slices on both sides. Shake to remove any excess and place back on the original plates or boards.
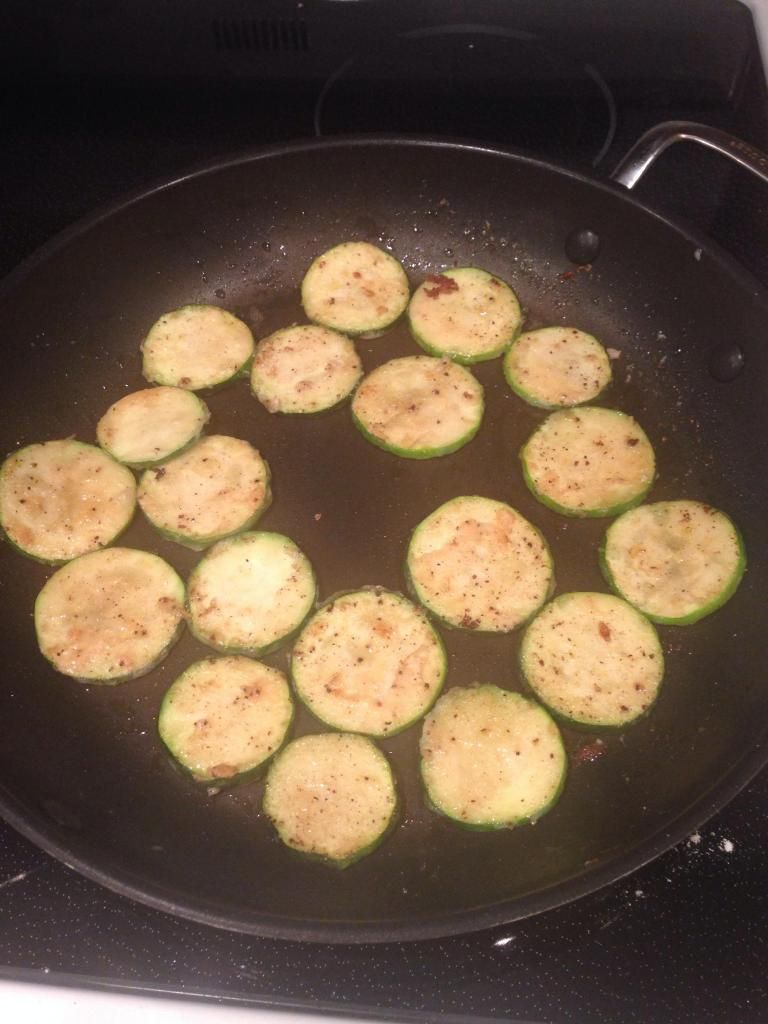
By the time all zucchini slices are dredged, the butter will be melted and the skillet will be hot. Arrange the slices in an even layer in the skillet and cook for three to five minutes per side, or until each side has browned. Remove from the skillet and place in an even layer in two 9x13 inch baking pans. Repeat with all slices until they are all cooked.
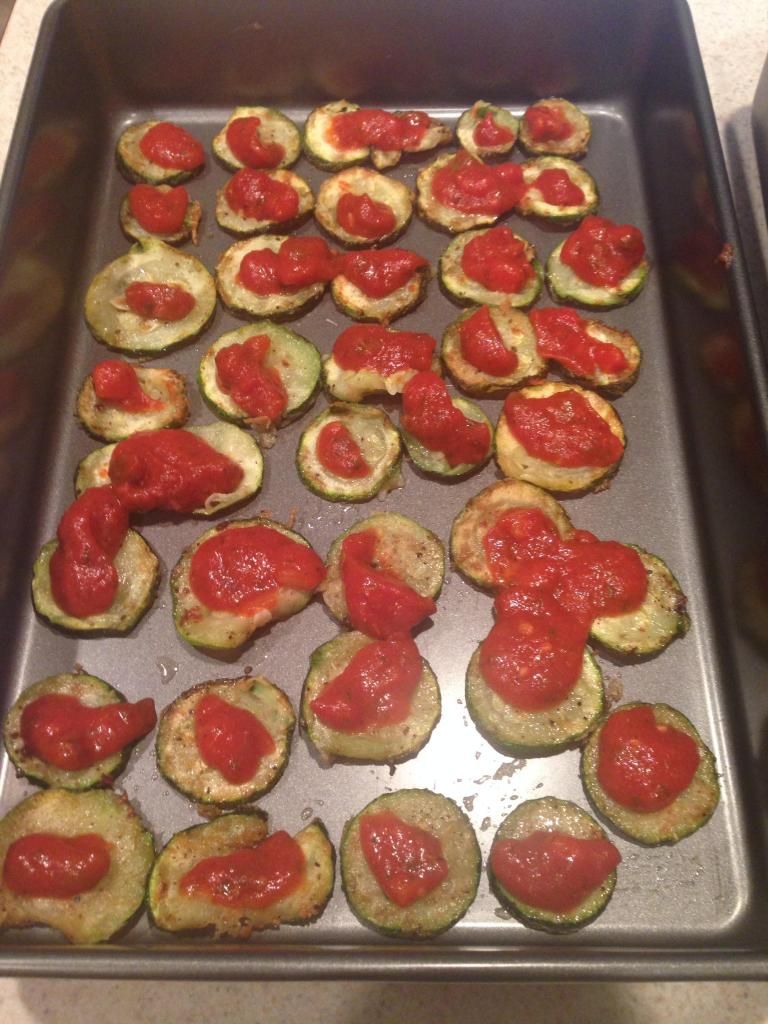
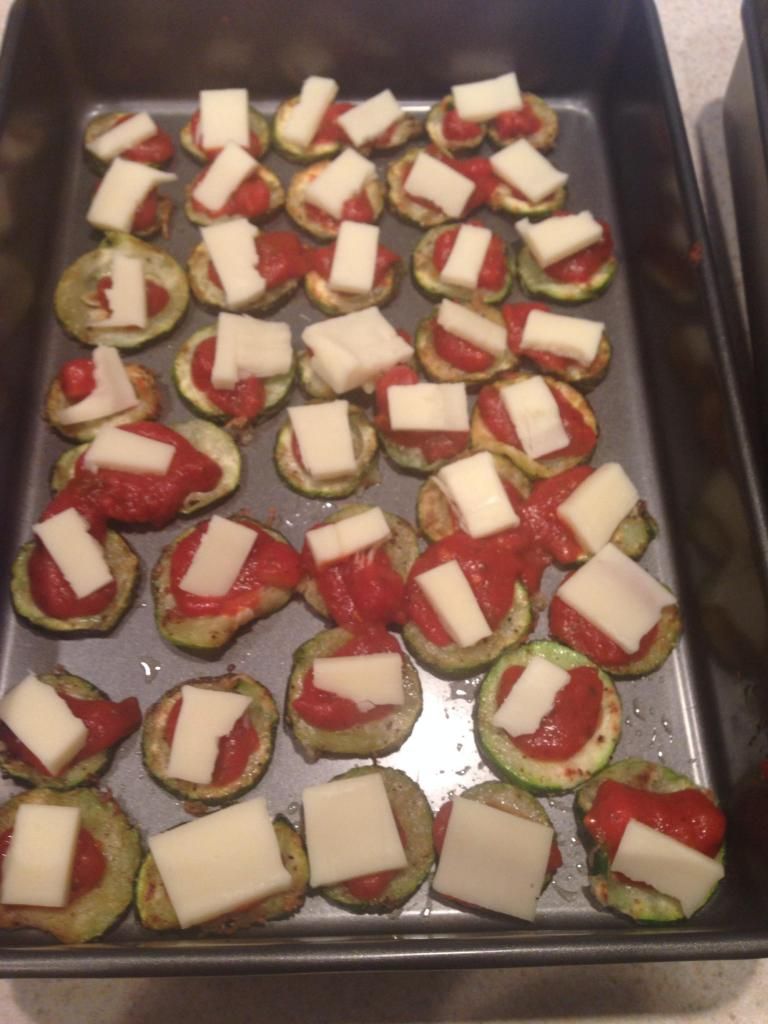
Next, spoon a tablespoon or less (depending on preference) of the marinara sauce on each slice of zucchini until all are covered. Then, place a slice of mozzarella cheese on top of each sauce-topped zucchini slice.
Place the baking pans in the oven and bake for 20-25 minutes, or until the cheese has started to melt and the sauce is hot and bubbly around the edges. Remove the pans from the oven and sprinkle with Parmesan cheese. Return to the oven and bake for five minutes more, until the Parmesan cheese is melted. Take the baking pans out of the oven and sprinkle with Parsley for garnish. Serve and enjoy!
The End Result:
I've learned to enjoy zucchini as a stand alone ingredient and this dish didn't disappoint. While the pieces of zucchini are quite thin, browning them added a bit more flavor than if they were to be cooked alone. The marinara sauce I chose was a "vegetable variety" and I think it added more than the typical, plain marinara sauce. The bubbly mozzarella was very tasty and really rounded out the dish. Granted, this dish sets itself apart from the traditional Eggplant Parmesan, because the lack of pasta noodles, but I think this is great dish and something that should definitely be tried again!
Thanks for joining us this week. Check back next week as we continue to showcase new recipes for you to try at home. Until then,
~Cheers!
The Recipe: Zucchini Parmesan
An Adaptation of a Recipe Found On: www.pinterest.com
What You'll Need:
3 Medium Zucchini, washed and sliced into 1/3-inch pieces
1 (24 Ounce) Jar of Marinara Sauce (personal preference is up to you)
1 Pound fresh Mozzarella Cheese, sliced into 1/4-inch slices
1 Cup fresh grated Parmesan Cheese
1/4 Cup Butter
1/3 Cup All-Purpose Flour
To start, preheat an oven to 350 degrees and heat a large nonstick skillet over medium-high heat, melting the butter. Arrange the zucchini slices on either plates or cutting boards. Sprinkle with salt and pepper on both sides of the slices. Place the flour in a shallow bowl and dredge the zucchini slices on both sides. Shake to remove any excess and place back on the original plates or boards.
By the time all zucchini slices are dredged, the butter will be melted and the skillet will be hot. Arrange the slices in an even layer in the skillet and cook for three to five minutes per side, or until each side has browned. Remove from the skillet and place in an even layer in two 9x13 inch baking pans. Repeat with all slices until they are all cooked.
Next, spoon a tablespoon or less (depending on preference) of the marinara sauce on each slice of zucchini until all are covered. Then, place a slice of mozzarella cheese on top of each sauce-topped zucchini slice.
Place the baking pans in the oven and bake for 20-25 minutes, or until the cheese has started to melt and the sauce is hot and bubbly around the edges. Remove the pans from the oven and sprinkle with Parmesan cheese. Return to the oven and bake for five minutes more, until the Parmesan cheese is melted. Take the baking pans out of the oven and sprinkle with Parsley for garnish. Serve and enjoy!
The End Result:
I've learned to enjoy zucchini as a stand alone ingredient and this dish didn't disappoint. While the pieces of zucchini are quite thin, browning them added a bit more flavor than if they were to be cooked alone. The marinara sauce I chose was a "vegetable variety" and I think it added more than the typical, plain marinara sauce. The bubbly mozzarella was very tasty and really rounded out the dish. Granted, this dish sets itself apart from the traditional Eggplant Parmesan, because the lack of pasta noodles, but I think this is great dish and something that should definitely be tried again!
Thanks for joining us this week. Check back next week as we continue to showcase new recipes for you to try at home. Until then,
~Cheers!
Thursday, August 14, 2014
16 Burgers of Summer: Western Turkey Burgers
Good evening everyone! Summer is winding down and so is our 16 burgers of summer series. Tonight marks the 11th entry to the summer long series that has featured a myriad of ways to cook up everyone’s favorite “on the grill” classic. Tonight, we dip into a territory that some people simply detest (honestly, I’m a bit surprised it took us this long to get here) the dreaded TURKEY BURGER!
Bum bum baaaaa
Why is the turkey burger so detested? I have a theory that involves the frozen variant found in many grocery store meat sections. Somewhere along the line, nearly everyone has tried one of these pre formed patties and nearly everyone has had the same experience.
“Bland”
That’s because the common prepackaged turkey burger is just that. Straight up plain ‘ol turkey. Turkey isn’t quite like chicken; it doesn’t carry the day on its own natural flavor. Turkey is, in fact, bland. That’s why you slow roast it on Thanksgiving and serve it alongside gravy and other veggies. It’s why sliced deli turkey is frequently accompanied by cheese, mustard or mayo. Yet, when folks take plain old ground turkey and turn it into a plain burger, they’re ‘disgusted’ with how bland it is.
You’ve got to help it along a bit to get the true potential of turkey to show itself. Tonight’s recipe will do just that. Inspired by a Bobbly Flay recipe, tonight’s dish will truly change the way America sees turkey burgers!
Or, it won’t. But you’ll have a tasty dish to try either way.
The Recipe: Western Turkey Burgers
Recipe Inspired by: Bobby Flay’s Cheyenne Burger
What You’ll Need:
(Serves 4)
1 Pound Ground Turkey (90%-92% lean)
8 Slices Hickory Smoked Bacon
1 Teaspoon Cayenne Pepper
Ancho Chile Powder (Pinch)
French Fried Onions
Sharp Cheddar Cheese
A brief note before we begin. This marks the third time a Bobby Flay recipe has been adapted for our burger series and this is the third time that I’ve entirely discarded his recipe in order to make my own. While I enjoy his concepts, his execution is overly cumbersome and needless complex for my liking. This is coming from the guy who likes to make everything from scratch if possible – so when a recipe has too much for ME, you know it’s gone a bit “off the rails”. (Tonight’s recipe, for instance, has you making up your own fried onions along with the BBQ sauce – the sauce I can support – as we make our own too – but deep frying the onions? No thanks. Sure, frying your own onions would be a bit healthier, but we’re not using the fried onions as breakfast cereal – a small handful will do you no harm. He also didn’t season the turkey…which is sort of odd).
To begin, add the ground turkey into a large bowl along with the cayenne and ancho powder. Mix well, until the seasoning is evenly combined into the meat. Then, break the meat into four equal sized balls and work those balls into patties.
Turkey is a bit “stickier” than standard ground beef, so we don’t actually need to add binders like we do in our standard burgers. No eggs or breadcrumbs in this dish – but that doesn’t mean we can skip the refrigerate step. Place the patties on a plate and allow them to rest in the refrigerator for at least 10 minutes. This allows the meat to tighten up and makes things much easier to grill.
Speaking of the grill, preheat it to 500 degrees, clean the grates and turn off all but one burner. Lower that burner to medium (300 degrees) and then place your burgers directly over the remaining burner. Cook for 5 minutes per side, or until the meat is cooked through. Just before removing your burgers from the grill, top them with the sharp cheddar cheese and allow the cheese to melt slightly.
While your burgers are cooking, fry up your bacon slices and set them aside.
Once the burgers are cooked through, begin assembling your burgers. Add as much BBQ sauce as you desire to the bottom of a bakery fresh bun. Next add one slice of bacon (split in half) and top with the burger. Top the burger with another slice of bacon (split in half) and finish the whole thing off with a small handful of the French fried onions. Serve and enjoy!
The Results:
Once you try this burger, you’ll never think of turkey burgers as bland again. The seasonings alone bring the turkey burger to life as the ancho and cayenne add a touch of heat and complexity to the normally neutral turkey. Bacon, sharp cheddar and BBQ sauce make ANY burger better, so it should come as no surprise that they pair very well with our seasoned turkey as well. This burger may not change America’s mind when it comes to turkey burgers (we simply don’t have that far of reach) but it will absolutely provide you with a great weeknight meal to enjoy during these waning weeks of summer.
That’s all we have for you this evening. Stop back later this week as Maggie shares a brand new recipe that blends brilliant flavors with some veggies that are hitting their peak this time of year. Until then,
~Cheers
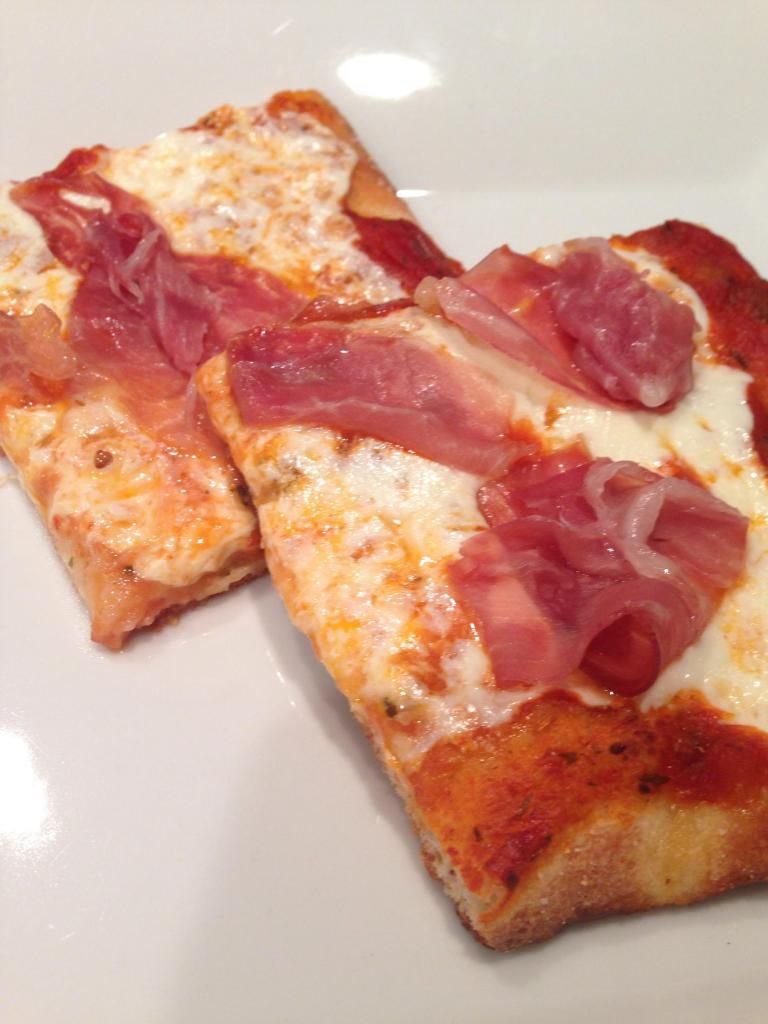
Subscribe to:
Posts (Atom)