Tuesday, March 8, 2011

Cod - The Other Other White Meat

Good evening everyone! Tonight's menu item is an old favorite - cod. We're going to be featuring a lot more fish recipes over the next few weeks for three reasons. 1) We stated at the beginning of the year that we're going back to our roots and focusing more on healthy cooking. Our goal is to not just show you how to cook like a chef - but cook like a chef who wants to live past 50 years old. Sadly, there is a distinction. Fish, chicken and whole grain pastas are great ways to cook like a professional chef, but still manage your waistline and heart health at the same time.

2) Our local Hy-Vee has expanded its fish assortment. Items like swordfish, flounder and more have begun appearing on the shelves (or more accurately, in the freezer section). We particularly like Hy-Vee's fish assortment because they use a flash frozen fish. The fish are fresh caught, cleaned and immediately frozen and shipped to the store. We've found that this leads to great flavor of fresh caught fish - without the timeframe to cook it immediately (like you would have to with a fresh caught fish).

3) Finally, and most importantly (in my opinion) fish has built a bad reputation for itself. It seems too many times we say 'we're making (cod, halibut, tilapia, salmon etc.)' and people respond with -I don't like fish - I've found that's because most people have had one bad experience with fish (either undercooked salmon or under seasoned cod - or out of season anything) and have decided that all fish is going to taste bland, stale, musty or whatever negative term you can think of.

We've proven with multiple fish recipes that breaded, pan seared, pan sauced, curried, chili powdered fish are all great methods for cooking a nice fillet. I have an assortment of recipes up my sleeve for multiple cuts of fish and figured there is no time like the present to eat healthier and show our readers just how versatile of a dish fish can be. We'll get things started tonight with a concept that I tested on chicken earlier this year - and with a few tweaks, I'll show you how you can apply the same breading principles to a nice cod fillet. Let's get started!


The Recipe: Almond & Lemon Crusted Cod Fillets
Recipe Inspiration From: Eatingwell.com

What You'll Need:

2 Cod Fillets
Zest Of 1 Lemon
1 Teaspoon Dried Dill
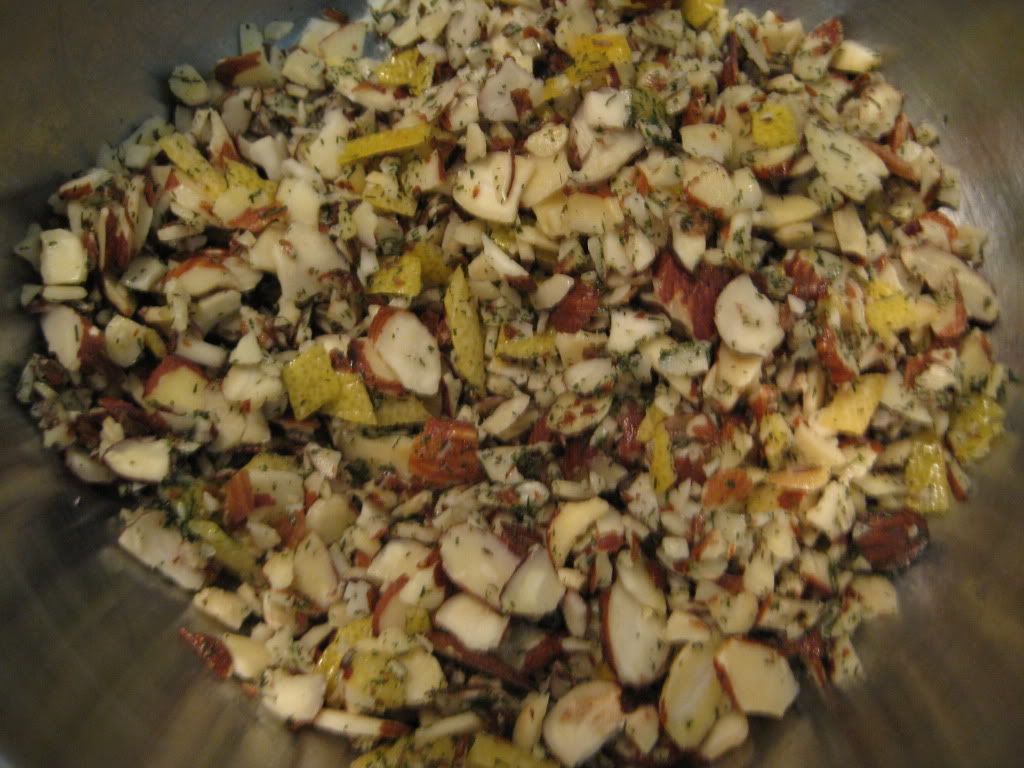
1/2 Cup Sliced Almonds (Roughly Chopped)
1 Teaspoon Olive Oil
1/2 Teaspoon Kosher Salt
2 Teaspoons Dijon Mustard 


Begin by preheating your oven to 400 degrees and covering a large rimmed baking sheet with cooking spray.

The original version of this dish had us toast the almonds in a skillet with some bread crumbs to create a nice, complex breading for an entire chicken breast. This version is a little more simple. Since we're going to be cooking sliced (I.E. already thin) almonds in the oven, there is no need to toast the almonds before hand. They should brown up nicely on their own without the extra cooking. In addition, we're not breading the entire fillet - instead, we're simply creating a nice crunchy hat for the fillet to wear. This not only simplifies the cooking process, but it also lowers calories without a loss of flavor.

In a medium bowl, combine the lemon zest (free tip - if you have a rotato - you and place the lemon on the rotato and peel the skin off that way. The rotato expertly removes skin only (no rind) and you have perfect lemon zest in a lot lest time than it would take to use a zester) dill, almonds, olive oil and salt. Mix until well combined.


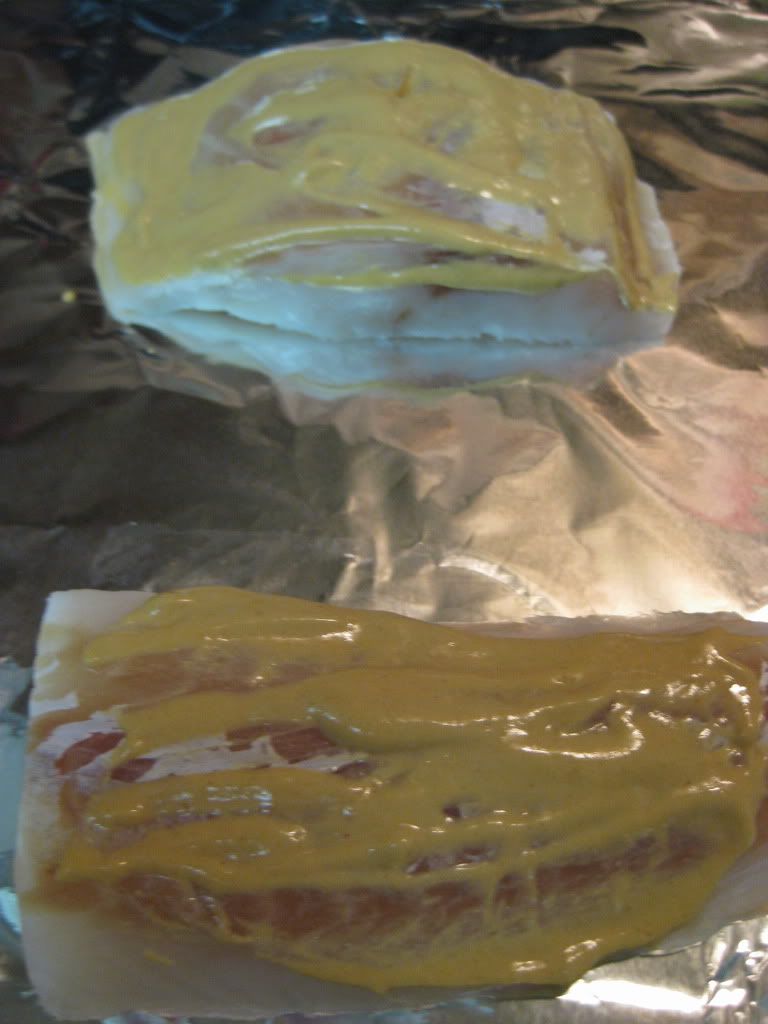
On each cod fillet, spread 1 tablespoon of the dijon mustard. Next, spread the almond breading onto the mustard which acts like a glue, keeping all of your tasty almond breading in place. Be sure to press the almond mixture into the fillet - and spread it on thick if you wish. With such thin almonds, there really is no reason to be concerned with over-breading the top of the fish. (Within reason obviously, 3 inches of breading might fall into the 'overkill' category)
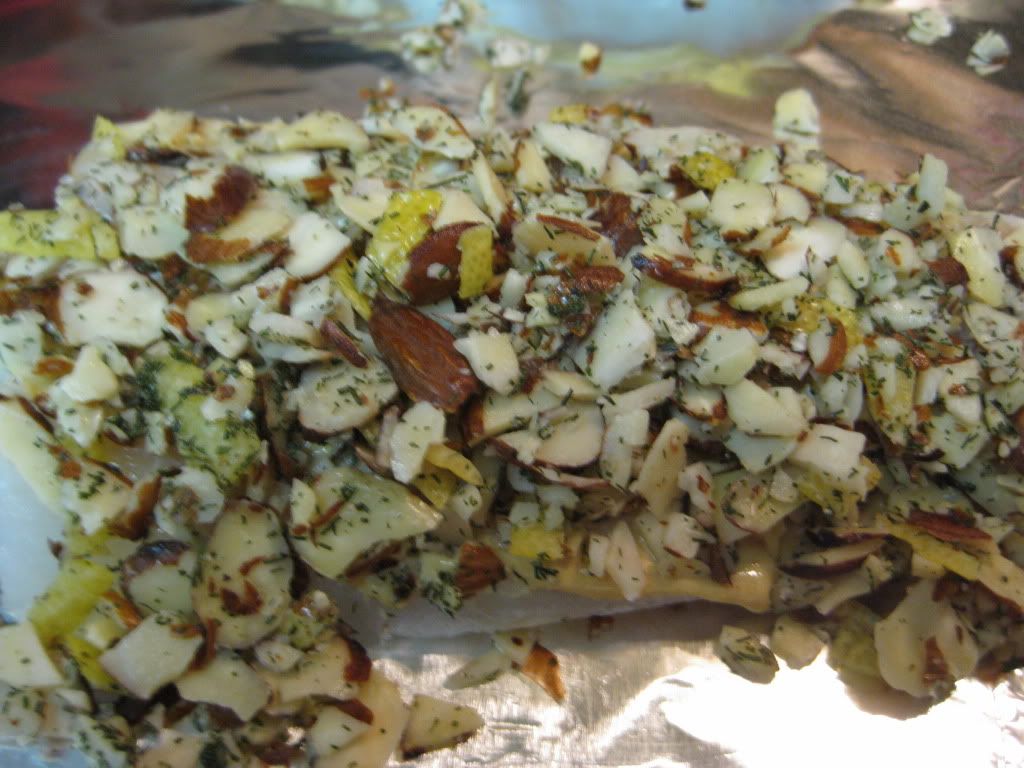
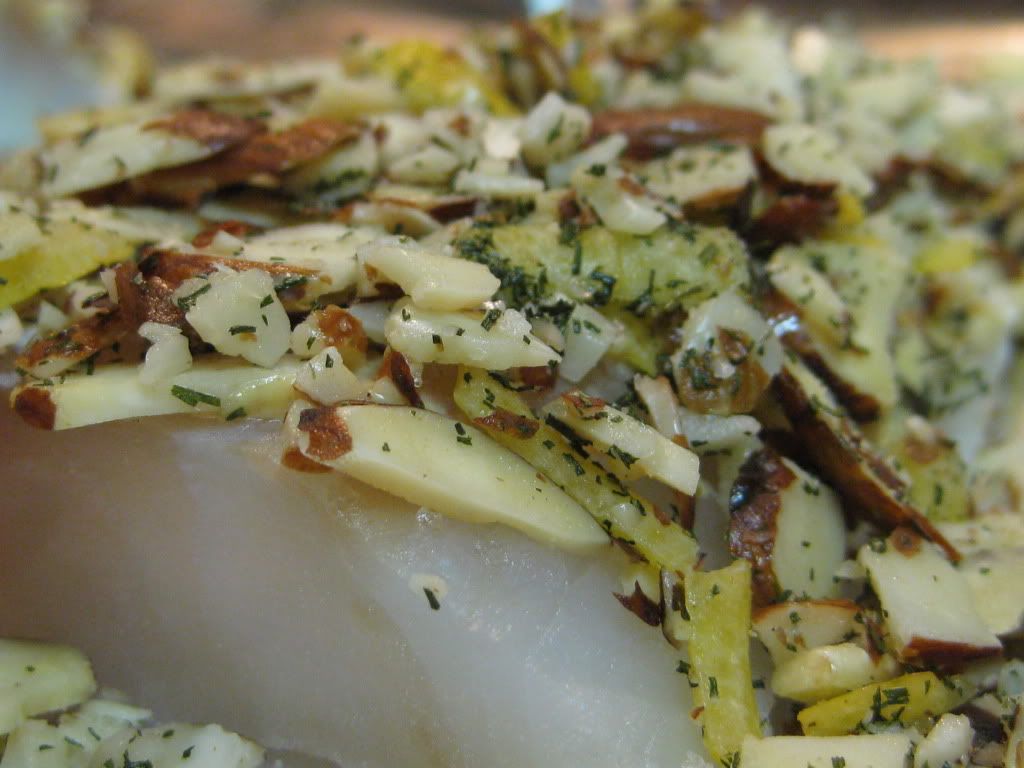


Place the fillets on the greased baking sheet and into the oven. Cook until opaque in the center, roughly 7 to 9 minutes, depending on the thickness of the fillet. Serve with a lemon wedge and enjoy.

You can also serve this dish on top of a bed of cooked spinach or with a side of greens. The flavors of the fillet compliment a summer salad well too.


The Results:
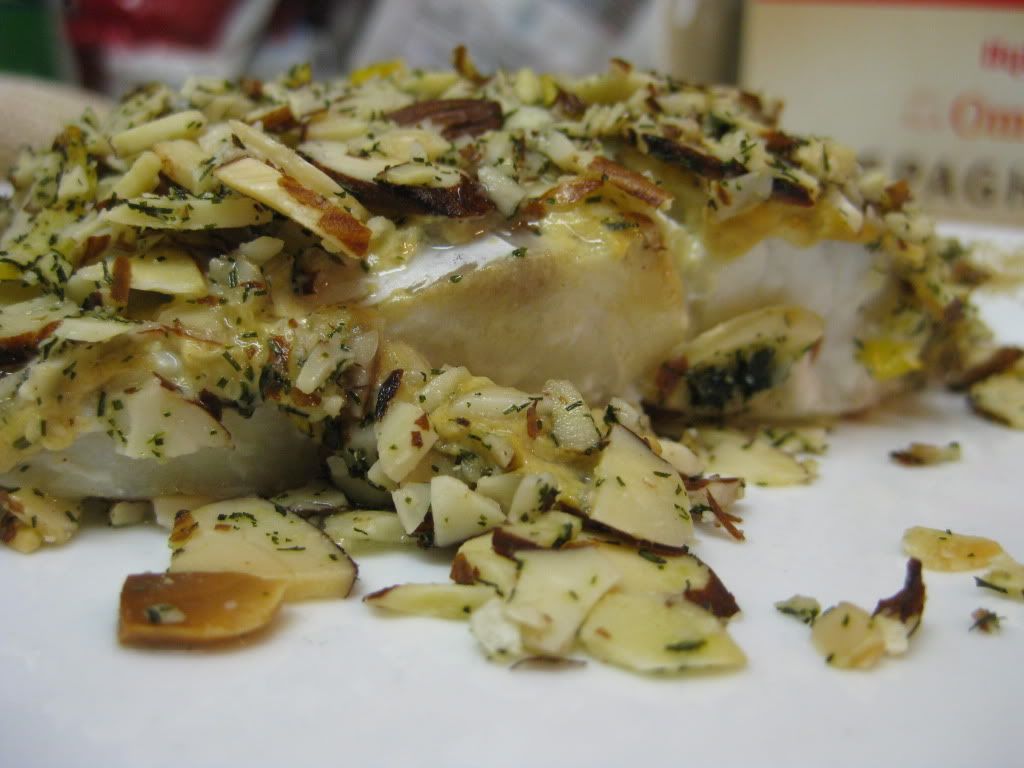


While this recipe was built off of the foundation of my almond covered chicken, it ended up tasting like its own brand new recipe. The lemon, almond, cod combination created a fantastic (springtime like) flavor that made it hard to believe you were eating fish. The breading ends up being slightly crispy without being overly crunch and packs so much flavor you don't even need any dipping sauce for the cod. For some people, that may be hard to imagine, but it just goes to show that with the right combination of herbs and other ingredients, fish can shine on its own. This is a delicious, simple, quick supper time fix that you simply cannot skip out on. If you love fish - you'll love the dish. If you're on the fence, this might just convince you to change your mind.

That's all we have for you this evening. I'm back in the kitchen tomorrow night with a recipe that pulls inspiration from the an unlikely place. Not to mention, it includes a few ingredients that I never thought I would use, let alone combine in my lifetime. (Nothing gross, I promise!) Tune in tomorrow night to see what I've got cooking. Until then,

~Cheers

Monday, March 7, 2011

Around The Culinary World

Good evening everyone! Welcome back to a new week of cooking, blogging and adventure at Out Of The Culinary! The coming week is going to be packed full of healthy, delicious recipes that are a little 'out of the box' from what we've usually been doing. Maggie and I are making a stronger commitment to eating healthy and are shifting our focus to be very low calorie, heart healthy while still preserving all of the flavors we love. That means less 'butter pan sauces' (that groan you hear is from Maggie...) and more fish, chicken and vegetable centered dishes. It's what the original basis of this blog was built around, so it's not a bad thing to return to.

As always, we start our Mondays off with a little tour of culinary news from around the world. Sadly, unlike the past two weeks which have been a hotbed of food controversy, topics and discussion - this week is pretty bland and run of the mill. We did manage to grab the a few interesting stories from the pile-o-bland, however, and here they are:


Jamie Oliver, a personal hero of the blog is still on his Food Revolution tour. This time, he's fighting the fattening foods from the Los Angeles school district. This week he debuted an impressive device to promote healthy cooking at eating. It's always been Jamie's stance that healthy eating is not enough -you have to teach people that cooking isn't hard and that healthy cooking isn't complicated at all. If they know how to cook healthy foods, they are more likely to stick to a better diet. Jamie has created cooking schools across England for that very purpose. He has also created a cooking school in Huntington West Virginia (the home of the first season of Food Revolution). This week, he debuted his method for teaching large groups of people how to cook - and it's a brilliant idea. Check out the 'new school' approach to a cooking school HERE.


Are you the type who likes to cook on occasion, but hates the shopping and seemingly endless list of things necessary to cook? Do you find yourself craving to cook something, only to find out that you lack a few key ingredients. Before you know it, the urge to cook has died and your sitting on the couch waiting for your microwave pizza to finish cooking. Eatingwell.com has a list of cooking provisions, simple items to always have stocked in your pantry - that will greatly reduce the need to run to the grocery store every time you have a cooking urge. A quick glance through the list shows that Maggie and I, the 'cooking gurus' (cooking hobbyists, amateur chefs - however you'd like to call it) have about 80% of this list. (So it's a pretty solid list of things to keep stocked!) Check out the list HERE.

I WISH we had that kind of storage... 


Low fat used to be the trend in the healthy food market. However, it seemed that if you wanted to fight your way into the competitive world of healthy eating, you only had to slap the low fat label on your product and boast its health benefits. Unfortunately, this market became crowded with products whose low fat labels really only meant 'lower fat that the original - and not at all healthy' which greatly degraded the claim. (Or my personal favorite - labels that boasted low fat without changing the nutritional content at all - the trick? Reduce the serving size suggested!) After awhile, most consumers simply overlooked these labels as marketing fluff and were left struggling to find healthy food items on their own. (Since the FDA and USDA doesn't really regulate claims like 'low fat' and 'healthy option' as closely as you'd imagine - the consumer was forced to shop based on the nutrition label and nutrition label only). The days of healthy foods and not so healthy foods battling out over low fat labels may be ending, however. In fact, labels that boast fat may be on the rise. Why the sudden change? It has to do with the new dietary guidelines and developing science that supports a diet with the right fats. There is a great editorial on this shift from The Huffington Post. Check out the full analysis of the low fat to pro fat label shift HERE.


Now they're healthy...right? 


Sadly, there is another food recall just starting to make the rounds, this time, it involves Skippy Peanut butter. We've commented countless times about food safety and the shift that the new food safety laws should be making for consumers to feel more comfortable that their food won't...well...KILL THEM. Once these standards go into effect, changes should become more apparent and these stories SHOULD dwindle to next to nothing. Until then, we'll continue to share major recall news with you - so you can stay on top of the issue and keep your families from becoming ill. Read all about this recall HERE.


Finally this week, we have a rebuttal to a story we shared last week. We spoke last week at great length about the war on fast food oatmeal. In short, the oversimplification of oatmeal (and the subsequent passing off of this product as healthy) was deemed horrible for the consumer. Oatmeal, on it's own, is speedy, healthy and delicious - why does fast food oatmeal have to change something so simple? That was the collective thoughts of the food world last week. This week, a few outlets are stepping up in favor of fast food oatmeal - even going so far as to point out healthy fast food oatmeal items (or how to make not so healthy items healthier) McDonald's oatmeal even makes the list. Check out the counter story to last week's 'feature topic' HERE.


That's all we have for you this evening. I'll be in the kitchen tomorrow night with a brand new recipe. I'll follow that up with another new dish on Wednesday and Maggie will close out the week on Thursday with a dish of her own. Be sure to stop in tomorrow night to see what I've got cooking, until then,

~Cheers

Thursday, March 3, 2011

Winner, Winner, Potato Dinner

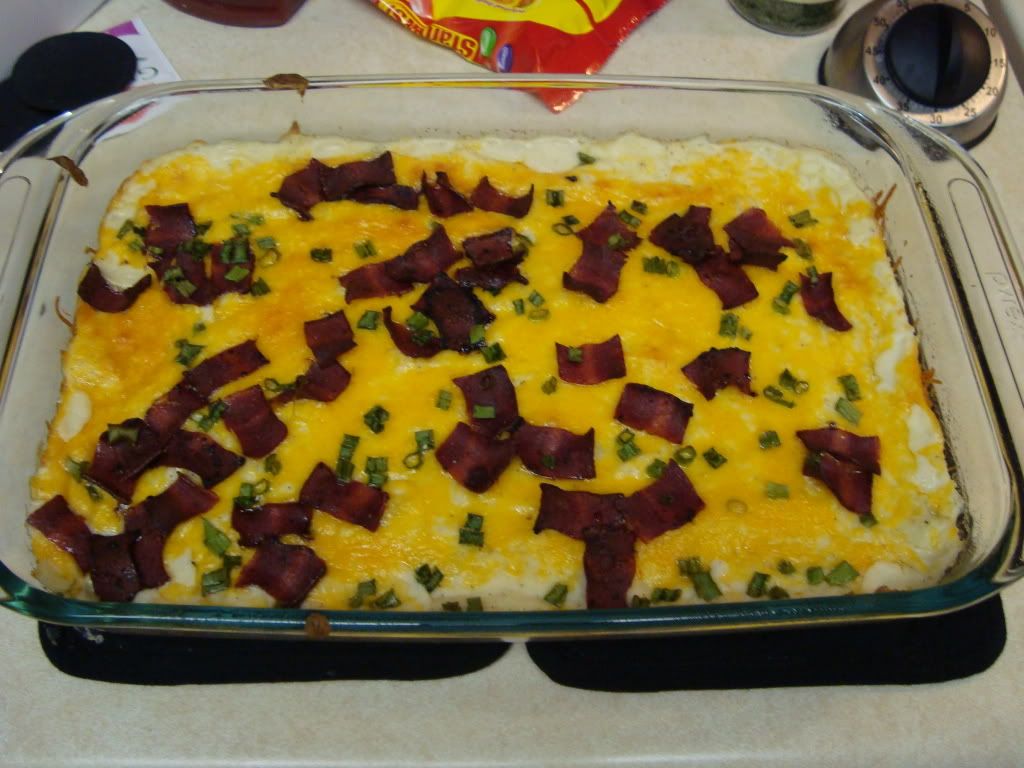
Good evening everyone!  As our week slowly winds down, I wanted some sort of comfort food to end the week.  Most comfort food contains high amounts of fat and/or grease, or very rich ingredients, neither which my new digestive system can handle two weeks after my surgery.  With this recipe, I found that the ingredients weren't too rich and that there was very little grease.  But would the dish still be acceptable for the sensitive tummy's?

The Recipe:  Make Ahead Mashed Potatoes (or Pow!-tatoes)
Original Recipe Found In:  Taste of Home, February/March 2011

What You'll Need:
3 Pounds (9 Medium) Potatoes, Peeled and Cubes
1 Package (8 Ounces) Cream Cheese, Softened
1/2 Cup Sour Cream
1/2 Cup Butter, Cubed
1/4 Cup 2% Milk
1 1/2 Teaspoon Onion Powder
1 Teaspoon Salt
1 Teaspoon Garlic Powder
1/2 Teaspoon Pepper
6 Bacon Strips, Chopped
1 Cup Shredded Cheddar Cheese
3 Green Onions, Chopped

Place potatoes in a Dutch oven and cover with water; bring to a boil.  Reduce heat; cover and cook for 10-15 minutes or until tender.  Drain; mash potatoes with cream cheese, sour cream, and butter.  Stir in milk and seasonings.


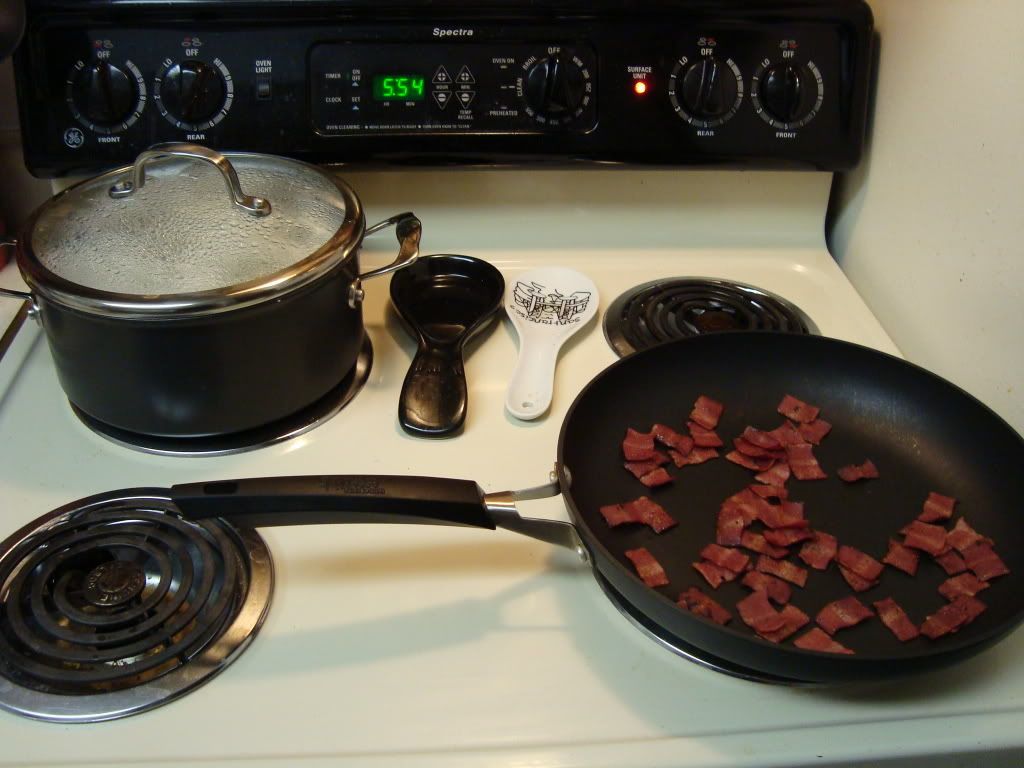
In a small skillet, cook bacon over medium heat until crisp.  We used turkey bacon for this recipe, because it would be a little bit easier to digest than regular bacon - plus, you can't tell the difference between bacon and turkey bacon.  Remove bacon to paper towels with a slotted spoon.


Transfer potato mixture to a greased 13x9 baking dish, sprinkle with cheese, onions, and bacon.  Since the original recipe is titled "Make Ahead Mashed Potatoes", you can cover and refrigerate until ready to use.  Since we made this ready to bake, omit the refrigerating portion.  Bake, uncovered at 350 degrees for 40-50 minutes, or until heated through.

The End Result:


An incredibly flavorful dish that wasn't too hard on the stomach.  All the seasonings and ingredients, adding to the already straight flavor of potatoes, made it a wonderful dish to eat.  Plus the addition of cheese, bacon, and green onions made this stand on its own.  And, since there's only two of us, there was plenty for leftovers.  Overall, one of the best I've made and I'm pretty darn impressed!

Thanks Maggie!  You can't beat a simple recipe that is packed full of flavor. That was the theme of the week - from the halibut to the steak to the pow-tatoes, this week was full of simple dishes with great flavor (accidental theme of the week I guess?)

That's all we have for you this week.  Make sure to tune in on Monday for Around the Culinary World.  Until then,

~Cheers

Wednesday, March 2, 2011

Welcome Back!

Good evening everyone!  I make my triumphant (okay, maybe not so much) return to the blog.  I am definitely feeling 90 percent better than where I was two weeks ago.  Granted, I still have some pains and my tummy doesn't look too appealing, but I'm ready to get cooking again.


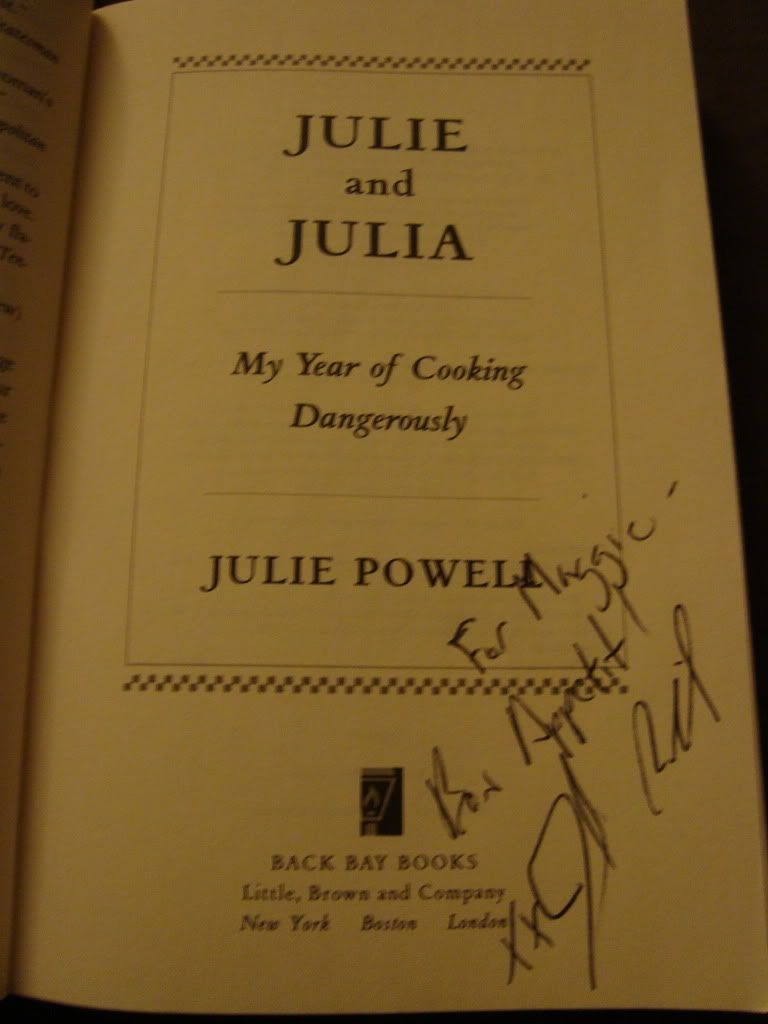
As Tyler mentioned on Monday, we did meet a culinary icon.  But before that, a brief history of how I got to know Julie Powell.  Way before our trip into the the land of cooking, I saw an advertisement for a movie called "Julie and Julia".  I was intrigued, not only by the back story of Julia Child, but by this other woman who decided to cook all the recipes in one of Julia Child's cookbooks.  In the ad, it also mentioned that this lady, Julie, had written a book based on her blog about her Julia Child experience.  I am one for reading a book before I see a movie based on it - just to compare and contrast on what movie producers think is important to put in a movie from a 200-300 page book.


So I read "Julie and Julia: My Year of Cooking Dangerously" and it was extremely funny.  Reading this woman's experience from no cooking expertise to cooking boeuf bourguignon and all the hilarity that ensues made me literally laugh out loud.  She is also very witty with her words and has a sharp tongue.


About two months after I read the book, Tyler and I saw the movie.  Granted it wasn't as great as the book, it's still a cute little movie good for watching with your foodie friends (on a side note, if you want to read one man's hilarious assignment of watching "Julie and Julia" for one year, read http://lawrenceandjulieandjulia.blogspot.com/ - it is too funny to pass up.)


Fast forward two years and we're working hard on the blog when one of my co-workers mentioned that Julie Powell would be in the greater Des Moines region for an evening for a q & a session and a book signing.  My jaw dropped to the floor and I was squealing with delight.  Julie Powell is the foremother of cooking blogs and the opportunity to meet her and possibly name drop our blog would be great.


Fast forward to Sunday and her q & a session was hilarious and she was incredibly witty (just like her book, go figure!)  This author by choice and foodie by chance said "Food is the prism in which all the world sees", meaning everyone connects with food - how we eat it, how we prepare it.  Everyone is obsessed with food.  


After an hour long chat session about her blog, cooking, writing, and her opinion on the movie "Julie and Julia", a book signing took place.  We really didn't want to wait in line, so we quickly ran to the area where Julie would be signing books and we found ourselves in the beginning of the line.  A couple minutes after, Julie walked to the table and we started our thirty second conversation.  I mentioned that we have a cooking blog (not like she's heard that one before) and she inquired about the name.  She laughed at the name and said "Clever!"  We thanked her, commented on her writing, and it was on to the next person.  One can only guess if she decides to check out our blog, but to have met two "inspirations" of our little blog means the world to us.


And we got an autograph :)


Anyway, on to this evening's dish, obviously extreme flavor is still a shaky ground, so something minimal flavor was key.  Also, lack of an ingredient made things complicated.  But, adding and substituting is what cooking is all about.  So would the dish turn out alright?

The Recipe:  Pan-Seared Strip Steak with Red-Wine Pan Sauce with Pink-Peppercorn Butter
Original Recipe Found In:  Bon Appetite: February 2011

What You'll Need:

Pink-Peppercorn Butter:
1/2 Stick Unsalted Butter (room temperature)
1 Teaspoon Minced Fresh Thyme
1 Teaspoon Honey
1 Teaspoon Whole Pink Peppercorns

Steak:
2 10 Ounce New York Strip Steak
2 Teaspoons Extra-Virgin Olive Oil, Divided
1 Teaspoon Minced Fresh Thyme
1/4 Cup Thinly Sliced Shallot
1 Cup Dry Red Wine
1/2 Cup Low-Salt Beef Broth

Rub steak with 1 teaspoon oil, sprinkle both sides with thyme, then coarse salt and pepper.  Let steak stand at room temperature 30 minutes.  


Meanwhile, make the pink peppercorn butter:  Combine the butter, thyme, honey, and pink peppercorns in a small bowl; mix with fork until peppercorns are slightly crushed.  Since pink peppercorns are an EXTREMELY hard to find item and rarely used item, we decided to omit this ingredient.  We figured that this would be a minimal flavor loss and it would be okay to not have it in.  Season the butter with salt and pepper.  Keep this mixture out of the fridge so the butter will be at a good room temperature when you'll need to use it.


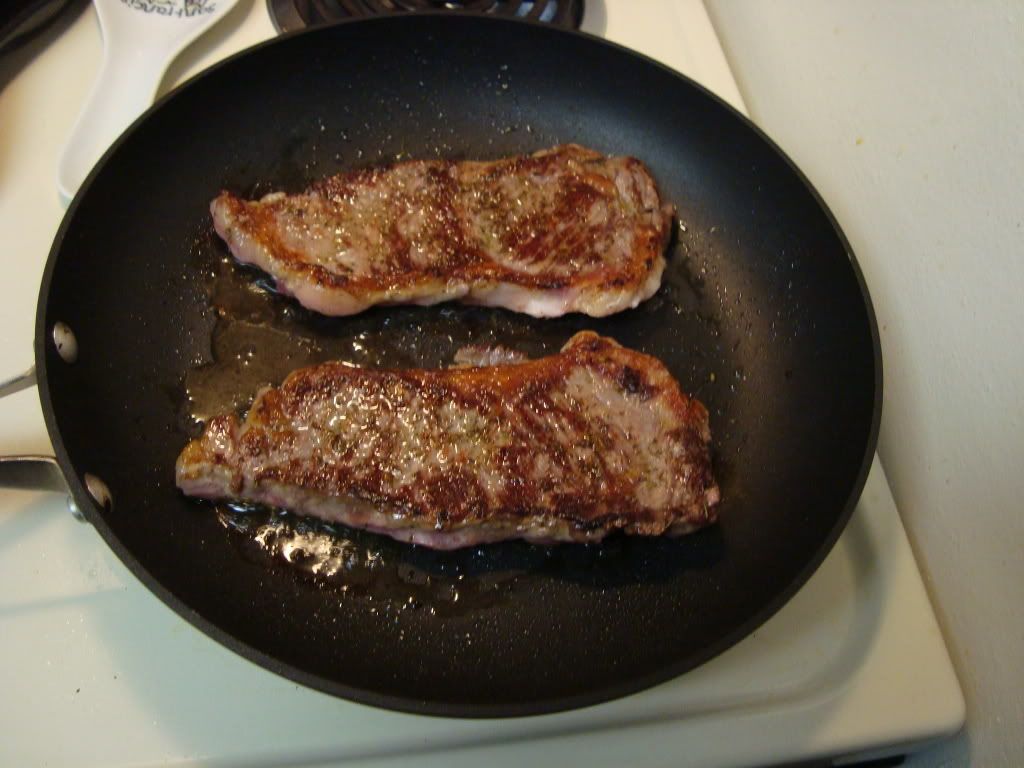
Steak sizzling away


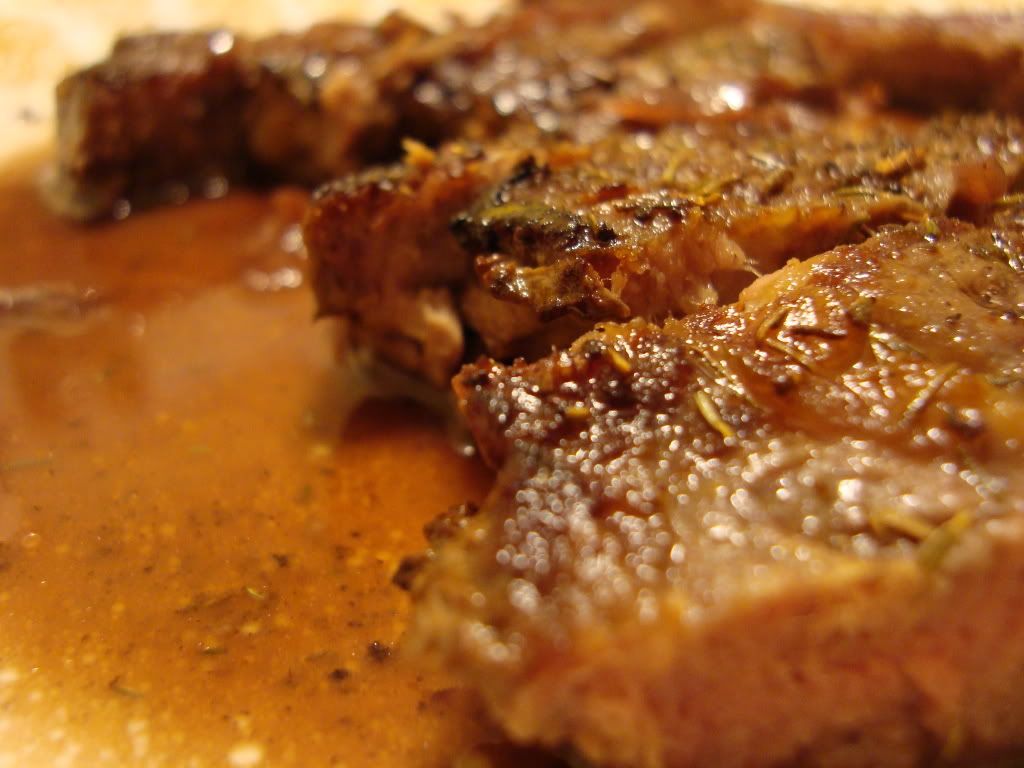
After the steak marinates, heat a nonstick medium skillet over medium-high heat.  Add steak; cook to desired doneness, 3-4 minutes each side for medium rare (or for those of us who like are beef not mooing, 6-8 minutes on each side.)  Transfer steak to plate; tent with foil.  Add teaspoon oil to skillet; add shallot and saute until slightly softened, scraping up brown bits.  Add wine; boil until liquid is reduced by half, stirring often, about one minute.  Add broth; boil until sauce is thickened, about two minutes.  Whisk in three tablespoons (or the whole butter mixture) of the pink peppercorn butter.  Season with salt and pepper.  Slice the steak in 1/3 inch thick slices, serve with red-wine sauce, and enjoy!

The End Result:


For something quite simple, it was really flavorful.  The thyme added a nice mini crust to the steak and all the natural flavors of the steak infused with the thyme.  The red wine sauce wasn't as thick as I would have liked it to been, but again, it added a good hardy flavor to the steak.  Overall, a good flavorful dish without heavy seasonings or sauces.


(Tonight's blog was written, edited, illustrated and captioned 100% by Maggie! Most evenings, I edit, caption, add pictures and construct 95%-100% of the blog - tonight, Maggie was trained on doing it all herself. A round of applause for her 'all by myself blog debut. I did some minor editing and formatting, but tonight's blog is a result of her hard work! Bravo!)

That's all we have for you tonight. Maggie is back again tomorrow night with another tasty dish. Stop back in to see what she's got cooking. Until then,

~Cheers

Tuesday, March 1, 2011

'Fresh' From The Sea

Good evening everyone! Tonight, we're debuting a new dish for the blog - one of my all time favorite fish dishes. Halibut. I still remember the first time I had halibut, it was freshly caught from the Alaskan sea. Every bit burst with flavor. Tender, juicy, almost chicken like flavor. I had never had such a delicious cut of fish. And, sadly, since I live in the midwest, I have yet to experience that taste again. It seems fresh caught Alaskan halibut is hard to come by when you live thousands of miles away from the ocean. Who knew?

Sort of an ugly guy...

The second pic is much more appetizing 


Tonight we're trying the closest substitute we could find. Our local Hy-Vee sells 'flash frozen' halibut steaks, which are supposed to be frozen almost immediately after they are sliced. In theory, this should yield a delicious cut of halibut comparable to the 'fresh from the ocean' variety. By cooking the halibut via skillet & oven, it should minimize outside flavors and allow the natural taste of the halibut to shine. Again, this is all in theory. Did my theory hold up? Let's find out:

The Recipe: Pan-Roasted Halibut
Original Recipe Found In: The Complete America's Test Kitchen TV Show Cookbook: Every Recipe from the Hit TV Show With Product Ratings and a Look Behind the Scenes, 2001-2011


What You'll Need:

2 X Halibut Steaks (3/4 Inch to 1 Inch Thick)
2 Tablespoons Olive Oil
Vinaigrette, Flavored Butter Or Lemon Juice (For Sauce)

Preheat your oven to 425 degrees. Adjust the rack to the middle position.

Begin by patting the halibut steaks dry with paper towels. The drier the better in this situation as you're going to be frying the steaks in oil and any moisture still in the halibut will leak into the oil and that will cause a whole lot of splashing, hot, burn inducing oil. Take caution prior and pat them dry now. Your arms and hands will thank you later!

Next, season each side of the steaks with a generous helping of salt and pepper. Now, if you really want to impress someone, here's a little tip for getting a beautiful golden brown crust on the halibut. On one side of the halibut steak, season with a pinch of sugar. Not a whole lot - you're not making candied fish here - but just enough to visible. When you place the steaks into the skillet, place the sugar side down. The sugar will caramelize, causing a beautiful brown crust that took next to no time at all!

In an oven safe skillet, add the olive oil and heat until just smoking. Once smoking, add the halibut steaks (sugar side down if you're using the 'cheat') and cook for 4 minutes, or until lightly golden brown. Don't disturb, nudge, peek or otherwise poke the steaks during this cooking time. Like any pan frying technique, the key here is to let the steak rest and let the heat and oil do all of the work. Nudging the fillet will throw off your browning as well and you don't want that to happen!

Once the steaks have browned nicely, remove the skillet from the heat and flip the steaks over. Place the skillet into the oven and cook for 10 to 15 minutes, or until the steaks register 140 degrees on an instant read thermometer. Right before you stick the steaks into the oven, feel free to add a splash of lemon juice, a pinch of lime juice, or another herb/seasoning combination you desire. This extra little touch can infuse a little more flavor into the steaks.

Once the steaks are at 140 degrees, serve and enjoy. There are many white fish friendly sauces available, feel free to prepare any combination you desire to top off the fish. However, halibut has its own great flavor, so you don't really HAVE to make a sauce. We served ours with a simple side of lemon juice.

The Results:

Halibut is still my favorite cut of fish. Although it is expensive, the extra cost for all of the great flavor the fish provides is worth it in my opinion. We kept tonight's recipe simple by adding only lemon juice to the fish. This was to allow the natural flavor to shine and to set up a stage for future recipes. I have a breaded halibut recipe and a pan sauce that I want to try - however, my favorite form of halibut is the 'naked' version we made tonight. Great flavor, great texture, great dish. Well worth a shot for those tired of tilapia and all carped out.

Apologies for the lack of photos tonight. The camera died...again, and now it is refusing to sync the photos it holds....grr.

That's all we have for you tonight. Nothing like a nice, easy (and delicious) dish to get the week started off right. In the future, we'll expand on the pan frying recipe and add sauces, breadings and all sorts of other adventures. Stay tuned for that!

Maggie takes back to the kitchen for the first time in two weeks tomorrow night, so be sure to stop in then to see her first dish sans-gallbladder. Until then,

~Cheers

Monday, February 28, 2011

Around The Culinary World

Good evening everyone! We're back and better than ever (well...back anyway!) Maggie is healing up nicely, although she does have some minimal pain from time to time, she is back to a normal diet and normal activities. My finger has healed up nicely over the past week, although it is still fairly gross to look at, I can type and (more importantly for blog purposes) cook with ease once again.

First and foremost, you may notice a few slight changes to the blog. It's true, I've spent the last few days making subtle visual updates or tweaks to the blog - no particular reason, I just felt it was time to freshen up a little bit. We're now using a new font style (ooh...ahh!) and a new color scheme, as well as a new background image. Enjoy and let me know what you think of the changes.

Also of note, yesterday the Urbandale Public Library held a 'forum' and book signing with Julie Powell of 'Julie & Julia' fame. After an hour -question/answer/interview session - we got to meet Julie and have her sign a copy of her book. Maggie will have more on this meeting on Wednesday's blog - but I just felt the need to mention that after we told her about our blog, she laughed and commented 'I love the name'. We're two for two in regards to famous culinary figures and loving our blog title. We may not become famous, get a movie or even make a buck on our blog - but at least we have an entertaining name. You have to take the little victories in life.

Over the last two weeks, the 'Around The Culinary World' feature has been a little...sparse to say the least. The food world simply wasn't turning out stories of any interest. There were small dustups over sodas and diet sodas - but nothing that deserved the full attention of the press juggernaut that is 'Around The Culinary World' (Full embellishment and sarcasm in use here)

This week, our patience has been rewarded with a new food controversy, thanks to the previously mentioned McDonald's oatmeal. Not to mention, our own favorite celebrity chef Jamie Oliver has come out firing at Sarah Palin (her stance on healthy eating and her own stupidity need no introduction) for her stance on changing the diets of children in America's schools. Top that off with a few interesting stories regarding snack foods and we've got a great week of tales to share! So, let's dive in!


Around The Culinary World: 2/28/11


We'll start off this week with the big food controversy. Over the past week, the actual ingredients of McDonald's newest breakfast menu item - 'healthy' oatmeal, were analyzed. It turns out that (and no surprise here) McDonald's version of healthy food and the rest of the world's version tend to differ...slightly.

McDonald's oatmeal, which has already been called out for being flat out disgusting and an assault on everything that is good about oatmeal (check out that story from a previous Around The Culinary World) is far from the healthy choice they lead you to believe. It turns out that the oatmeal contains more sugar than a Snickers bar and only 10 fewer calories than a McDonald's cheeseburger. This shouldn't be the case, after all - oatmeal IS AN INGREDIENT you don't have to add anything to it, alter it in anyway at all to make it a meal. It is a meal by itself. Adding fresh fruit and even a pinch of sugar or honey shouldn't send the dish skyrocketing to cheeseburger status. When prompted by an outside source regarding its ingredient choices, McDonald's responded with:

 “Customers can order FMO with or without the light cream, brown sugar and the fruit. Our menu is entirely customizable by request with our Made for You platform that has been in place since the late 90s.”


               Oh -so, it's not our fault it's bad for you...it's yours. You're keeping all of the extra junk on the oatmeal, the old don't blame me, I just make it defense. (Also known as the 'you don't have to eat it' defense) Stay classy McDonald's. For more insight and commentary, check out the full story HERE


My favorite story of this week comes from the inspiration for this blog - Mr. Jamie Oliver. It's not secret that we're big champions of Jamie's 'Food Revolution' campaign - a movement that is trying to change the way school lunch systems operate (from the ground up). His argument is simple, start with healthy eating habits when kids are young and they will develop a healthier eating / lifestyle as the grow older. Obesity is a large problem in the United Sates, and starting off kids on the right foot (by removing processed foods and sugary drinks) is one great way to lower the rate that America's children are ballooning. Jamie's television show changed my perspective on cooking and eating well, his cookbooks taught me to cook and his passion made me a supporter of his cause. We're not doing what we're doing without Jamie Oliver.

Enter Sarah Palin, who for all intents and purposes, is the opposite of Jamie Oliver. Mrs. Palin has taken the stance that changing the dietary guidelines for children is an 'assault on American families' and that Michelle Obama and Jamie Oliver and telling parents how to raise their children. Healthy eating habits are bogus and America doesn't need this forced on our kids - etc. etc. We've lambasted Sarah Palin and her moronic stance on this issue before on the blog - so we won't dive into that issue again - however, Jamie Oliver fired back this week with something I wish I would have thought of calling her:

'Clearly, on this issue, she's a Froot Loop' Oliver said of Palin's attacks on Mrs. Obama and the healthy eating initiative. Well put Jamie! Read the full story of Jamie's comments on the political 'froot loop' HERE


Spot on Jamie...Spot on! 


How would you react if I told you chocolate was actually good for you?


Wait! Before you go running out the door to the nearest grocery store and stuff your face full of discounted Valentine's Day candy - you should know there's a catch.


Multiple studies are emerging that are linking chocolate to many health benefits. Chocolate has been found to include antioxidants, especially the antioxidant polyphenol, which is also found in plants and red wine. Polyphenol helps lower heart disease by preventing the artery walls form accumulating waxy, fatty substances known as LDL cholesterol. 

Ever eat a chocolate bar and feel a little more optimistic or aware? Science has an answer for that too - chocolate contains theobromine, which acts a lot like caffeine (without the withdrawal or addiction) a small amount of theobromine can stimulate the mind to be more awake or even improve your mood. 

In addition, chocolate has been proven to lower blood pressure in people with hypertension. One ounce of chocolate has been shown to be enough for all of these health benefits to be enjoyed. So, why has chocolate been getting a bad rap for all of these years? Well, much like any menu item at McDonald's it's not the item itself, it's what we've done to it. 

Chocolate gets filled with sugar and buttermilk, canceling out all of the health benefits with health detriments. (Such as obesity, cholesterol and high blood pressure...) So, (and here's the bad news) not all chocolate will help you and (more bad news) you can't eat mounds of it. However, small amounts of dark chocolate (which don't have nearly the levels of sugar or added fat as milk chocolate) can yield amazing heath benefits. So, there you have it - chocolate is good for you (sort of). Check out the full story, along with better descriptions of the science behind the story HERE


Finally this week,we have a interesting little story regarding snack foods. Snacking has always been a black sheep of the culinary world. Is it bad for you? Is it good for you? To an extent - yes to both. Snacking has been shown to have positive health benefits (supplementing a diet, lowering calories consumed throughout the day, better portion control) however, mindless snacking (and snacking on the wrong things) can be extremely detrimental to your health. So, what is the right snack food and what is the wrong snack food? Find out HERE. (The wrong isn't really a surprise in my opinion - but the 'right' may catch you off guard)


There you have it folks, that's what's new in the culinary world for Monday, February 28th 2011. We've got a full week lined up for you in regards to recipes - Maggie makes her return to the blog with two dishes this week. Also, I've got a great halibut dish (pushed from last week) that I can't wait to try out. It should be (pending any emergency surgeries or kitchen injuries) our first full cooking week in two weeks. Stop back tomorrow night for my halibut dish - until then,


~Cheers

Tuesday, February 22, 2011

Great Dish - With A Painful Lesson

Good evening everyone! Welcome back to Out Of The Culinary! I'm happy to say that Maggie is feeling much, much better today - she's even back at work and starting to resume her normal day to day functions. While she's not pain-free, she is feeling somewhat 'normal' again and that is a great improvement from 'death warmed up' (her words) earlier in the week.

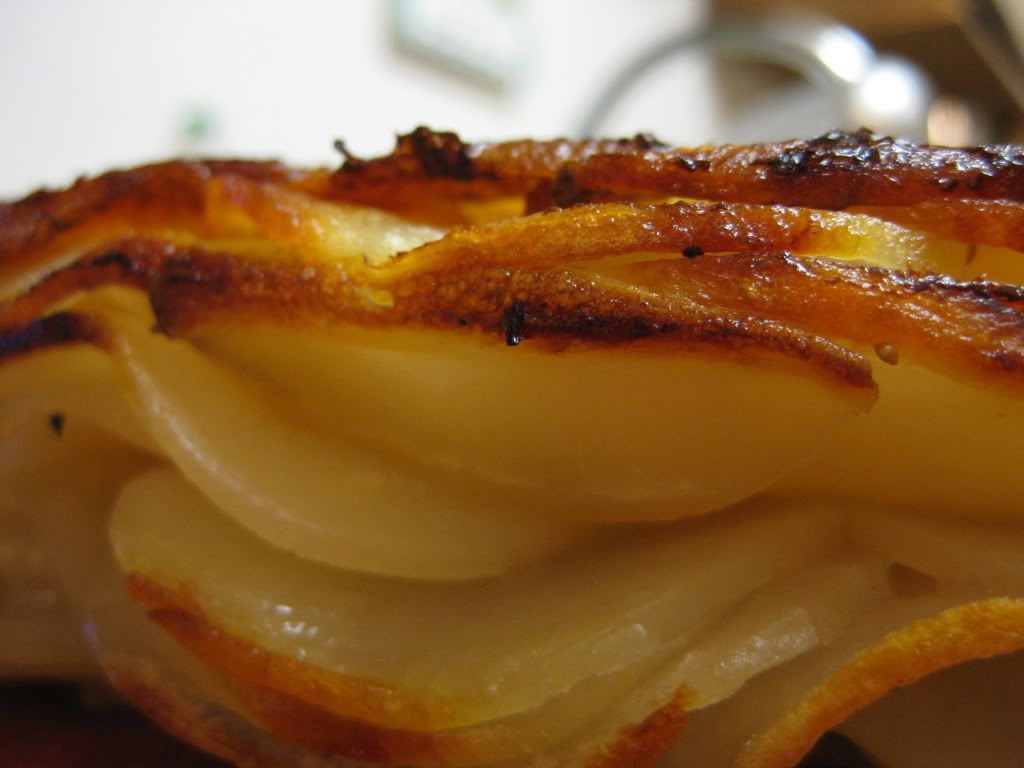
Even though she's feeling better, we still have to ease back into a normal diet. That means the bland diet has to continue for another week or so - but that doesn't mean the dishes have to be boring. Tonight we're channeling French inspirations in the form of potato galette. Potato galette is a potato based dish (obviously) that resembles a pie. This is a typically complicated dish (as most French dishes) but the fine folks at America's Test Kitchen have found a way to keep the flavor but cut the prep time. Sounds like a win-win to me! Let's get cooking!


The Recipe: Potato Galette
Original Recipe Found In: Cook's Illustrated: March/April 2011 Issue

What You'll Need:

2 1/2 Pounds Russet Potatoes
5 Tablespoons Butter (Melted)
1 Tablespoon Cornstarch
1 Teaspoon Table Salt
1/2 Teaspoon Black Pepper
1/2 Teaspoon Dried Rosemary (Optional)


Begin by preheating the oven to 450 degrees and adjusting the oven rack to the lowest position.

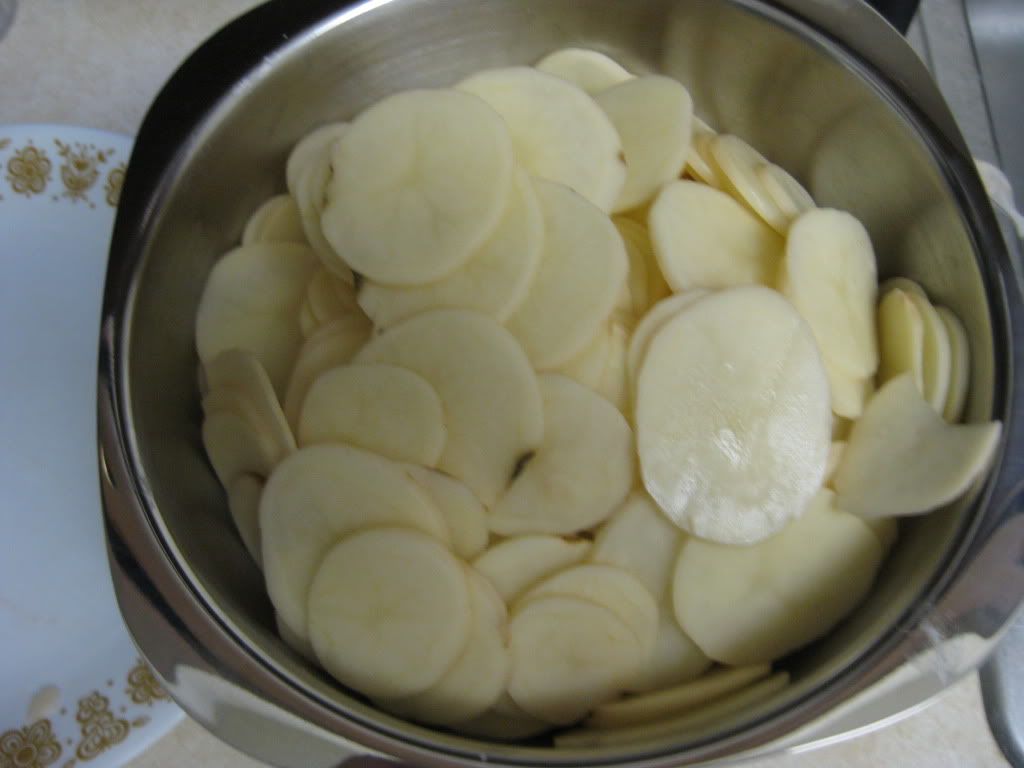
This whole process is a lot easier if you have a Rotato and a mandoline available.  I was able to peel and slice the potatoes in about 15 minutes - much easier than by hand.  When using the mandolin, make sure the thickness is set to 1/8 inch or lower.  Anything thicker will inhibit the potatoes from sticking together.

Once the potatoes are sliced, fill a large bowl with cold water and rinse the potato slices in the bowl.  Move the slices to a kitchen towel and dry them thoroughly.


The reason we wash the potato slices is due to one element:  starch.  As you all know, potatoes are very starchy, however, not all potatoes contain the same amount of starch.  In fact, the level of starch can vary dramatically between two potatoes in the same bag.  What does this all mean for the recipe?  Starch is the component that makes the potato slices stick together.  When the starch levels are not the same, the potatoes don't stick together consistently.  By washing them in cold water, you are removing the starch from the potatoes and by adding corn starch, you create a consistent starch level for all the potato slices, which should result in a dish that sticks together (in a good way.)

In a small bowl, combine 4 tablespoons of the melted butter with the corn starch, salt, pepper, and rosemary.  Place the potato slices in a large bowl and pour the butter mixture over them.  Toss by hand until the slices are evenly coated.  Use the remaining tablespoon of butter to oil the bottom of a large oven safe skillet or Dutch oven.

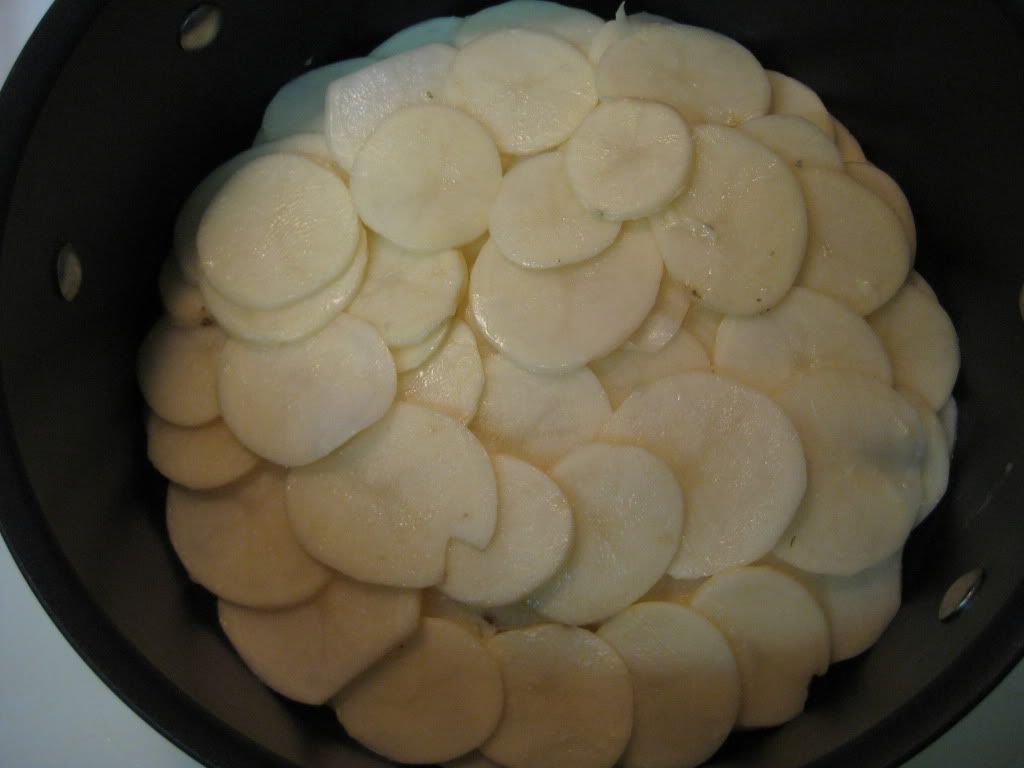
Now you can begin creating the galette.  Choose a large potato slice and place it in the very center of the skillet.  Use the remaining potato slices to overlap the center slice in a circle.  Continue layering until the bottom of the skillet is completely covered.  For better structure, you can repeat this process multiple times - I did two layers of precise laying.


The French approach to this dish is to layer all the potato slices in this way. This is a time consuming and complicated process.  Luckily, we're not French.  Once you have your top layers established, simply add the remaining potato slices in no real order necessary.  Just make sure they are evenly dispersed.  Feel free to add some salt and pepper between layers to boost up the flavor. Also optional, you can add a tablespoon of unmelted butter to the last layer and let that flavor melt down into the potatoes as the dish cooks. If you're looking to trend healthier...avoid this tip!

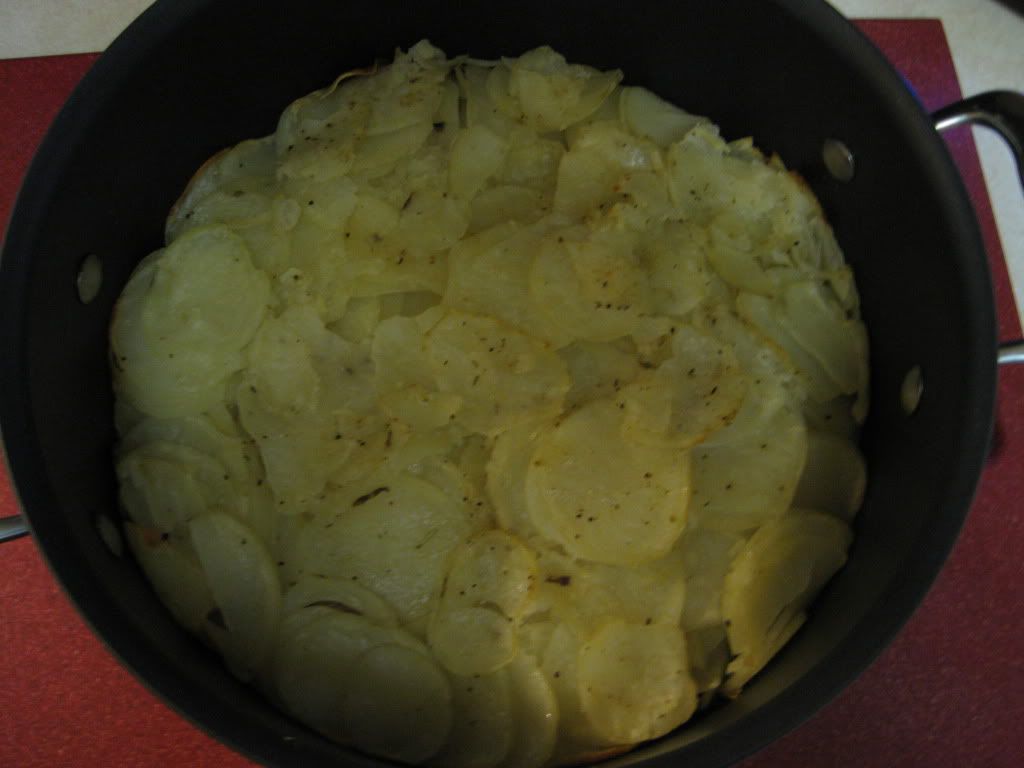
Place the skillet on medium heat and cook for five minutes. This accomplishes two things, first it fuses the first two layers of the galette together, secondly it creates a beautiful golden brown layer that you will appreciate later.

With a wooden spoon, press down on the potatoes to eliminate any air pockets.  Place the skillet into the oven and cook for 20 minutes.  After 20 minutes, use the wooden spoon to press down on the potatoes again and return the skillet to the oven again for another 20 minutes.  After these 20 minutes, the dish should be done.


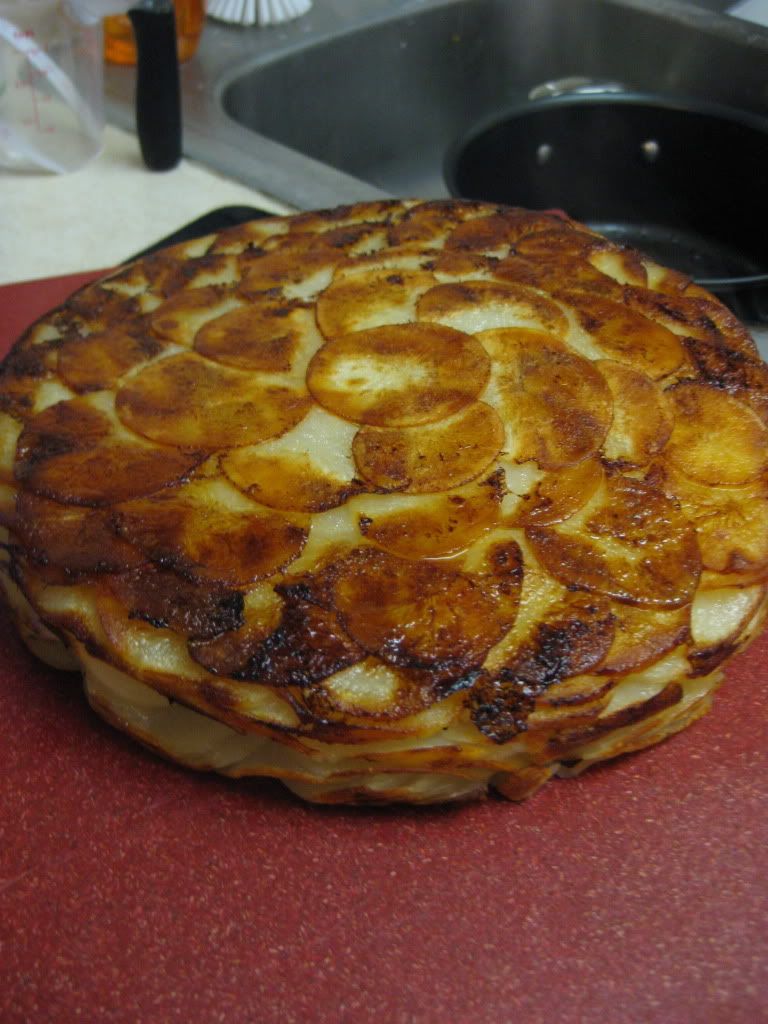
However, we're not quite done yet.  The galette is prepared upside down, meaning the first layer you put in the skillet is actually the top of the dish.  This means you'll have to flip the galette before serving.  Place a cutting board on top of the skillet and with one hand on the cutting board and one hand on the skillet, flip the dish until the the galette release.  With any luck, everything will have stuck together (thanks to the corn starch) and you should have a beautiful golden brown galette.  Slice into wedges and enjoy!

The Results:


For such a simple dish, the galette had a lot of flavor.  The potatoes were soft and moist, but the top layer had a nice crunch to it.  The extra touch of rosemary added to the warm country-like flavor.  The hardest part of this dish is the preparation and that's just time consuming.  In reality, a little bit of effort yields a fantastic end result.

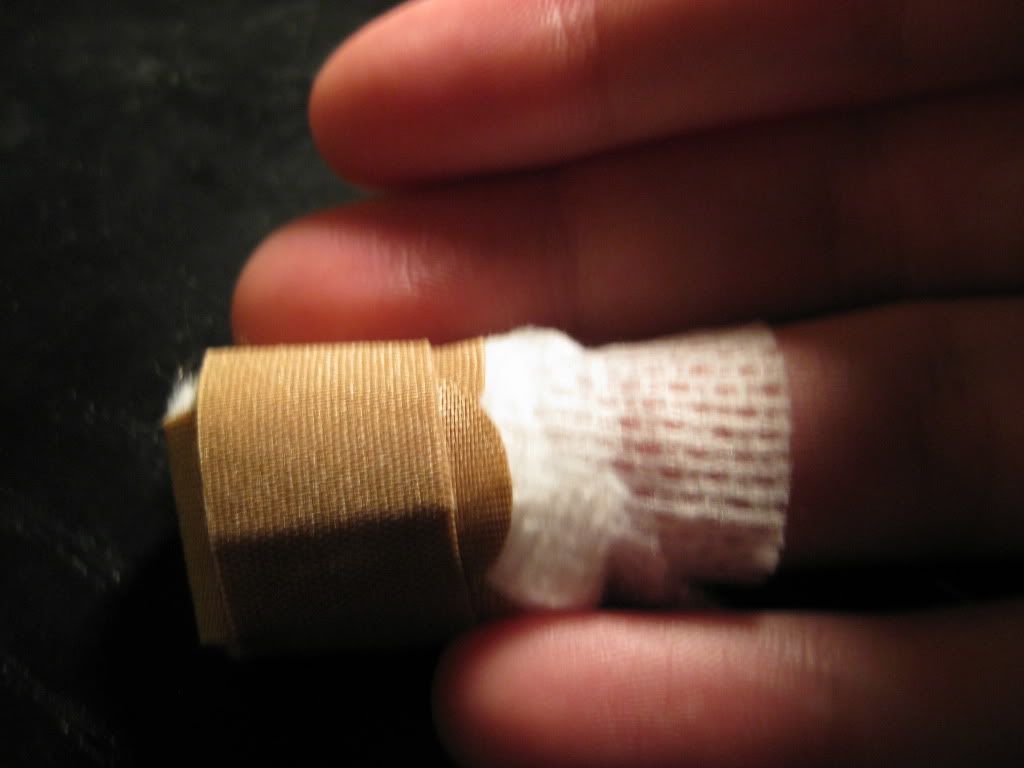
The lesson from tonight involves the mandoline.  If you're familiar with the tool, you know it comes with a plastic skewer to grip whatever you're slices while protecting your fingers.  While this does slow you down sometimes, it's there for a reason.  Don't try to speed up the process by foregoing the plastic protector because you'll quickly find out that the mandoline cannot tell the difference between a potato and the tip of your finger.  I learned this the hard way after I sliced a corner of my finger off on the first potato.  Lesson learned (as a result, my finger hurts too much to type tonight's blog, thankfully, my lovely wife is typing up the blog as I speak it to her.)

ow...


That's all we have for you this evening.  We're off to Target to buy some heavy duty bandaids.  I'm planning on having another recipe tomorrow, but that could change depending on everyone is feeling.  Keep an eye on our Facebook page and we'll let you know if/when tomorrow goes up.  Until next time,

~Cheers

Monday, February 21, 2011

An Update

Good evening everyone! Tonight's blog is going to serve one purpose - to update everyone on Maggie's recovery and her progress back to normal, everyday function. While we won't go into the full details of the last week (trust me, there are some things you don't want to know...) - we can safety say it's been an eventful week, and I think it would have been more relaxing to actually have been at work, rather than at home!

Maggie is recovering nicely. She's had a lot of pain over the first few days but is now completely off the pain pills and down to a moderate 'ache'. We've had run ins with nausea and some cookie-tossing - but that seems to be behind us now.

Long story short, Maggie is the proud owner of 4 new holes in her tummy, one less internal organ and a whole lot of aches and pains. In the long haul, she should be able to return to the foods and flavors she so loves, in the short term, the menu is potatoes, mac & cheese and oatmeal.

As far as the blog goes - we're working on another shortened week. I'm planning on two recipes this week, but that all could change. Tomorrow night, I've found a potato recipe (with French inspiration) that fits right into our new short term diet ('safe foods') and will have a full blog (along with the cooking science behind the recipe) up tomorrow night. From there, the week becomes a big question mark. If everything progresses as planned, I'll have another recipe on Wednesday and that will be the week.

We won't be doing an 'Around The Culinary World' this week for two reasons. 1. I've been a little too busy taking care of miss Maggie to peruse the world of culinary news - and 2. After a quick look this morning, I've found nothing of interest to share with you anyway! A slow news week and a busy past few days have killed off our Monday feature for the week.


So there you have it folks, Maggie's alive and recovering. Slowly but surely she's on the mend. She'll be back and blogging before you know it. I'll have a recipe to share tomorrow night, and pending other circumstances (I.E. how exhausted I am as the week progresses) we could have an additional recipe to share on Wednesday.

As always, we'll try to keep you informed of everything that is going on - Stop back in tomorrow night for our return to cooking - it's a simple dish (less than five ingredients) but I'm eager to give it a go. Until then,

~Cheers

Wednesday, February 16, 2011

The Last Supper (For One Particular Gallbladder Anyway...)

Good evening everyone! Welcome to the final edition of Out Of The Culinary (well...for this week anyway). With Maggie's surgery looming tomorrow - we're going to be off for the next week or so. We hope to return by Monday the 21st, however, if Maggie cannot go back to a 'normal' diet by that time, we may have to delay the return of cooking (and in turn, the blog) until further notice. We'll be sure to keep you posted when we return to the world of cooking - but before we sign off for the week, we've got one more 'safe' recipe that (hopefully) will prove that healthy, non fat filled meals can still pack a lot of flavor. Tonight's dish, chicken with dumplings, combines foods that are gallbladder friendly (chicken, broth, veggies, biscuits) but uses them in a way that maximizes flavor without a lot of extra hassle. Let's get started:


The Recipe: Chicken With Dumplings
Original Recipe Found In: The Complete America's Test Kitchen TV Show Cookbook: Every Recipe from the Hit TV Show With Product Ratings and a Look Behind the Scenes, 2001-2011


What You'll Need:

5 Pounds Bone-In, Skin On Chicken Thighs (About 12)
4 Teaspoons Vegetable Oil
4 Tablespoons (1/2 stick) Unsalted Butter
4 Carrots, Peeled & Sliced 1/4 Inch Thick
2 Celery Ribs, Sliced 1/4 Inch Thick
1 Medium Onion (Sliced)
6 Tablespoons Unbleached All Purpose Flour
1/4 Cup Dry Sherry
4 1/2 Cups Low Sodium Chicken Broth
1/4 Cup Whole Milk (Do not substitute a lighter milk)
1 Teaspoon Minced Thyme Leaves (1/4 Teaspoon dried)
2 Bay Leaves
1 Cup Frozen Peas
3 Tablespoons Minced Fresh Parsley Leaves (1 Teaspoon dried)

Dumplings:

2 Cups Unbleached All Purpose Flour
1 Tablespoon Baking Powder
1 Teaspoon Table Salt
1 Cup Whole Milk (Do not substitute lighter milk)
3 Tablespoons Melted Butter*

*The original recipe calls for the reserved chicken fat from cooking the thighs. However, since we're trying to err on the side of health and good eating - we're substituting butter in place of the chicken fat. While butter is not 'healthy' it is slightly better for you than liquified chicken fat.

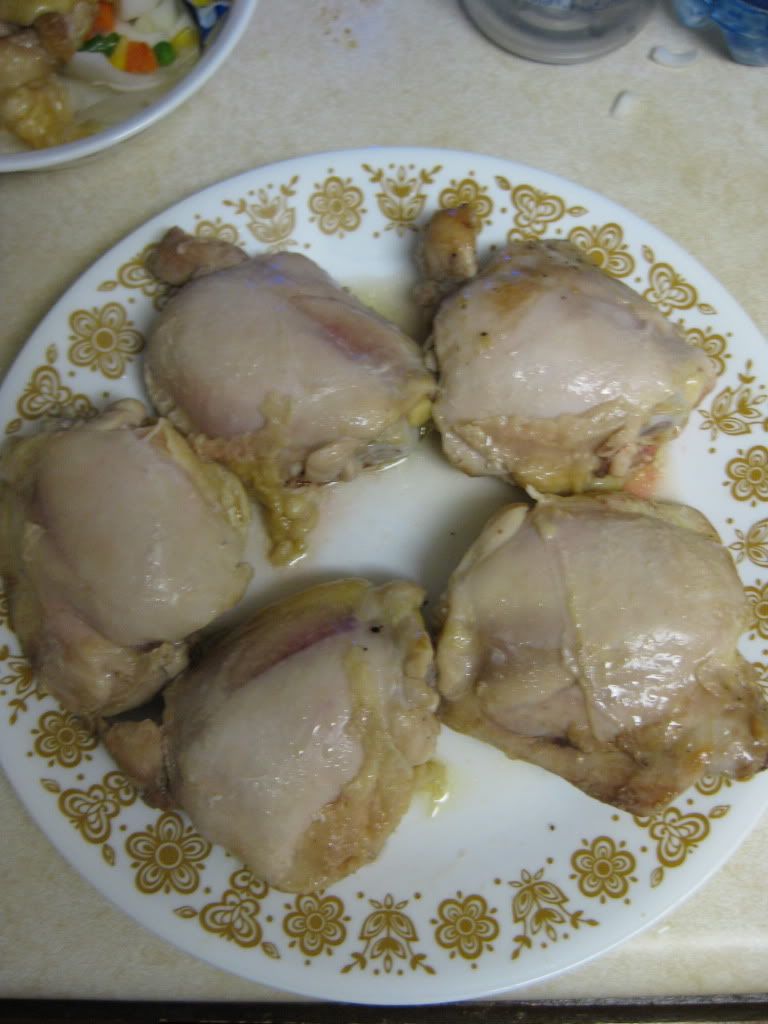
Begin by patting your chicken pieces dry with paper towels and season them lightly with salt and pepper. In a large dutch oven, heat 2 teaspoons of the vegetable oil until just smoking. Add as many of the chicken pieces as possible (if the dutch oven is large enough, you should be able to do this in two batches). Cook the chicken pieces over medium heat until the outside is golden brown - roughly 5 minutes per side. Remove the cooked pieces from the dutch oven and set aside on a plate. Place the remaining chicken pieces in the dutch oven (add the remaining vegetable oil if necessary) and repeat the cooking process until golden brown. Remove and discard the skin from the chicken pieces.


The concept of cooking the chicken skin-on first is to reduce the cooking time while maintaining the natural juices of the chicken. By cooking the chicken 'skin-on' you reserve the juices - when you remove the skin, you're allowing the juices to seep out and into whatever else you're cooking - which is great for our next steps.

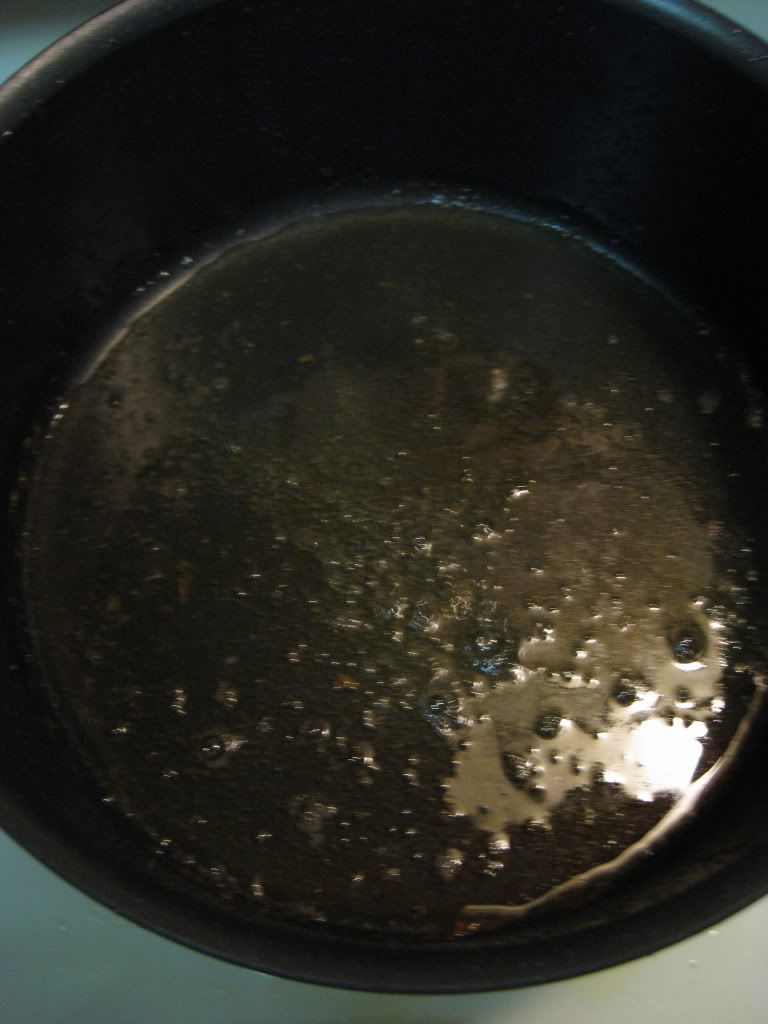
Check the dutch oven to see if you need to remove any remaining chicken fat/grease. A little grease is okay, but a big pool:


Not so much. Drain the excess grease if needed. Next, melt 4 tablespoons of butter in the dutch oven (medium heat). Add your carrots, celery, onion and 1/2 teaspoon of salt. Cook until the vegetables soften - about 8 to 10 minutes. Next, stir in the flour, combining until everything is well blended. Add the sherry, making sure to scrape up any browned-on bits from the chicken with a wooden spoon while mixing. Finally, stir in the broth, milk, thyme an bay leaves. Nestle the (naked) chicken into the pot and cover. Allow the mixture to simmer until the chicken is full cooking - roughly one hour.


Once the chicken is cooked and tender, remove the pieces of chicken from the stew and place them on a cutting board. (Now is also a good time to fish out and discard your bay leaves). Shred the chicken from the bones (after the hour long cook, it shouldn't be too hard to do) and place the meat aside in a small bowl. After you're shredded the chicken meat, return to the stew and skim off any of the excess fat/grease that may have risen to the surface. Finally, return the shredded chicken meat to the stew. Return the stew to a simmer and add the peas and parsley.

Now you can begin to work on your dumplings. In a medium bowl, combine the flour, baking powder and salt. Next, microwave the milk and melted butter in a small bowl (high power) for about 45 seconds to 1 minute. You want to heat up the mixture, but not cook it. Adjust the cooking time based on your microwave's power.

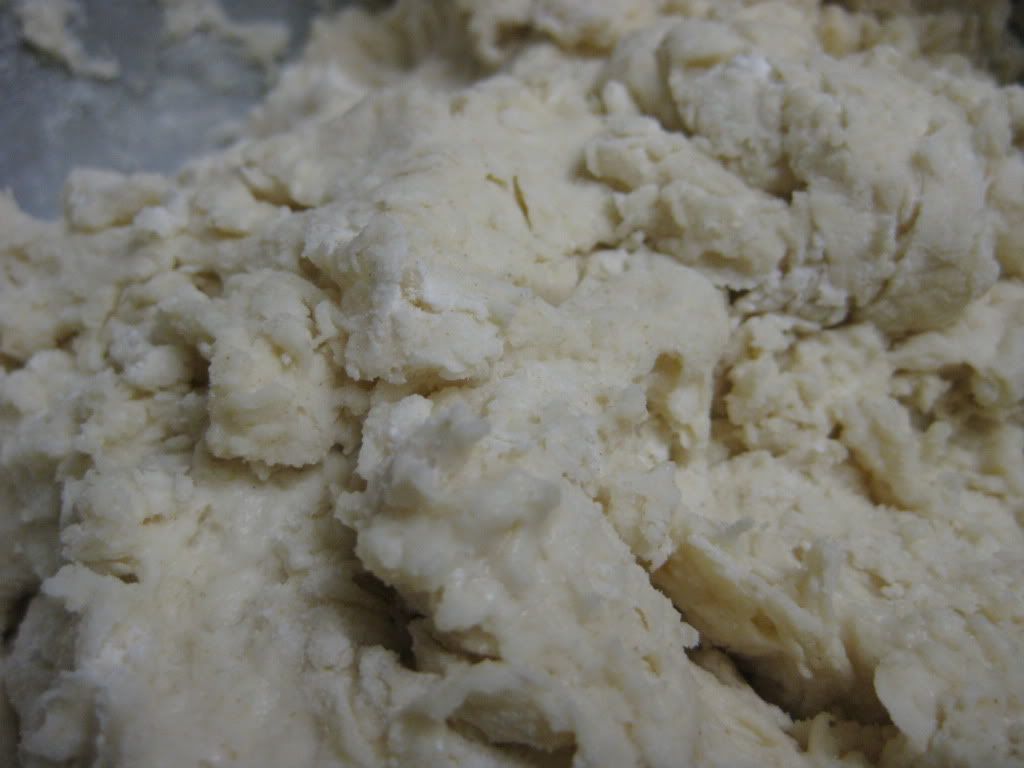
Stir this warmed milk mixture into the flour bowl. Combine until the mixture is smooth and well mixed.


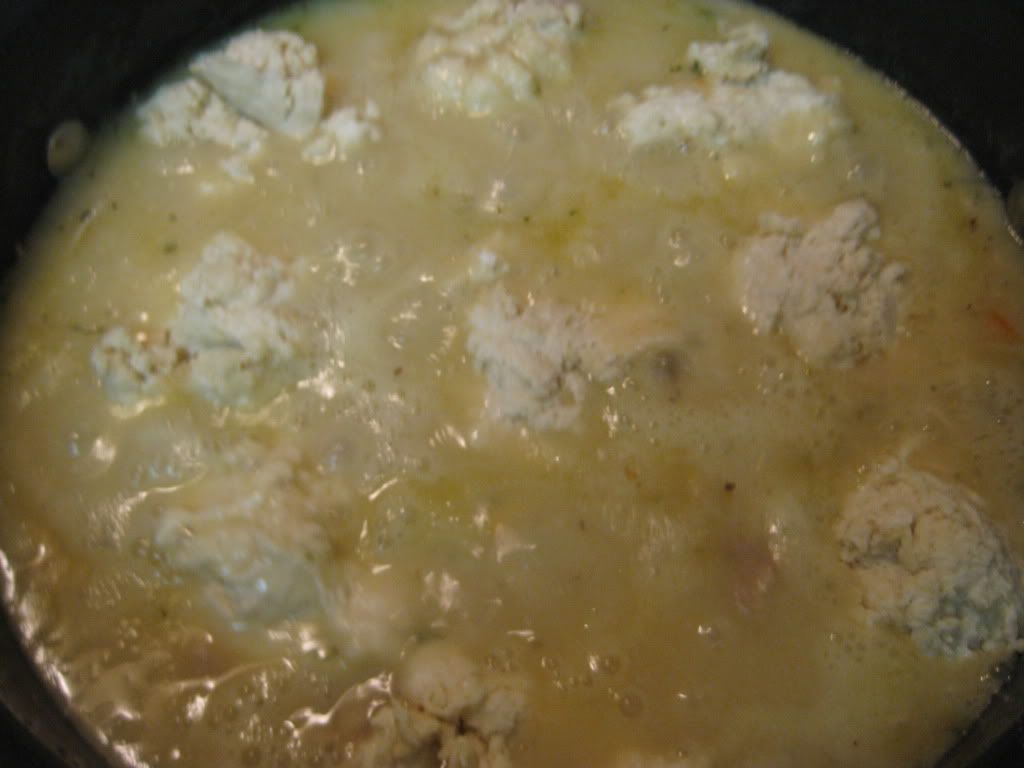
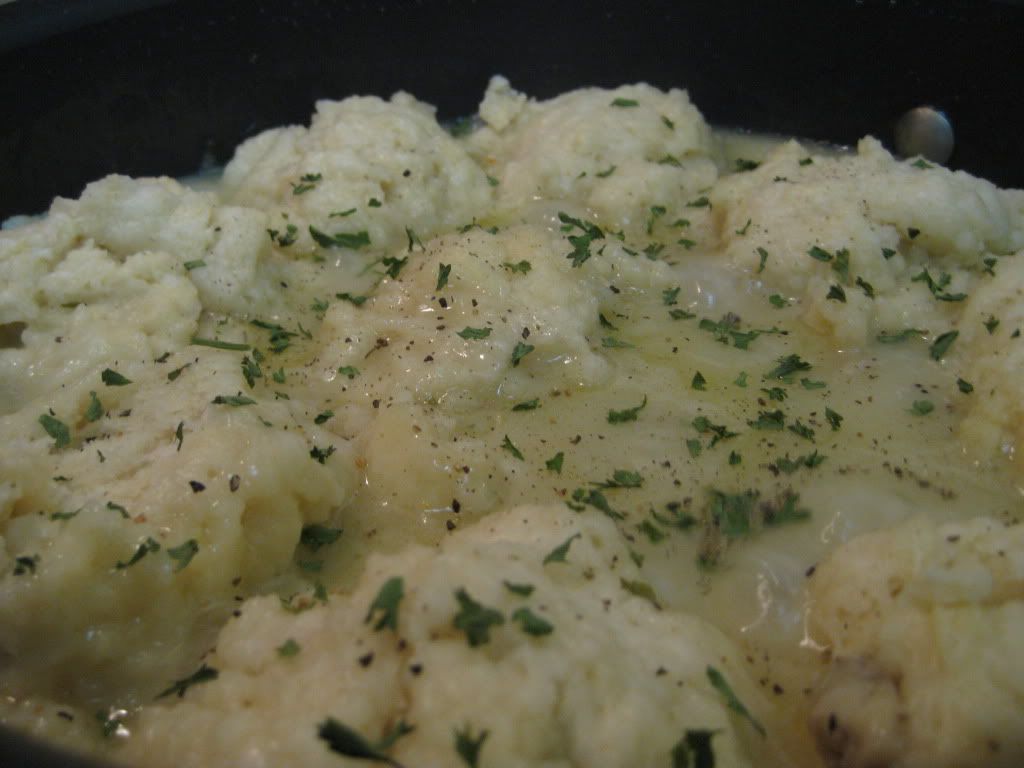
Using a wooden spoon or cookie scoop - drop golf ball sized dough balls on the top of the stew (leaving about 1/4 inch of space between each ball). Reduce the heat to low and allow to cook until the dumplings have doubled in size. This should take about 20 to 30 minutes.


Serve and enjoy!


The Results:


One of the time saving cheats for this recipe is using ready-made biscuits and simply serving the stew on top of those. While that may work for those in a time crunch, I feel that the homemade dumplings really make the dish. The stew itself boasts great flavor and an amazing aroma. Add in the fresh, slightly doughy dumplings and the dish moves to a brand new level. Simply delectable. A great way to end the week. (And, as a bonus, there are a lot of leftovers to enjoy for lunch the next few days!)


That's all we have for you this week! Maggie heads into surgery tomorrow morning, and should be out be early afternoon. We'll return to the world of blogging and cooking as soon as we can. Until then,

~Cheers

Tuesday, February 15, 2011

If This Counts As A "Bland Diet" - Count Me In!

Good evening everyone!  As my surgery looms closer and closer, we're still batting in the safe zone, as far as food goes.  Granted, I could have my gallbladder go out with a bang, that's probably not the wisest decisions.  Today, I talked to a nurse about the upcoming procedure, and I asked her what I would be able to eat right after the surgery.  She told me "Very bland foods: macaroni and cheese, pudding, mashed potatoes, jello...nothing greasy or spicy" - which I have been doing and it seems to help.  But obviously I won't be diving in head first into the foods I once loved, but now have given up.  Time will only tell when I'll be able to eat that kind of food again.


Tonight, I decided to try a breakfast recipe as a "safe food."  Not only does it look delicious, but I think it might be a wise decision for my tummy.


The Recipe:  Buttermilk Pancakes with Vanilla Bean-Berry Syrup
Original Recipe Found In:  Food Network Magazine, January-February 2011

What You'll Need:
Pancakes:
1 1/2 Cups All Purpose Flour
1/2 Cup Finely Ground Cornmeal
3 Tablespoons Granulated Sugar
2 Teaspoons Baking Powder
1/2 Teaspoon Salt
Pinch of Grated Nutmeg
2 1/4 Cups Well-Shaken Buttermilk
2 Large Eggs, Beaten
1 Tablespoon Vegetable Oil, Plus More for Greasing
Syrup:
1 Cup Maple Syrup
1 Vanilla Bean, Split Lengthwise
1 Pint Fresh Blueberries, Blackberries, or Raspberries


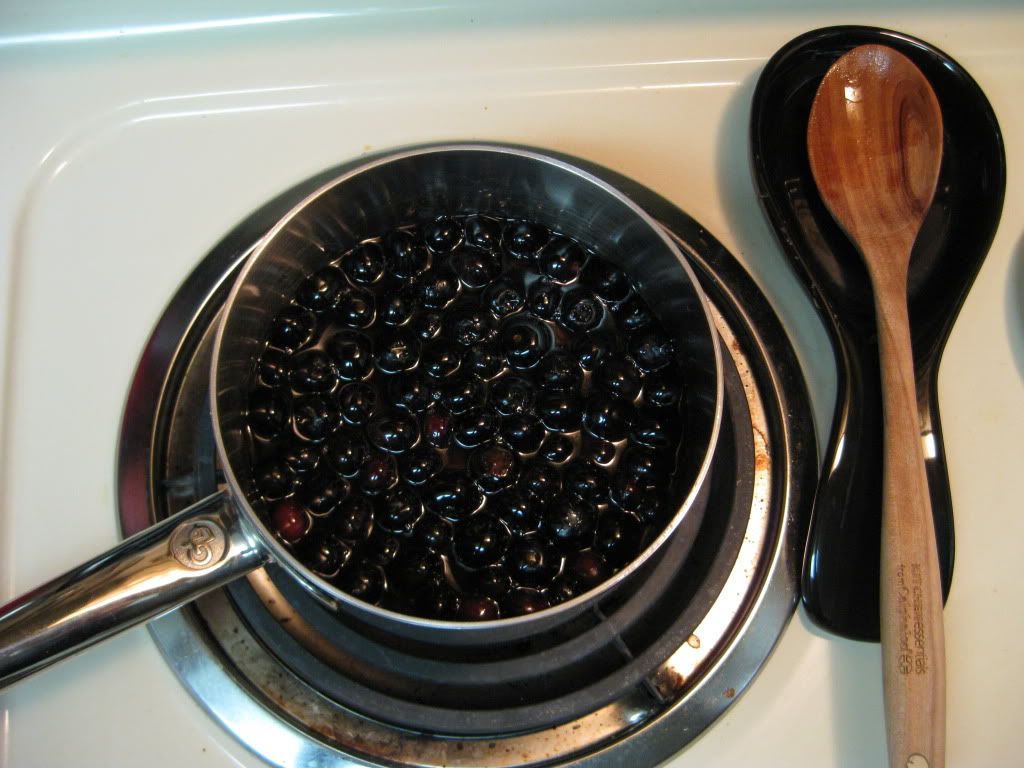
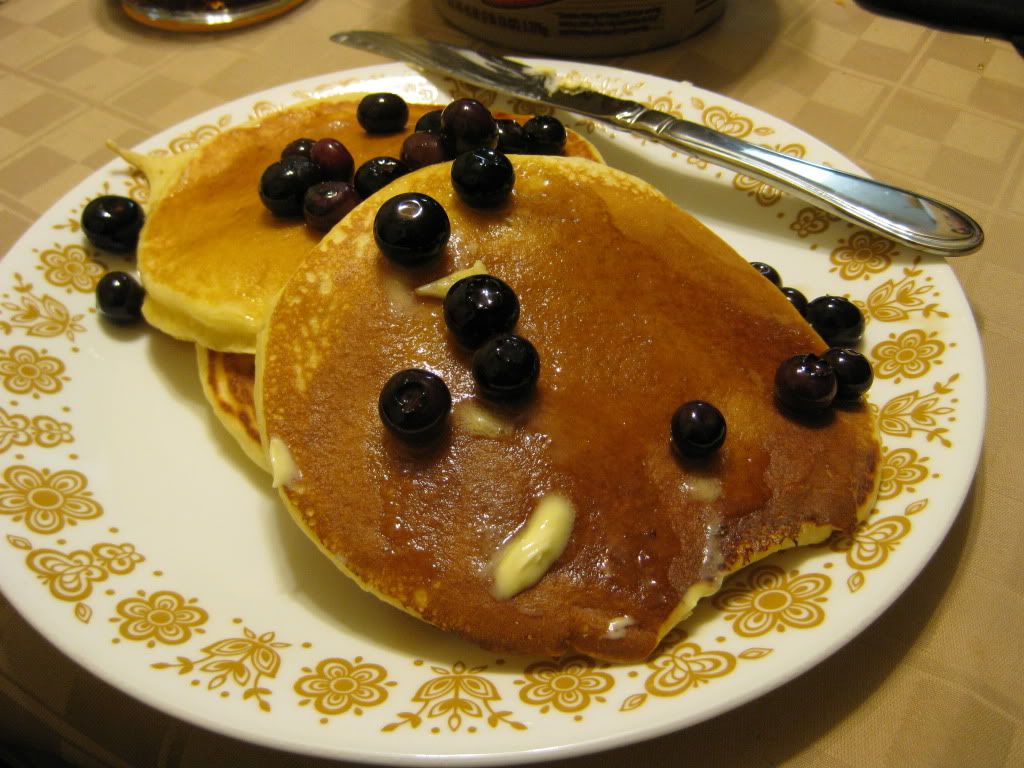
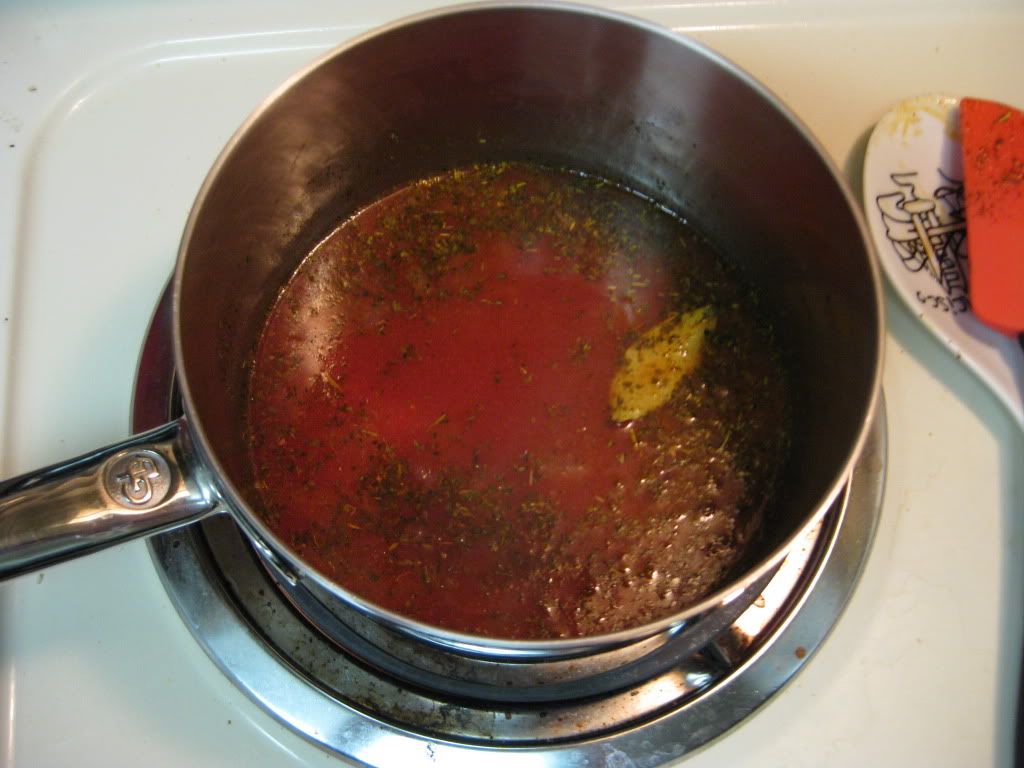
Begin by making the syrup:  heat the syrup and both halves of the vanilla bean in a small saucepan over medium-high heat.  If you aren't aware, vanilla bean is VERY expensive, like 7 dollars a container of TWO vanilla beans.  We opted for vanilla bean extract, and splashed a 1/4 teaspoon with the syrup, just enough to add some flavor without bleaching our mouths with vanilla taste.  Just before the mixture comes to a simmer, remove from heat, stir in berries, and set aside for thirty minutes to let the flavors meld.  We chose blueberries in our version.  Blueberries and pancakes were just meant to be together and they have a great flavor pairing: the fluffiness of the pancakes and the tartness of blueberries just harmonize so well.


Making the pancakes:  preheat the oven to 200 degrees.  Whisk the flour, cornmeal, granulated sugar, baking powder, salt, and nutmeg in a large bowl.  In a separate bowl, whisk the buttermilk, eggs and oil.  Stir the wet ingredients into the dry ingredients until just blended.  Heat a large nonstick skillet over medium high heat.  Add enough oil to grease it lightly and leave a film on the bottom of the pan.


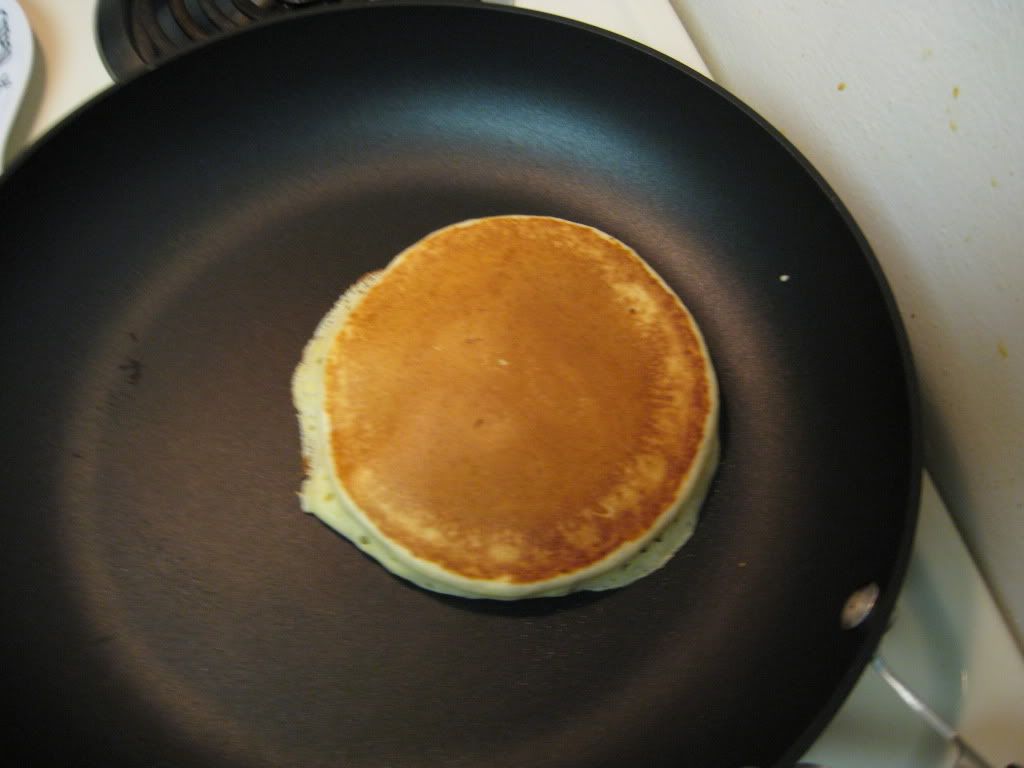
Working in batches, ladle the batter, about 1/2 cup at a time, into the pan.  Cook until the pancakes are golden brown on the bottom and bubbles start to form on the top, about three to five minutes.  Flip and continue cooking for two to three minutes.  Put the finished pancakes on a sheet tray and let sit in the oven to stay warm.  Serve with berry syrup, butter, and enjoy!


The Final Result:


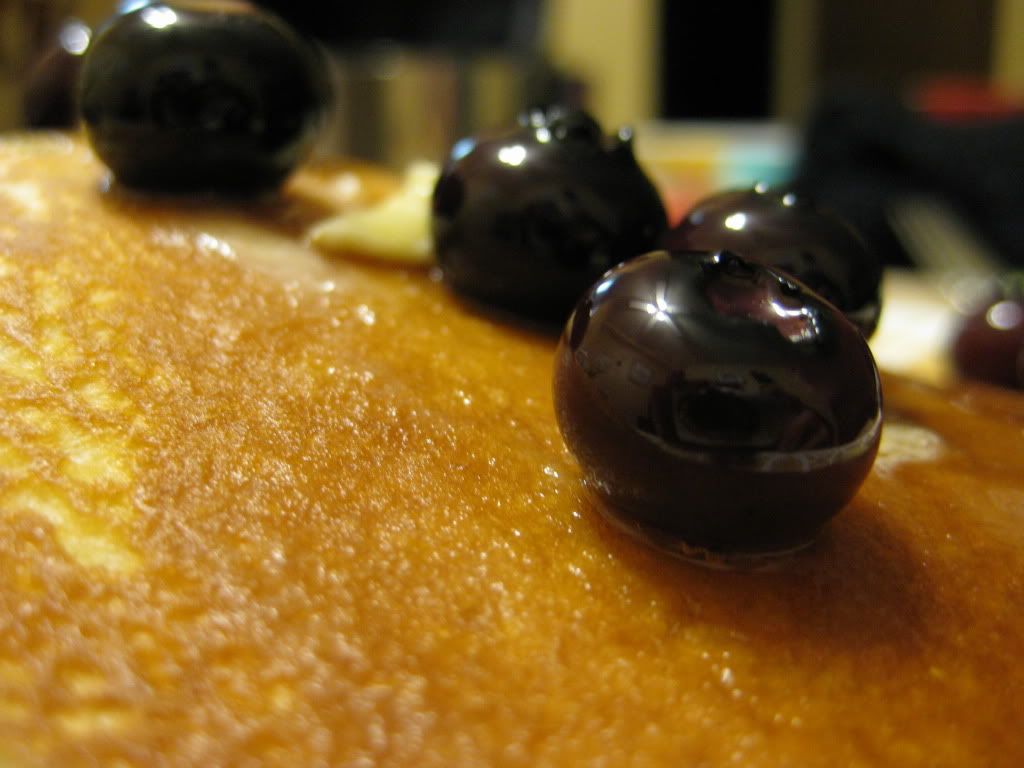
The sweetness and tanginess from the syrup adds a delicious touch to these pancakes.  The slight flavoring from the vanilla extract adds a whole new dimension to the syrup and boosts its flavor component.  The blueberries added a nice touch to the whole dish and proved, once again, that blueberries were meant to be with pancakes.  The pancakes were extremely fluffy and it filled you up, but never left a overt full feeling, like you get with most pancakes.  Overall, a mighty fine dish and very simple as well!  


Thanks Maggie! This could be one of the last 'safe dishes' we have to cook in a long while (after the two week 'recovery' period - obviously) that being said, if all the safe dishes came out like this...I don't think I'd mind!

That's all we have for you tonight. I'm back in the kitchen tomorrow night, so be sure to stop back tomorrow evening to see what I've got cooking. Until then,

~Cheers

Monday, February 14, 2011

Around The Culinary World

Good evening everyone! It's Monday once again, but somehow it's more tolerable than a typical Monday. Maybe that has to do with the 50 degree temperatures and the full 'it's almost spring' feeling that is in the air. As the thick icy grasp of winter begins to melt away, it's easier to feel a little more chipper - even when it's a Monday.

The last few weeks have been a bit slow in regards to culinary news. Small stories, neat little tidbits - and interesting (sometimes odd) tales have been the norm. I'm happy to say that this week...isn't any different. While it is a slow news week, the stories we do have for you are intriguing little glimpses into the culinary world. Here's the best stories from the culinary world this week.

The biggest culinary story of the week centered around the new studies linking diet sodas to increased stroke risk. The study found that a person drinking diet sodas everyday was at a greater risk for a stroke than a person who didn't drink any soda. The study has found that it was specifically diet soda (not any soda) that caused this increased risk. The study doesn't have an answer to what ingredient can be blamed for this risk. The study's scientists recommend that you drink water instead - a safer alternative to diet soda, they claim. I'd like to counter that drinking any form of soda everyday is going to put you at an increased risk for anything health related. The high sugar and empty calories have long been known to be bad for you and a everyday soda drinker is much more likely to be in slightly worse health than a non soda drinker.  That doesn't discount the fact that an increase of strokes in diet soda drinkers is a scary prospect - I just don't find the study as 'terrifying' as the news outlets want to make it out to be. Soda is bad for you - that shouldn't come as any surprise to anyone. Check out the full story HERE.


In a (slightly) related story - there is drama surrounding the new look of Diet Pepsi cans. The company unveiled the new look cans last week to a lot of critical outcry. The cans feature a taller, slimmer look that the company claims make it more desirable and trendy. "Our slim, attractive can is the perfect compliment to today's stylish looks" Pepsico said in a statement regarding the new look. The negative press began to pour in immediately. Not to regarding the actual style - oh no - that received praise, but regarding the fact that Pepsico was clearly pushing the 'skinnier is better' line to consumers. Once again, I find this to be a non controversy that news outlets are drumming up for a story - are people really outraged that Pepsico is making a skinny can? Are they taking in to consideration the fact that the reason there is even a Diet Pepsi is because consumers are thinking slim when they drink the product? Pepsico is reinventing their can to look more trendy and stylish with today's general public (E.G. the women of the world) - let's leave it at that and not make everything a major controversy. Read the full story (and both sides of the argument) HERE.

Above: Controversy! (And maybe a killer?) 


My fellow Americans, it's time to celebrate! The United States is no longer the fattest country in the world! This is obviously a sign that Americans are moving to healthier lifestyles, cutting out fast food and exercising more right? Well...no. What it is a sign of, however, is other countries sudden surge in weight gain. Yes, the U.S. isn't eating healthier - other countries are simply eating worse, at a faster rate, than we are. The new 'fattest country in the world' title holder? You wouldn't guess it if I gave you 10 tries. Check out the story HERE.

Source: http://www.good.is/post/chart-the-united-states-is-no-longer-the-fattest-country/


I don't think this particular ingredient is on the menu... Check out the surprising addition one woman got when she ordered a salad at McDonalds. There's not much more to add to the story than that. I'm not sure if I'd be happier to find out that the woman is lying, or that she is telling the truth. If she's lying - it's a sad reflection on our society and people's willingness to lie and deceive in order to gain financially - if she's telling the truth it's a shocking look into just how low our food service standards are these days. Lose, lose situation if you ask me.


Finally this week, EatingWell.com has a list of uses for a common citrus. The lemon. These go beyond zesting up a recipe or adding a nice tang to cakes and bread - the lemon is a secret kitchen force that has the ability to clean a cutting board, fight bad breath and keep fruits and veggies fresh for longer. Check out the full list of useful lemon tips HERE. (This article is primed for a 'Culinary Mythbuster' story - we've delayed our first foray of the planned feature until after Maggie's surgery, but we're still seeking ideas to test, try or demonstrate when it comes to culinary tips and tricks. Stay tuned for our first feature - regarding onions, in a few weeks. If you have any ideas or myths that you'd like to see us test (like the lemon article for example!) send them in to Outoftheculinary@gmail.com


That's the culinary news for Monday, February 14th 2011. We've got a short week of cooking lined up - one recipe apiece. Maggie is taking to the kitchen on Tuesday, and I'll close out the surgery shortened week on Wednesday. Stop back in tomorrow evening to see what Maggie's got cooking. Until then,

~Cheers
Thursday, February 10, 2011

Bending The Rules...

Good evening everyone!  As my surgery date creeps ever so slowly, I've been doing a lot of research.  I understand that my diet will probably change quite a bit after surgery and slow reintroductions to foods will have to be incorporated.  But the thing that has been boggling my mind is what foods can I eat right after my surgery.  According to one website, I have to avoid everything and anything.  Another one said just liquids.  I suppose I won't know until I have the organ yanked out to find out what tastes good or not.


As for this evening though, I'm trying a festival of flavor.  Not only do the ingredients sound great, but they sound amazing together.  I figure for my last recipe (for a while) that I would go out with a bang...or something like that...


The Recipe:  Tasty Italian Chicken
Original Recipe Found In:  Taste of Home, December 2010/January 2011

What You'll Need:
1/2 Cup Chopped Onion
1 1/8 Teaspoons Paprika, Divided
3 Teaspoons Olive Oil, Divided
1 1/4 Cups Water
1/4 Cup Tomato Paste
1 Bay Leaf
1/2 Teaspoon Reduced-Sodium Chicken Bouillon Granules
1/2 Teaspoon Italian Seasoning
1/4 Cup All-Purpose Flour
1 1/2 Teaspoons Grated Parmesan Cheese
1/2 Teaspoon Salt
1/4 Teaspoon Garlic Powder
1/4 Teaspoon Dried Oregano
1 1/2 Pounds Chicken Tenderloins (2-3 Chicken Breasts)


Begin with sauteing the onions and 1/8 teaspoon paprika in 1 teaspoon oil in a small saucepan.  Cook until tender, 5-10 minutes.  Stir in the water, tomato paste, bay leaf, bouillon, and Italian seasoning.  Now, you might be asking, "Maggie, I thought you would be steering clear of any tomato based products since it made your gall bladder upset."  Well...I kind of did take a risk here.  Since it is a paste and not really chopped or chunky tomatoes, it might do well in my system.  Bring the entire combination to a boil.  Reduce the heat to simmer and keep uncovered for 10 minutes.


Meanwhile, in a large re-sealable plastic bag, combine the flour, Parmesan cheese, salt, garlic powder, oregano, and remaining paprika.  Add the chicken into the bag, seal and shake to coat.  Also, another variation would be to use a plastic sandwich bag and roll the chicken for a minute or two until well coated.


In a large, nonstick skillet coated with cooking spray, cook the chicken in one teaspoon of oil.  If you have tenderloins, cook for two to three minutes on each side or until no longer pink.  If you have chicken breasts, cook for 10 minutes on each side or until a meat thermometer reads 165 degrees.  Remove the bay leaf, serve sauce with chicken and enjoy!


The End Result:


I thought this recipe would be bursting with flavor and have a nice thick sauce.  Both of which did not happen.  Most of the seasonings on the chicken were hardly there and could barely taste.   The tomato based sauce did have some flavor but not enough to make it great.  It ended up being really watery and added a nice accent to the dish, but that's about it.  As for gall bladder safe...I think it is.  Nothing is too potent in it to cause an uproar in my tummy, but, as with every dish that is "gall bladder safe", it needs more flavor!


Thanks Maggie, and yes dear reader - Maggie did cheat the rules for a dish tonight. Tomato products are off the list and onions are greatly discouraged. Someone snuck this recipe up on me until the last minute and managed to get it approved...hmm. That being said, the dish wasn't as bad as Maggie was making it out to be. The sauce was more of a light glaze that worked well as a dip. The flavor was reminiscent of chicken parmesan - but yes, it did need more herbs. Sadly, this dish is a victim of our limited diet until Maggie gets to feeling better.


That's all we have for you this week. We've got a short week lined up next week. Simply an 'Around The Culinary World' and one recipe. With surgery pending next week, we're simply not going to have the time or the energy to cook all week. We know you'll understand.

Until next time,

~Cheers


Wednesday, February 9, 2011

Au Natural Cod

Good evening everyone! I hope everyone is surviving the deep freeze out there! It's been in the negative numbers (actual temperatures) for the past two days and frankly, I've had enough. I'm ready for spring. Winter was miserable while it lasted, but now it's time for farmer's markets, warm weather, fresh (non-imported) vegetables, warm weather, sunny skies, warm weather and...warm weather.

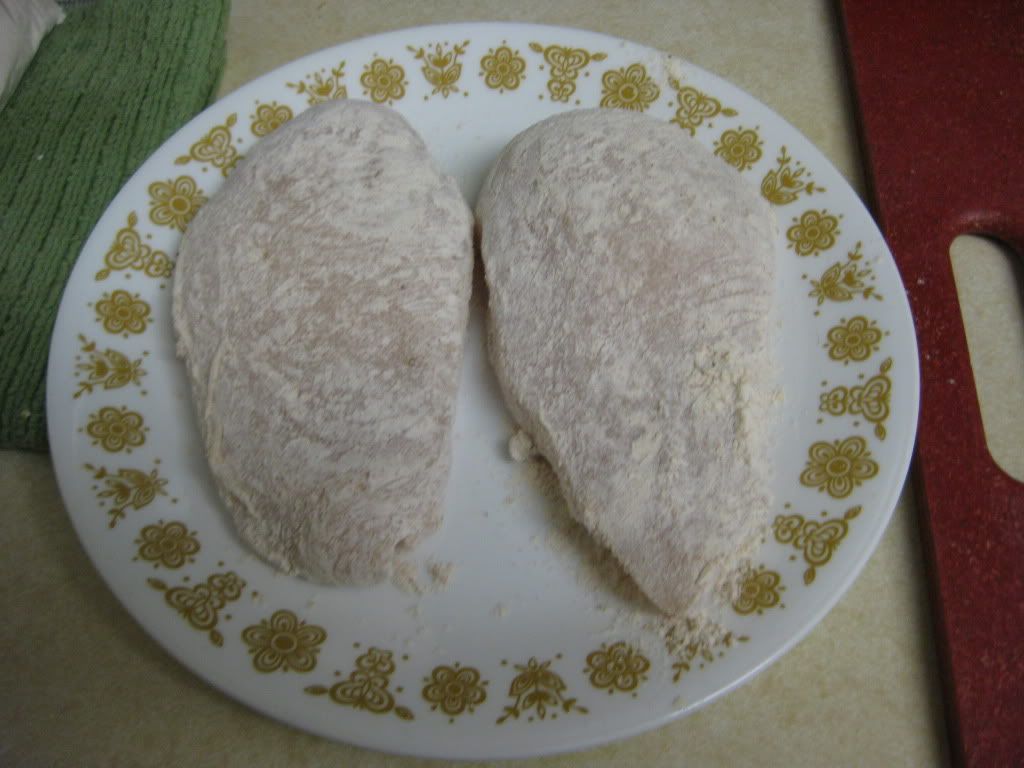
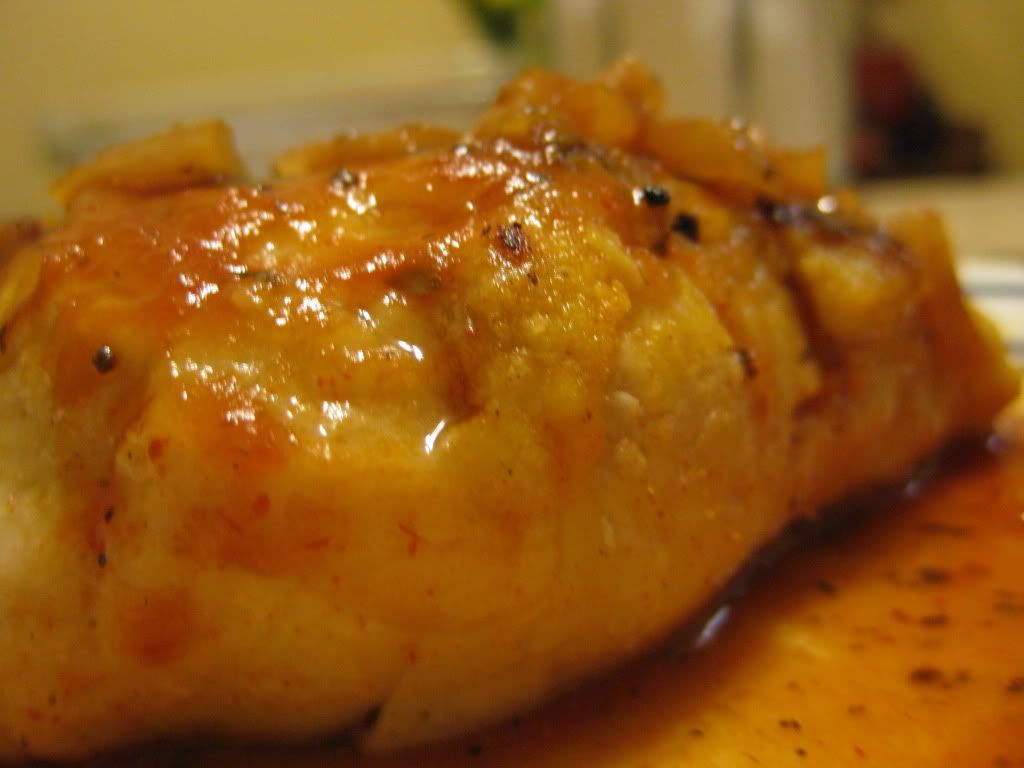
Yesterday, we shared a delicious take on a breaded chicken recipe that also fell into the category of 'Maggie safe'. The breading was full of flavor, but didn't have a lot of creamy coatings or heavy oils to cause issues with Maggie's gallbladder. Tonight, I'm taking that concept one step further and going sans breading. Tonight's recipe is a variant of breaded cod - only without any breadcrumbs. Instead, the breading is created 100% by herbs and spices. (Nothing too extreme or fiery, however, as that would defeat the purpose!) I've attempted a recipe similar to this before - a pan fried curried cod that ended up...well, horribly. My hope is that by shifting from pan frying to oven roasting, the issues of that original recipe will not be a problem. Did it work out that way? Let's find out:


The Recipe: Fast Roasted Cod With Parsley, Oregano, Chile & Lime
Original Recipe Found In: The Naked Chef

What You'll Need:

2 Cod Steaks
1 Tablespoon Olive Oil
1/2 Tablespoon Dried Oregano
2 Tablespoons Flat Leaf Parsley (Dried)
1 Medium Sized Red Chile*
1 Lime

*Red chiles certainly have a season, and when they are not in season, they are harder to find than a Dodo bird, Maggie and I searched through 3 local grocery stores - including a specialty grocery store that usually has at least one of everything - no luck. Since we're not big pepper fans (and Maggie can't handle a lot of spice) I opted to replace the chile with 1/2 teaspoon of red pepper flakes - for a little bit of a kick.

Begin by placing a wire rack on a rimmed baking sheet and spraying the rack with nonstick spray. Place the rack/baking sheet into the oven and begin preheating to 425 degrees. The idea behind heating the rack at the beginning is to create a instant sizzle when you place the cod on the rack. This helps both sides of the fish cook evenly - the top side is exposed to the most even heat, but the bottom side got a head start.

Pat your cod fillets dry with paper towels. It's very important to remove all of the moisture possible from the outside of the fillet. Moisture, especially when dealing with breaded fish, causes a lot of problems in breading. It clumps, it runs and disrupts even cooking across the surface of the cod. Moisture is your enemy in this situation - remove it with a vengeance.
Once you have destroyed all evidence of moisture's existence, gently rub olive oil on the surface of the cod. You just want a light layer - don't soak the the surface with oil. Unlike water, the olive oil evenly attracts the breading and evenly distributes heat while cooking. Not too mention, the oil acts as a barrier on the surface keeping the interior moisture of the cod (the good kind) inside where it belongs.

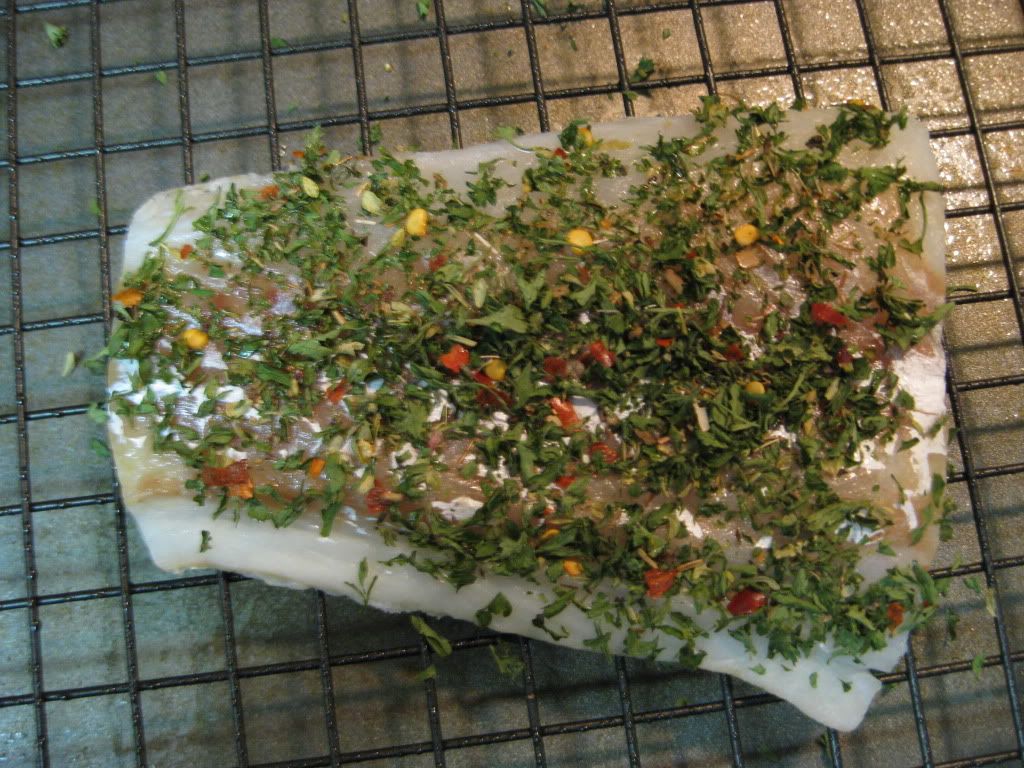
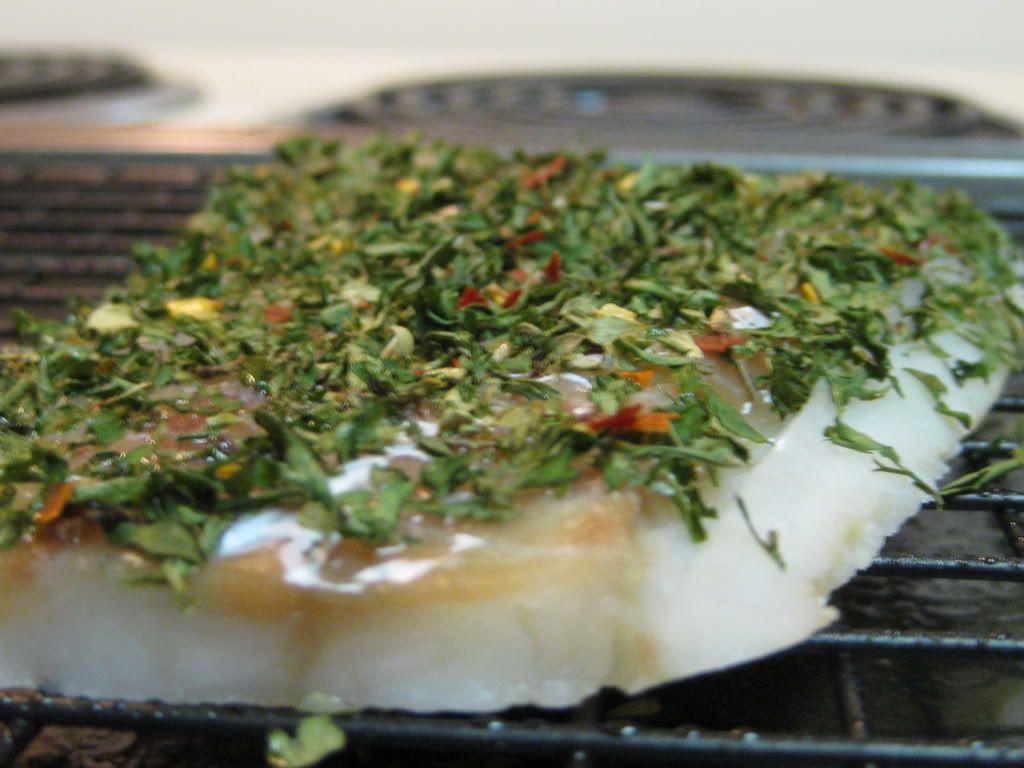
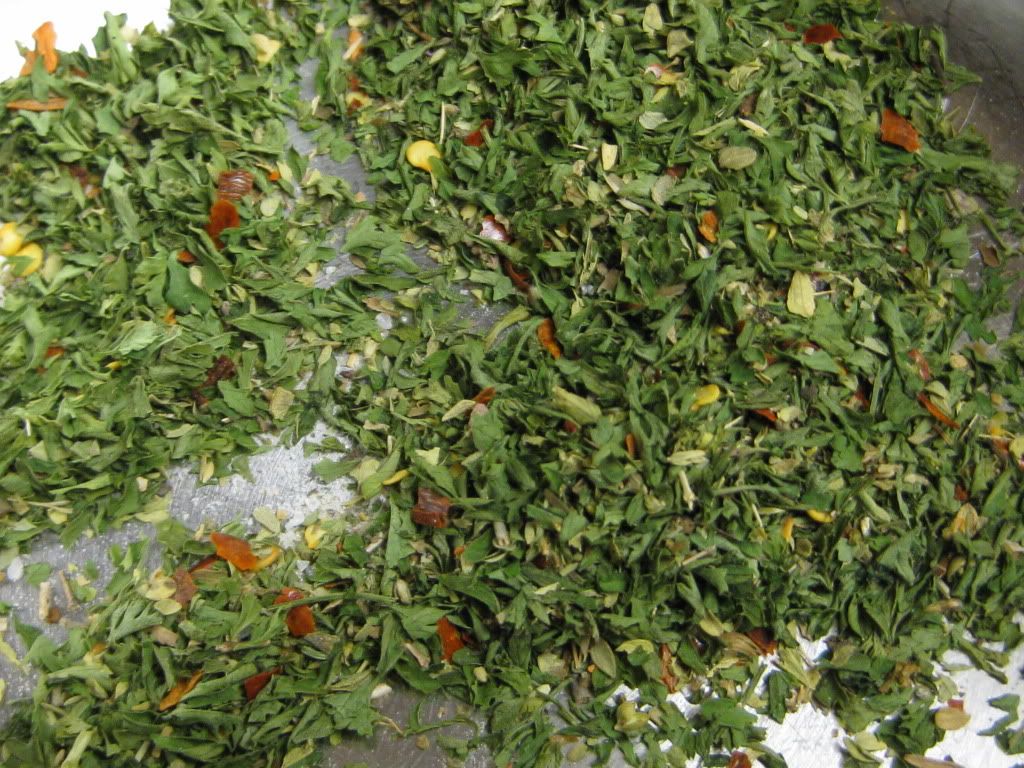
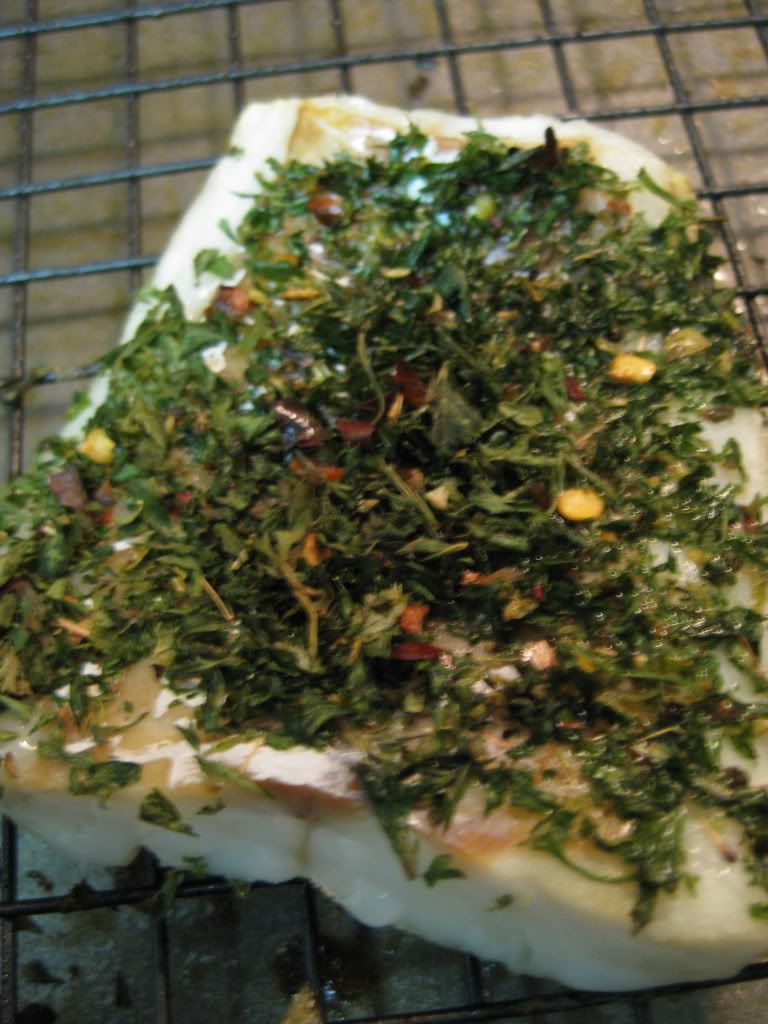
In a small bowl, mix the herbs, chile pepper and a pinch of salt and pepper. The original recipe calls for the cod to be rolled in the mixture, but I found it easier to simply pick up pinches of the herb mixture with my fingers and distribute it evenly across the surface of the fish. Once both sides are evenly coated with a herb breading, place the fish into the oven (listen to the sizzle when you first put the cod on the hot wire rack!) and cook for 10 to 15 minutes or until the cod becomes light and flaky.

+

=


Serve with some freshly squeezed lime juice (or lime halves) and enjoy!


The Results:


Jamie Oliver's claim to fame has always been to let recipes tell their own story. You don't need to pour sauce all over a dish to make a great flavor come out. Instead, let the natural flavors work together to create something that so many people miss - real flavor. Tonight's dish is the simplest form of this philosophy. While it may not seem like it, these few ingredients pair up so well together, it's like the fish really is breaded and covered in a multitude of sauces and creams. Add the light zest of lime juice and you have a almost tropical tasting dish that required very little effort or odd ingredients. Simple, elegant, delicious cooking (and healthy to boot!)

That's all we have for you this evening. Maggie takes to the kitchen tomorrow night to finish off the week. Be sure to stop back tomorrow evening to see what she's got cooking. Until then,
~Cheers