Thursday, January 31, 2013

Giving a Twist to an Old Favorite

Greetings fellow culinary adventurers!  (Sorry, sometimes we all need an exciting greeting like that.)  As Tyler mentioned yesterday, here on the blog, we are prone to find traditional recipes and make them healthier.  Sometimes, this isn't always possible, but when it is possible, it's definitely a thrill to compare it to the old recipe.  Tonight, I'll take a traditional Italian recipe, add a few tweaks, and produce a new favorite.

The Recipe:  Chicken Parmesan Meatballs
Orignal Recipe Found from Various Sources

What You'll Need:
1 1/4 Pounds ground Chicken
1/2 Cup Breadcrumbs
2 Tablespoons chopped Onion
1 Tablespoon chopped Parsley
1/2 Cup Parmesan cheese
1 clove minced Garlic
1 Teaspoon Fennel Seeds
1 Egg, whisked
3 Tablespoons Olive Oil

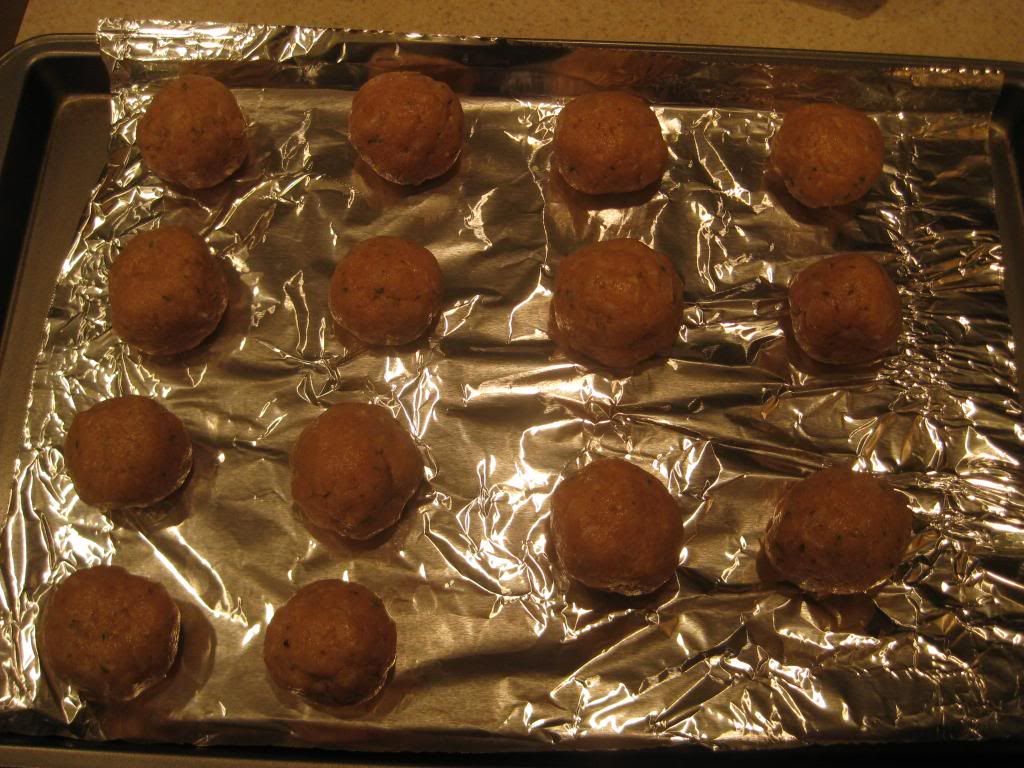
To start, preheat the oven to 400 degrees.  In a mixing bowl, mix the ground chicken, breadcrumbs, onion, parsley, Parmesan cheese, sprinkle of salt and pepper, garlic, fennel seeds, and egg, until well incorporated.  From this mixture, shape into balls that are slightly larger than a ping-pong ball, but not as big as a tennis ball.  When you have the mixture in your hands, it will be easier to eyeball the size and to tell when the meatball gets too large.  On a foil-lined baking sheet, place the meatballs on the sheet, and space them a few inches apart.  Brush each meatball with a small amount of olive oil.  Place the meatballs in the oven and bake for 15 minutes.


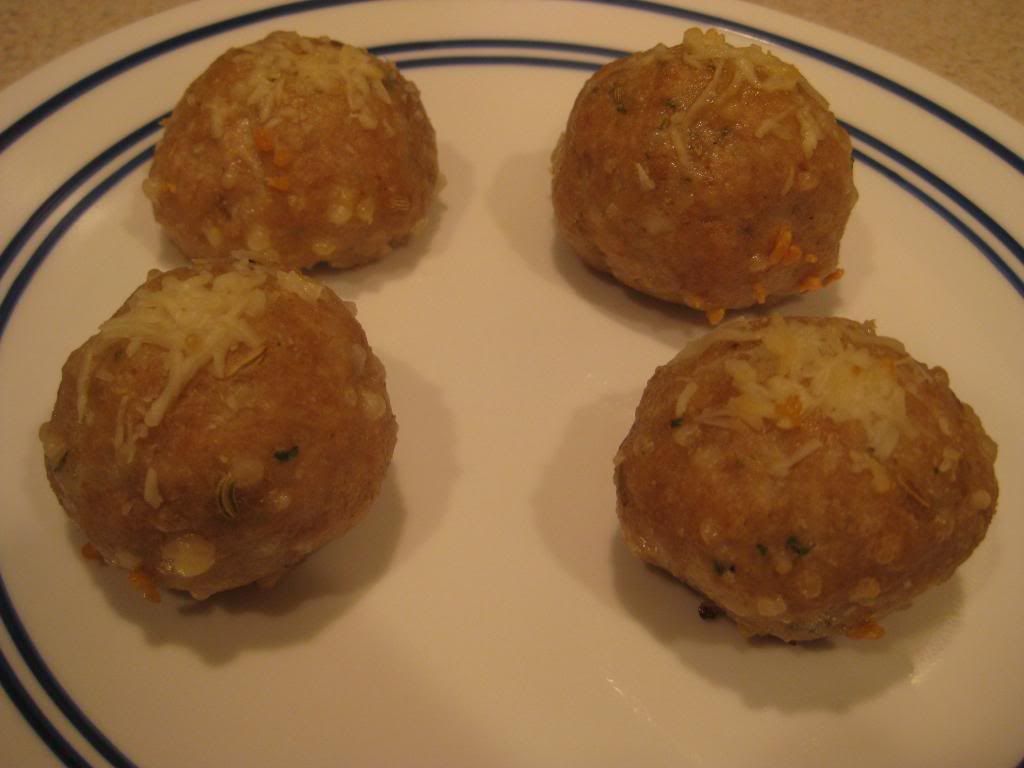
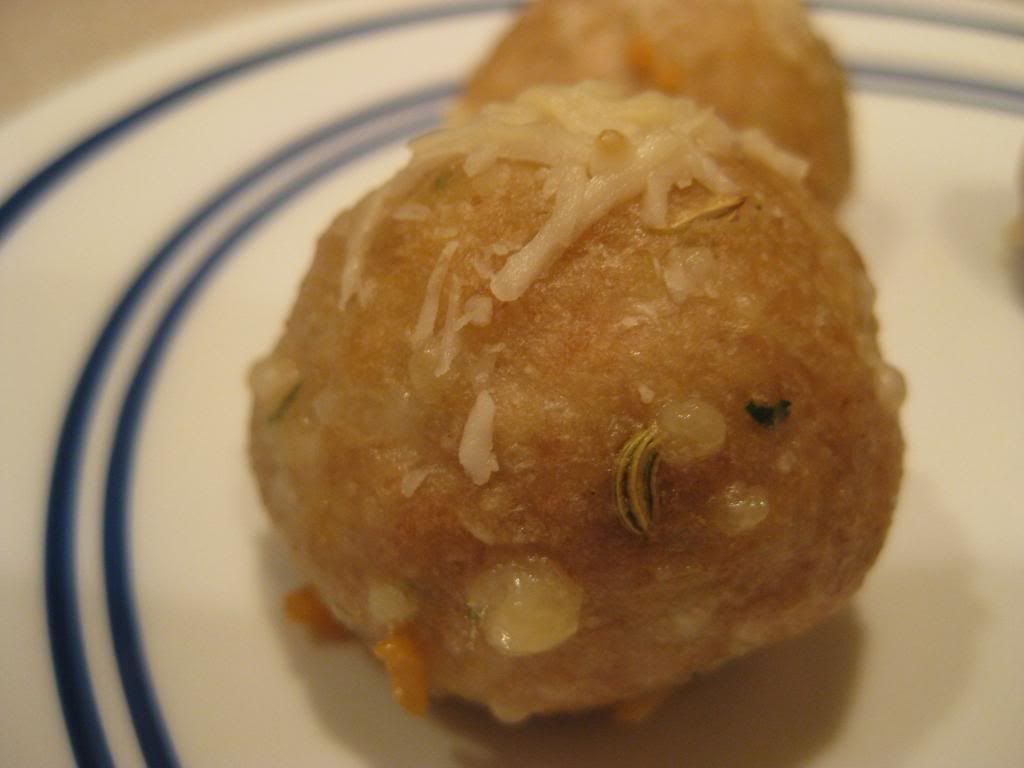
Once the meatballs are cooked, take the baking sheet out of the oven.  Using some extra Parmesan, sprinkle each meatball lightly with cheese and put the sheet back in the oven.  Cook for another 3 to 5 minutes, or until the cheese is golden.  Take the baking sheet out of the oven and let the meatballs cool. Serve and enjoy!


The End Result:


The chicken adds a new dimension to the traditional style of meatball, but it is still incredibly tasty.  Some of the classic ingredients are still in the recipe (breadcrumbs, eggs,) but one ingredient in particular (fennel seeds) really give the meatballs a different flavor that I've never tried in a meatball before.  Baking the cheese in the meatball and on top gives it a creamy taste, but it's not too overwhelming, like many cheeses could be.  Overall, a great healthy alternative to a traditional dish, that packs a flavor punch that you soon won't forget.

In the original recipe, it called for store bought pizza sauce and to place on top of each meatball and cook in the oven.  Since we are doing a healthier version of this recipe, the pizza sauce will not only cut out calories, but a lot of sodium that might be hidden in the sauce.  Also, the original recipe called for putting mozzarella cheese on top of the meatballs and cooking until the cheese has melted.  Cutting out some of these simple ingredients that might not be detrimental to the dish, will save extra calories in the end.

Thanks for joining us this week.  Check back next week as we continue to explore the culinary world.  Until then,

~Cheers!

Wednesday, January 30, 2013

Light Scalloped Potatoes

Good evening everyone! Okay...I guess if you live in the greater central Iowa area, it's not such a good evening. We currently find ourself buried in the midst of yet another winter storm - the 2nd in as many months - there ought to be a rule about that. As I look out the window all I can see is a wall of white and the trees whipping in the wind. Brr.

As our regular readers are likely well aware, one of my favorite tricks is to take a classic recipe and find a way to make it healthier. A few weeks ago, I found myself craving scalloped potatoes and ham. This classic, cheesy dish is a popular fall and winter recipe, but it can be call anything but healthy.

There were not a lot of 'healthy' scalloped potatoes and ham recipes to be found on the internet - or at least, none that I was particularly interested in. So, I took a different path. I found a recipe for healthy scalloped potatoes and simply added ham (brilliant, right?)


The Recipe: Light Scalloped Potatoes and Ham
Original Recipe Based On: Scalloped Potatoes from Eatingwell.com

What You'll Need:
(Serves 8)

2 Pounds Yukon Gold Potatoes, Peeled and Sliced 1/4 Thick
8 Ounces Diced Ham
2-3 Tablespoons Extra Virgin Olive Oil
1 Medium Onion (Diced)
3 Tablespoons All Purpose Flour
2 1/2 Cups Low Fat Milk
1/2 Cup Shredded Gruyere Cheese
1/2 Cup Bread Crumbs

Begin by preheating your oven to 425 degrees.

Toss the sliced potatoes in a large bowl along with 1 tablespoon of olive oil and a pinch of salt and pepper. Once all the potatoes are coated evenly, distribute them on a baking sheet lined with foil. Place the baking sheet(s) in the oven and let the potatoes roast for 20 to 25 minutes, or until they're light and golden brown. (Make sure to stir and rotate the potatoes about halfway through cooking).

While your potatoes are roasting, you can begin preparing the sauce. In a large (12 inch) non stick skillet, add 1 tablespoon of olive oil and heat until it begins to shimmer. Add the onion and cook until it becomes soft and golden brown, this takes about 5 to 10 minutes. Next, add a pinch of salt and pepper, along with the all purpose flour. Stir until the mixture thickens up into a sticky ball (this should happen quickly). Next, add the milk and use a rubber spatula or wooden spoon to work up any stuck on bits from the skillet. Stir this mixture occasionally while it simmers. Allow it to cook until the mixture thickens up. (When the sauce coats the back of the spoon, you've reached the desired thickness).

From here, you can choose two options to "dress up" your sauce. Either add fresh herbs such as thyme, parsley or sage to make the sauce a brighter, more "fresh & rustic" style, or add some shredded cheese to create a nice rich and creamy base. Because I'm not just cooking for myself, but also for my cheese-fiend wife, I opted to add cheese to the sauce. Regardless of the method you choose, remove the sauce from the heat and set aside. (If you'd like, you can add the ham to the sauce at the end, it saves a step in the next part of the recipe).

Once the potatoes are done, remove them from the oven and scoop them into a 2 quart baking dish. I like to add the ingredients in sections, to make sure everything is well incorporated (scoop or two of potatoes, a little pour of sauce, repeat). Also be sure to mix in your diced ham during this process as well. Repeat this layer process until all of your ingredients have been worked in and everything is evenly distributed.

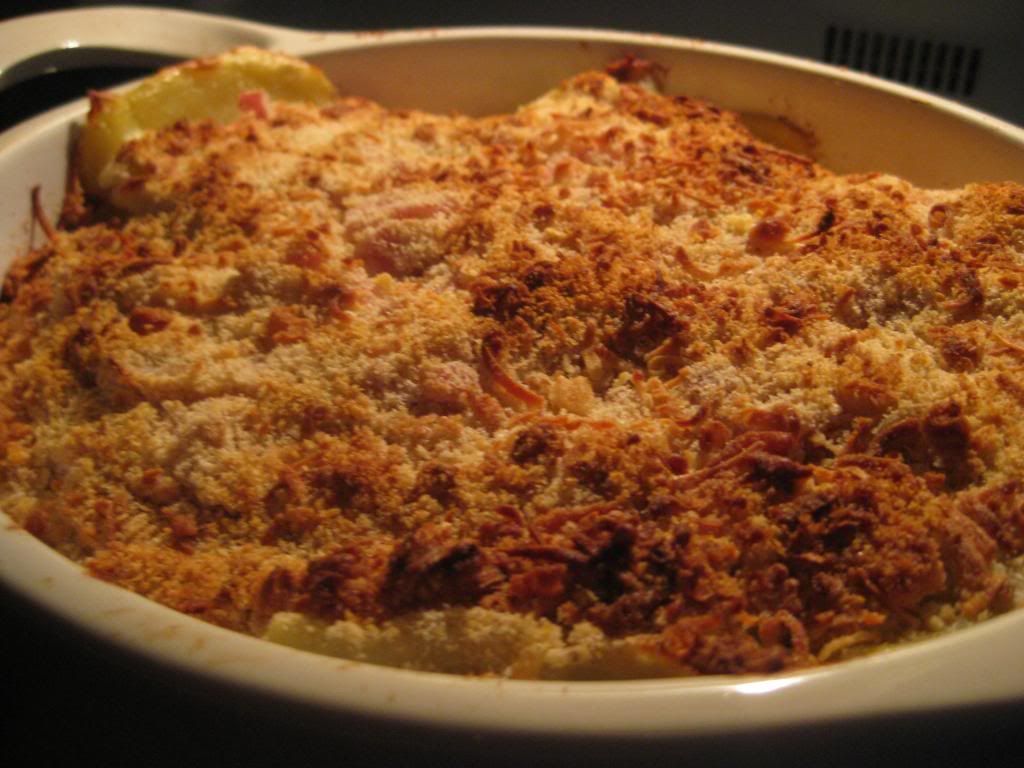
Top the baking dish off with the breadcrumbs and a light sprinkle of cheese (optional) and then place the dish in the oven (still at 425) for 20 to 25 minutes or until the breadcrumbs become a deep golden brown. Serve and enjoy!


The Results:


Cheese and potatoes are one of the culinary "sure hits" - you really can't go wrong when you combine the two. The trick is keeping a dish healthy, while still utilizing this great flavor combination. By making a sauce with cheese as an ingredient, instead of the base, you create the same great cheesy flavor, but avoid piling on unnecessary calories. Also, by using olive oil in place of butter in the baking process, you cut out lots of bad fat. At just under 300 calories per serving, this healthy and tasty treat is sure to hit the spot and keep you eating well during the winter months.

That's all we have for you this evening, Maggie takes to the kitchen tomorrow night to try her hand at a brand new recipe. Until then,

~Cheers

Wednesday, January 23, 2013

Slow Cooker Split Pea Soup

Good evening everyone! It’s been a frigidly cool week here the greater Midwest, we’re hitting high temps in the single digits and our wind-chill has frequently begun with (-). In other words, it’s soup weather!

I wanted to try something new this week, so I turned to an ingredient I’ve read about, but have never used – the split pea. Unlike some ingredients, which are named a certain way but are entirely different in their actual construction (for example, the chickpea, which is not a pea at all – but a legume) the split pea is in fact, a pea. Split peas are made by drying, peeling and splitting the seed from the pea plant. They’re durable and easy to cook with, making them the perfect companion to soups and stews.

We’ve got our new ingredient, let’s get to cooking!

The Recipe: Ham and Split Pea Soup
Original Recipe Found On: Foodnetwork.com & Eatingwell.com (this is a hybrid of two recipes I found)

What You’ll Need:
(Serves 6)

16 Ounces Dried Split Peas (one bag)
6 Cups Chicken Broth
2 Large Carrots (Chopped)*
1 Yellow Onion (Diced) *
2 Large Celery Hearts (Diced)*
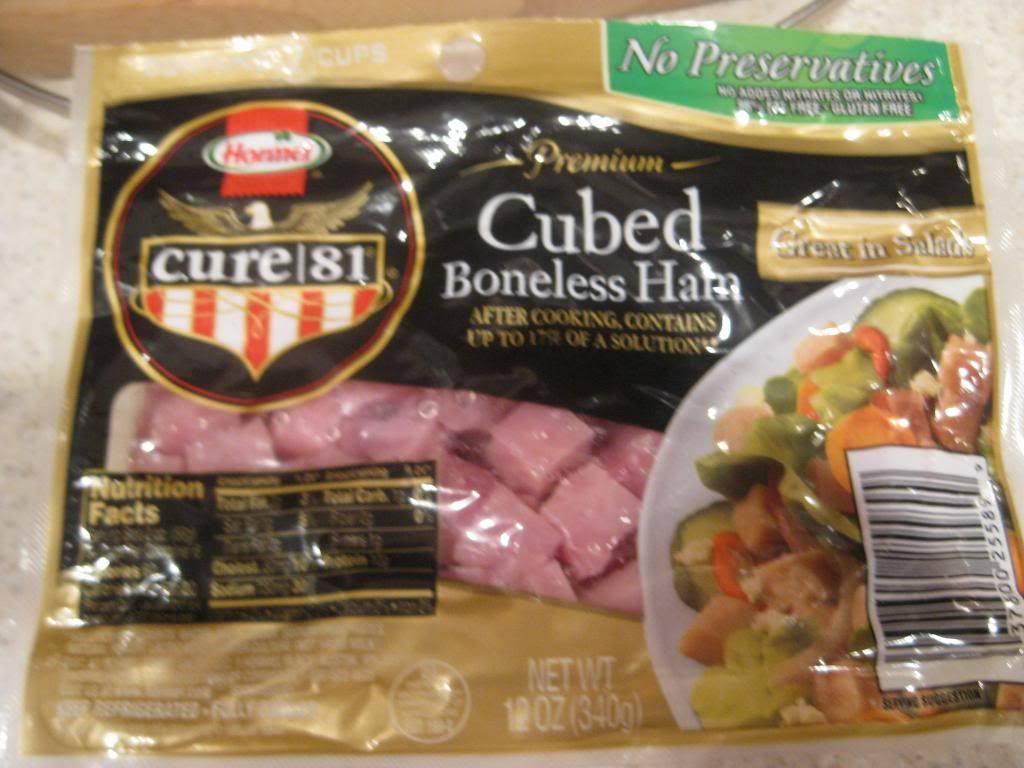
8 Ounces Diced Ham or Ham Steak (see photo)
Pinch Garlic Powder

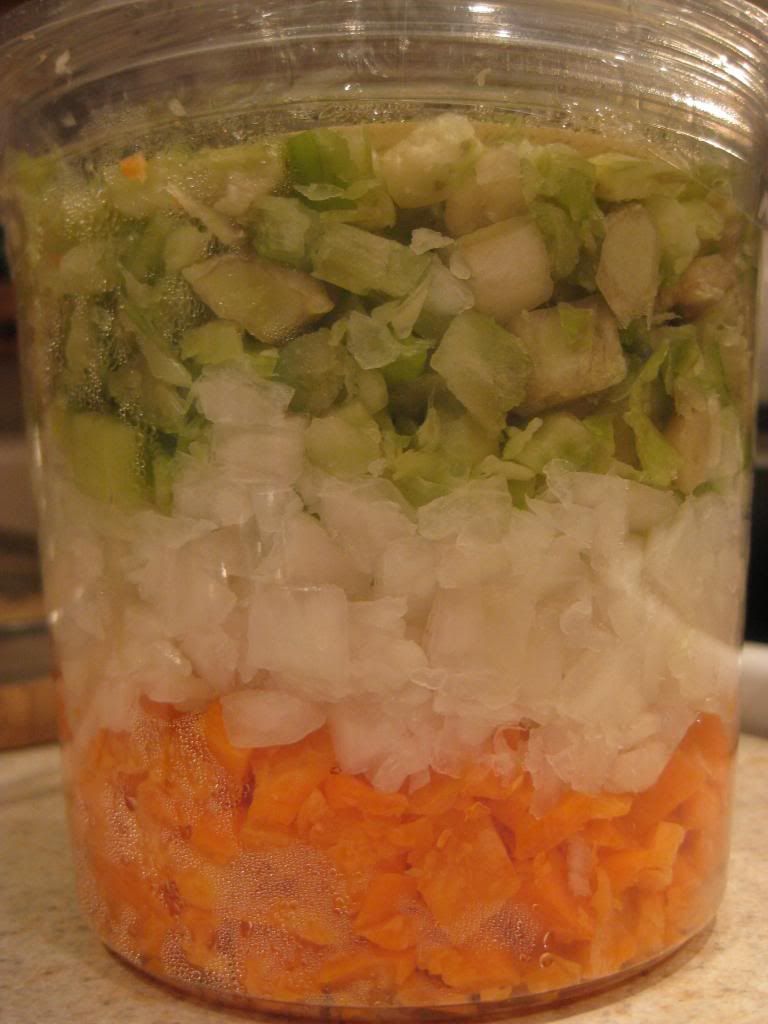
*Alternatively, you can pick up a container of mirepoix mix if your local grocery store sells it. These containers will have carrots, celery and onions already diced and measured out. It’s a great value and saves a LOT of time and prep work.

$3 and lots of time saved


This recipe is built for a slow cooker, but I’ve found that doing a little bit of prep work ahead of time can greatly improve the final flavors of any soup or stew that is destined for the slow cooker.

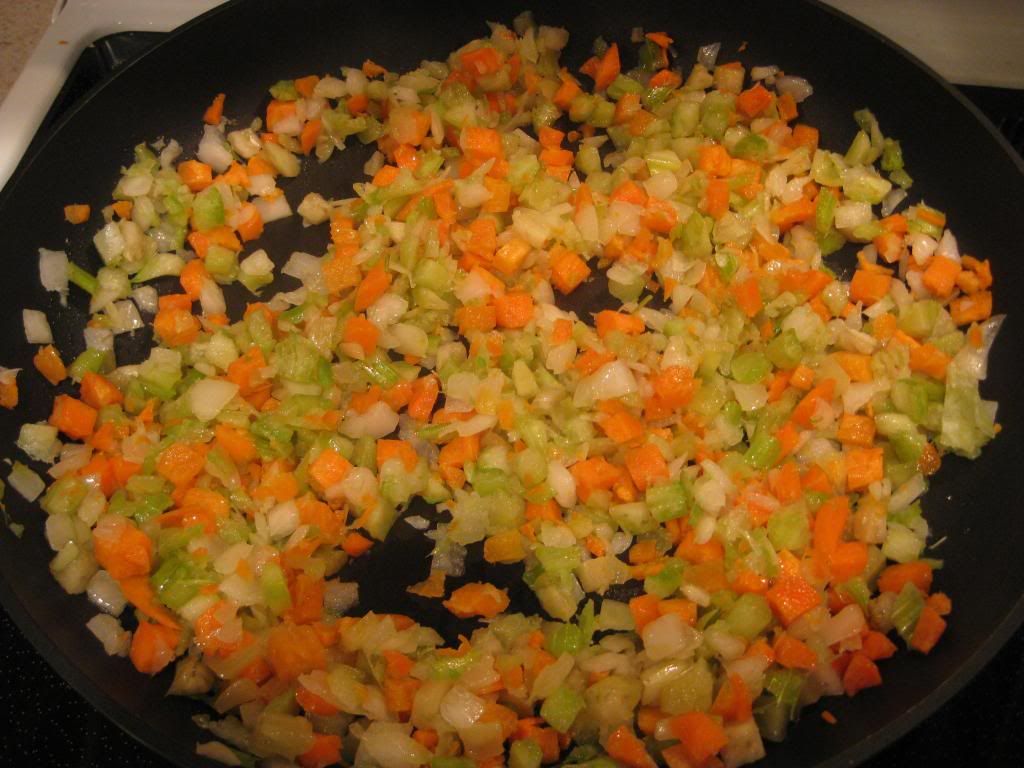
To begin, add 1 tablespoon of olive oil to a 12 inch non stick skillet placed over medium high heat. Once the oil begins to shimmer slightly, add in your carrots, celery and onion. Cook, stirring occasionally, until the veggies begin to soften. This takes about 5-10 minutes.

Take the time to sauté - you'll appreciate it later


You can just add these ingredients to the slow cooker without sautéing them first, but you’ll end up with boiled veggies. While there’s nothing wrong with that per say – you can extract a whole lot more flavor from these ingredients by giving them a quick fry in the pan.

Next, add your split peas, chicken broth, ham and sautéed veggies to a large (4 to 6 quart) slow cooker. Give everything a good stir and set the slow cooker on low. Allow the mixture to cook for 6 to 8 hours.

8 ounces and ready to go right in the slow cooker


Once everything has been stewing the day away and you’re ready to serve, give the mixture a good stir, serve and enjoy!


The Results:

First - no pictures of the final dish because...well, it doesn't translate well to photo. Let's face it, it's a pea based soup with a chicken stock broth. The end result is sort of an olive looking dish that is, admittedly, not the most appetizing thing to look at. Between the name (Split pea soup...pea soup? Ewww) and the color, this dish is being dealt a tough hand. That being said, I'd encourage you to overlook the name and the color - the final dish is delicious.


There’s something beautiful about a simple dish like this. Easy ingredients, simple flavors – yet it still achieves a warm and filling result. (A scant 220 calories per serving is a nice perk too!)

I’m pleased with my first encounter with split peas. They have an earthy – almost lentil like – flavor in comparison to the standard pea, but they’re slightly sweeter than most legumes that typically accompany ham in soup.

I adapted the original recipes that called for 4 cups broth and 4 cups water, and I’m glad that I did. I don’t like adding water to soups – I feel it dilutes the flavors and doesn’t really add anything but volume to the dish. By swapping out 4 cups water for an equal amount of chicken broth, your can really boost up the base of this dish, helping create a more “whole” flavor.

Tuesday, January 22, 2013

A Homestyle Classic...In Half the Time!

Good evening everyone!  Everyone has that favorite recipe, that is so rich and delicious and has a laundry list of ingredients to create.  Yet, it takes hours to create so it's only reserved for special occasions.  For myself, one of those recipes is beef stroganoff.  I remember the recipe being introduced into our family recipe repertoire and how excited I got when we made it.  I would often help with the recipe because it took at least an hour and a half to make and as many hands that could help as possible, the smoother the dish was made.  Tonight, I'm recreating this dish, but instead of taking an hour and a half to create, I'm pairing it down to 40 minutes and a few key ingredients.

The Recipe:  Quick Beef Stroganoff
Original Recipe Found In:  Cooking Light, January 2013

What You'll Need:
6 1/2 Cups Water, divided
4 Ounces uncooked Egg Noodles
1 Pound Flank Stead, trimmed
1 Cup chopped Onion
1/4 Teaspoon hot Paprika
1 (6 Ounce) package pre sliced exotic Mushroom Blend
1 Cup lower-sodium Beef Broth, divided
5 Teaspoons All-Purpose Flour
1/3 Cup fat-free Sour Cream
3 Tablespoons thinly sliced Green Onions
1 Tablespoon Butter
2 Tablespoons chopped fresh flat-leaf Parsley

To start, bring six cups of water to a boil in a large saucepan.  Once at a boil, add the egg noodles and cook the noodles for five minutes or until al dente.  Drain in a colander and set aside.

When the pasta is cooking, cut the trimmed steak across the grain into 1/4 inch wide strips, then cut these strips into 2 inch pieces.  The smaller these pieces are, the easier they are to cook and it won't add extra minutes to this already time-sensitive dish

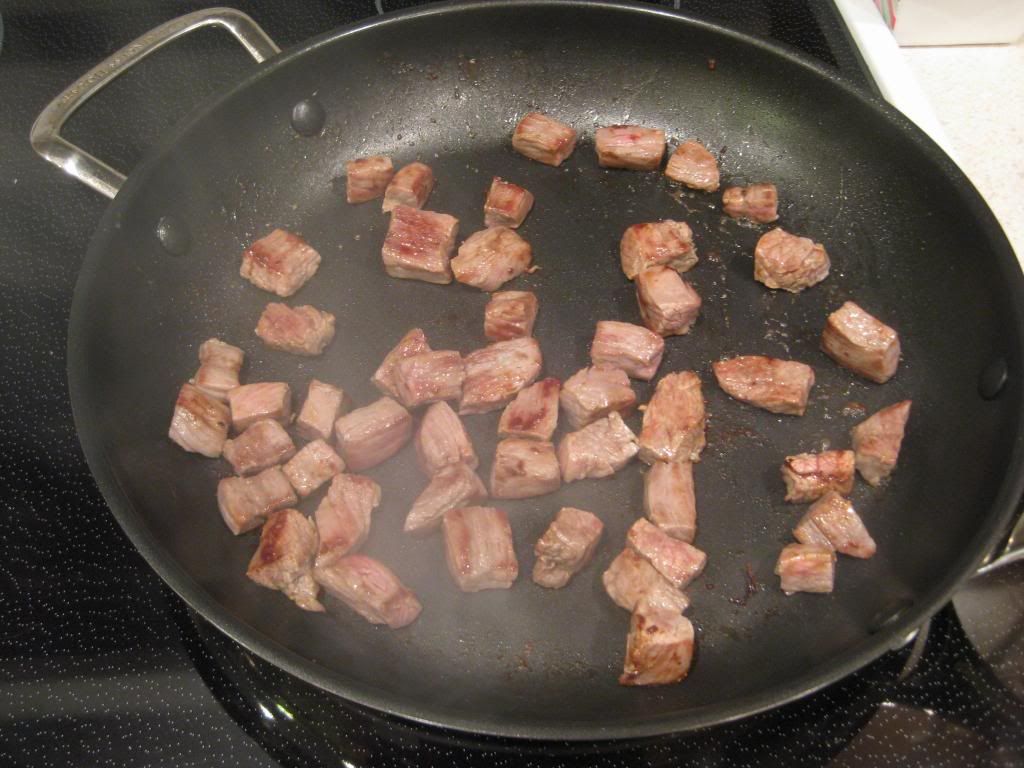
Tender pieces of heaven

Next, heat a large skillet over medium-high heat and coat the pan with cooking spray.  Add the beef to the pan and sauté for four minutes, or until the beef is browned.  Once the beef is cooked thoroughly, remove it from the pan, place on a warmed plate, and tent with aluminum foil.  This will help keep the juices in and keep the beef warmed until it is needed later on in the recipe.  To the skillet, add the chopped onion, 1/2 teaspoon black pepper, 1/2 teaspoon salt, paprika, and mushrooms.  Saute this combination until the onion begin to soften, about four to five minutes.  Reduce the heat of the skillet to medium.

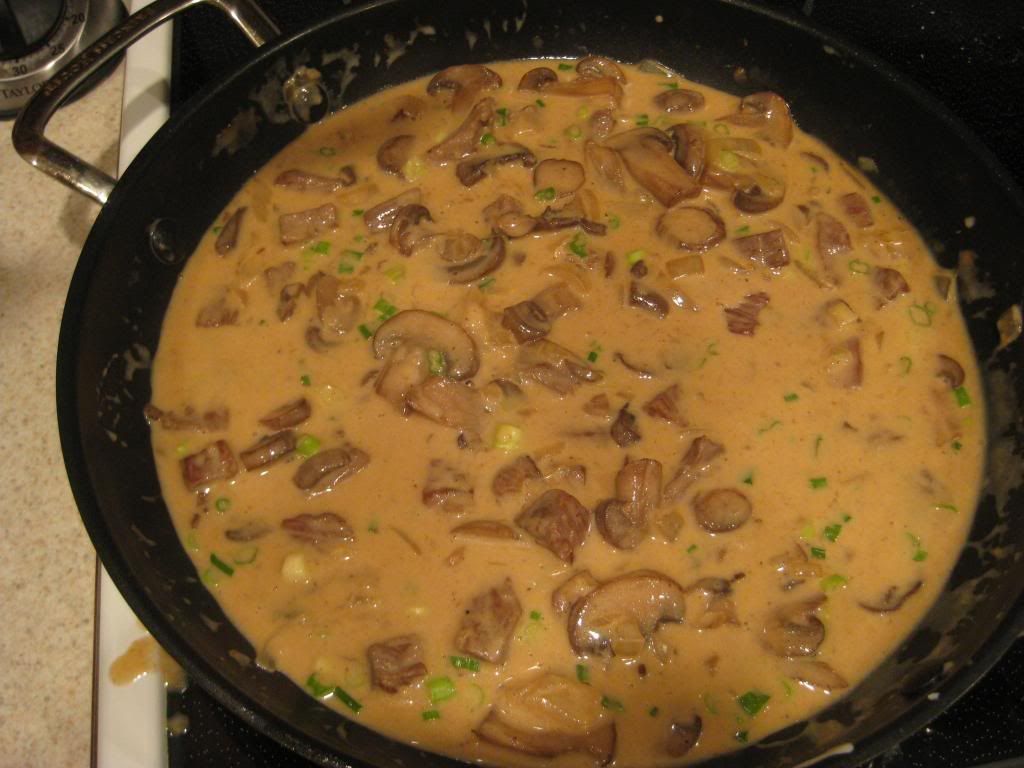
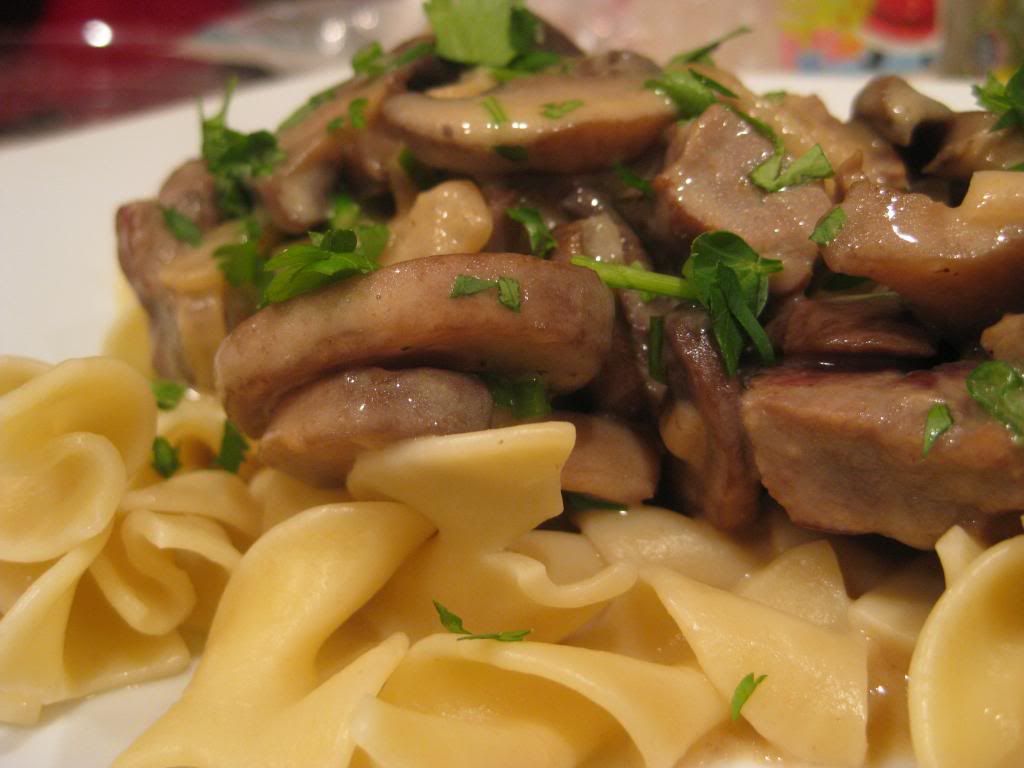
In a small bowl, mix 1/4 cup of the beef broth and flour, stirring with a whisk until the broth and flour are combined.  Add the broth mixture, beef, remaining 3/4 cup of beef broth, and remaining 1/2 cup of water to the skillet.  With this liquid, be sure to scrap the pan to loosen any browned bits.  Cover the skillet and cook for eight minutes or until the sauce thickens.  Once the sauce has cooked up, remove the skillet from the heat.  Stir in the sour cream, green onions, and butter until everything is melted and well combined.  Serve the beef sauce over the egg noodles, sprinkle with parsley, serve, and enjoy!

I could coat this sauce over anything and it would still be just as delicious!

The End Result:


This recipe was just like the version I had growing up.  Although the sauce was not as thick as I would have like it to be, it was creamy and had an intense flavor from the beef cooking with the beef broth and water.  It seems so simple and yet, it makes the dish so flavorful from that easy step.  The sour cream and butter really harmonize all those ingredients in the sauce, but it definitely doesn't weigh it down.  Serving the sauce with egg noodles has always been my preferred method with beef stroganoff.  There are other ways to serve this delectable sauce, but this version really coats and clings to the noodles.  And I won't have to feel guilty eating this dish:  at a whopping 357 calories, it's the perfect dish to serve any night of the week!

Join us tomorrow as Tyler creates the perfect wintertime soup.  Until then,

~Cheers!

Thursday, January 17, 2013

The Melding of Two Worlds

Greetings and welcome back to another evening here at Out of the Culinary! When I cook, I love when I find recipes that have two distinct flavors from different styles of cooking that merge into one recipe.  It's the versatility of those ingredients that makes cooking so enjoyable and satisfying.  Tonight's recipe matches that exact challenge: take a traditional Italian dish, throw in a distinctly Spanish ingredient, to produce something completely unique, with, hopefully, strong results.

The Recipe: Chorizo Carbonara
Original Recipe Found In: www.jamieoliver.com

What You'll Need:

11 Ounces Uncooked Penne
2.5 Ounces Chorizo
Two sprigs fresh Rosemary
4 cloves Garlic
1.5 Cups Parmesan Cheese
1 Tablespoon Lemon Juice
1 large Egg
2 Tablespoons fat-free, natural plain Yogurt

To start, bring a large saucepan of water to boil, add salt if necessary. Add the penne and cook according to package directions. After the noodles are cooked, reserve a cup of the pasta water and set aside. Drain the water from the noodles in a colander and set aside, tenting the colander with aluminum foil to keep the noodles warm and to prevent them from sticking to one another.

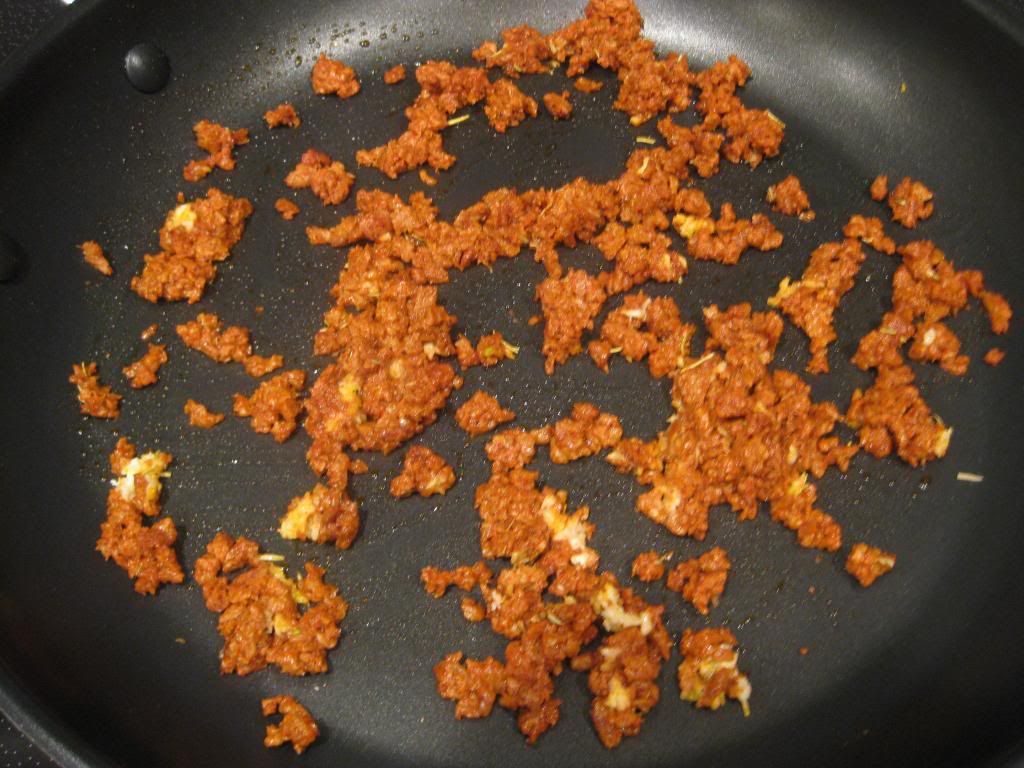
Next, heat a large skillet over medium-high heat with a tablespoon of olive oil. On a cutting board, finely slice the chorizo and rosemary. The amount of chorizo might scare you, since there's not a lot of it.  But if you've cooked with chorizo before, you know that a little chorizo goes a long way and you don't want to overwhelm the entire dish with a hot, spicy mess.  Once the skillet is hot, add the chorizo, rosemary, and a pinch of pepper. Then, using a garlic mincer, add the garlic to the skillet and cook all the ingredients until the chorizo is lightly golden and heated through, about three minutes.

The smell that rises from these flavors blending together is quite fantastic.

In a small mixing bowl, whisk together the egg, lemon juice, yogurt.  Be sure there aren't any lumps of yogurt in the final result.  Pour the egg mixture into a larger mixing bowl with the Parmesan cheese in it and stir until well combined.  


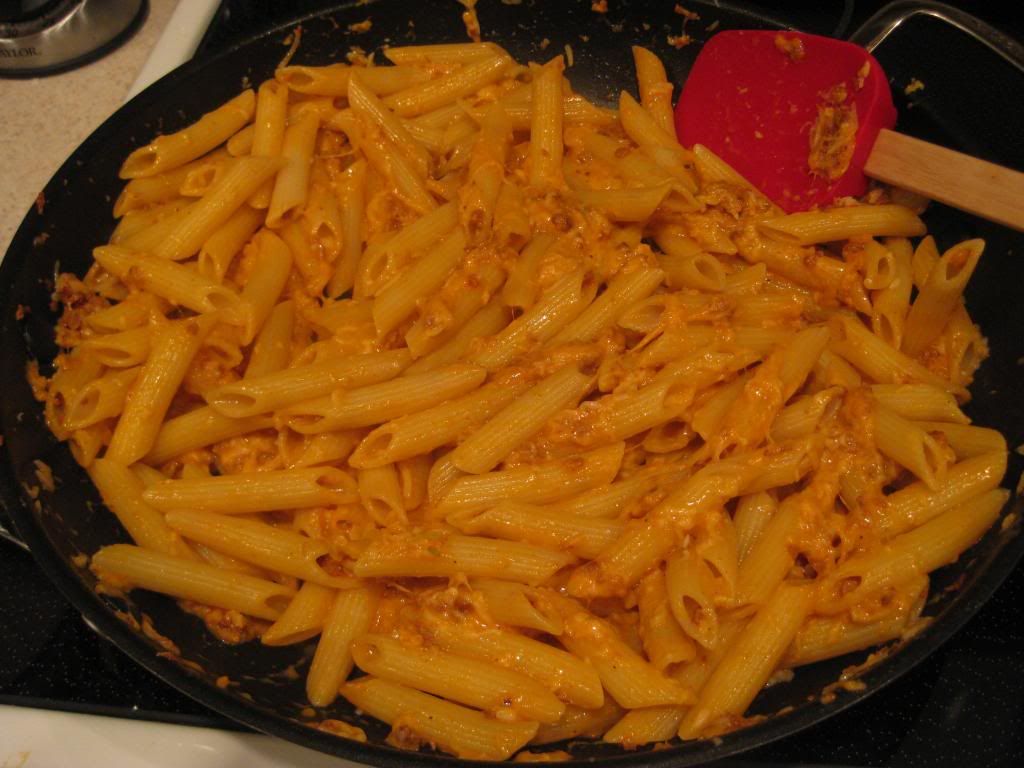
Add the drained pasta to the skillet with the chorizo mixture and mix well. Stir in the cheese/egg mixture until creamy, adding small portions of the reserved pasta water, if the mixture becomes too thick and the cheese doesn't melt evenly. Serve and enjoy!


The End Result:


The flavor of this dish is beyond anything I've made.  I was skeptical cooking with such a little amount of chorizo, but the amount I added was just the right amount.  It didn't become too overwhelming, yet it still gave a good amount of heat.  Added with the rosemary and garlic boosted that flavor that I haven't had yet in a recipe.  Unfortunately, my cheese didn't melt evenly, like I would have wanted too, but it still tasted great.  I would have added the cheese/egg mixture in small portions to ensure everything melted consistently.  The penne noodles soaked up all that good flavor and kept it in, giving every bite of the carbonara a fantastic flavor.  Overall, a superb dish that was easy on the pallet and tasted quite amazing.

That's all we have for you this week.  Thanks for your continued support and sharing our interest in cooking.  Join us next week as we share our culinary adventures.  Until then,

~Cheers!

Wednesday, January 16, 2013

Crispy, Crunchy, Crab

Good evening everyone! It seems like every chef, no matter the experience level, has that one ingredient that they've just never been able to get right. No matter how many times you try to make it, or how many different ways you attempt, whenever this ingredient comes up, something goes wrong. For the longest time, Maggie struggled with fish recipes - never quite hitting the execution she was looking for. I struggled for a while trying to get a breading technique down to a science.

Eventually, both Maggie and I mastered our tricky ingredients - a sign that persistence pays off! That doesn't mean we're without new "tricky" ingredients, however. Despite my best efforts, I've never been able to pull of a crab dish to my liking. Additionally, frying things in hot oil has been a bane of my cooking experience as well. Tonight, I'm meeting both of these challenges head on. We're using crab...and we're frying it in oil.

Bring it on.

The Recipe: Crab Balls With Salsa
Original Recipe Found In: Jamie's America

What You'll Need:
(Serves 4)

3/4 Cup All Purpose Flour
3 Cups Bread Crumbs*
3 Large Eggs
14 Ounces White Crabmeat
2 Lemons (1 cut into wedges, 1 zested and juiced)
Fresh Italian Parsley, Chopped Fine
1 Quart Vegetable Oil
Cayenne Pepper (Pinch)

*Note: This quantity is if you're using 'fresh' or homemade bredcrumbs. If you're using store brand or packaged breadcrumbs, 1 cup will more than suffice

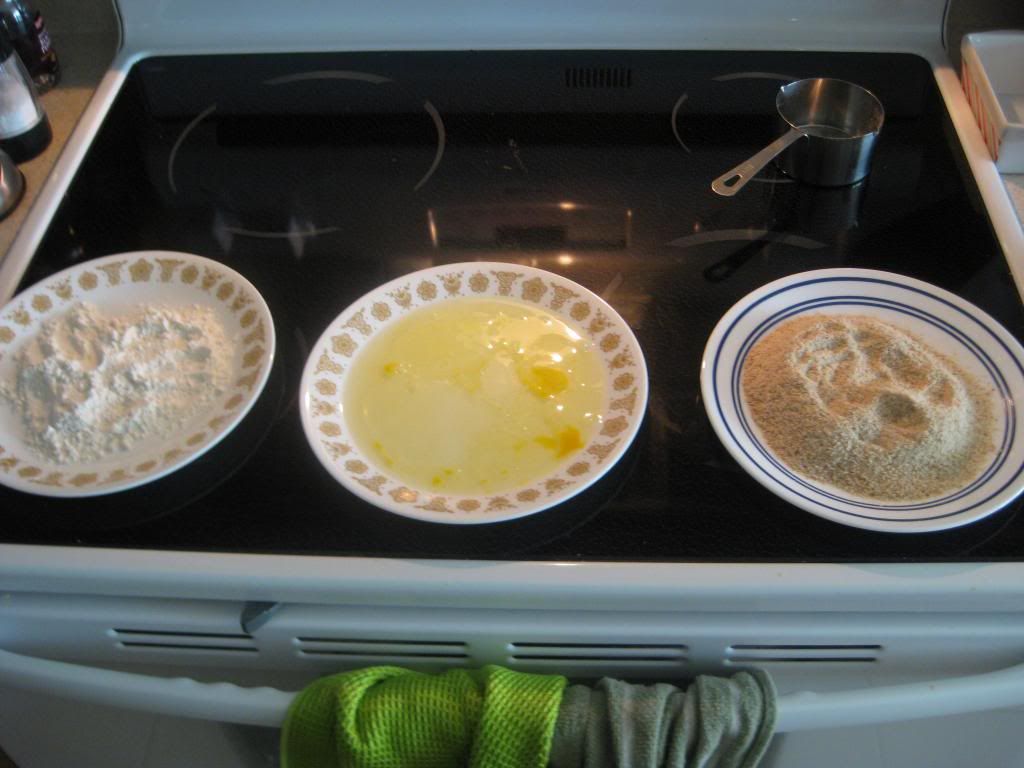
To begin, set up your workstation much like you would if you were doing one of our countless breading dishes. Line up 3 large plates, flour on the first plate, egg white on the second (save the yolks, keep those in a bowl) and breadcrumbs on the third.


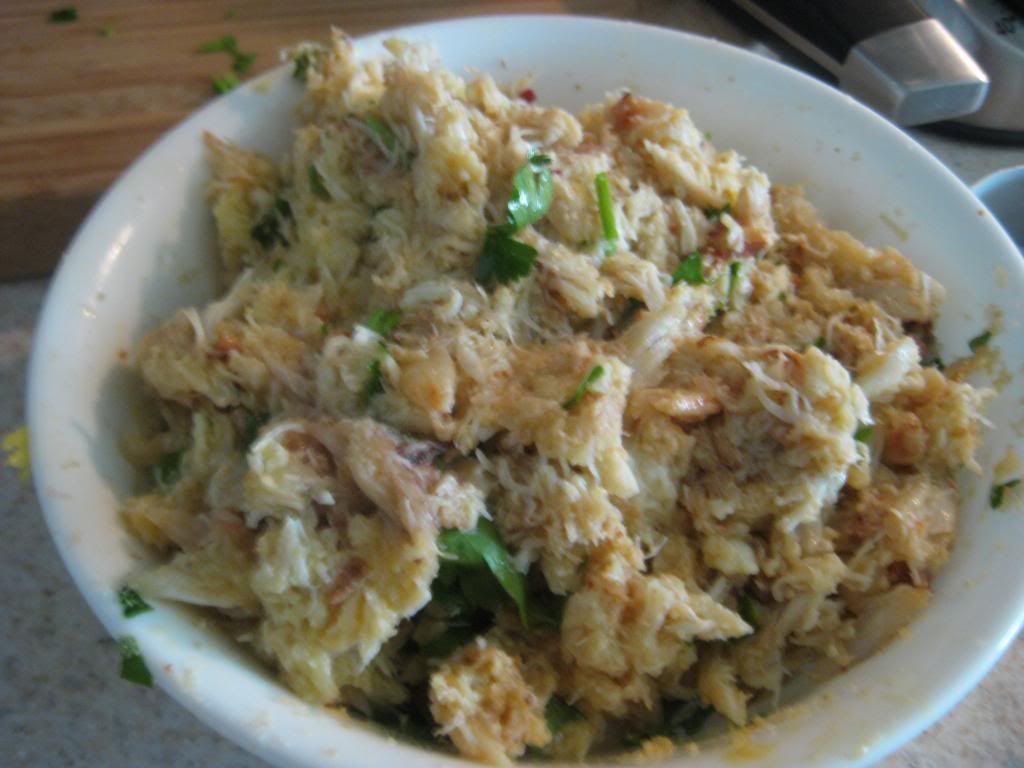
Add the crab meat to the bowl of egg yolks and add the lemon zest and fresh parsley along with a pinch of salt and pepper and the cayenne. Using your hands, mix everything together. Next, (after washing your hands) grab a small handful of breadcrumbs and add them to the mixture. You want to add just enough to bind everything together, but try to avoid making breadcrumbs the star of the mixture. Divide this mixture into 4 equal piles.


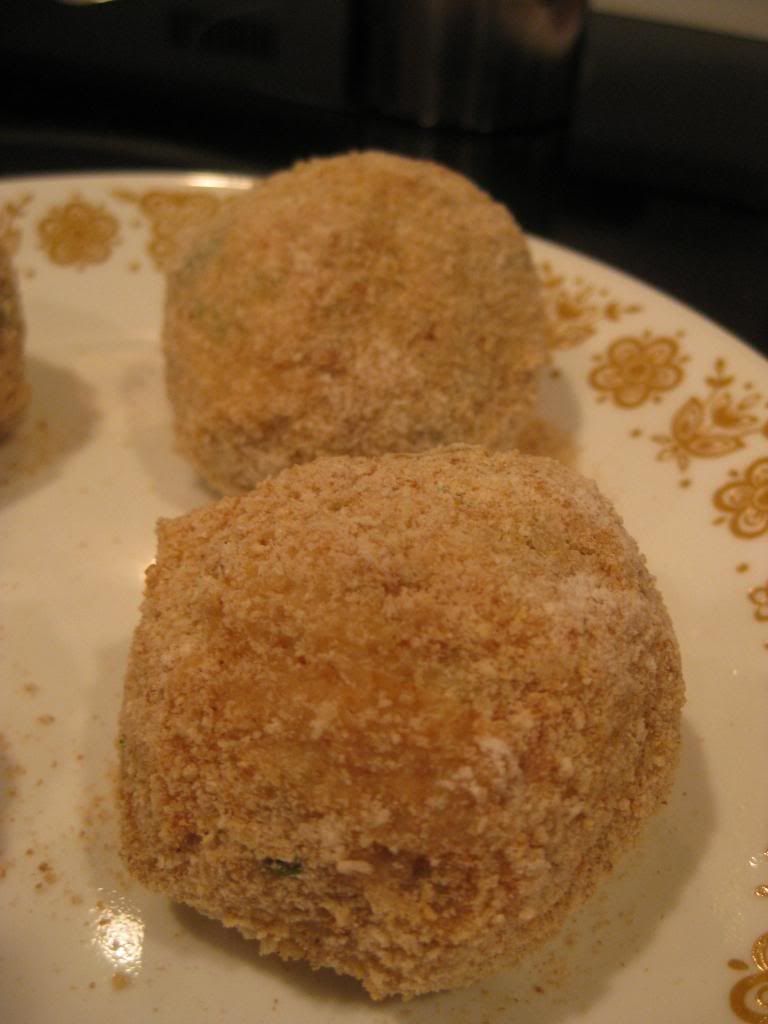
Grab one of the piles and work it into an orange sized ball with your hands, making sure to pack them nice and tight. Next, roll the ball in the flour mixture, then carefully roll it in the egg white mixture before finally rolling it in the bread crumb mixture to form an exterior breading. Make repeat this process until all 4 balls are covered completely in breadcrumbs.


If you have time, set the balls on a plate in the refrigerator for about an hour. This helps them "firm up" a little prior to cooking. It's not required, but it may make the next steps a little easier.

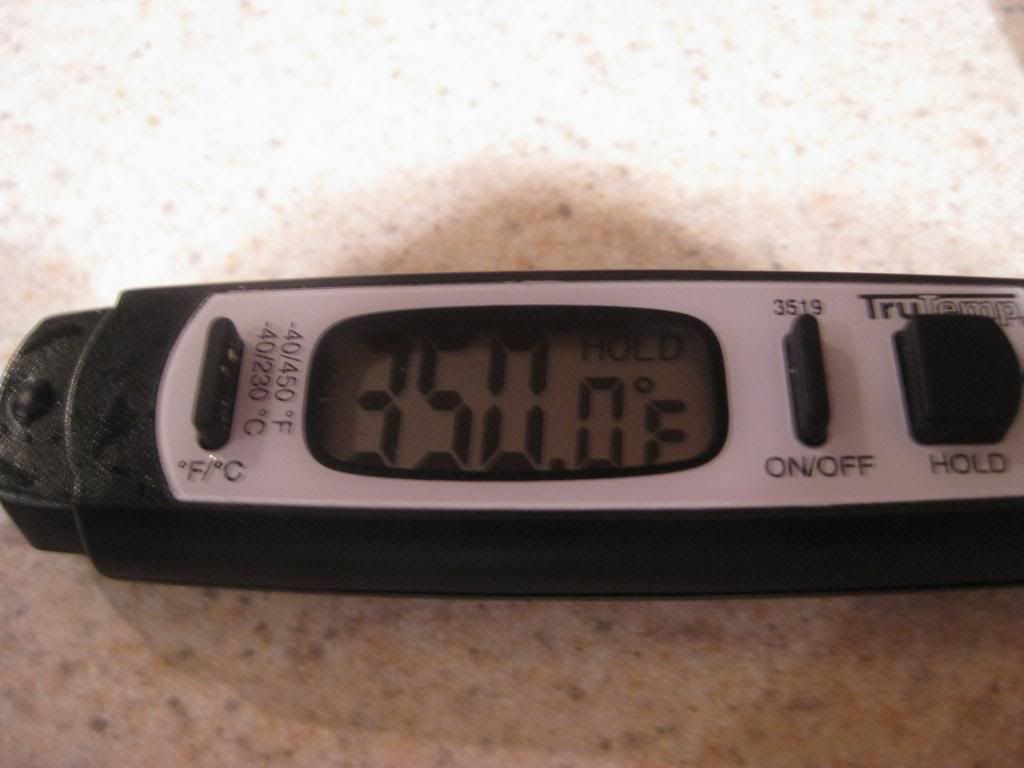
Once you're ready to cook, add your vegetable oil into a deep sauce pan or pot and set it over medium heat. Bring the oil up to 350 degrees (if you don't have a kitchen thermometer - get one - it's much too difficult to gauge oil temp without it).


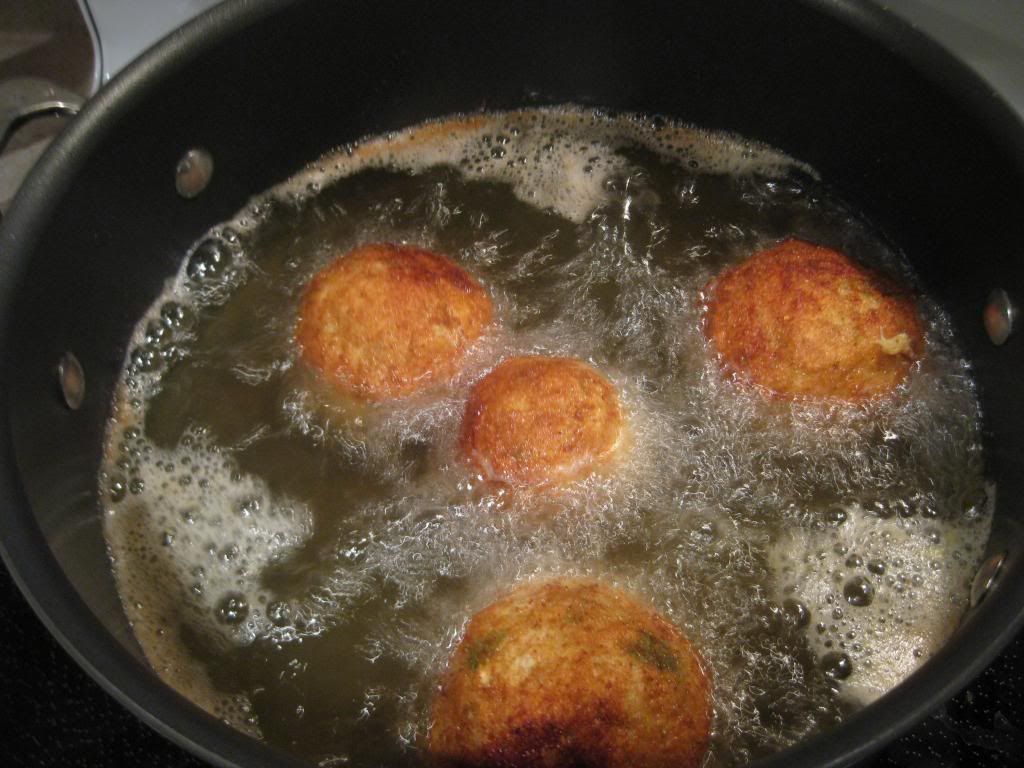
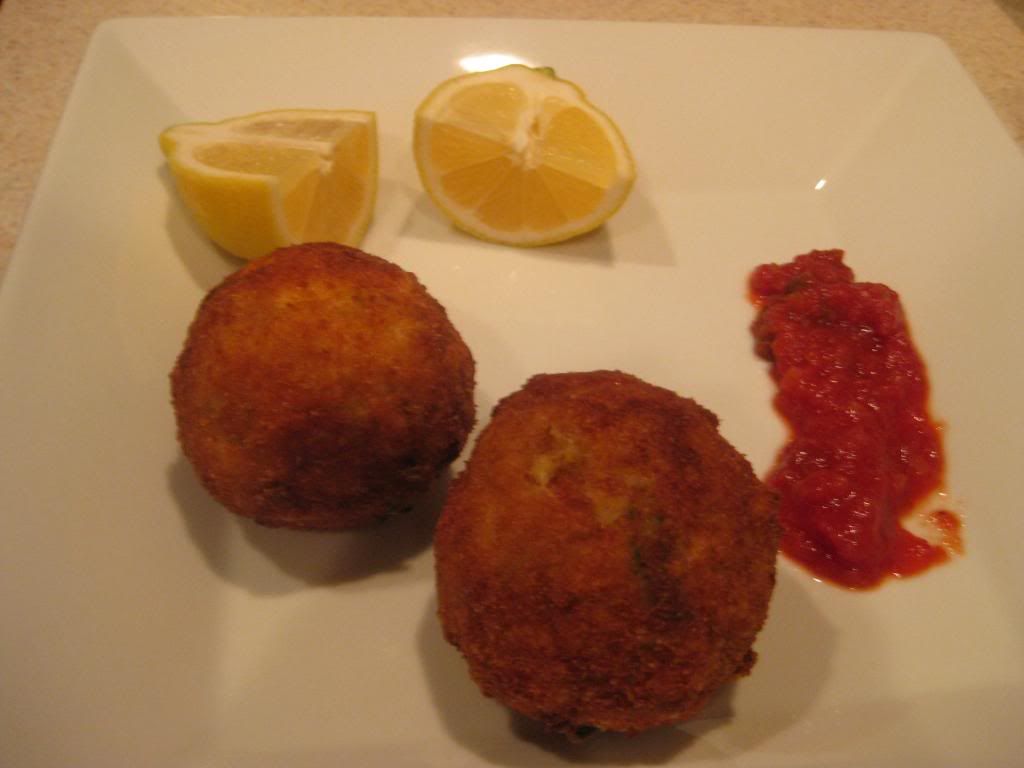
Once your oil is up to heat, carefully add the crab balls to the pot and allow them to fry for about 5 minutes or until they turn nice and golden brown. Use a strainer or perforated spoon to pluck the balls out of the oil and set them on a plate lined with paper towels to absorb any excess oil that drips off. Serve immediately with a side of fresh salsa and a lemon wedge. Enjoy!


The Results:


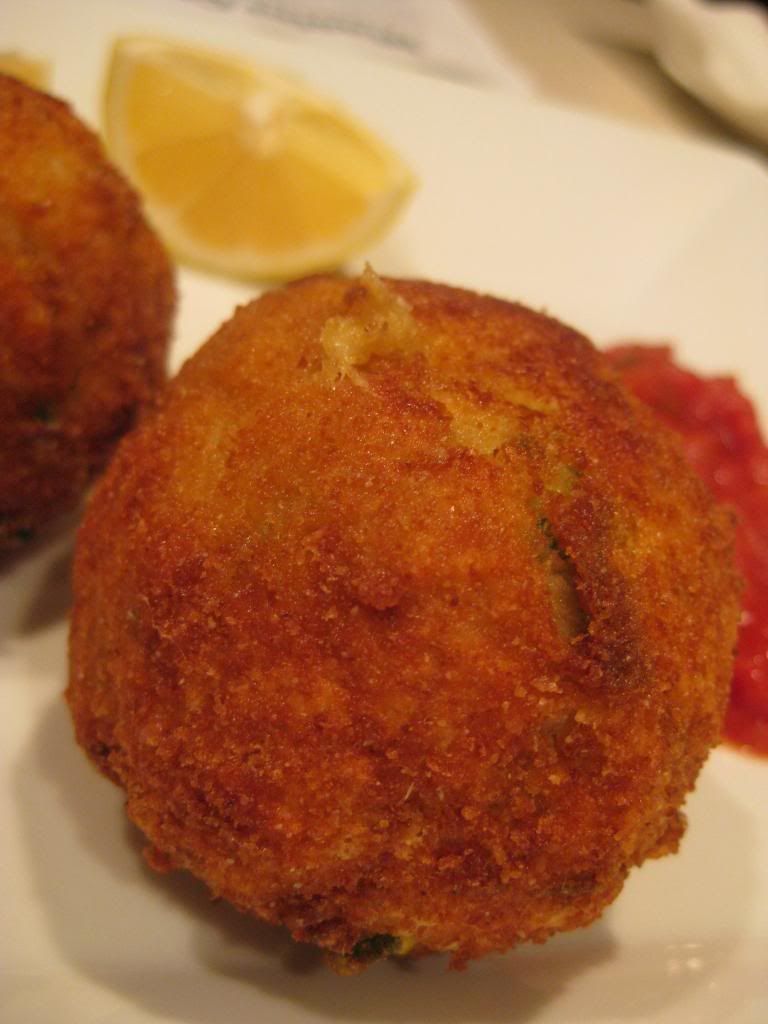
Crab - consider yourself conquered! These little breaded balls of wonder are full of flavor that allows the crab meat to shine alongside the parsley, lemon juice, cayenne filling. The balls are nice and crunchy on the outside while being delightfully soft on the inside.

While I was initially skeptical about serving these with salsa, I'll say it is almost a necessity with the dish. The flavor perfectly compliments the crab ball and really adds to the final dish. Don't omit the salsa, embrace it! (Metaphorically of course - don't actually hug your salsa).

Finally, the last bane of my cooking experience - oil frying - we can also strike this one as conquered. By simply adding a thermometer to the equation, it was easy to determine when the oil hit 350 and when it was time to start cooking. No fires, no smoke - no disaster. Hooray!

That's all we have for you this evening, Maggie takes to the kitchen tomorrow night with a brad new dish of her own. Until then,

~Cheers


Thursday, January 10, 2013

Slow Cooker Lasagna

Good evening everyone! We fans of being ingenuity here at Out of the Culinary – if we can find an efficient and still-as-effective way to cook up a classic dish, we’ll almost certainly give it a try. For some recipes, ingenuity is a necessity. For example, this week I decided that a nice lasagna recipe would really hit the spot. The only problem was any recipe I dug up took longer to make than I had available this week. I needed to find a lasagna recipe that would deliver on the flavor, but cut out the prep time entirely.


Enter Alton Brown and his “Good Eats” cookbooks. In the third volume of said cookbook, Alton has a recipe for slow cooker lasagna that fit the bill perfectly. While my dish tonight isn’t a duplicate of his recipe, it is heavily inspired by his ingenuity. So, hat tip to Mr. Brown and his ingenious method of taking a time intensive dish and making it weeknight friendly. Let’s get cooking!


The Recipe: Slow Cooker Lasagna
Original Recipe Found In: Good Eats 3


What You’ll Need
(Serves 6)

1 LB No Boil Lasagna Noodles*
1 LB Ground Hamburger (lean – 93/7 or 90/10)
1 LB Ground Pork
2 Cups Low Fat Mozzarella Cheese (Shredded)
Italian Seasoning
1 Large Zucchini, Sliced Thin
14 Ounces, Canned Diced Tomatoes


*We profiled no boil pasta a while ago HERE – give it a look if you’re wondering how exactly this incredible little ingredient works. For our purposes, no boil noodles are perfect as we can cut out all the prep time of preparing the pasta and move right on to building the dish.

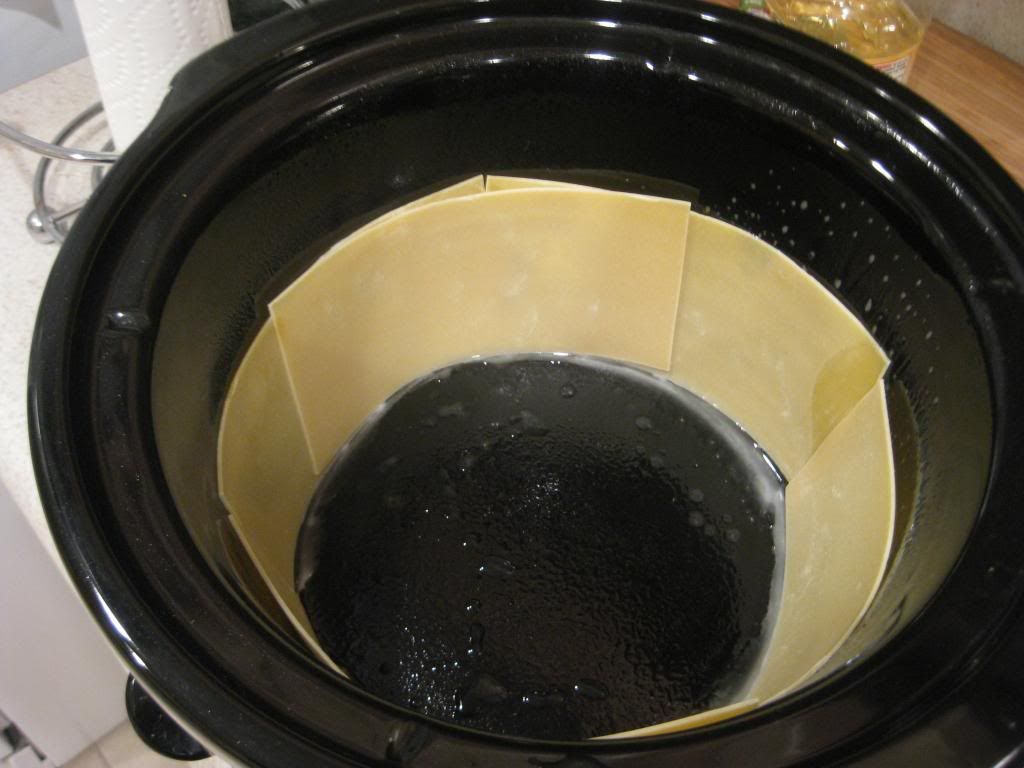
Begin by filling a rimmed backing sheet ¾ full of hot water. Lay around 4 or 5 lasagna noodles on the tray in the warm water for about 10 minutes to allow them to soften. We need to surround the edges of the slow cooker with a pasta shell, and since dried pasta isn’t exactly known for its flexibility – we have to soften it up first.

While the pasta is soaking, give your slow cooker a light spray of cooking oil (alternatively, you can rub it with a olive oil covered paper towel) – this just ensures that the pasta wont stick to the sides of the slow cooker while cooking.

After about 10 minutes, your pasta should be nice and pliable. Set the pieces horizontally in the bottom of the slow cooker and line the walls (essentially creating a well of noodles) – see the picture below for reference.


Now you can begin building your lasagna. Just like a standard lasagna recipe, we’re going to be working in layers. Begin by spreading a thin layer of the diced tomatoes on the bottom of the slow cooker. Cover this layer with a layer of lasagna noodles. (You can cross them in an ‘X’ pattern or lay them lengthwise across – just try to cover the entire layer below. If you have gaps, break one noodle into smaller pieces and use the pieces to cover any smaller cracks.)


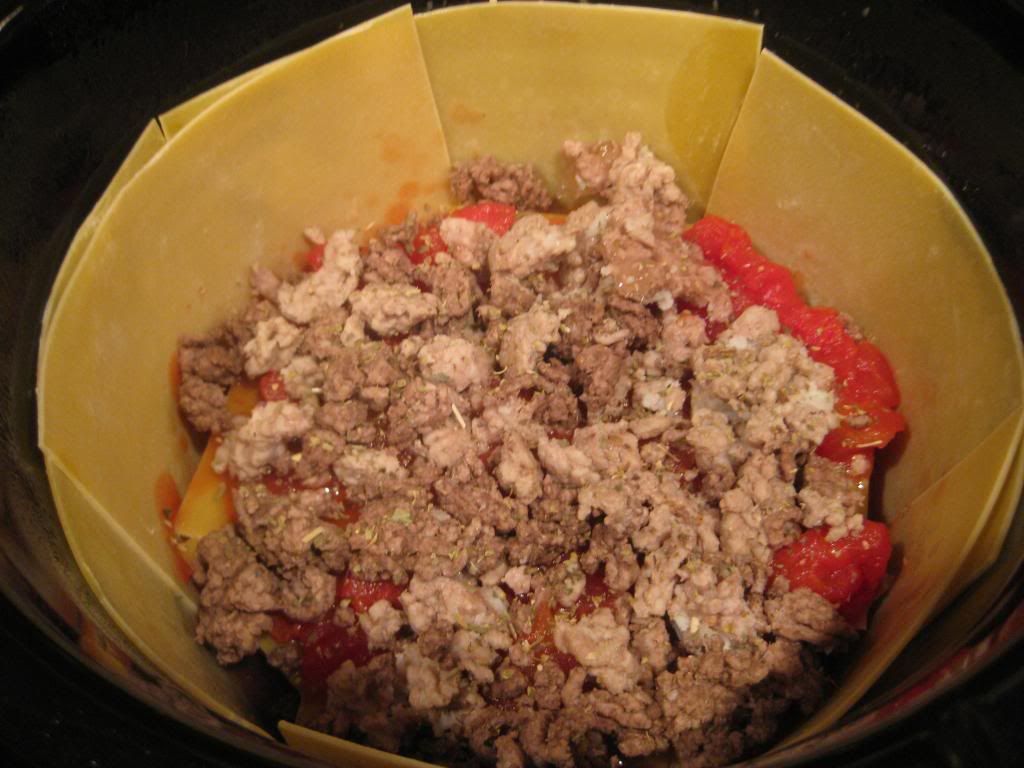
Add another light layer of diced tomatoes on top of the noodles, then scoop in healthy portion of the ground pork and ground beef. I found it was easier to brown the pork and beef the night before and store them both in the same bowl. This way you can simply scoop from one dish and the meat will already be lightly mixed.

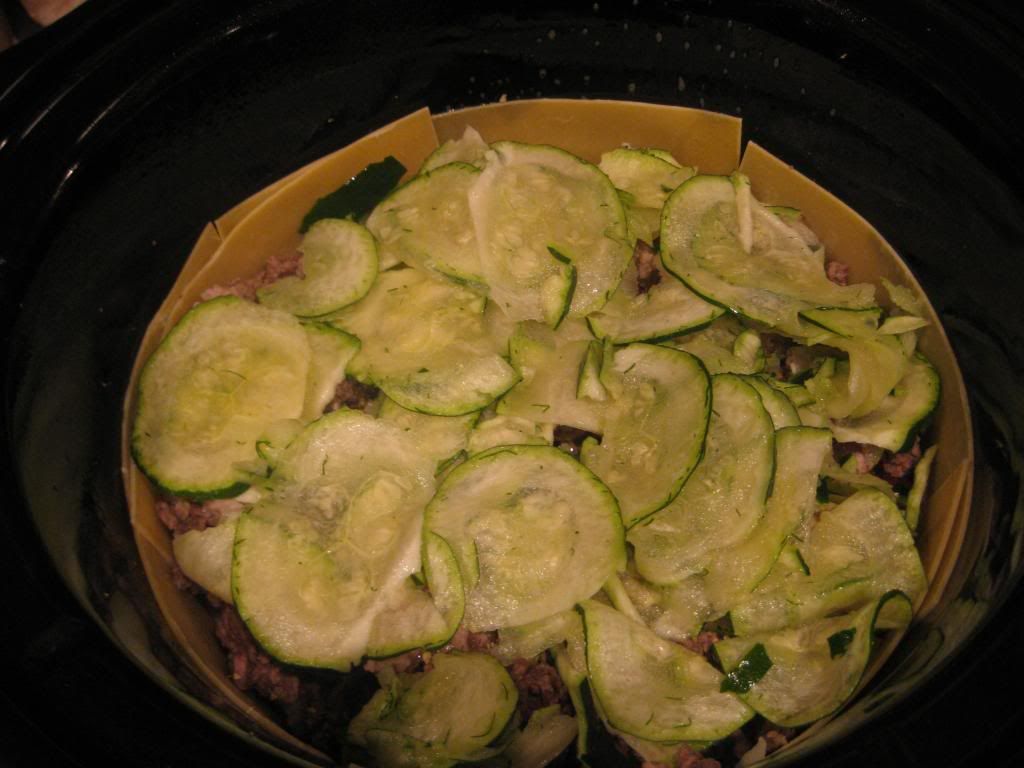
Top the meat layer with a few generous pinches of Italian seasoning. Next, add a layer of the sliced zucchini.


Zucchini may seem like an odd companion to lasagna, but our past cooking experiences with pasta have found that this little green veggie coexists quite well with meat/cheese/tomato sauce dishes. The fresh flavor and bright color of the zucchini also helps balance out the otherwise heavy flavors of traditional lasagna.

Top the zucchini layer with a layer of cheese and then repeat the process from the beginning. A layer of lasagna noodles, tomatoes, meat, seasoning, zucchini, cheese, noodles – etc. until you’ve either reached the top of your noodle wall (the noodles you lined the slow cooker with in the first step) or until you’ve run out of ingredients (just be sure to reserve enough noodles and cheese to make a top layer). You can everything a light push from time to time to compact ingredients if you’re slow cooker is filling up fast.

Once you’ve filled the slow cooker to where you’d like it, top everything with one last layer of noodles and top the noodles with another sprinkling of cheese and a pinch of Italian seasoning.

Place the lid on your slow cooker and set it to low. Allow the lasagna to cook for 3 to 5 hours before serving.

You may be wondering – “How will the noodles cook without any extra liquid added to the pot?” the answer lies in two places – the natural fat of the meat and the moisture in the tomatoes. As the meat cooks, the fat is going to liquefy, adding moisture to the pot. Likewise, the natural juices of the tomatoes will cook out as they heat up. This moisture will vaporize, rise to the top of the pot and then hit the lid, condense and fall back into the slow cooker, this process – extended over the period of 5 hours or so, will be enough moisture to effectively “boil” the lasagna.

One last tip: If you’re finding a lot of fat and grease at the top of your lasagna (this is likely as the fat from the meat and oils from the cheese will likely have made their way to the top by the end of cooking) you can use a pot lid to make things better.

Grab a lid with a lip and press it down on the lasagna. The lasagna will crush / condense, and the liquid on top will fall into the pan lid – but be contained by the lip. This achieves two great things – it compacts the lasagna for easier serving and it removes all that extra fat and oil that you didn’t need anyway.

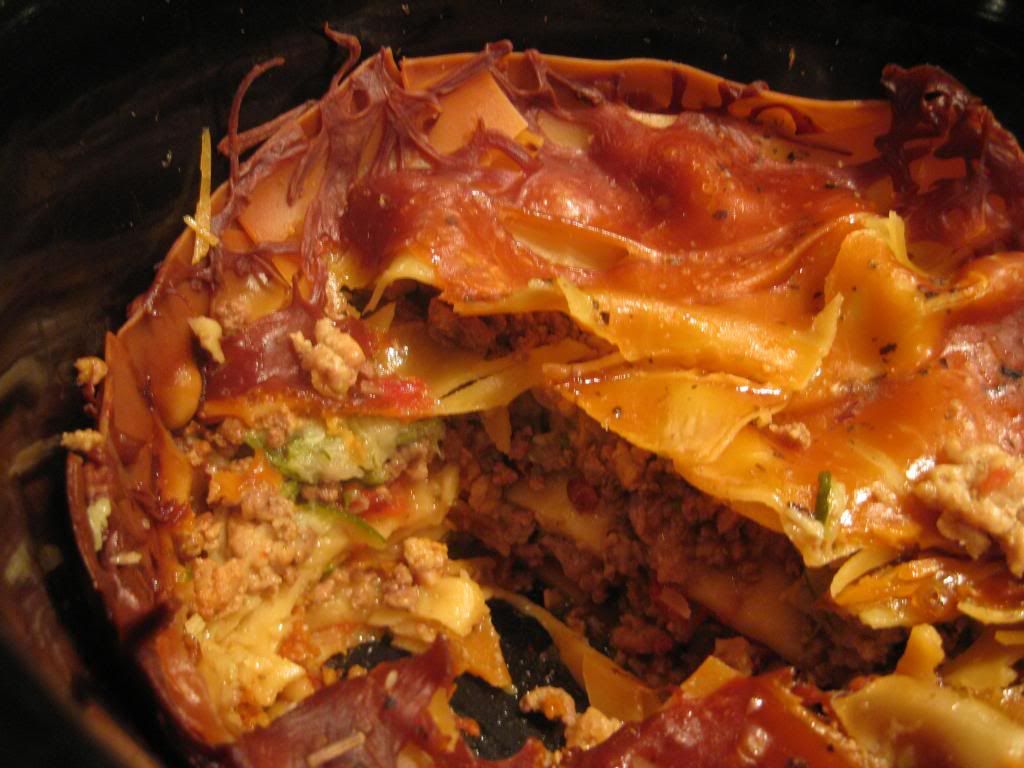
NOTE: It's a little hard to dish this up in a 'presentable' way - serving in a bowl is probably your best bet as the lasagna sort of...falls apart, one you scoop it out. Just because it doesn't look pretty doesn't mean it won't still taste great!


The Results:

I tried to get a nice shot of the layers since it didn't hold up upon exiting the slow cooker


Delicious!

This dish packs all the flavor of homemade, oven roasted lasagna without all of the fuss of the standard recipe. The meat mixture, seasoned and surrounded by gooey cheese and a light layer of tomatoes simply shines with great flavor. It should be noted – I like a drier style of lasagna and I’m not a big fan of tomato flavors, so I went really light on the tomato aspect of this recipe. If you’re a fan of sloppy “loose” lasagna or if you just like tomato flavors, I’d add a can of tomato sauce or an additional can of diced tomatoes to the mix.

That’s all we have for you this week, we’re back next week with more new recipes and culinary adventures. Until then,

~Cheers

Tuesday, January 8, 2013

On the Lighter Side of Burritos

Good evening everyone!  As we continue to focus on healthier versions of great tasting recipes, it's always great to find healthy alternatives to popular dishes.  One of those popular dishes, for example, are burritos.  Jammed with incredibly tasty flavors and ingredients, it's one of my favorite things to eat.  Although there are restaurants that like to serve a huge burrito, there are so many calories in the burrito, that one won't need to eat for several days.  Tonight, I'll create a healthy, yet flavorful burrito that will surely beat any other version out there.

The Recipe:  Crispy Southwest Chicken Wraps
Original Recipe Found In:  Various sources

What You'll Need:

1 Cup cooked Rice, warm or at room temperature
1 Cup cooked, shredded Chicken (or any other leftover meat, such has shredded pork or beef)
1 Can Black Beans, rinsed and drained
1 Green Onion, finely sliced (green and white parts)
1/2 Green Bell Pepper, diced
1/4 Cup fresh chopped Cilantro
Juice of 1 Lime (about 2 Tablespoons)
1/2 Tablespoons Chili Powder
1 Teaspoon ground Cumin
1/2 Teaspoon Garlic Salt
2 Cups shredded cheese (I'm using a Mexican blend shredded cheese)
6 burrito-size Flour Tortillas
Sour Cream (optional)

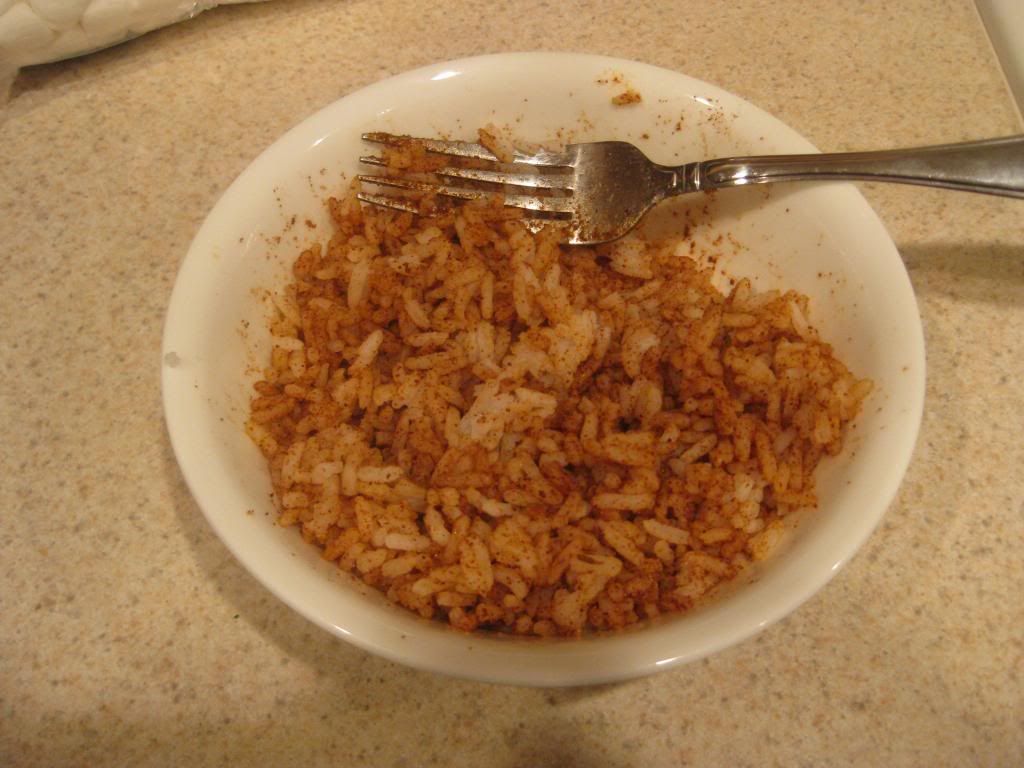
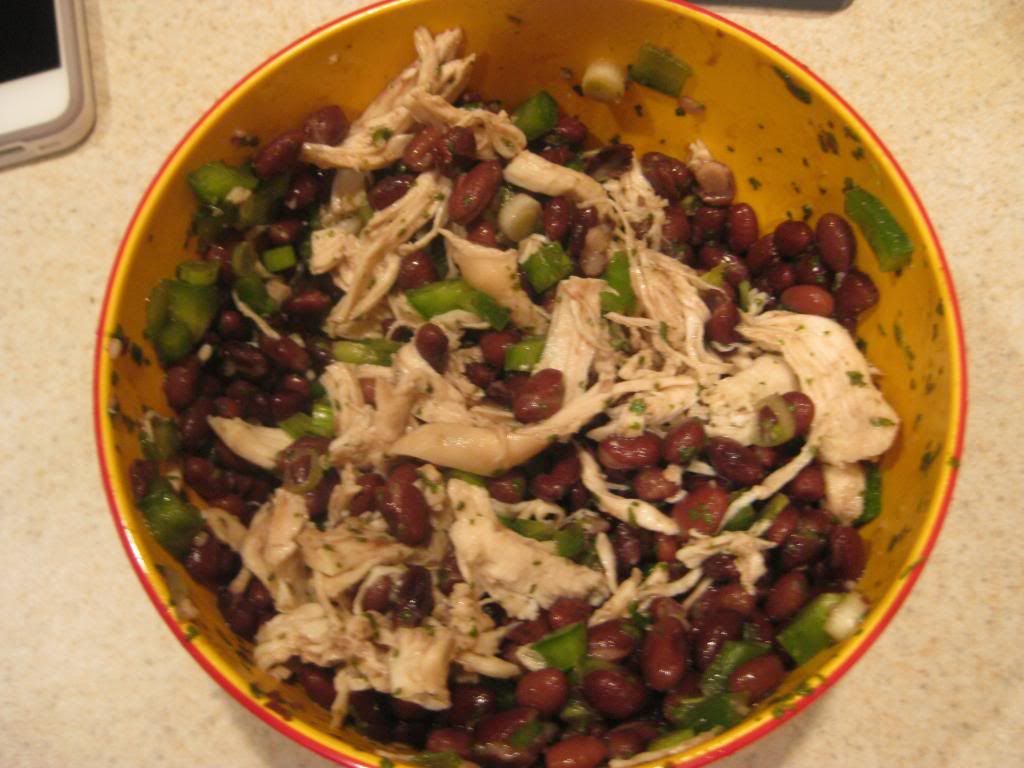
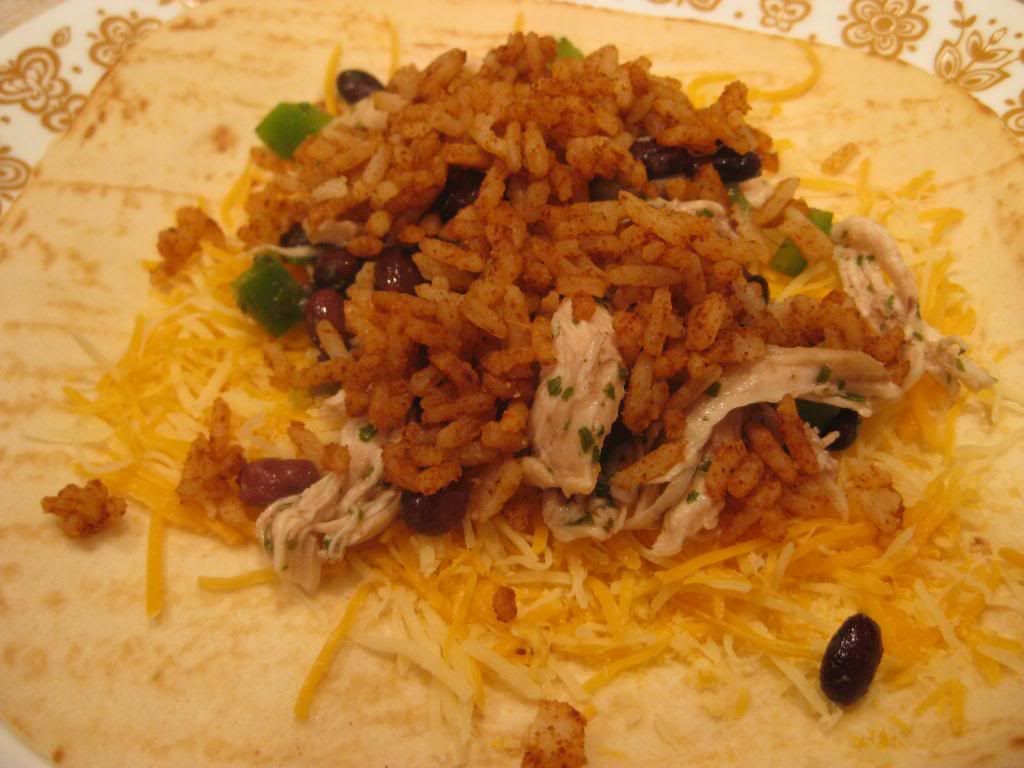
To start, mix the rice, chili powder, cumin, and garlic salt together until the spices coat the rice.  Next, add the chicken (or whatever meat you choose,) black beans, green onion, red (or green) bell pepper, cilantro, and lime juice.  Stir until all the ingredients are well incorporated.  Sprinkle the cheese over the tortillas, leaving a 1/2 inch border around the edges.  Down the middle of the tortilla, arrange the chicken and the rice mixture.  If you are using a different size tortilla, be sure to adjust how much stuffing you put in the tortillas so that it won't overflow or break open during the next part.

Spiced up rice

Although it doesn't look appealing, the flavor is quite amazing

Next, heat a large non-stick skillet over medium heat.  Arrange the now wraps, seam-side down in the skillet, and cook until golden brown and crisp, about 2-3 minutes.  If you start by cooking the wraps seam side down, it will seal the ingredients in the wrap and not fall open.  Flip the wrap over and continue to cook for another 2-3 minutes.  Continue until all the wraps are cooked.  Serve with a side of sour cream, salsa, or taco sauce, serve and enjoy!

The End Result:


The spices really give this dish its kick.  Granted they are only mixed together with the rice, you can definitely taste that flavor and that's what makes these wraps unique.  Not only do all the ingredients have some sort of presence when eating the wrap, but everything works so well together.  The cheese doesn't overwhelm, but it's a nice base for the other ingredients.  Having those fresh elements (the green onion, green pepper, cilantro, and lime juice) helps enhance other ingredients (the chicken and black beans.)  Overall, a great dish that is full of flavor and incredibly easy to create any night of the week!

Join us on Thursday as Tyler takes a new spin on an Italian classic.  Until then,

~Cheers!

Thursday, January 3, 2013

Mexican Made Healthy

Good evening and Happy New Year everyone!  After some time off, we are back in action for a brand new year of cooking.  I'm echoing Tyler's theme from yesterday, that fresh and delicious recipes don't have to have ingredients that are full of calories.  Just include ingredients that are full of flavor and that will result in some extremely satisfying meals.  At first glance, tonight's recipe seems to add the calories, instead of take them away.  But this light version of a classic casserole dish will really surprise you at how low the calories go.

The Recipe:  Tortilla Chip Casserole
Original Recipe Found In:  Cooking Light, January 2013

What You'll Need:
1 Tablespoon Canola Oil
1/2 Cup chopped Onion
1 Tablespoon minced fresh Garlic
2 Tablespoons all-purpose Flour
1 Cup 2% reduced-fat Milk
1/2 Cup unsalted Chicken Stock
1 Teaspoon ground Cumin
1/2 Teaspoon ground Coriander
1/4 Teaspoon Salt
1/4 Teaspoon Black Pepper
4 Ounce 1/3-less-fat Cream Cheese
1 Cup organic, canned Black Beans, rinsed and drained
3 Cups chopped cooked Chicken breast
4 Ounces bake Tortilla Chips, crushed
1 roasted Red Bell Pepper, chopped
8 Ounces lower-sodium green chile Enchilada Sauce
2.5 Ounces shredded Cheddar-Monterey Jack cheese (about 2/3 cup)*

*Note:  For convenience sake, I'm using a Mexican blend shredded cheese, which has cheddar and monterey jack cheese in it, with just a few more cheese flavors (who wouldn't complain about that?)

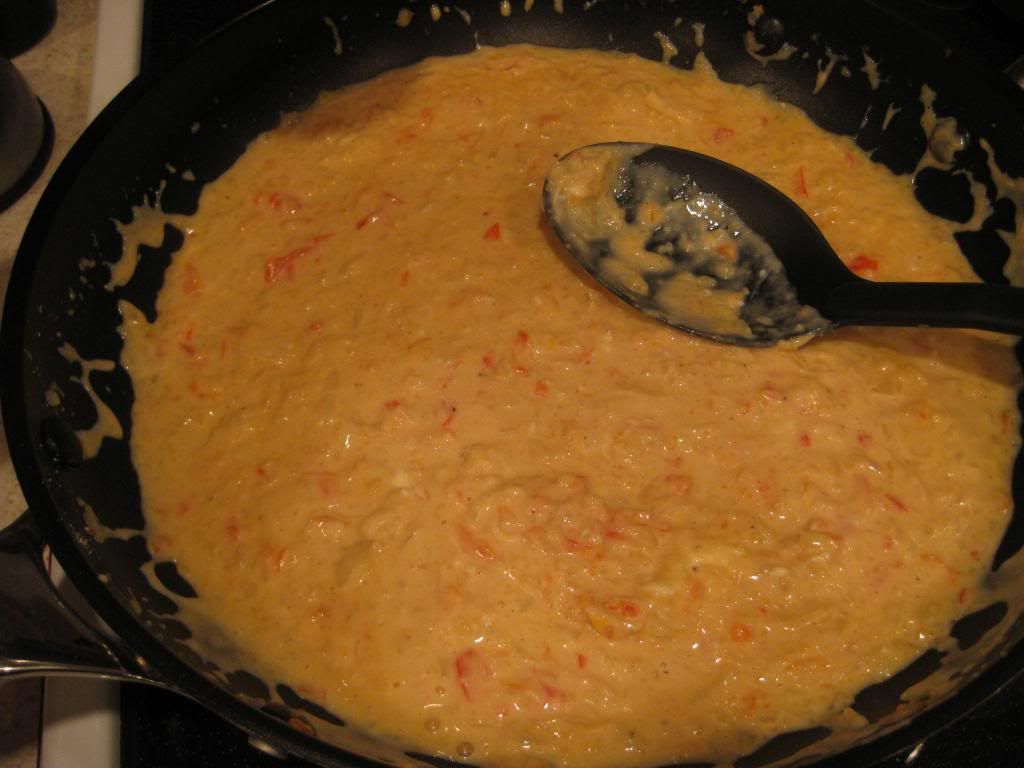
To start, preheat the oven to 350 degrees.  Next, in a large skillet, heat the oil over medium-high heat.  Add the chopped onion and cook for six minutes.  Stir in the garlic and flour and continue to cook for two minutes, or once the garlic starts to become fragrant.  Gradually add the milk and the chicken stock, while stirring constantly, as to not to burn the milk.  After bringing this combination to a boil, remove the skillet from heat.  Add the cumin, coriander, salt, pepper, and cream cheese and stir until smooth.  I'd prefer my cream cheese to be just shy of room temperature, so it's easier to melt in the skillet.

It doesn't look like much, but there's a whole lot of flavor in that skillet

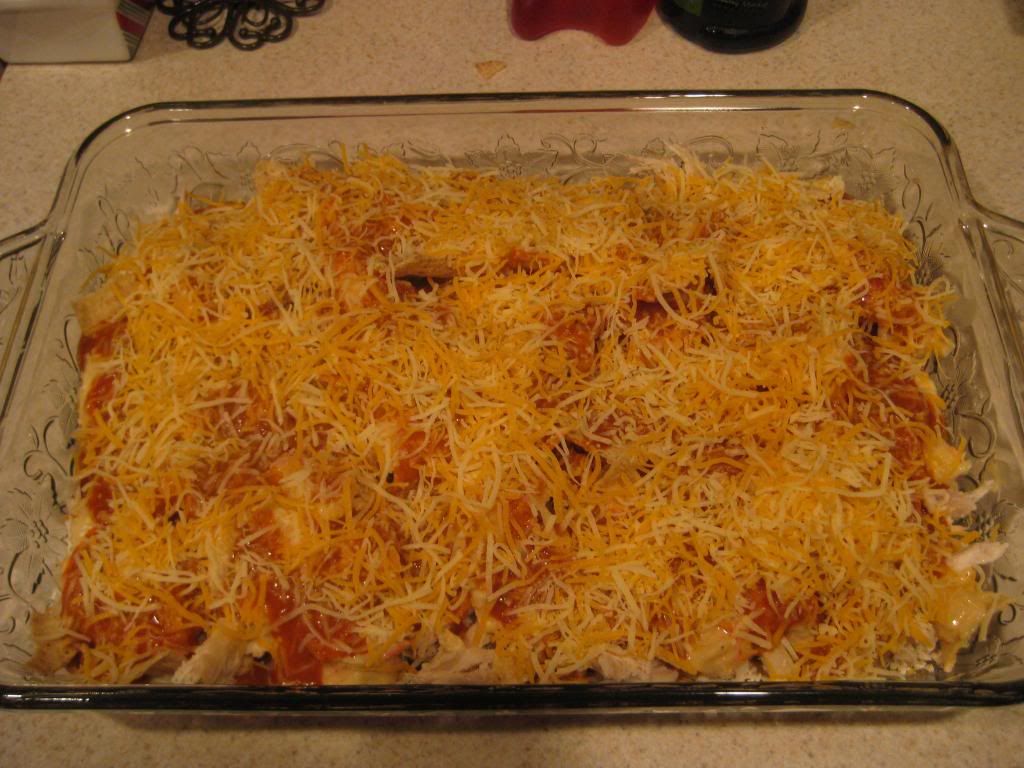
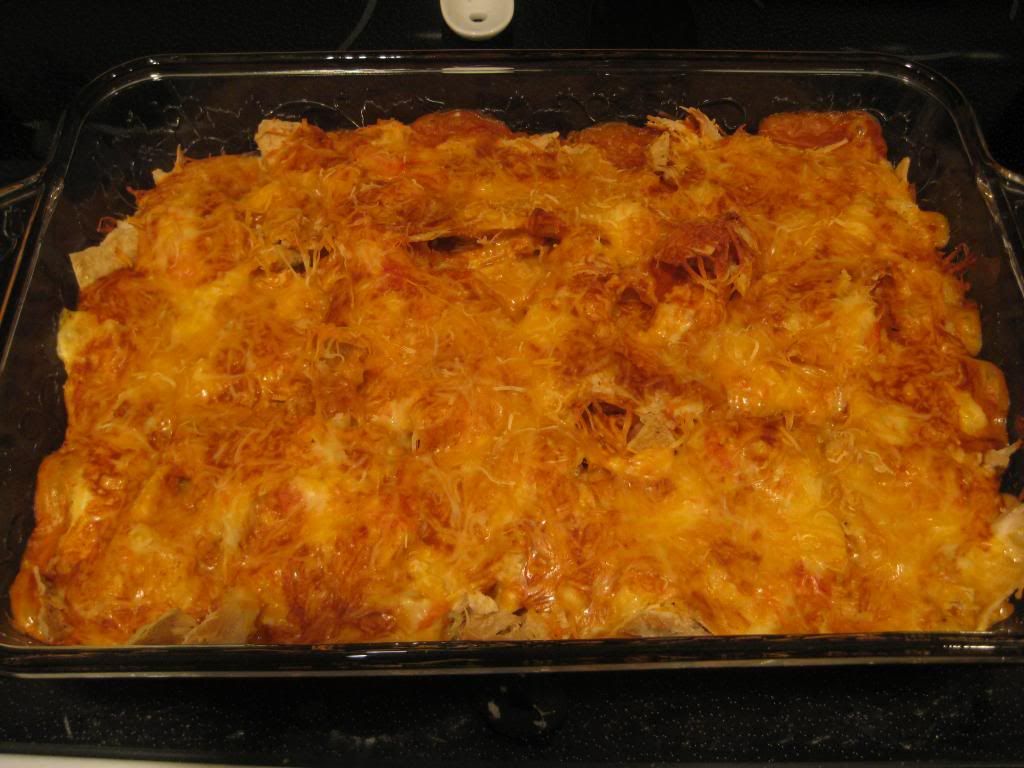
Next, pour 1/2 cup of the milk mixture over the bottom of a broiler-safe 11x7 inch baking dish.  I found this to be a little sparing, so I added some more of the milk mixture so there's just enough to line the bottom of the baking dish.  After this, add the beans, 1 1/2 cups of chicken, and two ounces of the crushed tortilla chips.  It won't be a even layer of ingredients, but it will add texture to the dish.  Also, it's tough to measure out exact amounts of each ingredient, so eyeballing it will help save time.  Add another layer a 1/2 cup milk mixture.  Finally, layer 1 1/2 cups chicken, red bell pepper, and two ounces of crushed chips.  Cover the top of the dish with one cup of the milk mixture, the enchilada sauce, and sprinkle with cheese.  Bake at 350 degrees for 30 minutes.  Serve and enjoy!

All layered and ready to bake!

The End Result:


I get a really great feeling when I know I can create an dish that will not only taste good, but won't weigh too heavy on the waistline.  This dish did both tonight.  This has some of the quintessential ingredients and flavors that are featured in a majority of Mexican dishes, such as the enchilada sauce, black beans, and tortilla chips.  All, with the other ingredients, taste great together and create a harmonious dish.  It was creamy, yet crunchy and had a hint of spice.  The flavor was really well-rounded and definitely satisfied.  But, with a serving portion only having 379 calories, is the real winner here.  Most Mexican recipes have too many calories for an even portion size, but this a great alternative to the traditional, calorie-ridden dishes.  What a great way to start off 2013!

That's all we have for you this evening.  Join us next week as we continue to share our culinary adventures.  Until then,

~Cheers!

Wednesday, January 2, 2013

New Year, Old Style

Good evening everyone and happy new year! We're back to cooking in 2013, starting our third year of cooking healthy and delicious recipes. It only seemed proper that my first recipe of 2013 come from the very source that inspired me to start this blog to begin with (and then later coerced Maggie into joining) Jamie Oliver.

Jamie's somewhat recently released cookbook "Jamie's America" focuses on traditional American dishes and adds his classic twists to them. Tonight's dish, while not exactly an "American" classic, is at least an American southwest classic. Let's get cooking!

The Recipe: Mexican Breakfast (Or - classic huevos rancheros)
Original Recipe Found In: Jamie's America

What You'll Need:
(Serves 6)

1 1/2 Tablespoons Olive Oil
1 Small White Onion (Diced)
2 Cloves Garlic (Peeled, diced)
2 Red Bell Peppers (Seeded, diced)
2 Red or Orange Chiles (Seeded, diced)
1 Large Dried Chile
3 Fresh Bay Leaves
14 Ounces Canned Diced Tomatoes
2 Large Tomatoes (Sliced thin)
6 Large Eggs
6 Tortillas (Flour)
6 Ounces Freshly Shredded Cheddar Cheese
1 Cup Steamed White Rice (Optional)

Begin by placing a large, non stick skillet (preferably one that has a lid) over medium high heat and adding the olive oil to the pan. Add the onion, garlic, peppers, fresh chiles, dried chile, bay leaves and a pinch of salt and pepper to the skillet and allow everything to simmer, stirring occasionally, for about 15 minutes or until the vegetables start to caramelize. (The onions will become translucent, then pick up a light yellow hue, the other vegetables will soften significantly).


Next, add the canned tomatoes to the skillet and break up the larger tomato chunks with a spoon or spatula. Bring this mixture to a boil, then reduce the heat to medium and allow the mixture to simmer for another 5 minutes. The goal here is to allow the sauce to thicken, we're looking for a stew like consistency - so be sure to allow the sauce to reduce before moving on to the next step.

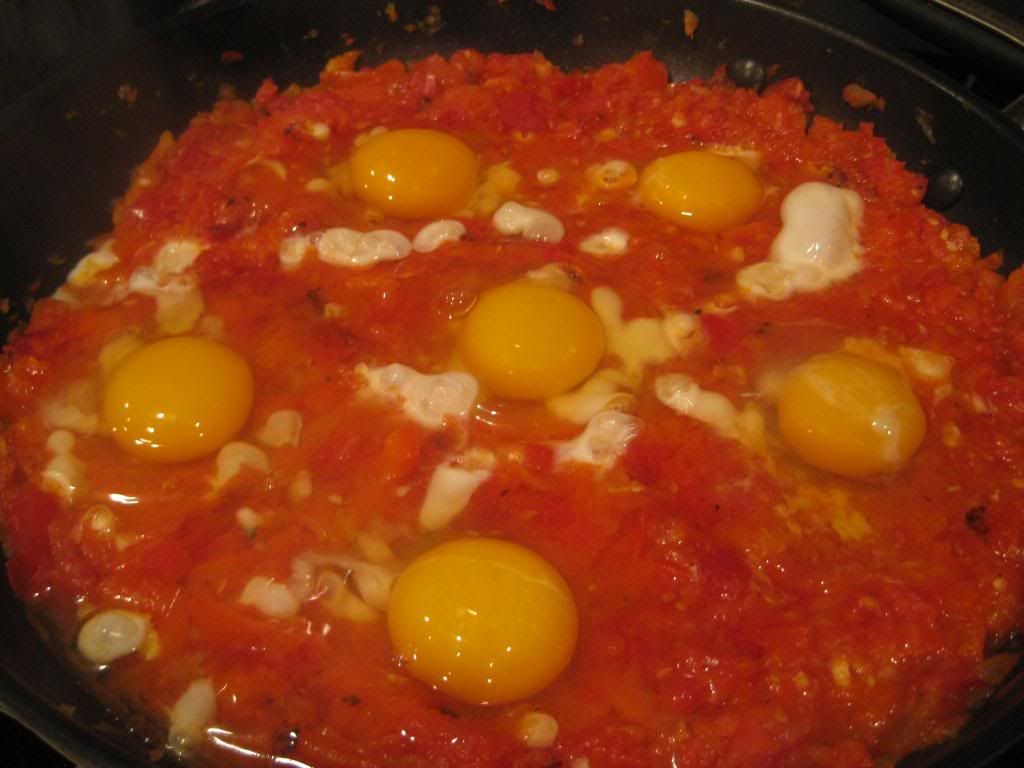
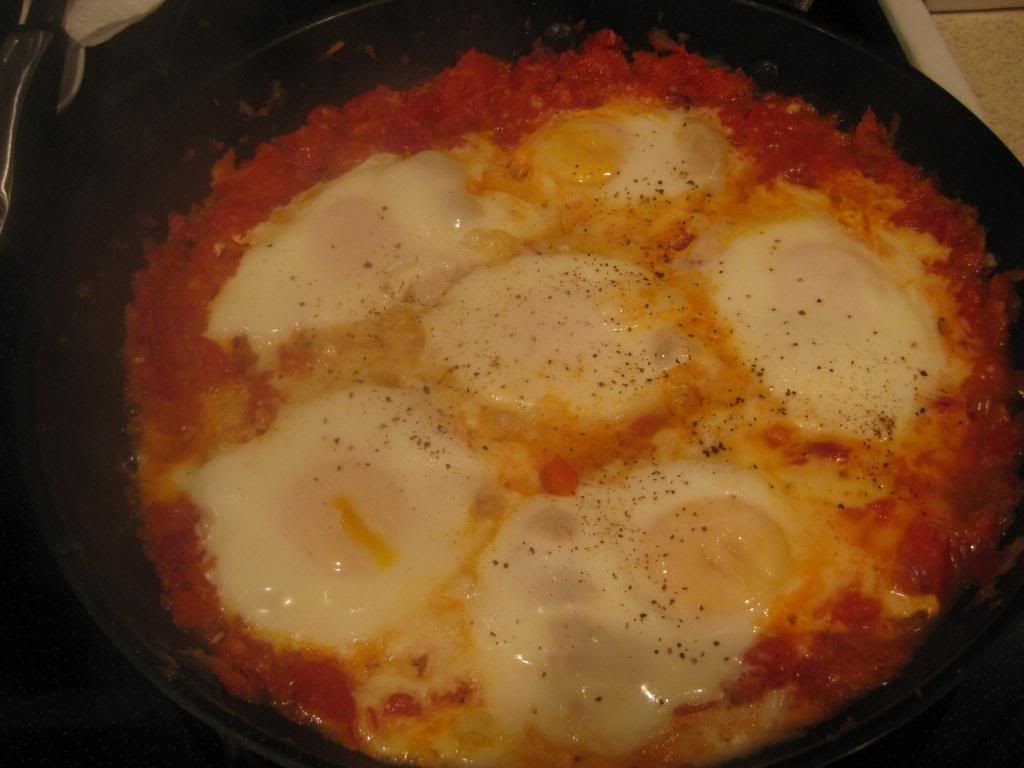
Once your sauce has thickened, spread your diced tomatoes across the top of the stew and then, using a spoon, make 6 little "wells" into the mixture (around the edges). Now, quickly crack your eggs into each well (as pictured) - try to get all of the eggs in around the same time, that way the cooking time will be about even for each egg. By cracking the eggs into the thick sauce, we're essentially poaching the eggs - with the added bonus of a rich tomato base cooking into each egg. Sprinkle the stew with another pinch of salt and pepper and cover the skillet.


Allow the eggs to cook until they reach your desired level of 'doneness' (around 3 to 5 minutes). Give the eggs a gentle prod with your finger or spatula to make sure they've fully set up.  Pull out the dried chile and bay leaves at this time as well.


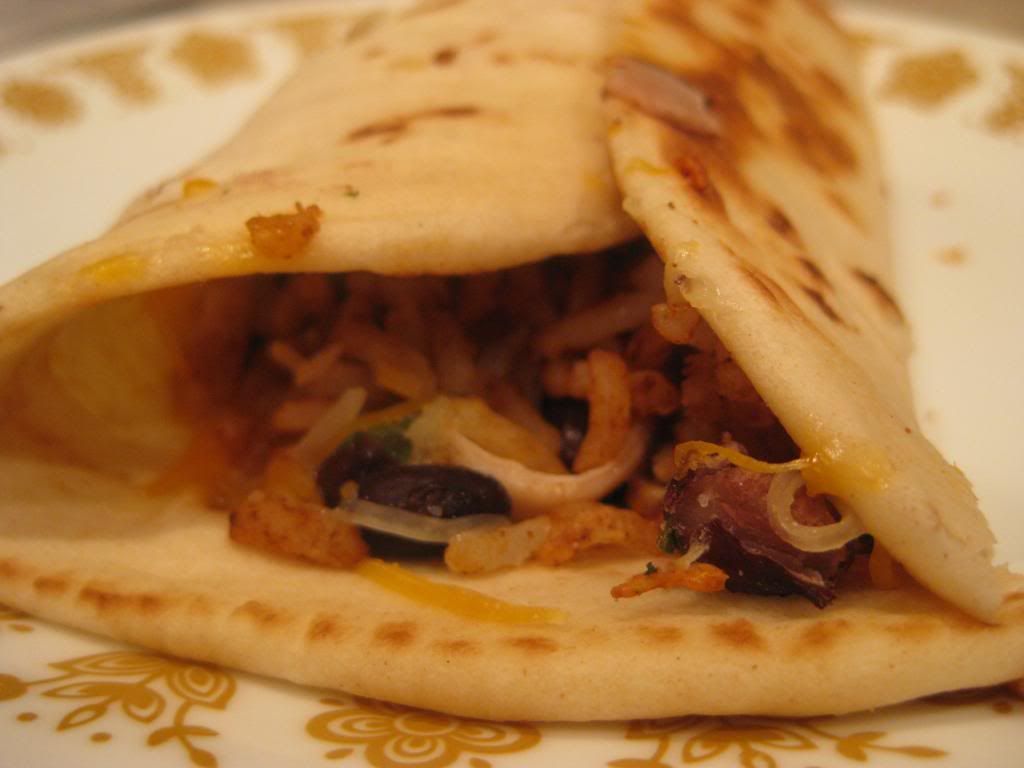
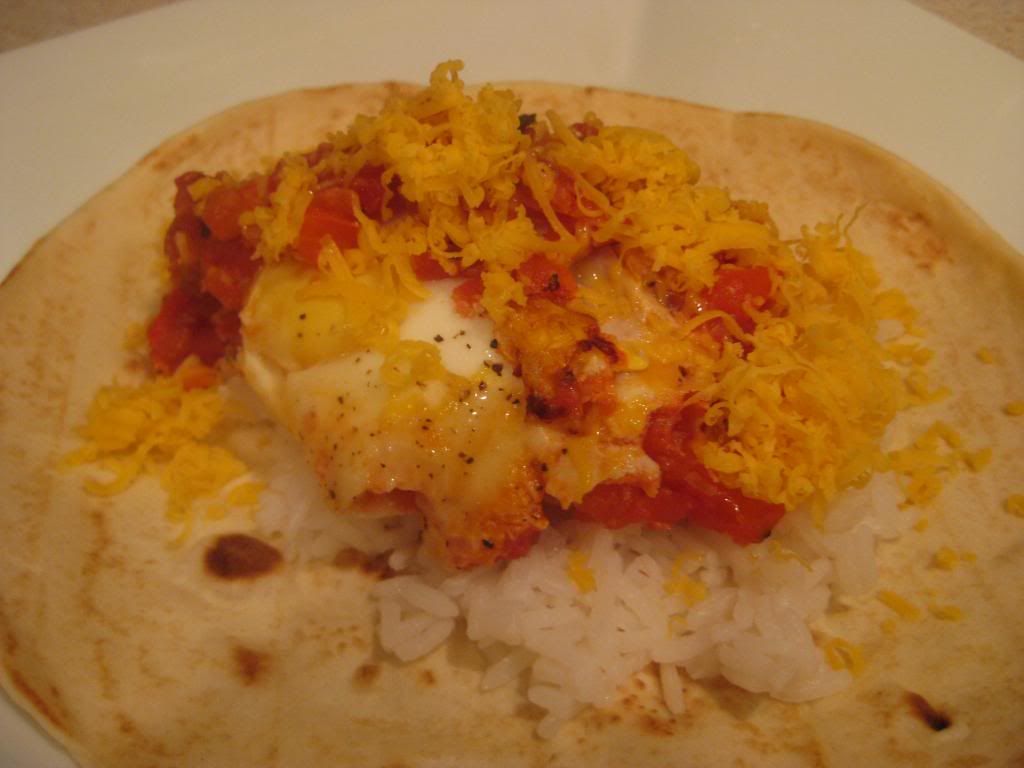
Scoop the tomato mixture (with the egg) into a warm tortilla and top with your freshly shredded cheese. If you'd like, you can add some steamed white rice to the recipe and spread that into the tortilla as well (we did). Serve and enjoy!


The Results:


One of my favorite aspects of any of Jamie's recipes is that they allow the food to shine. He doesn't monkey with a lot of spices or complex sauces to dress up a dish, he simply lets the ingredients themselves do the talking.

This adaptation of huevos rancheros is no different. The rich tomato stew truly shines with light hints of bell pepper and chiles adding a nice level of heat (present, but not overwhelming) the eggs bring a nice change of texture and their flavor really shows through as a crisp "burst" amongst the sauce.

Out Of The Culinary started on recipes like this, and it's nice to go back and remind ourselves of our motivation. Fresh food, simple recipes, delicious results. Do yourself a favor and cook up this tasty dish for a weeknight meal or a nice Sunday breakfast. You will not be disappointed.

That's all we have for you this evening. Maggie takes to the kitchen tomorrow night to debut her first recipe of 2013. Until then,

~Cheers
Thursday, December 20, 2012

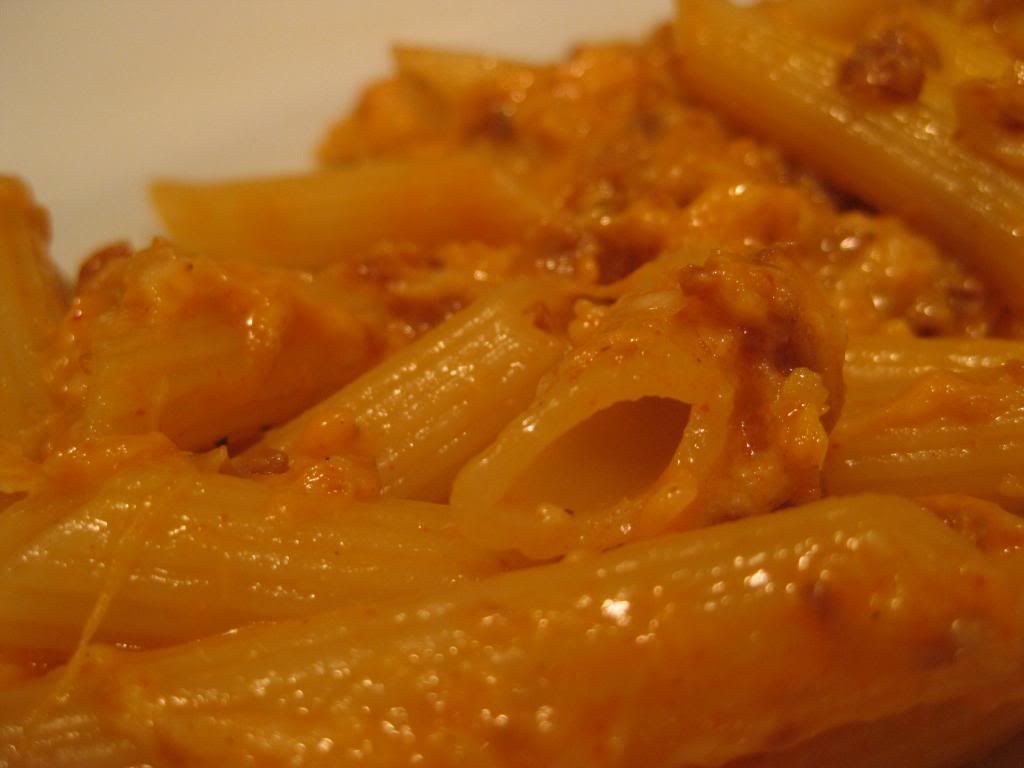
Guilt Free "Mac" & Cheese

Good evening everyone! Greetings from the great white north! As all of our readers from  Iowa are aware, we received one heck of a snow storm last night, dumping between 9 to 13 inches of snow across the state. Our little portion of the Des Moines metro ended up with around 10 to 11 inches and we're currently "enjoying" 30-40 MPH winds. After a long winter of no snow, Mother Nature has seen it fit to bestow us with an entire season's worth in one evening.

It's days like these that it's nice to turn to the kitchen to cook up some warm and filling "comfort food". Of course, you want to make sure you're eating relatively healthy as well. Tonight's dish manages to find some common ground between eating well and filling up on a tasty dish.

The Recipe: Beefy Mac and Cheese
Original Recipe Found In: Food Network Magazine: October 2012 Issue

What You'll Need:
(Serves 4)

8 Ounces Pasta or Shells (We used Penne)
3 Tablespoons Unsalted Butter
1 Small Onion (Chopped)
1 Tablespoon Tomato Paste
1 Tablespoon Chili Powder
8 Ounces Ground Beef (Either low fat content or drained of fat)
2 Tablespoons All Purpose Flour
1 Cup Low Fat Milk (1%)
2 1/2 Cups Shredded Mexican Cheese
2 Tablespoons Panko Breadcrumbs
2 Scallions, Sliced Thin

Begin by brining a large pot of lightly salted water to a boil. Cook your pasta according to package instructions, drain and reserve 3/4 cup of the cooking water for later use.

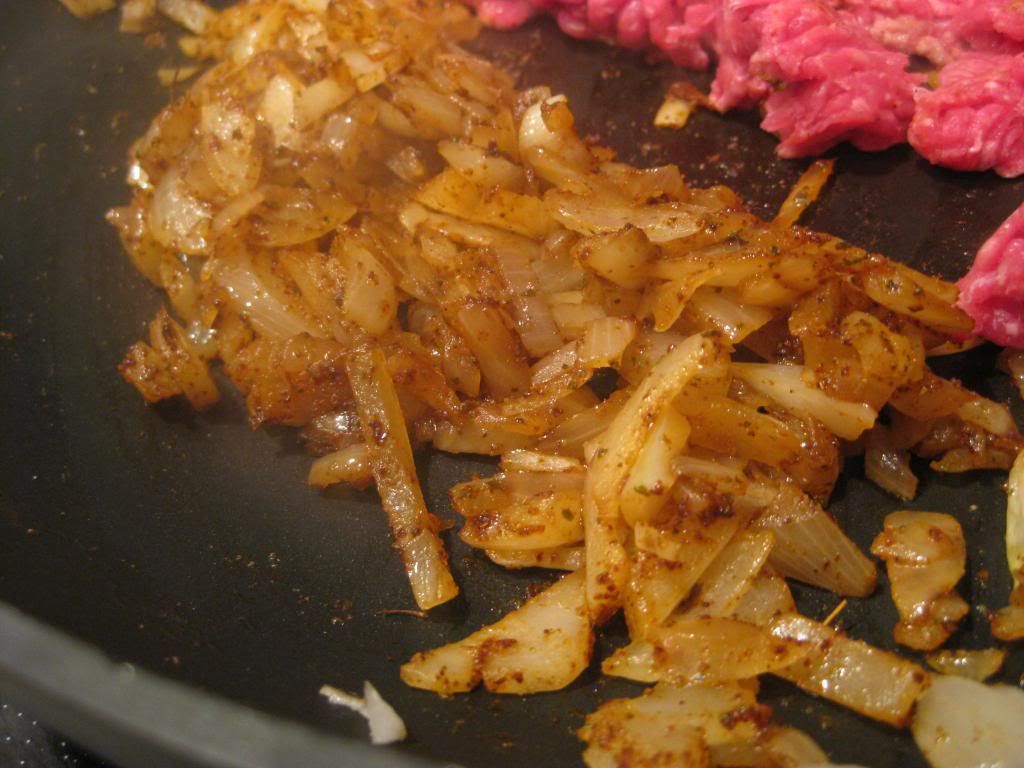
While your pasta is cooking, melt 1 tablespoon butter in a large nonstick skillet oven medium heat. Add the onion and cook until it softens, about 5 minutes. Next, add the tomato paste and chili powder. Stir to combine the ingredients and cook until the mixture turns an earthy red color (this takes about 2 minutes of simmering). Finally, add the beef and cook until it browns (stirring occasionally) this takes about 4 minutes. Season this mixture with a dash of salt and then spread it in a 3 quart (broiler safe) baking dish.  Preheat your broiler at this time as well.


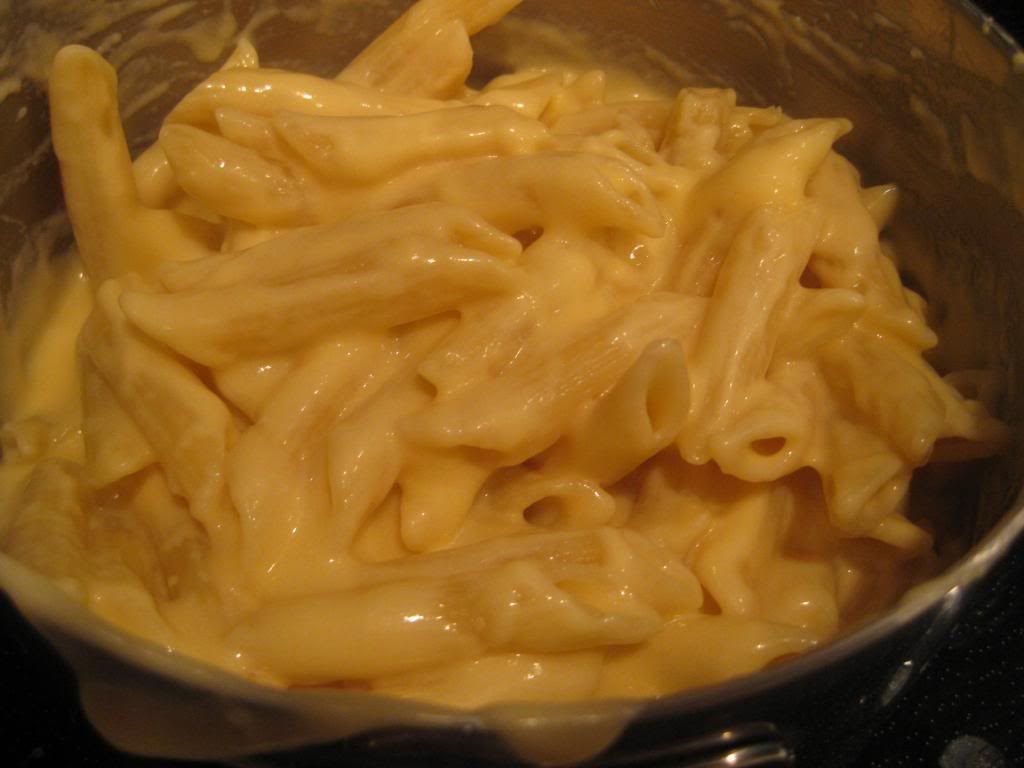
Next, melt the remaining 2 tablespoons of butter in a medium pot over medium heat. Add in the flour and allow cook (stirring constantly) for 1 minute or until the mixture thickens. Next, add the milk and reserved cooking water and allow this mixture to come to a simmer. Continue whisking the mixture until it becomes thick - this takes about 2 minutes. Finally, add 2 cups of the cheese and the pasta to the pot and stir to incorporate everything evenly. Continues stirring until the cheese is fully melted. Add this pasta mixture over top of the beef mixture in your baking dish.


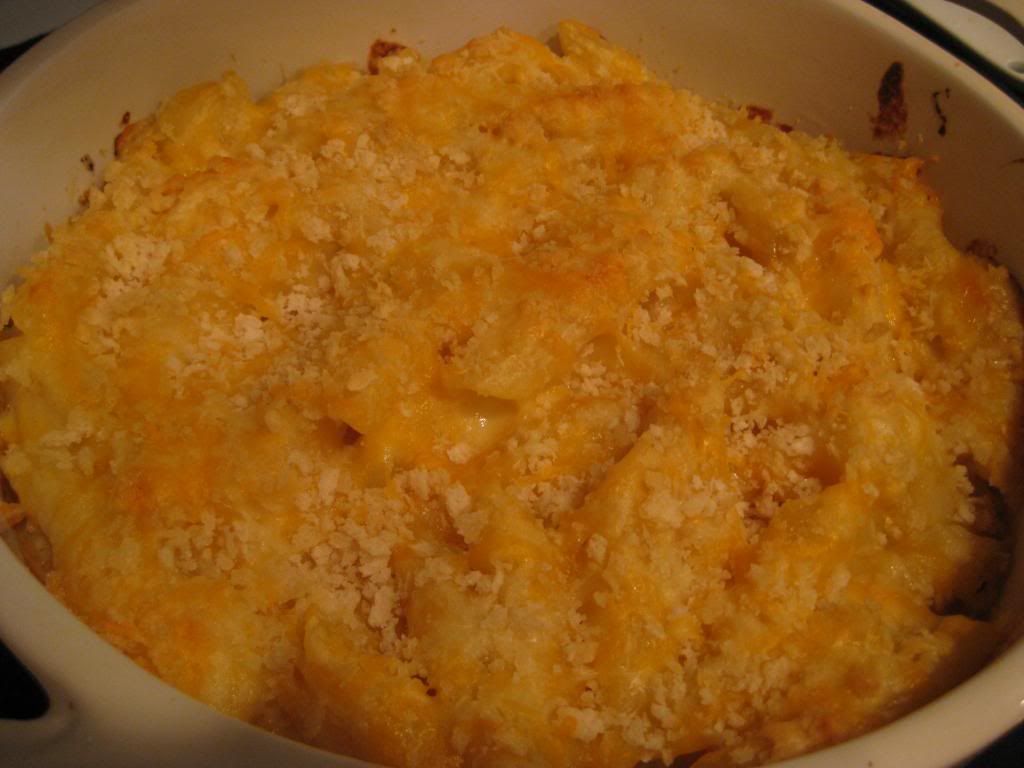
Mix the remaning 1/2 cup of cheese with the breadcrumbs and sprinkle over the pasta. Place the dish into the oven (under the broiler) and cook until golden brown on top. Top the dish with the sliced scallions and serve!

The Results:


Mac and cheese (or in this instance, penne and cheese) with beef - there are few recipes that can compete with this flavor combination when it comes to pure, unbridled "comfort food". Rich, creamy pasta combines with a lightly seasoned beef to create a warm filling dish sure to hit the spot on any winter's night. The best part is that by using low fat milk in place of a heavy cream and a lower fat cheese you cut out a lot of the empty calories that normally turn this dish into a "guilty pleasure". With a relatively modest 600 calories per serving, you can enjoy your comfort food without any of the guilt.

That's all we have for you this week. We're obviously not going to be cooking next week with the Christmas holiday. Here's hoping you and yours have a happy holiday season. We'll be back in the first week of 2013. Until then,

~Cheers

Tuesday, December 18, 2012

Fantastic Flavored Fish

Good evening everyone!  As many readers of our blog know, I don't step out of my cooking comfort zone that often.  I cook ingredients and techniques that are familiar to me.  Every once in a while, I step out and try something different, often with varied results.  I do have a yearning to try new flavors and cooking methods, but with those varied results, I am often leered away to do so.  So tonight, I'm trying a new cooking technique with also fresh ingredients that I would not pair together, and I am definitely excited for these results.

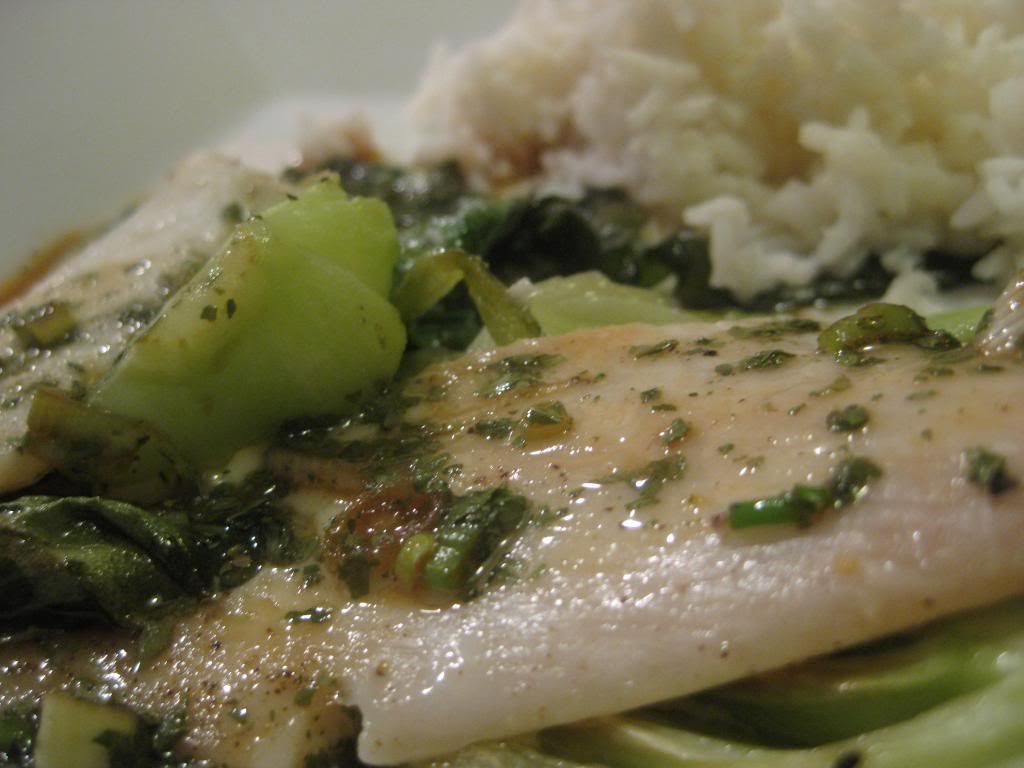
The Recipe:  Oven-Roasted Flounder with Bok Choy, Cilantro, and Lime
Original Recipe Found In:  Bon Appetite Magazine, December 2012

What You'll Need:
1 Scallion, thinly sliced
1/4 Cup coarsely chopped Cilantro
1/4 Cup fresh Lime Juice
3 Tablespoons reduced-sodium Soy Sauce
2 Tablespoons unseasoned Rice Vinegar
2 Teaspoons finely minced peeled Ginger
3 1/2 Tablespoons Vegetable Oil, divided
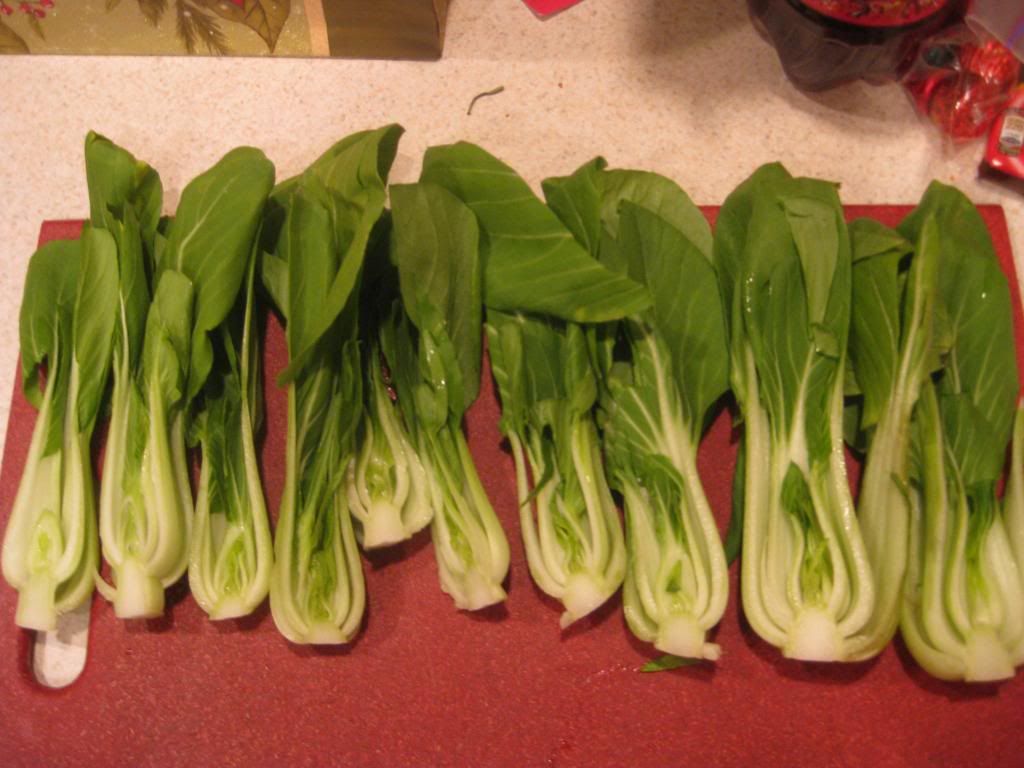
1 Pound Baby Bok Choy, cut in half lengthwise*
1/2 Cup Sake or dry White Wine
4 (4 Ounce) fillets Flounder or other delicate white fish

*For those of you who are unfamiliar to bok choy, it can be described as a Chinese cabbage, but it has the consistency of lettuce.  It has a little bit of a darker green color than regular lettuce, but the flavor is more powerful.  It normally goes in stir fry dishes or soups, but tonight, it will be paired with flounder.

Baby Bok Choy...they're so cute when they're little!

To start, arrange a rack in the upper third of an oven and preheat to 400 degrees.  In a small bowl, combine the scallion, cilantro, lime juice, soy sauce, vinegar, and ginger.  Whisk in 1 1/2 tablespoons of oil and season with salt and pepper.  Set this sauce aside.

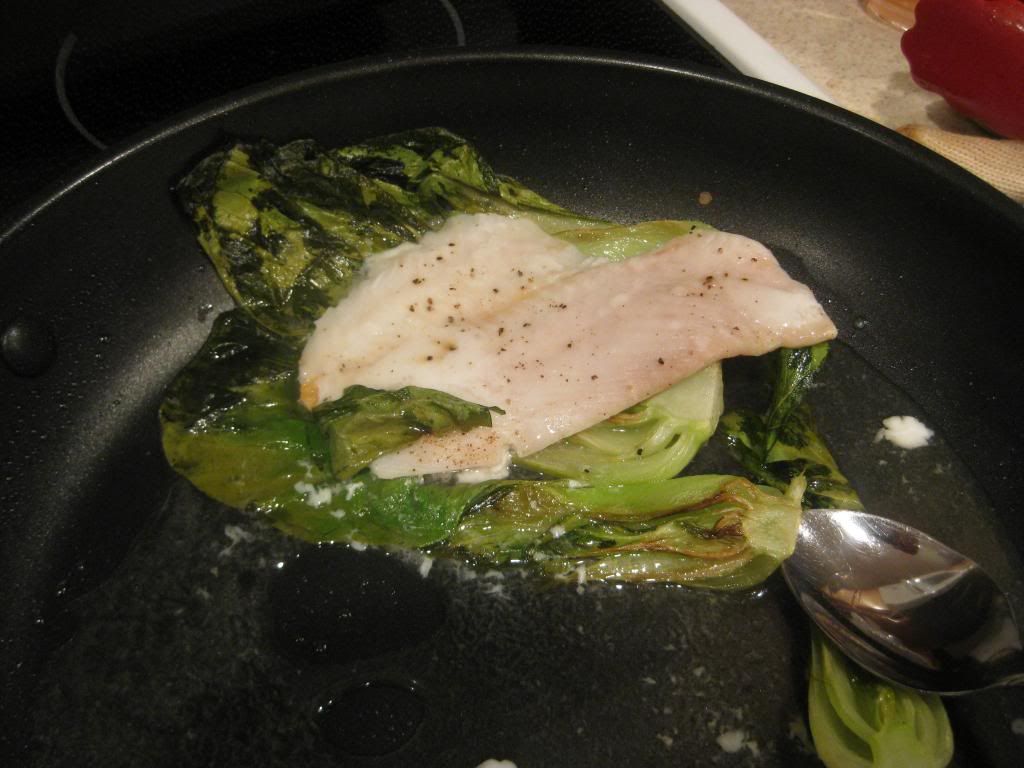
Next, heat the remaining two tablespoons of oil in a large skillet over high heat until the oil is shimmering.  Add the bok choy, cut side down, and sear until golden brown, about two to four minutes.  Turn the bok choy cut side up and remove the pan from the heat.  Add the sake (or dry white wine.)  Season the flounder with salt and pepper and arrange the fish in a single layer over the bok choy.  Roast the fish in the oven until they are just cooked through, about eight to ten minutes.


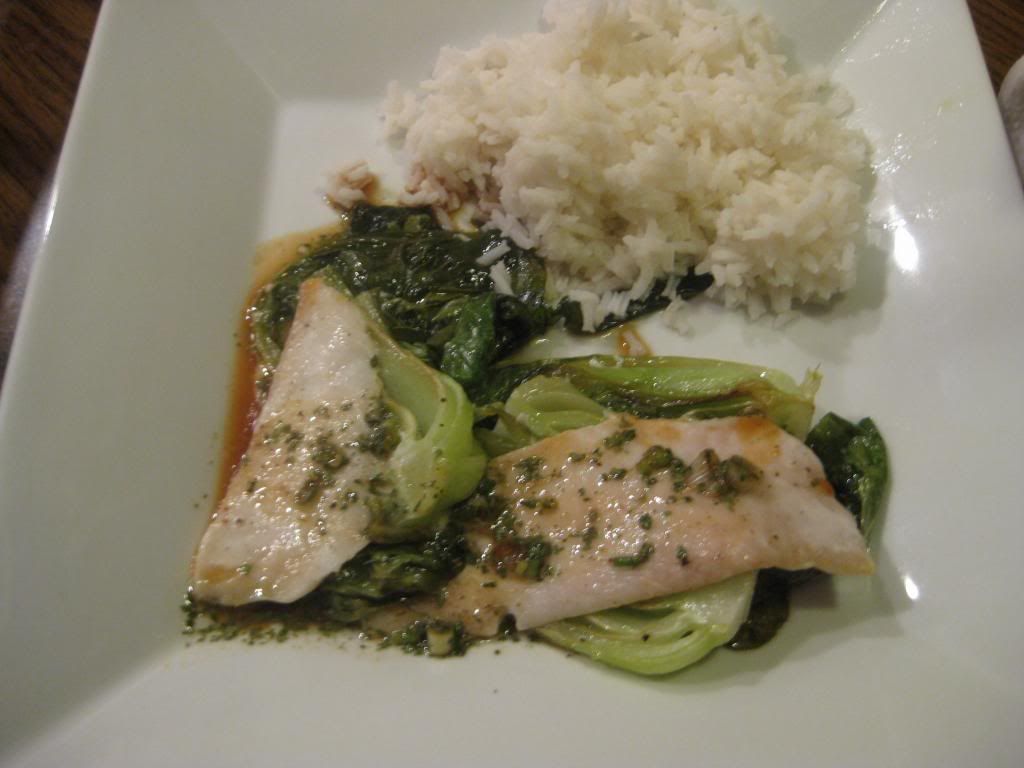
After the fish are cooked, remove the skillet from the oven and spoon the sake sauce from the skillet into the bottom of four shallow bowl, dividing evenly.  Add the bok choy to each bowl, also dividing evenly, and top each bowl with a fish fillet.  Spoon some of the cilantro-lime sauce over the fish.  Serve with a side of steamed brown or white rice and enjoy!

The End Result:


I'm usually not one for Asian cuisine, granted I love a lot of Chinese food, but this dish is a great introduction into the Asian flavor realm.  The cilantro-lime sauce mixes in quite a few of these flavors and gives you a super sauce of power, but the fact that it is served over the usually bland flounder fish, makes it delicious.  The bok choy that was seared tastes amazing in accompaniment to this dish.  Bok choy, I believe, is an unsung hero in the vegetable world, because it's rarely used in American cuisine.  But once you step out of the 50 states, it's used quite a bit and is a delicious addition.  The fish was cooked perfectly and becomes nice and flakey.  Overall, a great dish, bursting with flavor and a wonderful addition to our recipe collection.

Join us on Thursday as Tyler takes a fresh new idea for an American classic.  Until then,

~Cheers!

Wednesday, December 12, 2012

Fish and Chips Redux

Good evening everyone! One of my all time favorite dishes to order whenever Maggie and I decide to dine out is fish and chips. There's something so simple and yet so satisfying about breaded and fried white fish with crispy fries or chips. Of course, this menu item is never very good for you and is typically fried in fatty grease and oil that any health conscious at home chef wouldn't dream of using. We've managed to find a few healthy fish and chip recipes across the years, but we're always on the look out for new and innovative ways to make the popular dish. When I stumbled across tonight's recipe and its interesting breading style, I knew I had to give it a shot.

The Recipe: Oven Fried Fish and Chips
Original Recipe Found On: Eatingwell.com

What You'll Need:

1 1/2 Pounds Russet Potatoes, Scrubbed & Cut Into 1/4 Wedges
4 Teaspoons Olive Oil
1 1/2 Teaspoons Cajun Seasoning
2 Cups Cornflakes
1/4 Cup All Purpose Flour
1/4 Teaspoon Salt
2 Large Egg Whites (Beaten)
1 Pound Cod, Haddock or other white fish (tilapia, perch) cut into 4 pieces

Begin by adjusting your oven racks so that one sits in the top third of the oven and the other sits and the bottom third. Preheat your oven to 425 degrees and prep two baking sheets. Spray one with cooking spray, and place a wire baking rack on the other, coat the rack in cooking spray as well.

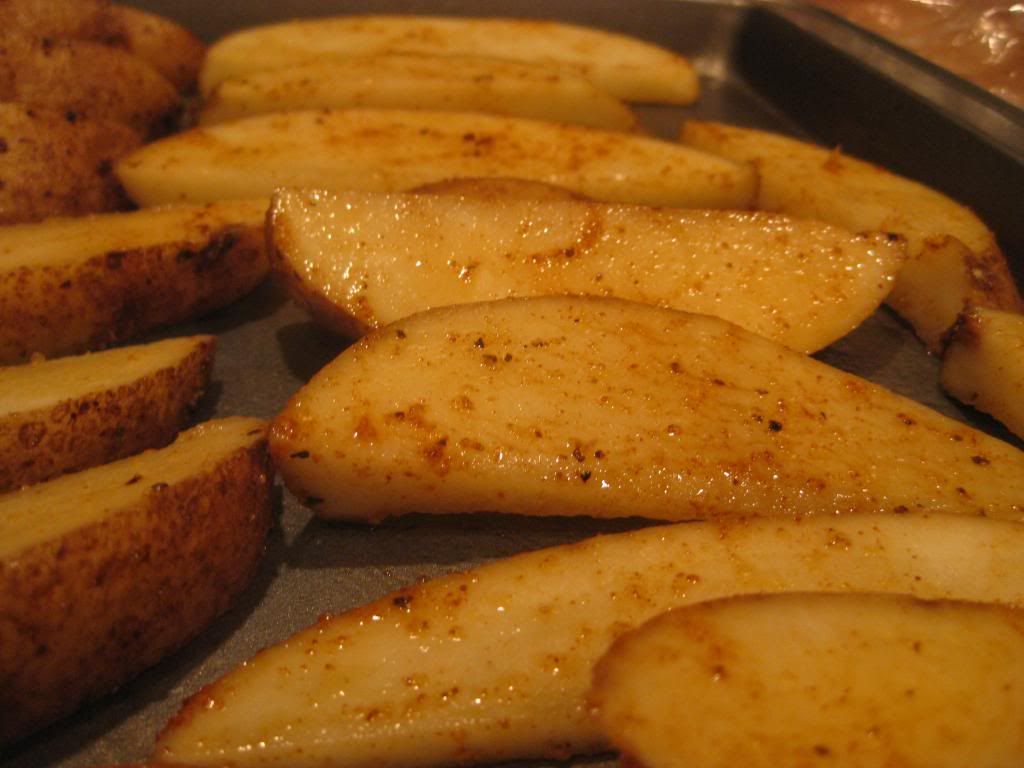
Begin by tossing your potatoes (already scrubbed and cut) in a colander under cold water until they are completely clean. Pat the potatoes dry with a paper towel to remove most of the water. Next, add the potatoes to a large bowl and toss them with olive oil and 3/4 teaspoon of the cajun seasoning. Toss until the wedges are evenly covered. Spread the wedges onto the baking sheet (sans wire rack) and place them in the oven (on the lower rack). Bake until they're tender, making sure to turn the wedges every 10 minutes or so, for about 30 to 35 minutes.


Next, coarsely grind the corn flakes in a food processor, blender or simply smash them in a plastic bag (last one is the easiest - and less clean up too) Transfer the crushed flakes into a shallow dish. Add the flour into another shallow dish and finally, place the beaten egg whites in a shallow bowl. Add the remaining cajun seasoning and salt to the flour mixture and toss to evenly incorporate.

Now, if you're a fan / long time reader, you know how this next part goes - arrange your dishes, assembly line style, on the counter. First, place the dish with the flour mixture, followed by the egg white, followed by the corn flakes. Leave your baking sheet with the wire rack at the end of the assembly line so that you have an easy place to drop off your finished fish.

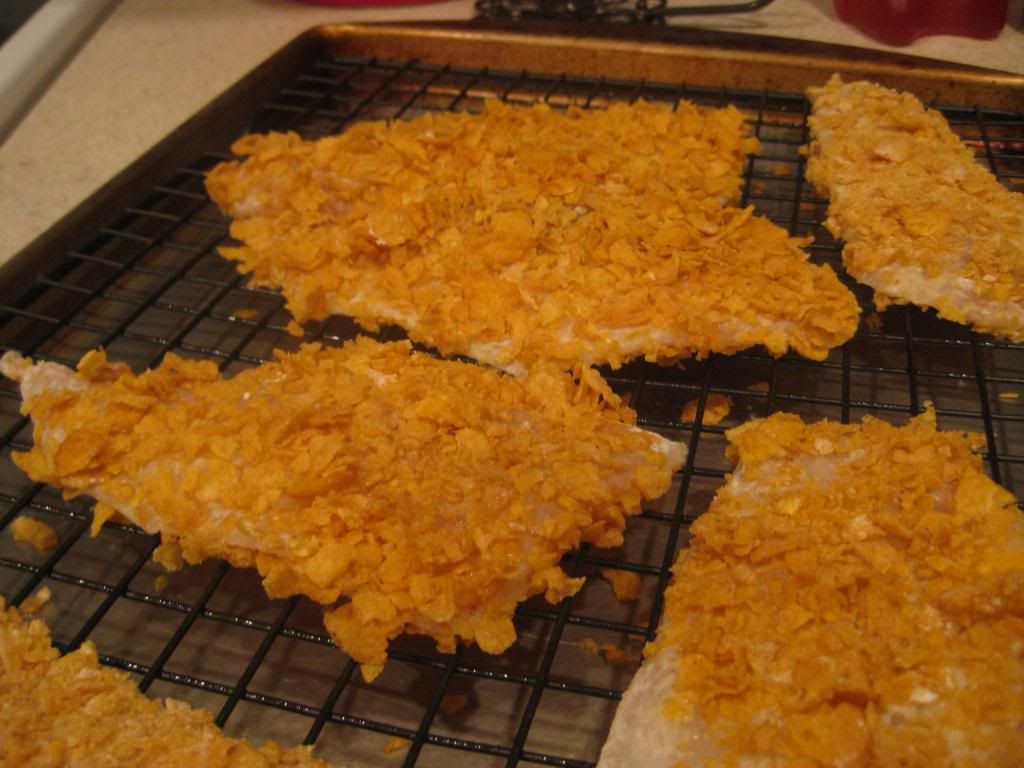
Begin the breading process by patting the fish fillets dry with a paper towel. Next, dredge both sides of the fillets through the flour, allowing any excess to shake off. Carefully dunk the fillets into the egg white mixture before pressing them into the corn flake breading. Make sure that the breading is evenly distributed into the fish, and that all cracks and crevices are filled. Place the breaded fillet on the wire rack and repeat until all fillets are breaded.


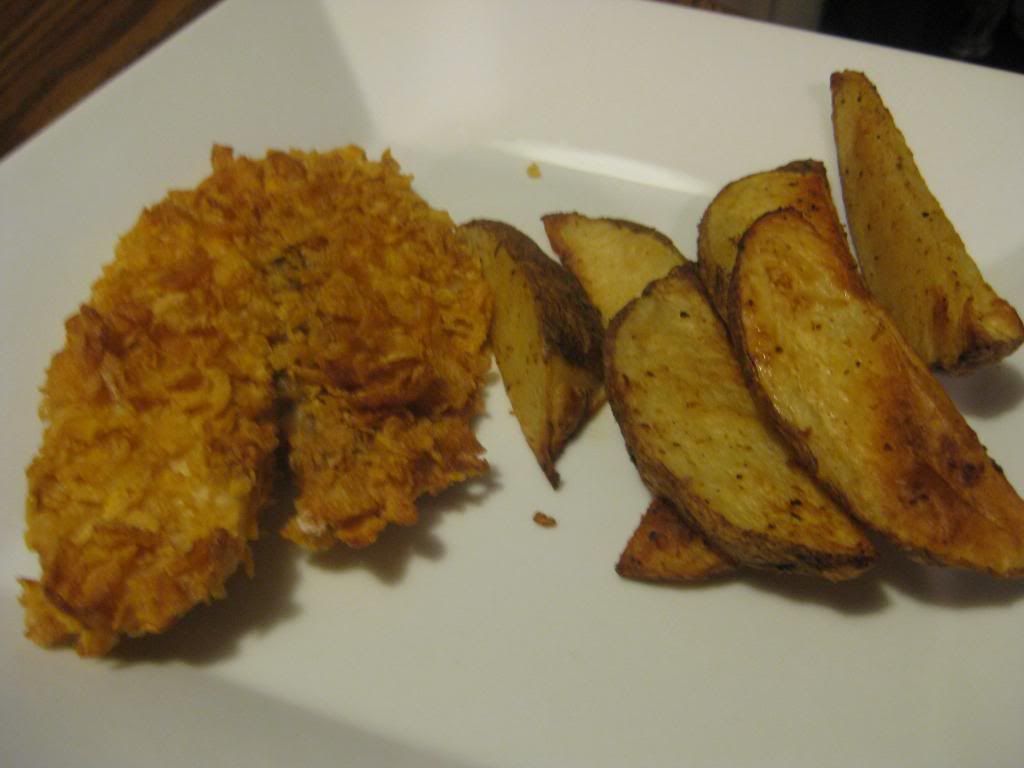
Place the second baking sheet on the upper rack in the oven and bake for 20 minutes until the breading is golden brown and the fish is opaque. Serve with the 'chips' and enjoy!


The Results:


The main draw for this dish was the new breading - corn flakes. I'm pleased to say they worked very nicely, in fact, they're hard to discern from panko bread crumbs after they've been crushed. They add an interesting new "crunch" to the final breading as well. The cajun seasoning was a nice touch to this recipe and one that is needed. Without the seasoning, the flavors could all run together and be rather bland, but just a little dash of this seasoning adds a great deal of depth and complexity to the final dish. When you factor these great flavors in with the fact that very little oil is used at all in the cooking process, you simply cannot go wrong with this dish!

That's all we have for you this evening. Be sure to stop in tomorrow night as we give a special "behind the scenes" look at our new kitchen / cooking layout. Until then,

~Cheers
Tuesday, December 11, 2012

Soup and Stew Season Starts Now

Good evening everyone!  It's starting to somewhat feel like winter here in the Des Moines metro.  While it snowed for a little while on Sunday, the cold temperatures have made it definitely feel like it's December.  And while November brought the soup recipes back to the blog, it's December that will bring the stews and hardier soups we crave during these cold winter months.  While we have several attempts at Chicken Pot Pie, tonight, I'll attempt a soup version of this classic dish, with a interesting twist.

The Recipe:  Chicken Potpie Soup
Original Recipe Found In:  Food Network magazine, December 2012

What You'll Need:
1 disk refrigerated Pie Dough
1/2 Teaspoon plus a pinch of Poultry Seasoning
2 Tablespoons unsalted Butter
1 Pound skinless, boneless Chicken breasts, cut into 1/2 inch pieces
2 Stalks Celery, chopped
1 medium Onion chopped
1/4 Cup all-purpose Flour
3 Cups low-sodium Chicken Broth
1 Cup Half-and-Half
3 medium Yukon gold Potatoes, chopped
1 10 ounce package frozen Mixed Peas and Carrots*

*Note:  We are omitting the mixed peas and carrots and using a premade mirepoix mixture.  This is a handy mixture to get, especially if you don't like to waste time chopping vegetables.

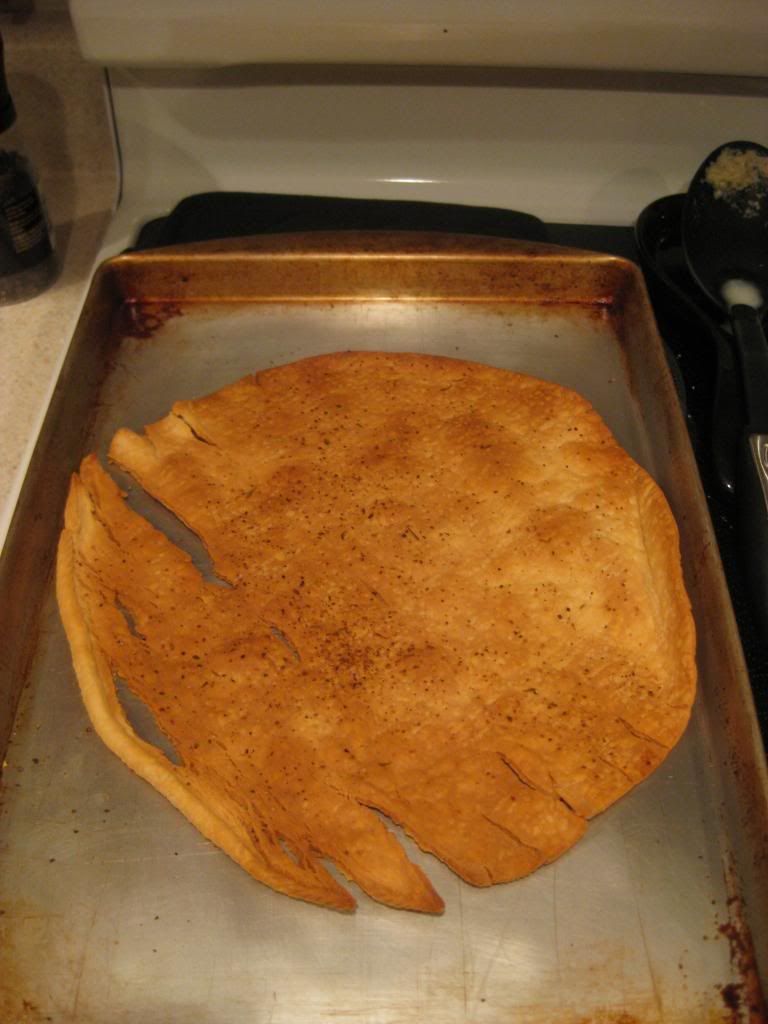
To start, preheat the oven to 425 degrees.  On a large baking sheet, unroll the pie dough and sprinkle with pepper and a pinch of the poultry seasoning.  Cut the disk into four quarters and bake until the dough is cooked through and is puffed and golden, about ten minutes.  If you are concerned about finding poultry seasoning, it's actually not that hard to find.  It's located right with the other seasonings and spices in your local grocery store.
Pie crust, sans pie

While the pie dough cooks, melt the butter in a large pot over medium high heat.  Once the butter is melted, add the chicken and 1/2 teaspoon of salt and cook.  Don't be tempted to move the chicken, because it will need to cook undisturbed for two minutes.  Then cook the chicken, stirring for about one minute.  Transfer to a bowl and keep warm.

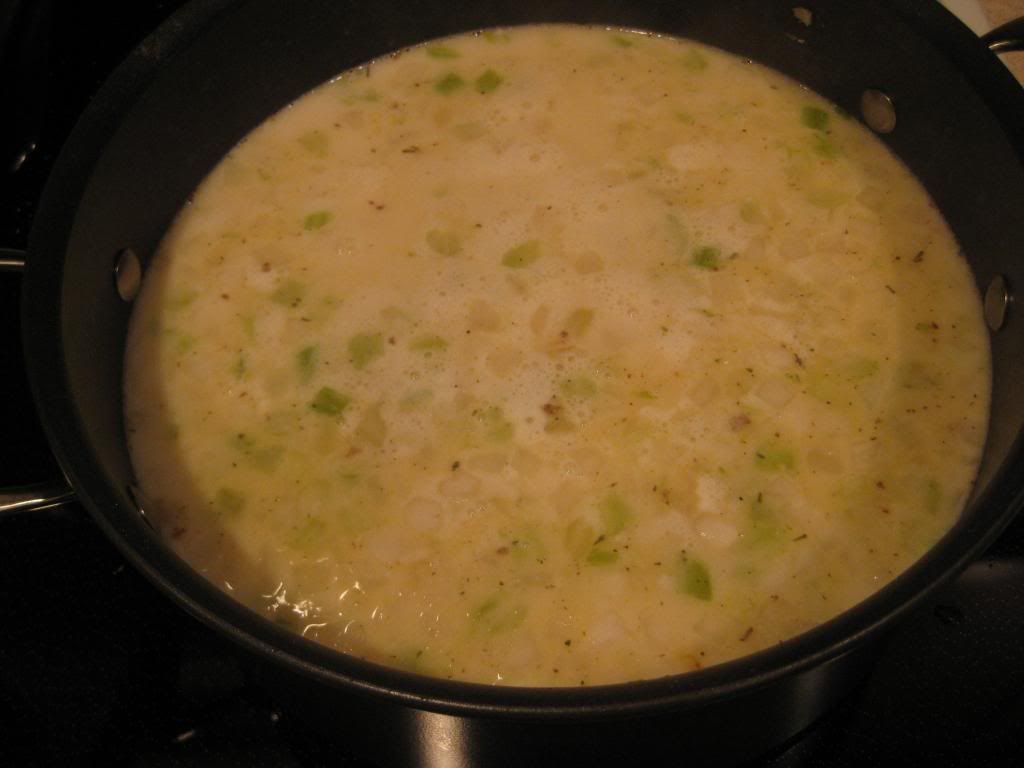
Next, in the same pot, add the celery, onion, flour, 1/2 teaspoon of salt, and 1/2 teaspoon of poultry seasoning and cook for one minute, stirring.  Stir in two cups of water, the chicken broth, half and half, and potatoes.  Cover this mixture and bring to a simmer.  Reduce the heat to medium.  Keep the pot partially covered and simmer for 10 minutes.  Add the peas and carrots and continue to simmer until the vegetables are tender, about six minutes. 

Getting all those flavors ready for our tastebuds!
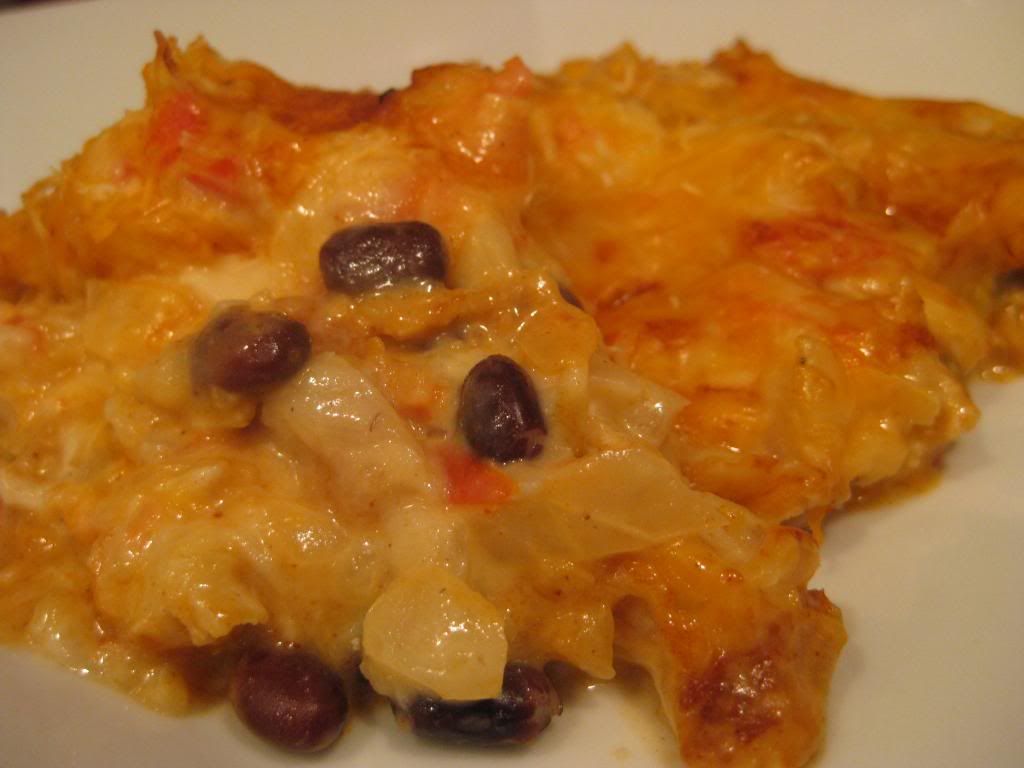
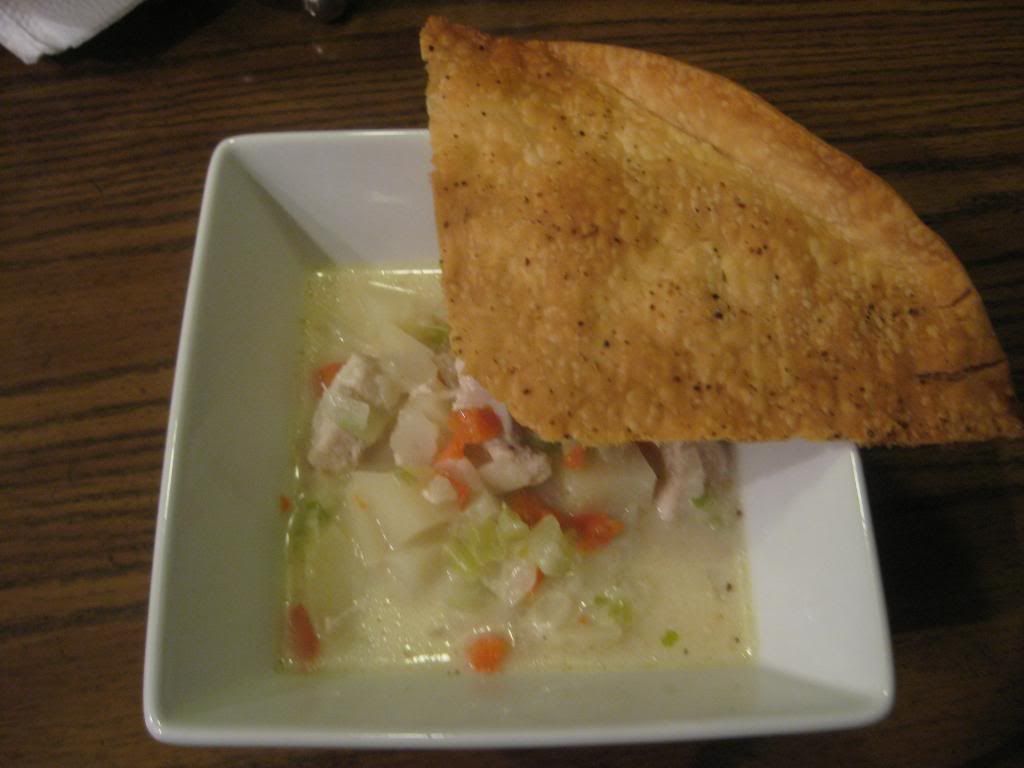
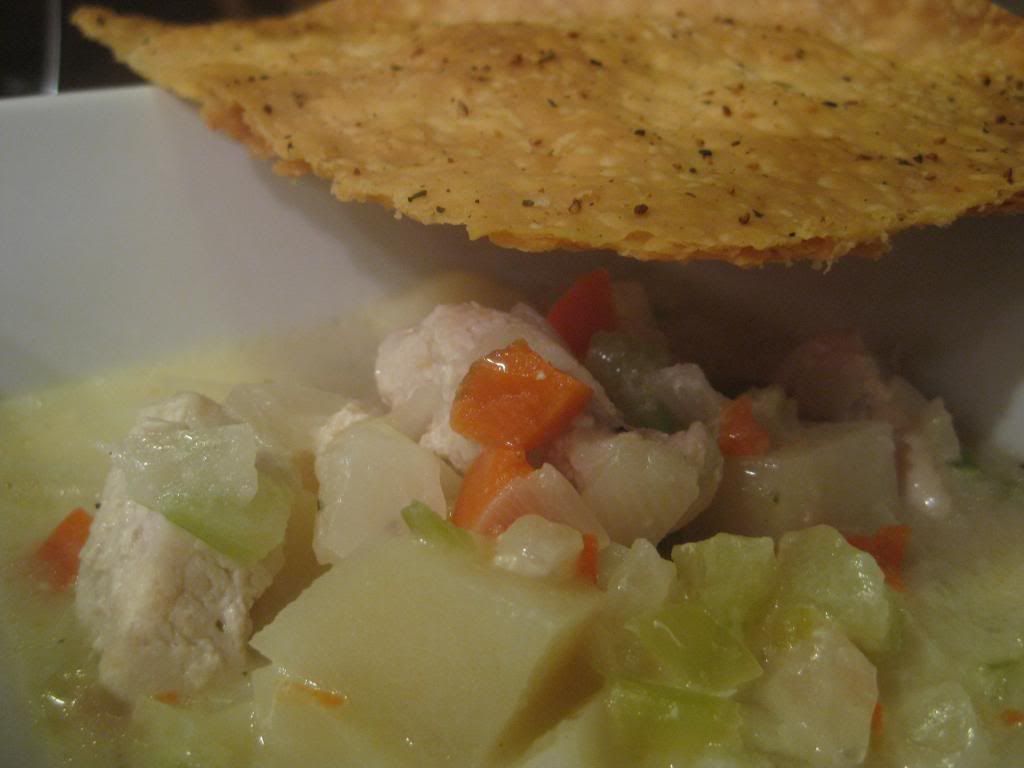
Return the chicken to the pot and cook until everything is cooked through, about one minute.  Divide amongst bowl, top with the crust, serve, and enjoy!
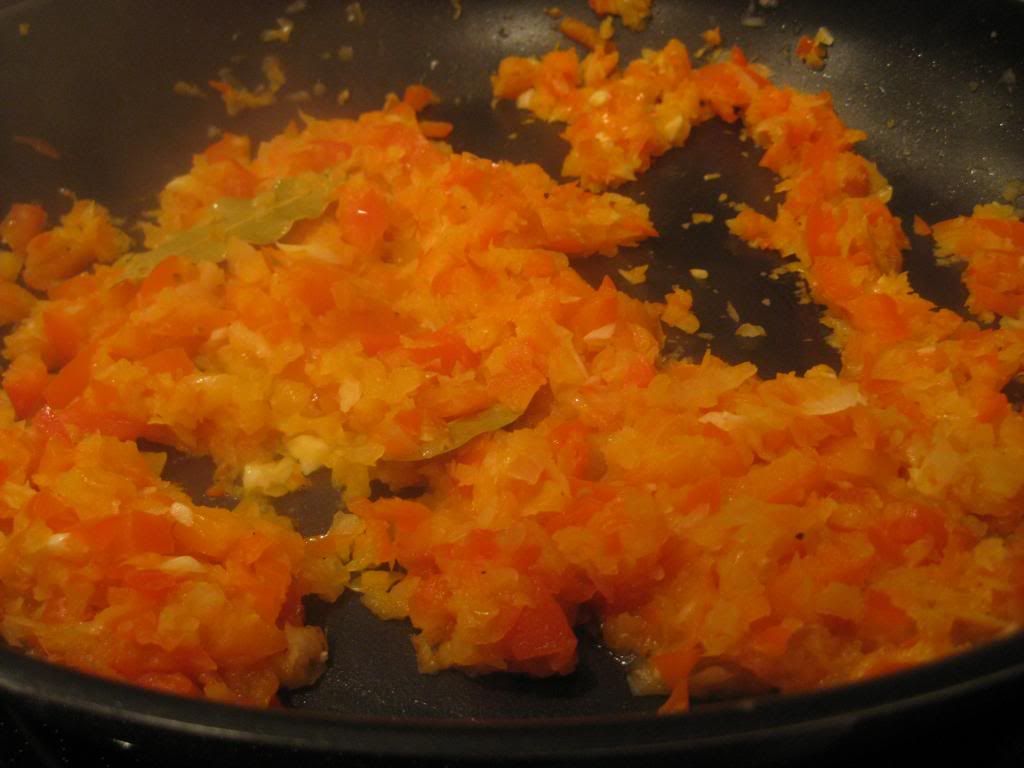
The End Result:


While the premise behind this dish was promising, it ended up somewhat similar to a recipe I made two years ago.  The base of the soup should have been thickened, but resulted in a runny, flavorless mixture.  Also, my potatoes were somewhat undercooked, and that also threw off the flavor of the dish.  But something miraculous happened when the soup amount in my bowl got lower.  Not only did the base get thicker, the potatoes were cooked and the flavor of the soup was actually there; if only the entire bowl of soup had that flavor.  I think I underestimated the "simmer" portion of the recipe.  That's where the true heart of any soup is - if you let the flavors meld during the simmer process, it will go a long way for a truly, hearty dish.

Thanks for joining us this evening.  Check back tomorrow as Tyler delves into a brand new recipe.  Until then,

~Cheers!