Thursday, January 30, 2014

Tuna, More Than Lunchbox Filler?

Good evening everyone! After enjoying Maggie's (very tasty) tuna casserole last week, I was reminded of an old episode of Alton Brown's TV show, 'Good Eats'. The episode, titled "Tuna, Surprise" begins with a skit in which a giant tuna accosts Alton for "forgetting about tuna". Alton responds with a quip "Well, I grew up". To which the giant tuna responds "I understand, all I'm good for is old-lady casseroles and lunchbox sandwiches...I doubt there's anyone in this world brave enough, talented enough to take old canned tuna and make..." (The shows theme always rolls when they trail off, so that the first words you here are "Good Eats")

The intro makes a good point - canned tuna is largely looked at as a one trick pony. You can make tuna sandwiches, maybe a tuna casserole...and not much else. Alton Brown tackles that assertion and counters that you can, in fact, do more with tuna than the standard lunchbox fare. One of the dishes he cooks up on the show was tuna croquettes and I remember thinking "that looks good, I should try that".

As one tends to do, I forgot about the dish until Maggie brought tuna back to the menu. So, tonight, we're taking our own crack at making tuna into something more. Let's get cooking!

The Recipe: Tuna Croquettes
Original Recipe From: Good Eats: Tuna, Surprise

What You'll Need:

7 Ounces Albacore Tuna (Drained)
2 Scallions (Finely Chopped)
2 Teaspoons Dijon Mustard
2 Large Eggs
1 Teaspoon Lemon Juice
1/2 Teaspoon Kosher Salt
1/4 Teaspoon Black Pepper
3/4 Cup Panko Bread Crumbs
Olive Oil

In a large bowl, combine the tuna, scallions, eggs, lemon juice, salt, pepper, 1/2 cup of the bread crumbs and dijon mustard. Mix well by hand, then divide the mixture into 8 equal pieces and onto a sheet of parchment paper (if you have a cookie scoop / baller - they work well for this). Allow the pieces to rest for 15 minutes.

Transfer the remaining panko to a shallow dish or pie plate. Use a spatula (or your hand if you want) to flatten each round to about 1/2 inch thickness. Next, place a round into the bread crumb mixture and turn to coat each side evenly in bread crumbs. Repeat with each round until all are evenly covered.

Add enough oil to a large (12 inch) non stick skillet to cover the bottom evenly. Bring the oil to a shimmer over medium high heat and add the rounds evenly in the skillet. Cook for 2 to 3 minutes per side, or until they are golden brown. Transfer the rounds to a cooling rack and allow them to cool for 2 minutes before serving. Serve with lemon juice or tartar sauce and enjoy!


The Results:


These little rounds remind me of crab cakes or salmon cakes (both things we've tried before on the blog) but with much better flavor. The tuna is a nice, neutral presence that carries the lemon / scallion flavoring beautifully while the panko provides a great crunch. This is a nice way to utilize that extra can of tuna hanging around your pantry without resorting to the standard sandwich.

That's all we have for you this evening. We're back next week with two brand new recipes, until then -

~Cheers

Wednesday, January 29, 2014

Winter's Favorite Pal: Stew

Good evening everyone!  Currently, we are caught in the deepest part of winter.  While we don't have a lot of snow, the temperatures and wind remind us that we finishing out January in Iowa.  This kind of weather entices all sorts of recipes, including numerous soups, stews, and chilis.  It's easy to pan off these broth-based dishes as an easy fix, but to get a delicious end result, a fair amount of work has to go into building flavors.  Tonight, I'm highlighting a flavorful stew that will warm the coldest night.

The Recipe:  Hearty Beef and Stout Stew
Original Recipe Found In: Cooking Light, January 2014 Issue

What You'll Need:
12 Ounces boneless Beef Chuck, trimmed and thinly sliced
1/4 Teaspoon Salt
1/4 Teaspoon Black Pepper
5 Teaspoons Olive Oil, divided
2 Cups finely chopped White Onion
1 1/2 Cups (1/4 inch thick) diagonally cut Carrot
6 Ounces pre-sliced Cremini Mushrooms
3 Thyme sprigs
1 Tablespoons Tomato Paste
2 Teaspoons minced Garlic
3/4 Cup Stout Beer
1 1/2 Cups unsalted Beef Stock
1 Tablespoon All-Purpose Flour
1 1/2 Teaspoons lower-sodium Soy Sauce

To start, heat one tablespoon of olive oil in a large nonstick skillet over medium-high heat.  While the pan is heating, sprinkle the beef with the salt and pepper.  Once the pan is heated, swirl the oil to coat and add the beef to the pan.  Cook for three minutes or until all sides are browned.  Remove the beef from the pan onto a clean plate and cover with other plate to keep warm.  

Next, add the remaining two teaspoons of oil to the pan and swirl to coat once more.  Add the chopped onion, carrots, mushrooms, and thyme sprigs and sauté for four minutes or until the onions have become translucent.  Next, add the tomato paste and minced garlic and cook until the garlic becomes fragrant, about one minute.  Slowly pour the beer in the skillet and cook for one minute, scraping the the pan to loosen any browned bits.  Finally, add the beef stock and the flour and stir until everything is well combined.

Add the beef back to the skillet and cover.  Reduce the heat of the skillet to simmer and cook for 15 minutes.  Once everything has cooked, stir in the soy sauce and discard the thyme sprigs.  Serve in soup bowls and enjoy!

The End Result:


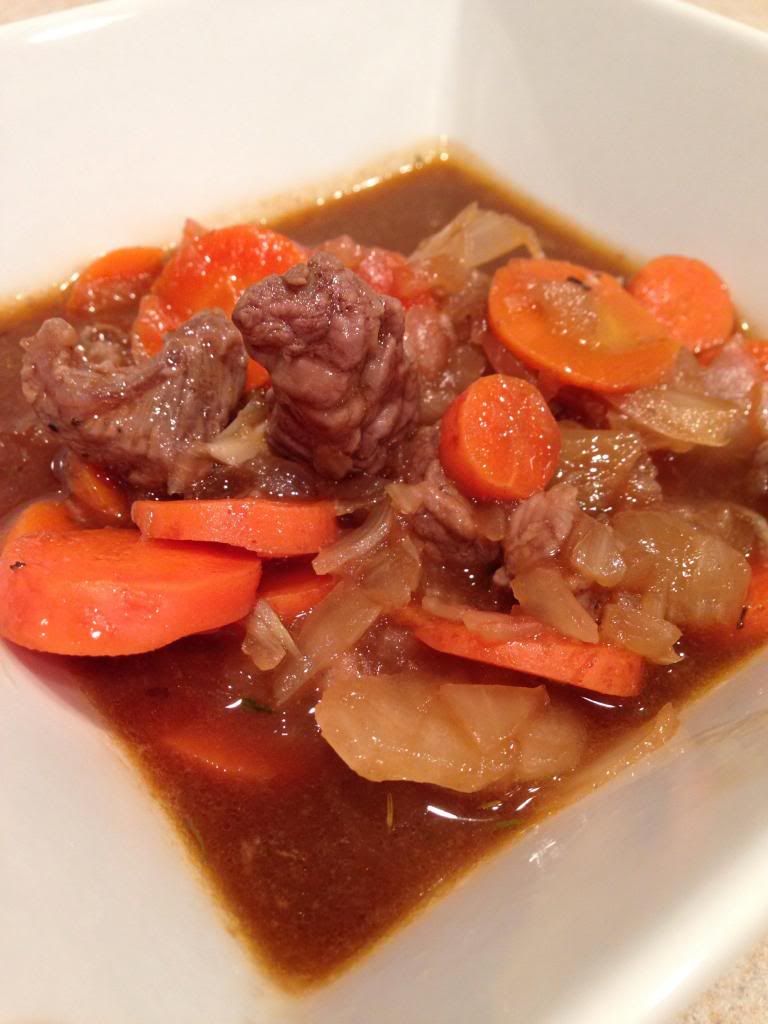
The beef is perfectly cooked and seasoned and adding it back to the skillet to cook soaks up the other ingredients.  While most of the alcohol is cooked out, the stout flavor remaining and adds a heartiness that you won't get from most stews.  It almost tasted like a French Onion soup, without the hassle of cooking onions down for hours on end.  The carrots are also a nice touch, but some pieces are still kinda crunchy, but other pieces aren't, but adds something different to the stew.  Overall, another great stew recipe to share with you and yours in the middle of winter!

Thanks for joining us tonight, check back as Tyler presents a brand new recipe.  Until then,

~Cheers!

Thursday, January 23, 2014

Amazing Glazing

Good evening everyone! We've said many times on the blog that our culinary inspirations are Alton Brown and Jamie Oliver (among others). It was Alton Brown that showed me the science of cooking (and thereby helped me understand how it worked) and it was Jamie Oliver that took complicated terminology and turned it into everyday lingo. From their inspirations, our entire blog and lifestyle has grown. We cook for ourselves, we're adventurous in the culinary world and we're not afraid to create our own meals from nothing more than inspiration.

Every once in a while, it's nice to return to your "roots" so to speak. That's why, this week, I'm grabbing a page from Alton Brown's cookbook (quite literally) and using the work of one of our earliest inspirations as inspiration for our own dish. Let's get cooking!

The Recipe: Orange Glazed Chicken
Original Recipe Found In: Good Eats 3: The Later Years

What You'll Need:
(Serves 4)

2-3 Pounds Chicken Thighs (Bone in, skin on - trimmed of excess fat)
6 Ounces Frozen Orange Juice Concentrate
3 Tablespoons Hoisin Sauce
1 Tablespoon Soy Sauce
2 Teaspoons Honey
1 Teaspoon Rice Vinegar
1/2 Teaspoon Red Pepper Flakes


This recipe, as originally constructed, is meant for chicken wings. However, I have never liked chicken wings. I simply don't get the point. Too much work for too little meat. The meat isn't even that GOOD - it's typically fatty, easily overcooked and usually just an excuse to glob on excess sauce. So, I've taken the glaze recipe from above and will be adapting it to chicken thighs - a much more flavorful and (in my opinion) worthwhile piece of meat. The cooking steps will be different from the original recipe, so don't simply substitute chicken wings back INTO the dish and expect it to work. If you'd like a wing recipe, look up Mr. Brown's original.

Preheat your oven to 425 degrees.

In a medium saucepan, combine the orage juice concentrate, hoisin sauce, soy sauce, honey, rice vinegar and red pepper flakes. Set the heat to medium high and bring the mixture to a light simmer while stirring constantly. Allow the mixture to cook, with regular stirring, until it reduces to about 1/2 of a cup. Transfer this glaze to a shallow bowl.

Next, place a wire cooling rack on top of a rimmed baking sheet. Spray the cooling rack with a light coating of non stick cooking spray (if your rack isn't non stick).

Using your fingers, carefully pry the outer skin away from the meat of the thigh to create a small pocket. Next, using a small spoon or a small pastry brush, add a portion of the glaze to the chicken between the skin and meat. Repeat until each thigh has a bit of glaze beneath the skin. Next, gently roll each thigh in the glaze (this is why I said shallow bowl) until a light layer of glaze is on each thigh. Place the thighs on the wire baking rack and then into the oven for 40 to 45 minutes, or until the internal temperature of the thighs reaches 170 degrees. (Note: this method produces a nice crispy skin. If you do not like the skin - like us - you can use a covered baking dish. The difference here is you can add all of the glaze into the dish and let the chicken cook surrounded by the glaze. Cooking time remains the same, regardless of method).

Serve topped with any remaining glaze and enjoy!

The Results:


If you've ever had orange chicken from a Chinese buffet or Chinese restaurant you'll recognize the flavor right away. This glaze coats the chicken beautifully, becoming a sticky yet savory vessel that gives each bite a burst of flavor. It should be noted, I don't typically eat chicken skin, so I wasn't too concerned with getting a good crisp skin. If you're looking to partake in the skin, add a few more minutes to the cooking time.

This recipe is versatile enough to be adapted to any cut of chicken, so whether you're cooking up wings for a game day feast or just want to give a bright citrus boost to a weeknight meal, this recipe won't steer you wrong.

Wednesday, January 22, 2014

Meatball Sliders, Heading Your Way!

Good evening everyone! The slider, fun sized little sandwiches (typically burgers) have started to infiltrate every part of the culinary world. While they’re not a new concept, they have typically been a staple of restaurants and fast food chains. It’s only been recently that the concept has begun to make its way into the everyday kitchen.

This month’s Food Network Magazine featured an assortment of slider recipes, but one in particular caught my attention both for its creativity and versatility. It takes the common meatball and turns it into a tasty bite sized sandwich – I took this inspiration and ran with it. The result was a lot of fun to cook and eat.

The Recipe: Meatball Sliders
Original Recipe Inspired By: Food Network Magazine, January 2014 Issue

What You’ll Need:
(Serves 4)

1 Pound Ground Chuck or Sirloin
12 Dinner Rolls
½ Cup Bread Crumbs
½ White Onion (Diced fine)
3 Cloves Garlic (Crushed)
12 Ounces Marinara Sauce
Shredded Mozzarella Cheese

I’ve heavily adapted the original recipe to the point where my instructions no longer follow the instructions in the magazine. As such, if you want to try the recipe the way it was originally concocted, I’d recommend checking it out in the most recent Food Network issue.

If you’ll recall, we showed you how to grind your own chuck or sirloin in a THIS post. It’s a great way to have high end beef without paying high end ground beef prices. Don’t simply replace the meat with traditional ground beef – you’ll lose a lot of the flavor simply to save a couple of minutes of prep time (It’s not worth it!)

In a large bowl, combine the ground chuck, bread crumbs, diced onion, garlic and a pinch of salt and pepper. Using your hands, combine the mixture until everything is evenly distributed. Using a small ice cream scoop or a couple of tablespoons, make small (tablespoon sized) balls out of the meat. You should yield between 12 and 15 meatballs. The bigger you make the balls, the fewer you’ll have (and the longer your cook time will be for each ball) adjust accordingly.

Add a tablespoon of extra virgin olive oil into a large (12 inch) non stick skillet and place it over medium high heat. Bring the pan up to heat and let the oil begin to shimmer before adding the meatballs. Cook, undisturbed, for 5 minutes before flipping the balls over and cooking for an additional 5 minutes. After the meatballs have been browned on the outside, add the marinara sauce to the skillet and bring the mixture to a light simmer. Reduce the heat and cover the skillet, allowing the sauce to thicken for about 5 to 10 minutes.

Place a small pinch of the mozzarella cheese on the bottom half of a dinner roll (sliced in half) then spoon a small portion of the marinara on top of the cheese. Add one meatball, topped with more cheese, then the top of the dinner roll. Repeat until all meatballs have been served. Enjoy!

The Results:


Think spaghetti and meatballs, without the spaghetti. Effectively, you have everyone’s favorite part of the traditional dish without all the pasta. These little morsels are tasty and easy to eat. I opted to add the garlic and onion INTO the meat, rather than into the sauce as the original recipe called for – which resulted in a little more flavorful meatball. I also chose to cook the marinara sauce alongside the meatballs and reduce it slightly, creating a thicker, more glaze like sauce that clung to the meatballs which was a welcome touch.

If I were to tweak this recipe, I think I’d replace the ground chuck meatballs with the crackin’ meatballs as inspired from Jamie Oliver’s recipes. Those meatballs are the pinnacle of any ball based meat we’ve ever made and would do quite well on a small dinner roll. These meatballs are perfectly fine on their own, but why settle for fine when you know there’s something better out there?

That’s all we have for you this week. We’re back next week with another set of brand new recipes. Until then,

~Cheers

Tuesday, January 21, 2014

Not Your Typical Tuna Casserole

Good evening everyone!  As a product of the public school system, there are a number of dishes that remind me of what we were fed as children.  Albeit the majority of them being not so healthy for our young minds (trust me, that's a completely different subject that has deserved many posts from us.)  One of the many dishes we were given was Tuna Casserole and it wasn't, at all, appealing.  Tonight, I'll take a new spin on the traditional tuna casserole and make it memorable.

The Recipe:  Tuna and Corn Pasta Bake
Original Recipe Found In:  Quick Cook Pasta

What You'll Need:
3 Tablespoons unsalted Butter
5 Tablespoons all-purpose Flour
2 1/2 Cups Milk
14 Ounces Rotini pasta
1 (12 ounce) can Tuna in water, drained
7 Ounces frozen Corn kernels
3/4 Cups grated Sharp Cheddar cheese
1/4 Cup Panko bread crumbs

To start, heat a medium saucepan over medium heat.  Melt the butter and stir in the flour until a smooth paste forms and cook until golden, two minutes.  Gradually whisk in the milk and bring to a boil, stirring frequently.  Once the sauce starts to bubble slightly, reduce the heat to a simmer and cook for ten minutes or until thickened and stirring occasionally.  Season the sauce with salt and pepper.

While the sauce is cooking, bring an oven to 400 degrees.  Also, bring a large saucepan of water to a boil and cook the pasta according to package directions.  Once cooked, drain the pasta in a colander and return the pasta to the pan.  To the pan, add the sauce, tuna, corn, and cheese and stir until everything is well combined.  If it becomes difficult to combine, don't use the saucepan to mix all the ingredients.  You can mix the ingredients in the dish you'll cook the pasta in.

Next, spoon the pasta mixture into a large oven safe cooking dish and sprinkle with the panko and any remaining cheese.  Place the dish in the oven and cook for 15 minutes or until the top is lightly browned and is bubbling.  Spoon into serving bowls, serve, and enjoy!

The End Result:


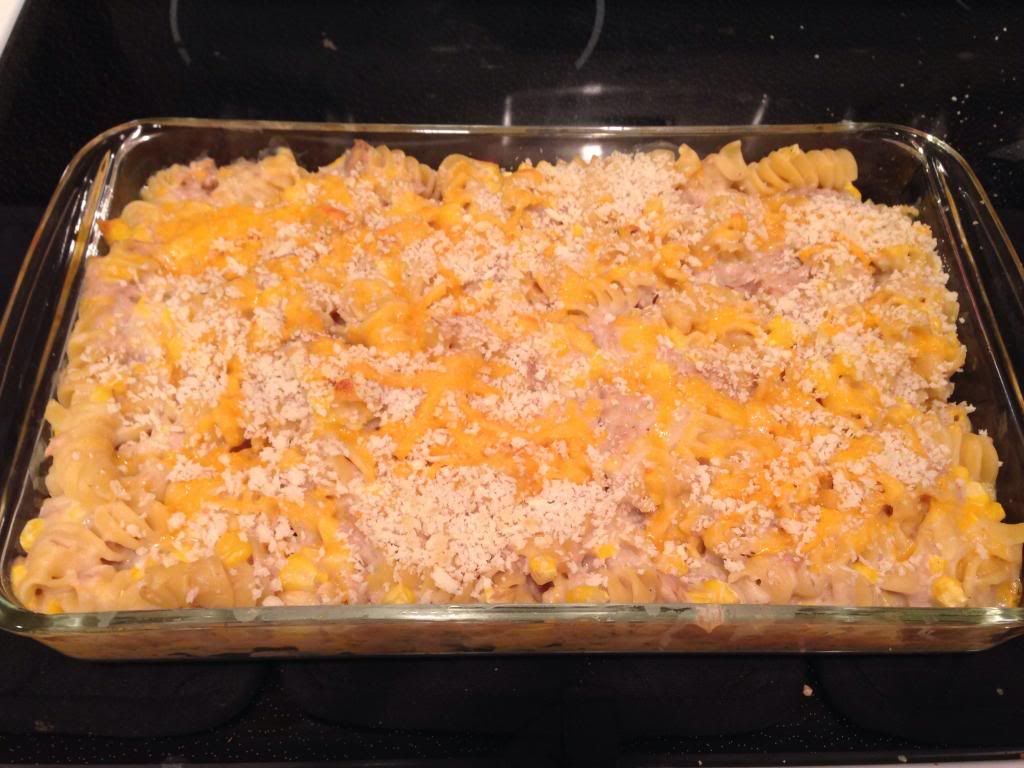
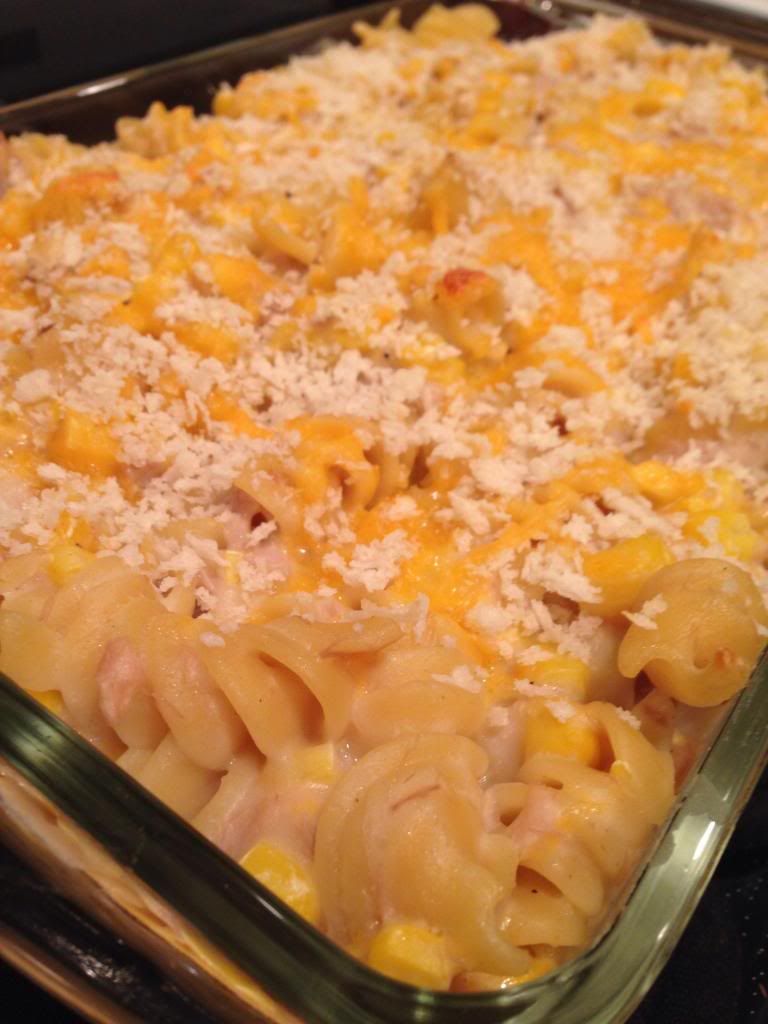
This tuna casserole is nothing like the dish we were served as kids.  The sauce coats the pasta, tuna, and corn and makes the entire dish super creamy.  It was almost like a velvety feel on the palate.  The corn added a few hints of sweet when biting into them and added a nice surprise when eating the dish.  I'm not afraid to admit that I like canned tuna, but using it in this recipe was actually quite nice. If we used any other kind of tuna, the recipe may not have turned out the way it did.  Overall, a great departure from the school lunch classic.

That's all we have for you this evening.  Check back on Wednesday and Thursday as Tyler brings back to back recipes to share.  Until then,

~Cheers!

Wednesday, January 15, 2014

Chili, Kicked Up a Notch

Good evening everyone!  I get many ideas for our blog from the website, Pinterest.  While some of these recipes aren't that reliable (trust me, I've had my fair share,) there a few gems worth noting.  And while these gems are great on their own, I've often questioned if they could be better.  Tonight, I take two versions of the same recipe and make it completely my own, with results that are beyond compare.

The Recipe:  Steak Chili
An adaption from several recipes featured on www.pinterest.com

What You'll Need:
1 Pound Stew Meat
1 Red Onion, diced
4 Cloves Garlic, minced
1 Jalepeno, diced
1 Cup dry Red Wine
1 (14.5 ounce) can diced Tomatoes
1 (14.5 ounce) can crushed Tomatoes
1 Tablespoon Chili Powder
1 Tablespoon Ancho Chili Powder
2 (15 ounce) cans Kidney Beans
Sour Cream
Shredded Cheddar Jack Cheese
Oyster Crackers

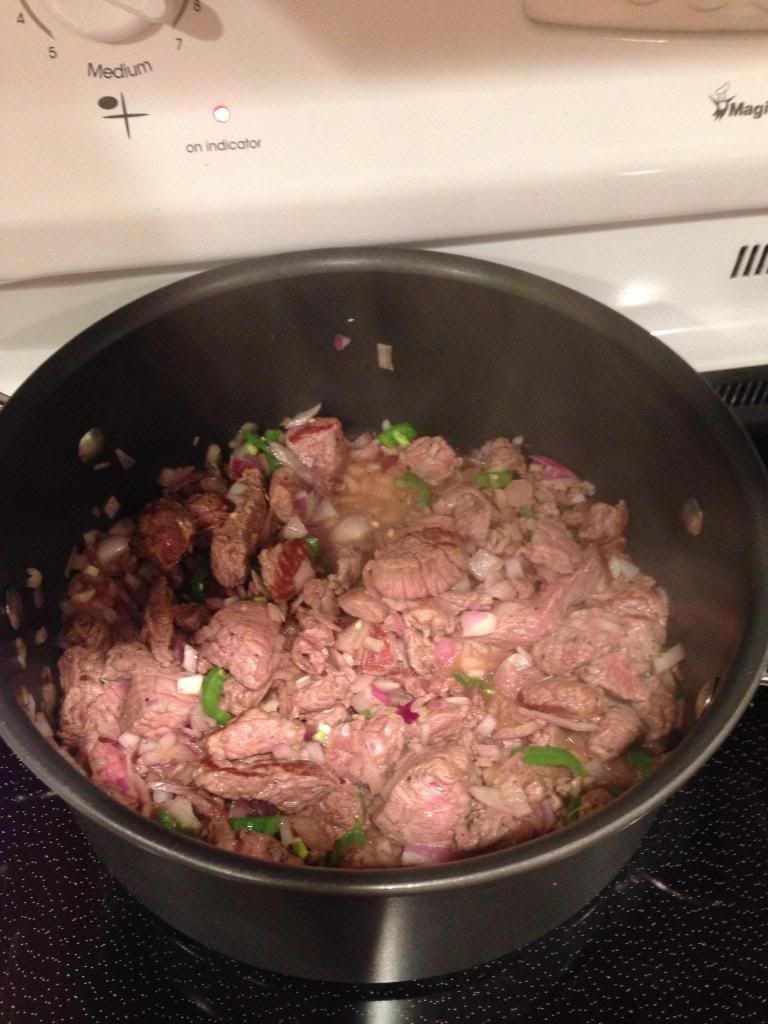
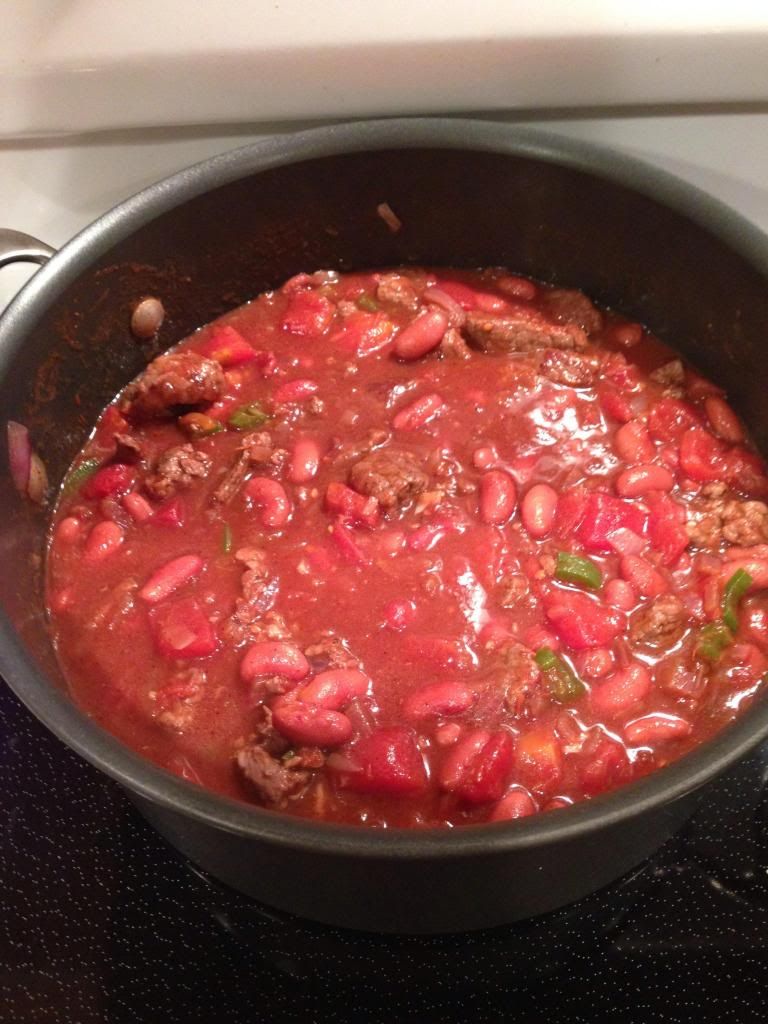
To start, season the stew meat with salt and pepper, tossing to coat.  Next, heat a large Dutch oven over medium-high heat.  Once heated, add the meat and cook until browned, about two to three minutes.  The meat will start to release a liquid; this will be vital for cooking purposes.  Once the meat is cooked and the juice has started to bubble, add the onion, garlic, and jalepenos.  Cook until the ingredients become fragrant, about three minutes.  


Stir in the diced and crushed tomatoes, along with the kidney beans and red wine.  If all the ingredients are not covered by any liquid (from the diced tomatoes or the wine,) add 1/2 cup of water.  Only add more if it is needed.  Also add the chili and ancho chili powders and stir to combine.

Pre-simmer

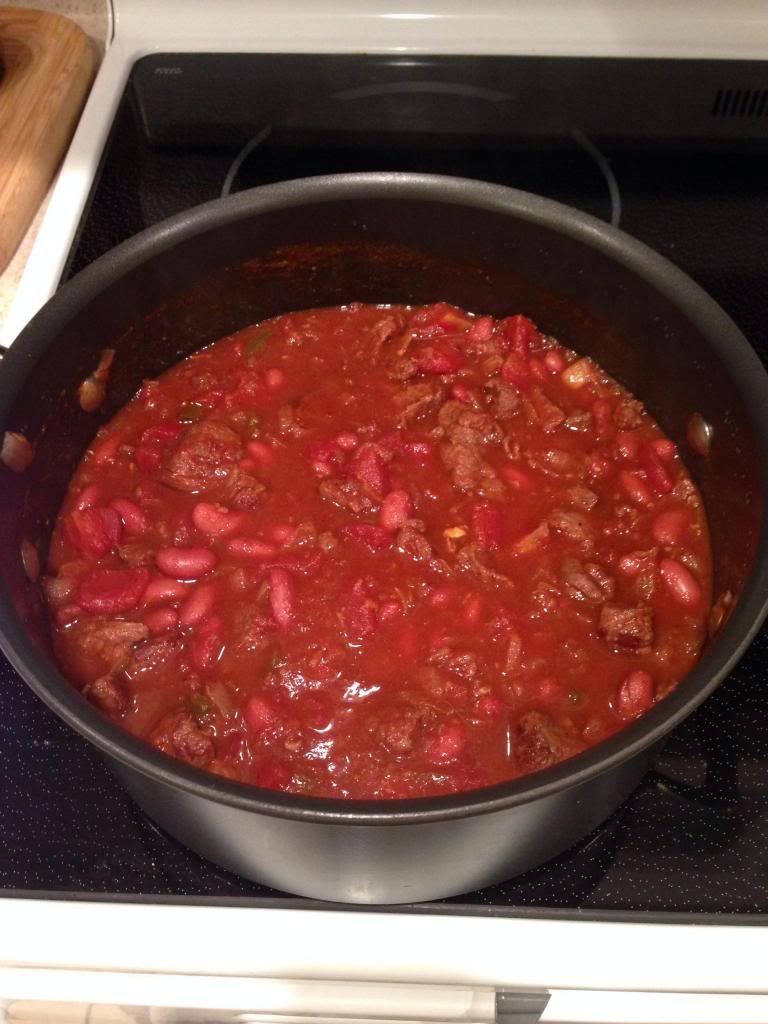
Reduce the heat to low and cover with a lid.  Let the chili cook for two hours - not a minute less.  If the fragrance of the chili becomes too overwhelming, check to see if it needs a stir.  This will happen about three to four times, but you will not need to babysit it.

After two hours of the chili simmering it its own juices

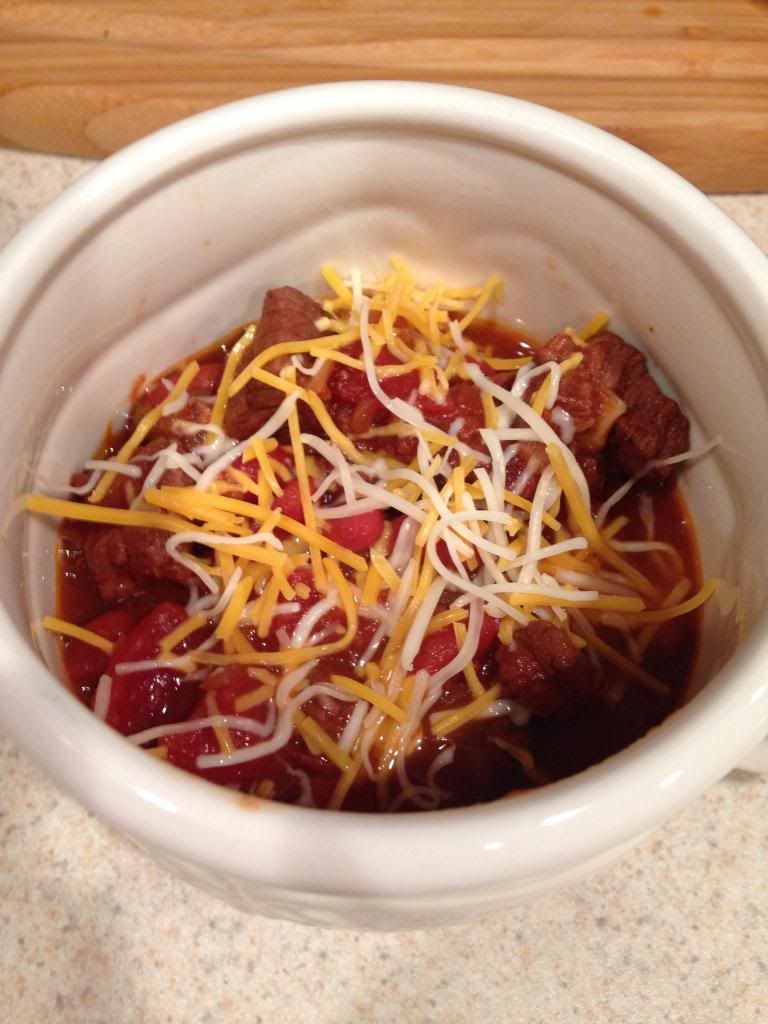
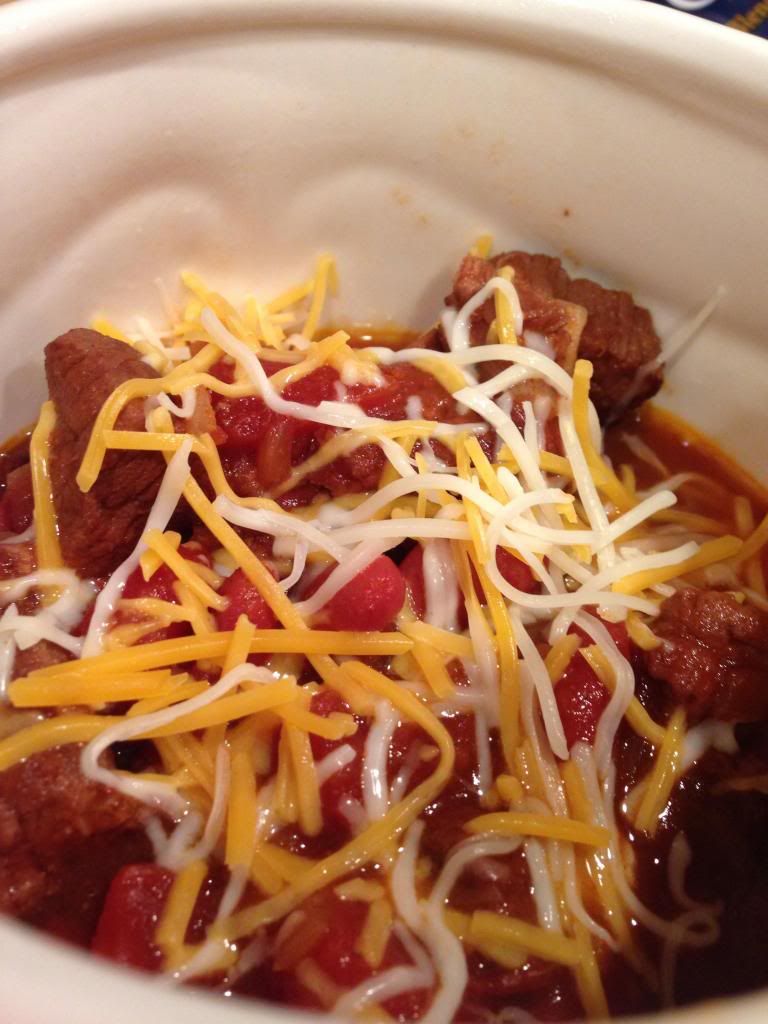
Spoon into individual soup bowls.  Add sour cream, shredded cheese, or oyster crackers to taste.  Serve and enjoy!

The End Result:


This is, by far, the best chili I've had or ever created.  The slow, simmer process really gave the flavors more depth and made the meat the "melt in your mouth" consistency.  If you are looking for the beans in the final dish, they won't be as noticeable, if you were to throw the ingredients together and cooking it on the spot.  One of the versions of the recipe called for one to two cups of water, while the other had one cup of red wine.  I was astonished that the blogger chose water over wine.  I understand if you don't like cooking with alcohol, but substitute it with beef stock or broth.  It would have yielded a great taste, without a boozy feel to it.  

Also, both versions had two tablespoons of chili powder and no ancho chili powder.  While we ran out of chili powder by the first tablespoon, it was pure accidental to add the ancho.  It gave the chili a nice kick that helped the flavor of the dish.  If you can't stand too much heat, adding the oyster crackers or sour cream will help mellow it out, without taking away that flavor.  Overall, a great soup recipe to add to try on your own!

That's all we have for you this evening.  Check back tomorrow as Tyler whips up a great slider recipe.  Until then,

~Cheers!

Thursday, January 9, 2014

"Sage" You'll Give This A Try?

Good evening everyone! One of my favorite discoveries from this blog has been pork. More specifically, discovering that I can finally eat and enjoy pork. You see, when I was younger pork (and ham) left me with an upset stomach, which became bad enough that merely THINKING about pork was enough for me to feel ill.

I’m not sure if I simply had one bad experience and thereby associated all pork with that feeling, but whatever the cause, I simply would not eat ANYTHING pork related for many, many years. In addition, the few times I was forced to eat pork (luncheons or gatherings where it was the only thing on the menu, for instance) I never found the product to be all that…well…good. The texture (rubbery) the flavor (none) all combined for a negative experience that further enhanced my stance against “the other white meat”.

Then we started learning how to cook, cooking our own meals and looking for healthy recipes. I kept encountering pork in MANY healthy recipe books and sites. Finally, I caved and tried the product once again. The rest, as they say, is history. We’ve since embraced pork in all facets and have made many delicious pork based recipes on the blog to date.

So many, in fact, that a lot of other recipes we find are simply derivatives of OTHER recipes we’ve made earlier. It’s not as much fun for our readers when we re-hash a dish, so we tend to either make those dishes without a blog post or simply avoid them. So, when a recipe comes along that features a twist we haven’t tried yet, you can be sure we’re going to pounce on it. That’s the case with tonight’s dish. Intrigued? Let’s get cooking!

The Recipe: Braised Pork Chops With Sage
Original Recipe Found In: Food Network Magazine, January 2014 Issue

What You’ll Need:
(Serves 4)

¼ Cup Sugar
4 Bone In Pork Chops (8 ounces each), Extra Fat Removed
¼ Cup All Purpose Flour (Unbleached preferred)
2 Tablespoons Extra Virgin Olive Oil
3 Large Sprigs Sage
3 Garlic Cloves (Smashed)
1 Lemon (Sliced into 6 rounds, then halved)
4 Whole Pickled Pepperoncini (Drained)
1 ½ Cups Grape Tomatoes
1 Cup Low Sodium Chicken Broth
2 Cups Couscous (Prepared according to package instructions)
1 Tablespoon Parsley (Fresh, chopped)

* We’ve made some heavy modifications to the recipe that we’d like to point out before we begin. If you ever order a Papa John’s pizza (don’t – but if you have) you’ve likely encounter a pepperoncini. They’re little green peppers that have a small amount of heat (Papa Johns puts them on top of their pizzas occasionally). I’m not a fan of heat and Maggie cannot take much at all, so we left out the little pepper tonight. Since that was gone, I opted to remove the whole Mediterranean theme from the dish and dropped the grape tomatoes too. Instead, I halved the chicken broth (1/2 cup) and focused on the lemons and garlic to create a citrus sauce.

Since I was changing things, I dropped the brine as well. (I’ll still go over those steps below, in case you would like to follow the recipe as originally laid out). The sugar, made necessary by the presence of the peppers in the dish, simply would have been too much once we dropped the pepperoncini so it was cut. Furthermore, our pork chops were “enhanced” (the butcher’s way of saying pre-brined) so a salt bath would have done little more than waste time for us. If you chops are NOT enhanced, you’ll want to follow the brining steps at the beginning of the recipe.

Okay, enough details – let’s cook.

Combine the sugar and ¼ cup kosher salt in a bowl or shallow dish, then dissolve the mixture with 3 cups of water . Submerge your pork chops in the water and allow them to rest for 10 minutes. As I alluded to above, this quick brine will help preserve some of the moisture in the pork chop while cooking (the sugar balances the heat from the peppers added later). Enhanced pork chops have already been injected with a salt / water mixture, so they do not need to be brined again.

Add your flour to a shallow dish or plate. Season each chop with pepper (no salt, that’s already been taken care of) then dredge each chop through the flour, coating each side (allow the excess flour to fall off).

In a large skillet (cast iron if you have one), heat the oil over medium high heat until it begins to lightly shimmer. Add the pork and allow it to cook undisturbed for 5 minutes, or until the bottom becomes golden brown. Next, add the sage to the skillet, flip the pork chops so they rest on top of the stage (uncooked side down, against the sage) Scatted the garlic, lemon slices and pepperoncini (if using) around the pork chops. Cook, undisturbed, for 5 minutes or until golden brown.


Add the tomatoes, chicken broth and ½ cup water to the skillet (we added ½ cup chicken broth and nothing more) and reduce the heat to medium low. Allow the mixture to simmer for 10 to 15 minutes, or until the pork chops are cooked through and the liquid has reduced by about half. (Make sure to flip the chops about half way through cooking).

Transfer the chops (and surrounding sauce) to a serving platter. Serve with the couscous and top with the fresh parsley. Enjoy!

The Results:


You never are quite sure of the final result when you play with a dish as much as I did tonight. I made so many changes to the original concept of the recipe that it wouldn't be unheard of for the final dish to be lacking something. While we typically try to balance out any changes we make, sometimes a dish is just missing an element of flavor when the "dust settles". 
Luckily, that was not the case tonight. The sage / lemon combination was a bright, refreshing twist to the traditional flavor of pork that gave the meat a whole new life. It's amazing how well aromatics can transfer flavors - the sage is not part of the final dish at all (you leave the sprigs in the pan) but the pork tastes like sage (not in an overwhelming way, more in a "hey, is that sage?" way). 
If you've never tried couscous, this is the dish to change that. (Check your local grocery store's rice and pasta aisle, it's likely hiding out right next to the rice). This simple little grain cooks up in flash (7 minutes for the type we were using - that INCLUDES waiting for the water to boil) and it picks up the flavors that surround it beautifully. A little drizzle of lemon juice from the lemons in the skillet and this couscous simply "popped" with flavor. 
The only thing that didn't work out as well as the original recipe intended was the pan sauce. It wasn't bad...there just wasn't any. By cutting the broth in half and omitting the water, the liquid portion of my dish simply went up in vapor by the time my chops were cooked through. In the long run, that's not such a bad thing as the chops stood up quite well on their own - no sauce needed! 

That's all we have for you this week. Stop back next week for more culinary adventures and new recipes. Until then, 

~Cheers

Tuesday, January 7, 2014

Toasting Pasta

Good evening everyone!  As I checking my plethora of cooking magazines, I came across a recipe that called from 'toasting pasta' before cooking it.  My curiosity struck and I was intrigued.  The more I looked into it, it was actually a simple idea for providing delicious results.  Tonight, I attempt this brave, new concept with a great, creamy end.

The Recipe:  Skillet-Toasted Penne with Chicken Sausage
Original Recipe Found In:  Cooking Light magazine, January 2014

What You'll Need:
6 Cups unsalted Chicken Stock
2 Tablespoons Olive Oil, divided
8 Ounces uncooked Penne pasta
1 Cup sliced Sweet Onion
13 Ounces Italian Chicken Sausage, casings removed
2 Tablespoons fresh Lemon Juice
1/4 Teaspoon Kosher Salt
2 Tablespoons grated Parmigiano-Reggiano Cheese

To start, pour the entire amount of chicken stock in a large saucepan.  Bring the stock to a simmer, but do not boil.  Keep the stock warm over low heat as you continue with the recipe.

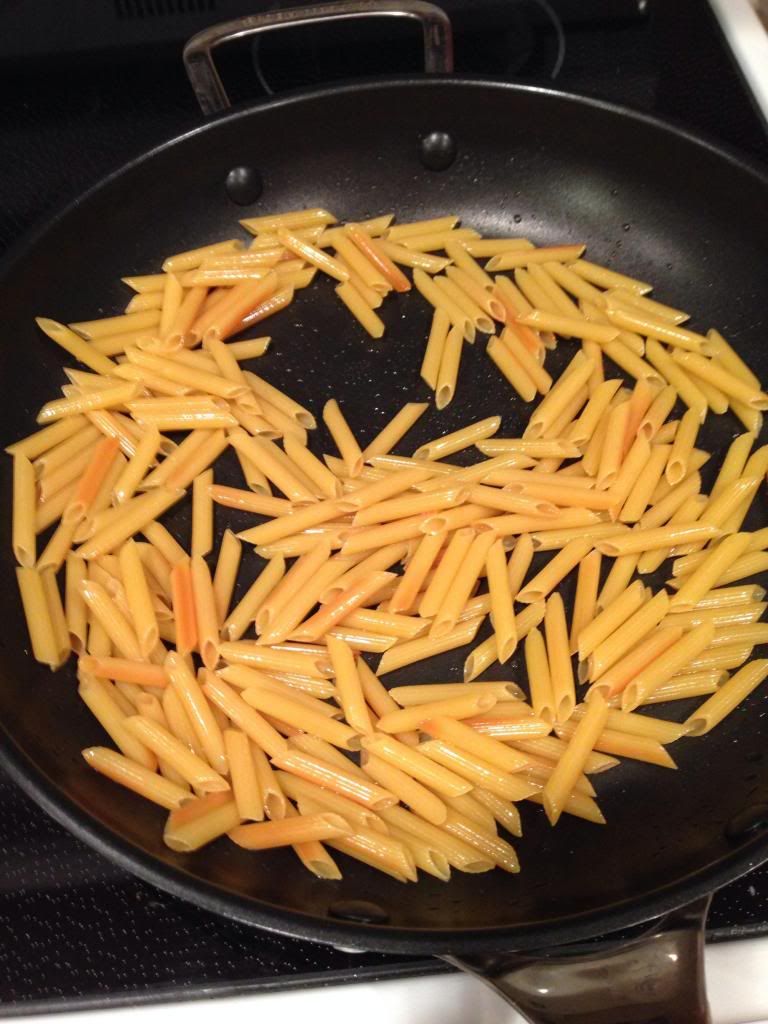
In a large skillet, heat one tablespoon of olive oil over medium heat.  Once the pan is heated, swirl the oil to coat and add the pasta.  Cook the pasta for five minutes, or until all sides of the pasta are a golden brown color.  Be sure to stir the pasta frequently, as to evenly cook it.  Once cooked, remove the pasta from the pan in a bowl and set aside.


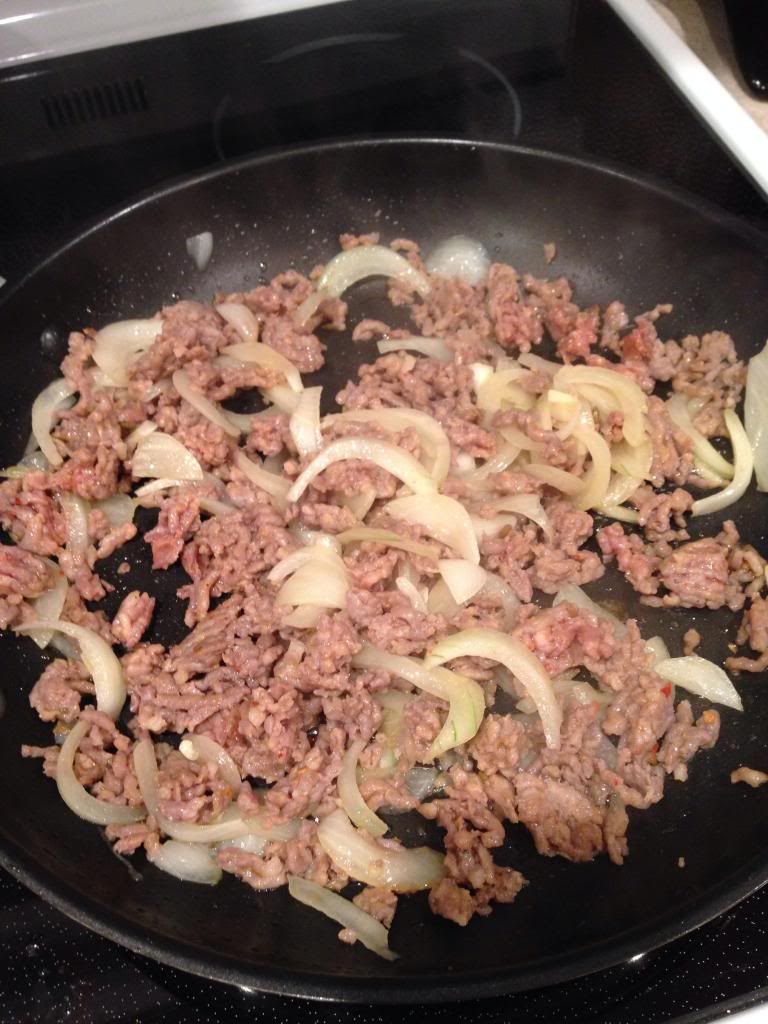
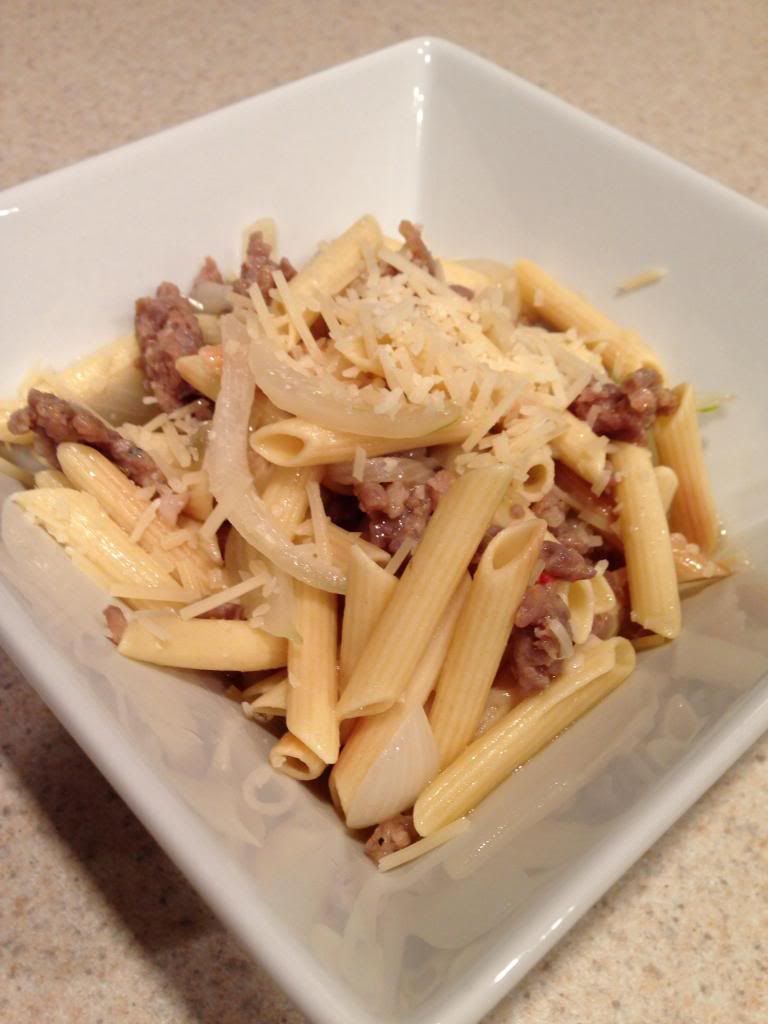
Next, add the remaining tablespoon of oil and add the onion and sausage.  Cook until the onion begins to soften and the sausage browns, about four to five minutes.  Once cooked, remove the sausage mixture from the pan into another bowl and set aside.  Reduce the heat to medium-low heat and return the pasta to the pan.  Add one cup of the stock to the pasta and stir constantly or until each portion of stock has nearly absorbed.  Continuing adding one cup of stock until the liquid is gone from the saucepan; this will take about 35 minutes, while stirring frequently.  Add the sausage mixture, lemon juice, salt, and cheese.  Stir until all the ingredients are heated through, spoon into a serving bowl, serve, and enjoy!


The End Result:


I've never heard of the 'toasting pasta' concept before tonight, but it is one to definitely remember!  The pasta becomes sort of nutty and is almost creamy, without any cream sauce whatsoever.  Cooking the pasta like a risotto really brings out those flavors that are cooked out with boiling water and draining.  While it would be easier to do so, I would highly recommend you don't, because you won't know what you'll miss!  The sausage and onions add a nice bite of heat and crunch that won't overwhelm your pallet too much.  With the bit of cheese I added, it helped round out the flavors of the truly unique pasta dish.

That's all we have for you this evening.  Join us on Thursday as Tyler presents a new dish.  Until then,

~Cheers!

Thursday, January 2, 2014

Mole! Mole! Mole!

Good evening everyone, welcome to 2014 (boy, that’s going to take a bit to get used to). We’re kicking off the new year by entering a new realm of cooking; creating the famous Mexican sauce, mole. (Pronounced mol-eh or mol-ay, not like the subterranean mammal).

For those not familiar, mole is a traditional sauce found in many Mexican dishes. While it’s commonly found in Mexican cuisine, its definition is not common at all. In fact, there’s very little agreement in what actually constitutes mole. As such, there are variants ranging from the more common brown mole (chile based, featuring ancho chile peppers) to green and even yellow. While the makeup is different among each variety, the concept is relatively the same. A spicy (typically pepper) base is mixed with a sweetener (usually chocolate) to create a rich, savory sauce that accompanies beef, chicken or pork.

Surprisingly enough, despite our fondness for Mexican cuisine, we’ve never cooked up a traditional mole. That changes in 2014! Let’s get cooking:

The Recipe: Slow Cooker Turkey Mole
Original Recipe Found In: Food Network Magazine, December 2013 Issue

What You’ll Need:
Serves 8

15 Ounces Diced Tomatoes (Drained, if canned)
2 Large Carrots (Finely diced)
1 Green Bell Pepper (Diced)
¼ Cup Fresh Cilantro (Chopped)
4 Scallions (Chopped)
2 Tablespoons Peanut Butter
1 ½ Tablespoons Low Sodium Soy Sauce
1 Tablespoon Ancho Chile Powder
2 Teaspoons Unsweetened Cocoa Powder
½ Teaspoon Chinese Five Spice Powder
1 Skinless, Boneless Turkey Breast
Corn Tortillas

In a large (4 to 6 quart) slow cooker, combine the tomatoes, carrots, bell pepper, cilantro, scallions, peanut butter, soy sauce, chile powder, cocoa powder and five spice powder. Stir well until everything is evenly blended before adding the turkey breast to the pot. Turn the breast in the mixture and layer it between the ingredients (if possible). Set the slow cooker to low and leave it alone for at least 8 hours.

After 8 hours, shred your turkey using a fork. (If you could only find bone-in turkey breast at your local grocer, remove the breast prior to shredding, to avoid leaving any bones behind). After the long cook, the turkey should easily fall apart. Once shredded, stir the pot well to combine all of the ingredients (time in the slow cooker can cause the liquid and solids to separate – a good stir encourages them to join forces once more).

Use a slotted spoon to serve the turkey mole into corn tortillas. Top with a bit of cilantro and scallions if you so choose. Enjoy!

The Results:


Our first foray into mole (ha, that rhymed) turned out quite well. The sauce is almost hard to define. It’s not at all spicy, despite featuring ancho chile powder, five spice powder and bell peppers – a fact that’s only possible due to the presence of peanut butter and cocoa powder. Speaking of which, you’d think these not so traditional ingredients would stand out in stark contrast to the veggies and turkey, but you’d be wrong. They blend so well you cannot even taste a hint of either in the dish.

This low calorie (362 calories per serving) mole does a nice job of creating authentic mole flavoring without fully diving into the traditional sauce and works well as a starter point for those unfamiliar with the popular base (like us). But it does leave you craving a bit more – you can tell eating this dish that the sauce could have a bit more potential if one were to embrace the traditional ingredients. However, for the low calorie trade off, you certainly can’t go wrong giving this lighter mole recipe a try.

That’s all we have for you this week. We’re back next week with a pair of brand new recipes. Until then,

~Cheers

Tuesday, December 31, 2013

Fancy Pasta in a Flash!

Good evening everyone!  Sometimes, we command too much out of a pasta recipe.  Whether it's heavy sauces or a list of ingredients two pages long, we tend to add too much to the humble pasta dish.  Sometimes, the best pasta dishes are the most simplest.  Tonight, I'll showcase one example of a simple, yet delicious pasta recipe that you can make in a snap!

The Recipe:  Herby Fettuccine with Fried Eggs
Original Recipe From:  Quick Cook Pasta

What You'll Need:
10 Ounces Fettuccine
2 Tablespoons grated Parmesan Cheese, plus extra to serve
1 Teaspoon dried Parsley, plus extra to serve
3 Tablespoons Olive Oil
1 Garlic clove, finely chopped
4 Eggs
Pinch of dried Red Pepper Flakes

To start, bring a large saucepan filled with water to a boil over medium-high heat.  Cook according to the package directions.  Once the pasta is done cooking, reserve 1/3 cup of the pasta water and drain the pasta in a colander.  Once all the water has drained out, bring the pasta back to the saucepan.  Add the Parmesan and parsley and stir well until the cheese has melted.  If the cheese clumps together on itself, add small portions of the pasta water to thin out the cheese.  Season with salt and pepper.

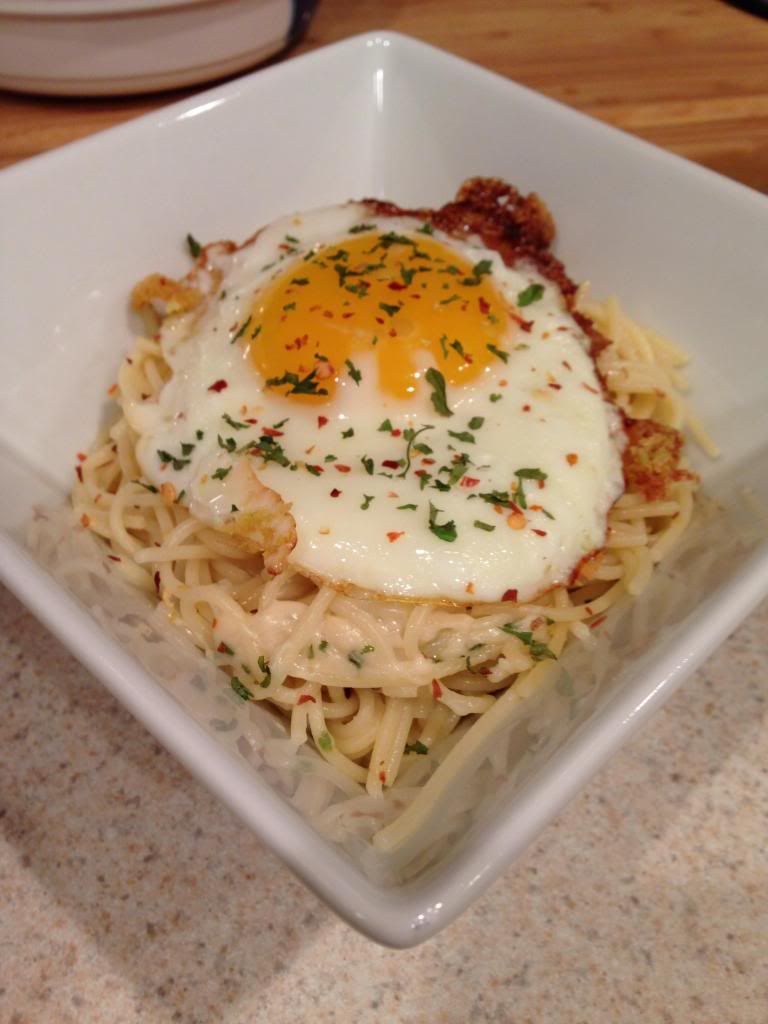
Next, in a large nonstick skillet, add the olive oil and heat over medium-high heat.  Once the oil has heated, add the garlic and heat until the garlic has become fragrant, about 30 seconds.  Then, crack the eggs into the skillet and cook for three minutes, or until the whites are cooked, but the yolks have just set.

Divide the pasta into four serving bowls and top each with a fried egg.  Sprinkle the red pepper flakes, any remaining Parmesan cheese and parsley, serve, and enjoy!

The End Result:


The melted cheese, combined with the pasta, created a creamy sauce that wasn't too heavy, yet had just enough flavor to enhance the dish.  The parsley added a hint of flavor, but the red pepper flakes gave just enough heat to warm the back of the throat.  The fried egg was definitely a treat.  While the yolk was cooked just enough, yet was still runny, it covered the pasta in coat of tastiness that can only be experienced to enjoy.  While it is a little odd to have eggs on pasta, it is one recipe that you shouldn't pass up!

That's all we have for you this evening.  Check back on Thursday as Tyler lightens a Mexican favorite.  As 2013 comes to a close, we want to thank all of you who read our blog.  We are nothing without our loyal followers and we cannot thank you enough for sharing our culinary adventures with us.  We'll see you in 2014!  Until then,

~Cheers!

Wednesday, December 18, 2013

Western Omelet "Hash"

Good evening everyone! Every once in a while, we accidentally stumble upon a theme week when we pick recipes for the blog. This week is one of those weeks. Maggie started us off with a delicious french toast casserole that was one for the cookbook (the still in progress cookbook...it's a long story). Tonight, I'm taking another breakfast recipe for a spin. Nothing says winter like breakfast food...right? Either way, let's get cooking!

The Recipe: Western Hash Brown Omelet
Original Recipe Found In: Food Network Magazine, December 2013 Issue

What You'll Need:
(Serves 4)

8 Large Eggs
2 Tablespoon Extra Virgin Olive Oil
4 Ounces Thick Cut Deli Ham
2 Bell Pepper (Red, Green) Diced
1 Onion, Diced
2 Tablespoon Unsalted Butter
3 Cups Frozen Shredded Hash Browns (Do not thaw)
4 Ounces Smoked Gouda Cheese (Grated)
1 Bunch Scallions (Chopped)

Beat the eggs in a large bowl until they become bubbly / foamy.

In a large (broiler safe - so no non-stick) skillet heat the olive oil over medium high heat until it begins to shimmer lightly. Next, add the ham, peppers and onion along with a pinch of salt and pepper and cook until the veggies begin to brown. Once cooked, add this mixture to the bowl of beaten eggs.


Preheat the broiler.

Wipe the skillet clean, then add the butter and set the skillet over medium heat. Melt the butter before adding the hash browns. Cook, pressing the hash browns into the bottom and up the sides of the skillet (into a cohesive layer) then allow the hash browns to brown (this takes about 6 minutes). Next, pour the egg mixture over the hash browns and place the skillet under the broiler. Cook until the eggs have partially set (5 minutes) then sprinkle the cheese over the eggs and cook for an additional 2 to 3 minutes, or until the eggs are set and the cheese has melted.

Using a small spatula, pry the hash brown from the sides of the skillet and transfer to a platter or large cutting board. Fold the hash brown "round" in half, then slice into wedges. Serve topped with scallions and enjoy!

The Results:

The finished dish "pre-fold" the "fold" didn't go so well on our end... 


This dish was quite the surprise. While the execution proved to be a bit harder than anticipated (the omelet didn't fold, so much as "crumble" leaving us with a hash, not an omelet) the final flavors were a perfect blending of cheese, potato and peppers. We've tried some other forms of western omelets before - with different ranges of success - but this recipe proved that simplicity is the best answer. Simple ingredients equal complex flavors. If you're looking for something to spice up a weekend omelet or if you want to bring some variety to the weeknight meal, give this recipe a try.

That's all we have for you this week, in fact, that's all we have for you NEXT week as well. With the holidays coming up next week (holy cow, right?) and the travel we'll be doing we simply won't have time to blog. We hope everyone has a happy holiday and enjoys the time spent with their loved ones. Until the week of 12/30,

~Cheers


Tuesday, December 17, 2013

Breakfast for Dinner Part One: Not Your Standard Casserole

Good evening everyone!  While we were planning our cooking schedule this week, we accidentally both chose breakfast recipes.  We have done many adaptations of great breakfast dishes that adapt well to the evening meal.  This is great for us since we both love breakfast/brunch meals.  Tonight, I'm cooking up a hearty French Toast variation that will leave you wanting more!

The Recipe:  Easy French Toast Casserole
Original Recipe From:  www.myrecipes.com

What You'll Need:
2/3 Cup packed Dark Brown Sugar
2 Tablespoons unsalted Butter
2 Tablespoons Dark Corn Syrup
1 1/2 Cups 1/% Low-Fat Milk
1/2 Cup Egg Substitute
1 Teaspoon Vanilla Extract
1/4 Teaspoon Salt
1/8 Teaspoon grated Orange Rind
2 large Eggs
6 (1 1/2-inch-thick) slices French bread
6 Tablespoons frozen fat-free Whipped Topping, thawed
1 to 2 Teaspoons Grand Marnier (or orange-flavored liqueur)*
2 Tablespoons finely chopped Pecans, toasted

*Alternatively, if you do not have an orange-flavored liqueur handy, you can substitute orange extract, just remember that the extract will be more potent than the liqueur, so for every teaspoon of liqueur, use 1/4 teaspoon of extract.  Still the same flavor, without some of the booziness.

To start, prepare a 9x13 baking dish by spraying the bottom with cooking spray.  Next, combine the brown sugar, butter, and corn syrup in a small saucepan over medium heat.  Cook for five minutes, or until the ingredients come together, or until the sugar dissolves and it begins to bubble.  Be sure you stir this mixture constantly, or else the sugar will burn and will leave a not-so great smell in your kitchen!  After the mixture has come together, quickly transfer the mixture to the bottom of the baking dish and spread while the mixture is still hot to evenly coat the bottom of the dish.  Set the pan aside and let the dish cook completely.


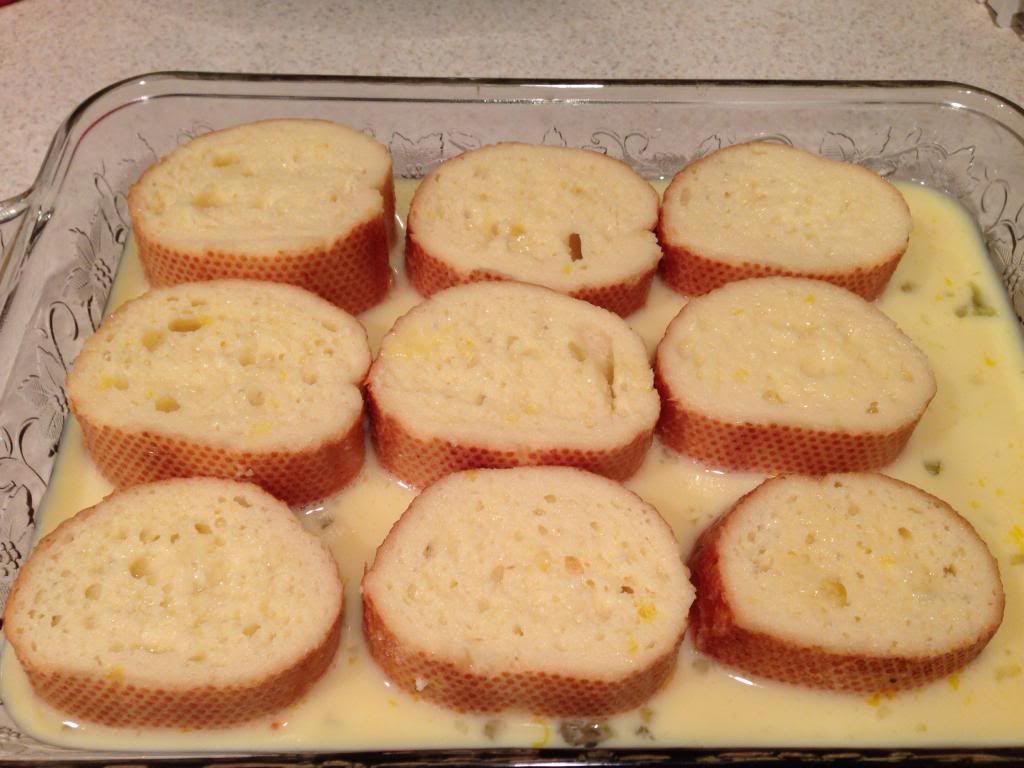
Next, in a small mixing bowl, combine the milk, egg substitute, vanilla extract, salt, orange rind, and eggs.  Whisk until all the ingredients are all combined.  Place one bread slice into the egg mixture and flip the slice to coat on both sides.  Place the dredged bread slice in the sugar-lined dish.  Continue the dredging process and placing in the baking dish for the next bread slices.  Once all the pieces of bread are in the baking dish, pour any of the remaining egg mixture over the bread slices.  Cover the baking dish with a lid or aluminum foil and refrigerate overnight.


The next day, preheat an oven to 350 degrees.  While the oven is preheating, take the baking dish out of the refrigerator and bring to room temperature.  By the time the oven is preheated, the dish should be ready to put in the oven.  Bake the casserole in the oven for 30 minutes at 350 degrees or until lightly browned.

While the casserole bakes, prepare the topping.  In a small mixing bowl, combine the whipped topping and the Grand Marnier until well combined.  Once the casserole is done baking, remove from the oven.  Place one bread slice, with the caramel side up, on a serving plate.  Top each piece of bread with a dollop of the prepared topping and a sprinkle of pecans.  Serve and enjoy!

The End Results:


Oh...my...goodness!  There were so many great parts about this dish that can't go unnoticed.  I've heard rave reviews about 24 hour and overnight soaks for French toast dishes and I can see why.  The bread is completely submerged in the egg mixture and creates almost a velvety feeling when you bite into it.  The caramel melted and creates a cloak of sweet texture over the bread.  The whipped topping has a hint of orange flavor and makes the toast even more delicious.  Even the pecans added a bit of a crunch and added to this already perfect dish.  This French toast casserole definitely cannot be missed and should be part of your next brunch lineup!

Thanks for joining us this evening.  Check back tomorrow when Tyler continues the breakfast for dinner theme with a brand new recipe.  Until then,

~Cheers!

Friday, December 13, 2013

Friday Bonus Blog: We're Baking Some Scones!

Good evening everyone to a special Friday blog!  One thing that we don't include as often on the blog is baking recipes.  While neither of us have a knack for baking, when I see a delicious baked good, I really want to try it.  My baking results have, more often than not, been about 65% not good to 45% good.  This recipe would highlight itself under the 45% file and is a recipe I would love to try again.

The Recipe:  Chocolate Chip-Hazelnut Scones
Original Recipe Found From:  www.bakeorbreak.com

What You'll Need:
2 Cups White Whole-Wheat Flour
2 Tablespoons Granulated Sugar
2 Teaspoons Baking Powder
1/2 Teaspoon Baking Soda
1/2 Teaspoon Salt
1/2 Cup Unsalted Butter, cold and cut into 1/4 inch cubes
1/4 Cup chopped Hazelnuts
1/4 Cup mini Semisweet Chocolate Chips
2.4 Cup Buttermilk
1 Egg Yolk
1/2 Teaspoon Vanilla Extract

To start, preheat an oven to 375 degrees.  Also, prepare a baking sheet with parchment paper or a silicone liner.  Next, in a large mixing bowl, add the flour, sugar, baking powder, baking soda, and salt and combine well.  Into that bowl, add the butter and cut into the mixture, using a pastry blender or a fork until the butter/flour mixture looks like coarse meal.  Once this has mixed, carefully stir in the hazelnuts and chocolate chips.

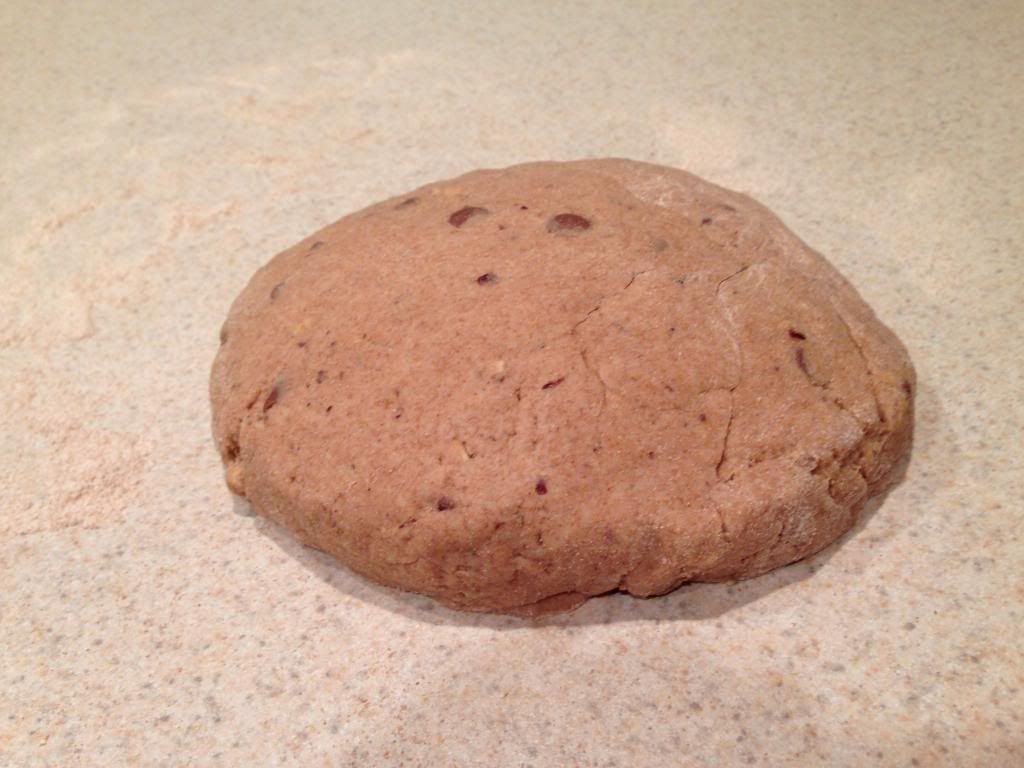
In a small bowl, whisk together the buttermilk, egg yolk, and vanilla.  Gently pour the liquid mixture into the flour mixture and stir until a dough forms.  Next, carefully transfer the dough to a lightly floured work surface and knead gently for a few turns.  Once the dough has combined itself, gently pat the dough into a flat disk, about seven inches in diameter and no more than an inch and a half thick.  Cut the disk into six to eight wedges.


After cutting into wedges, transfer them to the prepared pan.  For softer scones, leave the wedges close together in a circle, for crispier scones, separate and spread out the wedges.  Place the baking pan in the oven and bake for 18-25 minutes, or until lightly golden brown.  Cool the pan on a wire rack.  Once cooled, serve, and enjoy!

The End Result:

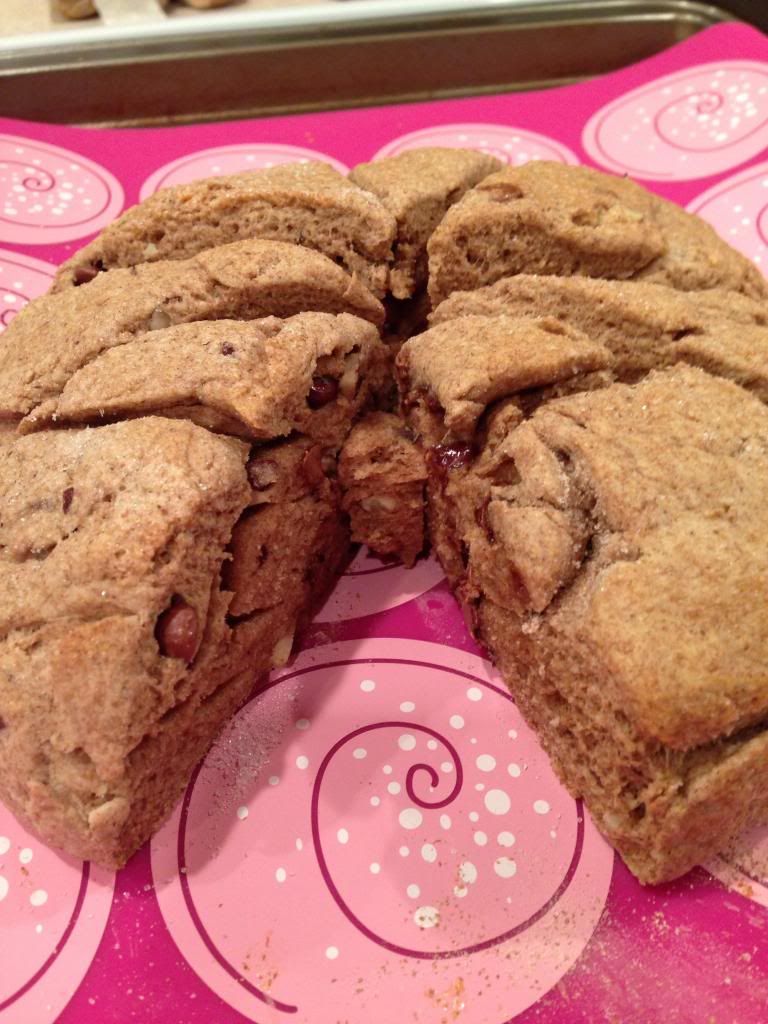
(The bright pink you see under the scone is a silicone mat we got at IKEA - it was $10, compared to $25 for "brand name" silicone mats!)


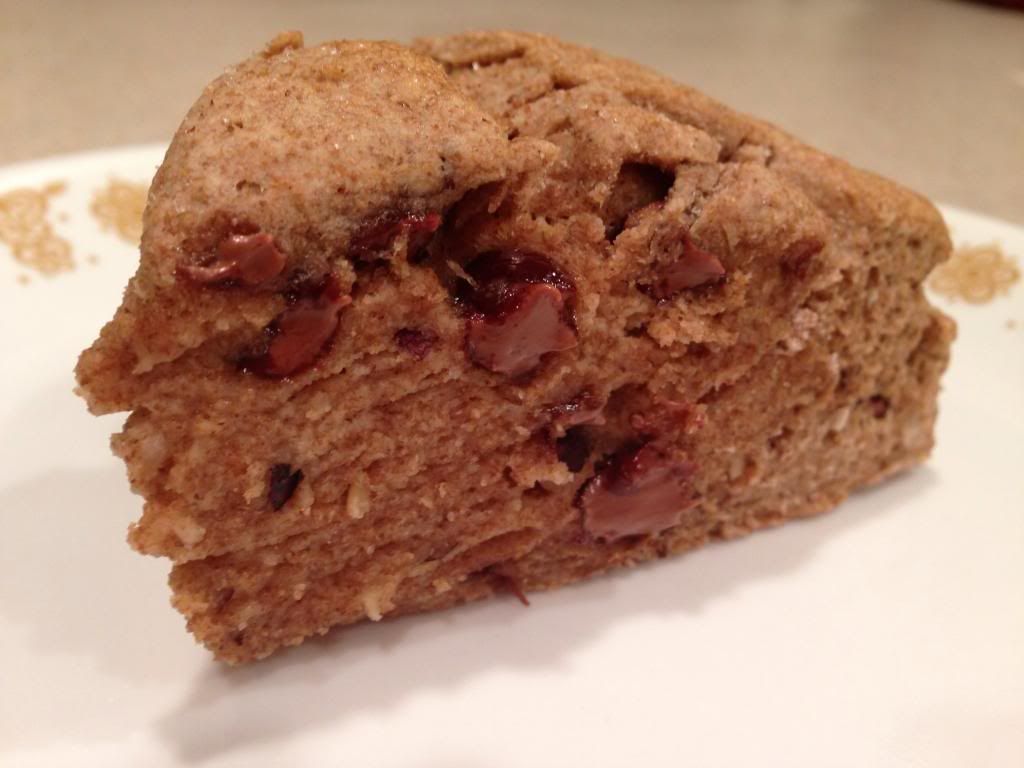
I did have high hopes for this scone when I started baking it, and some of those hopes got lost in the shuffle.  We used whole-wheat flour, instead of WHITE whole-wheat flour, and that made a huge difference.  The flavor of the dough wasn't quite right, and almost tasted yeasty (which is weird, because there was no yeast in the recipe.)  With that being said, the scone was almost too dry to chew and needed warming up when eating it.  The saving grace of this recipe though was the chocolate chips and the hazelnuts.  If it worn't for those two ingredients, this scone recipe would have been a disaster.  I would like to try this recipe again, except I would make some major alterations:  I would use all-purpose flour (or white whole-wheat) flour, so the flavor components would really shine through.  Also, adding more sugar, chocolate chips, and/or hazelnuts would really enhance the entire flavor of the scone.  Otherwise, it was a baking attempt that was almost there, but it didn't completely fall on its face.

Thanks for joining us this week.  Check back next week as we continue to cook up some brand new recipes.  Until then,

~Cheers!

Wednesday, December 11, 2013

Helping the Holiday Ham

Good evening everyone! We’re presently in the dead center of the holiday season. Thanksgiving is two weeks behind us, Christmas is two weeks ahead. This means countless family gatherings and endless holiday meals. Thanksgiving and Christmas are fairly traditional holidays when it comes to the meal selection. Turkey is the staple of Thanksgiving, while ham is the predominant dish come Christmas day. (Obviously this isn’t a blanket statement and your own family could choose to eat something else entirely on these holidays – the larger point here is that when it comes to percentages, those two rank ahead of all else).

Turkey gets a lot of attention on Thanksgiving because it’s such an uncommon item to cook (we typically deal with it once per year) and people are worried their inexperience could lead to a disastrous finish (dried out meat, burnt down house, family never speaking to you again – you know, the usual). As such, there are countless “how to cook a turkey” stories on morning news shows, food magazines and online.

The traditional holiday ham, however, rarely receives such attention. After all, it’s just ham, how hard can it really be? Well, I don’t know about you, but I’ve had my fair share of dried out hams at family gatherings and can attest that ham must not be as easy to cook as people assume it is.

In fact, when you consider what you’re up against, the holiday ham should probably be treated with as much prep and research as the thanksgiving turkey. After all, you’ve got a large (and typically expensive) piece of meat that needs several hours to cook, but can dry out in as little as one hour. Then there’s the sauce to think about. Sure, most hams come with a prepackaged sauce, but those over sweet disasters rarely ADD anything to the dish and typically are so powerful they wash away the flavor of everything else on the plate.

Yes, it’s time the holiday ham got its due attention. After all, with just a few easy steps, you can save the ham from becoming a dry piece of leather – thereby saving Christmas for everyone.

The Recipe: Holiday Ham with Cherry Port Glaze
Original Recipe Found In: America’s Test Kitchen – The Complete Cookbook

What You’ll Need:
1 Spiral Cut Ham (Bone-in) – weight depends on the number of people you’re feeding
½ Cup Cherry Port
½ Cup Cherry Preserves
1 Teaspoon Black Pepper


Spiral cut, bone in ham provides the best flavor for your buck, and if you’re serving a large crowd, it actually becomes a decent value (per plate). Since we were serving two, we opted to use a whole ham (boneless) that came in at a more modest 5lbs and $9. However, our instructions are applicable to the use of both hams.

The key to the ham lies in the roasting time. The rule of thumb has been 20 minutes of cooking time per pound of ham (bone in) – which when you start dealing with larger hams, can push the cook time into the two to three hour range. The problem is that a large roast will dry out on the ends well before the center is cooked. You can lower the oven temperature, but that can push your cook time into the 4 to 6 hour range and you’ll STILL likely have dried edges.

Luckily, the folks at America’s Test Kitchen have devised a solution. Begin by filling a large container (one big enough to fit the ham in) with hot tap water (as hot as your tap goes). If you have split sinks, one side of a sink works well for this. Submerge the ham (still wrapped in it’s packaging) in the water for 45 minutes. Then drain the water and will the container with hot tap water once more, again allowing the ham to sit submerged for 45 minutes.

This hot bath brings up the internal temperature of the ham, and lowers the cooking time per pound from 20 minutes to a much more reasonable 10.

Place your oven rack to its lowest position and preheat the oven to 250 degrees.

Remove the ham from its packaging and place it in a large roasting pan. If your pan has a lid, and it fits over the ham, cover the pan with the lid. If, however, the ham is too big for your roasting pan (this is very likely) use aluminum foil to tightly cover the exposed portion of the ham. Once covered, place the ham in the oven and cook for 10 minutes per pound. (For example, our 5 pound ham needed 50 minutes in the oven).

While your ham is roasting, you can begin preparing the glaze. In a small saucepan over medium high heat, bring the cherry port to a simmer and allow it to cook until it reduces to about 2 tablespoons (this takes about 5 minutes). Once reduced, add the cherry preserves and black pepper. Stir well, then bring the mixture to a light simmer. Allow it to simmer until it thickens (it should cling to your spoon when you stir). Once thickened, remove from heat and set aside.

After the initial time is up, remove the ham and use and instant read thermometer to check the temperature at the center of the ham. You’re looking for 100 degrees. If you’re there, increase the oven temperature to 350 and cover the ham with about ½ of the glaze you prepared earlier. If it’s still a bit short of 100 degrees, cover the ham and return it to the oven for an additional 10 to 15 minutes and check the temperature once more.

Return the glazed ham to the oven (uncovered) and bake for 10 minutes, or until the glaze thickens and forms a sticky outer layer on the ham. Remove the ham from the oven and transfer it to a cutting board. Tent it loosely with aluminum foil and allow it to rest for 10 minutes before cutting.

Slice into ½ inch thick pieces and serve with the remaining glaze. Enjoy!

The Results:


This was the most moist, flavorful ham I’ve ever had – a fact that could only be achieved via the warm bath method described above. The ham was evenly cooked throughout, with no dried edges and no underdone portions in the center. Better yet, each bite was full of moisture and flavor.

The glaze was extremely flavorful, but admittedly at bit too sweet for my liking. I’m not overly found of sweet glazes, so my prejudice could be clouding my take on the glaze a bit (Maggie thought it was quite good). I’d modify this glaze a bit in the future by cutting the sweetness with a bit of citrus – cranberries could work well in that regard.

We paired our ham with escalloped corn (from a recipe we posted a few weeks ago) and crispy oven potatoes (recipe to come next week). You, of course, are free to pair the dish with whatever you so choose.

It’s amazing how a few simple steps took a traditional, flawed, holiday staple and turned it to a sure fire hit. If your menu calls for holiday ham this year, give this cooking method a try. You won’t be disappointed.

That’s all we have for you this evening. I’m coming back tomorrow night with a quick recipe idea for how to use some of that leftover ham (because there’s always some left after the holidays) and Maggie will close out the week with a recipe for a healthy take on the classic scone. Until then,

~Cheers