Friday, June 27, 2014

16 Burgers of Summer: Sirloin Burger

Good evening everyone! There are certain terms or processes in the culinary world that paralyze the at home chef. Some lose all confidence once talk of “poaching” or “tempering” enters the equation. Others begin to fret when “braise” or “brine” cross the instructions of a recipe. Each cook has their own region where they’re not quite as comfortable as others. The one common denominator that I’ve found is grinding. Once talk turns to grinding your own meat, the everyday at home chef throws up their hands and proclaims “I don’t have the tools or time for that” or that it “Isn’t worth the effort!” We’ve covered grinding for yourself previously on the blog – but today we’re using it for burgers. A result that is surely causing some of you at home to say “It’s not worth the effort”. 1) It IS worth the effort  and 2) it’s very little effort

Stick with me and follow these easy steps and you too can create one of the best burgers you’ll ever enjoy.

The Recipe: Sirloin Burger

What You’ll Need:
8 Ounces Sirloin Steak
8 Ounces Chuck Roast
1 Egg
½ Cup Fine Bread Crumbs

The process of grinding your own meat is so incredibly simple, when we first learned how to do it we couldn’t believe it wasn’t more common. As I mentioned in the open, we covered this process in a previous recipe, but we’ll recount the steps once again today.

Begin by finding a sirloin steak and chuck roast from your local butcher. Don’t search out ground sirloin – first it may be tough to find and secondly, the premium cost added to ground sirloin isn’t worth it when it so easy to do on your own.

Look for a quality steak with decent marbling, but remember that you’re grinding this beast. It doesn’t have to be the prettiest steak on the shelf, just look for quality. Once you’ve selected your steak and roast, cut them into ½ to ¾ inch cubes. Working in sessions, add a few handfuls of the cubed meats (about half of each) into a large food processor and pulse for ten, 1 second intervals. This should yield a nice and even grind. Remove the ground meat, set aside and repeat until off the meat has been ground. Then combine the meat. Add in the egg (beaten) and the bread crumbs and work the mixture into 4 separate, equally sized balls and work those balls into patties.

Lightly season the outside of each patty with salt and pepper and then allow the patties to rest in the refrigerator for 10 to 15 minutes before placing them on a 300 degree grill. Cook for 3 to 5 minutes per side and top with lettuce, cheese, onions and any other toppings you desire.

While it was a new recipe, I didn’t feel that sharing how to grind your own sirloin burgers was quite enough this week. As such, we’re adding this tasty side dish that compliments your burgers (or any other grilled meal) perfectly.

The Recipe: Grilled Asparagus

What You’ll Need:
1 Bunch Fresh Asparagus
Olive Oil
Lemon Juice
2 Garlic Cloves (Crushed)
Salt / Pepper

The quantity of the ingredients above will vary based on a whole range of factors – so we’ve left out any specific measurements. To prepare, simple wash and trim your asparagus before adding them to a large (1 gallon) zip top bag. Add in enough olive oil so that a few light tossing will evenly cover all of the asparagus, then do the same for the lemon juice. Finally, toss in the garlic cloves (garlic powder works in a pinch as well) and a few pinches of salt and pepper. Seal the bag and work everything around vigorously (so that all of the asparagus are evenly coated). Allow the bag to rest for 10 to 15 minutes (flip the bag halfway through) before transferring the asparagus to a piping hot grill (300 degrees is ideal). Allow the asparagus to cook for 5 minutes before flipping them and cooking for an additional 5 minutes. Transfer to a serving platter and enjoy!

The Results:


First and foremost, this burger will be one of the best you’ve ever made. If you wanted to go bold, you can use this base for all of your creative burger creations. Of course, sirloin runs a bit pricey so that isn’t entirely realistic – but if you’re looking for a high quality burger that will impress the crowd or if you’re just looking to treat yourself with something special – this recipe is the easiest (and most effective) way to do so.

The grilled asparagus is one of my all time dishes on the grill, and this is coming from someone who won’t eat asparagus in any other form. With this marinade and the evolution the asparagus undertakes once grilled, these green little stems become an absolute delicacy – if you’ve never tried grill asapargus before, give it a shot. You’ll be amazed at how flavorful this side dish is!

We’re back with two brand new recipes next week. Until then,

~Cheers

Wednesday, June 25, 2014

Simple Soaked and Seared Steak

Good evening everyone!  It's easy to overlook the humble steak.  While it's simple enough to cook in the oven, it's best when it's been grilled.  And when adding an effortless marinade to the mix, the results are absolutely mouthwatering.  Tonight, I'll be grilling a great steak that's so easy, you'll wonder how you did plain steak ever again.

The Recipe:  Fabulous Flank Steak
Original Recipe Adapted From:  www.pinterest.com

What You'll Need:

For the Marinade:
1/2 Cup Olive Oil
1 Cup Soy Sauce
2 Teaspoons Sesame Oil
3 Cloves Garlic, smashed
2 Teaspoons fresh Ginger, minced
1 Teaspoon Sesame Seeds
1 Teaspoon Brown Sugar
1 handful Cilantro, chopped
Juice of 1 Lime
1/3 Cup Green Onions, chopped
2 Pounds Flank Steak, trimmed

To start, combine the olive oil, soy sauce, sesame oil, garlic cloves, ginger, sesame seeds, brown sugar, cilantro, lime juice, and green onions in a large, sealable plastic bag.  Close the bag and mix all the ingredients until they are well combined.  Add the flank steak and season with salt and pepper.  Close the bag and place in the refrigerator.  Marinate the steak for a minimum for four hours, or if you want a real intense flavor, marinate overnight.  I marinated our steak from 8:00 PM to 5:00 PM the next day - trust me, if you do it for that long, you'll be well rewarded!

When you are ready to cook the steak, preheat a grill over high heat.  Remove the steak from the bag and place on a cutting board.  Be sure to close the plastic bag and set aside.  Once the grill is heated, lay the steak on the grill, cover, and cook.  Of course, depending on how well you want your steak to be done, will depend on how long you cook it.  If you want medium rare, cook for five to seven minutes on each side, flipping only once.  If you want your steak a little bit more done, about medium to medium well, cook the steak for a minimum of seven minutes on each side.  

Once the steak is done cooking, remove from the grill and place on the cutting board.  Loosely tent with aluminum foil and keep covered for ten minutes.

While the steak is resting, you can make the sauce.  Remember the marinate?  We're going to make a sauce out of it!  Pour the remaining marinate into a food processor and blend until bigger ingredients have been pulverized.  From here, pour the liquid into a small saucepan and heat over medium-high heat until the liquid begins to boil.  This just ensures any meat particles get heated and cooked down. 

Once at a boil, drop the temperature of the saucepan to a simmer and cook for at least ten minutes.  Toward the end, add two tablespoons of unsalted butter for a bit of thickness to the sauce.  After cooking, strain the sauce using a mesh sieve into a small serving bowl.  Slice the meat against the grain, serve a couple of pieces of sliced meat with some sauce, and enjoy!

The End Result:


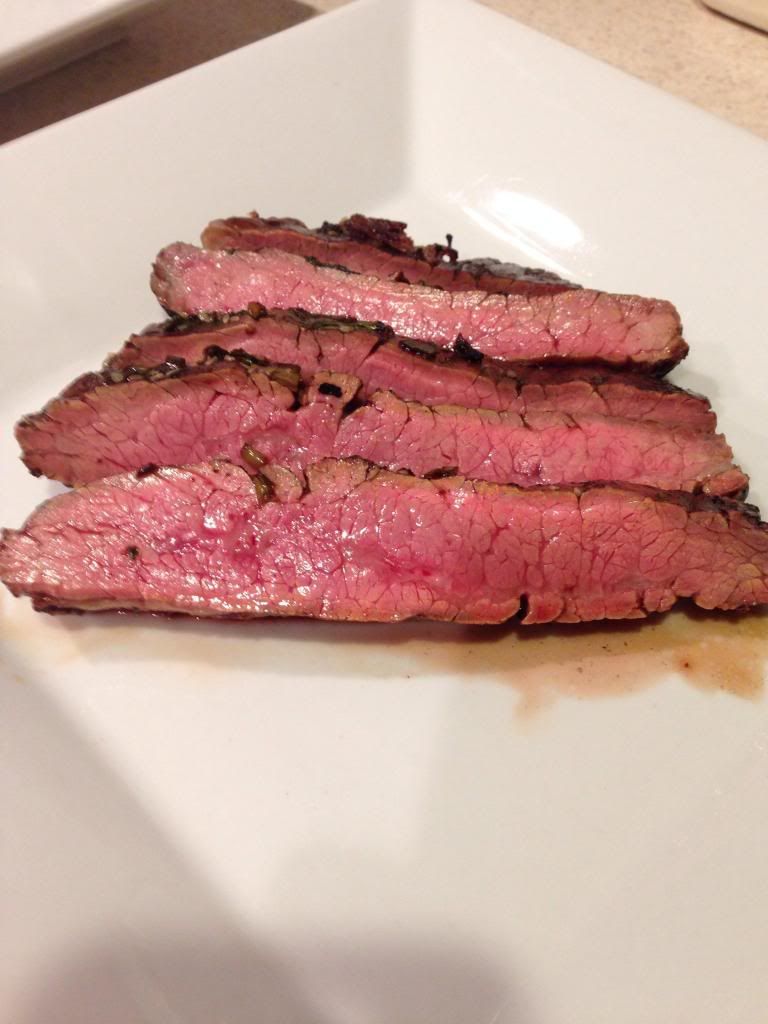
Don't let the doneness fool you in this picture, because the flavor of this steak is phenomenal!  The soy sauce caramelized a bit when cooking and added a real heartiness.  There are hints of green onion, ginger, and garlic, but it doesn't completely overwhelm the dish.  It seems to have a bit of Asian influence, but it makes your mouth want to drool.  I think the flavor from the steak is really added from the sauce.  Whether you drizzle the sauce over the steak, or dunk cut pieces into a small bowl of sauce, it really adds to the steak.  If you are looking for something different to do to a steak, this might be the recipe for you!

Thanks for joining us tonight.  Check back on Friday as Tyler creates another summer burger delight!  Until then,

~Cheers!

Monday, June 23, 2014

16 Burgers of Summer: Chicken Cordon Bleu Burger

Good evening everyone! When we decided to embark on a burger themed summer menu, I knew I wasn’t going to limit our options to beef based burgers. After all, there is a whole world of options out there and focusing solely on the beef would be a disservice to the burger theme. While we probably weren’t going to go crazy and focus on ostrich burgers or start frying up alligators, I did plan on working in turkey and chicken to the menu.

If you’ve ever cooked a turkey or chicken burger and have walked away less than impressed – you’ll understand my next point. Where beef can exist and even thrive on natural flavor, the “white bird” meats cannot. A turkey or chicken burger left alone, with no support or plan of attack simply turns into a bland piece of meat that does little to satisfy.

That meant I would not only have the challenge of finding a “out of the ordinary” burger, but one that would embrace and adapt with the limitations of the medium.

Fast forward a few weeks and as fate would have it, I stumbled across a chicken burger concept that was both creative and simple. This concept seemed like the best place to move our burgers of summer theme (temporarily) away from beef and on to a new medium: chicken.

The Recipe: Cordon Bleu Burger
Original Recipe From: Eatingwell.com

What You’ll Need:
(Serves 4)

1 Pound Ground Chicken
1/3 Cup Diced Ham
¼ Cup Low Fat Mayonnaise
1 Teaspoon Dijon Mustard
5 Tablespoons Chopped Shallot (Divided)
1 ½ Teaspoons Fresh Thyme (Finely chopped, divided)
4 Slices Swiss Cheese
4 Bakery Fresh Buns
Fresh Spinach to Top


In a small bowl, combine the mustard, mayo, 1 tablespoon of shallots and ½ teaspoon of thyme. Whisk until well blended. Store in the refrigerator until ready to serve. If you’re crunched for time, you can make this sauce a day ahead of time and store in a sealed container.

Preheat your grill to 500 degrees and clean the grates. If you typically have “sticky” grates (think steel / stainless steel) you’ll want to use a thick paper towel lightly coated in olive oil to quickly grease the grates (chicken is sticky). If you have cast iron grill grates you’re well aware that it takes quite a bit to have anything “stick” to your grates. Ignore the oiling and pat yourself on the back for your savvy grill purchase.

While the grill is preheating, work the ground chicken, ham and the remaining shallots and thyme together in a medium bowl along with a pinch of salt and pepper. Form the meat into four equally sized balls and then work those balls into roughly ¾ inch thick patties. Much like every burger recipe we’ve shared so far (and for every burger recipe we’ll ever share) we’re going to add a step here – place the patties on a plate and set in the refrigerator for at least 5 to 10 minutes (longer is better). This allows the patties to firm up and makes them easier to work with on the grill.

Once the patties are firm, reduce your grill heat to medium and cook for 3 to 5 minutes per side, or until the center of the patties register a nice, safe 165 degrees on an instant read thermometer. Right before removing the patties from the grill, top them with the swiss cheese and allow it to melt and envelop the burgers (30 to 45 seconds on a hot grill should do the trick).

To serve, simply spread the mustard / mayo mixture on the bottom of the bun, and top the burger with some fresh spinach leaves. Enjoy!

The Results:

When you enter the realm of “duplication” recipes, you’re never quite sure what you’ll end up with. In this case, the end result is a burger that is shockingly close to authentic cordon bleu. The sauce truly completes the illusion, blending with the swiss cheese to emulate that creamy, yet still sharp filling that the titular dish is infamous for. By simply working in a little ham to the chicken, a whole new dynamic is given to the normally neutral meat. That twist is enough to make the burger flavorful – but when complimented with the sauce and cheese, it takes the next step towards a truly delicious burger. If you’re bored of beef – this recipe is sure to satisfy.

(No picture tonight – a white burger on white bun smothered with white cheese didn’t exactly “display” well for the camera. Rather than present a less than appealing picture, I thought I’d let the words paint the picture tonight).
That’s all we have for you this evening. We’ve got a full week planned as Maggie will take to the kitchen during the middle of the week and I’ll close things out with another burger recipe – this time featuring a unique side dish suited for summer. Until then,

~Cheers
Thursday, June 19, 2014

Meat Salsa: The Results are Delicious!

Good evening everyone!  I've started to become more and more akin to using the grill for such seasonally inspired dishes, especially when the heat index tops 100 and cooking inside becomes too hot to handle.  Tonight, I'm grilling up a great flavored pork tenderloin, with a condiment that isn't normally used with pork, but it's definitely worth making it with the dish.

The Recipe:  Pancetta-Wrapped Pork Tenderloin with Cantaloupe-Red Pepper Salsa
Original Recipe Found In:  Cooking Light, July 2014 Issue

What You'll Need:
For the Tenderloin:

1 Pound Pork Tenderloin, trimmed
1/4 Teaspoon Salt
1/4 Teaspoon Black Pepper
2 Ounces thinly sliced Pancetta, about six slices

For the Salsa:
1 Cup finely chopped fresh Cantaloupe
1/2 Cup finely chopped Red Bell Pepper
1/4 Cup finely chopped Red Onion
3 Tablespoons chopped fresh Mint
1 Tablespoon finely chopped, seeded Jalapeño Pepper
1 Tablespoon fresh Lime Juice
1/4 Teaspoon Salt

The night before cooking this dish, you can prepare the salsa:  in a medium mixing bowl, add the cantaloupe, red bell pepper, red onion, mint, jalapeño pepper, lime juice, and salt.  Stir to combine the ingredients thoroughly.  Keep covered and place in the refrigerator.  Take the salsa out just before serving.


Before preparing the tenderloin, preheat a grill to medium-high heat.  Place the tenderloin on a clean plate and pat dry with paper towels.  Sprinkle the pork evenly with salt and pepper.  Once seasoned, wrap the pork with the pancetta slices, making sure the slices overlap slightly.

Once the grill is heated, the tenderloin is ready to cook!  Gently place the tenderloin on the grill grates and cover.  Grill for twenty minutes, or until a meat thermometer reads 145 degrees.  Turn the tenderloin every five minutes to ensure it cooks evenly and the sides begin to brown.  Once cooked, remove the pork from the grill.  Cover with a loose tent of aluminum foil for ten minutes to let the juices redistribute in the meat.  Slice the tenderloin into 1/2 inch pieces, serve with the salsa, and enjoy!

The End Result:


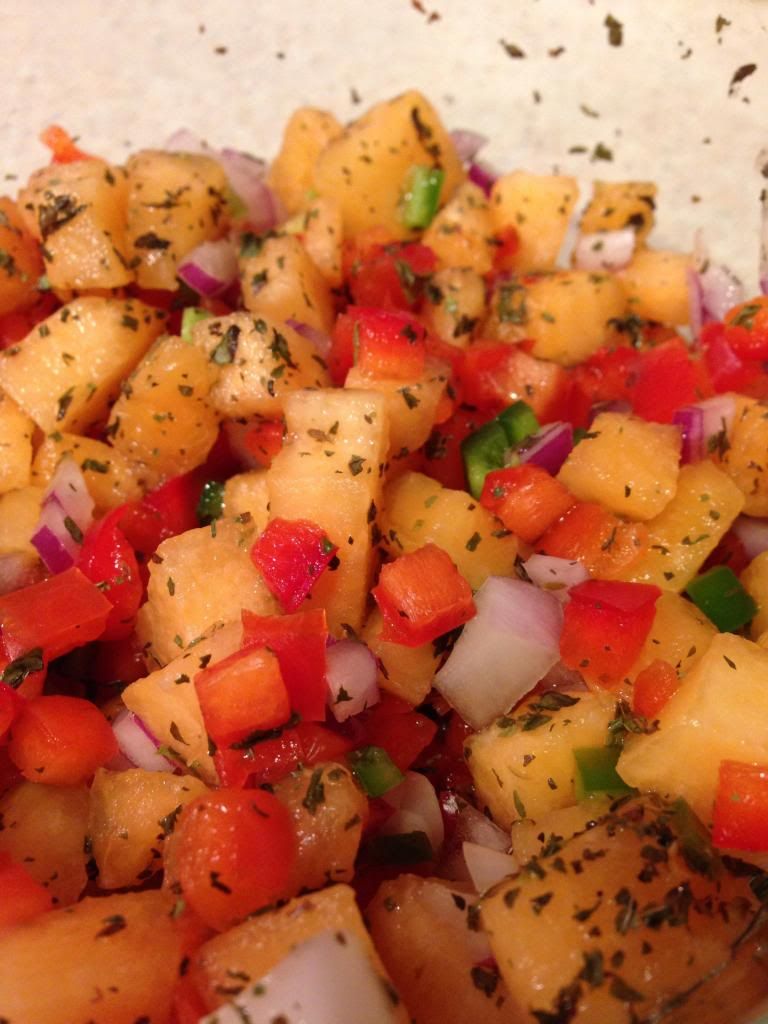
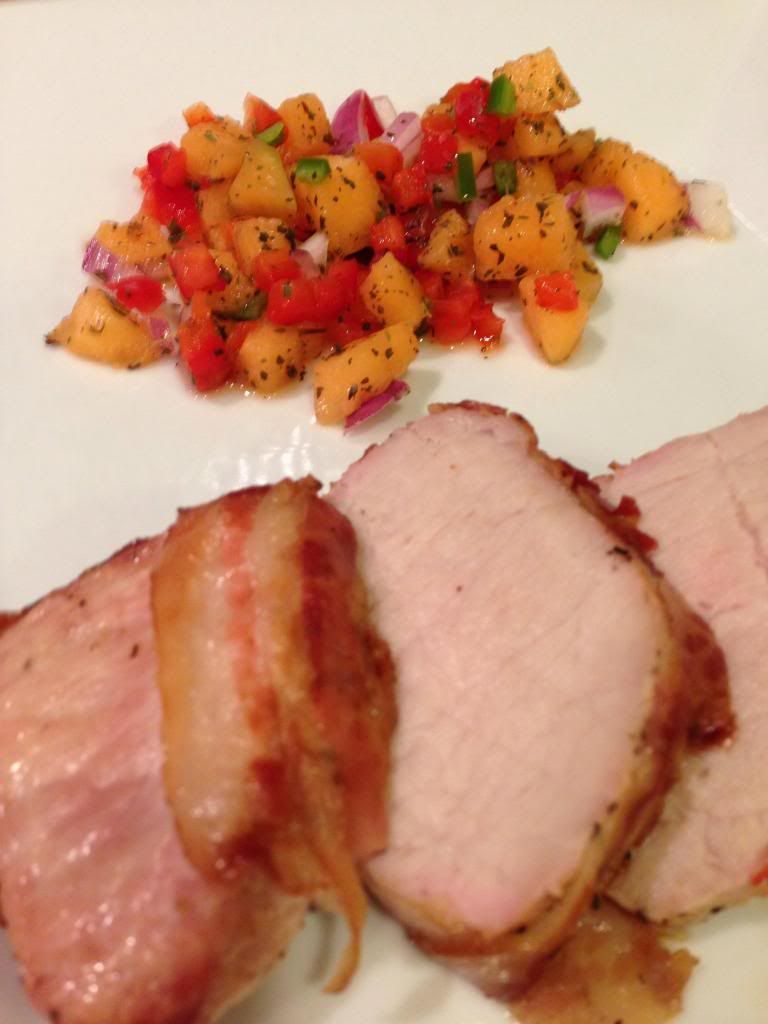
The pancetta adds a nice, smokey flavor to the otherwise plain tenderloin.  When you make sure to rotate the tenderloin, the pancetta gives the final result a good crust of flavor.  Pancetta is somewhat like bacon, so it's a great flavor enhancer to the overall dish.  Also, letting the tenderloin rest before slicing makes it incredibly juicy.  The salsa?  It's too bad it's a "meat salsa" because I would gobble that up as much as I could!  The sweetness from the cantaloupe balances out the spicy from the red bell pepper and red onion.  They almost cancel each other's strong hints of flavor.  But that's what makes the salsa work.  The onion and the jalapeño's flavors don't overpower the salsa either.  It's a great addition to what could be potentially a boring dish.  Overall, a great summertime grill out recipe that I give anyone a recommendation to try!

That's all we have for you tonight.  Check back tomorrow as Tyler continues his Burgers of Summer series.  Until then,

~Cheers!

Friday, June 13, 2014

Mexican Casserole...In a Skillet?

Good evening everyone!  I will be the first to admit that my fallback on recipes is Mexican.  I just quite can't get enough of these recipes.  Although tonight's dish might not exactly fall in the Mexican (or Tex-Mex) style, it sticks to one skillet and a whole lot of flavor.

The Recipe:  Chicken Tortilla Casserole
Original Recipe Adapted From:  www.pinterest.com

What You'll Need:

2 boneless, skinless Chicken Breasts
2 Tablespoons Vegetable Oil
1 Shallot, minced
2 Garlic cloves, minced
1-2 Tablespoons minced Chipotle Peppers in Adobo Sauce
1 3/4 Cup Chicken Broth
5 Cups Tortilla Chips, broken into large pieces
1 Tomato, cored, seeded, and chopped
4 Ounces shredded sharp Cheddar Cheese (about one cup)
2 Tablespoons chopped fresh Cilantro

To start, heat a nonstick, oven-safe skillet over medium high heat.  Place the chicken on a clean plate and pat the chicken dry with a paper towel and season with salt and pepper.  Once the skillet is heated, add one tablespoon of vegetable oil.  Swirl the oil to coat the skillet and add the chicken to the skillet.  Cook until both sides are golden brown, five to seven minutes total.  Transfer the chicken to same plate, keep covered, and set aside.

Next, add the remaining oil, shallot, garlic, chipotle pepper, and 1/4 teaspoon salt.  Cook this mixture until fragrant, about 30 seconds.  After this, add the chicken broth and scrape up any browned bits.  Bring the broth and shallot mixture to a simmer.

Stir in half of the tortilla chips into the broth, then nestle the chicken breasts in.  Reduce the heat of the skillet to medium-low.  Cover the skillet and cook for 10-15 minutes, or until the chicken is cooked through (about 165 degrees.)  Bring the chicken out of the skillet onto a cutting board and shred or chop into bite size pieces.

Bring the chicken back to skillet and stir in the tomato, 1/2 cup of cheese, and one tablespoon of cilantro until everything is well incorporated.  This mixture is quite thick, so be prepared to put a little elbow grease into it!  Stir in the remaining tortilla chips until they have become moistened.

Meanwhile, heat a stove to a broil.  Sprinkle the remaining cheese on top of the chicken mixture and broil until the cheese is melted and is beginning to brown, about two to three minutes.  Take out of the oven and sprinkle the remaining cilantro.  Allow the casserole to sit for five minutes.  Serve and enjoy! 

The End Result:


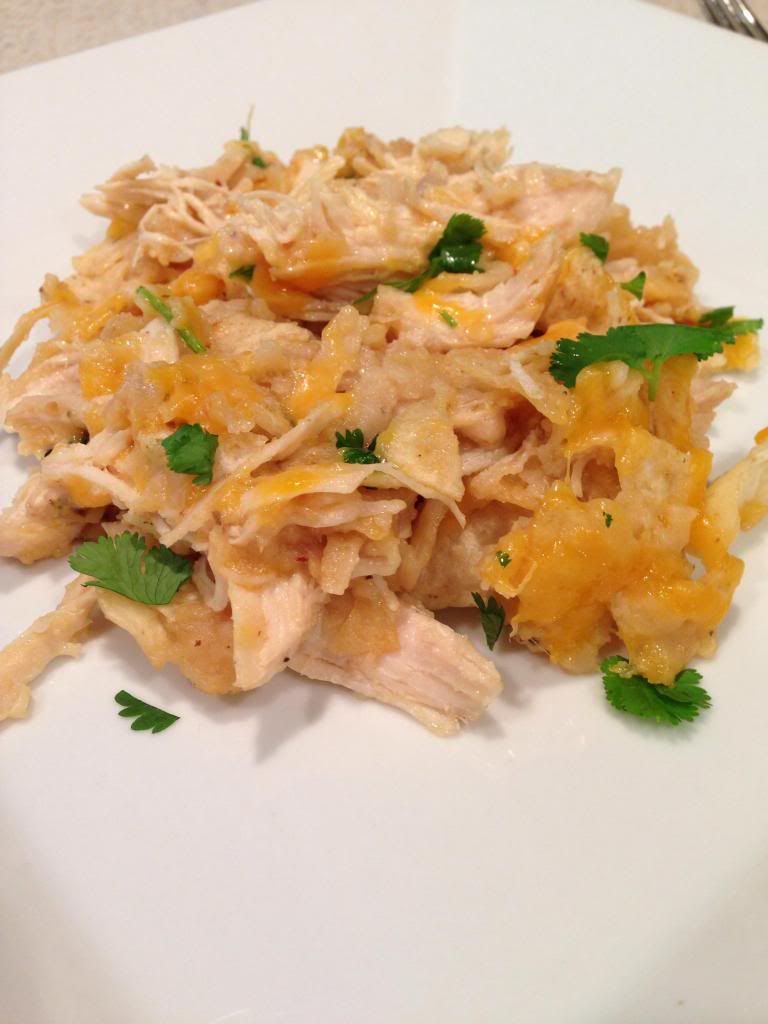
For all the work that is put into this dish, it's actually quite flavorful.  There is a subtle hint of heat from the chipotle pepper, but it is never overwhelming.  If it wasn't in it, this recipe might actually be quite bland.  The cilantro also adds another fresh element to this dish.  The pops of green are quite welcoming and adds bursts of flavor.  This dish doesn't feel too heavy on the pallet either.  Since the tortilla chips soaked in most of the broth, it's quite pleasant, without being too much.  There's just enough cheese to coat the dish and that's all it needs.  Overall, a dish that will surprise you and make you want more!

That's all we have this week.  Check back next week as we continue our Burgers of Summer and great grilling dishes.  Until then,

~Cheers!

Thursday, June 12, 2014

16 Burgers of Summer: 50/50 Burger

Good evening everyone! We’re no strangers to the realm of blending meats within one recipe. We’ve found that some of the best meat loaf recipes come from a blend of ground beef, turkey and pork. The science behind the concept is simple, you cover deficiencies in ingredient A with the strength of ingredient B. Ground beef is durable and holds flavor well, but tends to dry out. Add pork to the equation (which maintains its fat “moisture” during cooking) and you’ve got a great blend.

So, when I found tonight’s recipe and saw that not only did it blend two meats in a totally new way but it also qualified as burger #5 for our 16 burgers of summer feature, I knew I had to give it a shot.

The Recipe: 50/50 Burger
Original Recipe From: 5 in 5 – Michael Symon

What You’ll Need:
1 Pound Ground Beef (85/15)
10 Ounces Ground Chorizo (Pork)
1 Tablespoon Olive Oil
Pepperjack or Monterrey Jack Cheese Slices
1 Bunch Fresh Cilantro
1 Egg (beaten)*
1 Tablespoon Sriracha Sauce / 1 Tablespoon Mayo (mixed well)*


* The premise of chef Symon’s book is 5 ingredient recipes that take about 5 minutes to cook. So far, we’ve had one disastrous dish and one quite good dish from this cookbook, so I was cautious heading into this recipe. That proved wise, as adjustments were needed to make the original dish viable. The concept of “5 simple ingredients” is a nice selling point, but it sometimes leaves recipes….lacking. Case in point, this recipe doesn’t call for an egg, but after taking it to the skillet and seeing the burger collapse where the chorizo and ground beef combined – I clearly can tell it needs one.  What follows is our adaptation of the original recipe. If you’re a purist, be sure to look up the dish in Mr. Symon’s book.

In a large bowl, combine the beef, chorizo and egg until the mixture is evenly combined. Break the mixture into six equally sized balls then work each ball into a rough patty. Oddly enough, the original recipe calls for ¾ pound ground beef. I just don’t see the practicality in dividing a pound of ground beef (which is the quantity you’re most likely to have on hand) that way, so I opted to use the entire pound, and just make two extra patties out of the mixture.

Season each patty lightly with salt and pepper and place a large non stick skillet over medium high heat. While your skillet is heating up, pop the patties into the refrigerator and let them hang out for about 10 minutes. This step wasn’t suggested in the recipe, but hands on experience proved that a little time in the chill chest to tighten up is a good idea.
Add the olive oil and bring it to a shimmer before add the patties. Press them with a spatula to think them out slightly, and then allow the patties to cook undisturbed for 3 minutes before flipping. (If you used the egg and refrigerator, you’ll likely have an uneventful flip. If you followed the original recipe – be careful here, the mixture can come loose, causing a sloppy burger).
After cooking the burgers for 2 minutes on the other side, top each patty with cheese and cover the skillet. Allow the burgers to cook (and the cheese to melt) for an additional minute. Once cooked through, spread the chipotle mayo mixture on the bottom of a fresh hamburger bun. Top the burgers with fresh cilantro and enjoy!

The Results:


The burgers pack a nice bit of spice with the chorizo / beef blend, but the chipotle mayo and pepperjack cheese really brought out the best flavors of the dish. The cilantro acts as the perfect foil – providing a bit of freshness (like lettuce) while also neutralizing the most extreme heat from the chorizo.
All in all, this is a tasty burger dish. I think it’s a bit lacking as is from the cookbook – but a few light tweaks quickly make this dish an easy recipe for any burger lover to enjoy!

That’s all we have for you this evening, Maggie will take to the kitchen tomorrow night with a brand new recipe. Until then,

~Cheers

Thursday, June 5, 2014

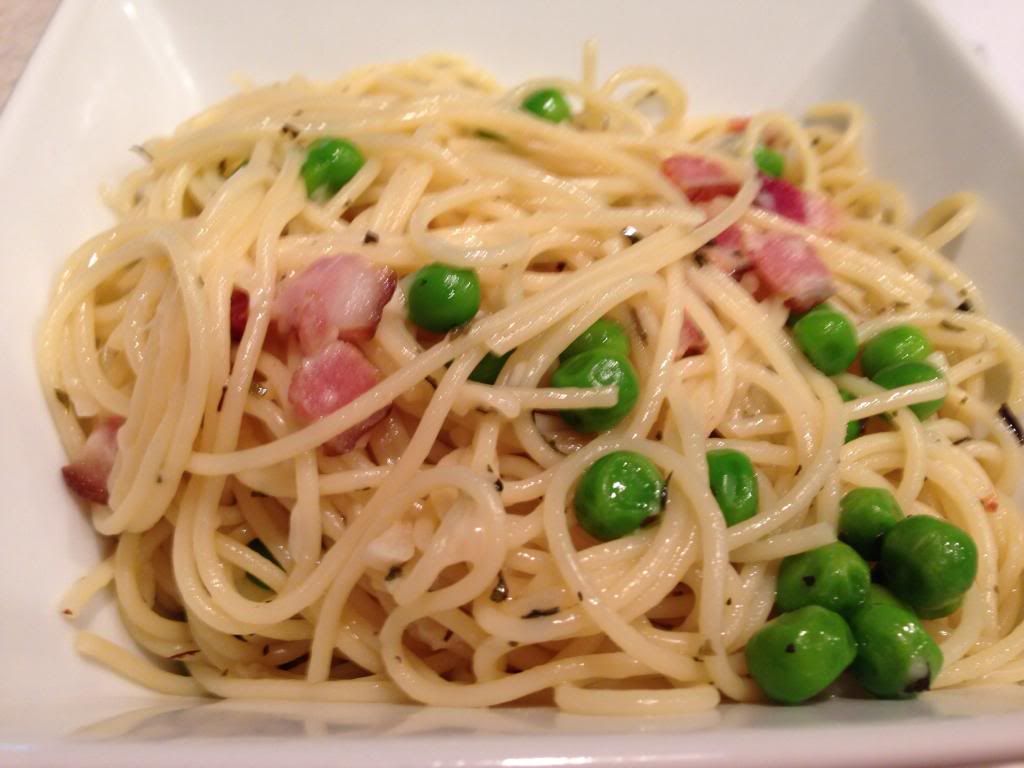
Naked Pasta is Often the Best Pasta

Good evening everyone!  After a not-so-great outing from Chef Michael Symon's Five in Five cookbook the first time around, I didn't want to let that deter me from any of the other recipes in his book.  The key was to avoid anything that involved heat - as we saw before, Chef Symon is a fan of spicy.  Tonight, we are happy to report that Chef Symon has a softer, less flame worthy side.

The Recipe:  Angel Hair with Peas and Pancetta
Original Recipe Found In:  Michael Symon's Five in Five

What You'll Need:
1 Pound dried Angel Hair Pasta
1/2 Pound diced Pancetta (or bacon)
2 Garlic cloves, minced
1 Cup fresh or frozen Peas
1/2 Cup torn fresh Mint leaves
1/2 Cup shredded Parmesan cheese
3 Tablespoons Olive Oil

To start, fill a very large pot with water and on the stovetop, bring the water to a boil.  Sprinkle some salt in to taste.  Once the water is boiling, add the pasta and cook according to package directions indicate "just al dente".  After the pasta is done cooking, drain in a colander, making sure to save one cup of pasta water for later in the recipe.

Meanwhile, heat a large skillet over medium heat.  Once heated, add the pancetta and cook until just crisp.  Depending on if you are cooking with pancetta or bacon, this will determine the cooking time. If you are cooking with pancetta, it will take about three minutes.  If you are cooking with bacon, it will take about eight minutes.  Keeping the meat in the pan, add the garlic to the pan and stir, making sure the garlic doesn't brown.  This will take about thirty seconds.

Next, add the reserved pasta water and the peas to the skillet and simmer for one minute.  Add the cooked pasta to the skillet and stir into the sauce and cook for thirty seconds.  Remove the skillet from the heat and stir in the mint, Parmesan cheese, and olive oil.  Season with salt and pepper, if desired, and add any Parmesan cheese, also if desired.  Serve and enjoy!

The End Result:


First of all, there's no heat (yay!)  And second, it's tasty (yay!)  With subtle hints of mint dispersed, the pasta doesn't feel weighed down by a thick or heavy sauce.  With a lack of sauce, that's bound to happen.  The peas are also a delightful burst of freshness to this dish.  We used bacon for our version and with every bite of pasta with bacon made it super delicious.  The hints of Parmesan sprinkled throughout is also a great addition.  Overall, a redemption for Chef Symon's cookbook and definitely worth trying again.

Thanks for joining us this week.  Check back for brand new recipes from the both of us.  Until then,

~Cheers!

Wednesday, June 4, 2014

16 Burgers of Summer: Whiskey Burger

Good evening everyone! One of my favorite “mediums” to use within cooking is alcohol. It’s a divisive ingredients, with some folks swearing by it and others running for the hills fearful of…well, I’m not really sure what they’re afraid of – but rest assured, people ARE afraid to use it.

I can understand if you’ve run across a recipe or two featuring alcohol that didn’t end well – if done incorrectly, alcohol can ruin a dish in an instant. But when it’s used properly, you can extract great – complex and extravagant flavors into your recipes. I generally enjoy using alcohol in my dishes as I’ve found it adds quite a bit of depth to a dish, and it’s versatile in its flavor “distribution” (from pasta sauces to soups and braises, there’s not a dish it can’t help) So, when I found a recipe featuring burgers AND alcohol – I knew I had to pounce at an opportunity to adapt it for the blog.

Adapt is the key word here, the original concept called for a beer cheese center and a whole lot of extra “fluff” that screamed more gourmet than practical – what I ended up with was a blending that I’ve dubbed practical gourmet – high end flavors, yet easy prep. Let’s get cooking!

The Recipe: Whiskey Burgers

What You’ll Need:

1 Pound 80/20 Ground Beef
½ Teaspoon Red Pepper Flakes
1/4 Cup Breadcrumbs
1/3 Cup Whiskey
2 Tablespoons Melted Butter
2 Tablespoons Worcestershire Sauce
½ Tablespoon Garlic Powder
Pinch of Salt / Pinch of Pepper

Combine everything but the beef in a large bowl. I found that mixing the ingredients was easier without the beef involved, simply use a large whisk and stir gently until everything is blended. Once combined, add in the beef and use your hands to turn and work the mixture into the beef. Once everything is nicely combined, work the beef into four separate balls and pat them into nice wide patties.

Without the traditional binding agents (read: egg) and with some extra moisture (whiskey) these burgers were quite loose after being initially formed. To fix this, simply stick them on a plate and let them refrigerate for about an hour before cooking. A little rest in the chill chest will tighten up the mixture and keep the burgers together on the grill.

Once you’re ready to grill, simply preheat – clean and set the grill to medium and then cook the burgers to your desired doneness. (We average 3 to 5 minutes per side for a medium well burger).

During the final moments of cooking, add a slice of cheese of your choosing (we used pepperjack) and allow it to melt around the burger. Serve on a fresh bun and top with lettuce and BBQ sauce and enjoy!

The Results:


Our burger is pictured sans lettuce simply because we didn’t have any in the kitchen when I cooked up this dish – which is shame because lettuce would have really completed this dish. With the BBQ sauce, red pepper flakes and the pepperjack cheese this burger carried a bit of heat on it’s own – then you factor in the whiskey…

Oh, yes, the whiskey. It imparted an amazing smoky flavor to the burger and also quite a bit of bite. While most alcohol based dishes are safe for kids because the alcohol cooks off during the process – I’d mark this one as “not for kids” as the final flavor indicated that a good bit of that whiskey was still hanging around with the beef. Adults that appreciate the flavor of whiskey will love this burger – kids, not so much.

All in all the flavors of this burger are bold and have a bit of bite – and that’s a good thing. It’s nice to have a little more than boring ground beef every now and again. BUT the lettuce is a must. It would neutralize and blend the flavors just a bit, making this a perfect recipe for the adult burger crowd.

That’s all we have for you this evening. Maggie will take to the kitchen tomorrow night to give a second chance to a source whose first entry on the blog went…poorly. Until then,

~Cheers

Sunday, June 1, 2014

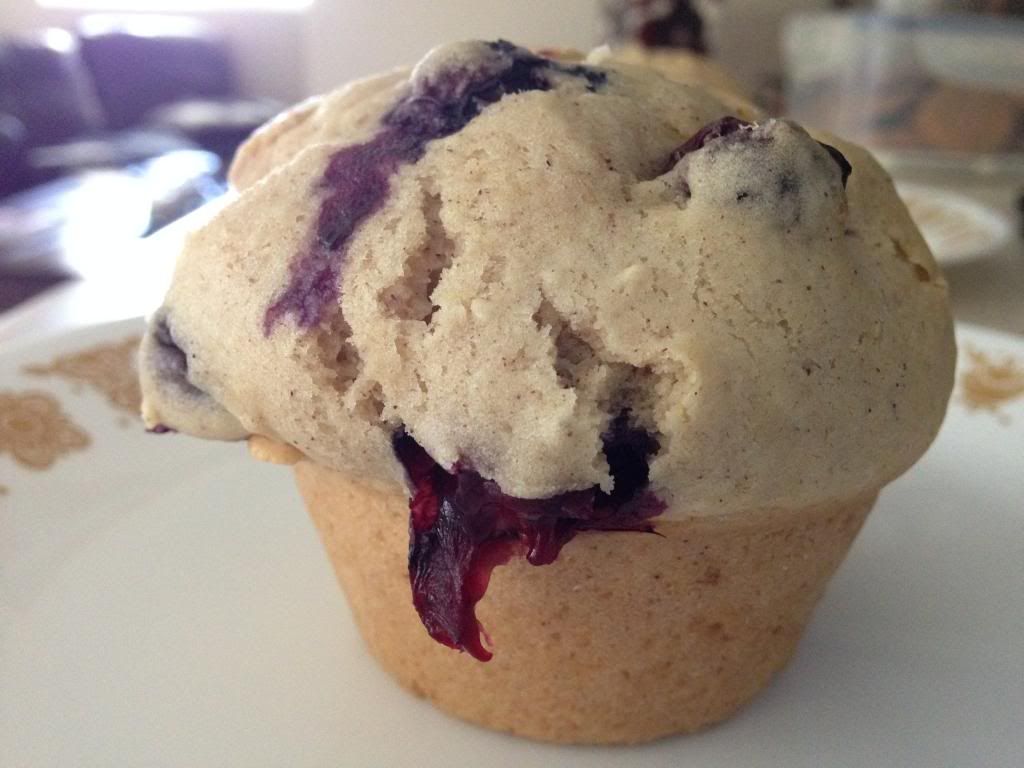
Sunday Special: Delicious, Flavorful Blueberry Muffins

Greetings everyone!  As I alluded to a while ago, we found a new recipe for muffins.  It just happened to coincide that we found fresh blueberries at our local farmer's market.  It was only perfect that we make blueberry muffins, but little did we know that these muffins would far surpass any muffin we've made before.

The Recipe:  Jumbo Blueberry Muffins
Adapted from a Recipe Found In:  www.pinterest.com

What You'll Need:
3 Cups All-Purpose Flour
4 Teaspoons Baking Powder
1/2 Teaspoon Salt
1 Teaspoon Cinnamon
2 Eggs, room temperature preferred
1 Cup Sugar
1 Cup Milk
1/2 Cup Canola Oil
1 Teaspoon Vanilla Extract
1 1/2 Cups fresh or frozen Blueberries

To start, preheat an oven to 425 degrees.  Prepare your muffin tin by coating the insides and outside with nonstick cooking spray.  Set these aside until you need them.

Meanwhile, in a large bowl, toss the flour, baking powder, salt, and cinnamon together in a large mixing bowl until they are well combined.  This should only take about thirty seconds, or until you see little specks of brown dispersed throughout the mixture.

In another medium mixing bowl, whisk the eggs and sugar together, until they are well combined.  Mix the oil, milk, and vanilla in until the mixture becomes pale and yellow.  Carefully, fold the wet ingredients into the dry ingredients and mix everything with a sturdy spatula or by hand, if you want to.  Make sure the flour that is at the bottom of the bowl is mixed in.  A bit of warning:  this batter will be SUPER THICK and sticky, so if you are mixing by hand, they will get stuck very quickly to your hands.  Once the batter has mixed, fold in the blueberries.

Next, pour the batter into the prepared muffin tins, filling all the way to the top.  Place the tins in the oven and bake for 425 degrees for five minutes, then drop the temperature of the oven to 375 degrees and continue to bake for 13-14 minutes, or until a toothpick that is inserted in the middle of the muffin comes out clean.  The tops of the muffins should also have transformed into a light golden brown color.  Allow the muffins to cool for 10 minutes in the pan before consuming.  These muffins are best served warm, a light spread of butter (if desired,) serve, and enjoy!

The End Result:


I don't believe I've ever had muffins with the distinct flavor of cinnamon in it, but I don't think I'll ever go back!  The aroma of cinnamon filled our house while the muffins baked and the continued whilst eating them and it made the muffins perfect.  You almost don't need to coat them in butter - they are perfect the way they are.  Paired with the fresh, large blueberry muffins we picked up, it was almost muffin utopia.  I'm quite positive we will cook these muffins again, not only for their flavor properties, but if served for breakfast, these will most certainly fill you up!

Thanks for joining us today.  Check back later this week as Tyler cooks up another burger recipe from the kitchen and I'll be trying another recipe from a redeemed cookbook a try.  Until then,

~Cheers!

Friday, May 30, 2014

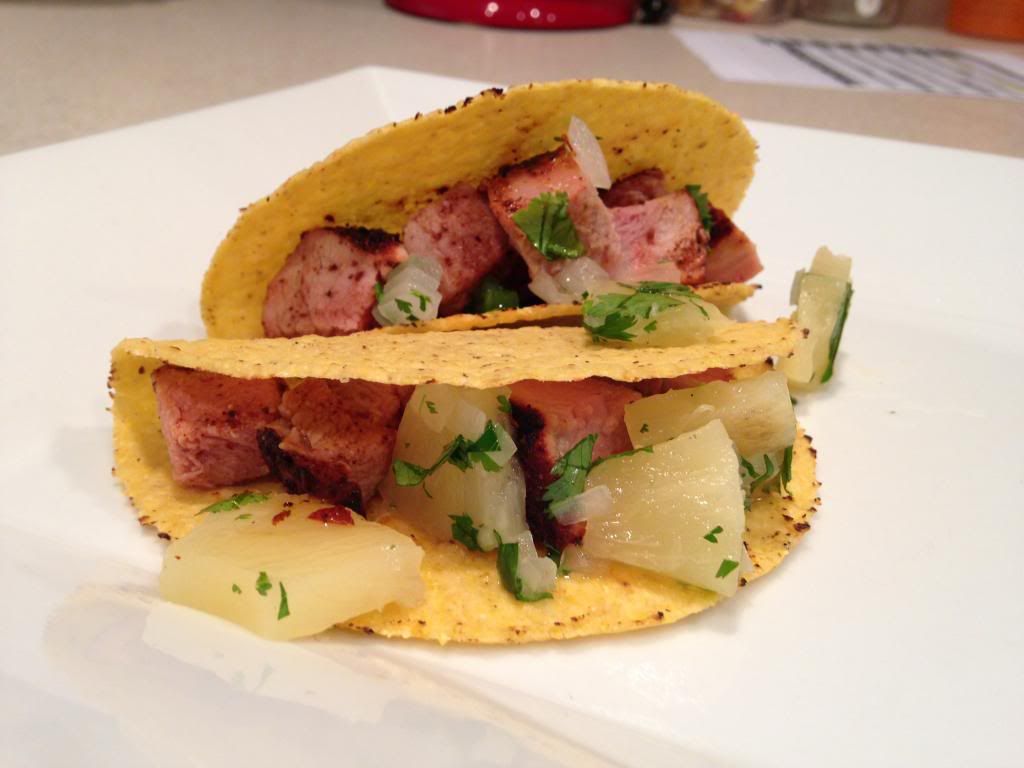
Yet Another Tasty Taco Recipe

Good evening everyone!  After last week's botched dish, it's tough to find a recipe that would yield delicious results.  I must of thrown caution to the wind, because I fell head first into a recipe that 1) has a lot of spice that could have a lot of heat and 2) lots of time to dedicate to it.  I must have been up for the challenge, because this is one taco recipe you'll definitely want to duplicate!

The Recipe:  Tacos Al Pastor with Grilled Pineapple Salsa
Original Recipe Found On:  www.myrecipes.com

What You'll Need:
Pork:
1 Chipotle Chile, canned in Adobo Sauce
1 Tablespoon Olive Oil
1 (1 Pound) Pork Tenderloin, trimmed
1 Tablespoon chopped fresh Oregano
2 Teaspoons Ancho Chile Powder
1/2 Teaspoon ground Cumin
1/2 Teaspoon Kosher Salt
1/4 Teaspoon Black Pepper

Salsa:
4 (1/2-inch thick) slices fresh (or canned) Pineapple
1/4 Cup fresh Cilanto leaves, roughly chopped
3 Tablespoons thinly sliced Red Onion
3 Tablespoons fresh Lime Juice
1/4 Teaspoon Kosher Salt
1/2 Jalapeño, thinly sliced and deseeded

Remaining Ingredients:
8 (6-inch) Corn Tortillas
8 Lime Wedges

To start, mince the chipotle chile and mix the chile and olive oil in a small bowl.  Place the tenderloin on a clean plate and rub the chile/oil mixture over the pork.  In another small bowl, combine the oregano, ancho chile powder, cumin, salt, and pepper.  Sprinkle the spice mixture over the pork and rub in.  Place the tenderloin in the refrigerator and let stand for 30 minutes.  

Prior to taking the pork out of the fridge, preheat a grill to high heat.  Once the grill is heated, place the pork on the grill grates.  Grill for six to ten minutes on each side, or until a cooking thermometer reads 145 degrees.  Remove the pork from the grill, tent with aluminum foil, and let stand for five minutes.

While the pork rests, place the pineapple slices on the grill grates and grill for five minutes on each side.  Once cooked, roughly chop the pineapple and add to a medium mixing bowl.  Add the cilantro, red onion, lime juice, salt, and jalapeño.  Toss the ingredients to combine.

After the pork has rested, roughly chop the pork.  If desired, warm the tortillas.  Serve two tacos evenly with the pork.  Top each taco with three tablespoons of salsa.  Serve with lime wedges and enjoy!

The End Result:


Although, we have created a pork tacos before, this recipe blew that one out of the water.  One difference being that we have a grill to use, that we didn't in the first two years of the blog.  The overwhelming heat, due to the spice content in the recipe, that I thought might occur, didn't happen.  The pork was quite flavorful and juicy, no heat whatsoever.  The spice coating made a nice crust for the pork and was delicious.  The true start of these tacos is the salsa.  The pineapple could have grilled a wee bit longer, but it didn't matter.  Combined with the onion and fresh cilantro, it was a mouthwatering feast.  The lime juice helped to cut out some of the burn from the jalapeño, but I was able to handle it - which surprised even me!  Overall, a recipe definitely worth trying, if you feel adventurous with your taco quests!

Thanks for joining us tonight.  Check back over the weekend for a muffin that will blow your socks off!  Until then,

~Cheers!

Wednesday, May 28, 2014

16 Burgers of Summer: Texas Burger

Good evening everyone! We're continuing on our theme of the summer once again this week with another burger based recipe. With these recipes, I'm looking to try something new - be it new combinations or just interesting toppings, I'm always out looking for something different. Along with that, I'm also actively searching for new ways to cook each dish. For instance, this week's recipe calls for both bacon and sautéed onions. Sure, I COULD complete those items on the stove top - but since we're already using the grill, why not find a way to get everything done with one appliance? The result is a brand new (safe) method for cooking bacon on the grill that I'm eager to share.


The Recipe: Texas Burger (Burger #3 of 16)

What You'll Need:

1 Crackin' Burger Recipe
1 Small white onion (Diced)
2 - 3 Strips Thick Cut Bacon
Pepper Jack Cheese


To begin, place a large sheet of aluminum foil over 1/2 of your grill. Carefully work the foil in between the grates of the grill to accentuate the "gaps" between the grates (you're effectively creating a pooling location between each grate). Make sure you don't puncture a hole into the foil.

Next, take a large sheet of aluminum foil and fold it in half. Then, fold each side in 1 inch and crease, creating a wall (like pictured below).


Once you have four walls, crimp the corners by folding them together (as pictured) to create a short sided box. Place this box on top of the foil covered side of the grill. Preheat your grill to 500 degrees and clean the other grate. Reduce the heat to medium on the foil covered side and medium low on the uncovered side.


Take another sheet of aluminum foil and fold it over itself to form a pouch. Place 1/2 tablespoon of unsalted butter in the pouch, along with the white onion. Crimp to seal the packet shut and place on the uncovered side of the grill (favor the side where the heat is more direct) cook the packet for 10 minutes, making sure to flip halfway through cooking.

Meanwhile, place your bacon strips into the foil box you created earlier. Line them up nicely in a row and allow them to cook for 3 to 5 minutes per side, or until they turn a deep golden brown color. If done correctly, your foil box will hold in all of the grease the bacon leaves behind. If some grease does leak out, the foil on top of the grate should contain it and prevent it from hitting the flame.

I cut our bacon pieces in half so they cooked easier and fit on the burger better

When your onions and bacon are halfway through cooking, place the burgers on the grill and cook to desired doneness. Prior to removing them from the grill, brush them lightly with BBQ sauce and cover with slices of pepperjack cheese. Allow the cheese to melt then serve topped the sautéed onions and with a light spread of mayo on the bun. Enjoy!

The Results:


I'm quite please with my method of cooking bacon on the grill. The bacon turned out crisp and golden brown and there were no flare ups or incidents on the grill. You always avoid any extra cleanup as the foil can be folded up and thrown away.

The burger itself was quite delicious as well. When you find yourself in a "rut" when it comes to traditional burgers, just throw some bacon and BBQ sauce on top and you'll instantly have a brand new (just as delicious) variant to enjoy. That's especially true with this recipe, which is complimented nicely by the onions and the BBQ "glazing" prior to serving. All in all - one tasty burger!

That's all we have for you this evening - Maggie takes to the kitchen tomorrow night with a brand new recipe of her own. Until then,

~Cheers
Thursday, May 22, 2014

A Rare Dud

Good evening everyone!  Over four years of blogging, we've evolved the goal of our blog. We originally set out to show you that healthy cooking was possible for amateur chefs. We then went for a more tutorial approach, providing background on cooking techniques and preparation methods for different dishes. More recently, we've focused on recipe reviews and creation. We cook up our own dishes or try some recipes from well traveled sites and let you know how they stack up. We take them on and make the tweaks so you don't have to. This means we sometimes stumble across great recipes - other times we find recipes with potential that just need a few tweaks. On a rare occasion we find a recipe that is simply...well...bad. Unfortunately, tonight's dish falls into the last category. 

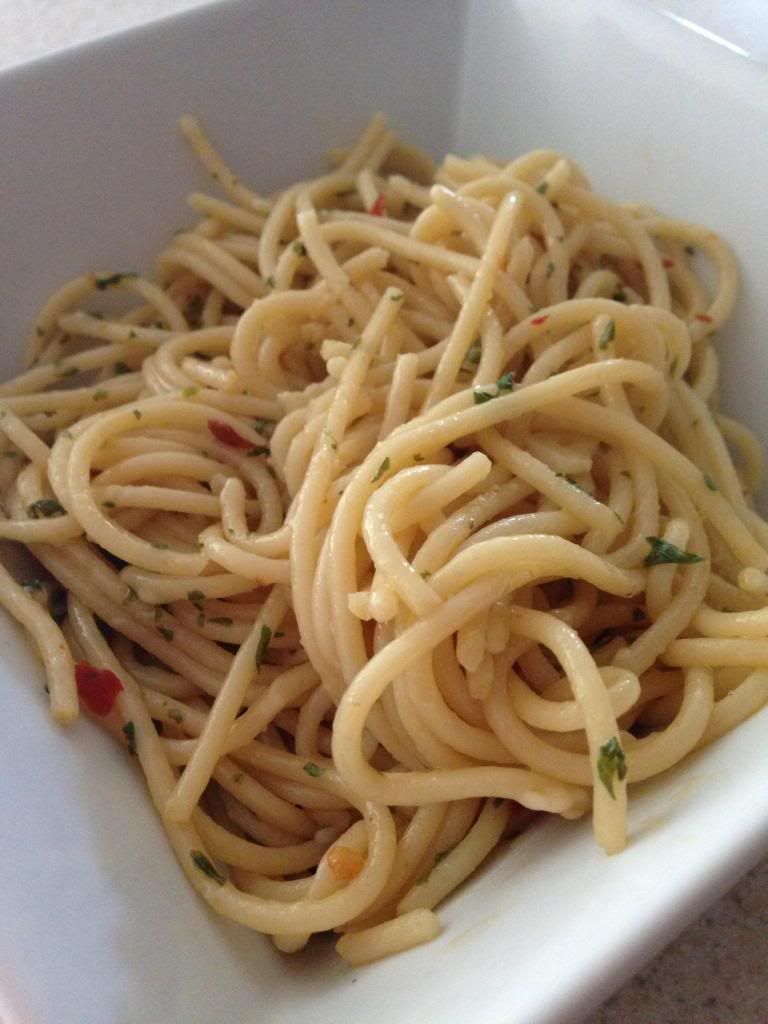
The Recipe:  Spaghetti with Olive Oil, Garlic, and Red Pepper Flakes
Original Recipe Found In:  Michael Symon's Five in Five

What You'll Need:
1 Pound dried Spaghetti
1/4 Cup Olive Oil
5 Garlic cloves, sliced
1 Tablespoon crushed Red Pepper Flakes
1/2 Cup fresh flat-leaf Parsley, chopped
1/2 Cup freshly grated Parmesan Cheese
1 Tablespoon unsalted Butter

To start, mix five quarts of water and three tablespoons of salt in a very large pot.  Bring these ingredients to a boil.  Add the pasta and cook until package directions state al dente.  Once the pasta is done cooking, scoop out a cup of pasta water and drain the remaining water from the pasta.

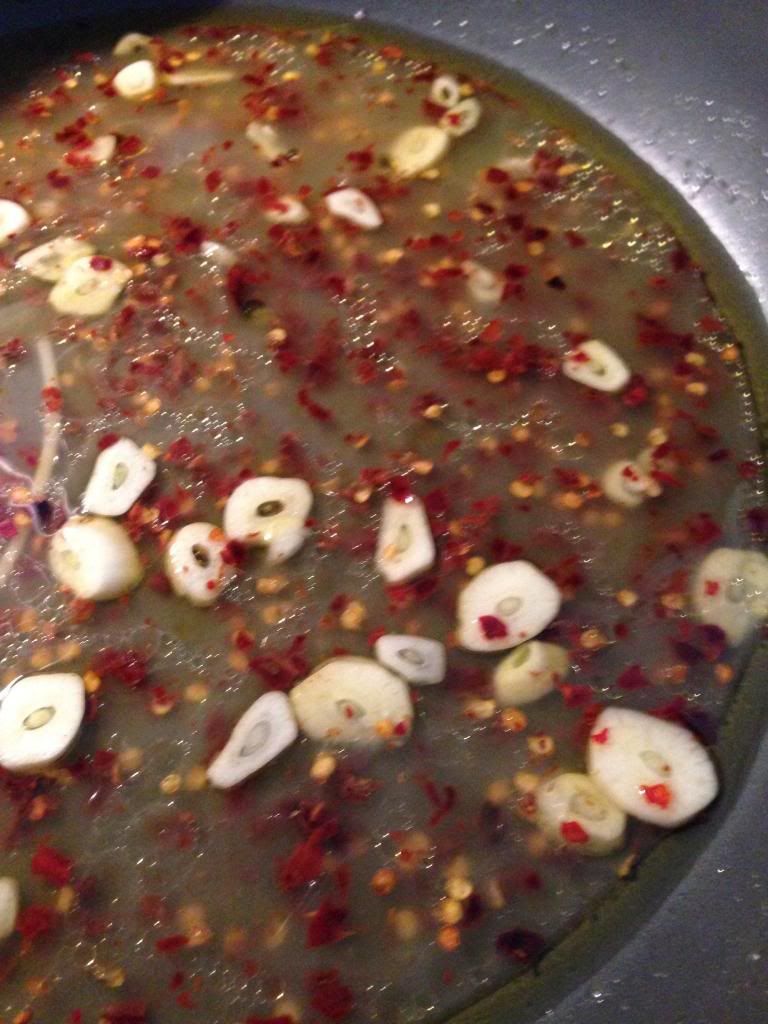
Next, in a large skillet, add the olive oil and garlic.  Heat this over low heat until the garlic becomes soft and fragrant, about three to five minutes.  Add the red pepper flakes, along with the reserved pasta water, to the garlic and oil mixture.  Bring the heat up on the skillet to a medium heat and heat the ingredients until they are at a simmer, about five minutes.

Meeting of the [flavor] minds...

Add the cooked pasta to the skillet and stir the noodles until they are covered with the sauce.  Remove the skillet from the heat and add the parsley, Parmesan, and butter.  Stir to coat the pasta.  Serve and enjoy!

The End Result:


The final picture looks quite innocent, but prepare yourself.  This is probably one of the hottest dishes we've ever created.  The dish was so hot it was simply inedible. It burned from first bite all the way through the swallow (you could feel it burn going down your throat!) The red pepper flakes were so intense that it overpowered all of the other flavors. This was simply "red pepper flake pasta" and in this case, that isn't a good thing. 

We're not sure if it was simply the quantity of the red pepper flakes or the quality of the flakes we used (we picked up some high quality flakes from Penzey's - it's possible the high quality flakes pack more heat). but the dish was hotter than necessary. 

This recipe deserves a second shot, but the red pepper flakes need to be reduced GREATLY before doing so. (We're talking 1 teaspoon to 1/2 teaspoon - cut it WAY down). As it stands, we simply can't recommend this dish. 

That's all we have for you this week.  Enjoy the long weekend as we salute those who have served our country so we can enjoy the freedoms we have.  Check back next week as we continue our Burger of the Week, serve delicious muffins, and present a brand new recipe.  Until then,

~Cheers!

Wednesday, May 21, 2014

16 Burgers of Summer: Roasted Corn Salsa Burger

Good evening everyone! This week marks entry number 2 in our "16 Burgers of Summer" theme. I'm drawing inspiration for these burgers from everywhere, the largest source being a "50 Burger Idea" insert from Food Network Magazine (a feature run in 2012). The problem with these burger ideas are that they are just that - ideas. In order to cram 50 burgers into a tiny insert, they cut out annoying things like quantity and...instructions. The result is some burger concept with nary a solid guideline to follow. These means flying without a safety net - and being creative. Two things that could throw off some at home chefs. I hope to prove with some of these recipes that even if your execution isn't 100%, you can still turn out a great meal. Tonight's dish is a perfect example of this concept.


The Recipe: Roasted Corn Salsa Burger


What You'll Need:

1 Crackin' Burger Recipe
1 1/2 Cups Frozen Corn
1 Small Red Bell Pepper (Diced)
1 Tablespoon Olive Oil
1 Teaspoon Lemon Juice
2 Tablespoons Mayonnaise
1 Tablespoon Sriracha Sauce


Preheat your grill to 500 degrees, clean the grates then reduce the heat to medium.

Place a small non stick skillet (8 inch) over medium high heat and add the olive oil. Bring the oil to a shimmer before adding the corn. Cook the corn until the kernels begin to soften and become fragrant, roughly 5 minutes. Add in the sliced bell pepper and cook until the peppers have been heated through (3 to 5 minutes). Add a pinch of salt and the lemon juice to the skillet, stir well and remove from heat.

As I noted in the open, the original "recipe" (If you want to be generous and call it that) said little beyond "combine corn and red bell pepper" - so I was left to improvise here. I was originally just going to cook up everything in the skillet, but then I thought, "We're grilling the burgers, why not grill this too?"

Using two sheets of heavy duty aluminum foil, make a pouch to contain the corn mixture. Seal it up well (any gaps or seams and you'll lose all the lemon juice) and place it on the grill directly over the heat. Allow the salsa to cook for the time it takes to cook your burgers (roughly 5 to 7 minutes).

Speaking of the burgers, right before you add them to the grill, give them a light dusting with a pinch of cumin. Then cook them like you would any other burger.

While everything is grilling, combine the mayo and sriracha in a small dish to form chipotle mayo. Spread a thin layer of this mayo on the bottom of a hamburger bun and set aside. You can store the remaining mayo for future recipes.

Once everything is cooked through, assemble the burger and top with a tablespoon of the corn salsa. Serve and enjoy!

The Results:

The chipotle mayo is on the bottom - the pic doesn't show it well but it's there! 


The corn salsa and chipotle mayo compliment well and both are balanced nicely by the juicy burger. That being said, the dish is a bit on the messy side as there's nothing to really "bind" the salsa together. If given the chance to redo this dish, I'd add one more step.

Right after removing the salsa from the grill, stir in 1/2 cup of shredded Mexican or colby jack cheese. Not only will the cheese add another element of flavor to the burger, it will act as a "glue' to keep the salsa together and prevent it from falling all over the plate.

If you attempt this burger at home, I'd highly recommend that little adaptation to this otherwise tasty recipe.

That's all we have for you this evening, We're back Thursday night with another brand new recipe. Until then,

~Cheers

(Oh, by the way, we just recently passed our 4 year anniversary of cooking and blogging at Out of the Culinary...so...Yay!)


Friday, May 16, 2014

16 Burgers of Summer: Chile Verde Burger

Good evening everyone! One of our favorite summertime activities is grilling out. After years of living in an apartment without the luxury of a grill, we've been taking advantage of this handy cooking method for the past year and half, ever since we moved into our house. The realm of grilling, much like standard cooking is only limited to your imagination. There are countless recipes out there that can easily be adapted for the grill and their are variations upon variations of each recipe.

Case in point: the burger. Simple in premise, but the final execution is only limited to your resources on hand. In fact, the world of burgers is so diverse, we're giving it some special attention. Starting this week and running each week through the rest of the summer, we're going to be cooking up a new burger recipe. We may change the meat types, the toppings or twist the concept on its head entirely - but the premise will remain the same. One new burger recipe, each week, until the end of summer. We're calling it "16 Burgers of summer" and it starts right now!


16 Burgers of Summer: Burger #1

Chile Verde Burger:

What You'll Need:

1 Cracking Burger Recipe*
Salsa Verde
Jarred Pimientos
Shredded Mexican Cheese


* Let's get the basics out of the way right off the bat. You can't make a burger without having a standard burger recipe. For us, that is and has always been a variation of Jamie Oliver's Crackin' Burger. Although we've covered it several times on the blog, I'll include the recipe for this framework burger once more - then, in future posts, when I reference "one cracking burger recipe" you'll know that this recipe is what we're referring to. (No, we won't use this base all of the time, but it's probably going to be the most used base for all of these burgers, so it's a good one to familiarize yourself with).

Crackin' Burger:

1 Pound 80/20 or 85/15 Ground Beef
1 Tablespoon Yellow Mustard
1/4 Cup Bread Crumbs
1 Egg (Beaten)

Combine all of the ingredients in a large bowl and separate into four equally sized balls. Work the balls into thin patties. They'll keep for 24 hours in the refrigerator otherwise they can be frozen for future use.

Now that the background information is out of the way - let's get cooking.

Preheat your grill to 500 degrees, then clean the grates. Reduce the heat to medium (300 degrees).

The original version of this recipe called for you to make your own salsa verde and your own sliced, pimientos...yeah, right. Listen, I like cooking as much (maybe even more) than the average individual but I'm not going to toil and make my own salsa verde (with 8 ingredients) and my own pimento mix (with another 5 ingredients) when both of those items are readily available at a super market for a low price. It doesn't make any sense to waste your time for small stuff like that - instead we opted to pick up fresh salsa verde and jarred pimientos (total cost $3 - and there's plenty of leftovers).

Grill your burgers to your desired doneness (I don't think we need to cover how to grill meat, right?) then top with the shredded cheese and allow it to melt. Top with the pimientos and then the salsa verde. Serve and enjoy!

The Results:


This was one tasty burger. I've never had jarred pimientos, but was pleasantly surprised at how well their light heat blended with the salsa verde. It all blended with the mexican cheese and the juicy burger - making up one brilliantly flavorful dish!

That's all we have for you this week. We're back next week with the second edition of our burgers of summer and another brand new recipe. Until then,

~Cheers


Thursday, May 15, 2014

Asian Takeout...In Your Own Home!

Good evening everyone!  Besides Mexican food, one of the my other loves is Chinese/Asian takeout. There are just limitless possibilities that are waiting to be discovered!  Most of the time, there are huge quantities of this food and you are left feeling super stuffed.  Tonight, I present a great tasting Asian-inspired dish that won't make you feel kinda bloated like normal takeout, but will leave you inspired to create your own stir-fry.

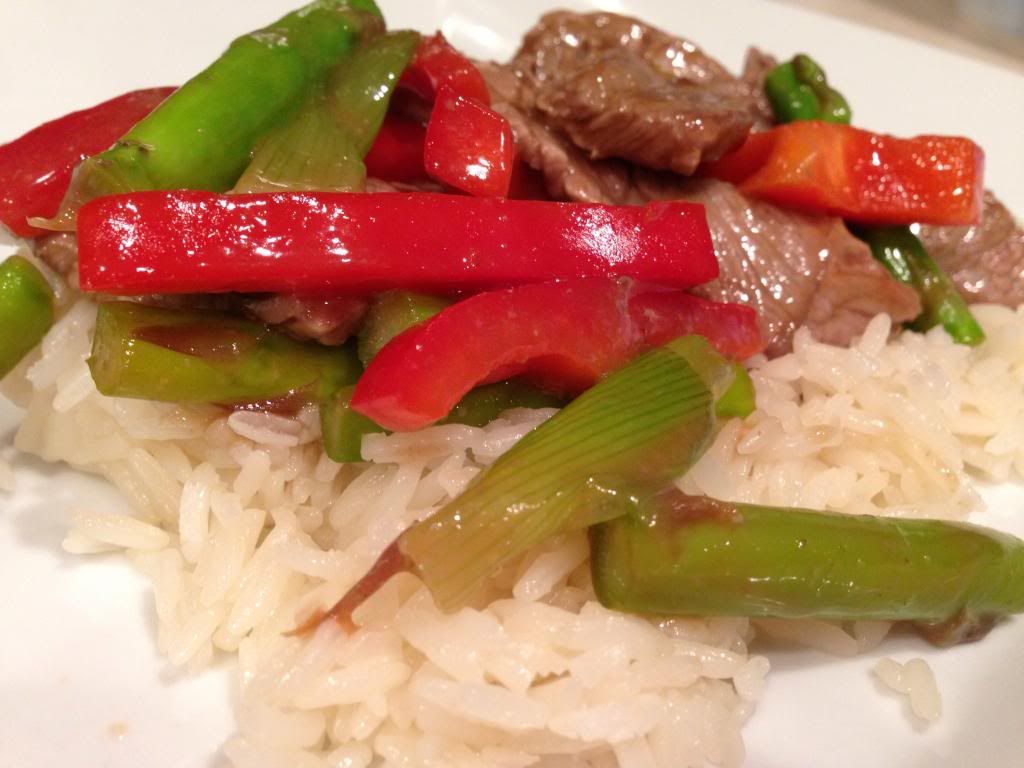
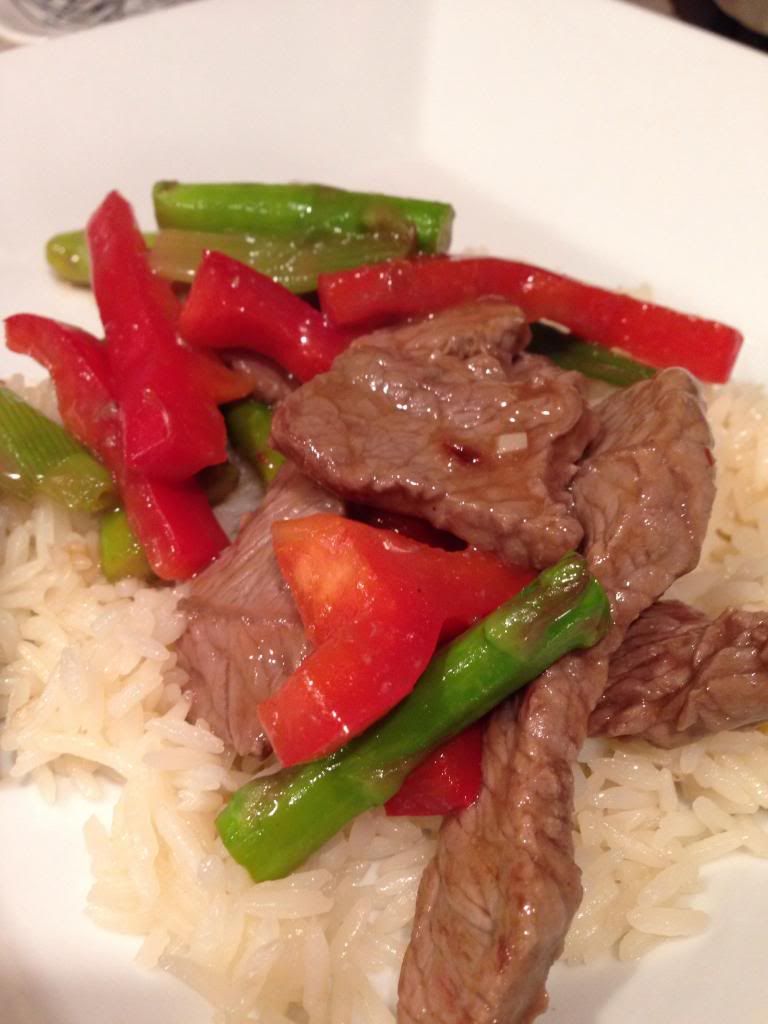
The Recipe: Steak and Asparagus Stir-Fry
Original Recipe Found In:   www.myrecipes.com

What You'll Need:
1/4 Cup unsalted Chicken Broth
1 1/2 Tablespoons Oyster Sauce*
1 1/2 Tablespoons lower-sodium Soy Sauce
2 Teaspoons grated peeled fresh Ginger
2 Teaspoons minced Garlic
1 Teaspoons Cornstarch
5 Teaspoons Canola Oil, divided
12 Ounces boneless Sirloin Steak, cut into 1/4-inch strips
12 Ounces medium Asparagus, trimmed and cut into 2-inch pieces
1 medium Red Bell Pepper, cut into strips
1/2 Teaspoon crushed Red Pepper Flakes
3 Green Onions, chopped

*If you don't want to buy an entire bottle of oyster sauce, hoisin sauce is a great substitute in a pinch, without connotations of oysters lingering in your head.

To start, combine the chicken broth, oyster sauce, soy sauce, ginger, garlic, and cornstarch in a small bowl.  Whisk all the ingredients together and set aside.

Next, heat a large skillet over high heat and add one tablespoon of canola oil.  Once the oil has heated, swirl the skillet to coat.  Add the beef and stir fry until browned, but not cooked through, about one and a half to three minutes.  While cooking, just ensure all sides have lost their pink color.  It's okay if some of them are still a touch pink, the slices of beef are thin enough they will cook later.  Once the beef has cooked, place on a clean plate and keep covered.  Discard the beef liquid in the pan.

Return the skillet to high heat and add the remaining two teaspoons of oil, swirl to coat again once the oil has warmed.  Add the asparagus and bell pepper and stir fry the vegetables for two minutes, until the asparagus has become greener and the red bell pepper has hints of browning.  Next, add the crushed red pepper and green onions and stir fry again for 30 seconds to one minute.  Reduce the heat of the pan to a medium-high heat.  Add the stock mixture and cook for three minutes or until the sauce has slightly thickened.  Return the beef and any remaining juices to the pan and cook for one to three minutes, or until all the ingredients have been coated and heated well through.  Serve and enjoy!

The End Result:


This is a great low-calorie (not to mention guilt-free) version of Asian takeout.  Using mostly vegetables, you'll get the flavor from these ingredients, instead of extra additives that might be hidden in normal takeout.  Although, when I added the crushed red pepper to the skillet, there was a waft of strong flavor that took my breath away, so be careful when inhaling at that portion of the recipe!  The steak is super thin definitely adds to an extra protein boost to the dish.  I highly recommend serving this with jasmine rice, because it'll soak that extra sauce and definitely even out any flavors that might be a little too intense.  Overall, a great dish that's suited for anyone willing to take the plunge into cooking Asian at home!

Thanks for joining us tonight.  Tyler joins us tomorrow as he presents a brand new, summer-long special for the blog.  Until then,

~Cheers!