Wednesday, February 25, 2015

Carrots...Who Knew?

Good evening everyone!  Tonight, I introduce a new chef to our kitchen.  No, we're not adding another writer to the blog.  I'm talking about another influence to our cooking abilities.  Chef Geoffrey Zakarian might not be a household name, but if you are a fan of Food Network (especially the show Chopped,) the name you'll immediately recognize.  His old-school, traditional recipes definitely add a bit of style to the modern kitchen, but he has some true talent that cannot be overshadowed.  Tonight, I'll be showcasing one of those dishes and it will not disappoint!

The Recipe:  Roasted Carrots with Provencal Breadcrumb Crust
Original Recipe Found In:  Geoffrey Zakarian's My Perfect Pantry

What You'll Need:

2 Pounds Baby Carrots with tops, trimmed to leave a small tip of green at the top
1/4 Cup Extra-Virgin Olive Oil
2 Cups unseasoned Bread Crumbs
2 small Shallots, finely chopped
1/2 Cup chopped fresh Basil
1/2 Cup chopped Scallions, white and green parts
2 Garlic cloves, finely chopped
1/4 Cup freshly grated Parmigiano-Reggiano cheese

To start, preheat an oven to 375 degrees.  In a large pot, fill with water and bring to a boil over high heat.  Add the carrots to the boiling water and cook until just tender, about four minutes.  Drain the carrots in a colander and place in a ice bath.  Bring the carrots out of the ice bath and onto paper towels to pat dry.  In a large glass or ceramic baking dish, arrange the carrots in a single layer and drizzle with some olive oil.  Season with salt and pepper.

Next, in a large mixing bowl, add the bread crumbs, shallots, basil, parsley, scallions, and garlic and throughly combine.  Season with salt and pepper.  Drizzle the mixture with olive oil and toss well with a fork to combine.

Sprinkle the bread crumb mixture over the carrots, so that that carrots are completely covered.  Sprinkle the cheese and drizzle with a bit more olive oil.  Place the baking dish in the oven and roast until the carrots are browned and the crumbs are crisp and golden, between 20 to 25 minutes.  Serve and enjoy!

The End Result:
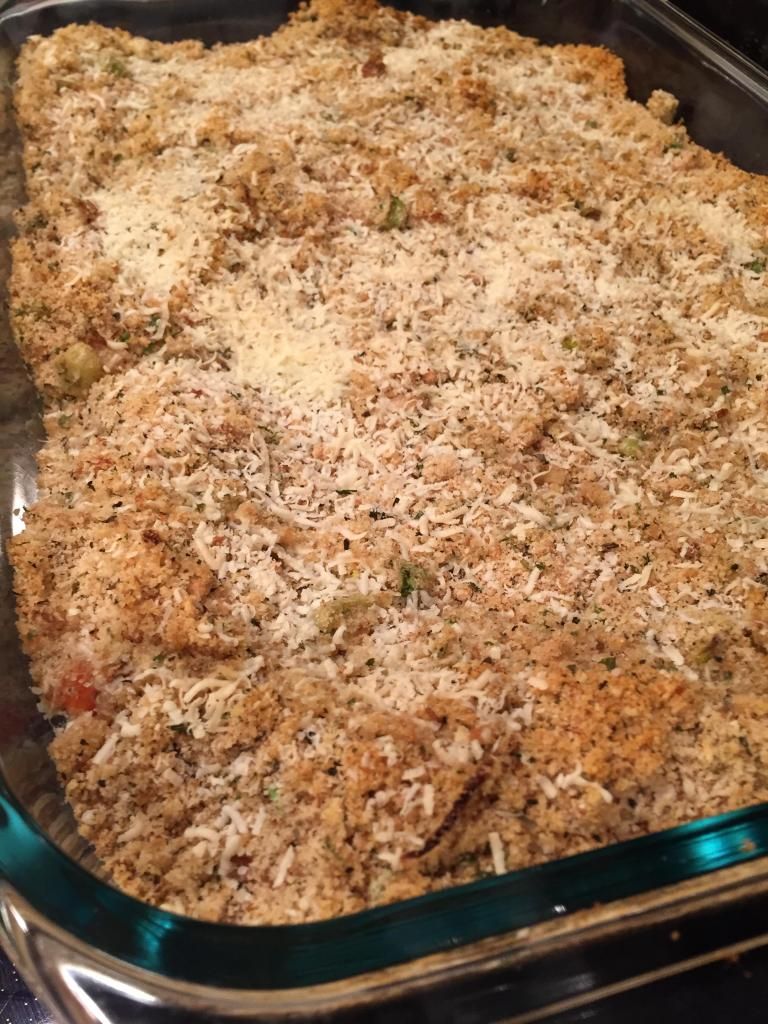


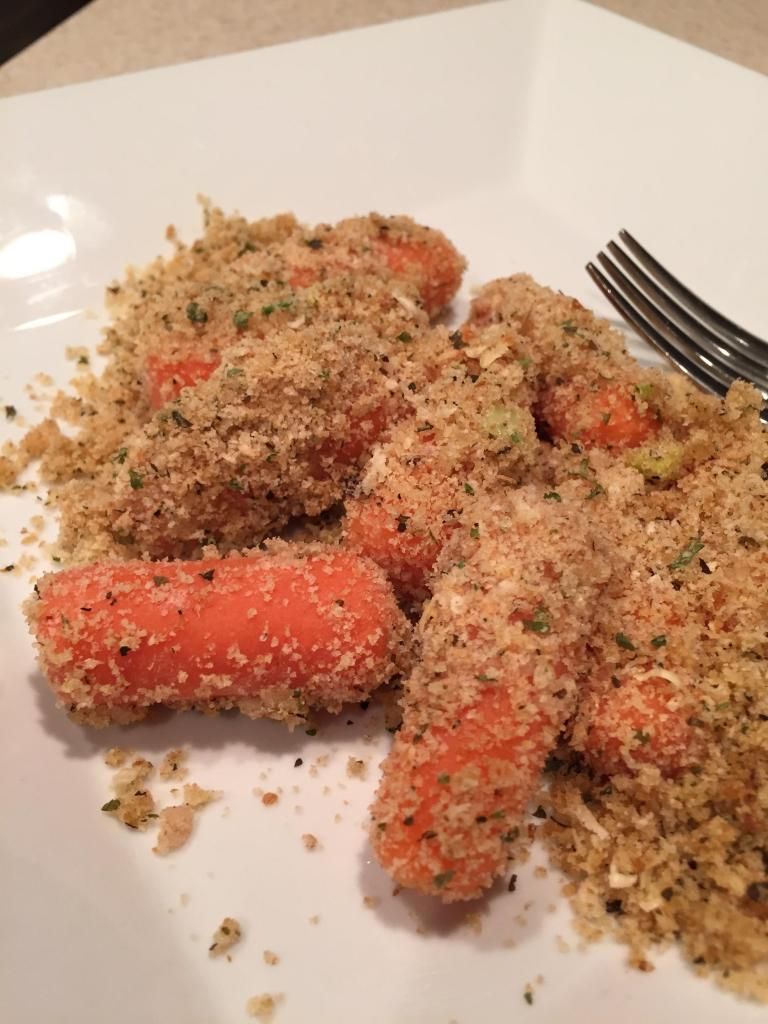
Even though this recipe could call itself a "side dish", there's no dish that could call itself the main course over these carrots!  Once the carrots are nice and tender, the bread crumb topping just melts into the carrots.  There's a host of flavors that have added themselves nicely to this dish and makes it quite delectable.  While this does take a bit more time than my usual week night meals, it well definitely be worth it and you're eating healthy too!

Keep checking back for recipes that are sure to entice and get your mouth watering!  Until then,

~Cheers!

Sunday, February 22, 2015

Chickpea & Spiced Pita Soup

Hello again everyone! While the calendar may be creeping toward spring, the reality is, winter still has a vicious hold upon most of the region. While that is bad news for most things (the air HURTS YOUR FACE! Why do we live in a region where the air hurts you face?!) it does mean that soup season is still very much in place - which is always a welcome thing.

So, let's take full advantage of soup season by cooking up a healthy, filling and most importantly - warm - soup.

The Recipe: Chickpea Soup With Spiced Pita Chips
Original Recipe From: Food Network Magazine - January 2015 Issue

What You'll Need:

1/4 Cup Extra-Virgin Olive Oil
2 Stalks Celery (Chopped)
2 Carrots (Chopped)
1 Large Onion (Chopped)
2 x 15 Ounce Can Chickpeas (Drained, rinsed)
1 x 15 Ounce Can Diced Fire Roasted Tomatoes with Green Chiles
1 Tablespoon Cumin
1 1/2 Teaspoons Ground Coriander
2 Pocketless Pitas (In a pinch, pita pockets work as well)
Juice of 1/2 a lemon

Preheat your oven to 325.

Heat 2 tablespoons of olive oil in a large dutch oven over medium high heat. Once the oil begins to shimmer, add the onion, celery and carrots along with a pinch of salt and pepper. Cook, stirring occasionally, until the veggies have softened.

Next, add 6 cups of water, the chickpeas, tomatoes, 2 teaspoons cumin, 1 teaspoon coriander and 1/2 teaspoon of salt. Cook, stirring occasionally until the mixture has thickened (this takes roughly 20 minutes). After 20 minutes, mash the chickpeas with the back of a large spoon - you don't have to mash them all or evenly completely mash them - just look to "break" them down a bit.

Meanwhile, slice your pita bread into wedges and toss them with the remaining 2 tablespoons of olive oil, 1 teaspoon of cumin, 1/2 teaspoon coriander and 1/2 teaspoon salt. Spread the wedges in a single layer on a rimmed baking sheet. Bake until the wedges are golden brown and crispy (roughly 8 to 10 minutes).

Just before serving, stir in the lemon juice and top with the pita chips. Enjoy!

The Results:


This recipe is a perfect example of a symbiotic culinary relationship. On its own, the soup is a bit bland, with lackluster texture - while on their own, the pita chips are a bit pungent and a little intense - together, however, the two make a beautifully balanced soup that finds great harmony in both flavor and texture. In short, this is a tasty soup that keeps the calorie count low. Just don't skip the pita chips - you'll be sorry!

Wednesday, February 18, 2015

Steak, Onion, and Pepper - A Classy Dinner Move

Good evening everyone!  It's nice to add a bit of decadence to the standard evening meal.  There are numerous options when this is the case.  Nothing says it more than steak.  While the meat itself is pretty bland, the possibilities of how you serve it and what you serve it with is what defines it.  Tonight, I'll be creating a delicious steak, served with some veggie options that are out of the norm.

The Recipe:  Strip Steak with Onions and Poblanos
Original Recipe Found In:  Cooking Light, November 2014 Issue

What You'll Need:
2 (10 Ounce) New York Strip Steaks, trimmed
3/8 Teaspoon Smoked Paprika
1 1/2 Tablespoons Sesame Oil, divided
1 (12 Ounce) Yellow Onion, cut into 12 wedges
2 Poblano Peppers, seeded and cut into 1/2-inch strips
4 Lime Wedges

To start, heat a large, cast-iron skillet over medium-high heat.  On a clean plate, position the steaks.  Sprinkle the steaks evenly with the paprika, salt, and freshly ground black pepper.  Add 1 1/2 teaspoons of oil to the pan and swirl to coat.  Carefully place the steaks to the pan and cook for four minutes on each side, or until desired degree on doneness.  Once cooked, remove the steaks from the pan on a cutting board, cover with aluminum foil, and let stand for ten minutes.

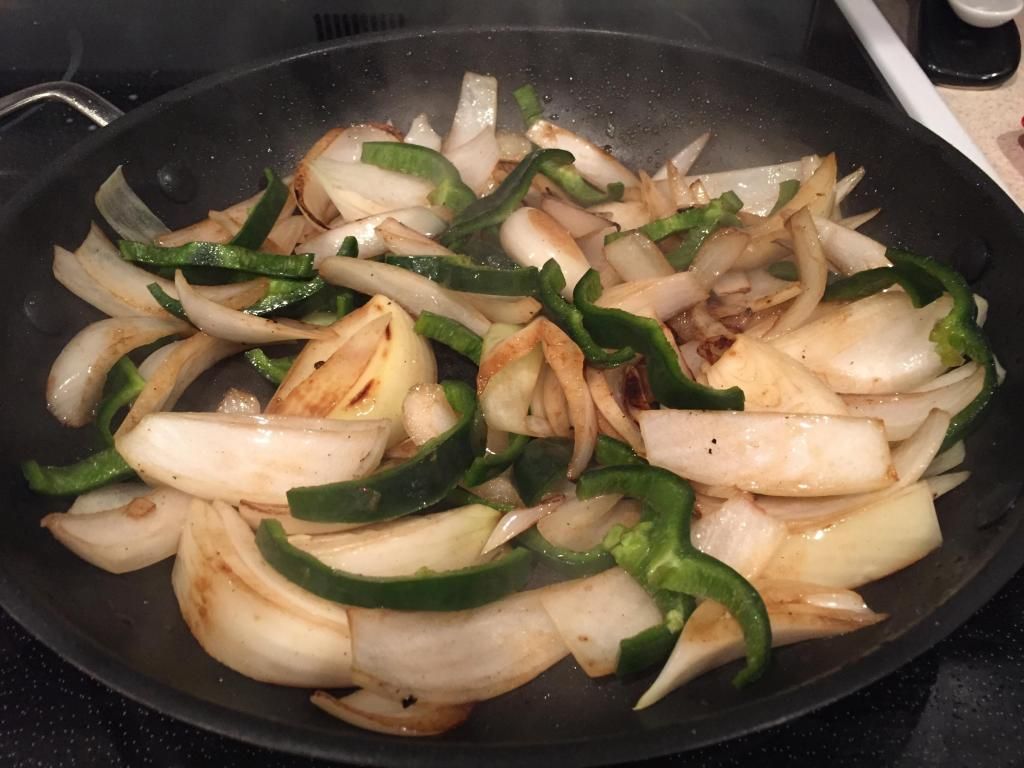
Meanwhile, add the remaining tablespoon of oil to the pan swirl to coat once more.  Add the onion wedges and cook for two minutes on each side.  Make room in the pan and add the poblanos.  Saute the ingredients for four minutes, stirring occasionally.  Remove the skillet from the heat, cover, and let stand for five minutes.  Season with salt and pepper.  


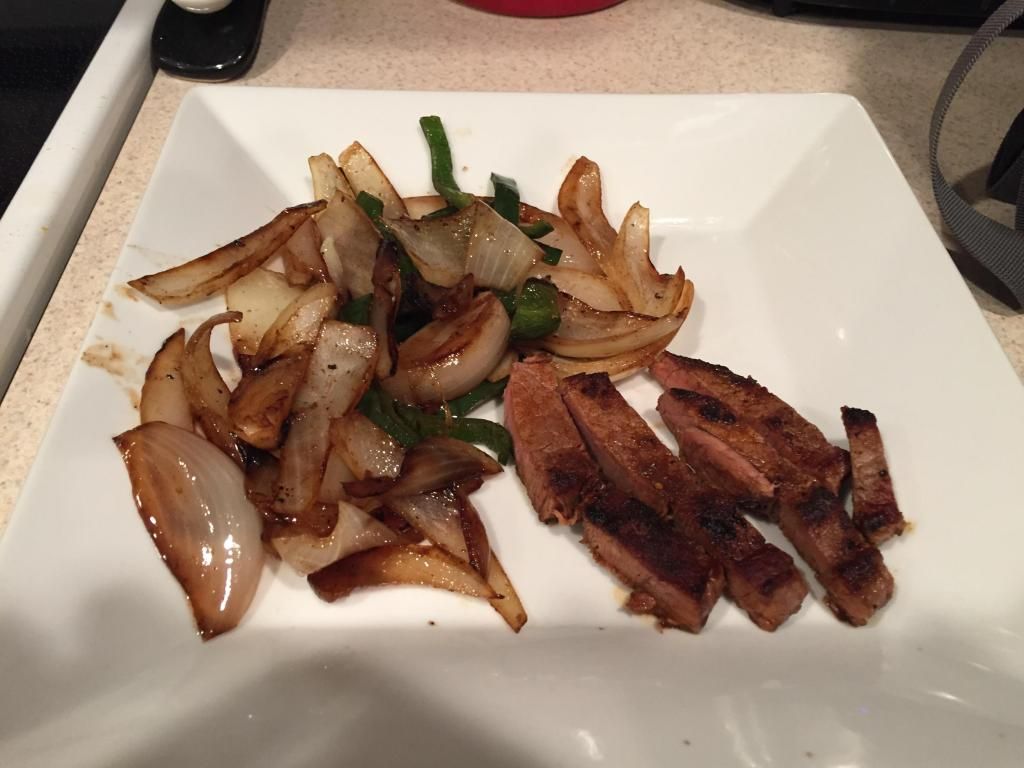
Prepare a clean platter and arrange the onion mixture on top.  Remove the foil from the steak and cut the steak across the grain into thin slices.  Arrange the steak over the onion mixture and sprinkle with salt.  Serve with lime wedges and enjoy!

The End Results:


While the onions look a bit charred, trust me, it only adds more complexity to the dish.  The steak is cooked perfectly, while resting it gives it more juice that would be lost if it was cut into right after cooking.  The poblanos lost most of their heat while deseeding and cooking, which ended up being a a great pepper add in.  The lime juice (we used bottled) spritzed on the meat and veggies added a bright note to the ingredients.  Overall, a great, simple, and a hint of class dinner option that will leave you hungry for more.

That's all we have for you this week.  Continue to check back with great options to try in your kitchen.  Until then,

~Cheers!

Sunday, February 8, 2015

Brilliant Blueberry Cakes

Hello again everyone! We've all been told countless times, "Breakfast is the most important meal of the day" - doctors, dietitians and anyone associated with keeping you healthy and happy have long repeated that mantra. The issue that many folks have is typically twofold - first "lack of time" and secondly "lack of options". In short, we're all in a hurry in the morning and the options set out for express breakfast are either poor in quality or not filling enough to last you all morning.

So, what are we, the at home chef, to do?

In short, address the week ahead on the weekend. Yes, with a bit of time investment on Sunday afternoon, you can prepare a week's worth of delicious breakfast treats that are not only satisfyingly tasty - they're also nutritious and filling. Sounds pretty good right? Then let's get cooking!

The Recipe: Blueberry-Oatmeal Cakes
Original Recipe From: Eatingwell.com

What You'll Need:

2 1/2 Cups Old Fashion Rolled Oats
1 1/2 Cups Low Fat Milk
1 Large Egg (Beaten)
1/3 Cup Pure Maple Syrup
2 Tablespoons Canola Oil
1 Teaspoon Vanilla Extract
1 Teaspoon Ground Cinnamon
1 Teaspoon Baking Powder
1/4 Teaspoon Salt
3/4 Cup Blueberries (Fresh or frozen)

Combine the oats and milk in a large bowl. Cover and place in the refrigerator for 8 to 12 hours.

After the initial soak, set your oven to 375 degrees and coat a 12 cup non-stick muffin tin with non-stick spray (yes, you'll need non-stick spray for non-stick pan - experience has shown that non-stick pans are not exactly non-stick...avoid a mess, use some spray!)

Next, stir in the egg, maple syrup, vanilla, cinnamon, baking powder and salt into the soaked oats. Mix until well combined. Portion the mixture into 1/4 cup increments, into each muffin cup. Top each cup with 1 to 2 tablespoons of blueberries and pop the muffins into the oven for 25 to 30 minutes, or until the muffins are springy to the touch.

Allow the muffins to cool for 10 to 15 minutes before eating. Best of all, these muffins can be stored in the refrigerator (tightly wrapped) for a week or frozen for 3 months.

Yes, these muffins can be frozen, which makes this recipe ideal for "make ahead" planning. You see, you can cook up a big batch of these muffins - pop the extras in the freezer and then simply microwave them for 30 seconds to 1 minute come weekday morning and - ta da! One delicious, filling and healthy breakfast.

The best part is, these little morsels are quite tasty (especially if you're a fan of blueberries!)


Wednesday, February 4, 2015

Stuffed with Spaghetti Squash?

Good evening everyone!  It is no secret that I love Mexican food.  I'm quite keen to the burritos and enchiladas of the world.  But most Mexican dishes are pretty calorie ridden and it's tough to find recipes that keep the flavor and loose the bulk.  Tonight, I'm sharing a pretty tasty Mexican recipe that won't break the calorie bank and will definitely be a fan favorite at your house.

The Recipe:  Chicken Enchilada Stuffed Spaghetti Squash
Original Recipe Adapted From:  www.pinterest.com

What You'll Need:
1 Large Spaghetti Squash, cut in half and seeded
1 Tablespoon Oil
1/2 Pound Boneless, Skinless Chicken Breast, cooked and shredded
2 Cups Enchilada Sauce
1/2 Cup Black Beans
1/2 Cup Corn
1/4 Cup Cilantro, torn (optional)
1/2 Cup shredded Sharp Cheddar Cheese
1/2 Cup shredded Monterey Jack Cheese

To start, prepare the spaghetti squash.  Preheat an oven to 400 degrees.  Brush in the inner flesh of the spaghetti squash with the oil and season with salt and pepper.  Place the squash on a heavy baking sheet, skin side up, and cook until tender, about 30 minutes.

While the squash is cooking, prepare the "inner" ingredients.  In a medium mixing bowl, combine the chicken, enchilada sauce, beans, corn, and cilantro and mix well.  Once the squash has cooled enough to touch, divide the mixture between the two halves.  Top the squash and ingredients with equal amounts of cheese.  

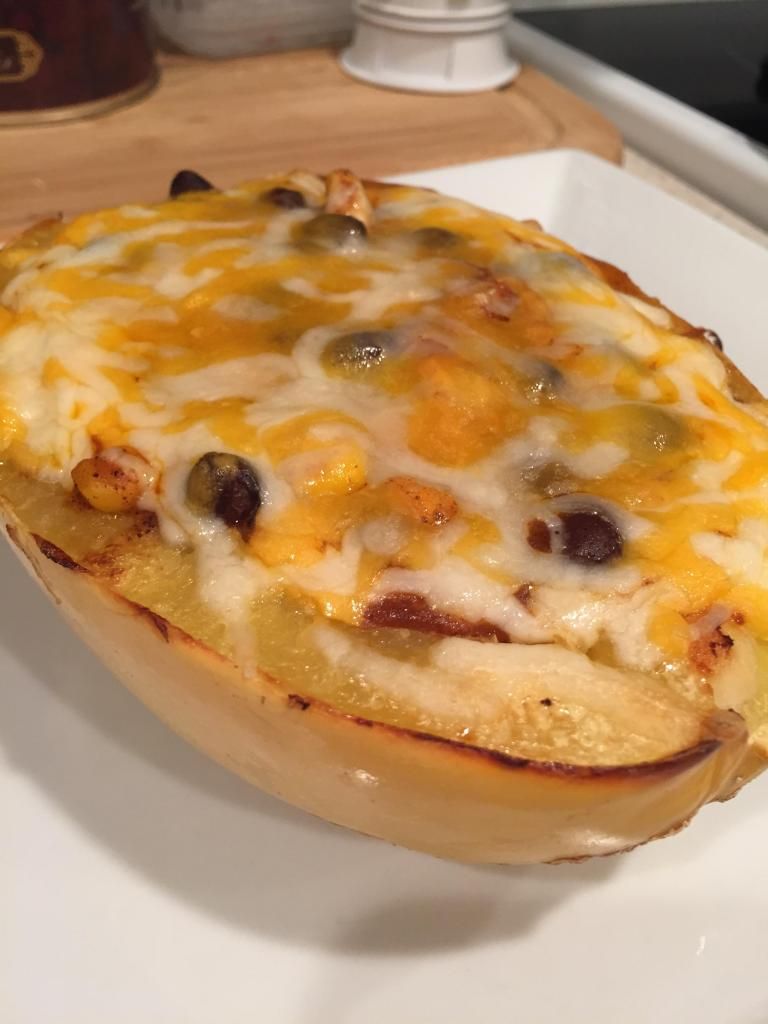
Place the squash back in the oven and cook until the cheese has began to melt and turn a light golden brown, about three to five minutes.  Place the cooked squash on clean plates, serve, and enjoy!

The End Result:


Using a spaghetti squash makes this a much healthier alternative to the traditional Mexican fare.  The portions are smaller, but yet in equal parts, so it's a good way to eat sensibly.  Also, when you mix all the ingredients (the chicken portion with the spaghetti squash flesh,) it tastes incredible!  I'm a big fan of spaghetti squash already and this is a great recipe to incorporate a healthy take into a favorite type food!

That's all we have for you tonight.  Keep checking back for more delicious ideas to bring into your kitchen.  Until then,

~Cheers!

Wednesday, January 28, 2015

Lickety-Fast, Finger Licking Pasta

Good evening everyone!  At some point, every family (or couple) needs a dinner that meets three criteria:  lightning fast to prepare, appealing to every pallet, and not too complicated ingredients.  If it's healthy for you too, that's an added bonus.  Tonight, I'm creating a dish that meets all FOUR of those cooking criteria and produces some delicious results.

The Recipe: Two-Cheese Penne with Chicken and Spinach
Original Recipe Found In:  Cooking Light, December 2015 Issue

What You'll Need:
8 Ounces uncooked, quick-cooking Penne
12 Ounces Boneless, Skinless Chicken Cutlets
1 Tablespoon Extra-Virgin Olive Oil
7 Ounces fresh Spinach
1/4 Teaspoon crushed Red Pepper Flakes
2 Garlic Cloves, minced
1 Tablespoon Lemon Juice
2 Ounces fresh Pecorino Romano Cheese, shredded (about 1/2 Cup)
2 Ounces 1/3-Less-Fat Cream Cheese (about 1/4 cup)

To start, bring a large saucepan of water to a boil and cook pasta according to cooking directions.  Once cooked, drain in a colander over a bowl, reserving 1/4 cup of pasta cooking water.

Next, heat a large skillet over medium-high heat and coat the pan with cooking spray.  Place the chicken on a clean plate and sprinkle both sides of the chicken with salt and pepper.  Once the skillet is heated, add the chicken.  Cook for three minutes on each side, or until the chicken is just done.  Remove the chicken from the skillet and thinly slice against the grain.

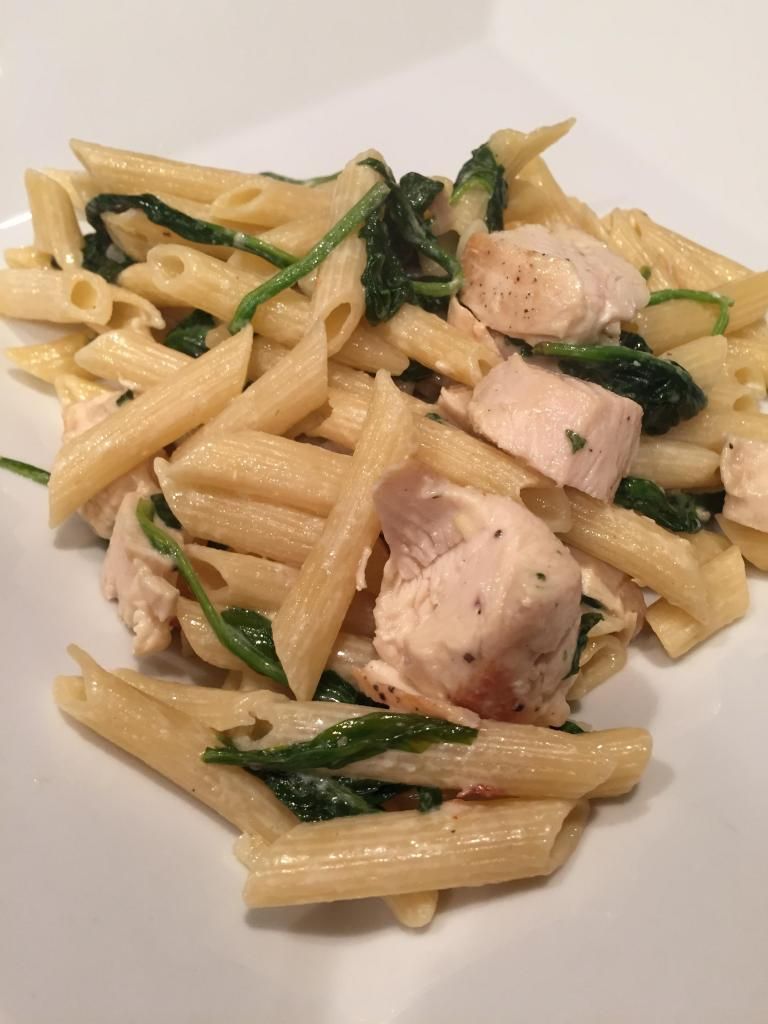
Return the skillet to the stovetop and reheat again the medium heat.  Add the oil and swirl to coat.  Add the spinach, red pepper flakes, and garlic.  Cook for three minutes, or until the spinach begins to wilt.  Add the cooked pasta, reserved pasta water, chicken pieces, lemon juice, and cheeses to the skillet.  Toss to coat and cook until the cheese begins to melt, between one to three minutes.  Serve and enjoy!

The End Result:

The cheeses used are very light on the tastebuds, but does add some substantial flavor.  While a thicker sauce or even oil could be used, it's best to use the cheese mixture and it won't disappoint.  The chicken adds a mean portion of protein and the spinach also amps up the vitamin quota.  But the true, shining point of this recipe is that it takes no time flat to create, which is great when there's not a lot of time to slave over a stovetop.

Thanks for joining us tonight!  Keep checking back for more delicious dishes that will surely inspire the cook in you.  Until then,

~Cheers!

Wednesday, January 21, 2015

More Soup to Shake a (Soup) Spoon At!

Good evening everyone!  Continuing on my soup conquest, I bring you a fall/winter time favorite ingredient, that might not be used as often as anticipated.  Granted, there's a whole menagerie of squashes out there, but to use one in a soup like this is quite tasty.  Plus, it's paired with a cheesy crouton that evens out all the flavors. 

The Recipe:  Butternut Squash Soup
Original Recipe From:  My Fitness Pal app

What You'll Need:
Two Tablespoons Olive Oil
1 Large White Onion, chopped
2 Medium Carrots, chopped
1/2 Medium Butternut Squash, cut into 1/4-inch pieces
6 Cups Low-Sodium Chicken Broth
2 Sprigs of fresh Rosemary
1/2 Small Baguette, sliced
4 Ounces of Sharp Cheddar Cheese, shredded
2 Scallions, thinly sliced

To start, head the oil in a large saucepan over medium heat.  Add the chopped onion and season with salt and pepper.  Stir all the ingredients together and cover, cooking for six minutes, stirring occasionally.

Once the onions have cooked, add the carrots and the squash, stir and cover.  Cook this mixture for five more minutes, stirring occasionally also.  Add the chicken broth and the rosemary and bring the mixture to a boil.  Once at a boil, drop the heat and let simmer for 12-15 minutes, or until the vegetables are tender.

While the vegetables are cooking, heat the oven broiler.  Place the sliced baguette pieces on a foil lined baking sheet and sprinkle with the shredded cheddar cheese.  Place the baking sheet in the oven and broil under the cheese has melted, about one to two minutes.  Remove from the oven and set aside.

Once the vegetables have cooked, remove and discard the rosemary.  If you are using a stainless steel saucepan, use a corded immersion blender and blend until all the ingredients are thoroughly mixed.  If you used a nonstick saucepan, carefully pour the ingredients in a blender and pulse to puree the ingredients.  Pour into serving bowl, top with scallions and the cheese croutons, and enjoy!

The End Result:


The soup will be surprisingly sweet, as the butternut squash is naturally that way.  The carrots help to enhance that flavor and no onion can be found.  But the cheese croutons, as I have so lovingly named them, will add a depth to the soup that can't be found elsewhere.  While they might look pretty on top the of the soup, submerge them in the liquid and add with your slurps of soup.  The bread will give the soup something to cling to and the sharp cheddar cheese is a nice contrast with the squash flavor.  Overall, a great, fresh soup recipe to add to your soup arsenal!

That's all we have for you this week.  Check back frequently for more tasty additions to your recipe book.  Until then,

~Cheers!

Thursday, January 15, 2015

Mighty Fine Meat

Good evening everyone!  There are often times where becoming a vegetarian wouldn't be so bad of an idea.  Promote a more healthful status while giving new fruits and veggies I've never heard of before a shot.  While I romanticize the idea, it's recipes, like this one tonight, that make me think otherwise and remember that I like being an omnivore.

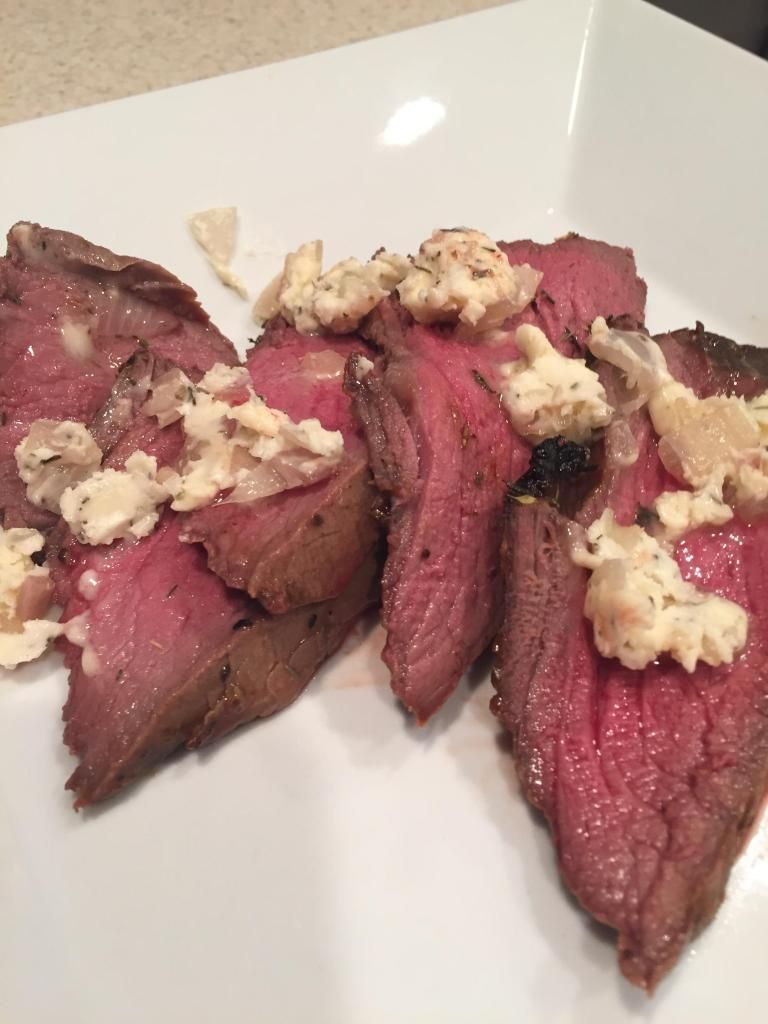
The Recipe:  Roast Beef Tenderloin with Cognac Butter
Original Recipe Found In:  Cooking Light, November 2014 Issue

What You'll Need:

For the Tenderloin:
1 Tablespoon Dijon Mustard
2 Teaspoons Honey
1 Teaspoon Lower-Sodium Soy Sauce
3/4 Teaspoon Salt
1/2 Teaspoon Black Pepper
1 (2 Pound) Beef Tenderloin, trimmed
2 Tablespoons chopped fresh Thyme

For the Cognac Butter:
1 1/2 Teaspoons Butter
3 Tablespoons minced Shallots
3 Tablespoons Cognac
6 1/2 Tablespoons Butter, softened
1 Tablespoon fresh Thyme leaves
1/8 Teaspoon Black Pepper

Start by preheating an oven to 425 degrees and prepare the cognac butter:  melt 1 1/2 teaspoons butter in a small, nonstick skillet over medium-low heat.  Next, add the shallots and cook for two minutes or until tender, stirring shallots occasionally.  Carefully stir in the cognac and cook for one minute or until the liquid has reduced by about one-third.  Remove the skillet from the heat and cool.

Next, place the 6 1/2 tablespoons butter in a small bowl and stir in the cooled cognac mixture, one tablespoon thyme leaves and 1/8 teaspoon black pepper.  Cover with plastic wrap and chill in the refrigerator for ten minutes.  Bring the mixture from the fridge and divide it in half.  Scrape each half of the butter mixture onto a piece of plastic wrap.  Shape each portion into a four-inch long log.  Wrap each butter log in plastic wrap and refrigerate or freeze one log for another use.

To prepare the tenderloin, combine the mustard, honey, soy sauce, 3/4 teaspoon salt, and 1/2 teaspoon of pepper in a medium mixing bowl and stir with a whisk.  Spread the mustard mixture over all the sides of the tenderloin and sprinkle with two tablespoons of thyme.  Place the tenderloin in a shallow roasting pan.  Place the pan in a 425 degree oven and cook for 38 minutes or until a thermometer inserted reads 135 degrees.  Cover the tenderloin with foil and let stand for ten minutes.

Remove the tenderloin from the roasting pan and onto a cutting board.  Cut the tenderloin crosswise into 16 slices.  Arrange the slices on a serving plate and cut one butter log into eight slices and top each serving with one butter slice.  Serve and enjoy!

The End Result:


I've been raised to like my meat at just under well done to well done, but lately I have been enjoying my cooked meat to still have some pink in the middle.  But for this recipe, it's well worth it.  I've never cooked with a beef tenderloin, but it is, by far, the best meat you can purchase and cook yourself.  Served with a wee bit of a boozy butter, it's quite fantastic.  If you don't like your meat that undercooked, you are welcome to cook it for longer, but just remember to let it rest once it is done cooking - your pallet will thank you!

Thanks for joining us and we continue to share our culinary adventures.  Until next time,

~Cheers!

Sunday, January 11, 2015

In The Morning, We're Making Waffles!

Hello again everyone! For most folks, the process of making waffles involves adapting pancake batter to the "waffle" instructions on the side of the box. We're not excluded from that generalization - for the longest time our waffle making process was simply adjusting the quantity of liquid to the pre-packaged mix.

The results aren't bad - we're not here to rag on the boxed pancake mix - but they're not all that waffles could be. You see, waffles from pancake mix are typically thicker which makes for a dense little waffle that is heavy in the stomach and that doesn't take well to a lot of toppings or other culinary uses. True waffle batter should yield a flavorful waffle (that can shine on it's own accord, without toppings if necessary) that is also light and fluffy.

Enter, Alton Brown. Who has crafted a basic waffle recipe that achieves all of these goals - best of all it contains only things you'll typically find in your pantry and it doesn't take any longer than the pre-package pancake batter does. Given that, why would you make waffles any other way? (You wouldn't...or shouldn't!)

The Recipe: Waffles...REALLY Good Waffles
Original Recipe By: Alton Brown

What You'll Need:

1 Cup All Purpose Flour
1 Cup Whole Wheat Pastry Flour
1/2 Baking Soda
1 Teaspoon Baking Powder
1 Teaspoon Salt
3 Tablespoons Sugar
3 Whole Eggs (Beaten)
2 Ounces Unsalted Butter (Melted)
16 Ounces Milk (Buttermilk is the original requirement, we used almond milk)

Coat your waffle iron with non-stick spray and heat according to its instructions.

Combine all the dry ingredients in a large bowl and stir to incorporate. In a separate bowl, combine all of the wet ingredients (eggs, milk, butter) and whisk until combined. Finally, add the wet ingredients to the dry ingredients and whisk until a majority of the lumps have been removed. DO NOT stir until all the lumps are gone - this will over toughen the batter and make things a bit too thick. After a few stirs to makes sure all of the dry and wet ingredients have melded nicely, simply walk away. You'll want to keep stirring. Don't! Just put the whisk down, and walk away.

Allow the batter to rest for 5 minutes before adding it to the waffle iron and cooking until you reach the desired doneness.

Top with syrup for a traditional flare, or use them for any variety of uses such as bread pudding, ice cream sandwiches, or whatever you can craft up (Seriously, the realm of uses for waffles is vast - start checking your recipe books, they're used EVERYWHERE).

The Results:


These simple little waffles truly outshine their boxed counterparts in every way. They're light, fluffy, flavorful and much more versatile than the thicker, heavier product that comes from pancake batter. In short, when it comes to waffles, if you want to do it right, you'll want to follow this recipe!

(By the way, this recipe will likely cook up more waffles than you can handle in one sitting. The great part is, they freeze beautifully. Simple slide them into a zip top bag and store in the freezer. To reheat, simply pop them in the toaster, just like their big box frozen cousins, they work nicely as a quick and easy breakfast meal right out of the freezer).

That's all we have for you today - but we're back next week with another brand new recipe, followed by a tasty treat utilizing the versatile little blueberry - look out for that next Sunday. Until then,

~Cheers

Wednesday, January 7, 2015

Prepare Yourself with a Whole Lot of Garlic!

Good evening everyone!  I absolutely love the combination of cheese and pasta!  To me, there is no greater combination of foods that can be put together.  Sure there are quite a few that can compare, but for comfort food, when cheese wraps itself around pasta, it's sure to be a hit.  When I found this recipe to enhance the traditional mac and cheese with garlic, it was worth whipping up a batch and see what would happen!

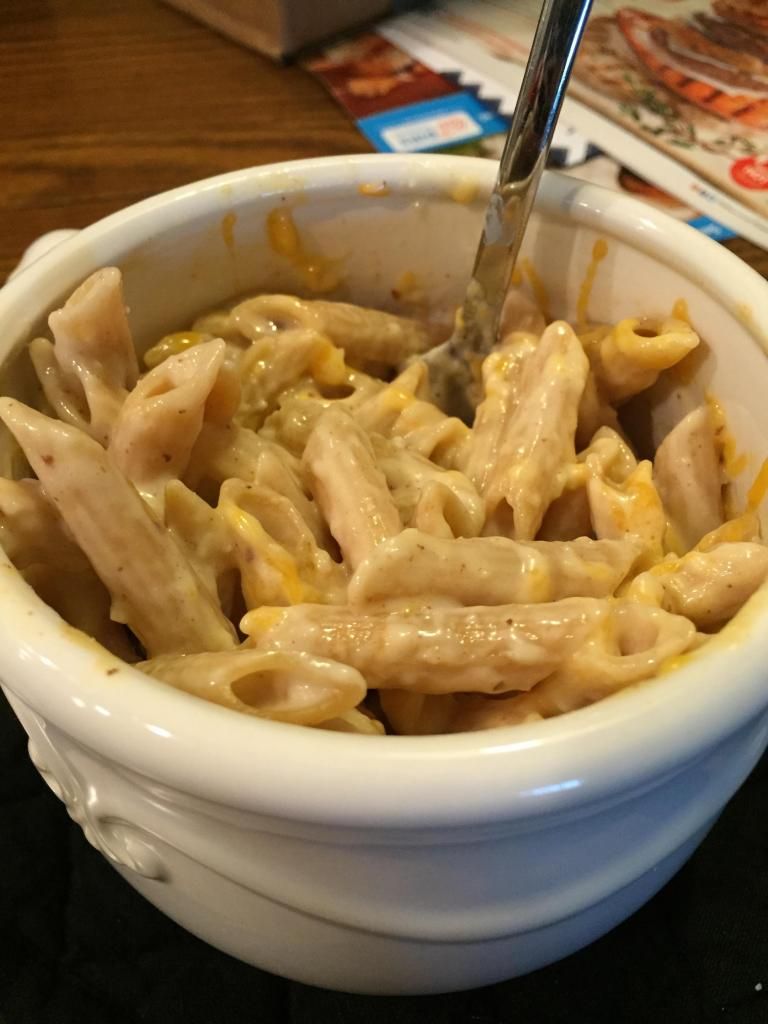
The Recipe:  Roasted Garlic Mac & Cheese
Original Recipe Found In:  Cooking Light, October 2014 Issue

What You'll Need:
2 Whole Garlic Heads
1 Tablespoon Olive Oil
3 Tablespoons Water
10 Ounces Whole-Grain Penne
2 3/4 Cup 1% Low-Fat Milk
3 1/2 Tablespoons All-Purpose Flour
1 Teaspoon Kosher Salt
1/2 Teaspoon Black Pepper
4 Ounces Sharp Cheddar Cheese, shredded and divided (about 1 cup)
2 Ounces Part-Skim Mozzarella Cheese, shredded (about 1/2 cup)

To start, bring a large saucepan of water to a boil and cook pasta according to package directions.  Once cooked, drain in a colander and set aside.

Next, remove the white, papery skin from the garlic heads, but do not peel or separate the cloves.  If you've ever worked with garlic, this is a hard concept to follow through since in most recipes it calls to separate the garlic cloves.  Tempting as it may seem, keep the cloves intact, but try to remove as much skin as possible.  Place the garlic heads in a microwave-safe bowl and rub the garlic heads with oil.  Pour the water in the bottle of the bowl and cover the entire thing with plastic wrap.  Place the bowl in the microwave and cook on high for 4.5 minutes or until the garlic is very tender.  Remove the bowl from the microwave and let it cool slightly.

Next, combine the milk and flour in a medium saucepan, stirring with a whisk.  Bring the mixture to a boil over medium-high heat, stirring frequently.  Cook the milk mixture for three minutes or until thickened.  Once cooked, remove from the heat and add the salt, pepper, 1 ounce of cheddar and mozzarella cheeses.  Stir until smooth and the cheeses have melted.  Set this aside.

Begin to preheat an oven broiler.  Meanwhile, from the microwaved bowl, separate the garlic cloves and squeeze to extract the garlic pulp.  Some of the garlic cloves will still be pretty warm, but if you work quickly, it should be a light task.  Place the garlic pulp and two cups of the milk mixture in a blender.  Process until the sauce is smooth.  Stir the garlic mixture into the remaining milk mixture and stir until well incorporated.  Add the pasta and stir to coat.  

Spoon the pasta mixture into a broiler-safe 11x7 glass or ceramic baking dish coated with cooking spray.  Alternatively, you could use 6 (10 ounce) ramekins or gratin dishes.  Once in the desired baking vessel, sprinkle with the remaining three ounces of cheddar cheese.  Broil for two minutes or until the cheese has melted and begin to turn brown.  Let the cooking vessel stand for five minutes, serve, and enjoy!

The End Result:


If you are not a fan of particularly strong garlic flavor, this mac and cheese will not be for you.  If you love garlic infused in every single bite, along with some potent cheese flavor, then be careful not to eat the entire batch in one sitting!  I didn't quite process the garlic to a smooth consistency, as instructed, but the flavor made itself known and was quite delightful.  While there was only two cheeses in this recipe, you could fool anyone with the outstanding cheese flavor.  If you want to kick up your mac and cheese game, this recipe is for you!

Join us next week as we continue our quest for awesome recipes to present to you.  Until then,

~Cheers!

Sunday, January 4, 2015

Express Sheperd's Pie


Good evening everyone! When it comes to traditional winter dishes, it’s hard to beat shepherd's pie. Built like a pot pie, a shepherd's pie is typically a bit thicker (think “gravy” to a standard pot pie’s “stew” filling) and topped with mashed potatoes. The distinctions between shepherd's pie and pot pie aren’t too grand, but they are significant enough to make them two distinct dishes.

 The largest difference is in time. Where a traditional pot pie can be covered and baked in a few hours, a shepherd's pie (and its thick mashed potato topping) can take double the amount of time both in the oven and in prep work.

 Of course, there’s also the matter of calories – while traditional shepherd’s pie is a nice “on occasion” comfort food, I don’t think you could really classify it as “good for you”. Plus, we’re entering the new year and most folks are looking to cut calories after all of the holiday indulging – on their way to their new healthier 2015.

So, therein lies the challenge – can we take traditional shepherd’s pie, cut down the prep time and make it a healthy weekend meal option? We found a recipe that gives it a good shot, and with our adaptations the results are worth duplicating.


The Recipe: Quick Shepherd's Pie
Original recipe adapted from: Eatingwell.com


What You’ll Need:
1 Pound Ground Turkey (Lean)
1 Medium Onion
1 Cup Frozen Corn
1 Cup Frozen Green Beans
¾ Cup Frozen Peas
14.5 Ounces (1 Can) Low Sodium Chicken Broth
3-4 Medium Yukon Gold Potatoes
All Purpose Flour (amount will vary)

Begin by dicing (if necessary) your potatoes and boiling them in a medium pot for 10 to 15 minutes, or until tender. Once tender, mash them by hand with potato masher (you want the potatoes to still have a few lumps – we’re not looking for perfectly smooth, so by hand is the best way to get there). Add in a splash of low fat milk and 1 tablespoon of butter while you’re mashing to make the texture of the potatoes a bit smoother. Set aside.

 While your potatoes are boiling, turn your attention to the main dish. In a large dutch oven or other nonstick pan, brown the ground turnkey alongside the onion – keep stirring regularly until the onion is translucent and the turkey is cooked through. Next, add the green beans and peas, along with a pinch of salt and pepper. Cook, stirring occasionally, until the beans have softened and the peas are nearly cooked through.
Next, add in a pinch of dried oregano or Italian seasoning (we opted for Italian, to add a bit more variety to the dish, but if you’re looking to keep it as authentic as possible, straight oregano is the way to go). Slowly stir in the broth and the frozen corn. Cover and bring the dish to a simmer. Allow the mixture to simmer until the all of the vegetables have cooked through (5 to 7 minutes).

 Finally, stir in two tablespoons of all purpose flour. Allow the mixture to return to a simmer and evaluate the dish – if it has thickened up to your liking, move on to serving, if not, add another tablespoon of flour and repeat the process. Be sure to only add one tablespoon at a time – you CAN over thicken the base, so keep an eye on things.
To serve, scoop the desired amount of the turkey base into a bowl and top with a spoonful of the mashed potatoes you prepared earlier. Season with salt and pepper to taste and enjoy!

The Results:


Traditional shepherd’s pie is a lamb based dish that is slow roasted all day and topped with a thick layer of mashed potatoes, then baked to the point of turning those spuds crispy.

That’s the long way of saying: you’re not going to duplicate true shepherd’s pie flavor in a quick (or healthy) fashion. You can, however, create something close – and that’s what this dish does well. You still have rich flavors – you still have a savory potato topping – but you only have to invest 35 minutes into the dish and it’s caloric content finishes in the 300-400 range, rather than 700 to 800 of the original. All in all, not a bad trade off to make.

 That's all we have for you today, but be sure to stop in during the week to see another new recipe courtesy of Maggie. I'll follow up next weekend with two recipes that are perfectly suited for those cozy weekend mornings. Until then, 

~Cheers

Sunday, December 21, 2014

World's Greatest Chili

Hello again everyone! For years, I've had a love / hate relationship with chili. When done correctly, traditional chili is a beautiful blend of rich meaty flavors that simply cannot be matched by any other stew. However, it's been difficult for me to find a chili recipe that does "it" correctly. My stomach tends to be overly sensitive to tomato sauce - it's too acidic and sends me on a one way trip to massive heartburn town. The compromise - it seems - is to laden the chili with other additives and when it comes to chili that means beans. Now, I'm not opposed to the occasional beans in my chili, but too many turns the batch into a fibrous chewy...disaster.

So, the trick was finding a recipe that didn't go overboard on the tomato base, that ALSO didn't compromise the structural integrity of the dish (I.E. let's keep the beans to a limited number...or out all together).

As with most kitchen conundrums, Alton Brown came to the rescue. His recipe is based on the traditional old west style of chili - the stuff the cowboys made out on the range. While his original recipe uses a pressure cooker (to replicate the days in a dutch oven in half the time) you can also use a slow cooker to reach the same result (which is what we did). So, how does Alton Brown solve my chili challenge? Let's get cooking and find out!

Original Recipe From: Alton Brown (Good Eats: The Big Chili)
The Recipe: Pressure Cooker Chili

What You'll Need:

2 Pounds Beef Stew Meat
1 Pound Ground Pork
16 Ounces Salsa (Medium or spicy)
1 Tablespoon Tomato Paste
1 Adobo Chile (Diced fine - from the canned variety)
1 Teaspoon Adobo Chile Sauce (From the can)
30 Tortilla Chips (Crushed)
1 Teaspoon Chili Powder
1 Bottle Beer (Preferably an Ale)


First and foremost - yes, this is not your traditional ingredient list for chili - and that's not a bad thing. Secondly, YES, this done turn into amazing chili. Stick with me, it's worth it.

Begin by browning all of the meat in a large dutch oven (work in batches to avoid overcrowding) use peanut oil in the dutch oven to aid in the browning process. Transfer the browned meat into a large slow cooker. If you have any browned on or stuck bits in the bottom of your dutch oven, use a bit of the beer to deglaze the pan (pour a bit of beer into the dutch oven over medium heat and give it a gentle stir - that should work everything right up).

Add this bit of beer (and the rest of the bottle) over the meat in the slow cooker along with the chili powder, salsa adobo chile (and sauce) and finally about half of the crushed tortilla chips. Give the mixture a good stir and then cover the slow cooker and set it on low for 8 hours.

After 8 hours, evaluate your chili. Odds are, it'll need a bit more "thickening" - that's where the rest of the tortilla chips come in. Stir them in and then serve immediately.

The Results:

Doesn't matter how you position it - there's no way to make chili photogenic 


This is the most wonderful, flavorful and meaty chili dishes I've ever had. The tomato sauce problem is eased by using a salsa base - it doesn't really change the flavor, but the versatility of salsa means it can take long slow heat without falling apart and since good salsa is typically made with fresh tomatoes - not the canned "metal like" tomatoes that so many tomato sauces or tomato juices are made with the flavor is cleaner and much better overall. The tortilla chips serve a wonderful purpose as well - they act as a thickening agent without overwhelming the dish with other flavors or making it overly chewy (looking at you - beans) and since most of them cook away and break during the 8 hour slow cook - you won't even know they're there.

That's all we have for you this week. We're "closed" for Christmas - but we'll be back next Sunday with a brand new weekend dish. Until then, Happy Holidays and as always,

~Cheers

Wednesday, December 17, 2014

Broccoli Pesto Pasta: Better for your Pallet!

Good evening everyone!  As Tyler mentioned previously, we are transitioning to a new way of posting recipes.  We are still focusing on delicious and healthy recipes, and we also want to showcase weeknight dishes that are a snap to make, without too much hassle.  Tonight's recipe is a great example of that.  While most pasta recipes focus too much on the sauce it's doused in, this dish showcases a brilliant, yet healthy alternative to the norm.  And it's speedy recipe to whip up in a flash.

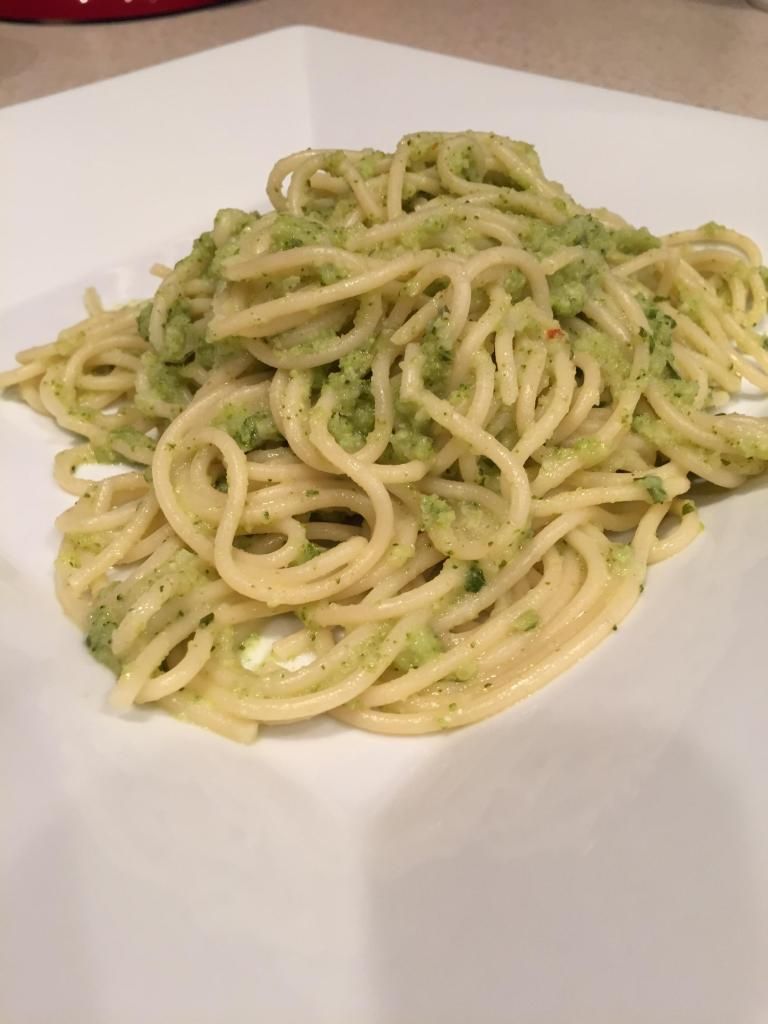
The Recipe:  Broccoli and Pecorino Pesto Pasta
Original Recipe Found In:  Cooking Light, September 2014 Issue

What You'll Need:
8 Ounces uncooked Whole-Wheat Angel Hair Pasta
1 (12 Ounce) package microwave-in-bag fresh Broccoli Florets
1/4 Cup fresh Basil Leaves
3 Tablespoons Extra-Virgin Olive Oil
1 Tablespoon grated fresh Lemon Rind
3 Tablespoons fresh Lemon Juice
1/4 Teaspoon Kosher Salt
1/4 Teaspoon crushed Red Pepper Flakes
2 Garlic Cloves
1 Ounce Pecorino Romano Cheese, grated (about 1/4 cup)

To start, prepare a medium saucepan, filled with water, over medium-high heat.  Bring the water to a boil and add the pasta.  Cook according to package directions, omitting any salt or oil.  In a sink, place a heatproof bowl over a colander.  Drain the pasta in a colander, reserving one cup of cooking liquid.

While the pasta is cooking, cook the broccoli according to package directions.  Once cooked, allow five minutes to cool the broccoli.  Prepare a food processor and add the broccoli, basil leaves, olive oil, lemon rind, lemon juice, salt, red pepper flakes, garlic cloves, and Pecorino Romano cheese into the processor.  Pulse all the ingredients together until the broccoli and basil leaves are finely chopped.

Keeping the processor on, slowly add the reserved one cup of cooking liquid through the chute, until the sauce has reached desired consistency.  In a large bowl, add the pasta, along with the broccoli mixture and toss to combine.  Place onto a serving dish, serve, and enjoy!

The End Result:


Like it's basic pesto predecessor, it keeps all the same flavors like before.  Adding the broccoli not only thickens the sauce, but makes it boosts its nutritional quantity.  If you didn't know you were eating broccoli, you'd be incredibly surprised to find it in this dish.  I'm all for dressing down overly complicated recipes.  If you are big fan of pesto (like myself,) you will not be disappointed with this dish!

That all we have for you this evening.  Check back frequently for brand new recipes to share with you and yours!  Until then,

~Cheers!
Sunday, December 14, 2014

Smooth and Savory Potato Soup

Good evening everyone! As Christmas approaches, and the cool weather takes hold of the country - we've officially moved into soup season! One of my all time favorite soups is potato soup - a fact that can be easily discerned by looking over the archives of the blog. We've tried just about every variant we could get our hands on, from rustic to bacon infused - it's all been sampled (and savored!) So, it's rare when we find a new potato soup recipe that we HAVEN'T tried before.

Today is one of those rare days.

Today's dish blends yukon gold potatoes with the ever versatile leek to create a smooth and savory dish that's sure to hit the spot as the snow flies and the windows frost over.


The Recipe: Creamy Potato Leek Soup

Original Recipe From: Good Eats: "Sprung a leek"


What You'll Need:

1 Pound Leeks (Roughly 3 large leeks) Cleaned, dark green sections removed, diced
1 Pound yukon gold potatoes (roughy 4 medium), diced
3 Tablespoon Unsalted Butter
1 Cup Heavy Cream
1 Quart Vegetable Broth
Heavy Pinch Kosher Salt
Fresh Chives


Place a large dutch oven over medium high heat and melt the butter. Once melted, add the diced leeks and cook, stirring occasionally, until the leeks are cooked through and softened - this takes about 25 minutes.

Next, add the potatoes and vegetable broth to the dutch oven and bring the mixture to a boil. Once the pot reaches a nice, rolling boil, reduce the heat to medium low and cover the pot. Allow the mixture to cook for 45 minutes (stir once halfway through).

Remove the pot from the heat and use an immersion or stick blender to blend the mixture until smooth. As the last lumps are being blended from the soup, slowly pour the heavy cream into the pot (while continuing to blend).

Finally, taste the soup and adjust with salt and pepper as necessary - serve with the fresh chives and enjoy!

The Results:


This smooth, savory soup is simple yet delicious. It's impressive how deep and flavorful this dish is despite only having two main ingredients. The potatoes act as a nice neutral backdrop for the leeks to shine, blending nicely with the heavy cream and chives to make this soup a personal favorite.

That's all we have for you this evening. We're making a bit of a change to the way we're posting updates to the blog. Maggie and I have each moved into new jobs, and the resulting new employment has changed our posting abilities. So, to amend this, we've picked up a new format. We still plan on posting two new recipes per week - but now Maggie will focus on weeknight cooking, posting her dishes sometime during the workweek. I'll shift to weekends and focus more on weekend cooking - soups, stews, roast - more ambitious projects - my posts will be up on Sunday evenings.

Nothing more than that is changing - we're still cooking - we're still sharing the recipes with you - it's just the timing that'll be different. Get it? Got it? Good!

Stop back in next week for a brand new dish from Maggie. Until then,

~Cheers


Thursday, December 4, 2014

A Curious Case for Citrusy Chicken

Good evening everyone!  On my continuing series of soup/stew recipes, I came across this Asian inspired dish.  While it has more of a broth base, the ingredient in the broth make it delightfully more cozy and delicious.

The Recipe:  Chicken and Rice Soup with Lemon and Ginger
Original Recipe Found In:  Cooking Light, November 2014 Issue

What You'll Need:
1 Tablespoon Olive Oil
1/2 Cup chopped Onion
1 1/2 Tablespoons finely minced fresh Ginger
1 Tablespoon White Miso
1 (8 Ounce package) pre sliced Cremini Mushrooms
4 1/2 Cups unsalted Chicken Stock
1 1/2 Cups shredded skinless rotisserie Chicken Breast
3 Cups chopped Bok Choy
1 (8.5 Ounce) pouch precooked Brown Rice
1 Tablespoon lower-sodium Soy Sauce
1/2 Teaspoon Kosher Salt
1/2 Teaspoon Black Pepper
1 Tablespoon grated Lemon Rind
2 Tablespoons fresh Lemon Juice

To start, heat a large Dutch oven over medium high heat and add the oil.  Once the oil has heated and been swirled around the cooking vessel, add the onion, ginger, and miso.  Saute for four minutes or until the onion has just begun to soften.  Next, add the mushrooms and cook for two minutes, or until they've taken on a bit of color.  Add the chicken stock, rotisserie chicken, and bok choy and stir to incorporate.  Bring the ingredients to a boil and once bubbling, reduce the heat to medium-low and simmer for eight to ten minutes.

While the soup simmers, prepare the pouched rice according to package directions.  After the soup has simmered, add the rice, soy sauce, salt and pepper into the soup and cook for four minutes or until the bok choy has become tender.  Remove the Dutch oven from the heat and stir in the lemon rind and juice.  Ladle into soup bowls, serve, and enjoy!

The End Result:


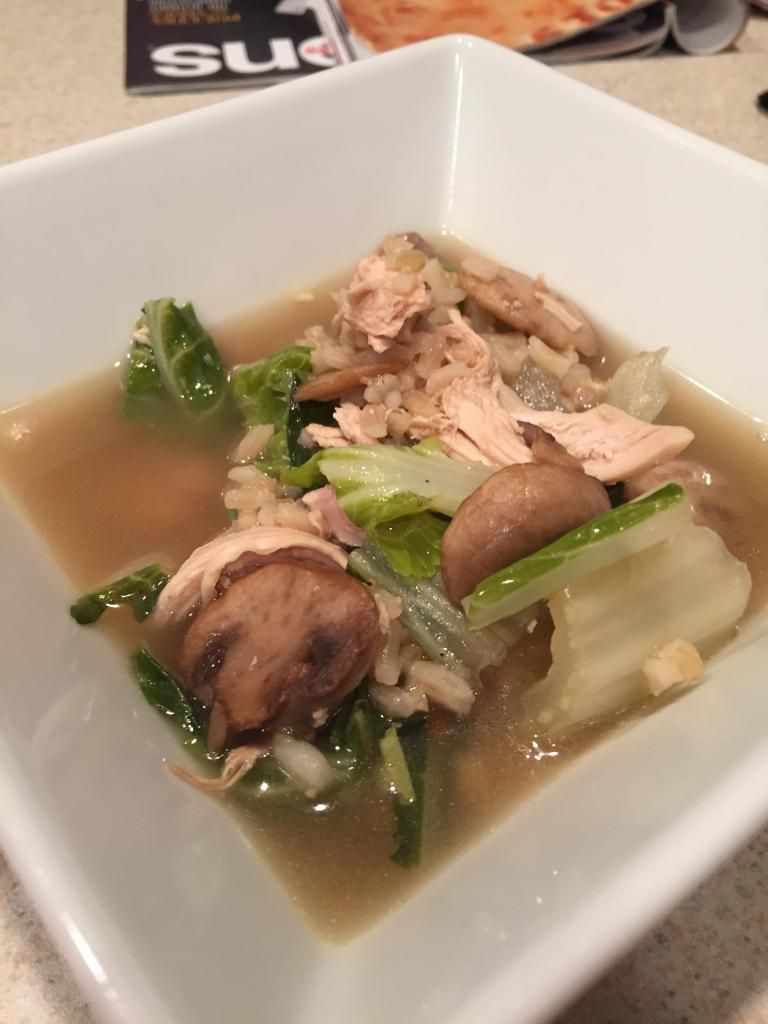
This recipe has a very distinct hint of citrus flavor, from the ginger and lemon.  While it's not completely overpowering, it's pronounced enough to note it, but it certainly does not take away from the flavor of the dish.  The chicken and the rice make the soup almost a homey feel, which I would have never gotten from putting rice in the soup.  The bok choy definitely makes its presence known.  It's almost a bitter green, without going into the realm of kale.  Adding it to the soup is a welcome addition, but the key is to cooking it until it becomes tender.  It might throw off the whole soup otherwise.  Overall, a great soup to add if you're looking to switch up your tradition Chicken Noodle Soup recipe.

Tuesday, November 25, 2014

T-Day Extravaganza!

Good evening everyone! This week, obviously, features the Thanksgiving holiday. Which, for a cooking blog is a bit like culinary Christmas. (Which makes Christmas like culinary new year? I'm not sure how that works...) Over the past four years, we've featured recipes around the holiday feast - from side dishes to ideas for leftovers - we've done it all but the turkey.

Until today.

That's right. We're doing a turkey this year! After years of putting off committing to the main event (it wasn't really practical for a family of two) we're finally taking on the feature dish on many menus. The results, if I do say so myself, were nothing short of outstanding. Simply put, unless you're 100% in love with your current turkey cooking method - you'll want to give this recipe a try.

The Recipe: Good Eats Roast Turkey
Original Recipe From: 'Good Eats' - Via Alton Brown

What You'll Need:

1 Turkey (...I hope that's implied) weight varies by amount you need to feed

For the Brine:
1 Gallon Vegetable Broth
1 Gallon Water (Heavily iced)
1 Cup Kosher Salt
1/2 Cup Brown Sugar
1 1/2 Tablespoons All Spice Berries
1 Teaspoon Whole Black Pepper Corns

For the Turkey:
1 Apple (Sliced roughly)
1 Onion (Sliced roughly)
2-3 Fresh Sprigs Rosemary
1-2 Fresh Sprigs Sage
Canola Oil


2-3 Days before T-day, you'll want to fully thaw your bird. Stir it in the refrigerator once thawed.

8 to 16 hours before the main event - begin preparing your brine.

In a large (clean and food safe) 5 gallon bucket, combine the broth, water, brown sugar, salt, all spice berries and pepper corns. Submerge the turkey (breast side down) in the brine and store it and cool place. Monitor the turkey from time to make sure the ice is still intact (replace if necessary).

3 hours before dinner time, remove the turkey from the brine and rinse it well.  Preheat your oven to 500 degrees. Pat the turkey (inside and out) dry with a paper towel. Meanwhile, add the apple and onion slices to a microwave safe dish with a cup of water and microwave on high for 5 minutes. Once that's complete, transfer the steeped veggies into the turkey's...cavity...along with the sage and rosemary. Cover the outside of the turkey with a liberal helping of canola oil. Transfer the bird to your favorite roasting rack and set aside.

Do you have an instant read thermometer? (You really should) Good! Now's the time to place the probe into the deepest part of the breast. Set the temperature alarm for 161 degrees and pop the bird into the oven for 30 minutes. (30 minutes at 500 degrees will create that great golden color that looks so good on the serving tray)

After 30 minutes, reduce the temperature to 350 degrees and let the bird roast until the probe starts beeping (I.E. until it reaches 161 degrees internally). Now, it's VERY IMPORTANT (you can tell, because I wrote it in all caps) that you allow the turkey to rest (covered by aluminum foil) for 15 minutes before carving. Get impatient and cut it up before then and you'll have wasted all of that effort you put into brining - your patience will be rewarded.

Finally, after the 15 minutes are up, simply carve up and enjoy.

The Results:


Best. Turkey. Ever.

Let me reiterate... BEST TURKEY EVER! This is one juicy and flavorful bird that I would be willing to put up against every other turkey I've ever eaten (or you've ever eaten) EVER. Yes, ever.

We paired out thanksgiving feast with some favorite side dishes:

Escalloped Corn
Green Bean Casserole 
Mashed Sweet Potatoes 
Pumpkin Pie 


With the holiday, we're not going to be posting any more this week. We hope you all have a happy and healthy turkey day with your friends and family. Until next week,

~Cheers

Tuesday, November 18, 2014

Can a Sandwich Influence a Stew?

Good evening everyone!  It's becoming apparent to me that I have a problem...a soup/stew problem.  Every recipe I find, I tend to gravitate towards the warm, brothy-ness of a soup.  In fact, I have three (including today's) recipes lined up that are some variation of a soup or stew.  When the temperatures are only the 20's-30's, can you blame me?  Tonight, I'm creating a very unique stew, that has influences from a very famous sandwich from Philadelphia.

The Recipe:  Philly Cheesesteak Stew
Adapted from a Recipe Found On:  www.pinterest.com

What You'll Need:
1 1/2 Pounds Beef Sirloin, very thinly sliced
1/4 Teaspoon Onion Powder
4 Tablespoons All-Purpose Flour, divided
2 Onions, quartered and thinly sliced
10 Ounces White Mushrooms, sliced
1/2 Teaspoon dried Thyme
2 Cloves Garlic, pressed through a garlic press
4 Cups Beef Stock
2-4 Slices Provolone Cheese

Before you begin anything, pour the beef broth in a large pot and set over medium-low heat, so that it's hot when you are ready to use it.  Meanwhile, in a large mixing bowl, add the beef sirloin, onion powder, and a couple of pinches of salt and black pepper and toss to coat evenly.  Sprinkle two tablespoons of flour over the meat and toss to coat again.  Set this mixture aside.

Next, place a large, nonstick skillet over medium-high heat and add three to four tablespoons of olive oil in.  Once heated, add half of the sirloin in and cook for a minute or two and flip the pieces over to cook on the other side, continuing to cook for a minute or two.  Remove the pieces of meat to a clean plate and add the repeat with the remaining sirloin. 

After the beef has cooked and been removed from the skillet, add a tablespoon of oil into the pan and add the sliced onions, along with a pinch of salt and pepper.  Cook for six minutes, until the onions have started to caramelize, but not burn.  Once the onions have cooked and started to soften, add the mushrooms and allow them to saute with the onions, cooking for six minutes, stirring frequently.


Next, add the dried thyme and garlic into the skillet and stir to incorporate.  Once the garlic becomes fragrant, sprinkle the remaining two tablespoons of flour over the onion/mushroom mixture and stir to combine and blend well.  Once thoroughly mixed, slowly add the hot beef stock to the skillet and stir as to not have any flour clumps forming.

Turn the heat down on the skillet to medium-low, add the cooked sirloin pieces, and let the stew simmer for 10 minutes, uncovered, so all the flavors can infused and it can begin to tighten up.  Season with salt and pepper.  


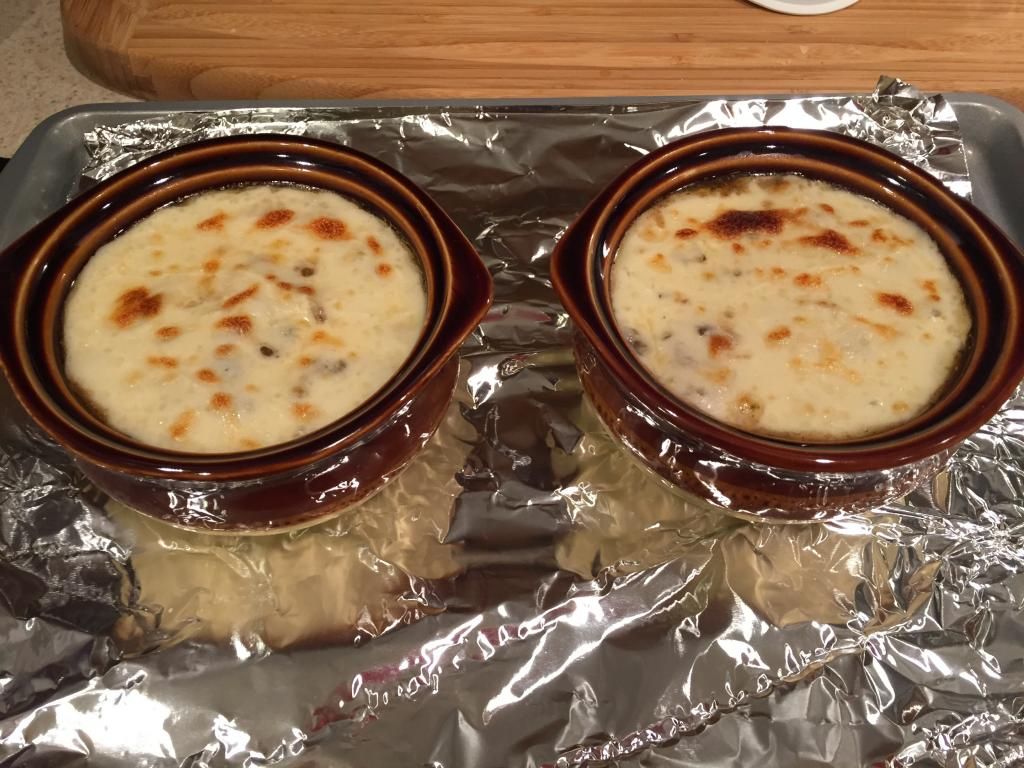
Preheat an oven to broil on high.  Prepare a small baking sheet with aluminum foil and place some crocks on top.  Ladle the stew evenly in the crocks and top with a slice of provolone cheese.  Place the baking sheet under the broiler and cook for a minute or two, just so the cheese has just began to melt.  Serve and enjoy!


The End Result:


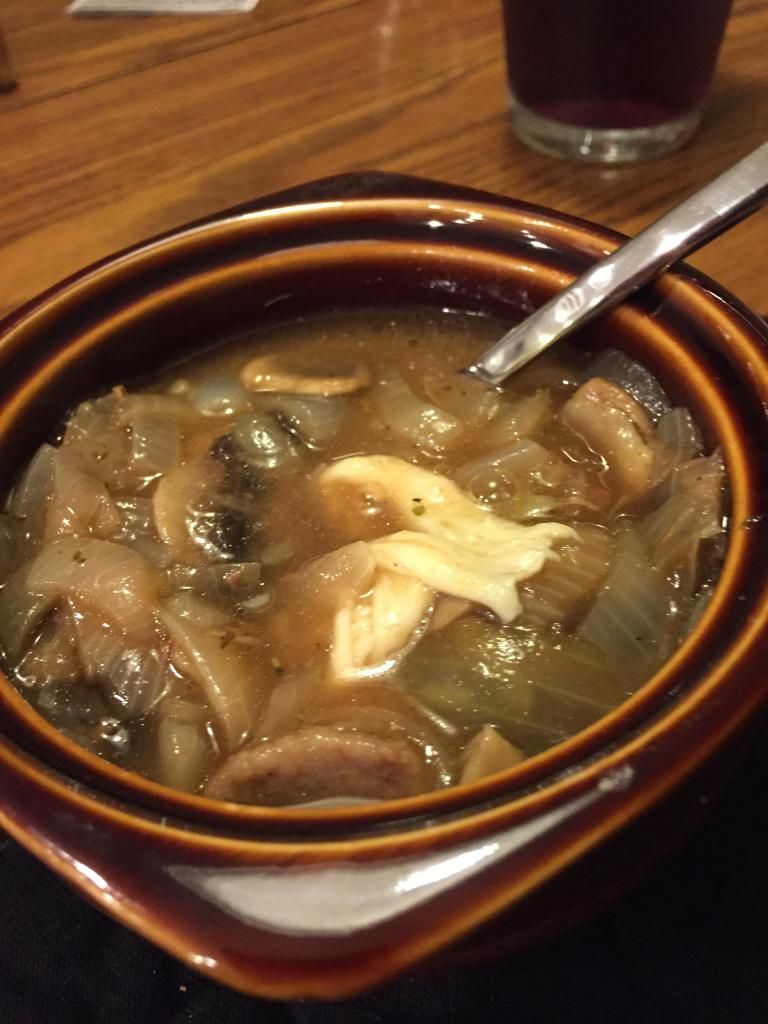
The incorporation of the onions, mushrooms, and beef in the recipe almost reminds me of a french onion soup, but obviously with a little more meat.  It's full of flavor and letting the stew the simmer with all the ingredients makes that happen.  The original recipe had the soup in sourdough bowls and letting the cheese melt on top of that.  While that is a very delicious idea, I had been itching for months to use the crocks Tyler got me for my birthday, and they were a great vessel to use the soup in.  If you want to try a new hearty stew, this is the recipe for you!

Thursday, November 13, 2014

Root Vegetable Pot Pie

Good evening everyone! As fall changes to winter, there's lots of things not to love. It's dark by 5pm (thanks, daylight savings time). It's a whole lot colder and then there's...snow. There is one positive from the switching seasons; root vegetables have moved into their prime season! From potatoes to turnips, if it's a root veggie, now is the time you want to get in the kitchen. While the globalization of the food industry means you can have root vegetables all year round, you'll likely never find them any better than they will be over the next few months.

If you decide to cook up some root vegetables, the next decision you'll need to make is which veggie to choose? Potatoes are a solid staple, as are carrots. You can change things up a bit by using rutabagas, turnips or parsnips as well - but we say, why limit yourself to one? The great perk about root vegetables is that they all compliment each other beautifully in any dish - so why keep them separate?

Enter tonight's recipe. Inspired by the standard chicken pot pie, this dish switches chicken for root vegetables and the result is one tasty late fall treat.

The Recipe: Root Vegetable Pot Pie

What You'll Need:

4 Large Russet Potatoes (Peeled, diced)
3 Large Carrots  (Peeled, diced)
4 Large Parsnips (Peeled, diced)
4 Cups Vegetable Broth
1/3 Cup Heavy Cream
1/4 Cup All Purpose Flour
1 Sheet Puff Pastry

Preheat your oven to 400 degrees.

Grease a 13 x 9 baking dish with cooking spray and add the vegetables. Drizzle with olive oil and toss until well combined. Place the baking dish into the center of the oven and allow the vegetables to roast for 40 minutes.

While the veggies roast, you can prepare the sauce. In a large stock pot, add the vegetable broth and set over medium high heat. Bring the broth to  a light simmer before slowly whisking the heavy cream into the mixture. Once well blended, bring the mixture to a simmer once more before whisking in the flour. Stir until well blended and bring the mixture to a simmer one final time before removing from heat and setting the pot aside.

Shortly before your veggies are done with the initial roast, place your puff pasty on a lightly floured countertop and work it flat until it is approximately the same size as your baking dish.

After 40 minutes, remove the vegetables from the oven and slowly pour the sauce mixture over the vegetables. Carefully top the dish with the puff pastry and press around the edges to create a seal. Return the dish to the oven and let it bake for an additional 30 to 35 minutes or until the puff pastry is golden brown.

Remove from the oven and let the dish rest for 10 minutes before serving. Enjoy!

The Results:


There's few things that can compete with slow roasted root vegetables. Topped with the savory sauce (which simulates traditional pot pie sauce quite nicely) and the flaky crust, you'll hardly notice this isn't a standard chicken pot pie. It's a bit time intensive, but the end result makes for one great weekend meal the whole family is sure to enjoy!

Saturday, November 8, 2014

Corn Soufflé? Corn Soufflé!

Good evening everyone! Some combinations just sound great – burgers & fries, ice cream sandwich, chicken noodle soup. These are things that, paired together, generally bring positive thoughts to the mind and palette. 

Corn soufflĂ© is…well…not one of those things. In fact, I’m not sure what first came to my mind when I read “corn soufflĂ©” (I know what comes to mind NOW, but that’s clouded by the results of this recipe) all I remember is that the concept was intriguing and I wanted to give it a try. Corn and soufflĂ© are things you very rarely read together, and yet the concept of tonight’s dish was interesting enough to make me wonder if that notion should change.

After you try this dish for yourself, I think you’ll agree with me.

The Recipe: Corn soufflé
Original Recipe Found In: Hy-Vee Seasons Magazine (October 2014 Issue)

What You’ll Need: 
6 Cups Frozen Corn (Thawed)*
2 Cups Half and Half
6 Large Eggs (Yolks and whites separated)
6 Tablespoons Butter (Softened, divided)
2 Tablespoons Honey
½ Teaspoon Salt
½ Teaspoon Pepper
2 Tablespoons Parmesan Cheese
3 Green Onions (Diced)

* The preferred method would obviously be fresh corn kernels here, but it’s October and the best Iowa sweet corn has long been consumed. If you saved some (via freezing) from this summer, this would be a great place to use a bit of it – for the rest of us, frozen is the only option.

Preheat your oven to 350 degrees and coat the inside of a 3 quart baking or casserole dish with non-stick cooking spray.

In a large food processor (and we do mean large…a lot is going to go into this baby) add 4 cups of the corn and the half and half. Pulse until the mixture is perfectly smooth and well blended. Next, add the egg yolks, honey, butter (divided into tablespoon sized chunks for easier processing) as well as the salt and pepper and pulse again until the mixture is smooth and all of the ingredients have worked in.

Transfer this mixture to a large bowl and stir in the remaining 2 cups of corn kernels as well as the green onions and parmesan cheese. Set this bowl aside.

Add the egg whites to a medium mixing bowl and beat them with an electric mixer until they become soft and slight peaks begin to form on the tips. You can use a standard handheld beater for this, but an electric mixer makes much faster (and easier) work. Once the egg whites are nice and foamy and have formed little peaks, carefully fold them into the bowl with the corn mixture. Once everything is combined, transfer this mixture into your baking dish and set it in the center of the oven for 45 minutes. 

Cook the soufflĂ© until the top is golden brown and the dish is cooked through. You can check the doneness by inserting a knife into the center of the soufflĂ©. If the blade comes out clean, you’re done – if there’s a bit of liquid on the knife, it needs more time. (For what it’s worth, we ended up cooking for an additional 30 minutes to reach the “done” point – and we have a fairly reliable oven.)

All that’s left is to serve and enjoy. You’re free to top with additional salt, pepper or butter if you so choose.

The Results: 


The phrase “corn soufflĂ©” should absolutely be in your culinary vocabulary. This dish was full of sweet corn flavor, balanced nicely from the browning in the oven (and the green onions). The highlight was the light and fluffy nature of the dish – it was almost like you were eating whipped corn…and odd concept, but when you try it, you’ll get it. In short, despite sharing two words that don’t typically associate – this recipe is one side dish you’ll definitely want to become familiar with.

Wednesday, November 5, 2014

Ain't Nothing Wrong with Mixing Chili and Pasta

Good evening everyone!  Sorry I haven't been around for a while - I've been adjusting to a new job and I've finally gotten some time to jot down the recipes I've been making.  The weather is getting colder and it's time for some warm, fill-you-up, kind of meals.  This recipe is no exception:  when you combine a hearty chili with pasta, the end result is quite delicious.

The Recipe:  Chili Pasta Bake
An Adaptation from a Recipe Found On: www.pinterest.com

What You'll Need:
1/2 Tablespoon Canola or Vegetable Oil
1 Whole Onion, chopped
1 Pound Ground Beef
1/2 Pound small shell Pasta
1 (15 Ounce) Can of Tomato Sauce
1 (14.5 Ounce) Can of Diced Tomatoes with Green Chiles
1 (15 Ounce) Can of Kidney or Black Beans, drained and rinsed
1 1/2 Tablespoon Chili Powder
2 Teaspoons Cumin
3 Shakes of Cayenne Powder
1/4 Cup Water
2 Cups Shredded Cheddar Cheese

To start, preheat the oven to 350 degrees.  Next, in a large, nonstick skillet, drizzle the oil over medium-high heat.  Add the chopped onions and saute for three minutes, or until they have become softened and semi-transulcent.  Add the ground beef and season with salt and pepper.  Cook until the beef is no longer pink, about 10 or so minutes.

While the beef is cooking, bring a medium saucepan filled with water to a boil, over high heat.  Add the pasta and cook according package directions are al dente.  Once cooked, drain in a colander and set the pasta aside.

After the ground beef is cooked, add the tomato sauce, diced tomatoes and green chiles, beans, chili powder, cumin, cayenne powder, and water.  Mix all the ingredients until well combined and let the combination simmer for about five minutes.  Then add the cooked pasta and stir to combine.  Let the new combination simmer for five more minutes.

Carefully, pour the chili pasta mixture into a 9x13 baking dish.  Flatten out the mixture with a spatula and cover with cheese.  Place the baking dish in the oven and cook for 30 minutes, until the edges are bubbling and the cheese has fully melted.  Spoon into serving dishes, top with sour cream and green onions (if desired,) serve, and enjoy!

The End Result:


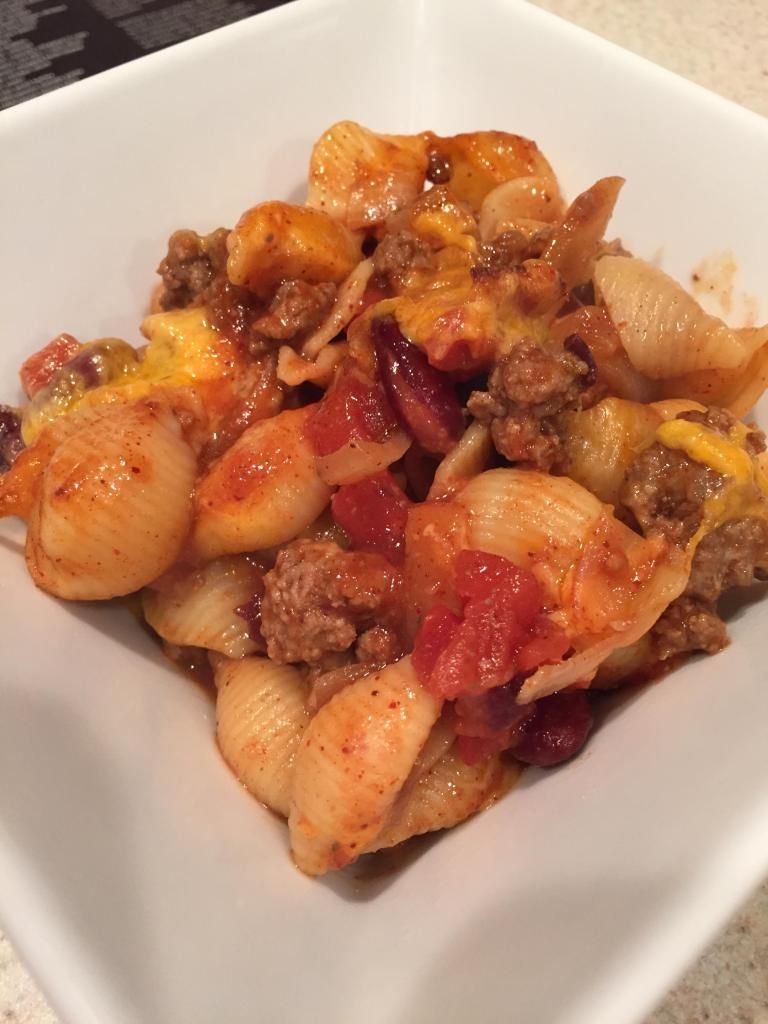
This is one hearty meal!  First off, the chili portion, with the beef, beans, and tomatoes - while it didn't simmer in a stewpot all day, the flavor elements are there and that part works.  Plus, all those ingredients filling the pasta shells, made for little morsels of chili goodness.  While I am a fan of cheese, I'm not sure that a thick layer of cheese on top would have been the best course.  Incorporating the cheese into the chili pasta mixture might have been the better option.  Plus, the spices made the chili have a little bit of heat, so that helped, in what might have been a bland dish.  Overall, if you're looking to feed a crowd with a great, robust meal, this chili is for you!

Thanks for joining us tonight, check back frequently for more fall meals brought to you by myself and Tyler.  Until then,

~Cheers!