Wednesday, February 27, 2013

Festive Fajitas

Good evening everyone! As Maggie mentioned yesterday, we sort of stumbled upon a theme week here on the blog. It wasn't intentional, but after we both came up with our recipes for the week and discovered they were from the same vein (Mexican cuisine) we decided to run with it. So, welcome to day 2 of Mexican week!

My dish today has been featured at least two times on the blog already, but I'm not the type of person who likes to settle on one recipe as the be all, end all for that dish. In fact, even though the basic concept of tonight's dish, chicken fajitas, seems fairly straightforward, I've found there are a multitude of ways you can prepare and enjoy this tasty Mexican treat. Let's try out a new way tonight!

The Recipe: Chicken Fajitas
Recipe Inspired By: Food Network Magazine March 2013 Issue

What You'll Need:
(Serves 4)

1 Teaspoon of Chili Powder
3/4 Teaspoon Ground Cumin
1 Pound Skinless, Boneless Chicken Breasts
2 Tablespoons Extra Virgin Olive Oil
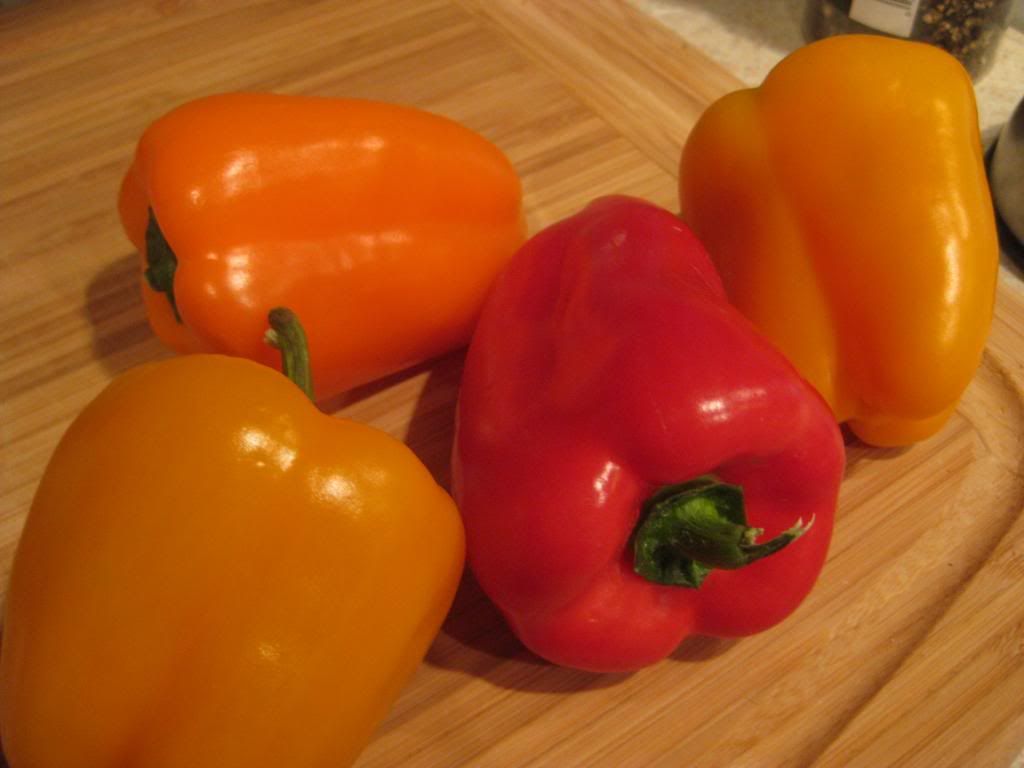
2 Large Bell Peppers (Any color) Sliced*
1 Red Onion, Sliced
2 Garlic Cloves, Chopped
1/2 Teaspoon Lime Zest (Reserve wedges for serving)
8 Corn Tortillas
1/2 Cup Prepared Pico De Gallo (Or fresh salsa)
1/2 Cup Crumbled Cotija Cheese**

* Try to select two different color peppers, not only will it add visual appeal to your dish, the contrasting heat levels of the peppers will add another layer of flavor and complexity to the final dish.


** Cotija cheese is a spanish cheese made from cow's milk. It's a thicker cheese, often served shaved or grated (like parmesan). It turns out, it's also HIGHLY seasonal. Since the cows that make this cheese have to be fed a certain kind of grass, their ability to produce this cheese only lasts from July through October. That means finding this cheese in your grocery store come February (like we were trying to do) is darn near impossible. As such, be prepared to adapt to another kind of Mexican cheese (such as Queso Fresco or another cheese from the Mexican cuisine section of your local grocery store).


There are two ways you can prepare the chicken for this recipe, by the original instructions, or by the method I decided to use today.

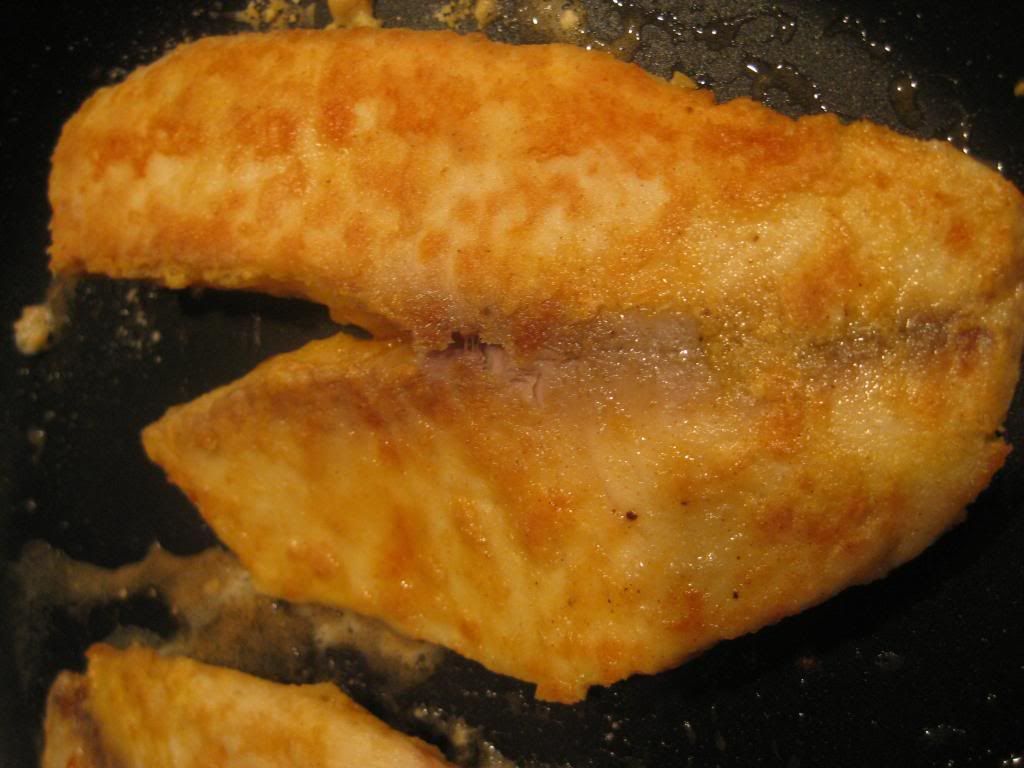
For the original instructions, season the chicken with the chili powder, cumin and a pinch of salt and pepper. Next, heat 1 tablespoon of olive oil in a large skillet and cook the chicken for 4 to 5 minutes on each side, or until the breasts are golden brown.

Pop the browned breasts into a 435 degree oven for 8 to 10 minutes to allow them to cook through. Allow the breasts to rest for 5 minutes prior to slicing the meat.

I opted to follow my own path. I really enjoy the flavor of a slow roasted chicken breast - but I didn't exactly want to babysit the chicken all day to achieve this result. Instead, I broke out our smallest slow cooker.

For this method, simply season the breasts as described above, then add them to the slow cooker along with just enough chicken broth to cover the breasts. Set the slow cooker on low and let it cook for 5 to 8 hours.

Once the chicken has spent a good portion of the day roasting, simply shred the breasts with a fork, and remove the chicken with a slotted spoon (you don't want the liquid - it'll ruin your fajita). This method really boosts the flavor of the chicken and allows you to have dinner on the table even faster if you're working all day.

To prepare the vegetables, heat 1 tablespoon of olive oil in a large non stick skillet on medium high heat. Once the oil is hot and shimmering, add the bell pepper, onion, garlic, a pinch of cumin and a pinch of salt and pepper and cook until the veggies have softened and are lightly browned. This takes about 8 to 10 minutes. Stir in the lime zest and add a tablespoon or two of water if the mixture is looking especially dry.

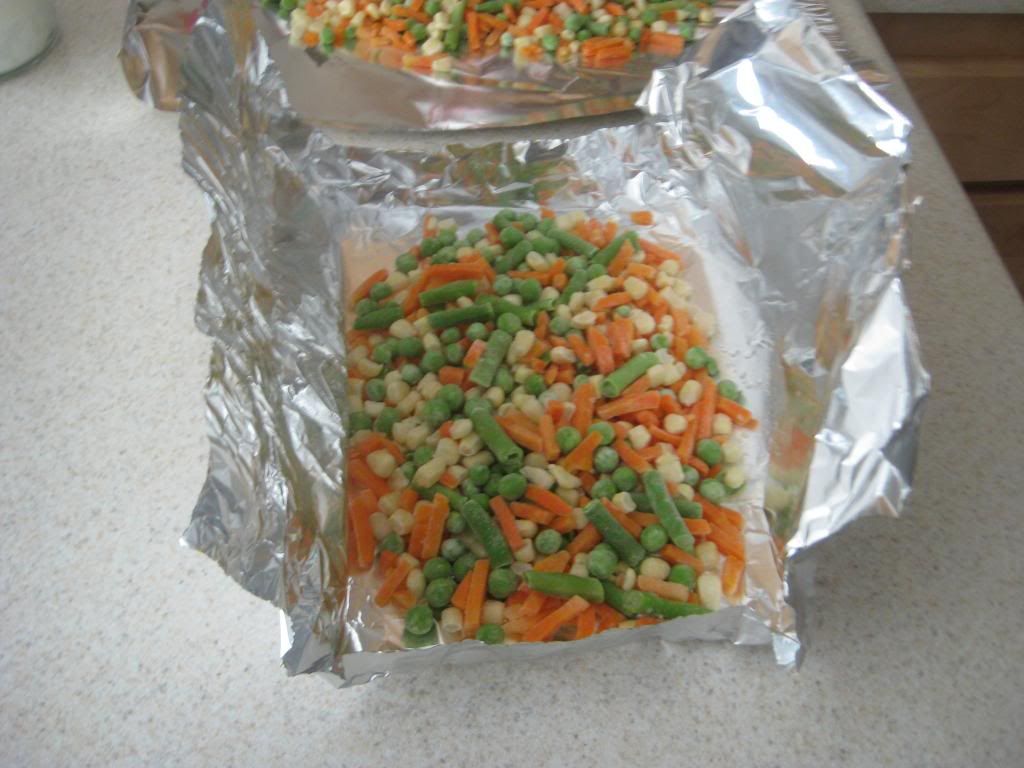
While your veggies are cooking, wrap your tortillas in aluminum foil and stick them in a 200 degree oven for 5 minutes. This softens the tortillas up and makes them less likely to crumble while you're eating.

Right before serving, combine your sliced or shredded chicken with the veggies and spoon this mixture onto the center of your warmed tortillas. Top with the fresh salsa and a few crumbles of cheese. Enjoy!
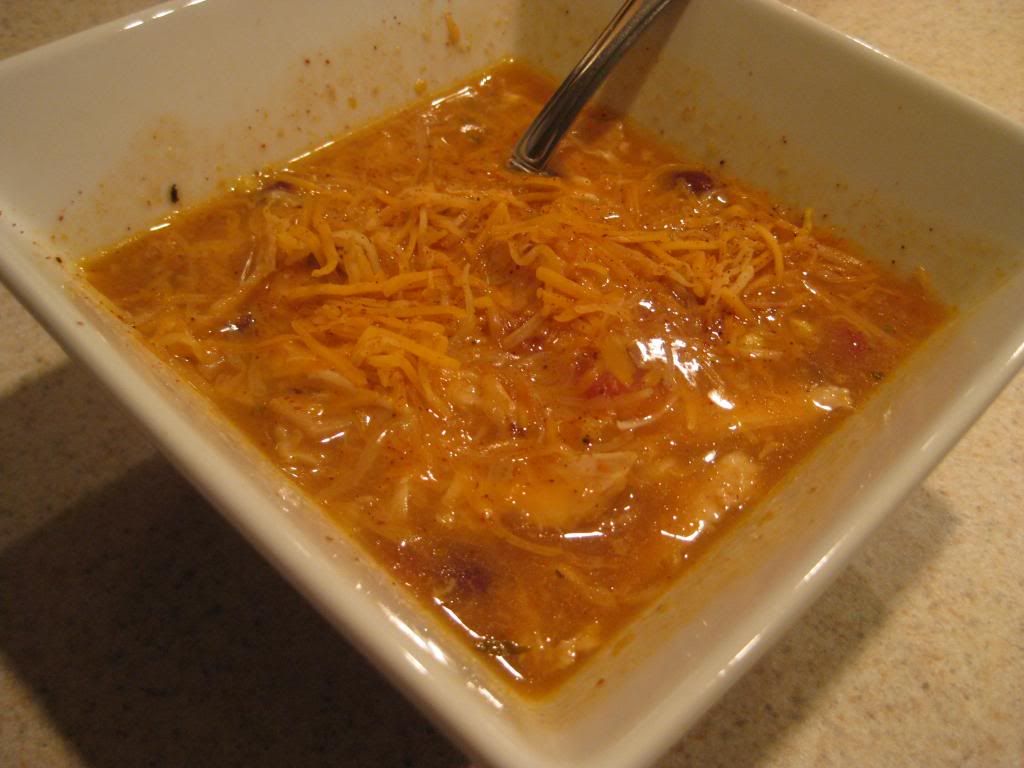
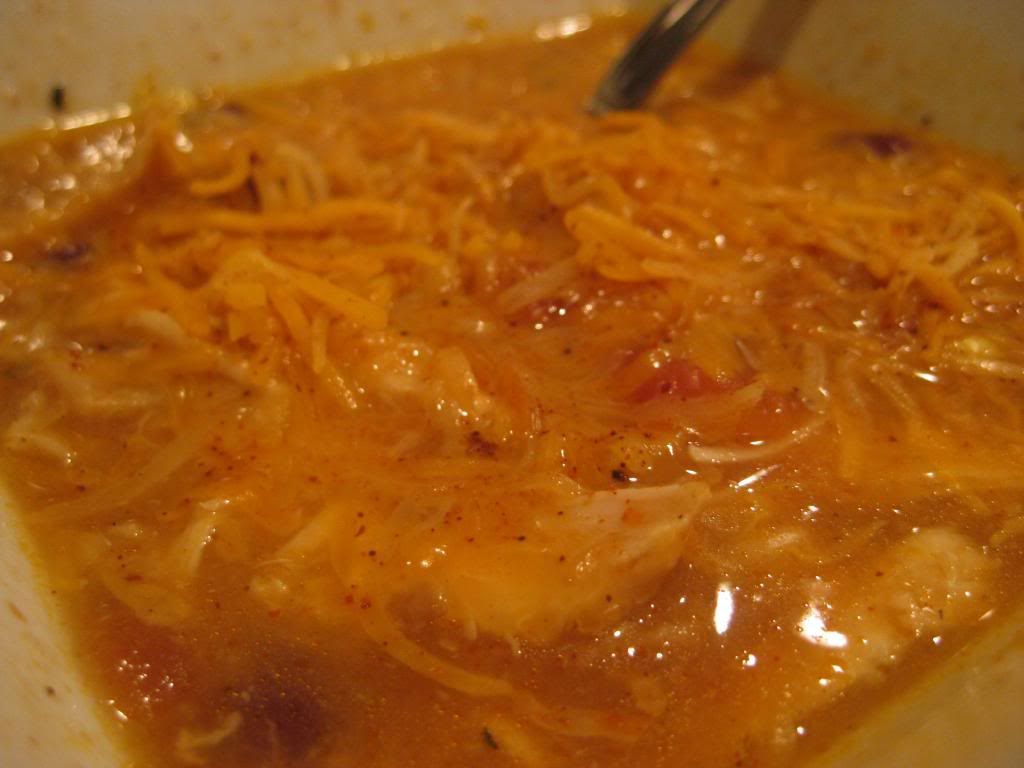
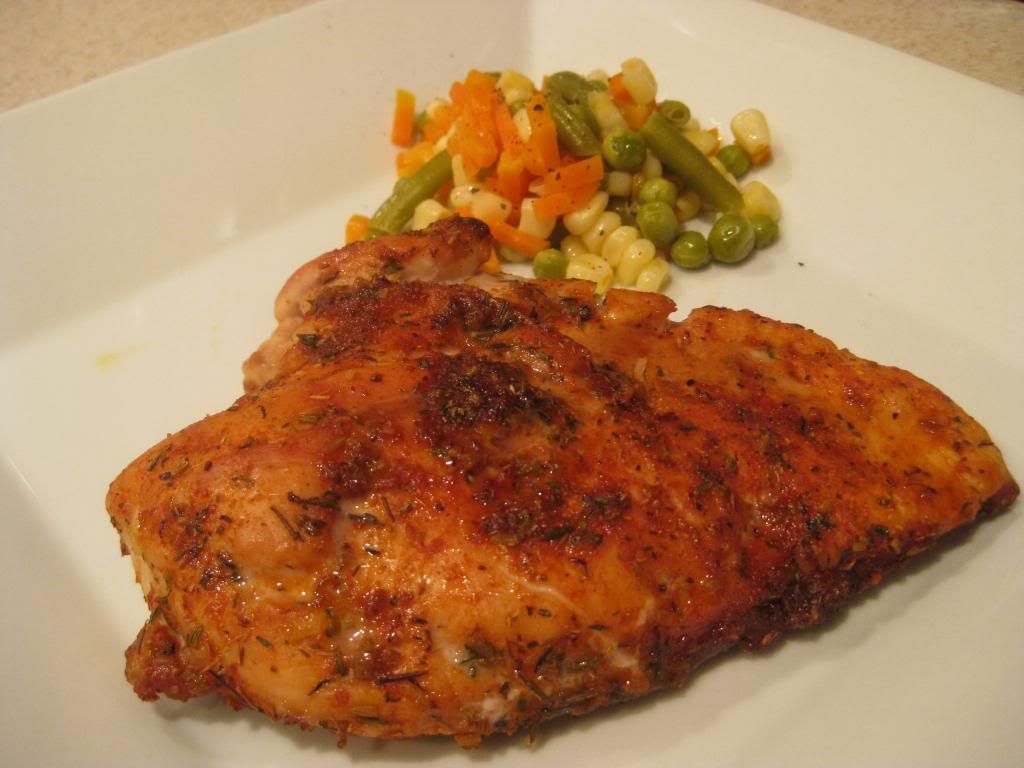
The Results:


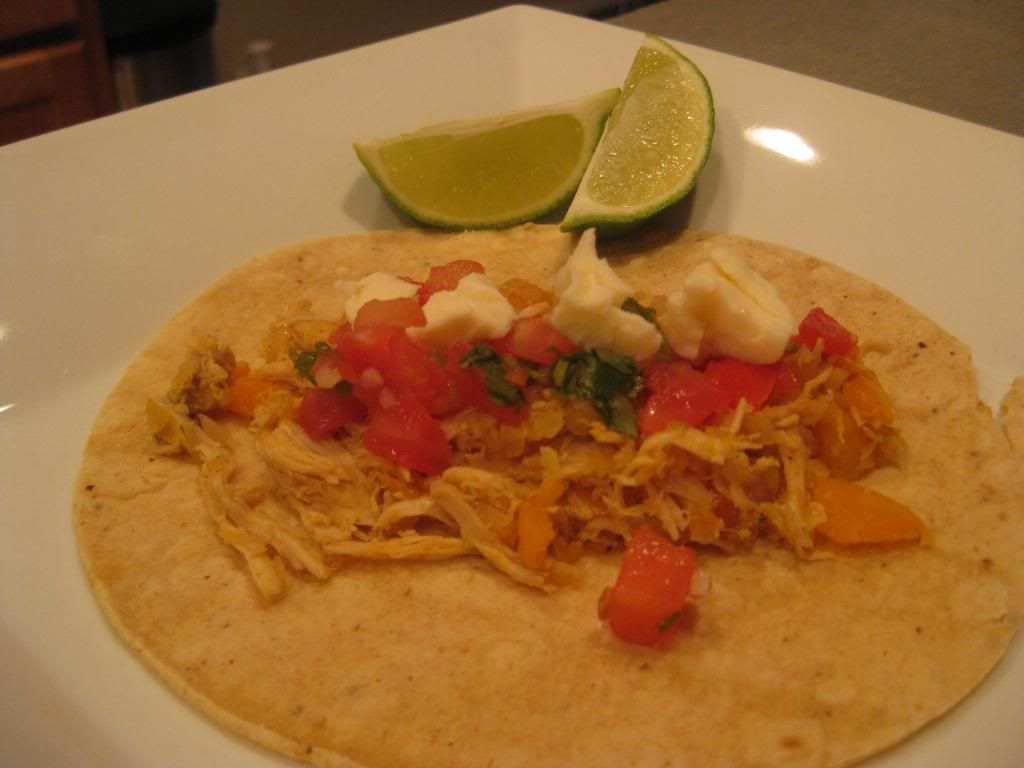
When it comes to quick and healthy Mexican cuisine, it doesn't get much better than the fajita. I'm glad I decided to slow cook our chicken as it imparted a great savory flavor to the final dish that I don't know would be there had we simply grilled the breasts. The combination of red, yellow and orange bell peppers and red onion really added a nice bit of heat and bit to counter the savory chicken and cheese flavors.

Warming the tortillas in aluminum foil is a nice trick that I will certainly use again. We've had issues in the past with corn tortillas simply crumbling during the meal - making for a rather adventurous dinner time experience. Microwaving them seemed to help, but never fully alleviated the problem. This method softened them greatly without making them crunchy or crispy (or drying them out).

That's all we have for you this week. We're back next with two brand new dishes and more culinary adventures. Until then,

~Cheers

Tuesday, February 26, 2013

Giving Mexican Soup a Lighter Twist

Good evening everyone! We often times, not intentionally, stumble upon theme weeks here on the blog and sometimes, we find this out until one of us cooks and the other has yet to cook their recipe.  This week would happen to be one of those theme weeks and personally, I love this week's theme!  We are cooking healthy Mexican dishes and I'm starting off the week with a soup that wouldn't look like it's healthy.  But with some better-for-you ingredients and portion size controlled, this soup will satisfy any appetite.

The Recipe:  Chicken Tortilla Soup
Original Recipe Found from Various Sources
(Serves 8)

What You'll Need:
16 Ounces jarred Salsa (any mild or hot flavor will do, depending on how spicy you want your soup to be)
2 Cups Cream of Chicken Soup
2 Pounds frozen Chicken Breasts
16 Ounces frozen Corn
2 Cups Black Beans, drained and rinsed
3 Cups Chicken Stock
2 Teaspoons ground Cumin
1 Cup Cheddar Cheese (or Mexican/Taco blend cheese, again, it's up to your personal preference)
4 Corn Tortillas

This is my first attempt at a slow cooker recipe, and it's one recipe that doesn't involve a lot of steps.  But, if you're in for a time crunch or want to whip up something flavorful that will make your whole kitchen (or house) smell great, this is the recipe for you.  Typically, Mexican dishes have numerous steps in the recipe before the end result is something delicious.  When it's this easy, it has to be tried and definitely shared.

In a large slow cooker, pour the cream of chicken soup, chicken stock, and salsa in the cooking vessel.  Next, add the chicken, corn, and black beans.  Stir until everything is well incorporated.  Sprinkle the cumin in and cover with the lid.  Set the slow cooker on low and cook for four to five hours (or if you are setting this to cook while your at work, eight to nine hours will work also.)  If you are serving this soup sooner rather than later, set the cooker on high and cook for two to three hours.

While the soup is finishing cooking, take out the chicken breasts and place on a plate.  Using a fork and a pair of tongs, shred the chicken.  Since it's been cooking between two to nine hours, the chicken will tear apart without any problem.  Next, preheat an oven to 350 degrees.  Place four small corn tortilla on a baking sheet and cook for 15 minutes, or until the tortillas get crispy.  Remove from the oven and let cool for five minutes.  After the shells are cooled, either break apart with your hands or slice with a pizza cutter.  Remove the lid and stir all the ingredients together inside.  

Add the cheese and the baked tortilla shells and stir once more to get everything incorporated.  Serve with sour cream, cilantro, chopped green onions, or by itself, and enjoy!

The End Result:


What a delicious combination!  All the ingredients together make for one delicious soup.  It does tend to run a bit on the runny side, but all those liquids combined make for one awesome broth.  The chicken is cooked to perfection and give it a boost of protein.  The beans and corn doesn't show themselves off, but they do add a nice addition to the soup.  I did add cheese to my soup and it made the soup creamier and added a little bit more flavor to the dish.  Also, a serving of soup is under 300 calories, so you won't feel guilty about breaking your diet.  Overall, a great recipe to try when you're short on preparation time and want something that tastes incredible.

Join us tomorrow as Tyler rounds out our healthy Mexican week with a classic dish with a lighter twist.  Until then,

~Cheers!

Wednesday, February 20, 2013

So Crazy It Just Might Work - Chicken Fried Fish

Good evening everyone. Many of you are likely familiar with the process of “chicken frying” a piece of meat. Most commonly, the “chicken frying” process happens to steak (I.E. chicken fried steak), it’s a primarily southern dish that earns its name because the steak is cooked and breaded much like fried chicken.

I’ve never actually had chicken fried steak, as the concept of beef breaded and fat or oil fried has never fully appealed to me. Last weekend, however, while perusing the pages of our latest food network magazine, I found something that caught my attention, chicken fried FISH. Better yet, LOW CALORIE chicken fried fish.

After a quick read through of the recipe, I found that it was really chicken fried in name only (the breading process is more of a natural breading process for fish) but the addition of its own white cream sauce and the chance to try yet another breading technique was too much to pass up. So, can you chicken fry a fish? Let’s find out!


The Recipe: Chicken Fried Fish
Original Recipe Found In: Food Network Magazine March 2013 Issue


What You’ll Need:
(Serves 4)

12 Ounces Green Beans (Trimmed)
4 X 6 Ounce Tilapia Fillets
¾ Cup All Purpose Flour
¼ Teaspoon Paprika
2 Large Eggs
¼ Cup Vegetable Oil
1 ¼ Cups Low Sodium Chicken Broth
¼ Cup Whole Milk
2 Tablespoons Cream Cheese
1 Tablespoon Chopped Fresh Parsley


To Prepare the green beans:

Add the beans in a microwave safe dish along with ¼ cup of water and ½ teaspoon of salt. Cover the dish loosely with plastic wrap and microwave the beans on high for 5 minutes, or until tender.

For the fish:

Combine the flour and paprika in a shallow dish and crack and beat the eggs in a separate shallow bowl. Assemble your dish in a row (as we traditionally do with breading dishes) – eggs first, followed by the flour mixture. Make sure to have a plate at the end of your “assembly line” to put the finished fish on.

Begin by thoroughly drying off the fish fillets. If I’ve said it once, I’ve said it one thousand times – moisture is the enemy of breading. Any water left on the fillet WILL sabotage the breading quality. Take a few extra minutes to blot off the excess moisture; you’ll appreciate the end result.

Once the fillets are dry, season them lightly with a little salt and pepper. Next, dunk the fillet into the egg mixture, allowing the excess to drip back into the bowl. Dredge the fillet in the flour mixture, making sure that all sides and crevices are evenly coated. Repeat this process until all of the fillets are breaded. Reserve the excess flour mixture –you’ll be using it later on.

Add 3 tablespoons of vegetable oil to a large (12 inch) non stick skillet over medium high heat. Once the oil begins to shimmer, add 2 fillets and cook them for 3 to 4 minutes per side, or until the breading is golden brown and the fish beneath is opaque and flaky. Transfer the fish to a plate tented loosely with aluminum foil and set aside.


Wipe the skillet clean, and then add the remaining tablespoon of vegetable oil. Once the oil shimmers, add 3 tablespoons of the reserved flour mixture from earlier, along with the chicken broth and ¼ cup of water. Make sure to whisk the mixture frequently while allowing it to come to a boil. Once boiling, add the milk, cream cheese and parsley, be sure to stir well to evenly incorporate everything. Continue whisking this mixture until it begins to thicken – this should take about 2 minutes. Season this sauce with a pinch of salt and pepper.

Serve the sauce over the fillet alongside the green beans. Sprinkle a little extra paprika on top of the fillets prior to serving just to boost the flavor. Enjoy!


The Results:


As I alluded to in the open, calling this recipe “chicken fried” is a bit of a misnomer – it’s not really any different from a battered fish recipe. Since it’s served alongside its very own white cream sauce, however, you can get away with a creative title. That being said, the battering of this dish is delicious and crispy with just a hint of heat from the paprika.

The true star of this dish, however, was the sauce. Oh. My. Goodness. The sauce is one of the best we've cooked up on the blog. Creamy, yet full of great depth and flavor, it's one of those sauces that you immediately think; "What else can I use this on". It's fantastic and worth trying this whole recipe just to cook up the sauce. I’ve never created a sauce for fish that wasn’t lemon or butter based, so this foray into ‘creamy’ was a fun path to follow. The green beans add a nice layer of freshness to the dish and actually taste quite good with a little of the cream sauce too! (Yes, I actually liked the green beans - mark that under "Things I never thought I would say")

That’s all we have for you this week. If you live in the greater Midwest, good luck dodging the impending snowstorm. It looks like the greater Des Moines metro is going to get nailed…did I mention I HATE winter? Yuck. Either way, we’re back next week with more delicious new adventures in the culinary world. Until then,

~Cheers

Tuesday, February 19, 2013

You Can Have Your Pasta and Eat it Too!

Good evening everyone!  As we are currently focusing on healthy recipes, sometimes we have to bid fond farewells to certain dishes that would not qualify as healthy.  For me, those dishes would be either include cheese or pasta.  Granted, if the quantity of the ingredient is minimal, it would still be healthy, but nothing too heavy or else it would be filled with hidden calories.  For tonight's recipe, I will be focusing on one of the "forbidden" ingredients, and also, how to make it on a relatively limited budget.

The Recipe:  Linguine with Spinach-Herb Pesto
Original Recipe Found In:  Cooking Light Magazine, March 2013

What You'll Need:
4 Ounces fresh Baby Spinach
1/4 Cup slivered blanched Almonds
1/4 Cup fresh Basil leaves
2 Teaspoons chopped fresh Oregano
1 Teaspoon chopped fresh Thyme
1/4 Teaspoon Black Pepper
1 large Garlic clove, chopped
2 Tablespoons organic Vegetable Broth
2 Teaspoons fresh Lemon Juice
1/4 Teaspoon Salt
2 Tablespoons Extra-Virgin Olive Oil
1 Ounce Parmigiano-Reggiano cheese, grated and divided (about 1/4 cup)
8 Ounces uncooked Linguine

To start, heat a large pot of water over medium-high heat and bring to a boil.  Next, place the spinach in a microwave safe bowl and cover it with plastic wrap.  Microwave the spinach on high for two minutes or until the spinach begins to wilt.  Remove the bowl from the microwave and remove the plastic wrap off the bowl.  Let the spinach cool slightly.  I found that this not only softens the spinach, but reduces on some of that spinach-y flavor that some people aren't a fan of.  This will help tremendously in the end flavor of the pesto.

After the spinach is cooled, place it in a food processor, along with the almonds, basil leaves, oregano, thyme, black pepper, and garlic.  Process these ingredients until everything is chopped, but not completely blended.  Next, add the broth, lemon juice, and salt and pulse this mixture five times.  With the processor on, slowly pour the olive oil through the food chute until this combination is well blended.  After the pesto is formed, pour (or scoop, depending on your consistency of pesto) into a bowl and stir in half of the Parmigiano-Reggiano cheese.  Cover with plastic wrap and set aside.

I love pesto so much, I could probably eat this whole bowl (no joke!)

By this time, the pot of water should be at a boil.  Place the linguine in the pot and cook according to package directions.  After the pasta is al dente, drain the pasta in a colander to remove the excess water.  Return the pasta back to a serving bowl and toss the pasta with a half cup of pesto.  Divide the pasta into 1 1/2 cups (one serving size) into bowls.  Serve with a sprinkling of the remaining cheese and enjoy!

The End Result:


This version of pesto is nothing like any pesto I've ever tasted.  The spinach gives it a refreshing, earthy flavor, instead of a strong herby flavor that would inhibit it if we used just basil leaves.  Your tongue doesn't feel like it's been ran through the herb aisle.  The pesto also clings to the linguine, which is an added bonus of using this type of pasta.  Trust me, you won't be begging for more sauce that won't be on the pasta.  But the overall surprise of this dish is that it is only 353 calories a serving, which is a delight to any pasta lover.

I had also mentioned earlier that this recipe is a budget saving dish.  Normal pesto is made from entirely basil leaves and pine nuts, with a sprinkling of olive oil thrown in.  While basil can be found for relatively cheap, it's the pine nuts that are almost always outrageously priced.  We've seen a four ounce container of pine nuts sell for almost $8 dollars in a regular supermarket.  With this version of pesto, using spinach and almonds, it greatly reduces the cost, without skimping on the flavor.

That's all we have for you tonight.  Tune in tomorrow as Tyler presents a brand new recipe.  Until then,

~Cheers!

Thursday, February 14, 2013

See, You Can Pair Fish and Cheese Together

Good evening everyone and Happy Valentine's Day!  As many, long-time followers of the blog are aware, we have one style of recipe that we keep going to again and again and again:  it's the breaded fish recipe!  Although many variations have passed through our pages, we have yet to duplicate a single dish.  Tonight, I'm putting my own, unique spin on this time-tested recipe.  Although we have not tried cheese, more specifically Parmesan cheese, (the key ingredient) in a fish dish yet, I cannot to wait to try it and see if it's worth the hype.

The Recipe:  Baked Parmesan Tilapia
Original Recipe Found from Various Sources
(Serves 2)

What You'll Need:
2 Tilapia Fillets
1 Egg, beaten
8 Teaspoons low-fat Mayonnaise
1/2 Teaspoon Lemon Juice
1/2 Cup Breadcrumbs
1/3 Cup grated fresh Parmesan Cheese
1/2 Teaspoon Oregano
1/4 Teaspoon Paprika
1/4 Teaspoon Garlic Powder
1/8 Teaspoon Pepper
1/4 Teaspoon Thyme
1 1/2 Teaspoon Parsley

To start, preheat an oven to 400 degrees.  Prepare a baking sheet with an even layer of nonstick cooking spray.  This will help the tilapia keep from sticking to the sheet - no one likes or wants stuck-on fish when cooking!  If you used frozen tilapia and thawed them in the refrigerator, be sure to pat off the excess moisture built up on the fish with a paper towel.  This might take several sheets, but you'll really want the fish to be dry.  This will help the coating and the breading stick better to the fillets.  Also, if there's any remaining ice sheets left on the fish, be sure the paper towel soaks up these also.

Fish patted dry and ready to be seasoned.


Next, pour the beaten eggs in a small bowl.  Add the mayonnaise and lemon juice and stir until everything is well combined.  In another small bowl, add the breadcrumbs, parmesan cheese, oregano, paprika, garlic powder, pepper, thyme, and parsley.  Stir all these ingredients together until everything is mixed well.

Arrange the bowls next to each other, along with a clean plate at the end of the line of bowls. Using one hand, dip each fish filet into the mayonnaise mixture and make sure each side is coated evenly.  Let the excess mixture drip off each fish.  Next, with the other hand, dip the fish in the breadcrumb mixture and coat both sides of the fish completely.  Place each fillet on the clean plate until all the fillets are coated and ready to cook.

Place the tilapia fillets on the prepared baking sheet with enough space so that their juices won't mix with each other.  Put the uncovered baking sheet in the oven and cook for 20 minutes or until the fish is white and flaky on the inside.  Serve with lemon juice and/or tartar sauce (or by themselves) and enjoy!


The End Result:


An incredibly moist fish that flakes the moment it's pierced with a fork.  Tilapia is a neutral flavored fish that will soak up any flavor its given.  This recipe is an excellent example of this.  The breading coated the fish completely and encased it in a delicious flavor.  No single spice is pronounced in the breading, but all of them work together to give the fish a great, well-rounded flavor.  I was sort of surprised that the Parmesan cheese didn't have a strong bite, but it did add a smidge of oomph that was just right to this dish.  Like I've mentioned before, the pairing of fish and cheese had never been attempted in the blog, but with this recipe, it's definitely worth coming back to.

Thanks for joining us this week!  Be sure to come back next week and check out the culinary adventures we will delve into.  Until then,

~Cheers!

Wednesday, February 13, 2013

Close Your Eyes & Dream of Summer

Good evening everyone! We're starting to run into our first hints of spring here in the Des Moines metro. I know that these warmer temps (if you want to call 40 degrees 'warm') and bright sunny days are simply an illusion, but I still can't help but feel upbeat that spring is now closer than it ever has been before.

With a spring mindset, I decided to cook up a dish that invokes the memories of spring and summer - BBQ. We've tried our fare share of BBQ dishes on the blog, from sauces and slow roasts to dry rubs and stove tops. What we've never tried, however, is a dry rub on chicken (we typically have used dry rubs for pork). When I found a new dry rub recipe, courtesy of blog favorite, Jamie Oliver, I decided tonight was the time to change that. Let's get cooking!


The Recipe: BBQ Rub Chicken with Citrus Vegetables
Dry Rub Recipe From: Jamie's America

What You'll Need:
(Serves 2)

2 Boneless, Skinless Chicken Breasts (Trimmed of fat)
1 Bag Frozen Vegetable Medley (Peas, carrots, green beans)
1 Lemon

For The Rub:

1 Tablespoon Fennel Seeds (Mashed with a pestel and mortar)
2 Teaspoons Smoked Paprika
1 Teaspoon Light Brown Sugar
2 Garlic Cloves (Minced)
Zest from one orange
Pinch of salt and pepper

To make the rub:

In a small bowl, combine all of the rub ingredients and toss until you achieve even distribution. Ideally, apply your rub to the chicken breasts 4-8 hours prior to cooking them, that way the flavors can truly marinate into each breast. Cover each breast liberally with the rub and then wrap them tightly in plastic wrap. Store the chicken in the refrigerator until you're ready to cook.

To prepare the citrus vegetables:

Nothing goes better with summertime BBQ flavors like some freshly steamed veggies with a little lemon juice. Since we're not exactly in prime veggie season in the midwest (with the ground being frozen and all) we're using the next best thing - 'fresh' frozen vegetables.

Pull out a large sheet of aluminum foil and add the frozen vegerables to teh center. Zest your lemon, adding the zest evenly across the vegetables. Next, pull up the sides of the foil to create a 'pouch' around the veggies. (See the picture below) Don't pull it closed just yet. Squeeze the juice from your lemon in the pouch, then seal it tightly.


Next, preheat your oven to 350 degrees (this can also be made on the grill, but since it's still winter, we're using the oven).

Pop your foil packed veggies into the oven a few minutes before you add the chicken. They'll take a little bit longer to cook.

Set a wire baking rack on a rimmed baking sheet and coat it lightly in non-stick cooking spray. Place your chicken breasts on the wire rack and into the oven. Allow them to cook for 35 to 40 minutes, or until the internal temperature reads 165 degrees.

Once your chicken is hot, remove the chicken and veggies from the foil and serve. If you'd like, cook up some homemade BBQ sauce to serve along side the chicken or simply enjoy the chicken with the rub.

The Results:


It might not be summertime outside, but it's summer at the dinner table when you cook up this dish. This rub was a new twist for me, I had never used one with fennel seeds before. The fennel orange combination actual balances quite nicely, adding a layer of citrus depth with the aromatic flavors of the fennel. Of course, paprika and brown sugar, two staples of any dry rub, make sure the BBQ flavor shines through brightest of all. Alongside a helping of fresh citrus infused veggies, this meal is light on calories (350 per serving) and heavy on great flavor!

That's all we have for you this evening, stop by tomorrow night as Maggie puts a new twist on a long time blog favorite. Until then,

~Cheers

Wednesday, February 6, 2013

Grilled Cheese With Pizzaz

Good evening everyone! Every now and again, Maggie and I embark on a "theme week" here on the blog. We decide to focus our recipes around one food group, cooking style, etc. Sometimes, like this week, we accidentally stumble upon a theme week. When we're picking out recipes for the coming week, we do try to avoid doing too similar of recipes (we try to prevent two soups in one week, for example). This week, Maggie and I both decided on dishes that featured sandwiches. However, since Maggie's dish was a unique twist on a decidedly "un-sandwich" dish and mine was a new rendition on a classic sandwich, we decided to roll with it.

So, let the unofficial sandwich week continue with tonight's recipe!

The Recipe: Southwestern Cheese Panini
Original Recipe Found On: Eatingwell.com

What You'll Need:
(Serves 4)

4 Ounces Sharp Cheddar Cheese*
1 Cup Shredded Zucchini
1/2 Cup Shredded Carrots
1/4 Cup Chopped Red Onion
1/4 Cup Prepared Fresh Salsa
8 Slices of Whole Wheat Bread
2 Teaspoons of Canola Oil

* You'll want to pick up sharp cheddar here over mild or regular. The more pronounced flavors of sharp cheddar mean you can use less cheese, but not lose out on the flavor.

The preparation for this recipe is delightfully simple (after all, it is just a gussied up grilled cheese).

In a large bowl, combine the cheese, zucchini, carrots, onion and salsa, making sure everything is evenly incorporated. Distribute this mixture evenly amongst the sandwiches. (TIP: Although it's not mentioned in the original recipe, I'd recommend using a slotted spoon to distribute this mixture that way any excess fluids drip out. You'll want to reduce the amount of liquid in the mix as much as possible as it will soak the bread and ruin your panini otherwise.)

Set a large (12 inch) non stick skillet over medium high heat. Add the canola oil (1 teaspoon) and bring it up to temperature. When it begins to shimmer, add two of the sandwiches to the skillet.

If you have a grill press or other weighted cooking instrument, set in on top of the sandwiches. If you don't, you can make your own by simply setting a smaller skillet atop the sandwiches and weighing that down with 2 to 4 soup cans (or pie weights).


Cook the panini for 2 minutes, or until the bread becomes golden brown. Next, remove the weight and flip the sandwich. Reduce the heat to medium, place the weight back on top of the panini and cook for 1 to 3 minutes, or until the other side is equally golden brown. Repeat this process with the other sandwiches.

Serve immediately and enjoy!

The Results:


Zucchini is quickly moving up our list of favorite veggies due to its great versatility. It brings a bright, fresh flavor to any dish, but it's subdued enough that it doesn't overwhelm the final flavoring. This is a great way to sneak your daily veggies into the evening meal. The sharp cheddar cheese creates the classic "grilled cheese" flavor, but the other veggies oh-so-subtly mix things up a bit. The real star of this dish is actually the salsa as it adds just enough of a unique twist to really bring this panini to another level.

That's all we have for you this week. We'll be back next week with more healthy and delicious recipes! Until then,

~Cheers

Tuesday, February 5, 2013

Hello Frittata...There's Something Different About You

Good evening everyone!  As seasoned followers of the blog know, the one recipe I'm bound by destiny to come back to again and again is the Frittata.  There are just so many variations of this simple egg dish, I'm sure I could create a whole blog about it (but then it would boring, making frittata after frittata, so I'm sure it would get old quick.)  Tonight, I'm taking on another frittata recipe, but this one has a brand new element that I haven't tried before.  It's not the ingredients in the frittata, but what's on the outside that I'm switching up.  It's my unique spin on a egg sandwich, that is actually quite healthy for you.


The Recipe:  Three Cheese and Herb Frittata Sandwiches
Original Recipe Found In:  Food & Wine Magazine, February 2013
(Serves 6)

What You'll Need:

2 Tablespoons unsalted Butter
2 Tablespoons Extra-Virgin Olive Oil
2 small Onions, finely chopped
1/2 Teaspoon finely chopped Thyme
Pinch of crushed Red Pepper
1 Bay Leaf
10 Large Eggs
4 Ounces fresh Goat Cheese, crumbled
1/2 Cup finely grated Parmigiano-Reggiano
1/3 Cup finely chopped Parsley
1/3 Cup finely chopped Chives
3 Ounces Gruyere cheese, shredded
3 Cups Baby Spinach
6 Slices Whole Wheat Toast
12 thin slices of Prosciutto

Optional:
2 medium tomatoes, thinly sliced
12 large Basil leaves, torn


To start, preheat the oven to 475 degrees.  In a large ovenproof nonstick skillet, begin to melt the butter in the olive oil over medium heat.  Once the butter is melted, add the onion, thyme, crushed red peppers, bay leaf, and an oversized sprinkling of salt and pepper.  Cover the skillet and cook this combination for about 20 minutes, stirring occasionally and until the onions are very soft.  Once this is done cooking, uncover and discard the bay leaf.

While the onions are cooking, in a large bowl, whisk all the eggs together.  Then, stir in the crumbled goat cheese, Parmigiano-Reggiano, parsley, chives, 1/2 cup of the Gruyere, 1 teaspoon of salt, and 1/4 teaspoon of pepper.  When this mixture is completely combined, slowly pour it in the slightly cooled skillet.  Next, gently stir to mix all the ingredients together, and cook on the stovetop over moderately low heat, until the eggs start to set, about five minutes.  You won't want the heat set too high because the eggs will cook immediately, nor do you want it too low or the eggs won't set.


Sprinkle the frittata with the remainder of the Gruyere cheese and transfer the skillet to the oven.  Bake the frittata in the oven for 8 to 10 minutes, until the center has just set and is completely cooked through.  Next, run a rubber spatula around the edge of the frittata and gently slide it onto a cutting board.  Let it cool slightly and cut it into six pieces.


After the frittata has cooked, you can begin to assemble your sandwich:  On top of one piece of toast, place a slice of prosciutto, a slice of frittata, a bed of spinach leaves (tomatoes and basil, if you are using them.)  Serve and enjoy!

The End Result:


This recipe had so many things going for it.  First of all, if it wasn't for the toast to even all these flavors out, this would have had one powerful bite.  The herbs and the cheese completely overtake the frittata, yet gave it a good melty, yet earthy flavor.  The spinach also helps to even out the flavor invasion, providing a cool layer between everything.  The prosciutto, still kinda cool from the refrigeration, was a stark contrast between the warmth of the frittata, but the meaty element from the prosciutto was needed in the sandwich.

The original recipe called for this sandwich to be constructed between two layers of bagels.  While the idea is great, we wanted to omit this big bite of caloric intake.  Not only were the two pieces of toast way under what the bagel would have been for calories, but this sandwich was only 270 calories.  This dish is way less than any takeout egg sandwich would be.  Overall, a great dish, if you're in the mood for something unique and very tasty.

That's all we have for you tonight.  Join us tomorrow as Tyler creates a brand new dish to share.  Until then,

~Cheers!