Thursday, September 27, 2012

Resourceful Risotto

Good evening everyone!  I'm feeling a bit better from the last two days.  Tyler has come up with a name for what I have:  collergies.  Since I'm not sure if what I have is a cold or allergies, I have decided that it's both.  If it's allergies, it's been the worse case I've had of them in quite some time.  Nevertheless,  tonight I'm feeling up to cooking in the kitchen and ready to whip up a brand new dish.

We've tried our fair share of a tasty little number called risotto.  Whether it's with butternut squash or with leeks and bacon, it's one of our favorite mediums to test with rice.  Tonight, I'm trying another vegetable variant, but with one very unique ingredient for a risotto dish.

The Recipe:  Tomato and Mozzarella Risotto
Original Recipe Found In:  Cooking Light, October 2012

What You'll Need:
3 1/4 Cups organic Vegetable Broth
1 Tablespoon unsalted Butter
1/2 Cup finely chopped Onion
1 Tablespoon minced fresh Garlic
1 1/4 Cups uncooked Arborio Rice
3/4 Cup canned crushed Tomatoes
1/2 Cup shredded fresh Mozzarella cheese
1/4 Teaspoon freshly ground Black Pepper
1/8 Teaspoon kosher Salt
2 Cups torn baby Spinach
1/4 Cup chopped fresh Basil

To start, bring the vegetable broth to a simmer in a medium saucepan, but do not bring to a boil  Keep the broth warm over a low heat.

In a large saucepan, melt the butter over medium heat.  Add the onion and garlic to the pan.  Saute for two minutes until the onion is tender, stirring frequently.  Next, add the rice and cook for one minute, stirring constantly.  Add a 1/2 cup of broth to the rice mixture and cook for five minutes until the liquid is absorbed and continue to stir constantly.  Reserve 1/3 of the broth and use the remaining broth for the rice mixture.  Adding 1/4 cup at a time and stir constantly until each portion of the broth is absorbed before adding the next.  This entire process should take about 22 minutes and your arm will get really, really sore.  But the end result will be really worth it.  (And unfortunately, it's a extremely hands-on process that doesn't lend itself to a lot of pictures.)

After the risotto is cooked, stir in the tomatoes and cook for one minute.  Add the cheese, pepper, salt to the rice and stir until the cheese is melted.  Remove the pan from the heat and stir in the 1/3 cup of broth, spinach, and basil.  Serve and enjoy!
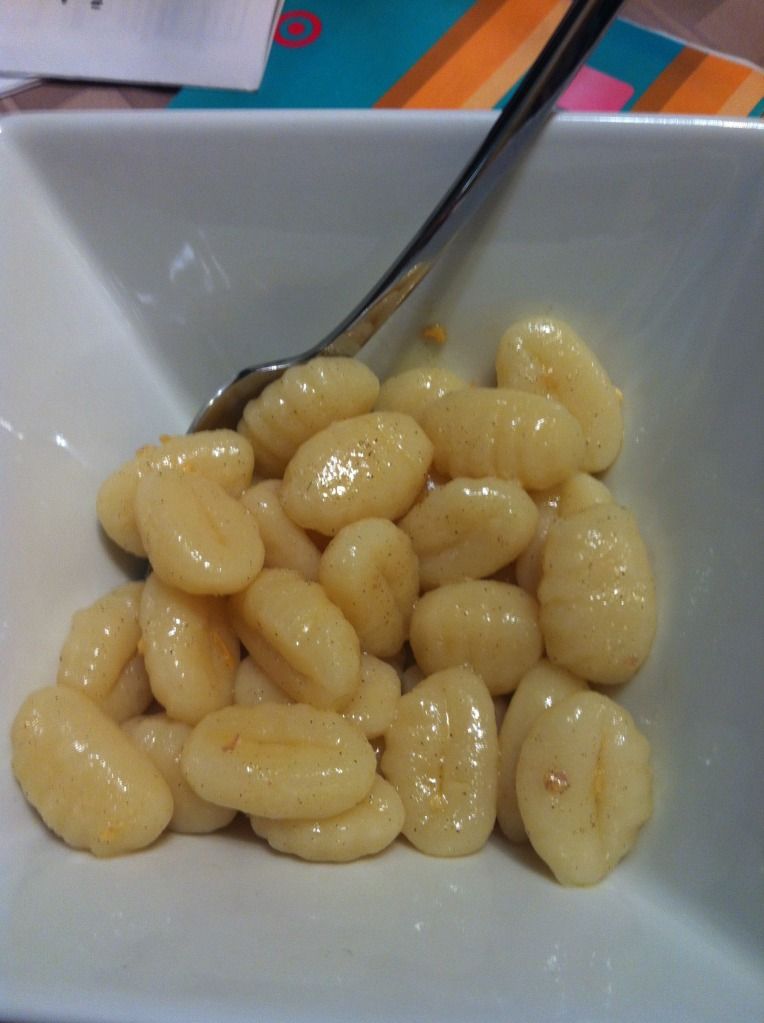
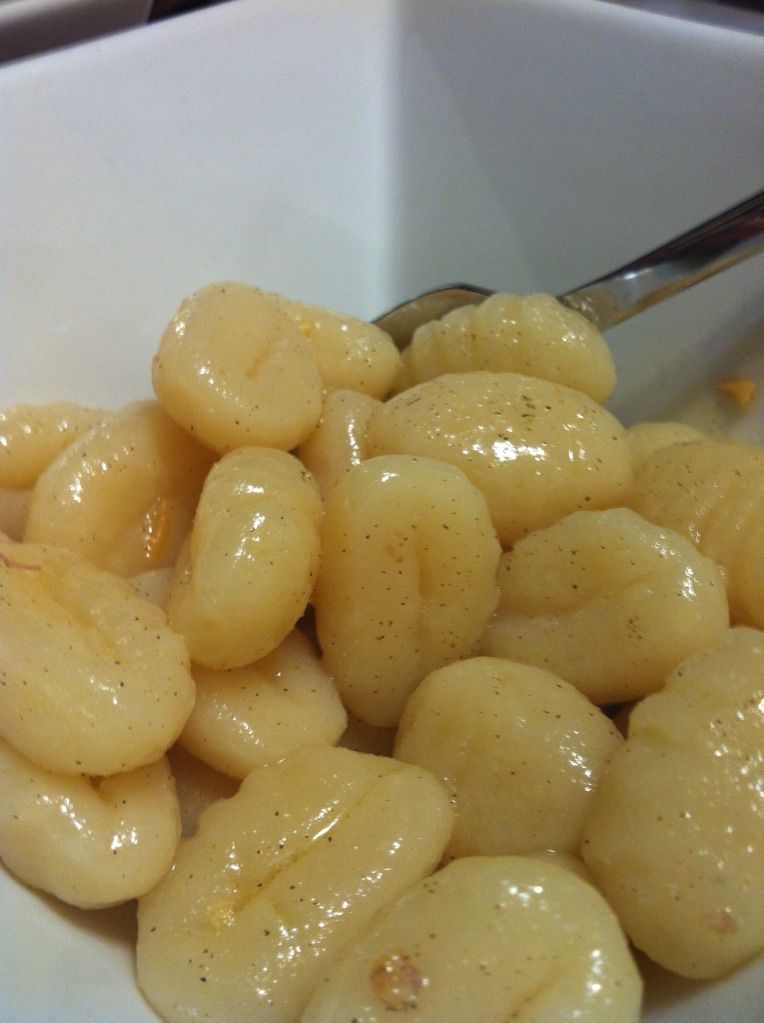
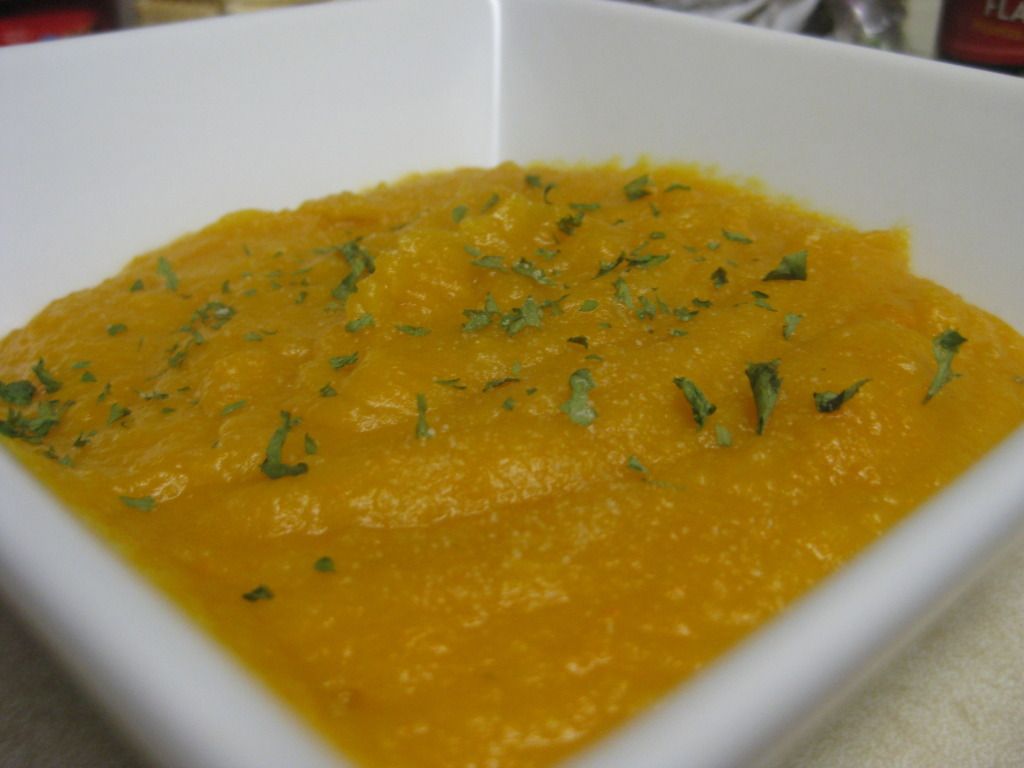
The End Result:


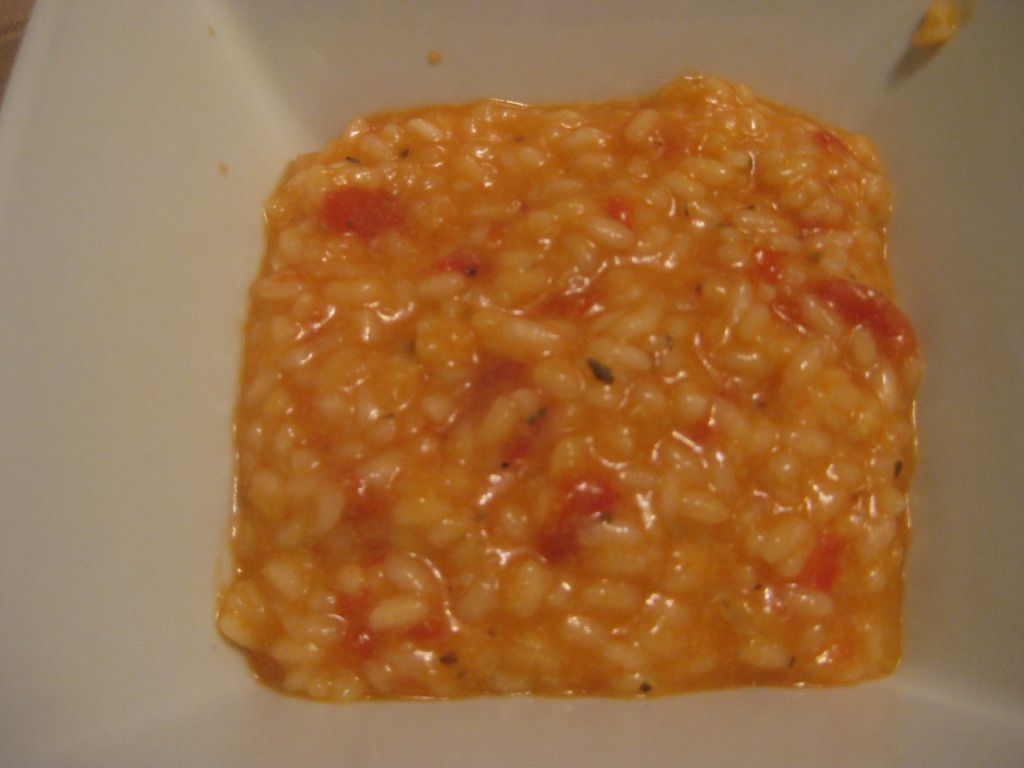
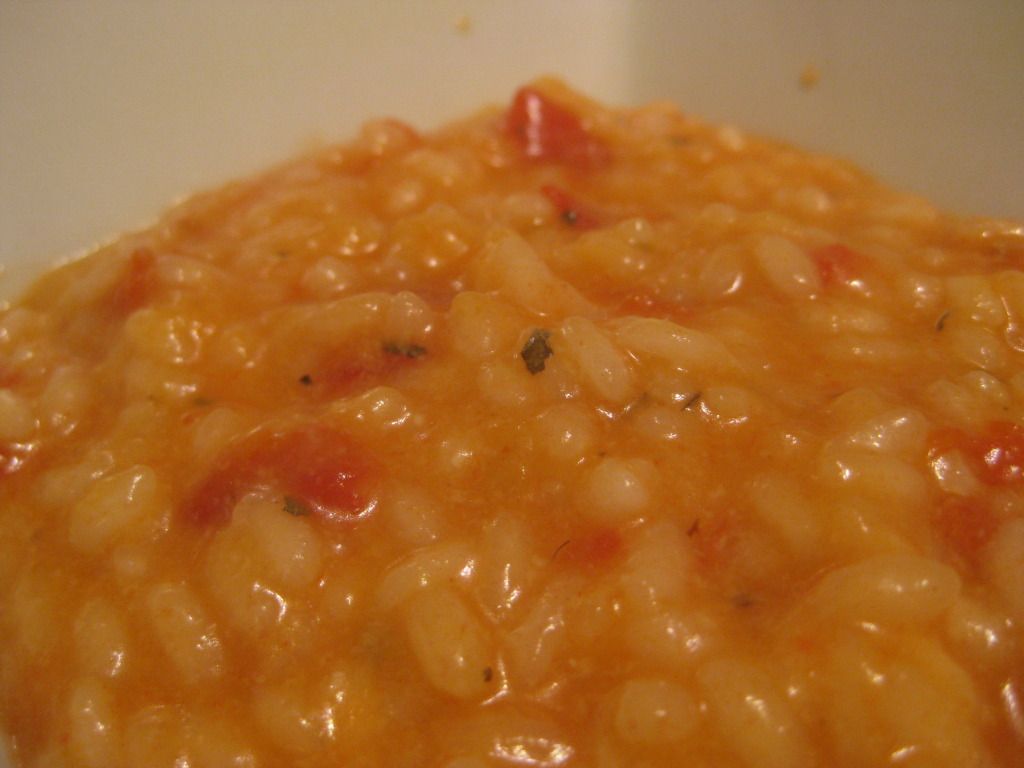
As always, when cooked properly, the risotto should be creamy and incredibly savory.  Adding tomatoes and mozzarella cheese to the mix?  I've had great risotto before (the butternut squash part deux was probably the best,) but this risotto was right up there.  There were so many flavor elements that made it incredibly delicious.  The cheese adds a nice hint of flavor, but it's not overwhelming, which is great for those that don't like a lot of cheese in their dish.  The risotto soaks up all that tomato flavor and adds a whole new flavor element to the rice.  Risotto is always a hit with us and when something that takes so much effort and tastes so good in the end, it makes all that work very worth it.

That's all we have for you this week.  Thanks for joining us and come back next week to find out what new culinary adventures we embark upon.  Until then,

~Cheers!

Tuesday, September 25, 2012

Spanish Turkey Meatball Stew

Good evening everyone! Long time readers of the blog know that we like to experiment with different flavors and different recipes from around the world. While we enjoy adapting Italian recipes, trying our hand at French cuisine and cooking up some Mexican style dishes - we don't limit ourselves to any one area or style of dish.

When this month's issue of Food Network Magazine came to our doorstep, I was immediately drawn to a cultural dish that we had yet to fully explore - Spain. Based around hearty tomatoes, lean meats and a rich, savory flavor, I knew I had to give this stew a try. Let's get cooking!

The Recipe: Spanish Turkey Meatball Stew
Original Recipe Found In: Food Network Magazine: October 2012 Issue

What You'll Need:
(Serves 4)

2 Tablespoons Extra Virgin Olive Oil
1 Large Onion (Chopped)
5 Cloves Garlic (Minced)
1 Teaspoon Smoked Paprika*
1 Cup Sliced Carrots
14 Ounces Diced - Fire Roasted Tomatoes**
2 Cups Low Sodium Chicken Broth
1 15 Ounce Can Chickpeas (Garbanzo beans) Drained & Rinsed
1 - 1.5 Pounds Ground Turkey

*Smoked paprika is common in many Spanish dishes. It's deep earthy flavor imparts a whole different element on a dish than standard paprika. While you can substitute for standard paprika if needed - smoked is preferred.

** Check your canned tomato section at your local grocer. You'll be surprised to find there are a LOT of variations of fire roasted tomatoes. It sounds like a hard to acquire item - but it's actually right alongside all of the other tomato products.

Place a large (12 inch) non stick skillet over medium high heat. Add the olive oil, onion and garlic along with a pinch of salt and cook the mixture until the onions begin to soften. Be sure to stir occasionally to keep the mixture from sticking. After the onions have softened (about 5 minutes) transfer half of the mixture to a large bowl.

Add the paprika and carrots to the remaining onion mixture in the skillet. Cook for about 1 minute before adding the tomatoes, chicken broth and chickpeas. Stir well to incorporate the mixture. Increase the heat to medium high and bring the mixture to a boil. Allow the mixture to simmer until the sauce thickens. This should take about 6 to 10 minutes.

While your sauce is simmering, you can begin construction of the meatballs. Add the ground turkey to the onion mixture bowl that you reserved from earlier. Using your hands, evenly incorporate the turkey with the onion mixture. Begin forming the meatballs by breaking off small sections of this mixture and rolling them into balls with your hands. You should be able to get 15 to 20 meatballs (you'll want to err on the smaller side as it will expedite cooking).

Place the finished meatballs in the skillet with the sauce mixture and allow them to simmer for 3 to 5 minutes per side (turning once) until they are cooked through. Top the finished dish with a pinch of pepper and fresh parsley and enjoy!

The Results:


This dish has the best of both worlds - a hearty, rich base formed by the tomatoes, paprika and chickpeas - but it manages to stay lean and light with turkey in place of beef or pork.  This flavorful stew comes in at just under 450 calories per serving, so it's a great low calories option for dinnertime. With a great flavor and no "oddball" ingredients, this dish is sure to please just about anyone in your family!

That's all we have for you this evening. Maggie takes to the kitchen tomorrow night to dabble in her favorite category. See what she's got cooking tomorrow evening! (Side note - Maggie's feeling a little under the weather at the moment, so her night to cook could be bumped back a few days) Until then,

~Cheers

Thursday, September 20, 2012

Nothing Wrong with Gnocchi

Good evening everyone!  There's nothing quite like a warm, soul-filling recipe that fills you up when the temperature cools down.  Especially when a dish could take all evening to cook and has an end result of something quite fantastic.  That's what I will attempt this evening:  a homemade dish, from start to finish, that has an incredibly homey feeling that will make you crave more.

The Recipe:  Potato Gnocchi with Browned Butter and Sage
Original Recipe Found On:  www.americastestkitchen.com

What You'll Need:

Gnocchi:
2 Pounds Russet Potatoes
1 Large Egg, lightly beated
3/4 Cup, plus 1 Tablespoon, All-Purpose Flour
1 Teaspoon, plus 1 Tablespoon, Salt

Sauce:
4 Tablespoons unsalted Butter, cut into four pieces
1 Shallot, minced
1 Teaspoon minced fresh Sage
1 1/2 Teaspoon Lemon juice
1/4 Teaspoon Salt

Start by heating an oven to 450 degrees.  Poke each potato eight times with a paring knife over the entire surface of the potato.  Microwave the potatoes until the ends begin to soften, about ten minutes, flipping the potatoes halfway though cooking.  Transfer the potatoes directly to the oven rack and bake until the potato can be easily pierce, about 18 to 20 minutes.

Using a potholder or a kitchen towel, peel each potato with a pairing knife.  Process the potato through a rice or a food mill onto a rimmed baking sheet.  Gently spread the potatoes in an even layer and let cool for five minutes.  If you have oven gloves, I would highly recommend to use them during this part of the cooking process.  The potatoes will be extremely hot and it's best to be overly cautious while handling them during this part of the recipe.

Next, transfer three cups of the warm potatoes to a bowl.  Using a fork, gently stir in the egg until just combined.  Sprinkle the flour and one teaspoon of salt over the potato mixture.  Again, using a fork, gently combine until no pockets of dry flour remain.  Press the mixture into a rough ball and transfer to a lightly flour dusted counter.  Gently knead until smooth, yet slightly sticky, about one minute.  Lightly dust the counter with flour as needed to prevent sticking.

Line two baking sheets with parchment paper and liberally dust with flour.  Cut the dough into eight pieces.  Roll each piece of dough into 1/2 inch thick rope.  Then cut the rope into 3/4 lengths.  Holding a fork with prongs facing down in one hand, press each dough piece cut side down against the backside of the tongs with thumb of the other hand to create an indentation.  Roll the dough down to form ridges on the sides.  Transfer the formed gnocchi to sheets and repeat with remaining dough.

Or, you could buy a package of pre made gnocchi, like we did.

To make the sauce, melt the butter in a large nonstick skillet over medium high heat, swirling occasionally, until the butter is browned and releases a slightly nutty flavor, about 1 1/2 minutes.  Take the skillet off the heat and add the shallot and sage.  Stir until the shallot is fragrant, about one minute.  Stir in the lemon juice and salt.  Cover to keep warm.

In a large pot, bring four quarts of water to a boil.  Add to the pot the remaining one tablespoon of salt, and using the parchment paper as a funnel, gently slide the gnocchi into the water.  Cook the gnocchi until it's just cooked through, about 90 seconds (the gnocchi should float to the top after a minute.)  Using a slotted spoon, transfer the gnocchi into the skillet with the sauce, gently toss to coat the gnocchi in the sauce, serve, and enjoy!

The End Result:


The gnocchi had almost a creamy texture to it that made it incredibly delicious.  The hints of sage and shallots scattered throughout the gnocchi added a savory flavor and the browned butter amped those flavors to a higher degree.  Although making your own gnocchi would be quite an adventure, but premade gnocchi was definitely the way to go, especially if you want to make this recipe in a pinch.  Overall, a great, savory dish where a little will go a long way.  I would definitely make this recipe again, perhaps with a different sauce and/or seasonings.

That's all we have for you this week.  Join us next week as we continue to delve into new culinary adventures and experiences.  Until then,

~Cheers!

Wednesday, September 19, 2012

Pan Seared Steaks With Asian-Chili Sauce

Good evening everyone! We've been featuring a lot of fall themed recipes on the blog recently - for good reason - it is fall after all! But tonight I'm breaking from that trend and using a traditional summer time staple - steak. Now, it's not grilling season and it's not exactly prime weather to have a BBQ, so why would we be featuring a steak recipe now? Well, this steak recipe doesn't use the grill at all - and yet it may result in the best steak you've made all year.

But we're not just cooking up any boring old steak (you should know us better than that by now) we're taking in some flavors of the orient and creating a delicious butter sauce to top the whole meal off. Let's get cooking!

The Recipe: Pan Seared Steak With Thai Chili Butter Sauce
Original Recipe Found In: The Complete America's Test Kitchen Cookbook 2011 Edition

What You'll Need:
(Serves 2)

2 - 8 Ounce Sirloin Steaks

For The Butter Sauce:

4 Tablespoons Unsalted Butter (Softened)
1 Tablespoon Chopped Fresh Cilantro Leaves
3 Teaspoons Asian Chili-Garlic Sauce
1 Small Garlic Clove (Minced)
2 Teaspoons Fresh Lime Juice


Begin by preparing the steaks. Set you oven to 275 degrees and pat the steaks dry with a paper towel. Season each side of the steak with salt and pepper, and place them on a wire rack set atop a rimmed baking sheet (as pictured).


Place the baking sheet in the middle of the oven and allow the steaks to cook for 15-20 minutes for medium rare, 25 to 30 for medium or 35 for medium-well. Use a meat thermometer to ensure you're hitting the 'doneness' of choice. 90 to 95 degrees at the thickest part of the steak indicates a medium-rare steak while 100 to 105 is medium and 110 and above is medium-well.

Next, heat 1 tablespoon of vegetable oil in a large (12 inch) non stick skillet over medium high heat. Once the oil begins to shimmer, place the steaks into the skillet and cook for 1 to 2 minutes per side, or until the steaks develop a nice sear. If you so choose, you can stand the steaks on their side (using tongs) and sear the sides of the steaks as well.


Once the steaks are nicely seared, transfer them back to the wire baking sheet and loosely tent them in foil. Allow them to rest for 10 minutes prior to serving.

While the steaks are resting, you can begin making the butter sauce.

Place the butter in a small bowl and whip it vigorously with a spoon or fork until it becomes soft and fluffy. Once fluffy, add the chili-garlic sauce, garlic clove, lime juice and cilantro, making sure to stir well until everything is evenly incorporated.

By now, you steaks should be ready to serve. Simply spoon a dollop of the butter sauce on top of each steak and allow it to melt slightly before serving. Enjoy!

The Results:


The method of cooking the steak is similar to methods we've used for pot roasts in the past. By cooking the steak at a low temperature for a long amount of time (relatively speaking in regards to steaks - 20 minutes is a long time) and then searing at the end, you're allowing all the natural juices to stay within the steak while still creating a great crispy sear.

The Asian-chili butter sauce added a nice spicy kick to the final flavor of the dish. The rich and savory beef flavor helped tone down some of the heat from the butter sauce - resulting in a harmonious blend of rich and warm flavors.

You're free to adapt the butter sauce in any way you see fit (or even try another form of sauce entirely) tonight's blog provides two creative muses for the at home chef - a fall friendly steak cooking method and a new way to spice up the everyday steak. Try one, try both - either way you won't be disappointed!

That's all we have for you this evening. Join us tomorrow night as Maggie takes to the kitchen to create a brand new dish featuring a new form of an old favorite. Until then,

~Cheers

Thursday, September 13, 2012

Savory Root Vegetable Soup

Good evening everyone! In yesterday’s recipe, Maggie spoke about fall being her favorite season. Cooler weather, warmer dishes and savory flavors all come into their prime during the fall months, making it one of my favorite seasons as well. One of my favorite aspects of fall cooking is that root vegetables (potatoes, sweet potatoes, carrots, parsnips – etc.) all come into their prime. My favorite fall dish (or side dish) is slow roasted root vegetables. Drizzled with honey or lemon juice and allowed to roast in a low temp oven all day – yum, yum, yum!


The dilemma, of course, is what to do when you’re craving slow roasted root vegetables but don’t have the time to babysit an oven all day. The simple answer? Break out the slow cooker! (Yes, this is the third week I’ve turned to a slow cooker. I’ve been busy with no days off during the week – I’m adapting the best that I can!)

I decided to take things one step further in fulfilling my root vegetable craving. I’m combining one of my favorite dishes, potato soup, with the savory flavors of roasted root veggies – the end result is an Out of the Culinary original creation:

The Recipe: Root Vegetable Soup
An Out of the Culinary original!

What You’ll Need:
(Serves 8)

1 Pound Yukon Gold Potatoes (Peeled, roughly chopped)
1 Pound Sweet Potatoes (Peeled, roughly chopped)
2-3 Large Carrots (Peeled, diced) or 1 Small Bag Baby Carrots
3 Medium Sized Parsnips (Peeled, roughly chopped)
3-5 Cups Low Sodium Chicken Broth (Or vegetable broth)
1 Tablespoon Dried Rosemary
2 Cloves of Garlic
3 Tablespoons Unsalted Butter
Pinch of Dried Parsley, Cumin, Celery Seed or Garlic Salt (Or all 4)


You might recall the parsnip making an appearance or two on the blog before. It made its debut in ‘What The Heck Is A Parsnip?’ and has popped up in a few other side dishes here and there since that first recipe. A parsnip is a root vegetable related to the carrot. It has a waxy outer skin, its “flesh” feels similar to condensed Styrofoam and it smells like a pine tree…while tasting like a mash up between a sweet potato and carrot. It’s a unique little veggie. (Kudos to the first guy that dug that up and thought “Yeah, I’d eat that”)

Once slow roasted, however, the parsnips turn into a lovely harmony of sweet and earthy flavors, making it a perfect companion to potatoes and carrots in a side dish or stew.

When you’re peeling and dicing the veggies, don’t worry about chopping them too fine – they are going to slow roast for hours and where eventually blending everything anyway, so rough cuts will work just fine.

To begin, grab a 4 to 5 quart slow cooker and toss in all of your veggies (including the garlic). Sprinkle in the rosemary and give the mixture a few good stirs to distribute the seasoning evenly. Next, add the chicken or vegetable broth. You’ll want to add enough so that the veggies are just covered by liquid. This amount will vary – thus the 3-5 cup range given in the original ingredients.

After everything is in the slow cooker, set it to low and allow it to stew away for 6 to 8 hours.

This low and slow process achieves similar ending flavors as roasting the veggies would. It’s the best alternative to using your oven for 3 hours and it requires a lot less babysitting!

Once your veggies have roasted for at least 6 hours and have become incredibly tender and flavorful, you can begin the final preparations for the soup.

Put a large stock pot or Dutch oven on the stove over medium high heat. Add the 3 tablespoons of butter and allow it to melt before adding the vegetables from the slow cooker. Move a majority of the broth with the veggies – but reserve some of the broth for the final stages of the soup.

Use a potato masher to break down the larger chucks in the pot before switching to an emersion blender to mix everything together. If the soup is too thick, add some of the reserved chicken broth. If you’d like a creamier soup, you can add splashes of half and half or whole milk to the soup – but be sure to do so in small quantities and taste test the soup before adding more – the flavor profile can become too rich if you add too much cream.

Once everything is blended smooth and the large lumps have been removed, give the soup another taste test. Add a pinch of dried parsley, celery seed, cumin or garlic salt (or any combination of those 4) to change the flavor profile to your liking. Cumin and parsley compliment root vegetables well, so if you’re unsure of which seasonings to add, opt for those first.

Once you’ve hit the flavor you want, all that’s left is to serve and enjoy!


The Results:


A recipe like this is ideal for days like we had today in the greater Des Moines metro. It was a cold and rainy day that invoked thoughts of October and changing leaves. This warm and savory soup hit exact spot we were looking for. Full of rich earthy flavors, this soup is destined to warm up any cool fall afternoon. The best part is the overall recipe clocks in at about 250 to 300 calories per serving!

That’s all we have for you this week. As always, we’ll be back next week with more brand new recipes to share. Until then,


~Cheers

Wednesday, September 12, 2012

A Maggie Family Classic

Good evening everyone!  As Tyler mentioned last week, in the central Iowa metro, we are finally starting to settle into the autumn season.  Fall is probably my favorite season: seasonal warm beverages, big fleecy sweaters, favorite comfort food that's only acceptable during this time of the year; yeah, I love Fall.  Comfort food is definitely on top of my list and tonight's recipe is my epitome of comfort food.  I've made this recipe before, but I have since received the "official" recipe and with the proper tools, I will create this delicious treat.

The Recipe:  Pannekoeken (Dutch Pancakes)

What You'll Need:
2 Eggs
2 Cups Flour
1 Teaspoon Baking Powder
1 Teaspoon Sugar
3 Cups Milk (we used plain soy milk)

To start, whisk all the ingredients in a medium mixing bowl.  You can whisk the eggs together before mixing in with the other ingredients, just so everything can get incorporated.

What this batter will form will be incredible (a slight over exaggeration, maybe...)
Meanwhile, heat a nonstick skillet over medium high heat.  The important ingredient in this whole dish is actually a utensil: the nonstick skillet.  Last time I attempted this recipe, we had only stainless steel pans and did I pay for making that mistake.   Not only is the skillet important, but melting a 1/2 tablespoon of butter in the skillet beforehand will help form the pancakes.

Once the skillet is warmed and the butter is melted, add 1/2 cup of the batter to the skillet.  Swirl the batter until it reaches the edges of skillet.  This will help make a thin pannekoeken, which is the way it is served traditionally.  Cook the batter between three to six minutes, until bubbles begin to form on top of the pancake and the batter looks "cooked".  Using a spatula (or a nonstick fish spatula,) flip the pancake over and continue to cook between two to four minutes.  The second side doesn't take nearly as long as the first side, so make sure to keep an eye on them.  About every two pancakes or so, add another 1/2 tablespoon of butter, to help the pancakes from keeping them from sticking to the skillet.


When the pancakes are done, keep them warm between two plates until serving.  Serve with butter, powdered sugar, and syrup and enjoy!

The End Result:


Unlike my previous attempt, these pancakes kept their shape and thin-like consistency.  My attempt tonight created the pannekoeken were just like the ones I had when I was a child, and I couldn't be more happier.  It's always great when you grew up with a certain dish and you are able to recreate it.  The pannekoeken was light, fluffy, and incredibly delicious.  I mentioned serving these with butter, powdered sugar, and syrup, but you can have sliced strawberries, bananas, cinnamon/apples, blueberries, whipped cream, regular granulated sugar, Nutella - the possibilities are endless!  These pancakes are a little slice of heaven and the ultimate form of a fall, comfort food for me.

Join us tomorrow as Tyler concocts a brand new, original recipe.  Until then,

~Cheers!

Saturday, September 8, 2012

Saturday Bonus: The Best Cornbread Muffins You'll Ever Have

Happy Saturday everyone!  Every fall, the collegiate football season has produced a rivalry between two of the larger universities in our state:  Iowa State University and University of Iowa.  Today, these two teams will battle it out on the football field.  But, before the big game starts, why not make a delicious cornbread muffin that will soothe any bitterness between the two teams.  These muffins are great for a tailgate party or spending an evening in.

The Recipe:  Famous Dave's Copycat Cornbread Muffins
Original Recipe Found In:  Various Sources

What You'll Need:
1 3/4 Cup Cornmeal
1 1/2 Cup All-Purpose Flour
2 Teaspoons Baking Powder
3/4 Teaspoon Salt
1/4 Teaspoon Baking Soda
2 Eggs
2/4 Cup Granulated Sugar
1/4 Cup Shortening
1/2 Teaspoon Vanilla Extract
3/4 Cup Whole Milk
1/4 Cup Buttermilk
1/3 Cup Vegetable Oil
4 Tablespoons Honey

To start, preheat the oven to 400 degrees.  If your cornmeal isn't finely ground, almost to a flour-like consistency, grind it in a food processor for five minutes.  This will help the dry ingredients keep the same consistency when mixing.  Pour the cornmeal, flour, baking powder, salt, and baking soda into a large mixing bowl and mix until all the ingredients are incorporated.

In another mixing bowl, combine the eggs, sugar, shortening, and vanilla.  Using an electric mixer, cream these ingredients together until they are well combined.  Next, pour the wet ingredients into the large bowl with the dry ingredients.  Stir together until smooth.  

Line two 12-cup muffin tins with paper muffin cups.  We used silicon muffin cups and they pop out the muffins much more easier than paper muffins cups.  Fill each muffin cup until it's 3/4 full with batter.  Place the muffin tins in the oven and bake for 18-20 minutes or until a toothpick inserted comes out clean.  Serve with butter and honey and enjoy!


The End Result:


I have been to Famous Dave's Restaurant several times and I always love to have their muffins.  Now, I won't need to go to their restaurant, because these muffins are way better.  The muffins have a little bit of moistness still left in them, even after baking in the oven for 20 minutes.  The sweetness isn't too much, but there is enough there to make it incredibly delicious.  Pairing the muffins with butter and honey is one of the ways we enjoys cornbread muffins, but you can decide what to pair with them.  We love these muffins so much, that I made them twice in a month.  Even if you aren't a cornbread muffin fan, we would definitely recommend that you try these, you won't regret it.

Thanks for joining us this week on Out of the Culinary.  Check back next week as we share with you our culinary expeditions.  Until then,

~Cheers!

Thursday, September 6, 2012

Light Mexican Style Chili

Good evening everyone! With the calendar officially reading September, the ‘fall season’ is now upon us. That means cool mornings, changing leaves, brisk nights and warm delicious dishes on the supper table. Of course, you could have fooled us that fall was here yesterday – it reached a balmy 90 degrees in the greater Des Moines metro! Minor heat wave aside, with the season slowly turning to fall, we too will slowly turn to fall recipes.


We’ve cooked up a few versions of white chili on the blog before (chicken, broth based, white beans) with a set of nice results. Tonight I’m expanding on that white chili concept and applying it to a more traditional chili base. Now, neither Maggie nor I are big fans of tomato based sauces, so we’re tweaking the recipe to suit our needs, but the main premise remains the same. Traditional chili, with a nice, low calorie, twist.

The Recipe: Light Mexican Chili

What You’ll Need:
(Serves 8)

2 Large Boneless Skinless Chicken Breasts
1 28 Ounce Can Diced Tomatoes (Drained)
1 14.5 Ounce Can Kidney Beans (Rinsed)
1 14.5 Ounce Can Black Beans (Rinsed)
1 14.5 Ounce Can Corn (Or fresh sweet corn, cut off the cob – preferred)
1 Tablespoon Chili Powder
1 Packet Taco Seasoning
2 Cups Low Sodium Chicken Broth

Be sure to take the time to rinse and drain the canned beans. The beans (even the organic ones) are canned in a salty “gunk” that adds an extra 20% of sodium to the beans. Rinsing them not only cleans off the gunk from the can, but washes away most of that excess sodium.

In addition, be sure to drain your canned tomatoes. The soupy juice in canned diced tomatoes is also sodium laden and carries an…interesting flavor (battery acid) – you’re better off creating your own broth base and omitting the canned juices.

Begin by adding the black beans, kidney beans, corn, tomatoes, taco seasoning and chili powder to a large (4 quart) slow cooker. Give everything a good stir to make sure all of the ingredients are evenly incorporated. Next, nestle the chicken in underneath and amongst the bean mixture.

Finally, add the chicken broth to the slow cooker. You’ll want to add enough so that all of the ingredients are covered by a small layer of liquid. This is typically 2 cups but could vary based on the size of your slow cooker and other minor variables.

The original recipe called for a tomato sauce base – but as I mentioned in the open, Maggie and I are not big tomato sauce fans. In its place, we’re using a low sodium chicken broth. This broth will pick up the bean and tomato flavors while keeping the base of the chili relatively light. Since we’re using a smaller quantity of liquid, we’re not going to get a soupy “broth base” that you see in some white chili dishes. The liquid should mostly absorb during cooking and allow the chili to thicken up.

Once everything has been added to your slow cooker, set it to low and allow it to cook for 8 to 10 hours.

After 8 to 10 hours, locate the chicken breasts in the chili and move them to a small bowl. Using metal tongs or two forks, shred the chicken into smaller pieces. Add the shredded chicken back to the chili and stir well. You can add a splash of chicken broth or water if you want to thin out the chili slightly. Serve and enjoy!

The Results:


Imagine if the consistency of chili were to blend with the flavors of white chili and then they all took a trip to Mexico and picked up some “Mexican flavor”. That’s the end result of this dish. It’s a lighter, chicken based chili that packs all the flavors of its meat and tomato based counterpart. At only 200 calories per serving this light chili won’t knock you off your diet either!

That’s all we have for you this evening. Maggie will be back this weekend to share her corn muffin recipe that was promised last week. No, we didn’t forget – we simply ran out of time last week to post the recipe. Be sure to follow us on Twitter or like us on Facebook to get first notice of new recipes – including the corn muffin recipe coming up this weekend. Until then,


~Cheers

Wednesday, September 5, 2012

Simplified Chicken Florentine

Good evening everyone!  We hope all of you got to enjoy some part of the last blast of summer, also known as Labor Day.  We took an extra day, in addition to our three day weekend, to celebrate our two year anniversary.  It only seems like yesterday that we got married, but my, how time flies!

These last two years also is an anniversary, of sorts, of our blog.  Granted we started it a couple of months before our wedding, it's been an activity that we've worked on and it's been an experience we've grown together on.  We're constantly coming up with ideas and find new sources to share with all of you.  So we'd like to say thank you, for sharing in our journey and we hope you continue to be with us as we grow and evolve as cooks.

Speaking of new ideas, we're trying a new one this week.  The concept isn't new, but we're trying it to see how it works.  The concept of using one main ingredient for both of our recipes has been used when trying to have a structured meal plan for families.  It can also be used for couples, like us, who want to try to meal plan, without spending a lot of money for groceries.  Tonight, I'll highlight the main ingredient in a fresh and flavorful way.

The Recipe:  Grilled Chicken Florentine Pasta
Original Recipe Found In:  Cooking Light, September 2012

What You'll Need:

2 (6 Ounce) bone-in Chicken Breasts, skinned
8 Ounces uncooked Linguine (we opted for a whole-wheat linguine)
2 Tablespoons Canola Oil
3 Tablespoons all-purpose Flour
1 Teaspoon chopped fresh Garlic
1 Cup Whole Milk
1 Cup fat-free, lower sodium Chicken Broth
3 Ounces Parmesan Cheese, grated (about 3/4 cup)
4 Cups fresh Spinach leaves

To start, heat a grill pan to medium high heat and coat it with cooking spray.  Sprinkle the chicken with salt and pepper on both sides and place the chicken on the pan to start to cook.  Cook the chicken for eight minutes on each side, or until a meat thermometer reads 165 degrees.  Place the chicken in a foil tented plate and let it rest for ten minutes.  This will help keep the juices in the chicken and add an increased flavor in the finished dish.

While the chicken is cooking, being a pot of water to boil.  Once the water is boiling, salt the water and add the linguine.  Cook until package directions indicate al dente and drain the water.  Return the pasta to the pot and cover with a lid to keep warm.

When the chicken is resting, you can begin to cook the sauce.  In a large nonstick skillet, over medium high heat, add the oil to the pan and swirl to coat.  Add the flour and garlic and cook until the garlic is browned, about two minutes, stirring this combination constantly.  Add the milk and broth, stirring with a whisk.  Bring this combination to a simmer and cook for two minutes or until thickened.  Next, add the cheese, stirring until all the cheese is melted.  Sprinkle 1/2 teaspoon of salt, 1/2 teaspoon of pepper, and the spinach.  Stir until the spinach has wilted.  Finally, add the chicken and the pasta and toss to combine.  Serve and enjoy!

The End Result:


In the years we've been doing this blog, I have never combined a grilled meat with a pasta variant.  I had to say that it is quite a delicious combination.  Letting the chicken rest gave the whole dish a savory result, which really enhanced the flavor and added a new depth.  The homemade sauce was much better than any pre-made sauce that came from a can or a jar.  Since the original recipe called for wilted spinach, I was afraid that the flavor would leave a giant gap.  But, in fact, I couldn't imagine this dish with the spinach in it.  In place of the spinach, I would definitely recommend an herb, like parsley or basil.  Overall, a fantastic quick fix for any night of the week.

Join us tomorrow as Tyler completes our one main ingredient week with a whole new flavor from our favorite style  Until then,

~Cheers!