Thursday, December 20, 2012

Guilt Free "Mac" & Cheese

Good evening everyone! Greetings from the great white north! As all of our readers from  Iowa are aware, we received one heck of a snow storm last night, dumping between 9 to 13 inches of snow across the state. Our little portion of the Des Moines metro ended up with around 10 to 11 inches and we're currently "enjoying" 30-40 MPH winds. After a long winter of no snow, Mother Nature has seen it fit to bestow us with an entire season's worth in one evening.

It's days like these that it's nice to turn to the kitchen to cook up some warm and filling "comfort food". Of course, you want to make sure you're eating relatively healthy as well. Tonight's dish manages to find some common ground between eating well and filling up on a tasty dish.

The Recipe: Beefy Mac and Cheese
Original Recipe Found In: Food Network Magazine: October 2012 Issue

What You'll Need:
(Serves 4)

8 Ounces Pasta or Shells (We used Penne)
3 Tablespoons Unsalted Butter
1 Small Onion (Chopped)
1 Tablespoon Tomato Paste
1 Tablespoon Chili Powder
8 Ounces Ground Beef (Either low fat content or drained of fat)
2 Tablespoons All Purpose Flour
1 Cup Low Fat Milk (1%)
2 1/2 Cups Shredded Mexican Cheese
2 Tablespoons Panko Breadcrumbs
2 Scallions, Sliced Thin

Begin by brining a large pot of lightly salted water to a boil. Cook your pasta according to package instructions, drain and reserve 3/4 cup of the cooking water for later use.

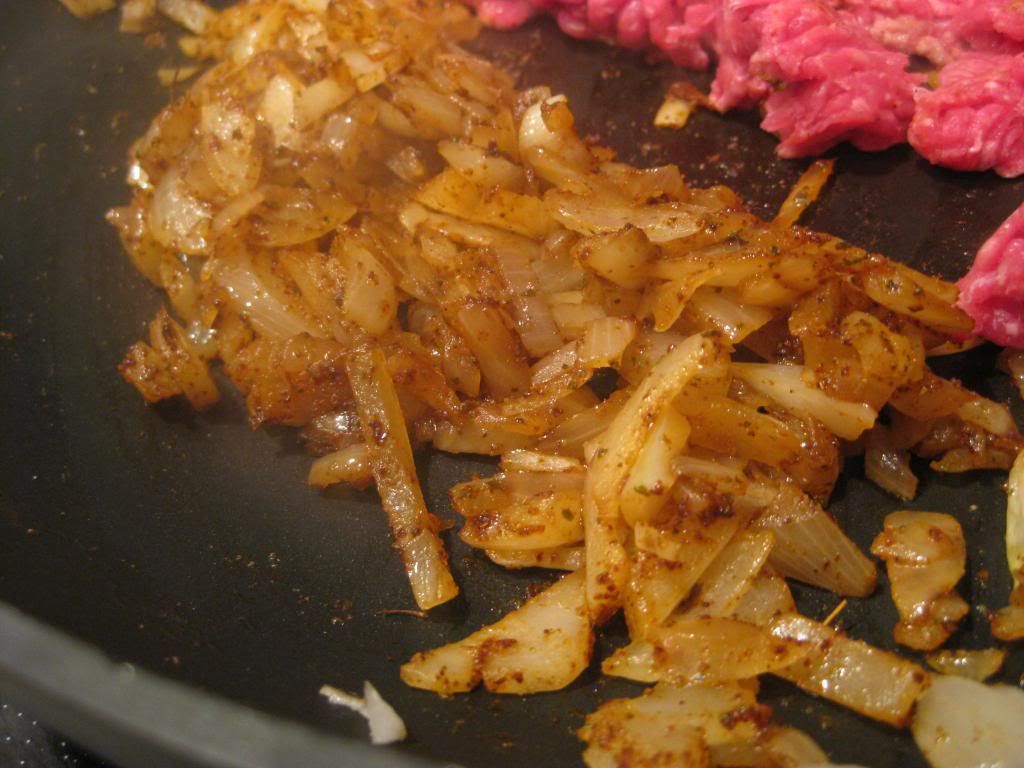
While your pasta is cooking, melt 1 tablespoon butter in a large nonstick skillet oven medium heat. Add the onion and cook until it softens, about 5 minutes. Next, add the tomato paste and chili powder. Stir to combine the ingredients and cook until the mixture turns an earthy red color (this takes about 2 minutes of simmering). Finally, add the beef and cook until it browns (stirring occasionally) this takes about 4 minutes. Season this mixture with a dash of salt and then spread it in a 3 quart (broiler safe) baking dish.  Preheat your broiler at this time as well.


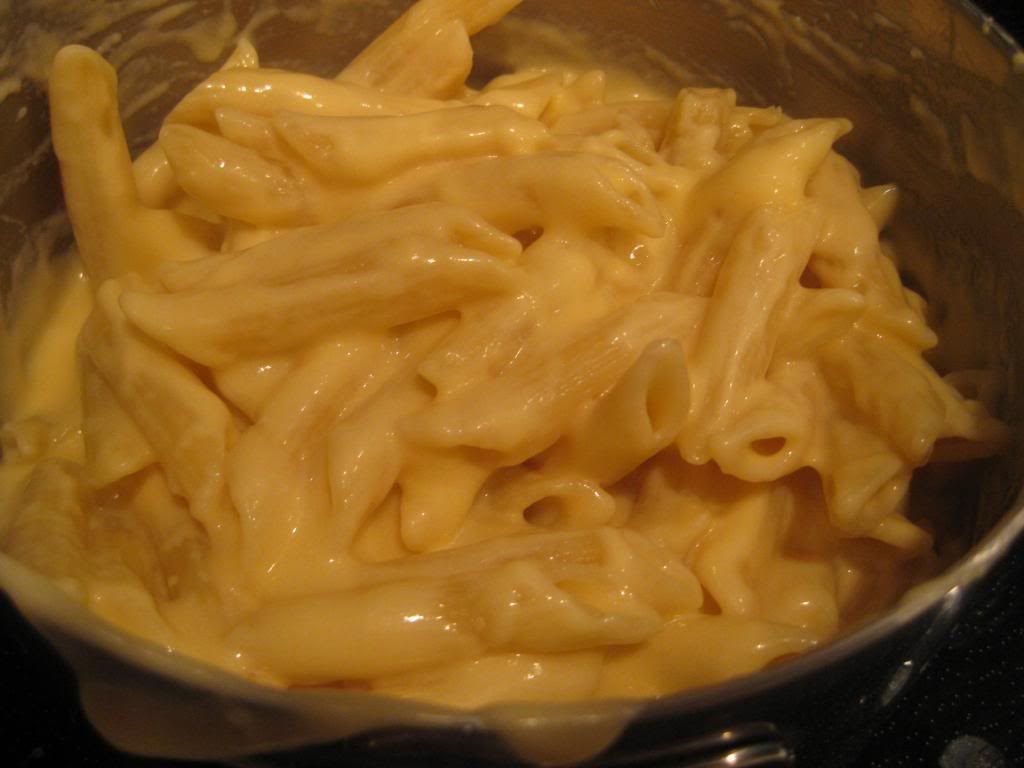
Next, melt the remaining 2 tablespoons of butter in a medium pot over medium heat. Add in the flour and allow cook (stirring constantly) for 1 minute or until the mixture thickens. Next, add the milk and reserved cooking water and allow this mixture to come to a simmer. Continue whisking the mixture until it becomes thick - this takes about 2 minutes. Finally, add 2 cups of the cheese and the pasta to the pot and stir to incorporate everything evenly. Continues stirring until the cheese is fully melted. Add this pasta mixture over top of the beef mixture in your baking dish.


Mix the remaning 1/2 cup of cheese with the breadcrumbs and sprinkle over the pasta. Place the dish into the oven (under the broiler) and cook until golden brown on top. Top the dish with the sliced scallions and serve!

The Results:


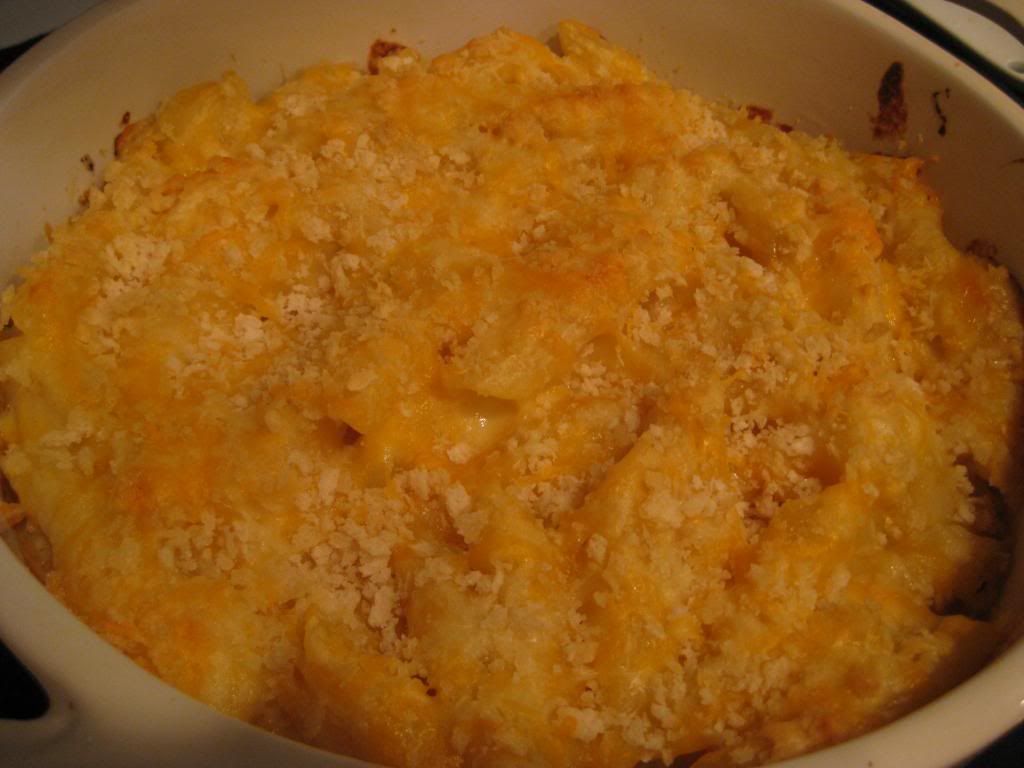
Mac and cheese (or in this instance, penne and cheese) with beef - there are few recipes that can compete with this flavor combination when it comes to pure, unbridled "comfort food". Rich, creamy pasta combines with a lightly seasoned beef to create a warm filling dish sure to hit the spot on any winter's night. The best part is that by using low fat milk in place of a heavy cream and a lower fat cheese you cut out a lot of the empty calories that normally turn this dish into a "guilty pleasure". With a relatively modest 600 calories per serving, you can enjoy your comfort food without any of the guilt.

That's all we have for you this week. We're obviously not going to be cooking next week with the Christmas holiday. Here's hoping you and yours have a happy holiday season. We'll be back in the first week of 2013. Until then,

~Cheers


Tuesday, December 18, 2012

Fantastic Flavored Fish

Good evening everyone!  As many readers of our blog know, I don't step out of my cooking comfort zone that often.  I cook ingredients and techniques that are familiar to me.  Every once in a while, I step out and try something different, often with varied results.  I do have a yearning to try new flavors and cooking methods, but with those varied results, I am often leered away to do so.  So tonight, I'm trying a new cooking technique with also fresh ingredients that I would not pair together, and I am definitely excited for these results.

The Recipe:  Oven-Roasted Flounder with Bok Choy, Cilantro, and Lime
Original Recipe Found In:  Bon Appetite Magazine, December 2012

What You'll Need:
1 Scallion, thinly sliced
1/4 Cup coarsely chopped Cilantro
1/4 Cup fresh Lime Juice
3 Tablespoons reduced-sodium Soy Sauce
2 Tablespoons unseasoned Rice Vinegar
2 Teaspoons finely minced peeled Ginger
3 1/2 Tablespoons Vegetable Oil, divided
1 Pound Baby Bok Choy, cut in half lengthwise*
1/2 Cup Sake or dry White Wine
4 (4 Ounce) fillets Flounder or other delicate white fish

*For those of you who are unfamiliar to bok choy, it can be described as a Chinese cabbage, but it has the consistency of lettuce.  It has a little bit of a darker green color than regular lettuce, but the flavor is more powerful.  It normally goes in stir fry dishes or soups, but tonight, it will be paired with flounder.

Baby Bok Choy...they're so cute when they're little!

To start, arrange a rack in the upper third of an oven and preheat to 400 degrees.  In a small bowl, combine the scallion, cilantro, lime juice, soy sauce, vinegar, and ginger.  Whisk in 1 1/2 tablespoons of oil and season with salt and pepper.  Set this sauce aside.

Next, heat the remaining two tablespoons of oil in a large skillet over high heat until the oil is shimmering.  Add the bok choy, cut side down, and sear until golden brown, about two to four minutes.  Turn the bok choy cut side up and remove the pan from the heat.  Add the sake (or dry white wine.)  Season the flounder with salt and pepper and arrange the fish in a single layer over the bok choy.  Roast the fish in the oven until they are just cooked through, about eight to ten minutes.


After the fish are cooked, remove the skillet from the oven and spoon the sake sauce from the skillet into the bottom of four shallow bowl, dividing evenly.  Add the bok choy to each bowl, also dividing evenly, and top each bowl with a fish fillet.  Spoon some of the cilantro-lime sauce over the fish.  Serve with a side of steamed brown or white rice and enjoy!

The End Result:


I'm usually not one for Asian cuisine, granted I love a lot of Chinese food, but this dish is a great introduction into the Asian flavor realm.  The cilantro-lime sauce mixes in quite a few of these flavors and gives you a super sauce of power, but the fact that it is served over the usually bland flounder fish, makes it delicious.  The bok choy that was seared tastes amazing in accompaniment to this dish.  Bok choy, I believe, is an unsung hero in the vegetable world, because it's rarely used in American cuisine.  But once you step out of the 50 states, it's used quite a bit and is a delicious addition.  The fish was cooked perfectly and becomes nice and flakey.  Overall, a great dish, bursting with flavor and a wonderful addition to our recipe collection.

Join us on Thursday as Tyler takes a fresh new idea for an American classic.  Until then,

~Cheers!

Wednesday, December 12, 2012

Fish and Chips Redux

Good evening everyone! One of my all time favorite dishes to order whenever Maggie and I decide to dine out is fish and chips. There's something so simple and yet so satisfying about breaded and fried white fish with crispy fries or chips. Of course, this menu item is never very good for you and is typically fried in fatty grease and oil that any health conscious at home chef wouldn't dream of using. We've managed to find a few healthy fish and chip recipes across the years, but we're always on the look out for new and innovative ways to make the popular dish. When I stumbled across tonight's recipe and its interesting breading style, I knew I had to give it a shot.

The Recipe: Oven Fried Fish and Chips
Original Recipe Found On: Eatingwell.com

What You'll Need:

1 1/2 Pounds Russet Potatoes, Scrubbed & Cut Into 1/4 Wedges
4 Teaspoons Olive Oil
1 1/2 Teaspoons Cajun Seasoning
2 Cups Cornflakes
1/4 Cup All Purpose Flour
1/4 Teaspoon Salt
2 Large Egg Whites (Beaten)
1 Pound Cod, Haddock or other white fish (tilapia, perch) cut into 4 pieces

Begin by adjusting your oven racks so that one sits in the top third of the oven and the other sits and the bottom third. Preheat your oven to 425 degrees and prep two baking sheets. Spray one with cooking spray, and place a wire baking rack on the other, coat the rack in cooking spray as well.

Begin by tossing your potatoes (already scrubbed and cut) in a colander under cold water until they are completely clean. Pat the potatoes dry with a paper towel to remove most of the water. Next, add the potatoes to a large bowl and toss them with olive oil and 3/4 teaspoon of the cajun seasoning. Toss until the wedges are evenly covered. Spread the wedges onto the baking sheet (sans wire rack) and place them in the oven (on the lower rack). Bake until they're tender, making sure to turn the wedges every 10 minutes or so, for about 30 to 35 minutes.


Next, coarsely grind the corn flakes in a food processor, blender or simply smash them in a plastic bag (last one is the easiest - and less clean up too) Transfer the crushed flakes into a shallow dish. Add the flour into another shallow dish and finally, place the beaten egg whites in a shallow bowl. Add the remaining cajun seasoning and salt to the flour mixture and toss to evenly incorporate.

Now, if you're a fan / long time reader, you know how this next part goes - arrange your dishes, assembly line style, on the counter. First, place the dish with the flour mixture, followed by the egg white, followed by the corn flakes. Leave your baking sheet with the wire rack at the end of the assembly line so that you have an easy place to drop off your finished fish.

Begin the breading process by patting the fish fillets dry with a paper towel. Next, dredge both sides of the fillets through the flour, allowing any excess to shake off. Carefully dunk the fillets into the egg white mixture before pressing them into the corn flake breading. Make sure that the breading is evenly distributed into the fish, and that all cracks and crevices are filled. Place the breaded fillet on the wire rack and repeat until all fillets are breaded.


Place the second baking sheet on the upper rack in the oven and bake for 20 minutes until the breading is golden brown and the fish is opaque. Serve with the 'chips' and enjoy!


The Results:


The main draw for this dish was the new breading - corn flakes. I'm pleased to say they worked very nicely, in fact, they're hard to discern from panko bread crumbs after they've been crushed. They add an interesting new "crunch" to the final breading as well. The cajun seasoning was a nice touch to this recipe and one that is needed. Without the seasoning, the flavors could all run together and be rather bland, but just a little dash of this seasoning adds a great deal of depth and complexity to the final dish. When you factor these great flavors in with the fact that very little oil is used at all in the cooking process, you simply cannot go wrong with this dish!

That's all we have for you this evening. Be sure to stop in tomorrow night as we give a special "behind the scenes" look at our new kitchen / cooking layout. Until then,

~Cheers

Tuesday, December 11, 2012

Soup and Stew Season Starts Now

Good evening everyone!  It's starting to somewhat feel like winter here in the Des Moines metro.  While it snowed for a little while on Sunday, the cold temperatures have made it definitely feel like it's December.  And while November brought the soup recipes back to the blog, it's December that will bring the stews and hardier soups we crave during these cold winter months.  While we have several attempts at Chicken Pot Pie, tonight, I'll attempt a soup version of this classic dish, with a interesting twist.

The Recipe:  Chicken Potpie Soup
Original Recipe Found In:  Food Network magazine, December 2012

What You'll Need:
1 disk refrigerated Pie Dough
1/2 Teaspoon plus a pinch of Poultry Seasoning
2 Tablespoons unsalted Butter
1 Pound skinless, boneless Chicken breasts, cut into 1/2 inch pieces
2 Stalks Celery, chopped
1 medium Onion chopped
1/4 Cup all-purpose Flour
3 Cups low-sodium Chicken Broth
1 Cup Half-and-Half
3 medium Yukon gold Potatoes, chopped
1 10 ounce package frozen Mixed Peas and Carrots*

*Note:  We are omitting the mixed peas and carrots and using a premade mirepoix mixture.  This is a handy mixture to get, especially if you don't like to waste time chopping vegetables.

To start, preheat the oven to 425 degrees.  On a large baking sheet, unroll the pie dough and sprinkle with pepper and a pinch of the poultry seasoning.  Cut the disk into four quarters and bake until the dough is cooked through and is puffed and golden, about ten minutes.  If you are concerned about finding poultry seasoning, it's actually not that hard to find.  It's located right with the other seasonings and spices in your local grocery store.

Pie crust, sans pie

While the pie dough cooks, melt the butter in a large pot over medium high heat.  Once the butter is melted, add the chicken and 1/2 teaspoon of salt and cook.  Don't be tempted to move the chicken, because it will need to cook undisturbed for two minutes.  Then cook the chicken, stirring for about one minute.  Transfer to a bowl and keep warm.

Next, in the same pot, add the celery, onion, flour, 1/2 teaspoon of salt, and 1/2 teaspoon of poultry seasoning and cook for one minute, stirring.  Stir in two cups of water, the chicken broth, half and half, and potatoes.  Cover this mixture and bring to a simmer.  Reduce the heat to medium.  Keep the pot partially covered and simmer for 10 minutes.  Add the peas and carrots and continue to simmer until the vegetables are tender, about six minutes. 

Getting all those flavors ready for our tastebuds!

Return the chicken to the pot and cook until everything is cooked through, about one minute.  Divide amongst bowl, top with the crust, serve, and enjoy!

The End Result:


While the premise behind this dish was promising, it ended up somewhat similar to a recipe I made two years ago.  The base of the soup should have been thickened, but resulted in a runny, flavorless mixture.  Also, my potatoes were somewhat undercooked, and that also threw off the flavor of the dish.  But something miraculous happened when the soup amount in my bowl got lower.  Not only did the base get thicker, the potatoes were cooked and the flavor of the soup was actually there; if only the entire bowl of soup had that flavor.  I think I underestimated the "simmer" portion of the recipe.  That's where the true heart of any soup is - if you let the flavors meld during the simmer process, it will go a long way for a truly, hearty dish.

Thanks for joining us this evening.  Check back tomorrow as Tyler delves into a brand new recipe.  Until then,

~Cheers!

Thursday, December 6, 2012

Adventures In Steak

Good evening everyone!  It's been an exciting (and kinda crazy) past couple of weeks: from packing all our belongings to moving said belongings to unpacking and arranging everything where we want to, it's been such a great experience.  And to top it off, we own a house, I believe this to be the best part.  I'm sure we'll give you a tour of our kitchen, which is one of the highlights of our new place.  We upgraded about 30, almost 40, years and there is so much space!  But enough raving, let's get to cooking!

Tonight, I'm taking on a variation of the classic meat and starch recipe.  I'm introducing a new dish to the blog.  I've heard wonderful things about this dish and I am eager to try it.

The Recipe: Skirt Steak with Gorgonzola Polenta
Original Recipe Found In:  Cooking Light, December 2012

What You'll Need:
2 Cups plus 1 Tablespoon fat-free, lower sodium Chicken Broth, divided
1 Cup 2% Reduced-Fat Milk
2/3 Cup quick-cooking Polenta
1 Ounce Gorgonzola cheese, crumbled (about 1/4 cup)
1/2 Teaspoon kosher Salt, divided
1/2 Teaspoon freshly ground black Pepper, divided
1 Pound Skirt Steak, trimmed and cut into four pieces
1 Teaspoon unsalted Butter
1 Tablespoon finely chopped Shallots
1/2 Cup dry Red Wine
1 Teaspoon chopped fresh Thyme
1 1/2 Teaspoons Honey
1/4 Teaspoon Cornstarch

To start, combine 2 cups chicken broth and the milk in a medium saucepan over medium heat and bring to a boil.  Add the polenta and gradually whisk in, stirring constantly.  Reduce the heat to medium-low and cook for four minutes, stirring frequently.  After the polenta looks fluffy, remove from the heat.  Stir in the cheese, 1/4 teaspoon salt, and 1/4 teaspoon pepper.  Cover the saucepan and let stand for five minutes.

Next, heat a large skillet over medium-high heat and coat with cooking spray.  Sprinkle the steak with the remaining salt and pepper.  Once the skillet is heated, add the steak to the pan and cook for three minutes on each side, or until desired degree of doneness.  For us, that degree of doneness is somewhere between well done and medium done, so cooking it six minutes is the sweet spot.  Once the steak is cooked, transfer it to a cutting board and cover loosely with foil.

Cooking the steak to perfection

Once the steak is cooked and covered, melt the butter in the skillet over medium-high heat.  Add the shallots and sauté for one minute.  Add the wine, thyme, and honey and bring this mixture to a boil.  Cook until reduced by half, between two to three minutes.  In a small mixing bowl, combine the remaining chicken broth and the cornstarch and whisk to combine.  Add the cornstarch mixture to the skillet and cook for one minute or until the sauce thickens slightly.

Cut the steak diagonally across the grain into thin slices.  Spoon the sauce on each plate, along with a half of cup of polenta and three ounces of steak.  Serve and enjoy!

The End Result:


The steak was cooked to near perfection.  While I like my steak well done, and Tyler likes his medium done, I met in the middle with an in between of our two.  It was still a smidge pink, but it was mostly cooked all the way through.  It was also juicy and had the just the right about of flavor.  It's amazing that the steak had just salt and pepper on it and didn't need any of those other seasonings or extra ingredients.

Unfortunately, I believe the steak was the best part of tonights recipe.  The polenta is supposed to be thick, but it turned out to be a soupy mess.  It was probably lack of experience cooking with polenta is what really threw me off.  I was very excited to cook with a new ingredient to have it in our stock, but the fact it fell flat got me really disappointed.  Also, the red wine sauce could have been reduced a little bit longer and become thicker.  It had an great, pungent flavor that tasted incredible with the steak.  But if I had cooked it for just a couple of minutes longer, it would have been the perfect sauce.  Overall, a great recipe with good intentions, but a bit more attention to detail would have really perfected this ensemble.

Join us next week as we round up a new batch of recipes and share them with you.  Plus, we get to give you a tour of our new kitchen - you won't want to miss this!  Until then,

~Cheers!

Wednesday, December 5, 2012

We're Back!

Good evening everyone! Yes, we're finally back. After shutting things down a few weeks ago so we could pack, move and unpack - I'm happy to report that Maggie and I are finally moved into and up and running in our new home. To kick off cooking once again, I wanted to try a recipe that had been sitting around for awhile. It's one that I've been itching to try, but with all of the things surrounding getting a mortgage and buying a home, plus moving - I simply never had to time to work it in. Tonight, I have the time, so let's get cooking!

The Recipe: Bacon Hasselback Potatoes
Original Recipe Found In: Food Network Magazine, Novemeber 2012 Issue

What You'll Need:
(Serves 6-12)

4 Slices Thick Cut Bacon, Each Cut Crosswise Into 9 Pieces
12 Medium Yukon Gold Potatoes (Peeled)
1 Stick Unsalted Butter
2 Scallions (Finely Chopped)
2 Tablespoons Fresh Parsley (Chopped)
1 Clove Garlic (Chopped)

Begin by laying your bacon pieces onto a baking sheet and placing the baking sheet in your freezer for 30 minutes, or until the bacon pieces become hard. Because of the low and slow cooking method we're using to cook the potatoes, the bacon will be exposed to the oven's heat for nearly 2 hours. By freezing the bacon first, you insure that the bacon will be perfectly cooked at the end.

Begin by preheating your oven to 350 degrees and brining a large pot of water to a boil.

While your water and oven are heating up, turn your attention to the potatoes. Using a chef's knife or paring knife, carefully make cuts crosswise across each potato, approximately 1/8 of an inch apart, leaving about 1/4 of space from the bottom uncut. Your potatoes should look similar to this:


Next, add the sliced potatoes into the boiling water and allow them to cook for about 4 minutes. Remove them carefully with a slotted spoon and transfer them to a baking sheet. Pat the potatoes dry with a paper towel.

Next, insert 3 slices of bacon evenly amongst the slots in each potato (see picture). Then melt 5 tablespoons of butter and brush said butter evenly over each of the potatoes. Reserve any excess butter for basting later on.


Place the baking potatoes (on the baking sheet) in the oven and allow them to cook for 2 hours, making sure to baste them halfway through with some additional melted butter.

As the potatoes are nearly completion, melt the remaining 3 tablespoons of butter in a small skillet and add the scallions, parsley and garlic. Spoon this mixture over the potatoes and allow them to roast for 5 more minutes before serving.

Top with a touch of salt and pepper (to taste) and enjoy!


The Results:


There are fewer things more certain in this world than the flavor combination of bacon and potatoes. What's even better is that this dish is highly adaptable. You like cheese? Add cheese? Want to cut some fat? Use turkey bacon. This dish can even serve as either a side dish to a bigger feast or a main course for easy weeknight (or lazy weekend) cuisine. No matter how you tweak it or make it your own, you owe it to yourself to give this dish a try!

That's all we have for you this evening. Maggie returns to the kitchen tomorrow night with a brand new dish of her own. Until then,

~Cheers