Good evening everyone! It's Monday once again (or Sunday evening - as that is when this is technically being posted!) - marking the start of another new week of cooking for your favorite amateur chefs (Okay, top five amateur chefs). This week, my work schedule begins to return to some form of normalcy - hooray! - This ultimately means that the blog will start to return to a normal cooking schedule. This week, we return to a three recipe week schedule. Maggie will be taking on two dishes this week, while I will be taking on one recipe and a product review.
The recipes we have on the docket this week are:
Classic buttermilk waffles - a simple and easily modified way to make the traditional breakfast staple
Thai Chicken Soup - Chicken noodle soup with an asian twist
Prosecution Provolone Panini - A normal grilled cheese sandwich that suddenly found the urge to travel to Italy
Maggie is taking on Tuesday and Wednesday, while I wrap the week up on Thursday. Two new 'twists on' dishes and a back to basics recipe that everyone should be able to modify and manipulate to their own desires.
As always we'll blog about our experiences and reactions along the way. It should be a lot of fun and it's guaranteed to be delicious. Be sure to stop back Tuesday evening to see which recipe Maggie is tackling first. Until then,
~Cheers

Sunday, October 31, 2010
Wednesday, October 27, 2010
Recipe Revisit: Potato Soup
Good evening everyone! I'm not so sure what's 'good' about it this time. It was another blustery, cold and rainy day here in Iowa. Cold, wet, windy such is our fall weather recipe. Tonight, the talk from the weather experts is that the temperature will fall to 30 degrees or below. YIKES. That is a little too cold for my liking - but the one advantage to this newly established cold pattern - it's officially soup season!
Not that I need an excuse to make a soup dish. (I tried my hand at a couple during the balmy summer months after all). As I said earlier this week, tonight's recipe is a revisit of sorts. I've attempted some variation of potato soup twice on the blog, each one different in multiple ways. Tonight, I'm revisiting each old recipe to create an entirely new recipe. I'm not cooking with a backdrop here, so there is the potential for a disaster...hold on to your hats folks...this is going to be fun!
The recipe: Loaded Baked Potato Soup
Recipe Revisit From: Rustic Potato Soup & Soothing And Savory Potato Soup
What You'll Need:
5 Medium Russet Potatoes
4 Slices Thick Cut Bacon
1 Large Onion (Chopped)
2 Cups Shredded Cheddar Cheese (Sharp Cheddar Preferred)
1/4 Cup All Purpose Flour
1 1/2 Cups Chicken Broth
1 3/4 Cups Water
2 Tablespoons Chives
1/4 Cup Dry White Wine
Begin by peeling and cubing your potatoes into 1/2 inch sections. The smaller the better here, as they will cook a little faster at a smaller size.
Next, chop 4 slices of bacon into smaller pieces (roughly 1/4 inch to 1/2 inch - keeping in mind that bacon shrinks during cooking.) I found that a good pair of kitchen shears works the best here. Rather than struggling to cut through the sometimes gristly bacon, the shears simply clipped right through.

In a large dutch oven or not stick cooking pot, place the bacon bits on medium heat and cook until they are golden brown. Once golden and crispy, use a slotted spoon to remove the bacon bits from the pot. Be sure to reserve as much of the grease and fat as you can. Place the bacon bits on a paper towel covered plate and set aside.

Next, add you chopped onion to the pot. The bacon grease acts as you butter or olive oil here - and it adds a great additional flavor - double bonus! Cook the onion until it becomes slightly golden brown.

Add the chicken broth, flour, water and potatoes. It works best to combine the flour and water beforehand - to ensure the mixture is completely combined - rather than trying to struggle with mixing everything in the pot. Stir everything together well and increase the heat to high. Allow the pot to simmer for about 10 minutes, or until the potatoes become tender. About half way through the simmering time - add the bacon bits back to the pot. I didn't want the bacon to become 'water logged' while cooking the potatoes, so by my reasoning, half way through the cooking process would allow the flavor to be present without sabotaging the crispiness of the bacon.
Once tender, add the wine and cook for another 3 to 5 minutes (to allow the alcohol to cook off.) Next, reduce the heat to low and slowly add portions of the shredded cheese (about a 1/2 cup at a time) making sure to stir well until the cheese is completely melted. Continue this process until the all 2 cups of the cheese has been added. Allow this cheesy mixture to simmer for another minute before adding the chives. Stir the chives in with the soup and top with a sprinkle of pepper to taste. All that's left is to serve and enjoy!

The Results:


For a homemade, "I-Hope-I'm-Doing-This-Right" recipe, it was very good! I am finally getting close to the flavoring that I've been trying to achieve for so long. The cheese, potato, bacon and chive combined to create a great - full and savory - baked potato flavor. Exactly what I was trying to do. Adding the water and flour created a thicker soup (which I discovered was needed after trying my second potato soup recipe.)
The only slight tweak I would make to this recipe now would be to reduce the ratio of water to chicken broth. I still would have liked more flavoring from the base of the soup and adding more broth and less water would achieve that for me I believe. In addition, for my next go-round with this recipe, I may through in on leek, on top of the onion. The leek's onion/garlic hybrid flavor could add an interesting element to this dish. Outside of that - I'm getting really close to creating the recipe I can taste in my head.
This is one of the greatest elements of cooking, experimenting and creating and discovering new things. Working, tweaking and updating a dish until it becomes the true end result you know it can be. I've tried my hand at three very different iterations of potato soup now and I finally feel like this third, original take is the closest I've been to that sweet, savory dream. I know (and you know) I will be returning to this recipe again and I think the 4th time will be the charm.
~Cheers
Not that I need an excuse to make a soup dish. (I tried my hand at a couple during the balmy summer months after all). As I said earlier this week, tonight's recipe is a revisit of sorts. I've attempted some variation of potato soup twice on the blog, each one different in multiple ways. Tonight, I'm revisiting each old recipe to create an entirely new recipe. I'm not cooking with a backdrop here, so there is the potential for a disaster...hold on to your hats folks...this is going to be fun!
The recipe: Loaded Baked Potato Soup
Recipe Revisit From: Rustic Potato Soup & Soothing And Savory Potato Soup
What You'll Need:
5 Medium Russet Potatoes
4 Slices Thick Cut Bacon
1 Large Onion (Chopped)
2 Cups Shredded Cheddar Cheese (Sharp Cheddar Preferred)
1/4 Cup All Purpose Flour
1 1/2 Cups Chicken Broth
1 3/4 Cups Water
2 Tablespoons Chives
1/4 Cup Dry White Wine
Begin by peeling and cubing your potatoes into 1/2 inch sections. The smaller the better here, as they will cook a little faster at a smaller size.
Next, chop 4 slices of bacon into smaller pieces (roughly 1/4 inch to 1/2 inch - keeping in mind that bacon shrinks during cooking.) I found that a good pair of kitchen shears works the best here. Rather than struggling to cut through the sometimes gristly bacon, the shears simply clipped right through.

In a large dutch oven or not stick cooking pot, place the bacon bits on medium heat and cook until they are golden brown. Once golden and crispy, use a slotted spoon to remove the bacon bits from the pot. Be sure to reserve as much of the grease and fat as you can. Place the bacon bits on a paper towel covered plate and set aside.

Next, add you chopped onion to the pot. The bacon grease acts as you butter or olive oil here - and it adds a great additional flavor - double bonus! Cook the onion until it becomes slightly golden brown.

Add the chicken broth, flour, water and potatoes. It works best to combine the flour and water beforehand - to ensure the mixture is completely combined - rather than trying to struggle with mixing everything in the pot. Stir everything together well and increase the heat to high. Allow the pot to simmer for about 10 minutes, or until the potatoes become tender. About half way through the simmering time - add the bacon bits back to the pot. I didn't want the bacon to become 'water logged' while cooking the potatoes, so by my reasoning, half way through the cooking process would allow the flavor to be present without sabotaging the crispiness of the bacon.
 |
| Soup recipes don't lend themselves to good photos - here's an 'artsy' shot of steam rising from the pot :) |
Once tender, add the wine and cook for another 3 to 5 minutes (to allow the alcohol to cook off.) Next, reduce the heat to low and slowly add portions of the shredded cheese (about a 1/2 cup at a time) making sure to stir well until the cheese is completely melted. Continue this process until the all 2 cups of the cheese has been added. Allow this cheesy mixture to simmer for another minute before adding the chives. Stir the chives in with the soup and top with a sprinkle of pepper to taste. All that's left is to serve and enjoy!

The Results:


For a homemade, "I-Hope-I'm-Doing-This-Right" recipe, it was very good! I am finally getting close to the flavoring that I've been trying to achieve for so long. The cheese, potato, bacon and chive combined to create a great - full and savory - baked potato flavor. Exactly what I was trying to do. Adding the water and flour created a thicker soup (which I discovered was needed after trying my second potato soup recipe.)
The only slight tweak I would make to this recipe now would be to reduce the ratio of water to chicken broth. I still would have liked more flavoring from the base of the soup and adding more broth and less water would achieve that for me I believe. In addition, for my next go-round with this recipe, I may through in on leek, on top of the onion. The leek's onion/garlic hybrid flavor could add an interesting element to this dish. Outside of that - I'm getting really close to creating the recipe I can taste in my head.
This is one of the greatest elements of cooking, experimenting and creating and discovering new things. Working, tweaking and updating a dish until it becomes the true end result you know it can be. I've tried my hand at three very different iterations of potato soup now and I finally feel like this third, original take is the closest I've been to that sweet, savory dream. I know (and you know) I will be returning to this recipe again and I think the 4th time will be the charm.
~Cheers
Tuesday, October 26, 2010
Recipe Revisit: Omelets With Fines Herbes
Good evening everyone! If you're are reading this from anywhere in the midwest, I hope you walked around with rocks in your pocket and made sure everything of value is otherwise secured to the lawn. It sure is blustery outside today! With wind gusts hitting 45 to 50 MPH and the temperature a much cooler 50 degrees for most of the day - fall has officially arrived...loudly and rudely.
Inside where it was safer and far less windy, Maggie took to the kitchen to remake a recipe she had tried previously. Her original attempt at 'Omelets With Fines Herbes' was a tasty dish that had room for some improvements. Tonight, armed with new herbs and a few other key ingredients, she took on the unique omelet dish again. I'll turn the keyboard over to Maggie so she can share how round two went down.
The Recipe: Omelets With Fines Herbes
Revisit From: Messin' With A Classic
What You'll Need:
6 Eggs
1/4 Cup Milk
1 1/2 Cups Shredded Cheddar Cheese
2 Slices Bacon, cut in half
1 1/2 Teaspoons Oregano
1 1/2 Teaspoons Thyme
1 1/2 Teaspoons Basil
1/2 Teaspoon Cilantro
Good evening everyone! When Tyler told me that we would be doing a redo of some previous recipes, I browsed through a many of recipes, trying to find one that we said that we'd change/redo. Then he quipped "Why not do the omelette with herbs one?" That's why I married him, folks...he's brilliant.
I started by cooking four slices of bacon - Tyler made a good choice by getting a super thick cut bacon, it was hardier and added a real punch to the omelette. As the bacon cooked, I shredded my cheese. I also mixed my herbs all together. The reason I chose these herbs is because they all had a super earthy undertone to them and they all blend together super nicely. I felt that the cilantro might have more of a kick, so I made that the herb to do less of.


After the bacon is cooked, patted down with a paper towel, and broken into smaller pieces, I was ready to construct my omelette mixture. In a large bowl, I added my six eggs, 1/4 cup milk, herbs, cheese, and bacon. Since the combination was a little thicker than my previous attempt, I really had to put some elbow grease into it and whisk together thoroughly.
Heat an omelette skillet, or a nonstick skillet, over medium heat. Pour half of the omelette mixture into the skillet, cooking until the mixture is set, less than 10 minutes. Slide the omelette out of the pan and fold over, keeping the omelette insides warm. Pour the second half of the mixture into the pan and repeat.

The End Result:


When I had a hunch that the earthy herbs would work well together, the hunch was right. The basil, oregano, thyme, and cilantro was a beautiful combination and worked excellently for the omelette. The cheese and the bacon really added some depth to the recipe. Those two ingredients were the saving grace of the new recipe because it produced more flavor. The addition of the milk was a last minute decision. I thought this morning "hm, I wonder what the recipe would be like if I added milk?" It made the omelette fluffier and not strictly just eggs and herbs. Redoing this recipe was definitely worth it and now, we have a recipe we can go to again and again.
Thanks Maggie! In the end, this 'second take' was certainly better than the first go round. The herbs were toned down and the cheese and bacon really added to the omelet's flavor. Adding milk to the recipe may have been Maggie's best move. The omelet was much fluffier and full than the previous incarnation of the dish. All around, a great second attempt at an already good dish.
That's all we have for you this evening. I'm in the kitchen tomorrow night taking on another potato soup recipe. This time, it's an original that I've fused from two previously attempted recipes. It should be interesting, so be sure to stop back tomorrow evening to see how everything went down. Until then,
~Cheers
Inside where it was safer and far less windy, Maggie took to the kitchen to remake a recipe she had tried previously. Her original attempt at 'Omelets With Fines Herbes' was a tasty dish that had room for some improvements. Tonight, armed with new herbs and a few other key ingredients, she took on the unique omelet dish again. I'll turn the keyboard over to Maggie so she can share how round two went down.
The Recipe: Omelets With Fines Herbes
Revisit From: Messin' With A Classic
What You'll Need:
6 Eggs
1/4 Cup Milk
1 1/2 Cups Shredded Cheddar Cheese
2 Slices Bacon, cut in half
1 1/2 Teaspoons Oregano
1 1/2 Teaspoons Thyme
1 1/2 Teaspoons Basil
1/2 Teaspoon Cilantro
 |
| It's a new cast of herbs this time around |
Good evening everyone! When Tyler told me that we would be doing a redo of some previous recipes, I browsed through a many of recipes, trying to find one that we said that we'd change/redo. Then he quipped "Why not do the omelette with herbs one?" That's why I married him, folks...he's brilliant.
I started by cooking four slices of bacon - Tyler made a good choice by getting a super thick cut bacon, it was hardier and added a real punch to the omelette. As the bacon cooked, I shredded my cheese. I also mixed my herbs all together. The reason I chose these herbs is because they all had a super earthy undertone to them and they all blend together super nicely. I felt that the cilantro might have more of a kick, so I made that the herb to do less of.


After the bacon is cooked, patted down with a paper towel, and broken into smaller pieces, I was ready to construct my omelette mixture. In a large bowl, I added my six eggs, 1/4 cup milk, herbs, cheese, and bacon. Since the combination was a little thicker than my previous attempt, I really had to put some elbow grease into it and whisk together thoroughly.
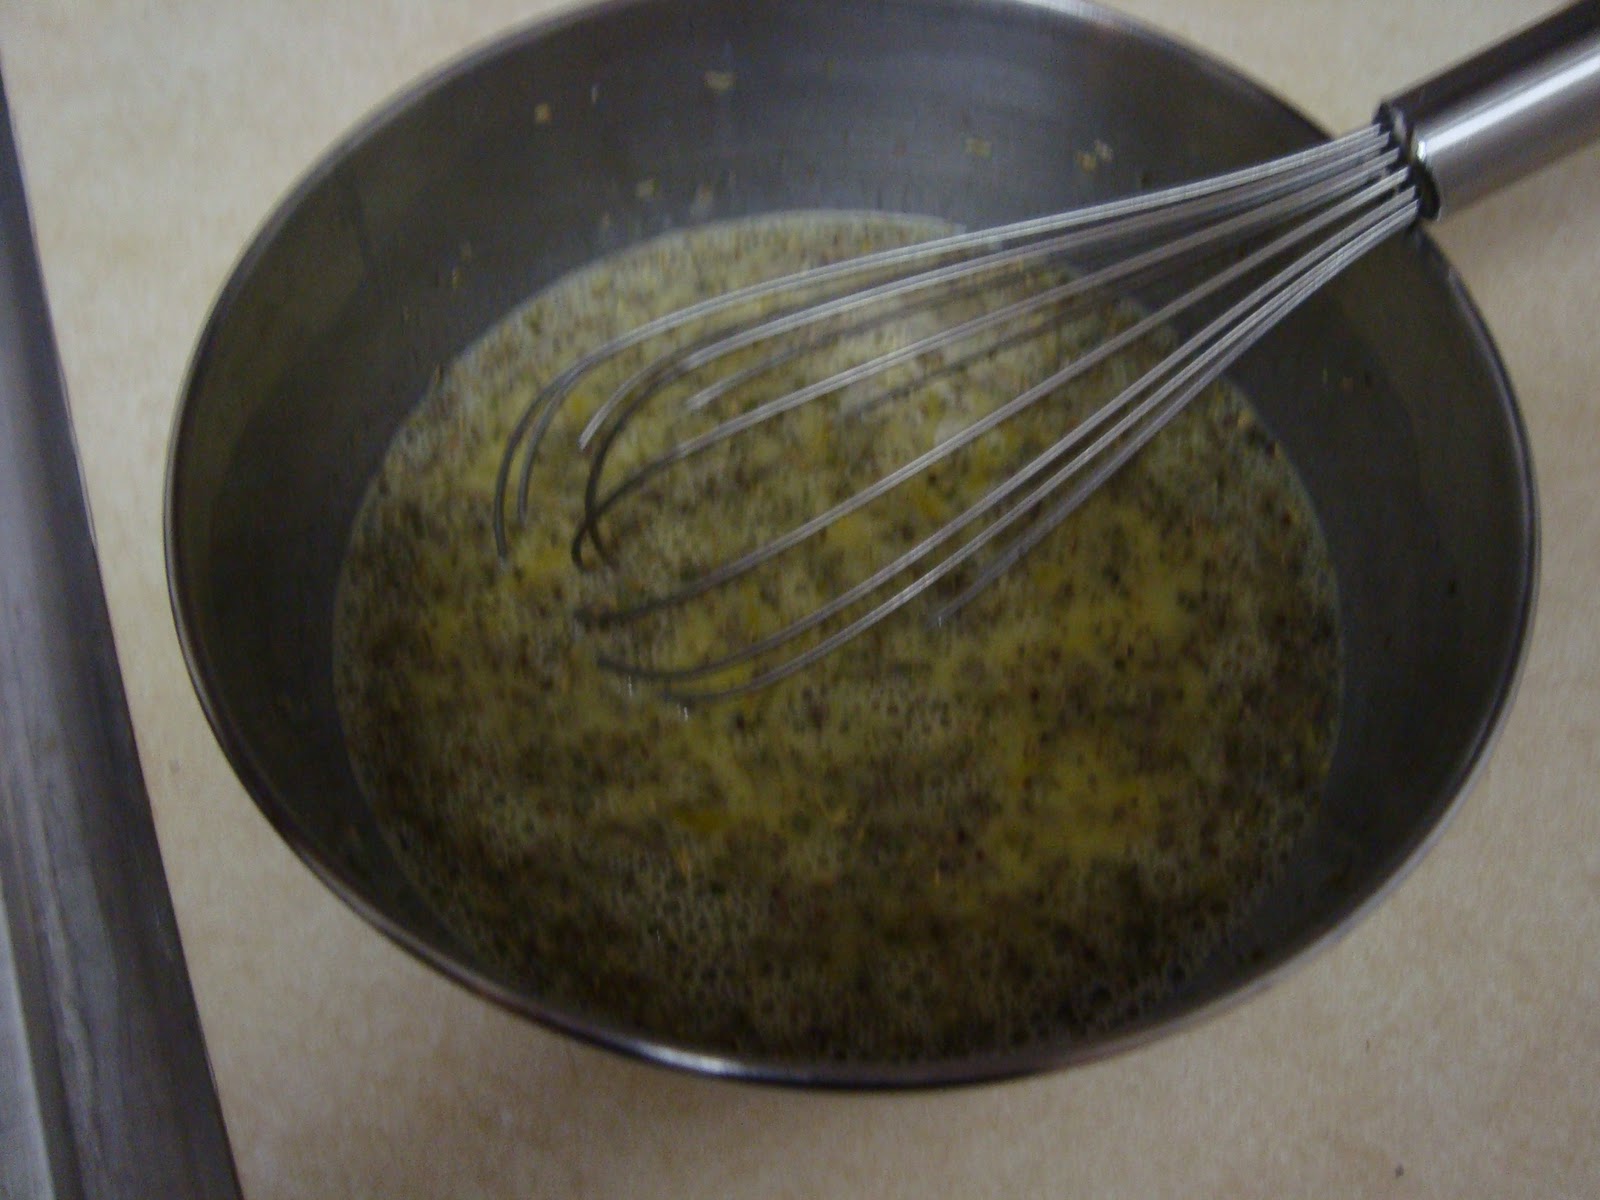 |
| Not pictured: Elbow grease |
Heat an omelette skillet, or a nonstick skillet, over medium heat. Pour half of the omelette mixture into the skillet, cooking until the mixture is set, less than 10 minutes. Slide the omelette out of the pan and fold over, keeping the omelette insides warm. Pour the second half of the mixture into the pan and repeat.

The End Result:


When I had a hunch that the earthy herbs would work well together, the hunch was right. The basil, oregano, thyme, and cilantro was a beautiful combination and worked excellently for the omelette. The cheese and the bacon really added some depth to the recipe. Those two ingredients were the saving grace of the new recipe because it produced more flavor. The addition of the milk was a last minute decision. I thought this morning "hm, I wonder what the recipe would be like if I added milk?" It made the omelette fluffier and not strictly just eggs and herbs. Redoing this recipe was definitely worth it and now, we have a recipe we can go to again and again.
Thanks Maggie! In the end, this 'second take' was certainly better than the first go round. The herbs were toned down and the cheese and bacon really added to the omelet's flavor. Adding milk to the recipe may have been Maggie's best move. The omelet was much fluffier and full than the previous incarnation of the dish. All around, a great second attempt at an already good dish.
That's all we have for you this evening. I'm in the kitchen tomorrow night taking on another potato soup recipe. This time, it's an original that I've fused from two previously attempted recipes. It should be interesting, so be sure to stop back tomorrow evening to see how everything went down. Until then,
~Cheers
Monday, October 25, 2010
Recipes Revisited Week
Good evening everyone! It's Monday once again and, alas, we seem to be watching the last grips of a warm fall fade away. Today's gorgeous 70 degree temperatures are predicted to fade into 40 to 50 degree temps for the rest of the week. Mix in some rain and heavy wind and you have a true recipe for 'real' fall Iowa weather.
Sometimes, it helps to remember the good times - like a week ago when the temperature was in the mid 70's and rain was not even thought of. Remembering the good times of a warm fall - that's what we're doing with this week's recipes as well - remembering the good times.
As you may notice, at the end of some of our recipes we like to add notes about things we would change for the next time around. A little tweak there (less thyme) a big shift there (NO MUSHROOMS NEXT TIME!) or even manipulating a dish entirely (next time, add chicken). With over 100 recipes shared on the blog now, we've accumulated a nice pile of 'return recipes'. These are our recipes that worked so well we want to try them again. In some cases they are recipes that worked okay - but could have been better with a tweak or two. Or, they were recipes that worked wonderfully but we want to see what happens when we add ingredient X. Whatever the case may be, a solid 30 to 40 recipes have made their way to this list. This week, we thought we revisit a recipe (one each) and try our suggested 'tweak' and blog about the results.
While they wont be 'new' recipes, they will be totally new experiences. Rather than posting an ingredient list for these recipes this week, we're going to simply share what recipe we're each revisiting. For this week, Maggie is revisiting her herb omelet recipe from June's block of blogs. The original recipe can be found here. Maggie is scheduled to remake this dish Tuesday evening.
My recipe this week is one that I've played with many times on the blog (no, not breaded chicken - I have only had one successful foray with that recipe and I don't think I need to go mucking that up!) potato soup is (once again) my playground for this week's recipe. You can check out my original two recipes here and here. Instead of remaking either of those recipes, I'm going to be taking elements of each and creating an original recipe. I will be tackling my dish on Wednesday night.
And that's what we're going to be cooking this week. This is my final week of a crazy work schedule - so the blog should be returning to its normal 'three recipes a week' status in the following week. We're both eager to take a second (or in my case third) shot at a successful - but not successful enough recipe. Hopefully you'll enjoy reading as the two amateur chefs flex a little culinary creativity. As we mentioned, Maggie gets us started tomorrow night, so be sure to stop back tomorrow evening to see how round two with the herb omelet goes. Until then,
~Cheers
Thursday, October 21, 2010
Cook Off Recap
Good evening everyone! Another week of blogging is drawing to a close. As you are well aware, Maggie and I engaged in a little culinary cook off over the past two days. The premise was simple - given a $20 gift card we each had to construct a meal to show off our culinary talents. This was supposed to be a dish that served multiple purposes. It should be a dish that you could make on a Sunday night - I.E. family gathering meal. Also, it should have some element of 'impressiveness' to it - something you'd bust out when the boss is coming over for dinner.
Now that we've both put our best dish forward, tonight we're each going to recap both recipes. We've also constructed five categories to judge the contest on. Creativity, Complexity, Flavor, Impressiveness and Value for the Dollar. Both Maggie and I will go over each category and pick a winner. The dish with the most votes 'wins' the cook off. Let's begin with the recaps:
Macaroni Pizza & Chocolate Apple Fondue
Tyler: Maggie's dish caught me completely off guard. We vaguely discussed our dishes with each other before the week - so we both had an idea of what the other one was cooking. However, I did not expect the dish that was placed in front of me on Tuesday night. Constructing pizza dough out of macaroni noodles was something that had never crossed my mind. Initially, I was skeptical about the flavor of the concoction but quickly put those notions to rest after the first bite.
The dish tasted a lot like cheeseburger pizza. The pepperoni, hamburger and onion formed the traditional 'meat lovers' flavor while the macaroni acted as a sort of cheesy, soft crust. Likewise, her chocolate apple fondue was a pleasant surprise as well. I did not think the pairing of apples and chocolate would blend as well as it did. It was another delightful surprise in a night that seemed chocked full of them.
In the end, recipes like this have sort of become Maggie's calling card. She steers clear of the overly complicated recipes and instead searches for the unique. While this dish certainly wont become a regular in our cooking rotation (It is by definition everything we are setting out against by cooking ourselves - box meal, preservatives, sugar laden) it certainly does fit into the 'guilty pleasure' category.
Maggie: My mac 'n' cheese pizza surprised me...and I know I say that about every dish. When I read up on my recipe beforehand, I guess I didn't really grasp the concept of having a "standard" American dish be the crust of a pizza. But in the end, it turned out exactly to be that: a pizza with cheesy noodles as a base.
The taste wasn't too bad either. It had beef and pepperoni, which made it almost a meat lovers pizza. The Mexican cheese combination was an excellent pick. If the cheese had been mozzarella or cheddar, it probably wouldn't have the same outcome. You couldn't really taste the mac 'n' cheese most of the time, but when you could pick up hints of the mac 'n' cheese, it blended very well into the whole dish.
For the fondue, I knew that the chocolate and peanut butter combination would go very well together. Since most individuals like to put peanut butter on their apples, it was no surprise that the fondue was appealing to the pallet. The only thing that bothered me about the fondue was that it kind of hardened after a couple of minutes of resting. I've never made fondue before, so maybe that's a characteristic of fondue, but it certainly didn't inhibit us from devouring it.
Lemon Roast Chicken & Strawberry Shortcake
Tyler: I mentioned last night that I was setting out to improve on a recipe that I had attempted earlier in our blogging days. My first foray into lemon roast chicken was a successful one - but I found the chicken to be not quite juicy enough for my liking. In the end, I knew the dish was good - but I felt it could be better. Last night, I turned to my cooking bible - America's Test Kitchen Cookbook to perfect the recipe.
In the end, the results were mixed. Yes, I did achieve a very juicy chicken thanks to the hour long brine and a slow roasting process. However, the lemon flavor that was so abundant in my first lemon chicken recipe was not nearly was noticeable in the second attempt. I think this is due to the lemons being sliced open in last night's recipe (vs simply poked with holes and inserted whole in the first recipe). I think the real winning recipe lies somewhere in between.
The flavors of the dish were still worth the effort, however. Lemon, garlic and natural chicken flavoring combined for a completely delicious dish. The strawberry shortcake, while not the most visually pleasing end result (I had a lot of issues with the dough) was still very, very good. Also, who knew it was so easy to make whipped cream? Chock that one up as a 'learn something new everyday' item.
In the end, this dish falls directly under my calling card. Multi-layered recipe with some more advanced steps yielding an impressive and delicious dish. I don't do easy and I don't venture out of the 'sane' flavor combinations like my lovely wife does. However, I take on the challenges and difficult recipes that she would never dream of tackling. I guess that's what makes us work so well together!
Maggie: Tyler's chicken was incredibly flavorful. The differing flavors from the lemon, garlic, and thyme made a very noteworthy mark for the chicken. The brine probably also helped the flavor of the chicken, not to mention making it very pronounced. The roasting process takes quite a while, but that flavor, not to mention moistness, makes it incredibly mouthwatering.
The strawberry shortcake was worked really well too. I don't really have a knack for baking - just as Tyler doesn't but maybe some day I will give it a try. But for a dessert, this worked superbly well. The fresh whipped cream and strawberries, not to mention the fresh short cake, was a true delight. Everything almost seemed to melt in your mouth and made it very pleasing for the pallet. It wasn't a heavy dish either and it really worked with the complex flavors of the chicken.
Tyler always challenges himself with new and intricate recipes. Most of the recipes I have to tip my hat, because I'm not gutsy enough to try it. With this chicken and short cake, another tipping has occurred. I'm always so impressed with the awesome recipes that he whips up and the chicken and short cake was no exception.
Head To Head:
Tyler: In my opinion, Maggie's dish wins hands down in the creativity portion. While I played it safe with chicken, she was making pizza out of macaroni and putting apples in chocolate. It doesn't get much more creative than that.
Maggie: Although the chicken had some unique flavor combinations, the mac 'n' cheese pizza was pretty darn unique and an interesting find, not to mention out of the ordinary...ha!
Winner: Maggie
Tyler: While Maggie's dish was certainly creative - it was not at all complex. Box macaroni insturctions and browning hamburger are by no means difficult culinary undertakings. My lemon roast chicken had basting, roasting, browning, quartering and reducing - and that doesn't even include the strawberry shortcake recipe! My dish gets my vote.
Maggie: Complexity was hands down Tyler's. The differing flavors within the chicken made it really incomparable and for something with few ingredients to have that flavor was incredible.
Winner: Tyler
Tyler: This category is a little more difficult to call. Maggie's dish had 'guilty pleasure' flavor. Mac and cheese, hamburger, pepperoni - all classic 'junk food' flavors that (of course) paired well together for a delicious bite. My dish worked with more classic flavors. Lemon, garlic and naturally smokey chicken. I had subtle undertones, hints of thyme and parsley - all things that brought a great, fresh flavor forward. It's a close call, but I'll give my vote to my recipe.
Maggie: Although my pizza had simple flavors, and almost a processed feel, it's flavors that everyone would come to recognize. The true essence of cooking and working with flavors belonged to the chicken and it dazzled brilliantly.
Winner: Tyler
Tyler: This is one category where Maggie and I agree 100% on the winner. The gorgeous picture of my roasted chicken on yesterday's blog tells the tale. You could plop that bird on the center of any table and certainly impress any boss or guest that you had in your home. Next to the stacked strawberry shortcake - my dish was clearly the move visually impressive.
Maggie: Ditto! When you make something and the picture looks exactly like what comes out of the oven...you get very giddy and excited...and definitely impress worthy.
Winner: Tyler
Tyler: This category is a toss up - I can see the argument in both ways. Maggie's dish had quite a bit leftover. If we applied this meal to a family of four, the leftovers would be reduced - but there still would be leftovers. Meaning her recipe could feed four with extra. That's 6~8 mouths for one meal. That's certainly streatching the dollar. BUT value isn't always about quantity - but sometimes also about quality. In that regard, my chicken was constructed with fresh garlic, fresh lemons and a free range, lean chicken. While my dish would feed a family of four in one meal with little to no leftovers - the quality of the ingredients really helps boost the 'value' of my recipe. When you compare what we spent (Maggie - $14.88 Tyler - $15.90*) it's essentially a wash. My vote is....draw.
* Note: My final total is adjusted form Monday after a reader pointed out that the $1.49 flour should not count against my total since that is an item that would typically be found in the pantry. The fact that we were running low on said item should not disrupt the competition.
Maggie: Granted my pizza had leftovers for family, it probably isn't the healthiest meal. Tyler's chicken is healthy and flavorful, but had little leftover. With those two factors in mind, I'll equal the both of us out.
Winner: Draw
Overall winner: Tyler
The final tally shows three votes for my lemon chicken, one vote for Maggie's macaroni pizza and one draw. In theory, my recipe 'wins' the cook off - however, I would argue that one draw and only two votes different between the two dishes clearly shows that there were not obvious winners. In the end, Maggie and I both produced fantastic dishes and had a lot of fun doing so. That's all that really matters.
That's all we have for you this week. Next week, we've got another interesting feature in mind - we'll give you the full details on that next Monday. Until then, I hope everyone enjoys there weekends! Until Monday,
~Cheers
Now that we've both put our best dish forward, tonight we're each going to recap both recipes. We've also constructed five categories to judge the contest on. Creativity, Complexity, Flavor, Impressiveness and Value for the Dollar. Both Maggie and I will go over each category and pick a winner. The dish with the most votes 'wins' the cook off. Let's begin with the recaps:
Macaroni Pizza & Chocolate Apple Fondue
Tyler: Maggie's dish caught me completely off guard. We vaguely discussed our dishes with each other before the week - so we both had an idea of what the other one was cooking. However, I did not expect the dish that was placed in front of me on Tuesday night. Constructing pizza dough out of macaroni noodles was something that had never crossed my mind. Initially, I was skeptical about the flavor of the concoction but quickly put those notions to rest after the first bite.
The dish tasted a lot like cheeseburger pizza. The pepperoni, hamburger and onion formed the traditional 'meat lovers' flavor while the macaroni acted as a sort of cheesy, soft crust. Likewise, her chocolate apple fondue was a pleasant surprise as well. I did not think the pairing of apples and chocolate would blend as well as it did. It was another delightful surprise in a night that seemed chocked full of them.
In the end, recipes like this have sort of become Maggie's calling card. She steers clear of the overly complicated recipes and instead searches for the unique. While this dish certainly wont become a regular in our cooking rotation (It is by definition everything we are setting out against by cooking ourselves - box meal, preservatives, sugar laden) it certainly does fit into the 'guilty pleasure' category.
Maggie: My mac 'n' cheese pizza surprised me...and I know I say that about every dish. When I read up on my recipe beforehand, I guess I didn't really grasp the concept of having a "standard" American dish be the crust of a pizza. But in the end, it turned out exactly to be that: a pizza with cheesy noodles as a base.
The taste wasn't too bad either. It had beef and pepperoni, which made it almost a meat lovers pizza. The Mexican cheese combination was an excellent pick. If the cheese had been mozzarella or cheddar, it probably wouldn't have the same outcome. You couldn't really taste the mac 'n' cheese most of the time, but when you could pick up hints of the mac 'n' cheese, it blended very well into the whole dish.
For the fondue, I knew that the chocolate and peanut butter combination would go very well together. Since most individuals like to put peanut butter on their apples, it was no surprise that the fondue was appealing to the pallet. The only thing that bothered me about the fondue was that it kind of hardened after a couple of minutes of resting. I've never made fondue before, so maybe that's a characteristic of fondue, but it certainly didn't inhibit us from devouring it.
Lemon Roast Chicken & Strawberry Shortcake
Tyler: I mentioned last night that I was setting out to improve on a recipe that I had attempted earlier in our blogging days. My first foray into lemon roast chicken was a successful one - but I found the chicken to be not quite juicy enough for my liking. In the end, I knew the dish was good - but I felt it could be better. Last night, I turned to my cooking bible - America's Test Kitchen Cookbook to perfect the recipe.
In the end, the results were mixed. Yes, I did achieve a very juicy chicken thanks to the hour long brine and a slow roasting process. However, the lemon flavor that was so abundant in my first lemon chicken recipe was not nearly was noticeable in the second attempt. I think this is due to the lemons being sliced open in last night's recipe (vs simply poked with holes and inserted whole in the first recipe). I think the real winning recipe lies somewhere in between.
The flavors of the dish were still worth the effort, however. Lemon, garlic and natural chicken flavoring combined for a completely delicious dish. The strawberry shortcake, while not the most visually pleasing end result (I had a lot of issues with the dough) was still very, very good. Also, who knew it was so easy to make whipped cream? Chock that one up as a 'learn something new everyday' item.
In the end, this dish falls directly under my calling card. Multi-layered recipe with some more advanced steps yielding an impressive and delicious dish. I don't do easy and I don't venture out of the 'sane' flavor combinations like my lovely wife does. However, I take on the challenges and difficult recipes that she would never dream of tackling. I guess that's what makes us work so well together!
Maggie: Tyler's chicken was incredibly flavorful. The differing flavors from the lemon, garlic, and thyme made a very noteworthy mark for the chicken. The brine probably also helped the flavor of the chicken, not to mention making it very pronounced. The roasting process takes quite a while, but that flavor, not to mention moistness, makes it incredibly mouthwatering.
The strawberry shortcake was worked really well too. I don't really have a knack for baking - just as Tyler doesn't but maybe some day I will give it a try. But for a dessert, this worked superbly well. The fresh whipped cream and strawberries, not to mention the fresh short cake, was a true delight. Everything almost seemed to melt in your mouth and made it very pleasing for the pallet. It wasn't a heavy dish either and it really worked with the complex flavors of the chicken.
Tyler always challenges himself with new and intricate recipes. Most of the recipes I have to tip my hat, because I'm not gutsy enough to try it. With this chicken and short cake, another tipping has occurred. I'm always so impressed with the awesome recipes that he whips up and the chicken and short cake was no exception.
Head To Head:
Creativity:
Maggie: Although the chicken had some unique flavor combinations, the mac 'n' cheese pizza was pretty darn unique and an interesting find, not to mention out of the ordinary...ha!
Winner: Maggie
Complexity:
Maggie: Complexity was hands down Tyler's. The differing flavors within the chicken made it really incomparable and for something with few ingredients to have that flavor was incredible.
Winner: Tyler
Flavor:
Maggie: Although my pizza had simple flavors, and almost a processed feel, it's flavors that everyone would come to recognize. The true essence of cooking and working with flavors belonged to the chicken and it dazzled brilliantly.
Winner: Tyler
Impressiveness:
Maggie: Ditto! When you make something and the picture looks exactly like what comes out of the oven...you get very giddy and excited...and definitely impress worthy.
Winner: Tyler
Value for the Dollar:
* Note: My final total is adjusted form Monday after a reader pointed out that the $1.49 flour should not count against my total since that is an item that would typically be found in the pantry. The fact that we were running low on said item should not disrupt the competition.
Maggie: Granted my pizza had leftovers for family, it probably isn't the healthiest meal. Tyler's chicken is healthy and flavorful, but had little leftover. With those two factors in mind, I'll equal the both of us out.
Winner: Draw
Overall winner: Tyler
The final tally shows three votes for my lemon chicken, one vote for Maggie's macaroni pizza and one draw. In theory, my recipe 'wins' the cook off - however, I would argue that one draw and only two votes different between the two dishes clearly shows that there were not obvious winners. In the end, Maggie and I both produced fantastic dishes and had a lot of fun doing so. That's all that really matters.
That's all we have for you this week. Next week, we've got another interesting feature in mind - we'll give you the full details on that next Monday. Until then, I hope everyone enjoys there weekends! Until Monday,
~Cheers
Wednesday, October 20, 2010
Cook Off: Round 2
Good evening everyone and welcome to round 2 of our great culinary cook off. Last night, Maggie brought her 'A' game with two very unique dishes that worked on a very quirky level. Macaroni pizza and chocolate peanut butter fondue with apples are two 'out there' recipes that certainly surprise - but they were no slouch when it came down to taste.
Tonight, I'm tackling a more traditional 'Sunday dinner' recipe - but I'm hoping to perfect and polish what is already a solid dish. I've tackled a version of lemon roast chicken before and was quite happy with the results. As I noted in the original post, however, I did feel there were areas where I could improve. Tonight, I set out to make those improvements. With a new variation on the recipe, and some experience up my sleeve, I was hopeful hat tonight's recipes would impress.
The Recipe: Classic Roast Lemon Chicken
Original Recipe Found In: The Complete America's Test Kitchen TV Show Cookbook 2nd Edition: Every Recipe from the Hit TV Show With Product Ratings and a Look Behind the Scenes
What You'll Need:
1/2 Cup Table Salt
1 (3 1/2 to 4 Pound) Whole Chicken; Giblets Discarded
2 Lemons
6 Medium Garlic Cloves (Minced)
4 Tablespoons Butter (2 Melted - 2 Cut Into Slices)
1 3/4 Cups Low Sodium Chicken Broth
1 Tablespoon Minced Parsley
1 Teaspoon Fresh Thyme
The Recipe: Strawberry Shortcakes
Original Recipe Found In: The Complete America's Test Kitchen TV Show Cookbook 2nd Edition: Every Recipe from the Hit TV Show With Product Ratings and a Look Behind the Scenes
What You'll Need:
For the fruit mixture:
8 Cups Strawberries (Hulled)
6 Tablespoons Sugar
For the shortcake:
2 Cups All Purpose Flour
5 Tablespoons Sugar
1 Tablespoon Baking Powder
1/2 Teaspoon Table Salt
8 Tablespoons (1 Stick) Unsalted Butter, Cut Into 1/2 Inch Pieces
1/2 Cup Half-And-Half or Milk
1 Large Egg, Lightly Beaten
1 Large Egg White, Lightly Beaten
For the whipped cream:
1 Cup Heavy Whipping Cream
1 Tablespoon Sugar
1 Teaspoon Vanilla Extract
* NOTE: This recipe makes 6 shortcakes. If you are cooking for a smaller crowd, simply reduce the amount of all ingredients accordingly. I prepared this recipe to make 2-3 shortcakes.
The first step to a juicy roast chicken is brining. It doesn't matter what way you look at it - all of the experts agree that the only way to keep the chicken moist and flavorful during the long roasting process is to give it a good long salt bath before cooking. We've covered brining in full detail on previous blogs (see here) so I won't go into the science behind the process - I'll simply say that for this recipe you will need to dissolve the salt in 2 quarts of cold water. Place the chicken in the water and store in the refrigerator for one hour.
Once you chicken has emerged from its salty bath, dry it completely (inside and out) with a few paper towels. Next, quarter one lemon and mince your garlic. Place the lemon quarters and the minced garlic in the cavity of the chicken. There is no gentle way to put this: you will have to violate the chicken. 4 slices of lemon are tricky to shove into a small cavity. Once everything is packed in there nice and tight (sorry chicken) brush both sides of the chicken with 2 tablespoons of the melted butter and season liberally with pepper (no salt since you just gave the bird an hour long bath in salt). Move the chicken to a roasting pan, breast side down (preferably one with a v-rack - if you lack a roasting pan or a v-rack a drying rack over a baking sheet will do the trick as well. As long as there is space below the chicken for the air to circulate - you are fine).
Preheat the oven to 375 degrees and place the buttered up bird in the middle of the oven for 40 minutes. After 40 minutes, remove the chicken from the pan and increase the oven temperature to 450 degrees. Carefully rotate the chicken so the breast side is facing up and return it to the rack. Add one cup of the chicken broth to the bottom of the pan and return the pan to the oven.

Allow to roast for another 40 to 45 minutes, or until the breast measures 160 to 165 degrees and the thigh registers 170 to 175 degrees. Once at the optimum temperature, remove the chicken from the oven and set on a cutting board (uncovered) to rest while you prepare the sauce.
Using the roasting pan or a smaller sauce pan, place the juices and drippings on the stovetop over high heat. Add the remaining 3/4 cup of chicken broth. Simmer until the mixture reduces to about 1/2 cup - this should take about 4 to 8 minutes.
Remove the lemon and garlic from the chicken's cavity and discard. Next, cut the chicken into quarters. To quarter a chicken, you first need to cut the chicken where the leg meets the breast and pull away.
Next, cut through the joint that connects the drumstick to the thigh (look for a softer, visible spot in the middle of the two pieces, that's the easiest place to cut)
Cut down the side of the breast bone, removing the meat from the bone. Finally, cut the wings from the breast pieces.
OR you can do like I do and hack at the little bugger until all the meat is off. Not as presentable, but still just as effective.

Next, halve the remaining lemon and squeeze 1/2 of the juice into the chicken broth mixture. Reserve the other 1/2 to serve with the chicken. Whisk in the remaining 2 tablespoons of butter and stir in the parsley and thyme. Pour this pan sauce over the chicken just before serving.
To make the strawberry shortcake, begin by mashing 1/2 of the strawberries in a large bowl with a potato masher. Slice the remaining strawberries and add to the bowl. Add the sugar and mix well until everything is blended. You can set this mixture aside for up to 2 hours before serving. (Allow at least 30 minutes of resting time before serving)
Preheat your oven to 425 degrees and line a baking sheet with parchment paper.
Pulse the flour, 3 tablespoons of the sugar, baking powder and salt in a food processor until the mixture is combined. Add the butter pieces to the mixture and pules until the mixture reaches a coarse meal like texture - about 15 seconds. Transfer this mixture to a large bowl.
Whisk the egg and half-and-half in a bowl until combined. Add this mixture to the bowl with the flour and turn with a large rubber spatula until lumps begin to form. At this point, remove the dough and knead on a floured surface until everything comes together (no lumps or dry spots).
Work the dough into a (roughly) 9X6 inch rectangle. Using a round cookie cutter or some other form of guide, slice the dough into rounds. Arrange these rounds on the baking sheet with about 1 1/2 inches between each round. Brush the tops of each round with the lightly beaten egg white and sprinkle evenly with the remaining sugar. Place into the oven for 12 to 14 minutes or until the shortcakes are lightly golden brown. Transfer the the shortcakes to a wire rack and allow to cool slightly (10 minutes) before serving.
To make the whip cream, combine the heavy cream, vanilla and sugar in a medium bowl and mix with a handheld mixer until foamy and peaks begin to form. (About 2 to 3 minutes)

When the shortcakes have cooled, split them horizontally and add the strawberries and a dash of the whipped cream. Serve immediately.
The Results:


Exactly as I had hoped. The chicken was a juicy and flavorful affair with nice hints of lemon and just a touch of garlic. The strawberry shortcake, while not picturesque or even all that presentable (hey, I'm a chef - not a baker) was still quite tasty.
That's all we have for you this evening. Tomorrow night, Maggie and I will be back with full recaps of both recipes this week. We'll give our opinions, rate the pros and cons of each recipe and eventually pick a 'winner' of the $20 cook off. It should be an interesting 'back and forth' blog tomorrow, so be sure to stop by and check it out. Until then,
~Cheers
Oh, and that 'other' site that we are working on - it's not done but you can see the future home of the blog by clicking here.
Tonight, I'm tackling a more traditional 'Sunday dinner' recipe - but I'm hoping to perfect and polish what is already a solid dish. I've tackled a version of lemon roast chicken before and was quite happy with the results. As I noted in the original post, however, I did feel there were areas where I could improve. Tonight, I set out to make those improvements. With a new variation on the recipe, and some experience up my sleeve, I was hopeful hat tonight's recipes would impress.
The Recipe: Classic Roast Lemon Chicken
Original Recipe Found In: The Complete America's Test Kitchen TV Show Cookbook 2nd Edition: Every Recipe from the Hit TV Show With Product Ratings and a Look Behind the Scenes
What You'll Need:
1/2 Cup Table Salt
1 (3 1/2 to 4 Pound) Whole Chicken; Giblets Discarded
2 Lemons
6 Medium Garlic Cloves (Minced)
4 Tablespoons Butter (2 Melted - 2 Cut Into Slices)
1 3/4 Cups Low Sodium Chicken Broth
1 Tablespoon Minced Parsley
1 Teaspoon Fresh Thyme
The Recipe: Strawberry Shortcakes
Original Recipe Found In: The Complete America's Test Kitchen TV Show Cookbook 2nd Edition: Every Recipe from the Hit TV Show With Product Ratings and a Look Behind the Scenes
What You'll Need:
For the fruit mixture:
8 Cups Strawberries (Hulled)
6 Tablespoons Sugar
For the shortcake:
2 Cups All Purpose Flour
5 Tablespoons Sugar
1 Tablespoon Baking Powder
1/2 Teaspoon Table Salt
8 Tablespoons (1 Stick) Unsalted Butter, Cut Into 1/2 Inch Pieces
1/2 Cup Half-And-Half or Milk
1 Large Egg, Lightly Beaten
1 Large Egg White, Lightly Beaten
For the whipped cream:
1 Cup Heavy Whipping Cream
1 Tablespoon Sugar
1 Teaspoon Vanilla Extract
* NOTE: This recipe makes 6 shortcakes. If you are cooking for a smaller crowd, simply reduce the amount of all ingredients accordingly. I prepared this recipe to make 2-3 shortcakes.
The first step to a juicy roast chicken is brining. It doesn't matter what way you look at it - all of the experts agree that the only way to keep the chicken moist and flavorful during the long roasting process is to give it a good long salt bath before cooking. We've covered brining in full detail on previous blogs (see here) so I won't go into the science behind the process - I'll simply say that for this recipe you will need to dissolve the salt in 2 quarts of cold water. Place the chicken in the water and store in the refrigerator for one hour.
 |
| Just chillin' in his salty swimming pool |
Once you chicken has emerged from its salty bath, dry it completely (inside and out) with a few paper towels. Next, quarter one lemon and mince your garlic. Place the lemon quarters and the minced garlic in the cavity of the chicken. There is no gentle way to put this: you will have to violate the chicken. 4 slices of lemon are tricky to shove into a small cavity. Once everything is packed in there nice and tight (sorry chicken) brush both sides of the chicken with 2 tablespoons of the melted butter and season liberally with pepper (no salt since you just gave the bird an hour long bath in salt). Move the chicken to a roasting pan, breast side down (preferably one with a v-rack - if you lack a roasting pan or a v-rack a drying rack over a baking sheet will do the trick as well. As long as there is space below the chicken for the air to circulate - you are fine).
 |
| One chicken: Slightly violated |
Preheat the oven to 375 degrees and place the buttered up bird in the middle of the oven for 40 minutes. After 40 minutes, remove the chicken from the pan and increase the oven temperature to 450 degrees. Carefully rotate the chicken so the breast side is facing up and return it to the rack. Add one cup of the chicken broth to the bottom of the pan and return the pan to the oven.

Allow to roast for another 40 to 45 minutes, or until the breast measures 160 to 165 degrees and the thigh registers 170 to 175 degrees. Once at the optimum temperature, remove the chicken from the oven and set on a cutting board (uncovered) to rest while you prepare the sauce.
 |
| This beauty is what comes out of the oven after all of that roasting |
Using the roasting pan or a smaller sauce pan, place the juices and drippings on the stovetop over high heat. Add the remaining 3/4 cup of chicken broth. Simmer until the mixture reduces to about 1/2 cup - this should take about 4 to 8 minutes.
Remove the lemon and garlic from the chicken's cavity and discard. Next, cut the chicken into quarters. To quarter a chicken, you first need to cut the chicken where the leg meets the breast and pull away.
Next, cut through the joint that connects the drumstick to the thigh (look for a softer, visible spot in the middle of the two pieces, that's the easiest place to cut)
Cut down the side of the breast bone, removing the meat from the bone. Finally, cut the wings from the breast pieces.
OR you can do like I do and hack at the little bugger until all the meat is off. Not as presentable, but still just as effective.

Next, halve the remaining lemon and squeeze 1/2 of the juice into the chicken broth mixture. Reserve the other 1/2 to serve with the chicken. Whisk in the remaining 2 tablespoons of butter and stir in the parsley and thyme. Pour this pan sauce over the chicken just before serving.
To make the strawberry shortcake, begin by mashing 1/2 of the strawberries in a large bowl with a potato masher. Slice the remaining strawberries and add to the bowl. Add the sugar and mix well until everything is blended. You can set this mixture aside for up to 2 hours before serving. (Allow at least 30 minutes of resting time before serving)
 |
| Strawberry mash |
Preheat your oven to 425 degrees and line a baking sheet with parchment paper.
Pulse the flour, 3 tablespoons of the sugar, baking powder and salt in a food processor until the mixture is combined. Add the butter pieces to the mixture and pules until the mixture reaches a coarse meal like texture - about 15 seconds. Transfer this mixture to a large bowl.
Whisk the egg and half-and-half in a bowl until combined. Add this mixture to the bowl with the flour and turn with a large rubber spatula until lumps begin to form. At this point, remove the dough and knead on a floured surface until everything comes together (no lumps or dry spots).
Work the dough into a (roughly) 9X6 inch rectangle. Using a round cookie cutter or some other form of guide, slice the dough into rounds. Arrange these rounds on the baking sheet with about 1 1/2 inches between each round. Brush the tops of each round with the lightly beaten egg white and sprinkle evenly with the remaining sugar. Place into the oven for 12 to 14 minutes or until the shortcakes are lightly golden brown. Transfer the the shortcakes to a wire rack and allow to cool slightly (10 minutes) before serving.
 |
| Pre-bake |
 |
| post-bake |
To make the whip cream, combine the heavy cream, vanilla and sugar in a medium bowl and mix with a handheld mixer until foamy and peaks begin to form. (About 2 to 3 minutes)

When the shortcakes have cooled, split them horizontally and add the strawberries and a dash of the whipped cream. Serve immediately.
The Results:


Exactly as I had hoped. The chicken was a juicy and flavorful affair with nice hints of lemon and just a touch of garlic. The strawberry shortcake, while not picturesque or even all that presentable (hey, I'm a chef - not a baker) was still quite tasty.
That's all we have for you this evening. Tomorrow night, Maggie and I will be back with full recaps of both recipes this week. We'll give our opinions, rate the pros and cons of each recipe and eventually pick a 'winner' of the $20 cook off. It should be an interesting 'back and forth' blog tomorrow, so be sure to stop by and check it out. Until then,
~Cheers
Oh, and that 'other' site that we are working on - it's not done but you can see the future home of the blog by clicking here.
Tuesday, October 19, 2010
Cook Off: Round 1
Good evening everyone and welcome to the opening day of the Out Of The Culinary cook off! We've covered the rules, we've talked about our premise and we've even shared our ingredients and expenses - all that's left is to actually get started cooking.
Maggie took to the kitchen tonight with a few recipes up her sleeve and a new experience to be had. She mentioned to me this morning that she had never made macaroni and cheese before (outside of the just add water Easy-Mac cups). Needless to say, I was surprised not only is mac and cheese a staple of the American diet (for better or worse) but I think nearly everyone makes the dish at some point in the lifetime. Heck, I've made variations of the dish on the blog. Maggie, however, had never tackled the paste confection until tonight. I'll turn the keyboard over to Maggie so she can share her first take on mac and cheese, along with her experiences with all of the recipes.
The Recipe: Macaroni 'N' Cheese Pizza
Original Recipe Found In: Taste Of Home magazine, August / September 2010 Issue
What You'll Need:
1 Package Macaroni And Cheese Dinner Mix
2 Eggs (Beaten)
1/2 Pound Ground Beef
3/4 Cup Chopped Onion
1 1/4 Cups Pizza Sauce
1 Can (4 Ounces) Mushrooms (Optional)
28 Pepperoni Slices
1 Cup (4 Ounces) Mexican Cheese Blend (Shredded)
The Recipe: Chocolate Mint Apple Fondue
Original Recipe Found In: Taste Of Home magazine, August/September 2010 Issue
What You'll Need:
1 Can Sweetened Condensed Milk
1 Cup Chocolate Chips
10 Chopped Peppermint Patties
(Alternatively, 1 Cup of peanut butter can be substituted for the peppermint patties)
2 - 3 Red (Sweet) Apples
Good evening everyone! Yes, I am actually quite ashamed to admit that in my 24 years of existence that I have never made a stove top version of mac'n'cheese. I always thought it was something kinda complicated (as I think back to it now, mac and cheese has nothing on some of the recipes we've created.) Also, I would mostly "cook", in a very loose term of the word cook, for myself in college and having mac and cheese, and my favorite add in: tuna, for four days after I made the initial recipe didn't sound appetizing. Alas, tonight I conquered the mac and cheese beast and went beyond the call of duty.
I started by heating the oven to 375 degrees and made the mac and cheese according to the box directions, followed by slowly stirring in the beaten eggs. Grease a 12 inch pizza pan and spread the mac and cheese on the pan. Pop the pan in the oven and cook for 10 minutes.
Meanwhile, brown the beef and drain. Add the chopped onion and return to heat. Cook for three minutes, until the onions start to become fragrant. Add and stir the pizza sauce in. By this time, the mac and cheese base should be done - remove from oven. Top the "crust" with the meat/onion/pizza sauce combination. Also top with the pepperoni slices and cheese. Pop entire pizza back into the oven for 10-15 minutes, or until the crust reads 160 degrees with a food thermometer.

While the pizza is cooking, begin to heat the chocolate chips, condensed milk, and, in our case, peanut butter over low heat. Keep an eye on it - it might have a tendency to harden if not stirred frequently. Heat and stir until well combined. Pour into small ramekins. Slice two or more apples and place on a plate.
Remove the pizza out of the oven, slice, and serve!
The End Result:


I always find myself surprised at the end of every successful recipe. Not because it worked - but because it worked so well! The pizza was like every meat lovers pizza I've tasted, except it had a slightly cheesy crust. And honestly, you couldn't even taste the mac and cheese, but it added a nice, almost spongey feel and it made the pizza more complete. The flavors worked really well too - from the cheese on the top and bottom to the meat/onion innards, everything was very cohesive.
The fondue was pretty tasty as well. Tyler and I are HUGE fans of chocolate and peanut butter and when the two are melted together, it's pretty much heaven. The apples we used had a slight tartness to them, but they were soft so it made dipping pretty easy. The combination of the chocolate, peanut butter, and apple was divine; it's easy to see what we'll be using for entertaining guests.
That's all we have for you this evening! Tomorrow night, it's my turn to take to the kitchen, so be sure to stop by and see what I'm brining to the table to match Maggie's dish from this evening. One site note worth mentioning before we go - according to Google, they will be doing maintenance on the blogger interface tomorrow evening. This may or may not interfere with posting the blog. If it does, I will post the blog on our OTHER blog (yes, there is another site where this blog exists - it is a work in progress and we hope to eventually move to this 'other' site permanently, however, there is some 'building' to be done and it's not ready for show - so we haven't shared it yet). There will be a specific note on our Facebook page ('Like' us if you haven't yet) with the link. Just an FYI in case things don't go well with Google tomorrow night. Until then,
~Cheers
Maggie took to the kitchen tonight with a few recipes up her sleeve and a new experience to be had. She mentioned to me this morning that she had never made macaroni and cheese before (outside of the just add water Easy-Mac cups). Needless to say, I was surprised not only is mac and cheese a staple of the American diet (for better or worse) but I think nearly everyone makes the dish at some point in the lifetime. Heck, I've made variations of the dish on the blog. Maggie, however, had never tackled the paste confection until tonight. I'll turn the keyboard over to Maggie so she can share her first take on mac and cheese, along with her experiences with all of the recipes.
The Recipe: Macaroni 'N' Cheese Pizza
Original Recipe Found In: Taste Of Home magazine, August / September 2010 Issue
What You'll Need:
1 Package Macaroni And Cheese Dinner Mix
2 Eggs (Beaten)
1/2 Pound Ground Beef
3/4 Cup Chopped Onion
1 1/4 Cups Pizza Sauce
1 Can (4 Ounces) Mushrooms (Optional)
28 Pepperoni Slices
1 Cup (4 Ounces) Mexican Cheese Blend (Shredded)
The Recipe: Chocolate Mint Apple Fondue
Original Recipe Found In: Taste Of Home magazine, August/September 2010 Issue
What You'll Need:
1 Can Sweetened Condensed Milk
1 Cup Chocolate Chips
10 Chopped Peppermint Patties
(Alternatively, 1 Cup of peanut butter can be substituted for the peppermint patties)
2 - 3 Red (Sweet) Apples
Good evening everyone! Yes, I am actually quite ashamed to admit that in my 24 years of existence that I have never made a stove top version of mac'n'cheese. I always thought it was something kinda complicated (as I think back to it now, mac and cheese has nothing on some of the recipes we've created.) Also, I would mostly "cook", in a very loose term of the word cook, for myself in college and having mac and cheese, and my favorite add in: tuna, for four days after I made the initial recipe didn't sound appetizing. Alas, tonight I conquered the mac and cheese beast and went beyond the call of duty.
I started by heating the oven to 375 degrees and made the mac and cheese according to the box directions, followed by slowly stirring in the beaten eggs. Grease a 12 inch pizza pan and spread the mac and cheese on the pan. Pop the pan in the oven and cook for 10 minutes.
 |
| That's the most interesting pizza crust I've ever seen |
Meanwhile, brown the beef and drain. Add the chopped onion and return to heat. Cook for three minutes, until the onions start to become fragrant. Add and stir the pizza sauce in. By this time, the mac and cheese base should be done - remove from oven. Top the "crust" with the meat/onion/pizza sauce combination. Also top with the pepperoni slices and cheese. Pop entire pizza back into the oven for 10-15 minutes, or until the crust reads 160 degrees with a food thermometer.

While the pizza is cooking, begin to heat the chocolate chips, condensed milk, and, in our case, peanut butter over low heat. Keep an eye on it - it might have a tendency to harden if not stirred frequently. Heat and stir until well combined. Pour into small ramekins. Slice two or more apples and place on a plate.
 |
| Chocolate sauce...stage one |
Remove the pizza out of the oven, slice, and serve!
The End Result:


I always find myself surprised at the end of every successful recipe. Not because it worked - but because it worked so well! The pizza was like every meat lovers pizza I've tasted, except it had a slightly cheesy crust. And honestly, you couldn't even taste the mac and cheese, but it added a nice, almost spongey feel and it made the pizza more complete. The flavors worked really well too - from the cheese on the top and bottom to the meat/onion innards, everything was very cohesive.
The fondue was pretty tasty as well. Tyler and I are HUGE fans of chocolate and peanut butter and when the two are melted together, it's pretty much heaven. The apples we used had a slight tartness to them, but they were soft so it made dipping pretty easy. The combination of the chocolate, peanut butter, and apple was divine; it's easy to see what we'll be using for entertaining guests.
That's all we have for you this evening! Tomorrow night, it's my turn to take to the kitchen, so be sure to stop by and see what I'm brining to the table to match Maggie's dish from this evening. One site note worth mentioning before we go - according to Google, they will be doing maintenance on the blogger interface tomorrow evening. This may or may not interfere with posting the blog. If it does, I will post the blog on our OTHER blog (yes, there is another site where this blog exists - it is a work in progress and we hope to eventually move to this 'other' site permanently, however, there is some 'building' to be done and it's not ready for show - so we haven't shared it yet). There will be a specific note on our Facebook page ('Like' us if you haven't yet) with the link. Just an FYI in case things don't go well with Google tomorrow night. Until then,
~Cheers
Monday, October 18, 2010
Out Of The Culinary Cook Off!!
Good evening everyone! It's another beautiful day here in the greater Des Moines metro - following up another gorgeous weekend of fall weather. When you consider that this time one year ago, most of central to north central Iowa was covered in an inch of that white nasty stuff known as 'snow'; 65 seem like a gift from above.
This week, we can finally debut the feature we've been teasing for over a month. This week, Maggie and I are going head to head in the "Out Of The Culinary Cook off". Essentially, it's a non-competitive competition pairing my culinary creative and flexibility vs. Maggie's.
The idea for this cook off started when we received two $20 gift cards to Hy-Vee for a wedding present. Rather than just using these cards to buy normal groceries, Maggie and I came up with the idea to utilize these little cards in a unique way.
The premise is simple, we each are given a $20 gift card and are faced with the task of preparing one meal. However, it's not just any meal - after all, with savvy shopping and frugal buying, we both could turn those cards in to two solid meals (with leftovers) apiece! Instead, we are tasked with creating a bold meal (we're talking, 'family over on Sunday night' style) something creative, something a little more fancy and ambitious than the normal 'Tuesday night' cooking fare.
As with any competition, there have to be some ground rules. In this cookoff we are only allowed to use the funds on the card. There can be absolutely zero outside spending. $20 is the limit - no exceptions. Everything that you need for your recipe must be purchased on this card. Exceptions are made for items that everyone would commonly have in their cupboards or pantry. For example, sugar, peanut butter, nutmeg, salt, pepper, etc. would not count against your tab as 98% of people are already going to have a supply at hand.
There is no rule for how you present you dish. You can choose to spend $15 on a roast and the rest on a few veggies and simply go with one large dish. Or, you can focus on salads and smaller dishes and try a five course affair. The decision is up to each chef. At the end of the week, we'll recap each recipe and cast our vote for who we feel was the most creative with their funds.
Tonight, we'll share what we each purchased with our cards - the cost of each item and the amount remaining on the card. Tuesday, Maggie will take to the kitchen to prepare her dish (or dishes) and Wednesday will be my turn. Thursday will be our summary day and that will be the week's worth of cooking. It's a neat idea (in our opinion) that we hope you'll enjoy. Now, here's what Maggie and I purchased to start the challenge:
Maggie:
Hy-Vee Chocolate Chips $1.50
Hy-Vee Sweetened Condensed Milk $1.69
Hy-Vee Mac & Cheese $0.59
Ragu Pizza Sauce $1.48
Hy-Vee Pepperoni $1.99
Cortland Apples (2) $1.53
White Onion $0.48
Ground Beef (93/7) $2.99
Total Spent: $14.88
Remaining: $5.12
Tyler:
Gold Medal All Purpose Flour $1.49
AE Heavy Whipping Cream $1.69
1 Bulb Garlic $0.50
Driscoll Strawberries $3.99
Lemon (2) $1.38
Smart Chicken (Free Range) $8.34
Total Spent: $17.39
Remaining: $2.61
Oddly enough, Maggie and I took two different strategies in purchasing our ingredients. Maggie went for store brand and cheap, that allowed her to purchase more items. She either has a more complicated recipe in mind, or she has a few recipes up her sleeve. I decided early on that I was going to spend my money where it counted - the main dish. By opting for a free range chicken over the cheaper store brand ($3.80) I am banking on quality over quantity. We'll see whose strategy turns out to be the 'winner' by the end of the week.
That's all we have for you this evening. Maggie gets the competition started tomorrow evening, so be sure to stop back tomorrow night to see what she brought to the table. Until then,
~Cheers
Thursday, October 14, 2010
Granny's Packin' : Apple Week Recipe 3
Good evening everyone! It's Thursday (finally) this week seems to have gone as slow as it possibly could! Today marks the end of our apple week - we've tried two new and unique recipes, an interesting take on the classic waldorf salad and a slow cooked stuffed apple recipe that has me craving warm applesauce this evening.
Tonight, with our thrid and final apple recipe, I'm taking a little more liberty with our apple week theme - instead of a dish starring our feature fruit, I'm placing it where it is not usually found - on top of a burger. I've run across recipes like this multiple times on restaurant menus, and earlier this summer I actually tried a variation of the apple burger and found it delightful. Tonight, I set out to duplicate the recipe myself.
The Recipe: Brie Burger*
* Now, that's the original name that many restaurants dub the burger. I've decided a creative dish like this needs a creative name. As such, I'm calling this burger:
Granny's Packin'
(Get it? Granny smith apples - brie cheese is packed in tins...I thought it was funny anyway!)
Original Recipe Found In: Various restaurant menus
What You'll Need:
1 Granny Smith Apple
1 Pound Hamburger
12 Unsalted Saltines
1 Tablespoon Dijon Mustard
Parsley
1 Egg
Salt
Black Pepper
Begin by coring the apple and using a mandoline to slice the apple into 1/4 inch slices. By using a mandoline rather than a knife, you ensure that the slices are still perfectly round, which (obviously) better suits the purpose of topping a burger.
Now, for the burger:
For this recipe, like any hamburger recipe we've done on the blog, we used Jaime Oliver's 'Crackin' Burger' recipe. Since we've detailed the process of making a crackin burger on many occasions on the blog - I wont go into the full ordeal. Instead, I've posted a 'step by step' photo process below. If you absolutely need the full details, refer back to our first run in with the crackin' burger.
Simply cook the burger in whatever form you prefer (I like using our George Forman grill) and top with some slivers of brie cheese and a slice of the granny smith apple. Pour on a little homemade barbeque sauce (recipes for any form of these sauces can be found here or here) and enjoy!
The Results:


Since I've tried this recipe before - I knew that the flavor combination was a winner. It was nice, however, to successfully duplicate the recipe without having...the actual recipe. The brie, granny smith and barbeque combination all blended to create a flavorful and savory burger. It is certainly one of those recipes that sounds a little 'odd' at first read - but is absolutely worth a try.
That's all we have for you this week! Next week, we (finally) debut the big feature we've been planning for a solid month. More details on this will come on Monday. We're both really excited to try something completely new and challenging on the blog. Come Monday, we'll finally reveal just what that challenge is. Until then,
~Cheers
Tonight, with our thrid and final apple recipe, I'm taking a little more liberty with our apple week theme - instead of a dish starring our feature fruit, I'm placing it where it is not usually found - on top of a burger. I've run across recipes like this multiple times on restaurant menus, and earlier this summer I actually tried a variation of the apple burger and found it delightful. Tonight, I set out to duplicate the recipe myself.
The Recipe: Brie Burger*
* Now, that's the original name that many restaurants dub the burger. I've decided a creative dish like this needs a creative name. As such, I'm calling this burger:
Granny's Packin'
(Get it? Granny smith apples - brie cheese is packed in tins...I thought it was funny anyway!)
Original Recipe Found In: Various restaurant menus
What You'll Need:
1 Granny Smith Apple
1 Pound Hamburger
12 Unsalted Saltines
1 Tablespoon Dijon Mustard
Parsley
1 Egg
Salt
Black Pepper
Begin by coring the apple and using a mandoline to slice the apple into 1/4 inch slices. By using a mandoline rather than a knife, you ensure that the slices are still perfectly round, which (obviously) better suits the purpose of topping a burger.
Now, for the burger:
For this recipe, like any hamburger recipe we've done on the blog, we used Jaime Oliver's 'Crackin' Burger' recipe. Since we've detailed the process of making a crackin burger on many occasions on the blog - I wont go into the full ordeal. Instead, I've posted a 'step by step' photo process below. If you absolutely need the full details, refer back to our first run in with the crackin' burger.
 |
| Add the egg |
 |
| Crushed crackers |
 |
| Parsley, mustard, salt and pepper |
 |
| Mix well |
 |
| The mixture should yield for burgers |
Simply cook the burger in whatever form you prefer (I like using our George Forman grill) and top with some slivers of brie cheese and a slice of the granny smith apple. Pour on a little homemade barbeque sauce (recipes for any form of these sauces can be found here or here) and enjoy!
The Results:


Since I've tried this recipe before - I knew that the flavor combination was a winner. It was nice, however, to successfully duplicate the recipe without having...the actual recipe. The brie, granny smith and barbeque combination all blended to create a flavorful and savory burger. It is certainly one of those recipes that sounds a little 'odd' at first read - but is absolutely worth a try.
That's all we have for you this week! Next week, we (finally) debut the big feature we've been planning for a solid month. More details on this will come on Monday. We're both really excited to try something completely new and challenging on the blog. Come Monday, we'll finally reveal just what that challenge is. Until then,
~Cheers
Wednesday, October 13, 2010
Slow Cooked Stuffed Apples - Apple Week Recipe 2
Good evening everyone! It's starting to actually feel like fall out there. 80 degree days, where have you gone? It seems like a thing of the past now, with temperatures struggling to surpass 60. It's days like these that make one crave a good, warm fall flavored recipe. Something with brown sugar and cinnamon, something warm and something flavorful.
Have I got just the recipe for that craving!
My dish tonight is perfect for those evenings where you are craving something warm and comforting, but don't really need or want to construct an entire feast. This recipe is light on waistline, but packs a punch with flavor and originality.
The Recipe: Slow Cooked Stuffed Apples
Original Recipe Found In: Taste Of Home Magazine: August / September 2010 Issue
What You'll Need: (Note, this recipe makes 6 stuffed apples, adjust the ingredients as necessary for your needs)
6 Tart Apples (Granny Smith preferred)
2 Teaspoons Lemon Juice
1/3 Cup Chopped Pecans
1/4 Cup Chopped Dry Apricots
1/4 Cup Brown Sugar
3 Tablespoons Melted Butter
3/4 Teaspoon Cinnamon
1/4 Teaspoon Ground Nutmeg

Begin by coring your apples and peeling the top 1/3 of each. Use a basting brush or paper towel, rub the lemon juice over the peeled sections of the apples (this helps to avoid unsightly browning of the peeled apple). If you're making the full 6 apples, place them in a 6 quart slow cooker. However, a smaller quantity of apples will not require such a large slow cooker. As I was only making 2 apples this evening, I chose to use our smaller, 'dip' slow cooker which is roughly 2 quarts.
In a bowl, combine the pecans, apricots, brown sugar, cinnamon, nutmeg and butter. I chose to add some dried cranberries to the mix as well, just to change things up a little bit. In reality, any 'fall flavor' of dried fruit or nut will mix in nicely with this concoction.
If your pecans and apricots are not chopped, you can use a chopper - such as the OXO chopper that Maggie and I love. I used our OXO chopper to reduce the pecans to a fine crumb like mix and attempted to use the chopper to slice up the apricots as well...the pecans chopped up just fine. The apricots, which were gummy and sort of soft in texture, simply bounced around the container. I opted to shred the stubborn little buggers manually instead.
Mix everything well in the bowl until you achieve a mixture that looks a lot like granola. Using a large tablespoon, pour heaping helpings of the mixture into the cored out apples. I used the end of the spoon to pack in the mixture in tight (like packing gun powder into a cannon) to ensure that each apple was filled to the top with the granola mixture.
Pour in 1/3 cup of water (or just enough to cover the bottom of the slow cooker) and set the temperature to low. Allow the apples to cook for 3 to 4 hours or until soft, serve and enjoy!
The Results:
Alas, my apples cooked for about 40 minutes too long. I had set the slow cooker on a timer, so it could begin cooking at 2:00. I was due home at 6:00 - by my logic that was 4 hours and everything would be fine. HOWEVER this was the first time cooking with this particular slow cooker, and as I found out the hard way that it is an ambitious little guy (I.E. hotter than I realized).
What that meant is sometime between 5:00 (when Maggie came home) and 6:00 - My apples essentially exploded...outwards. The skin literally cooked off the outer edge and the apple fell apart. This meant no 'end result' picture with a nice, golden apple. Sine the thing I spooned out of the slow cooker wasn't all that photogenic, I opted to not post pictures of my final mushy dish.
That being said, the outward appearance had no effect on the flavor - which was fantastic. Maggie summed it up eloquently by simply stating "it tastes like warm apple sauce, topped with cinnamon and nuts". She hit the nail right on the head, warm cinnamon apple sauce with pecans cooked right in. A perfect warming dish for those cool fall evenings....next time I'll set the timer a little shorter though...
That's all we have for you this evening. I'm back in the kitchen tomorrow with a recipe that I have personally tried in the past - but am now attempting to duplicate via only memory and taste...this could be an interesting evening! Be sure to stop in tomorrow night to see what I've got cooking. Until then,
~Cheers
Have I got just the recipe for that craving!
My dish tonight is perfect for those evenings where you are craving something warm and comforting, but don't really need or want to construct an entire feast. This recipe is light on waistline, but packs a punch with flavor and originality.
The Recipe: Slow Cooked Stuffed Apples
Original Recipe Found In: Taste Of Home Magazine: August / September 2010 Issue
What You'll Need: (Note, this recipe makes 6 stuffed apples, adjust the ingredients as necessary for your needs)
6 Tart Apples (Granny Smith preferred)
2 Teaspoons Lemon Juice
1/3 Cup Chopped Pecans
1/4 Cup Chopped Dry Apricots
1/4 Cup Brown Sugar
3 Tablespoons Melted Butter
3/4 Teaspoon Cinnamon
1/4 Teaspoon Ground Nutmeg

Begin by coring your apples and peeling the top 1/3 of each. Use a basting brush or paper towel, rub the lemon juice over the peeled sections of the apples (this helps to avoid unsightly browning of the peeled apple). If you're making the full 6 apples, place them in a 6 quart slow cooker. However, a smaller quantity of apples will not require such a large slow cooker. As I was only making 2 apples this evening, I chose to use our smaller, 'dip' slow cooker which is roughly 2 quarts.
In a bowl, combine the pecans, apricots, brown sugar, cinnamon, nutmeg and butter. I chose to add some dried cranberries to the mix as well, just to change things up a little bit. In reality, any 'fall flavor' of dried fruit or nut will mix in nicely with this concoction.
If your pecans and apricots are not chopped, you can use a chopper - such as the OXO chopper that Maggie and I love. I used our OXO chopper to reduce the pecans to a fine crumb like mix and attempted to use the chopper to slice up the apricots as well...the pecans chopped up just fine. The apricots, which were gummy and sort of soft in texture, simply bounced around the container. I opted to shred the stubborn little buggers manually instead.
 |
| Pecans...slightly chopped |
Mix everything well in the bowl until you achieve a mixture that looks a lot like granola. Using a large tablespoon, pour heaping helpings of the mixture into the cored out apples. I used the end of the spoon to pack in the mixture in tight (like packing gun powder into a cannon) to ensure that each apple was filled to the top with the granola mixture.
 |
| The whole mixture - it looks (and tastes) a lot like granola |
 |
| Showing a little flesh! |
 |
| Apple cannons...filled with granola and far less deadly |
Pour in 1/3 cup of water (or just enough to cover the bottom of the slow cooker) and set the temperature to low. Allow the apples to cook for 3 to 4 hours or until soft, serve and enjoy!
The Results:
Alas, my apples cooked for about 40 minutes too long. I had set the slow cooker on a timer, so it could begin cooking at 2:00. I was due home at 6:00 - by my logic that was 4 hours and everything would be fine. HOWEVER this was the first time cooking with this particular slow cooker, and as I found out the hard way that it is an ambitious little guy (I.E. hotter than I realized).
What that meant is sometime between 5:00 (when Maggie came home) and 6:00 - My apples essentially exploded...outwards. The skin literally cooked off the outer edge and the apple fell apart. This meant no 'end result' picture with a nice, golden apple. Sine the thing I spooned out of the slow cooker wasn't all that photogenic, I opted to not post pictures of my final mushy dish.
That being said, the outward appearance had no effect on the flavor - which was fantastic. Maggie summed it up eloquently by simply stating "it tastes like warm apple sauce, topped with cinnamon and nuts". She hit the nail right on the head, warm cinnamon apple sauce with pecans cooked right in. A perfect warming dish for those cool fall evenings....next time I'll set the timer a little shorter though...
That's all we have for you this evening. I'm back in the kitchen tomorrow with a recipe that I have personally tried in the past - but am now attempting to duplicate via only memory and taste...this could be an interesting evening! Be sure to stop in tomorrow night to see what I've got cooking. Until then,
~Cheers
Tuesday, October 12, 2010
A New Adventure Everyday: Apple Week - Recipe 1
Good evening everyone! Alas, our glorious streak of beautiful weather and warm temperatures seems to have come to a screeching halt today. While the morning and early afternoon started warm and sunny - mid afternoon turned soggy and blustery. Now that the temperature has plummeted a full 15 degrees from earlier in the day, it truly feels like fall out there.
What better day to debut the first of our apple recipes? (after all, the apple is 'fall's fruit') Tonight, Maggie took to the kitchen with a very unique recipe - for us anyway, it may not be that 'unique' to some of our readers. For my part, anyway, it was a recipe that I'd never seen before. Without further ado, I'll turn the keyboard over to Maggie so she can share the process!
The Recipe: Gingered Apple Salad
Original Recipe Found In: Taste Of Home Magazine: August / September 2010 Issue
What You'll Need:
1 Medium Tart Apple (Granny Smith or any green variety)
2 Medium Red Apples (Fuji is preferred, although any variety of red/sweet is okay)
1/4 Cup Toasted Pecans
2 Celery Ribs
8 Ounces Water Chestnuts
3 Tablespoons Crystallized Ginger (Chopped)
1/2 Cup Dried Cranberries
1/2 Cup Vanilla Yogurt
1/4 Cup Reduced Fat Mayonnaise
2 Tablespoons Sugar
1/4 Teaspoon Ground Ginger
1/2 Teaspoon Salt

Good evening! In the description for this recipe, it says "...a refreshing twist on the classic Waldorf salad." Now, I've had Waldorf Salad multiple times, since it is an essential dish at any of my family's get togethers. Every time I bite into the salad, I cringe a little bit - there is an element of tanginess that I'm still not adjusted to when I take the first bite. But with this recipe, it was a new ballgame.
I began by slicing my apples, celery, and water chestnuts. After these were sliced, I added my dried cranberries. I also [tried to] finely chop my crystallized ginger. If you have never encountered crystallized ginger, here's the scoop: they look like dried apricots with a heavy dose of either salt or sugar coated on the individuals pieces. (Pictured below) But they are actually quite soft to slice, which makes the process real easy. After everything has been sliced, add to a large bowl and toss.

In a smaller bowl, combine the yogurt, mayonnaise, sugar, ginger, and salt. Pour over the apple mixture and set in the refrigerator to chill. Meanwhile, spread the pecans on a baking sheet and toast for 5 minutes in a 200 degree oven. Take out of oven to cool. Once cool, sprinkle the pecans over the apple mixture. Serve and enjoy!


The End Result:


The taste had a semi-sweet flavor - it wasn't completely over the top, but the yogurt and sugar brought a harmonious, yet appealing sweet taste. The yogurt, I think, was the saving grace in this dish and made this dish completely its own. I would probably cut out the crystallized ginger, just because I'm not the biggest ginger fan - the 1/4 tsp of ground ginger would have given it plenty of good flavor. Overall, I'm pleased with the result and I can't wait to bring this to any of my family get togethers.
Thanks Maggie! I was very surprised by the interesting flavor combinations of this dish - mainly because I had no idea what to expect. The sweetness of the yogurt, the natural 'tang' of the fruit and the more bitter dried cranberries all combined into a harmonious salad. The lasting flavor could easily be described as 'fresh - yet fall like'. A tasty dish indeed.
That's all we have for you this evening. I take to the kitchen tomorrow with another new adventure in culinary exploits. Tomorrow's dish does not have the 'new' ingredient like Maggie's recipe tonight did, however, it does use a cooking process and technique that I have yet to try. It should be fun, so be sure to stop back in tomorrow evening to see what I've got cooking! Until then,
~Cheers
Subscribe to:
Posts (Atom)