Tuesday, December 31, 2013

Fancy Pasta in a Flash!

Good evening everyone!  Sometimes, we command too much out of a pasta recipe.  Whether it's heavy sauces or a list of ingredients two pages long, we tend to add too much to the humble pasta dish.  Sometimes, the best pasta dishes are the most simplest.  Tonight, I'll showcase one example of a simple, yet delicious pasta recipe that you can make in a snap!

The Recipe:  Herby Fettuccine with Fried Eggs
Original Recipe From:  Quick Cook Pasta

What You'll Need:
10 Ounces Fettuccine
2 Tablespoons grated Parmesan Cheese, plus extra to serve
1 Teaspoon dried Parsley, plus extra to serve
3 Tablespoons Olive Oil
1 Garlic clove, finely chopped
4 Eggs
Pinch of dried Red Pepper Flakes

To start, bring a large saucepan filled with water to a boil over medium-high heat.  Cook according to the package directions.  Once the pasta is done cooking, reserve 1/3 cup of the pasta water and drain the pasta in a colander.  Once all the water has drained out, bring the pasta back to the saucepan.  Add the Parmesan and parsley and stir well until the cheese has melted.  If the cheese clumps together on itself, add small portions of the pasta water to thin out the cheese.  Season with salt and pepper.

Next, in a large nonstick skillet, add the olive oil and heat over medium-high heat.  Once the oil has heated, add the garlic and heat until the garlic has become fragrant, about 30 seconds.  Then, crack the eggs into the skillet and cook for three minutes, or until the whites are cooked, but the yolks have just set.

Divide the pasta into four serving bowls and top each with a fried egg.  Sprinkle the red pepper flakes, any remaining Parmesan cheese and parsley, serve, and enjoy!

The End Result:


The melted cheese, combined with the pasta, created a creamy sauce that wasn't too heavy, yet had just enough flavor to enhance the dish.  The parsley added a hint of flavor, but the red pepper flakes gave just enough heat to warm the back of the throat.  The fried egg was definitely a treat.  While the yolk was cooked just enough, yet was still runny, it covered the pasta in coat of tastiness that can only be experienced to enjoy.  While it is a little odd to have eggs on pasta, it is one recipe that you shouldn't pass up!

That's all we have for you this evening.  Check back on Thursday as Tyler lightens a Mexican favorite.  As 2013 comes to a close, we want to thank all of you who read our blog.  We are nothing without our loyal followers and we cannot thank you enough for sharing our culinary adventures with us.  We'll see you in 2014!  Until then,

~Cheers!

Wednesday, December 18, 2013

Western Omelet "Hash"

Good evening everyone! Every once in a while, we accidentally stumble upon a theme week when we pick recipes for the blog. This week is one of those weeks. Maggie started us off with a delicious french toast casserole that was one for the cookbook (the still in progress cookbook...it's a long story). Tonight, I'm taking another breakfast recipe for a spin. Nothing says winter like breakfast food...right? Either way, let's get cooking!

The Recipe: Western Hash Brown Omelet
Original Recipe Found In: Food Network Magazine, December 2013 Issue

What You'll Need:
(Serves 4)

8 Large Eggs
2 Tablespoon Extra Virgin Olive Oil
4 Ounces Thick Cut Deli Ham
2 Bell Pepper (Red, Green) Diced
1 Onion, Diced
2 Tablespoon Unsalted Butter
3 Cups Frozen Shredded Hash Browns (Do not thaw)
4 Ounces Smoked Gouda Cheese (Grated)
1 Bunch Scallions (Chopped)

Beat the eggs in a large bowl until they become bubbly / foamy.

In a large (broiler safe - so no non-stick) skillet heat the olive oil over medium high heat until it begins to shimmer lightly. Next, add the ham, peppers and onion along with a pinch of salt and pepper and cook until the veggies begin to brown. Once cooked, add this mixture to the bowl of beaten eggs.


Preheat the broiler.

Wipe the skillet clean, then add the butter and set the skillet over medium heat. Melt the butter before adding the hash browns. Cook, pressing the hash browns into the bottom and up the sides of the skillet (into a cohesive layer) then allow the hash browns to brown (this takes about 6 minutes). Next, pour the egg mixture over the hash browns and place the skillet under the broiler. Cook until the eggs have partially set (5 minutes) then sprinkle the cheese over the eggs and cook for an additional 2 to 3 minutes, or until the eggs are set and the cheese has melted.

Using a small spatula, pry the hash brown from the sides of the skillet and transfer to a platter or large cutting board. Fold the hash brown "round" in half, then slice into wedges. Serve topped with scallions and enjoy!

The Results:

The finished dish "pre-fold" the "fold" didn't go so well on our end... 


This dish was quite the surprise. While the execution proved to be a bit harder than anticipated (the omelet didn't fold, so much as "crumble" leaving us with a hash, not an omelet) the final flavors were a perfect blending of cheese, potato and peppers. We've tried some other forms of western omelets before - with different ranges of success - but this recipe proved that simplicity is the best answer. Simple ingredients equal complex flavors. If you're looking for something to spice up a weekend omelet or if you want to bring some variety to the weeknight meal, give this recipe a try.

That's all we have for you this week, in fact, that's all we have for you NEXT week as well. With the holidays coming up next week (holy cow, right?) and the travel we'll be doing we simply won't have time to blog. We hope everyone has a happy holiday and enjoys the time spent with their loved ones. Until the week of 12/30,

~Cheers


Tuesday, December 17, 2013

Breakfast for Dinner Part One: Not Your Standard Casserole

Good evening everyone!  While we were planning our cooking schedule this week, we accidentally both chose breakfast recipes.  We have done many adaptations of great breakfast dishes that adapt well to the evening meal.  This is great for us since we both love breakfast/brunch meals.  Tonight, I'm cooking up a hearty French Toast variation that will leave you wanting more!

The Recipe:  Easy French Toast Casserole
Original Recipe From:  www.myrecipes.com

What You'll Need:
2/3 Cup packed Dark Brown Sugar
2 Tablespoons unsalted Butter
2 Tablespoons Dark Corn Syrup
1 1/2 Cups 1/% Low-Fat Milk
1/2 Cup Egg Substitute
1 Teaspoon Vanilla Extract
1/4 Teaspoon Salt
1/8 Teaspoon grated Orange Rind
2 large Eggs
6 (1 1/2-inch-thick) slices French bread
6 Tablespoons frozen fat-free Whipped Topping, thawed
1 to 2 Teaspoons Grand Marnier (or orange-flavored liqueur)*
2 Tablespoons finely chopped Pecans, toasted

*Alternatively, if you do not have an orange-flavored liqueur handy, you can substitute orange extract, just remember that the extract will be more potent than the liqueur, so for every teaspoon of liqueur, use 1/4 teaspoon of extract.  Still the same flavor, without some of the booziness.

To start, prepare a 9x13 baking dish by spraying the bottom with cooking spray.  Next, combine the brown sugar, butter, and corn syrup in a small saucepan over medium heat.  Cook for five minutes, or until the ingredients come together, or until the sugar dissolves and it begins to bubble.  Be sure you stir this mixture constantly, or else the sugar will burn and will leave a not-so great smell in your kitchen!  After the mixture has come together, quickly transfer the mixture to the bottom of the baking dish and spread while the mixture is still hot to evenly coat the bottom of the dish.  Set the pan aside and let the dish cook completely.


Next, in a small mixing bowl, combine the milk, egg substitute, vanilla extract, salt, orange rind, and eggs.  Whisk until all the ingredients are all combined.  Place one bread slice into the egg mixture and flip the slice to coat on both sides.  Place the dredged bread slice in the sugar-lined dish.  Continue the dredging process and placing in the baking dish for the next bread slices.  Once all the pieces of bread are in the baking dish, pour any of the remaining egg mixture over the bread slices.  Cover the baking dish with a lid or aluminum foil and refrigerate overnight.


The next day, preheat an oven to 350 degrees.  While the oven is preheating, take the baking dish out of the refrigerator and bring to room temperature.  By the time the oven is preheated, the dish should be ready to put in the oven.  Bake the casserole in the oven for 30 minutes at 350 degrees or until lightly browned.

While the casserole bakes, prepare the topping.  In a small mixing bowl, combine the whipped topping and the Grand Marnier until well combined.  Once the casserole is done baking, remove from the oven.  Place one bread slice, with the caramel side up, on a serving plate.  Top each piece of bread with a dollop of the prepared topping and a sprinkle of pecans.  Serve and enjoy!

The End Results:


Oh...my...goodness!  There were so many great parts about this dish that can't go unnoticed.  I've heard rave reviews about 24 hour and overnight soaks for French toast dishes and I can see why.  The bread is completely submerged in the egg mixture and creates almost a velvety feeling when you bite into it.  The caramel melted and creates a cloak of sweet texture over the bread.  The whipped topping has a hint of orange flavor and makes the toast even more delicious.  Even the pecans added a bit of a crunch and added to this already perfect dish.  This French toast casserole definitely cannot be missed and should be part of your next brunch lineup!

Thanks for joining us this evening.  Check back tomorrow when Tyler continues the breakfast for dinner theme with a brand new recipe.  Until then,

~Cheers!

Friday, December 13, 2013

Friday Bonus Blog: We're Baking Some Scones!

Good evening everyone to a special Friday blog!  One thing that we don't include as often on the blog is baking recipes.  While neither of us have a knack for baking, when I see a delicious baked good, I really want to try it.  My baking results have, more often than not, been about 65% not good to 45% good.  This recipe would highlight itself under the 45% file and is a recipe I would love to try again.

The Recipe:  Chocolate Chip-Hazelnut Scones
Original Recipe Found From:  www.bakeorbreak.com

What You'll Need:
2 Cups White Whole-Wheat Flour
2 Tablespoons Granulated Sugar
2 Teaspoons Baking Powder
1/2 Teaspoon Baking Soda
1/2 Teaspoon Salt
1/2 Cup Unsalted Butter, cold and cut into 1/4 inch cubes
1/4 Cup chopped Hazelnuts
1/4 Cup mini Semisweet Chocolate Chips
2.4 Cup Buttermilk
1 Egg Yolk
1/2 Teaspoon Vanilla Extract

To start, preheat an oven to 375 degrees.  Also, prepare a baking sheet with parchment paper or a silicone liner.  Next, in a large mixing bowl, add the flour, sugar, baking powder, baking soda, and salt and combine well.  Into that bowl, add the butter and cut into the mixture, using a pastry blender or a fork until the butter/flour mixture looks like coarse meal.  Once this has mixed, carefully stir in the hazelnuts and chocolate chips.

In a small bowl, whisk together the buttermilk, egg yolk, and vanilla.  Gently pour the liquid mixture into the flour mixture and stir until a dough forms.  Next, carefully transfer the dough to a lightly floured work surface and knead gently for a few turns.  Once the dough has combined itself, gently pat the dough into a flat disk, about seven inches in diameter and no more than an inch and a half thick.  Cut the disk into six to eight wedges.


After cutting into wedges, transfer them to the prepared pan.  For softer scones, leave the wedges close together in a circle, for crispier scones, separate and spread out the wedges.  Place the baking pan in the oven and bake for 18-25 minutes, or until lightly golden brown.  Cool the pan on a wire rack.  Once cooled, serve, and enjoy!

The End Result:

(The bright pink you see under the scone is a silicone mat we got at IKEA - it was $10, compared to $25 for "brand name" silicone mats!)


I did have high hopes for this scone when I started baking it, and some of those hopes got lost in the shuffle.  We used whole-wheat flour, instead of WHITE whole-wheat flour, and that made a huge difference.  The flavor of the dough wasn't quite right, and almost tasted yeasty (which is weird, because there was no yeast in the recipe.)  With that being said, the scone was almost too dry to chew and needed warming up when eating it.  The saving grace of this recipe though was the chocolate chips and the hazelnuts.  If it worn't for those two ingredients, this scone recipe would have been a disaster.  I would like to try this recipe again, except I would make some major alterations:  I would use all-purpose flour (or white whole-wheat) flour, so the flavor components would really shine through.  Also, adding more sugar, chocolate chips, and/or hazelnuts would really enhance the entire flavor of the scone.  Otherwise, it was a baking attempt that was almost there, but it didn't completely fall on its face.

Thanks for joining us this week.  Check back next week as we continue to cook up some brand new recipes.  Until then,

~Cheers!

Wednesday, December 11, 2013

Helping the Holiday Ham

Good evening everyone! We’re presently in the dead center of the holiday season. Thanksgiving is two weeks behind us, Christmas is two weeks ahead. This means countless family gatherings and endless holiday meals. Thanksgiving and Christmas are fairly traditional holidays when it comes to the meal selection. Turkey is the staple of Thanksgiving, while ham is the predominant dish come Christmas day. (Obviously this isn’t a blanket statement and your own family could choose to eat something else entirely on these holidays – the larger point here is that when it comes to percentages, those two rank ahead of all else).

Turkey gets a lot of attention on Thanksgiving because it’s such an uncommon item to cook (we typically deal with it once per year) and people are worried their inexperience could lead to a disastrous finish (dried out meat, burnt down house, family never speaking to you again – you know, the usual). As such, there are countless “how to cook a turkey” stories on morning news shows, food magazines and online.

The traditional holiday ham, however, rarely receives such attention. After all, it’s just ham, how hard can it really be? Well, I don’t know about you, but I’ve had my fair share of dried out hams at family gatherings and can attest that ham must not be as easy to cook as people assume it is.

In fact, when you consider what you’re up against, the holiday ham should probably be treated with as much prep and research as the thanksgiving turkey. After all, you’ve got a large (and typically expensive) piece of meat that needs several hours to cook, but can dry out in as little as one hour. Then there’s the sauce to think about. Sure, most hams come with a prepackaged sauce, but those over sweet disasters rarely ADD anything to the dish and typically are so powerful they wash away the flavor of everything else on the plate.

Yes, it’s time the holiday ham got its due attention. After all, with just a few easy steps, you can save the ham from becoming a dry piece of leather – thereby saving Christmas for everyone.

The Recipe: Holiday Ham with Cherry Port Glaze
Original Recipe Found In: America’s Test Kitchen – The Complete Cookbook

What You’ll Need:
1 Spiral Cut Ham (Bone-in) – weight depends on the number of people you’re feeding
½ Cup Cherry Port
½ Cup Cherry Preserves
1 Teaspoon Black Pepper


Spiral cut, bone in ham provides the best flavor for your buck, and if you’re serving a large crowd, it actually becomes a decent value (per plate). Since we were serving two, we opted to use a whole ham (boneless) that came in at a more modest 5lbs and $9. However, our instructions are applicable to the use of both hams.

The key to the ham lies in the roasting time. The rule of thumb has been 20 minutes of cooking time per pound of ham (bone in) – which when you start dealing with larger hams, can push the cook time into the two to three hour range. The problem is that a large roast will dry out on the ends well before the center is cooked. You can lower the oven temperature, but that can push your cook time into the 4 to 6 hour range and you’ll STILL likely have dried edges.

Luckily, the folks at America’s Test Kitchen have devised a solution. Begin by filling a large container (one big enough to fit the ham in) with hot tap water (as hot as your tap goes). If you have split sinks, one side of a sink works well for this. Submerge the ham (still wrapped in it’s packaging) in the water for 45 minutes. Then drain the water and will the container with hot tap water once more, again allowing the ham to sit submerged for 45 minutes.

This hot bath brings up the internal temperature of the ham, and lowers the cooking time per pound from 20 minutes to a much more reasonable 10.

Place your oven rack to its lowest position and preheat the oven to 250 degrees.

Remove the ham from its packaging and place it in a large roasting pan. If your pan has a lid, and it fits over the ham, cover the pan with the lid. If, however, the ham is too big for your roasting pan (this is very likely) use aluminum foil to tightly cover the exposed portion of the ham. Once covered, place the ham in the oven and cook for 10 minutes per pound. (For example, our 5 pound ham needed 50 minutes in the oven).

While your ham is roasting, you can begin preparing the glaze. In a small saucepan over medium high heat, bring the cherry port to a simmer and allow it to cook until it reduces to about 2 tablespoons (this takes about 5 minutes). Once reduced, add the cherry preserves and black pepper. Stir well, then bring the mixture to a light simmer. Allow it to simmer until it thickens (it should cling to your spoon when you stir). Once thickened, remove from heat and set aside.

After the initial time is up, remove the ham and use and instant read thermometer to check the temperature at the center of the ham. You’re looking for 100 degrees. If you’re there, increase the oven temperature to 350 and cover the ham with about ½ of the glaze you prepared earlier. If it’s still a bit short of 100 degrees, cover the ham and return it to the oven for an additional 10 to 15 minutes and check the temperature once more.

Return the glazed ham to the oven (uncovered) and bake for 10 minutes, or until the glaze thickens and forms a sticky outer layer on the ham. Remove the ham from the oven and transfer it to a cutting board. Tent it loosely with aluminum foil and allow it to rest for 10 minutes before cutting.

Slice into ½ inch thick pieces and serve with the remaining glaze. Enjoy!

The Results:


This was the most moist, flavorful ham I’ve ever had – a fact that could only be achieved via the warm bath method described above. The ham was evenly cooked throughout, with no dried edges and no underdone portions in the center. Better yet, each bite was full of moisture and flavor.

The glaze was extremely flavorful, but admittedly at bit too sweet for my liking. I’m not overly found of sweet glazes, so my prejudice could be clouding my take on the glaze a bit (Maggie thought it was quite good). I’d modify this glaze a bit in the future by cutting the sweetness with a bit of citrus – cranberries could work well in that regard.

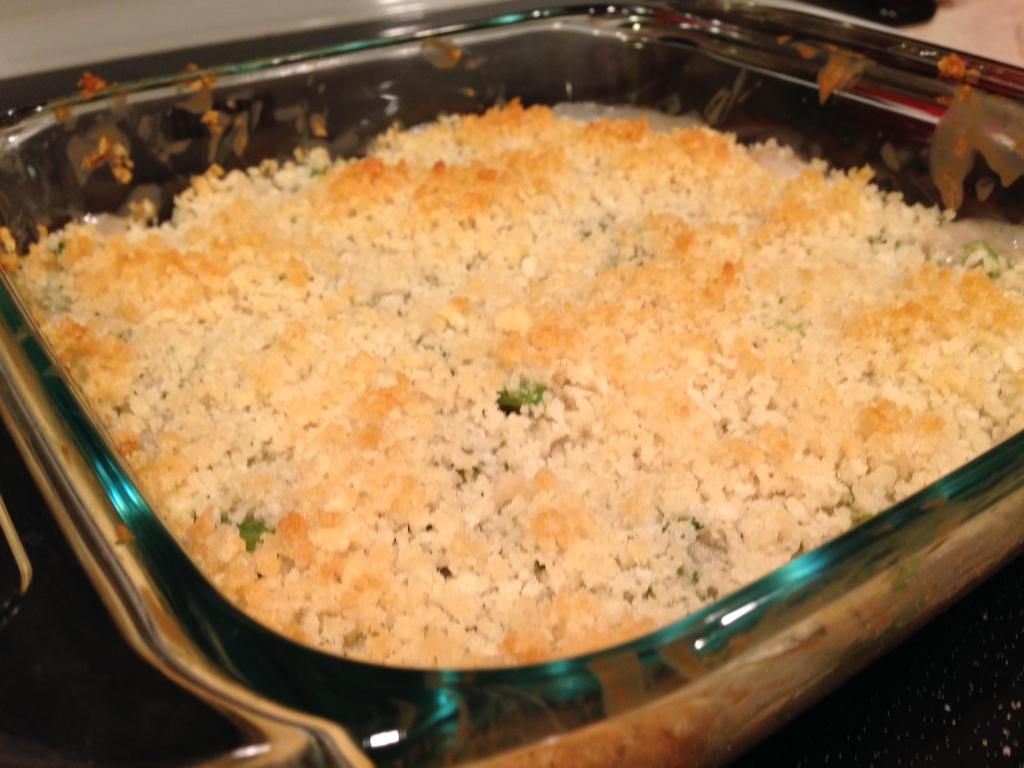
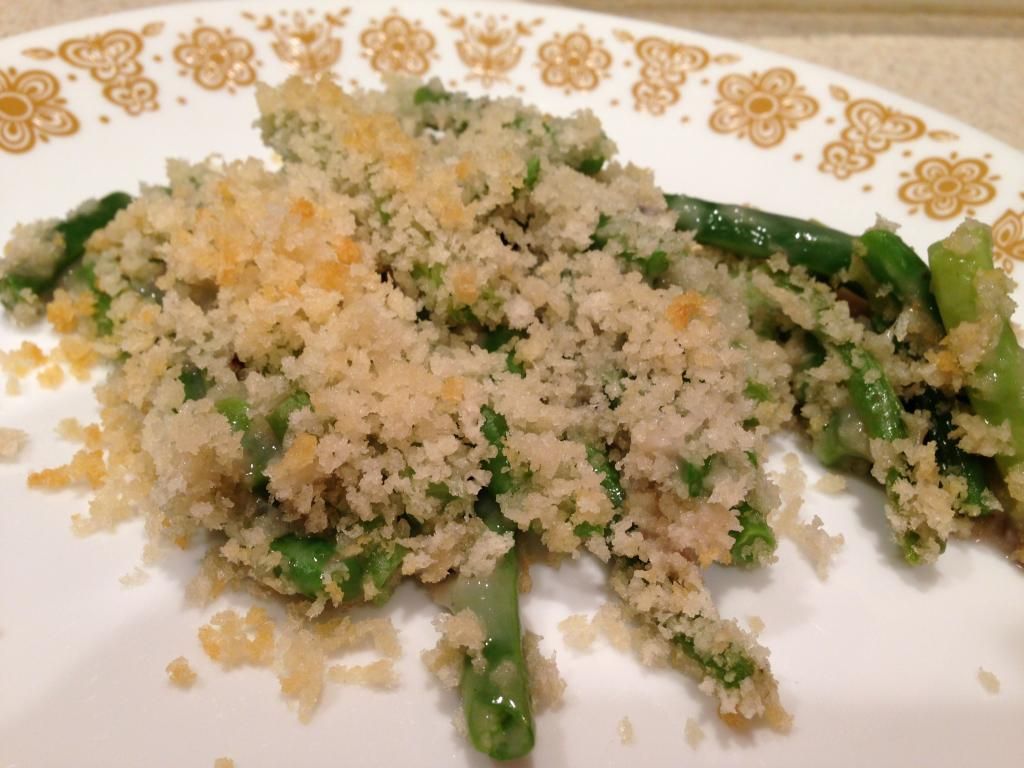
We paired our ham with escalloped corn (from a recipe we posted a few weeks ago) and crispy oven potatoes (recipe to come next week). You, of course, are free to pair the dish with whatever you so choose.

It’s amazing how a few simple steps took a traditional, flawed, holiday staple and turned it to a sure fire hit. If your menu calls for holiday ham this year, give this cooking method a try. You won’t be disappointed.

That’s all we have for you this evening. I’m coming back tomorrow night with a quick recipe idea for how to use some of that leftover ham (because there’s always some left after the holidays) and Maggie will close out the week with a recipe for a healthy take on the classic scone. Until then,

~Cheers

Tuesday, December 10, 2013

Mac and Cheese, All Grown Up

Good evening everyone!  Call us snobs, but we enjoy the higher quality ingredients when we cook.  Granted this doesn't mean we spend outrageous amounts of money when we shop for groceries, but we do like to be a bit picky when it comes to the ingredients that go in our meals.  We also like to feature local ingredients (when possible, of course.)  Sometimes this means going to a farmer's market and pick out fresher ingredients.  But sometimes, that includes ingredients that is locally produced by the best.  Tonight, we'll showcase one of those local businesses that will give the end dish a hearty flavor.

The Recipe:  Stout Mac and Cheese
An adaptation from a recipe found in Cooking Light, April 2013

What You'll Need:
7 Ounces uncooked Rotini pasta
2 Teaspoons Canola Oil
4 Ounces ground hot turkey Italian Sausage
2 1/2 Tablespoons all-purpose Flour
1/2 Teaspoon Black Pepper
1/8 Teaspoon kosher Salt
1 Cup Stout Beer*
1/3 Cup Whole Milk
4.5 Ounces reduced-fat sharp Cheddar Cheese, shredded**

*While the original recipe called for Guinness beer, I wanted to showcase a beer from a local brewery.  Millstream Brewing, based out of the Amana Colonies, produces some of the best beer in Iowa.  Whether it's something light on the palate, or something that will give your mouth a kick back, Millstream has a variety of beers suited for any beer drinker.  We've had luck finding them in local grocery stores.  If you feel up to it, head to the Amana Colonies for an inside peek into their brewery (plus, they have lots of drinks and items for sale!)

We used the Back Road Stout for this evening's dish.  If you like darker beer, you will not be disappointed!
**The original recipe also called for 2.5 ounces of shredded cheddar cheese AND 2 ounces of light processed cheese, ala Velveeta Cheese.  I have a confession to make:  I am not a big fan of processed cheese.  One could make the claim that all cheese is processed in some sort of way.  But this mass produced block of cheese product doesn't appeal to me in the least, so that's why I went with the cheddar cheese and just made it the sole cheese product.


To start, preheat an oven to 450 degrees.  While the oven is preheating, fill a medium saucepan with water and heat over medium-high heat.  Once the water is at a boil, cook the pasta according to package directions.  Once the pasta is cooked, drain in a colander and set aside.

While the pasta cooks, heat a large saucepan over medium heat.  Once heated, add the oil and swirl to coat.  Next, add the sausage and onions and cook for six minutes, stirring occasionally to crumble the sausage.  Once the sausage and onions are thoroughly cooked, add the flour, pepper, and salt, stirring to coat for one minute.  After this, add the beer, stir to incorporate all the ingredients, and bring to a boil.  This mixture should cook for three minutes or until it's stick and bubbly.  Remove the saucepan from the heat and stir in the milk and cheese, stirring until smooth.  Finally, stir in the drained pasta, until everything is well coated.

Sure it looks like gravy, but one taste and you'll know it isn't.

Prepare four ramekins by lightly spraying with cooking spray.  Divide the pasta mixture between the four dishes.  Place in the oven for ten minutes or until warm and bubbly.  Sprinkle fresh parsley on top, serve, and enjoy!

The End Result:


My, my, my...this isn't the mac and cheese that we've all grown up on!  While the stout looks daunting, it's alcohol is cooked out, by the flavor is left behind.  This produces one hearty and divine dish.  The sausage also adds a bit of heat to a dish that's piping hot out of the oven.  The creamy texture from the cheese makes all the ingredients have a cheesy flavor, without it being overbearing.  Overall, this adult version of a kid's favorite could be your next great pasta dish!

That's all we have for you this evening.  Check back later this week as Tyler showcases a traditional holiday meal that you can share with your family this year.  Until then,

~Cheers!

Wednesday, December 4, 2013

Bow Tie Pasta: As Elegant As It Sounds

Good evening everyone! Some of my all time favorite recipes are the ones that feature everyday ingredients. I enjoy constructing a dish around things that can be commonly found in your pantry or freezer. Often times, these recipes turn into a slow cooker feature or perhaps into a stew – but tonight we’re going in a different direction;  pasta.

The Recipe: Bow Tie Pasta with Corn
Original Recipe Found On: Chow.com
(As always, we’ve modified the original recipe to our own designs. If you want to try the original dish, be sure to check it out at the source).

What You’ll Need:
(Serves 4)

1 Pound Bow Tie Pasta (Farfalle or similar)
2 Tablespoons Olive Oil
½ Cup Shallots (Sliced thin)
6 Medium Garlic Cloves (Diced)
1 Cup Dry White Wine
4 Large Thyme Sprigs (Dried can be used as a substitute)
2 Cups Corn Kernels (Frozen are okay – they don’t even need to be thawed)
1 ¼ Cups Heavy Cream
½ Cup Parmesan Cheese
¼ Cup Fresh Chives (Dried can be used as a substitute)

Prepare you pasta according to package instructions. Remove the pasta just before it’s perfectly al dente (it will finish cooking later on). Strain in a colander and set aside.

In a large (12 inch) non stick skillet, heat the olive oil over medium heat until it begins to shimmer. Add the shallots and garlic, cooking until softened and fragrant. This takes about 3 minutes. Add a pinch of salt and pepper before adding the wine and thyme sprigs. Bring this mixture to a simmer, stirring occasionally, until the wine has reduced to about ¼ of a cup. (Roughly 5 minutes of cooking time).

Next, add the corn and heavy cream. Stir well and then bring the mixture to a simmer over medium high heat. Once simmering, add the pasta to the skillet, stirring well to incorporate. Stir in the parmesan cheese and allow the mixture to simmer until the cheese melts completely. Finally, season with a pinch of salt and pepper (to taste) and top with the chives prior to serving. Enjoy!

The Results:


This recipe borrows some concepts from Alton Brown’s classic cream corn recipe that we tried a few years ago. (See it HERE). Essentially, you have a sweet creamy base from the corn and cream that blends beautifully with the bite from the shallots and garlic. All the while, the pasta acts as a neutral observing, simply carrying the flavors without interfering. With a short ingredient list filled with fairly common items on hand, this flavorful pasta dish is sure to have something for everyone. Give it a try!

That’s all we have for you this week. We’re back next week with a few new recipes, including a tasty way to cook up a traditional pastry. Until then,

~Cheers

Tuesday, December 3, 2013

Not Your Typical Soup

Good evening everyone!  Personally, cooking is about taking risks on ingredients and flavors and turning them into something completely different.  As long as the ingredients agree with each other, I'm game for trying a dish I wouldn't normally try.  Tonight, I'm introducing black beans to chorizo and make them agree for the commonality of a soup.  Trust me, you will not be disappointed with the results.

The Recipe:  Black Bean Soup with Chorizo and Lime
Original Recipe Found In:  Cooking Light, December 2013 Issue

What You'll Need:
2 Teaspoons Olive Oil, divided
3 Ounces Spanish Chorizo, quartered lengthwise and cut into 1/2 inch pieces
1 Cup chopped Onion
1 Cup chopped Red Bell Pepper
2 Teaspoons chopped fresh Oregano
2 Teaspoons minced Garlic
1 Teaspoon ground Cumin
1/2 Teaspoon Chipotle Chile Powder
1/4 Teaspoon Salt
2 Cups unsalted Chicken Stock
2 (15 ounce) cans unsalted Black Beans, rinsed, drained, and coarsely mashed
1 Tablespoon Lime Juice
1/4 Cup reduced fat Sour Cream
1/4 Cup chopped fresh Cilantro

To start, heat a large saucepan, with one teaspoon of oil, over medium heat.  Once the pan is heated, swirl the oil to coat.  Add the chorizo and cook for three minutes, stirring occasionally.  The chorizo won't have the tell-tale signs of being cooked, but if it looks like it has been thoroughly heated, remove from the pan into a small bowl.  Do not wipe down the pan - there are bits of oil and chorizo that will be left for the next part of cooking.

To the now clear pan, add the remaining oil and swirl to coat.  Add the onion and red bell pepper and cook for three minutes.  The moisture from the onion and pepper will help to remove any cooked on bits of chorizo and enhance the flavor of the veggies.  Once the onion and pepper have softened, stir in the oregano, garlic, cumin, chile powder, and salt.  Cook for thirty seconds, or until the spices have become fragrant.

Next, stir in the stock and beans.  Increase the heat of the saucepan to high to bring the mixture to a boil.  Once at a boil, reduce the heat again and bring to a simmer.  Cook at this temperature for three minutes.  Stir in the cooked chorizo and lime juice and stir to combine well.  Ladle into a serving bowl and top with a dollop of sour cream and a light sprinkle of cilantro.  Serve and enjoy!

The End Result:


If you are looking to switch up your normal soup routine, this soup is for you!  The black beans give the soup a very strong heartiness that the typical chicken noodle soup won't offer.  All the wonderful, unique flavors from the onion, red bell pepper, and chorizo really boost the flavor quotient to the next level.  Not only is the soup served warm, but with these ingredients, they give a flavor warmth that won't soon be forgotten.  Best of all, one serving of this soup is under 290 calories, so you'll get a lot of flavor, for not a lot of calories - a win-win all around!

Thanks for joining us this evening.  Check back tomorrow as Tyler gets creative with a unique pasta dish.  Until then,

~Cheers!

Tuesday, November 26, 2013

Thanksgiving Side Dish in a Flash!

Good evening everyone!  As you all are well aware, Thanksgiving is just around the corner and there's lots of culinary adventures to find when cooking for family and friends.  Sometimes, you can plan out what you're going to serve this mass of people and sometimes, getting people together might involve short planning.  Tonight, I'll present a recipe that is ready under hour, flavorful, and, not to mention, incredibly healthy.

The Recipe:  Green Bean Casserole with Mushroom Sauce
Adapted from a Recipe Found In:  HyVee Seasons Holiday 2013 issue

What You'll Need:
1 Can Cream of Mushroom Soup
4 Cups fresh Green Beans
1/4 Cup Bacon bits, if desired
1 Cup Italian style or plain Panko bread crumbs
3 Tablespoons melted Butter

To start, preheat an oven to 350 degrees.  While the oven is preheating, add the mushroom soup, green beans, and bacon in a glass, 2 quart baking dish.  Stir until all these ingredients are combined.  Set aside.

In a small mixing bowl, add the breadcrumbs and melted butter.  Toss these ingredients together until the butter coats the bread crumbs evenly.  Next, sprinkle the breadcrumbs over the green bean mixture until an even coat forms.

Once the oven reaches 350 degrees, place the baking dish in the oven and cook for 30 to 35 minutes, or until the sauce is hot and bubbly and the bread crumbs are golden brown.  Let the dish stand for five minutes, serve, and enjoy!

The End Result:


Now, I am quite a fan of the traditional Green Bean Casserole and we've done our best to improve this dish, but this might top them all.  Using fresh beans, as proven before, really boosts the whole flavor of this dish.  I guess I don't like my green beans to be a squishy consistency, but if it snaps in your mouth, that is my idea of a good green bean.  Using one can of cream of mushroom soup, instead of two or three, lightly coats the beans and doesn't overwhelm with mushroom flavor.  While the baked onions certainly add to the flavor of the classic casserole, the bread crumbs add a nice crunch to end the perfect trifecta of this dish.  Tyler even quipped that he would eat this variant of Green Bean Casserole again - which is saying a lot, since he doesn't like mushrooms and overdone green beans aren't his thing either.  Overall, this dish is ready in a snap, and is the perfect dish to add to any Thanksgiving spread.

Thanks for joining us tonight.  This will be a short week for us, due to the holiday.  We hope that you get to celebrate Thanksgiving with those you love and you have a list of things your are thankful for.  We know that we are thankful for all our readers and supporters of our blog, so we thank you!  Join us next week as we continue to share great recipes from our kitchen to yours.  Until then,

~Cheers!

Saturday, November 23, 2013

Pizza for Breakfast or is it Breakfast in Pizza Form?

Good evening everyone!  Tyler and I are big fans of combining two different food combinations together.  When it comes to swapping flavors in different cuisines or different meals, we are big ones for trying it.  One of these happens to be breakfast pizza.  While the concept is relatively old hat, we are big fans of this "breakfast for supper" idea and we couldn't be more excited to share our first breakfast pizza with our followers!

The Recipe:  Egg and Bacon Breakfast Pizza
Original Recipe Found In:  Cooking Light, December 2013 issue

What You'll Need:
12 Ounces refrigerated fresh Pizza Dough
1 Teaspoon Olive Oil
2.5 Ounces part-skim Mozzarella Cheese, shredded (about 2/3 cup)
3-4 center-cut Bacon slices
4 large Eggs
1 Tablespoon grated Parmesan Cheese
2 Tablespoons minced fresh Chives
2 Tablespoons minced fresh flat-leaf Parsley

To start, place a pizza stone or heavy baking sheet in a oven and preheat the oven to 500 degrees.  Keep the pizza stone or baking sheet in the oven the entire time while the oven preheats.  While this is happening, lightly flour a workable surface, place the pizza dough over the flour, and let the dough stand at room temperature for thirty minutes.  You can also cook the bacon slices during this time frame.  Once the bacon is cooked, place on a paper towel lined plate and crumble once cooked.

After the thirty minutes have elapsed, roll the dough into a 14-inch circle, dusting with flour if necessary.  Next, pierce the entire surface of the dough liberally with a fork.  By this time, the oven (and baking sheet) should be preheated.  Take the baking sheet out of the oven and arrange the dough carefully on top.  Brush the dough lightly with oil and begin to assemble the pizza.  

Top the dough with the mozzarella cheese and bacon.  Next, very carefully crack the eggs on top of the pizza, ensuring equal space is between the eggs.  Finally, sprinkle with the parmesan cheese and place the baking sheet back in the oven.  Bake the pizza at 500 degrees for eight minutes or until the crust has browned and the eggs are just set.  Sprinkle the pizza with chives and parsley, cut into eight slices, serve, and enjoy!

The End Result:


Breakfast Pizza has one very distinguishable trait is that it has no marinara sauce or any traditional toppings that one would recognize as pizza.  But with the eggs, bacon, and mozzarella cheese, this definitely stands out on it's own.  While I cooked the pizza a bit too long, the eggs should be runny upon breaking the yolks and will create its own sauce.  The mozzarella is melted perfectly and the bacon adds a final bit of meatiness to the pizza.  If you like a pizza that won't leave you stuffed, but will leave you satisfied, you will find a winner here!

Thanks for joining us this week.  We share two brand new recipes with you next week.  Until then,

~Cheers!

Thursday, November 21, 2013

Soup: Simple & Savory

Good evening everyone! I’m frequently asked how I taught myself to cook – people are frequently overwhelmed by the prospect of cooking 100% from scratch meals and don’t even know where to begin when trying a task for themselves. My answer is always the same, I taught myself through trial and error and with a lot of help from Jamie Oliver’s “Food Revolution” cookbook. His cookbook broke complicated cooking concepts into basic English and made an overwhelming task relatively easy for a beginner.

From there, I moved on to America’s Test Kitchen recipes, which carefully laid out WHY flavoring works the way it does. This was supplemented by episodes of Alton Brown’s TV show “Good Eats” which explained the science of cooking alongside easy to follow instructions. It was a process and certainly didn’t happen overnight, but by taking small steps, I was able to effectively teach myself to cook from scratch.

“That’s all well and good” folks typically respond, “But I don’t even know where I’d begin to do something like that” that exchange typically ends the conversation. Most people are looking for the “starter recipe” something that is hard to mess up, but that will teach layering and other basic cooking techniques that are necessary for more advanced recipes. Pity such a recipe doesn’t exist, right?

Wrong.

In fact, we’re in the PERFECT season for just such recipes (yes, recipes, with an “S”). What is this wonder dish, this teacher of all teachers? Soup. Humble soup is the perfect candidate for the beginning chef, or those looking to brush up on their culinary skills (advanced chefs love it too – FYI). It’s almost impossible to mess up (too thick? congratulations, you made stew!) it has a decent amount of prep work (great practice) and it shows you how to layer different ingredients to create beautiful flavors.

If you haven’t figured it out, soup is on the menu tonight – and it’s one of my all time favorite recipes. Let’s get cooking!

The Recipe: Vegetable Soup
Original Recipe From: Good Eats (2004)

What You’ll Need:
(Serves 6 to 8)

4 Tablespoons Olive Oil
2 Cups Chopped Leeks (White part only, rinsed well)*
2 Tablespoons Minced Garlic
2 Cups Carrots (Peeled, chopped)**
2 Cups Russet Potatoes (Peeled, diced)
2 Cups Fresh Green Beans (Cut into ¾ inch pieces)
2 Quarts Chicken Broth or Vegetable Broth
4 Cups Tomatoes (Peeled, diced, seeded – canned works well as a substitute)
2 Cups Corn Kernels***
¼ Cup Packed Fresh Parsley Leaves
1 to 2 Teaspoons Fresh Lemon Juice

* By “white part only” the recipe means for you use the base of the leek all the way until the stem turns a darker green. You want everything that’s white to green/white (typically ½ to ¾ of the stem). For 2 cups, you’ll need about 3 medium leeks.

** Two medium carrots should yield two cups. We had smaller carrots, so we used four carrots. Adjust accordingly depending on what you can find.

*** If using fresh, 2 years of corn should yield two cups.

It’s tempting to take a shortcut with this recipe and simply use a bag of frozen vegetables to cut out the prep work. DON’T DO IT. While frozen vegetables certainly have their uses in recipes, they simply aren’t meant for this one. Go with as many fresh ingredients as you can, you’ll appreciate the final result when it’s all said and done. For our recipe, the only thing we could no longer find fresh was corn, so we had to use frozen corn kernels instead. Everything else was fresh and readily found in our grocery store.

Ideally for this recipe, you should use a large stock or soup pot with high sides. We’re not equipped with a stock pot, so we used our largest pot (our dutch oven) and while it worked, the pot was a bit crowded. If you have a tall narrow stock or stew pot – use it!

Begin by heating the olive oil in your pot over medium low heat. Once the oil is hot and shimmering slightly, add the leeks, garlic and a pinch of salt (the salt will help pull the moisture for the leeks) and cook until the leeks begin to soften. This takes about 5 to 8 minutes. Next, add the carrots, potatoes and green beans. Cook, stirring occasionally, for an additional 5 minutes.

Slowly add the stock, then increase the heat to high and bring the mixture to a light simmer. Once simmering, carefully stir in the tomatoes and corn kernels. Add a pinch of pepper to the pot as well. Stir to combine and then bring the mixture to a light simmer again before reducing the heat to medium low. Cover the pot and allow the vegetables to cook until they are tender – this take about 30 to 45 minutes, depending on how crowded your pot is (less room, more cooking time).

Once the veggies are tender, remove the pot from the heat and stir in the parsley and lemon juice. Season the soup with additional salt and pepper as needed (careful not to over season, it’s easy to add more salt, darn near impossible to take out excess seasoning after the fact). Serve immediately and enjoy!

Tip: if you find that some “foam” or “scum” from your veggies has risen to the top of the pot, simply use a small strainer or ladle to pull it off the surface and discard.

The Results:


The flavors of this recipe place it in my top 3 soup recipes of all time. The perfect blending of the veggies (hearty potatoes, fresh green beans, bright carrots, sweet corn) melding with the acidic tomatoes creates one of the most harmonious and fresh tasting dishes you’ll ever try.

The extra prep work that comes with this recipe is a great way to learn knife skills (there’s a LOT of cutting) and the diet friendly calorie count (255 per serving) just adds to this recipe’s appeal. If you’re looking for a place to begin your own culinary adventure or is you’re simply looking for a healthy soup for these cool fall nights, this recipe is sure to impress.

That's all we have for you this evening. Maggie takes to the kitchen tomorrow night with a brand new spin on pizza. Be sure to stop by and check it out!

Until then,

~Cheers

Wednesday, November 13, 2013

Incredibly Tasty (Vegetarian) Tacos

Good evening everyone!  As I have mentioned numerous times here on the blog, I have always tried to strive to find Mexican dishes that are also healthy for you.  It's a win-win all around:  one gets to enjoy the tastiness of Mexican cuisine, plus not feeling guilty after you eat it.  While I have found several recipes that exemplify this perfect balance, tonight's dish might be the pinnacle of that ultimate goal.  While we mix some unique flavors and ingredients, this dish has definitely been well worth the search of the perfect healthy, Mexican recipe.

The Recipe:  Black Bean Tacos with Feta Slaw
Original Recipe Found In:  Cooking Light, November 2013 Issue

What You'll Need:
1 center-cut Bacon slice
1 Cup vertically sliced White Onion
2 Teaspoons minced fresh Garlic
1/2 Jalapeño Pepper, seeded and chopped
1 (15 ounce) can seasoned Black Beans
3/4 Teaspoon ground Cumin
1/4 Teaspoon Salt
1 Tablespoon White Wine Vinegar
1 Tablespoon Canola Mayonnaise
1/4 Teaspoon freshly ground Black Pepper
2 Cups Angel Hair Coleslaw
1/4 Cup Cilantro leaves
2 Green Onions, thinly sliced
8 (6 inch) Corn Tortillas
1 Ounce Feta Cheese, crumbled

To start, heat a large nonstick skillet over medium heat.  Once heated, add the bacon and cook for two minutes, or until crisp.  Remove from the skillet and place on a plate.  When cool, crumble the bacon into small pieces.  Next, add the onion, garlic, and jalapeño to the drippings in the skillet.  Cook these ingredients until the onion is tender, or three minutes.  Place the onion mixture in a small bowl and set aside.  

In another bowl, lightly mash one cup of the black beans, until the beans have split open, but are not completely smashed.  Add the mashed beans, cumin, salt, and remaining beans from the can into the skillet.  Cook this mixture until everything is thoroughly heated, about two minutes, stirring occasionally.  Once heated, add the bacon crumbles.

Next, in a large bowl, combine the vinegar, mayonnaise, and black pepper.  Whisk together until all the ingredients are incorporated.  Add the coleslaw, cilantro, and green onions.  Toss all the ingredients together, until the dry ingredients are coated.

Place the tortillas on a microwave safe plate and heat, according to package directions.  Once heated, top the tortillas evenly with the bean mixture and sprinkle with the onion and coleslaw mixtures.  Top with the feta cheese, serve, and enjoy!

The End Result:


Oh, my tasty!  The black beans create a texture that is hard to rival with ground beef or chicken, but it leaves you so much more satisfied than what typical meats can do.  All the ingredients are in harmony with one another and there's not one ingredient that stands out from the rest.  The slaw isn't too heavy, but punches the right notes flavor wise.  The onions aren't super potent, but give a slight hint of garlic flavor.  The feta might stand out more than the other ingredients, but it's hard to pick out amongst everything else in the tacos.  Overall, a great, vegetarian, healthy Mexican dish (did I mention it's only 200 calories for two tacos?) with loads of flavor, that will amp up any dinner tonight!

Thanks for joining us this week.  Be sure to stop by next week as we continue our culinary adventures.  Until then,

~Cheers!

Tuesday, November 12, 2013

New & Improved Chicken Gravy on Mashed Potatoes

Good evening everyone! One of my all-time favorite winter/fall dishes is chicken gravy on biscuits or mashed potatoes. It's one of the simplest, most flavorful dishes you can cook up to really fill up the family on a cool evening while not spending all day in the kitchen. A couple of years ago, I made up my own recipe for chicken gravy and it worked out nicely.

The one downside to these types of dishes, and really this applies to any slow cooker recipe in general, is that the fat of the meat you're using can infiltrate the dish and sabotage the healthy qualities of your dish. This was true of my original recipe as well. The fat from the chicken dissolved right into the gravy, lowering the overall quality of the dish and making it a bit unsightly too.

So, I set out to take my original recipe and fix the fat problem. How exactly do you rid the grease and fat from the gravy, without losing the flavor? It's not a matter of simply cutting off the skin and fat from the chicken before cooking - you'll dry out the meat and the flavor will be underwhelming (we want the fat to add flavor while we're cooking, but we don't want to eat it when it's done...yes, we're picky).

After some brainstorming, I came up with a two part system that actually improves on the final flavor of the dish. Interested? Then let's get cooking!


The Recipe: New & Improved Chicken Gravy
This is an Out of the Culinary Original Recipe!

What You'll Need:

1 Whole Chicken (Neck & Giblets removed - weight determined by the size of crowd you're feeding)
4 Cups Low Sodium Chicken Broth
1 Small onion (Diced)
1 Bag Frozen Mixed Vegetables (Fresh are preferred, but we're not really in the season for good fresh veggies)


Begin by prying the skin up from the chicken to form 'pockets' between the meat and skin. Using your choice of herbs and/or spices, rub these pockets with seasoning until both the top and bottom of the bird are covered. (I used thyme and lemon pepper).

Add about 1/4 to 1/2 cup of chicken broth into a large slow cooker and place the chicken inside. Cover and cook on high for 3 to 5 hours.

After the chicken has cooked for most of the day, use a pair of tongs and pull off the skin (it should pop off quite easily - if it's still rubbery, give the chicken another hour to cook). Discard the skin.

Use the tongs to pluck the meat from the bones of the chicken, transfer the meat to a large bowl, and the bones and other undesirable pieces (fat, skin remnants) should be transferred to another bowl. Continue until you've removed all of the meat from the chicken, making sure to discard the bones when finished.

Carefully (use oven mitts or a kitchen towel) remove the crock pot bowl (if removable, if not, carry the entire pot) and pour the liquid through a strainer and down the drain. (The strainer catches any bones or other debris that has settled to the bottom during cooking). I know this is recipe blasphemy for many chefs, but my entire premise is to remove the fat from the meat - and the fat is currently living in that broth. By discarding it, we cut out all of the fat.

Return the crock pot bowl to the crock pot and wipe it clean with a lightly damp paper towel. Return the chicken to the crock pot and add 2 cups of low sodium chicken broth. Set on low and cover.

Next, add a drizzle of vegetable oil to a 12 inch non stick skillet over medium high heat and cook the onion until it becomes translucent. Add the frozen veggies to the skillet and cook them for 3 to 5 minutes, or until they begin to thaw.

Finally, add 1/2 cup of the chicken broth to the skillet and cover, allowing the veggies to lightly simmer until cooked through. This should take an additional 5 to 10 minutes.

Once cooked through, carefully transfer the veggies and broth to the crock pot with the chicken. Stir well to incorporate and increase the heat to high. Allow the contents to cook for an additional 1 to 3 hours. Right before serving, stir in flour, one tablespoon at a time, until the mixture reaches the desired thickness. I like a thick gravy, so I used 4 tablespoons of flour, but your results will likely vary.

Serve the gravy over mashed potatoes or biscuits and enjoy!

The Results:


Just like our first foray into chicken gravy, the end result of this dish was delightfully savory and full of great natural flavors. This dish, however, seemed brighter and more fresh than the first version. I cannot attribute this purely to the removal of (most) of the fat, as different veggies or a better quality chicken could have helped this as well. It certainly didn't hurt things by removing the excess fat and cooking in this two stage process. In fact, I may use this two stage method whenever possible when cooking with a slow cooker - it seemed to clean up the flavors and helped greatly in reducing the fat within the dish.

If you're looking for a flavorful and filling dish for these cold fall nights, this chicken gravy recipe certainly hits the spot!

That's all we have for you this evening. We're back tomorrow night with a brand new recipe. Until then,

~Cheers

Thursday, November 7, 2013

Bringing Mexican Food to a Casserole Dish Near You!

Good evening everyone!  If you've been living under a rock for the last two years or so, you, or someone you know, is on Pinterest.  It's a great website for anyone wanting to share DIY projects, hair or makeup secrets, travel tips, and recipes.  I'm on Pinterest more than I care to imagine, but when I find stellar recipes, I simply have to transition them from Pinterest to our blog.  Tonight's recipe is no exception and it most definitely excels when there are a lot of not-so great dishes.

The Recipe:  Enchilada Pasta Casserole
An adaption from a recipe found on www.pinterest.com

What You'll Need:
1 Pound Ground Beef
1/2 Teaspoon Chili Powder
1/4 Teaspoon Cumin
1/4 Teaspoon Cayenne Pepper
5 Ounces Cream Cheese
1/4 Cup light Sour Cream
1 Can (10 oz.) Enchilada Sauce*
1 Cup shredded Sharp Cheddar Cheese, divided*
1 Cup shredded Monterey Jack Cheese, divided*
1 Cup frozen Corn kernels, thawed
1 Can (4 oz.) diced Green Chiles
12 Ounces Egg Noodles*

*Note:  While the changes I made to this recipe aren't that dramatic, they are worth noting if you want to follow the original recipe or my own.  There are differing degrees of hotness that enchilada sauce comes in.  We played it safe and went with mild.  To save some time (and cheese purchases,) you can buy a large bag of shredded cheddar and jack cheeses, just be sure there are at least two cups of cheese in the bag.  Instead of egg noodles, we chose a variant called Mafalda, which are like egg noodles, but shrunken down and more wrinkly.  More on that substitution later.

To start, preheat an oven to 350 degrees.  While the oven is heating up, bring a large pot of water to a boil over medium high heat.  Once at a boil, add the desired pasta and cook according to package directions.  Also, you can begin to brown the ground beef over medium heat in a very large skillet.  When the beef is cooked, drain in a colander and rinse well with water.  Add the beef back to the skillet.

When the beef is back in the skillet, add the chili powder, cumin, and cayenne pepper.  Stir to combine the spices and beef.  Next, add the cream cheese and stir until all the ingredients are combined.

In a large bowl, combine the sour cream, enchilada sauce, half the cheddar cheese, half the monterey jack cheese, corn kernels, and diced green chills.  Stir to combine.  By this time the cream cheese should be melted in the skillet.  Pour the enchilada sauce mixture in the skillet and let simmer for three to five minutes, until slight bubbling occurs.

Sure it doesn't look like much, but there's tons of flavor, bubbling in that skillet!

Once the pasta is cooked, drain in a colander and transfer to the skillet.  Stir everything slowly and carefully, as the skillet might be at capacity with all the ingredients.  Once all the ingredients are coated with the sauce, transfer to a large casserole dish and top with the remaining cheese.

Place the dish in the oven and cook for 15 minutes or until the cheese has melted.  Remove the dish from the oven, serve, and enjoy!

The End Result:


I've made my fair share of recipes from Pinterest that have often failed.  This recipe is on the completely other end of the spectrum.  All the ingredients were blended together so well and complement each other to a T.  There's not one ingredient that stands out above the rest, although the "mild" enchilada sauce left a little residual heat in the back of my throat.  The Mafalda was an excellent choice for pasta because the sauce clings to it and makes it even more delicious.  I could see this being a great family dish or one of those classic comfort casseroles.  If you enjoy Mexican food, in a recipe that won't be too intimidating to make, this recipe is for you!

Thanks for joining us this week; check back next week as we continue to share our culinary adventures.  Until then,

~Cheers!

Wednesday, November 6, 2013

Penne With Vodka Sauce - The Sequel!

Good evening everyone! We’ve made a lot of dishes on the blog (over 300 unique recipes in 3 years) and some of them have become personal favorites. The problem is, if we ever want to return to a dish that was a success, we have to alter the recipe or find another, slightly different, form of the same dish (to avoid “double dipping” on the blog).

It’s a fun challenge, taking a recipe that you know works as originally creating and finding an adaptation to it. It really lets your curiosity and creativity reign. Tonight, we’re returning to a dish from the first year of the blog – Penne with vodka sauce. When we cooked up the America’s Test Kitchen version of this recipe, we found that the vodka enhanced tomato sauce became rich and full of flavor, with a nice "bite". So, how do you take an already great sauce and make it better?

If you said “add bacon” you’re wrong. Close. But wrong. Let’s get cooking and find out!

The Recipe: Penne with Vodka Sauce and Pancetta
Recipe Inspired by: America’s Test Kitchen & Eatingwell.com

What You’ll Need:

12 Ounces Penne
8 Ounces Thinly Sliced Pancetta
1 Small Onion, Diced
3 Cloves Garlic, Diced
½ Cup Vodka
28 Ounces Crushed Tomatoes
¼ Cup Half and Half
2 Teaspoons Worcestershire Sauce
½ Teaspoon Crushed Red Pepper Flakes
¼ Cup Chopped Fresh Basil

Bring a large pot of water to a boil and prepare the pasta according to package instructions. Cook the penne until it has just become tender. (12 to 15 minutes on average).

Set a large (12 inch) non stick skillet over medium high heat and add the pancetta (don’t overlap the pieces). Cook until the pancetta crisps slightly, cooking time will vary based on the thickness of your pancetta. Set the cooked pieces aside until they cool slightly then chop them into small pieces with a  chef’s knife.


Using the same skillet over medium high heat, add the onion and garlic and cook until the onion becomes translucent. Next, increase the heat to high and add the vodka. Allow the mixture to come to a boil. Continue to boil until about ½ of the liquid cooks off (5 minutes).

Stir in the tomatoes, half and half, Worcestershire sauce and the crushed red pepper flakes. Reduce the temperature until the mixture is at a light simmer. Allow the mixture to simmer until it thickens, roughly 10 to 15 minutes, before stirring in the pancetta.

Serve the sauce over the pasta, topped with fresh basil. Enjoy!

The Results: 


Both recipes contained almost the same ingredients (although quantities did vary slightly) so it should come as no surprise that this edition tasted very similar to the original recipe cooked up nearly 3 years ago. The sauce is rich, but has a nice "bite" courtesy of the vodka. If you don't like tomato heavy sauces, this is one you may be interested in trying. The sauce itself is very light and simply clings to the penne - you're not drowning the pasta with this sauce, which is a nice bonus. 

The difference between this recipe and the original, however, was the pancetta and the pancetta was the star of the dish. Lightly crispy, full of flavor and still (somehow) juicy - the pancetta transformed the sauce from "nice compliment" to the pasta to "headliner" of the recipe. It's amazing how much one ingredient can transform a dish, but pancetta's inclusion to this recipe makes this an all time favorite. 

That's all we have for you this evening, we're back tomorrow night with a brand new recipe. Until then, 

~Cheers