Tuesday, August 31, 2010

Getting Creative With Chicken

Good evening everyone! This week had to be the most difficult week to pick a recipe that I've experienced.  Typically, Maggie and I comb through our cookbooks, find recipes that look good/fun/unique and then head off to the grocery store to pick up the requisite supplies. As we've established, this week Maggie and I are using up some ingredients we have left over - in order to avoid a) leftovers and b) leaving things to spoil while we're away.

That made picking a recipe difficult. Not only did I have to find a recipe that used exactly what we had (in my case, bone in, skin on chicken thighs and drumsticks) but I also needed to find a recipe that wouldn't create a surplus (stews and soups were out of the equation this week). After about an hour with no luck - I decided to go about making my own recipe. I had a cooking technique that I wanted to use again, and I found a recipe for an orange glaze that looked like it could be adapted to my chicken. With these ideas in mind, I set off to the kitchen to create tonight's recipe.

The Recipe: Orange Glaze Chicken
Original Recipe By: Tyler (That's me!)

What You'll Need:

1 - 2 Pounds Bone In, Skin On Chicken Pieces (Thighs & Drumsticks)
2 Teaspoons Vegetable Oil
3/4 Cup Chicken Broth
1 Tablespoon Water
1 Teaspoon Cornstarch
1/2 Cup Maple Syrup*
1/2 Cup Orange Marmalade
1/4 Cup Cider Vinegar
2 Tablespoons Unsalted Butter
2 Tablespoons Dijon Mustard
1 Teaspoon Black Pepper

*Taste your marmalade before you begin. If the marmalade is overly sweet, reduce the maple syrup to 1/4 cup.

I decided to use a skillet frying technique that I've tried before on the blog in my stovetop roast chicken recipe. I liked the way the chicken absorbed all of the flavors that surrounded it in this recipe and I decided that this cooking technique, blended with a little shot in the oven with the glaze (to really bake in the flavor) would be the ideal way to go.

Begin by patting your chicken pieces dry with paper towels. Season the pieces with a good pinch of salt and pepper. Pour 2 teaspoons of vegetable oil into a large skillet and heat (on high) until the oil just begins to smoke.


Once the oil is hot enough, place (2 pieces at a time) the chicken in the skillet, skin side down and allow to cook undisturbed for about 3 to 5 minutes, or until the skin is a nice golden brown. Place the finished pieces aside on a clean plate and proceed to repeat this process until all of your pieces have a nice golden exterior. Feel free (in fact, I encourage it) to use a splatter screen when frying up the chicken. As the oil and chicken grease mix, it really starts to pop and sizzle, sending little droplets of molten hot oil everywhere. If your splatter screen is still letting some droplets through, place a second screen on top of the original screen (as I did - pictured below) or, use a colander turned upside down and set over the skillet.

Twice as safe


The crunchy outer shell does two things, first it creates a barrier to trap the natural moisture of the chicken in while cooking. Flabby skin is still porous and will allow the moisture to seep out while cooking. Secondly, it provides a tasty crunch to the chicken for those who partake in the eating the skin.

Nice and golden


In the original recipe, I returned the chicken to the skillet for a second frying. This caused the skin to get nice and crispy. However, since I was planning on putting a glaze over my chicken, and didn't need the skin to do anything other than hold in the moisture, I decided that one frying stage would be sufficient.

Wipe the grease and oil from the skillet with a wet paper towel and pour in your chicken broth. Bring the broth to a low simmer and then nestle you chicken pieces in amongst the broth. All the chicken to cook i the broth for 15 to 20 minutes, or until it reaches 150 to 160 degrees.


While the chicken is cooking away in the skillet, you can begin to make the glaze.

Chicken glaze, some assembly required


Mix the cornstarch and water in a small container and set aside.

Combine all of the other ingredients in a medium sauce pan on medium heat and bring them to a simmer.  All to simmer (stirring occasionally) for about 8 to 10 minutes. You are trying to reduce the glaze to about 3/4 of a cup. The easiest way to tell that you have reduced the glaze is to stick a whisk or spoon in the glaze and see if the glaze covers the utensil. If it is staring to stick, you've successfully reduced the moisture from the glaze.

Not quite glaze yet...


Preheat your oven to 500 degrees. Doing so here should (depending on your oven) allow it to be full temperature by the time the glaze is finished.

Mix in the cornstarch and water and stir well. If you remember your 6th grade science class, you know that cornstarch and heat causes liquids to thicken. That's why cornstarch is a cornerstone in most gravy recipes. Bring the glaze back to a simmer and allow to cook for another 1 to 3 minutes, or until the glaze reaches desired thickness.

By now, your chicken should be close to the perfect temperature. Transfer the pieces from the skillet into a small roasting pan or oven safe dish. Spoon the glaze over the chicken pieces (making sure to surround all sides with glaze) and place into the 500 degree oven. Allow the chicken to roast for 5 to 10 minutes, or until the pieces reach 170 degrees. During this time, your glaze should slightly caramelize and turn sticky and golden on top of the chicken. If you managed to reach 170 degrees, but do not have caramelization yet - feel free to pop the pieces back into the oven for another few minutes to allow the glaze to finish.

All that's left is to serve up the chicken and enjoy. (We opted to serve ours with some frozen sweet corn saved from this summer. You can use whatever side you like.)

The Results:


It's always a little nerve wracking making your own recipe. You're flying without a net. As far as I knew, this particular combination hasn't been attempted before - or at the very least has not been documented before.

After cutting into the chicken and taking that first bite - I was relieved. The recipe turned out quite well. The glaze ended up having an almost honey like flavor. It wasn't too sweet and not at all citrusy (as I thought it might be due to the marmalade) but was a nice, sweet touch to a very juicy and tender piece of chicken.

We've always said that we eventually want to turn this blog into a place where Maggie and I can share our original recipes. Tonight, we successfully debuted our first original recipe. (Hooray!) It wasn't at all complicated, but you need to start small (or else find out just how well your smoke detector works...) By simply pulling from past experience and knowledge, I was able to create a simple little main dish that had anything but simple flavor. Sometimes, it's the small victories that give you the most joy. Tonight's easy to make recipe was a simple (and tasty) victory.

That's all we have for you tonight. Maggie is in the kitchen tomorrow night, so be sure to stop by and see what she's got cooking. After that, we're off for a full week -  we plan to begin blogging again around September 12th or 13th. We'll keep you posted via our official Out Of The Culinary Facebook page (be sure to join today!) when we return.

Until tomorrow,

~Cheers
Monday, August 30, 2010

Product Review: Giada De Laurentiis Cookware

Good afternoon everyone! It's Monday once again, which means the start of another work week, our wedding day is only five days out and (for the purposes of the blog) that it's grocery day. However, since we are trying to use up the last of our perishable goods before we depart for the wedding - our grocery list this week is pretty meek. It has a whopping 3 items on it. Wow.

Rather than 'thrilling' you with a 3 item grocery list, I decided that today would be a great day to do another product review. So, for today's blog we're going to look at the most important items in the kitchen. The items that you use almost everyday, and in nearly every meal. Cookware.

Most of the experts out there will tell you to avoid cookware sets. (The big box that includes all of your skillets and pans in one). The reasoning behind this is simple, most cookware sets have one or two 'dog' items - things that are not as great of quality as the rest of the set (in order to balance our the cost for the production company).

The one exception to this rule is if you are just starting out and need, well...everything before you can get started. About 4 months ago, Maggie and I found ourselves in this same situation. We had one skillet (10 inches) and one pot (2 quarts) and that was it. So, we set out with a little bridal shower money and purchased: Giada De Laurentiis™ for Target® 10-pc. Professional Series Tri-Ply Clad Cookware Set

Now that we've had 4 solid months with the set. I feel we can provide an accurate review of the overall quality.


General Overview: 

Giada's cookware is only sold at Target stores and comes in two forms. The 'Professional' series and the standard series. While the outside of the box would make it seem like the two sets are very similar, both sets are stainless steel, both have 10 pieces (two skillets, 4 pots and 4 lids) however, a little digging reveals that they are anything but similar.

When you actually touch the pans, you can tell the professional series is just made better. The professional series is tri-ply clad (with a copper core) which means not only does the heat distribute better and maintain longer -it also makes the pan much more sturdy and heavy. The standard series felt cheap, it seemed like with enough force, one could bend the small skillet in their hands...not something that marks a quality set of cookware. Needless to say, we opted for the professional series, which retails at $199.99, however we purchased this set when it was on sale for $149.99 (and we got a free DVD too!).

Product Specifics: 

The Skillets - 


The professional set includes two skillets; 8 inch and 9.5 inches. Now, the standard set has a 8 inch skillet and 10 inch skillet. It's clear the skillets are the 'dogs' of this set. First of all, there is not 12 inch skillet. If you do any regular cooking, you are aware that the 12 inch skillet is basically the most used piece of cookware in your kitchen. Skipping out on the 12 inch skillet really hurts this set overall. From our experience, even the 10 inch skillet would have been a nice addition over the 9.5 inch skillet which is simply an awkward size. It's not big enough to handle many main dishes, but it's too large to do any quick frying (as it leaves a lot of wasted space).  The skillets also have fairly shallow side walls, meaning any dish that requires large amounts of liquid to fry/stew has to be moved to a pot. There are a few nice aspects of the skillets, however, such as their thickness and their sturdy, well built design.

The skillets do have a nice thickness 


The Pots - 


Simply put, I am in love with the pots in this set. There are four pots; 5 quart, 3 quart, 2 quart and 1 quart. The size variety is of great use as you are almost always guaranteed to have the pot that you need at any given time. The quality of the pots are amazing. They are all very heavy and thick, with solid bottoms (for better heat retention and distribution) and strong sides. The handles are well insulated so every a molten hot pot can be grabbed and moved without a towel. (This does not apply to the 5 quart pot, which has relatively tiny handles on the sides - those DO become molten hot VERY quickly).  Each pot has a matching lid that sits tightly on top. The only downside is that the lids are also stainless steel, meaning they have to be removed in order to visually inspect the food.


Ease Of Use & Cleaning: 

The entire set is stainless steel and not at all treated to be nonstick. This makes cooking a little bit of a challenge as oil and butter absolutely have to be used every time you place food in a pan. Even while cooking chicken, for example, you will have to add splashes of olive oil in between breasts or else be stuck attempting to pry the chicken from the pan.

The second downside of stainless steel cookware is the cleaning. While the set looks absolutely amazing and high quality, it takes a lot of work to keep it that way. As mentioned, they are not at all nonstick, meaning that every little thing you cook with will still be on the pan when you've finished. Deep soaking is a must to get stuck on oil, grease and fat off of the surfaces and Bar Keeper's Friend (or any type of stainless steel cleaner) must always be on hand to keep the shine.

Overall Opinion: 

While there are some aspects of this set that I am not too happy with (mainly the lack of a large skillet and the extra work that goes into using each pot or pan) the positives outweigh the negatives.

A nice little bonus of the set is that the lids for the pots also fit on the skillets. This nice attention to detail is welcome. While it may not seem like a big bonus, having a skillet set that already includes lids is a great money (and time) saver.

The set is extremely well made and feels like professional set. Sometimes cookware can feel cheap and flimsy - a flaw that WILL show up in the final dish. This set feels high end and very, very solid. I do not hesitate to throw anything at or in any of these pans - I know that whatever we want to cook up can be handled by the cookware. That's piece of mind that is well worth the price.

In the end, we would certainly recommend the Giada De Laurentiis™ for Target® 10-pc. Professional Series Tri-Ply Clad Cookware Set

While the price is a little higher than most other cookware sets, the quality makes it worth the difference. Small attention to detail like lids that fit a skillet as well as a pot, and the well built design of each pan make this a great set for the beginning chef, or for anyone who wants to update or upgrade their current cookware set.

That's all we have for you today. We only have two recipes this week, due to the upcoming wedding. I will be cooking on Tuesday and Maggie will be cooking on Wednesday. After that, we're off for a solid week. (No blogging on the honeymoon - wife-to-be's orders!) Stop by tomorrow evening to see what I've got cooking. Be sure to become a fan of Out Of The Culinary on Facebook, we will be posting updates and links through our official page exclusively starting next week. Maggie will no longer be posting the blog links once we're back from the honeymoon - so join our official page and stay in contact with the blog!

Until tomorrow,

~Cheers

Thursday, August 26, 2010

Taking A Second Crack At Cod

Good evening everyone! It's Thursday once again, which marks my return to the kitchen. As Maggie mentioned last night, our wedding date is quickly approaching. As such, we've been making an effort to keep our recipes a little simpler and streamlined. We're doing this mainly because we don't want a lot of leftovers to deal with or perishable ingredients left behind while we're away. So, we're trying to make recipes that are either a) simple and will not result in a lot of leftovers or b) that use ingredients we already have.

My recipe tonight falls into the second category. Tonight's recipe, super crispy oven fried fish, can almost be made without stopping by the grocery store. With the exception of cod (which I doubt everyone just has sitting in their freezer - save for you diehard fisherman types out there) everything in tonight's recipe is probably resting in your pantry or refrigerator. The best part is, despite the ease of preparation, this is far from a simple tasting dish. Let's get cooking!

The Recipe: Super Crispy Oven Fried Cod
Original Recipe Found In: The Complete America's Test Kitchen TV Show Cookbook

What You'll Need:

4 Slices High Quality Sandwich Bread (Torn into quarters)
2 Tablespoons Unsalted Butter (Melted)
2 Tablespoons Fresh Parsley Leaves (2 Teaspoons Dried)
1 Small Shallot (Minced)
1/4 Cup All Purpose Unbleached Flour - Plus Additional 5 Tablespoons
2 Large Eggs
3 Tablespoons Mayonnaise
1/2 Teaspoon Paprika
1/4 Teaspoon Cayenne
1 1/4 Pounds Cod, Haddock or Other Whitefish Fillets

Sweet & Tangy Tartar Sauce*

1/4 Mayonnaise
2 Tablespoons Pickle Relish
1 Small Shallot (Minced)
1 1/2 Teaspoons White Wine Vinegar
1/2 Teaspoon Worcestershire Sauce
1/2 Teaspoon Black Pepper

Mix all tartar sauce ingredients together in a bowl and let set in the refrigerator (covered) for at least 15 minutes prior to serving.

Tartar sauce 


The tartar sauce recipe is a blend of two recipes, one from the chefs at America's Test Kitchen, the other a homemade creation that I've played with constantly. You are free to make up your own tartar sauce in whatever way you prefer, however, if you don't have a recipe for tartar sauce, I would recommend my hybrid recipe listed above.

Begin by preheating your oven to 350 degrees.

Place your bread, melted butter, 1/4 teaspoon salt and 1/4 teaspoon black pepper into a food processor and pulse until everything is coarsely ground. This takes about 15 to 20 seconds, or if your food processor measures by the 'pulse' 8 to 10 pulses. Transfer this mixture to a rimmed baking sheet, making sure to spread the breading evenly across the surface of the sheet, and bake until golden brown. This should take about 15 minutes. Every 5 minutes or so, be sure to stir up the bread crumbs - this allows all of the crumbs to bake evenly.


Once golden brown, transfer the crumbs to a large plate and increase your oven temperature to 425 degrees. On a second plate, pour 1/4 cup of your flour. On a third plate (or in a large bowl) whisk the eggs, mayonnaise, paprika, cayenne and 1/4 teaspoon black pepper. Mix in an additional 5 tablespoons of all purpose flour and stir until smooth. Typically with breaded dishes, the egg is used as a 'wash' something to moisten the piece of meat up and allow the crumbs to adhere. In this situation, adding 5 tablespoons of flour makes the egg anything but a wash - and instead makes more of a batter. This makes things very sticky when you start your breading. Be sure to be prepared for a little messier breading procedure than usual.

The batter - it's a little sticky


Place a wire baking rack on top of a rimmed baking sheet. (Much like we did during our fried chicken recipe from last week.) Dry your fish fillets with paper towels (As I established in my pan fried curry cod recipe - any moisture whatsoever will ruin any attempt at creating a nice breading! Even though we were prepared this time, we still had to defrost the cod. It was frozen solid even after a full day of thawing. This time, however, we dried the cod VERY WELL. Fool me once...) and season them with salt and black pepper.

Arrange your 3 plates in an assembly line. Flour plate first, followed by the bowl/plate with egg mixture and finally the plate with the bread crumbs. Begin breading your fillets by first dredging the fish in flour, making sure to shake off any excess flour. Next, coat the fillet with the egg mixture. Finally, roll the fillet in the breading, making sure to cover all sides with a generous helping of breading. Transfer your finished fillet to the wire rack and repeat the process until all of the fillets are complete.

Fish assembly line

Up close and personal with the breading

Place the baking tray into the oven and allow to cook for 18 to 25 minutes, or until an instant read thermometer reads 140 degrees. Once you've reached that golden temperature, transfer the fillets to a plate, serve up with some homemade tartar sauce (optional) and enjoy!

Ready to go into the oven


The Result:


Oh

My

Goodness

Now, ladies and gentlemen - I've had some good fish in my day. The Colony Inn in Ventura Iowa has some of the best fish that comes to mind. But tonight, I ate the best fish I have ever tasted in my entire life.

Multiple complex flavors burst through the breading and the fish itself. The blending of the shallot, paprika, cayenne and parsley created a super team of amazing flavors. The breading was excellent. It was super crispy and did not fall off at all (a first for me in any breading recipe!). The crispy crust was a great contrast to the super soft and flaky cod. Tonight's dish was a stark contrast to my original shot at cod.

At 35 minutes of total preparation time - tonight's recipe is the perfect blending of easy preparation and amazing flavors. Even better, 90% of the ingredients are already in your pantry. With a recipe this easy (and this delicious) there is absolutely no excuse not to try it for yourself!


Before we go tonight, I'd like to mention our official Facebook page. Simply search Out Of The Culinary on Facebook and you should find our page. Click the big 'Like' button on top and you'll instantly be inducted into an exclusive club  - you'll get notifications via your news feed of our blog updates, see pictures we don't share on the blog - among many other great perks! We're slowly going to stop posting updates via our individual Facebook profiles, so if you want to stay up to date with everything Out Of The Culinary - this is the only way to do so. (We've also posted a nice button on the right hand side of the blog - it has our logo inside the Facebook box - click that and you should be directed straight to our page.)

That's all we have for you this week. Maggie and I have another busy weekend on tap, so we won't be blogging again until Monday. Thank you, as always, for sharing our recipes with us this week. Be sure to stop by Monday evening to see our ingredient list for the coming week. Also, be sure to 'Like' Out Of The Culinary on Facebook! Until next time,

~Cheers

Wednesday, August 25, 2010

EVERYTHING Is Better With Lemon On It

Good evening everyone! Tonight, Maggie took to the kitchen to try a recipe that had me intrigued. All she told me about tonight's recipe was that it was "lemon spaghetti". Naturally, anything that includes lemon instantly perks my interest. I'm a well documented lemon fan (in fact, I think it's the number one used fruit on the blog!) so Maggie was playing to a good crowd with her recipe tonight. But, I did wonder, how were the flavors of lemon and spaghetti going to combine? In word - superbly. I'll turn the keyboard over to Maggie so she can share the process with you.

The Recipe: Lemon Spaghetti
Original Recipe Found In: Everyday Italian: 125 Simple and Delicious Recipes

What You'll Need:

2/3 Cup Olive Oil
2/3 Cup Parmesan Cheese
1/2 Cup Fresh Lemon Juice (2 Lemons)
3/4 Teaspoon Salt
1/2 Teaspoon Fresh Pepper
1 Pound Spaghetti
1/3 Cup Basil
1 Tablespoon Lemon Zest (2 Lemons)


Good evening everybody!  With T minus 10 days left to go for the wedding, I wanted to create something tonight that was rather simple and that did not have a lot of steps.  Naturally, I don't go to Giada for these kinds of recipes because I know that she has rather long and drawn out steps to create an elaborate dish.  But once I read this particular recipe, I knew it was the one for this evening.


I began heating a large pot of water for my pasta.  Whilst that began to heat up, I began to zest my lemons.  I think I must have a defect and am not able to zest lemons with a zester, so I searched for an alternative to zest lemons without the zester.  I found out that using a potato peeler works just as great, but one has to make sure not to "peel" all the way down to the white part of the lemon (or the pith, as I was informed writing this section by my lovely fiancee.)  Once you get the desired zest, make sure to cut down to size so they are edible and not long strings of lemon peel.


Zesting...creatively


After zesting is complete, the water should be up to a boil now - add the one pound of spaghetti.  It may seem a lot, but the sauce needs all those noodles to soak up it yummy goodness.  Cook the spaghetti for eight minutes - this should give you enough time to make the sauce.  


Add the parmesan cheese, olive oil, the juice from the zested lemons, salt, and pepper into a small bowl. Whisk all these ingredients until it's somewhat cohesive.  You will have to whisk this mixture again before adding it to the pasta since the oil and juice will have separated by then.  Once the spaghetti is cooked, drain, and reserve a cup of the pasta water.  Return the pasta cooking pot.  To the pasta, add the lemony sauce and toss with the basil and the lemon zest.  After these are all tossed together, add a 1/4 of the pasta water at a time and toss - just enough so that everything doesn't cling together and make a clumpy pasta lump.  I only needed 1/4 cup of the water so that everything was combined, yet not too much to make a watery mess.


lemon sauce...YUM


You might want to mix this up a little... 


The End Result:


Oh, my goodness.  The tang from the lemon was subdued enough to make a creamy combination with the parmesan cheese.  The basil gave it a nice earthy flavor as well.  There was just enough ingredients to make everything blend so perfectly.


About 11 years ago, one of my sisters went to Italy for an exchange program for a summer.  When she came back, she brought back a recipe called "Italian Spaghetti", which was spaghetti pasta, combined with oil, parmesan cheese, and basil.  Ever since then, I have made it, never knowing the right combination of oil, cheese, and herbs.  As I was eating tonight's dish, I exclaimed that it was my sister's Italian Spaghetti, except with lemon.  Now, I know how to measure everything out and it won't end up too cheesy or too basil-y!


Thanks Maggie! Tonight's recipe was a fantastic blending of Maggie's classic Italian Spaghetti and zesty lemon flavors. The final blending was not too sour, not too basil-y (as Maggie mentioned) Although I am a little biased, I think the lemon really made this dish! The only 'change' I would make to this dish would be to add some chicken. Although it doesn't really need chicken - it certainly wouldn't hurt!

One extra thing of note tonight. We now have our own official Facebook page. Just search Out Of The Culinary on Facebook and become a fan. We will post updates to the blog, pictures and other news and info through the official page. We think it's a great way for everyone who reads the blog to keep up with all of our postings and news.

That's all we have for you tonight. I'm back in the kitchen tomorrow night was a tasty breaded treat. Stop back tomorrow night around the same time to see what I've got cooking. Until then,

~Cheers
Tuesday, August 24, 2010

Kitchen Collaboration

Good evening everyone! If you're a regular reader of our blog, then you know that Tuesdays are my scheduled nights to cook. (Alternatively, if you are a new reader of our blog....hi!) Tonight, however, we have something a little different planned. While I'm still cooking up the main course, my wonderful fiance is stepping in to contribute the side dish. That's right, two cooks - one meal. It's a first here at Out Of The Culinary!

My recipe tonight isn't so much a recipe, as an idea. I was craving a good steak sandwich - so that's what I decided to make. Now, it really doesn't take a recipe to make a steak sandwich. All you need is heat, meat and you're ready to eat. (Hey, that rhymed!) However, I did turn to our friends at America's Test Kitchen to help 'boost' my steak sandwich idea. I'm borrowing an idea for an interesting mayonnaise and applying that to my sandwich.

Maggie's portion of the menu tonight is parmesan smashed potatoes. She was originally planning on making these as a side dish to her recipe tomorrow - but we decided that perhaps tonight was the best night to unleash the potatoes on the menu.

Tonight should be fun, as I mentioned, we've yet to tackle a night together in the kitchen (it's a VERY small kitchen after all!) Who knows, if it all works well, we may start doing this regularly. But first, let's get cooking!

The Recipe: Pan Seared Steak Sandwich
Original Recipe From: This one is an 'original' creation

2 Steak Fillets (Top round, flank steak, new york strip - whatever you prefer)
1 Baguette (You want a good, thick bread that can stand up to steak - the rest is just preference)
Garlic Soy Mayonnaise *

* 1/2 Cup Mayonnaise
1 Tablespoon Soy Sauce
1 Teaspoon Minced or Freshly Grated Garlic
1/2 Teaspoon Honey
1 Small Garlic Clove
1/2 Teaspoon Toasted Sesame Oil

It's easier to make your mayonnaise beforehand and let it rest in the refrigerator. Giving it a good 30 minute head start will allow all of the flavors to combine. To make the mayonnaise, simply pour all of your ingredients in a small bowl and mix well with a whisk. Set in the refrigerator while you prepare the steaks.

Before...

After!


Begin by patting your steaks dry with paper towels. Depending on the type of steak you chose, you may need to trim the excess fat off the steaks. We chose to use top round, which is typically a leaner cut of meat - so we didn't have to trim any excess fat. Season both sides of the steaks with salt and pepper.


Bring a 12 inch skillet up to high heat. Once the skillet is good and hot, sprinkle some olive oil in the center of the skillet and swirl the pan around a few times to evenly distribute the oil. Cook the steaks, one at a time, for about 3 to 5 minutes on each side. This should result in a medium-rare steak. If you absolutely cannot have any 'pink' in the center of your steak, add another 3 to 5 minutes on to the cook time. Be warned, however, that you are losing a lot of the tenderness and flavor in the steak. The longer you cook it, the closer it turns into tasting like a shoe.


Place the finished steak on a cutting board tented with aluminum foil. Finish cooking all of your steaks and then allow them to rest under the foil for about 5 minutes. You do this to allow the juices to go back into the steak. If you slice up the steak immediately, most of the juices (which are at the surface of the meat due to the intense heat) will be lost on the cutting board. By allowing the steak to cool, you allow the molecules of the meat to reabsorb the juice - meaning less is spilled on the cutting board.

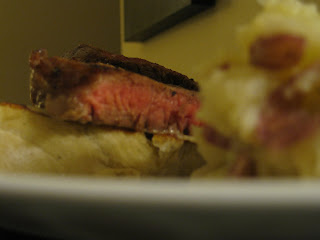
All that's left is to slice the steaks into 1/4 inch strips (against the grain) and serve on your bread of choice. We chose a thick garlic and cheddar asiago bread - which we toasted on our electric skillet to give everything a nice crunch. Spread your mayonnaise onto the bread, top with some slices of the steak and enjoy.

Garlic asiago bread...YUM!

Making it nice and crispy


BUT - that's not all tonight. As I mentioned, Maggie is contributing a side dish. So, I'll turn the keyboard over to Maggie so she can share her contribution to tonight's menu.

The Recipe: Smashed Parmesan Potatoes
Original Recipe Found In: Everyday Italian: 125 Simple and Delicious Recipes

What You'll Need:

3 Pounds Red-Skinned Potatoes
2/3 Cup Freshly Grated Parmesan Cheese
1/2 Cup Extra Virgin Olive Oil

Good evening everybody...wow, Tuesday night...this is weird - not used to this.  I kid, I kid.  When Tyler mentioned the idea of moving my side dish from Wednesday to today, I was actually quite happy with this.  My recipe for tomorrow and my potato side dish...well, let's just say it's might be too much of a good thing.


I started the recipe by getting all my potatoes (yes, get all three pounds, it may seem a lot, but it will cook up a nice amount of taters,) in a pot covered with water.  Giada says in the recipe "cover the potatoes at least two inches of water."  If you're like us and don't have a huge pot to boil water, just make sure the water covers the potatoes, yet not enough so that when the water does boil, it doesn't boil over.


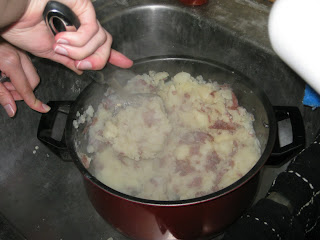
After you get your potatoes boiling, keep them on that boiling heat and cook for fifteen minutes.  After the cooking process ends, drain the potatoes and keep 3/4 cup of the cooking liquid.  Once the potatoes are drained, return them to the pot.  This is where the "smashed" part of the recipe comes into play.  Giada also mentions in the recipe to "mash the potatoes with a fork."  I don't know about you, but potatoes are rarely smashable with a fork, so I chose our potato masher as our smasher.  Use the cooking liquid to moisten the potatoes.


Smash!


Once the potatoes are nice and moistened, add the parmesan cheese and olive oil and continue to smash away until all the ingredients are combined.  Season every 3 smashes or so with salt and pepper until flavor desired occurs.


Thanks Maggie (by the way, did anyone else get the feeling that Maggie liked saying 'smash' tonight?)

The Results:


Two heads (and in this case recipes) are greater than one. First, the steak sandwich. The steak itself was incredibly juicy and tender. I normally prefer my steak to be a little more done than what we ended up with, but according to the 'experts' out there, a good steak sandwich should be medium rare. The mayonnaise was a good gamble on my part. The mayonnaise ends up having a very 'nutty' flavor with a slight kick from the soy sauce. This blended quite nicely with the natural flavors of the steak. Finally, the overall dish was punctuated with a delicious bite of the garlic asiago bread. The bread was seasoned (fairly heavily) with pepper, which added a nice bite to the overall dish. In the end, my craving for a steak sandwich was satisfied with this tasty treat.

Maggie's smashed potatoes were just as delicious as they sound. A light hint of parmesan cheese added a creamy undertone to the whole recipe, while the natural flavor of the red potatoes was still allowed to shine. These potatoes paired excellently with the steak sandwich.

Tonight's collaboration worked quite well. While the kitchen was admittedly a little too small to have the both of us working on something at the same time, we did make it work. I think we will have to try another night like this in the future.

The best part about tonight's recipes was the quick preparation time. My steak sandwich took 20 minutes, start to finish and Maggie's potatoes took roughly the same time. We like to keep things varied for you, dear reader. While one night we might bust out something complicated like Coq Au Vin or Beef Wellington, we can also serve up some bow tie pasta or a quick steak sandwich. We like to keep you guessing and on your toes!

That's all we have for you tonight. Maggie is back tomorrow night with her unique recipe (I'm very interested to see how this particular dish will turn out). So be sure to stop by around the same time tomorrow night to see what she's got cooking. Until then,

~Cheers

Monday, August 23, 2010

This Week's Ingredients

Good morning everyone! It's Monday once again - ending a short but busy weekend for Maggie and I. It also marks the end of summer for most kids and college students (man, I don't miss the first day of classes!) But, for us 'normal' working folks, Monday only means the start of yet another new week. Which means, of course, today is grocery day! Here's what we're cooking with this week:

2 Flank Steak Fillets
3 Pounds Red Potatoes
Soy Sauce
Minced Ginger
Toasted Sesame Oil
Hellman's Light Mayonnaise
2 Cod Fillets
2 Lemons
Spaghetti
Parmesan Cheese
1 Large Baguette
Cayenne Pepper
Premium Wheat Bread

There you have it. Maggie and I have 3 very different recipes this week - all of which should be prepared in under 20 minutes. I have the late shift this week (the last one for a little while anyway) so the blog will be up a little later in the evening (in comparison to last week). We're on our usual Tuesday, Thursday for me and Wednesday for Maggie schedule this week. Be sure to stop back tomorrow night to see what I've got cooking. Until then,

~Cheers

Thursday, August 19, 2010

World's Greatest Lasagna? I'd Have To Say YES!

Good evening everyone! I usually make the comment on Thursdays regarding how quickly the week has flown by and how I can't believe how fast time feels to go past. Well...not this week. For me, this week has been a slow and grueling week (for no particular reason!) It feels like I've had three Thursdays already this week. That fact, combined with the parking lot style commute (I.E. not moving) that I had coming home tonight - meant that I was certainly ready to turn to the kitchen to unwind.

For tonight's recipe, I'm making something I've never made before - in fact it's a food that (in general) I'm not a fan of. My recipe tonight is four cheese lasagna. If you listen carefully - the sound you are hearing is my family's jaws collectively hitting the floor. It's true, standard lasagna is one of my least favorite foods. I don't like the tomato rich sauce, the oozing mozzarella or the ground hamburger mixed in with it all. My recipe tonight, however, does not have any of that. The sauce is a white sauce, based in milk and there isn't any meat to be found within the dish. It's something different that I hope will change my perspective on the classic Italian dish.

The Recipe: Four Cheese Lasagna
Original Recipe Found In: The Complete America's Test Kitchen TV Show Cookbook

What You'll Need:

6 Ounces Gruyere Cheese (Shredded)
2 Ounces Parmesan Cheese (Grated)
1 1/2 Cups Part-Skim Ricotta Cheese
1 Large Egg
2 Tablespoons Parsley
1/4 Teaspoon Black Pepper
3 Tablespoons Unsalted Butter
1 Medium Shallot (Minced)
1 Garlic Clove (Minced)
1/3 Cup All Purpose Unbleached Flour
2 1/2 Cups Whole Milk (Skim or low-fat are substitutes)
1 1/2 Cups Low-Sodium Chicken Broth
1/2 Teaspoon Salt
1 Bay Leaf
Pinch Of Cayenne Pepper
15 No Boil Lasagna Noodles (See Monday's post for a full profile of these noodles)
8 Ounces Fontina Cheese (Shredded)
3 Ounces Gorgonzola Cheese (Crumbled)

Measure everything beforehand to make things easier later


Begin by preheating your oven to 350 degrees.

In a large bowl, mix the gruyere and 1/2 cup of the parmesan cheese. Turn a few times until mixed well. Set aside. In a second, medium bowl, combine the ricotta, egg, parsley and black pepper. Mix using a rubber spatula and set aside. It's tempting to use a whisk to mix the ricotta, but it has the consistency of cream cheese, so it's best to use something that wont get 'gummed up' with the mixture.

The ricotta mixture

In a small pot, begin to bring 2 inches of water to a boil. Once this water is boiling, pour it into your 13 X 9 oven safe dish. Place the lasagna noodles, 3 at a time in the water (for about 2 to 3 minutes) or until they become slightly pliable. Move the noodles to a clean kitchen towel to air dry before use. The idea here is to reintroduce the noodles to some moisture to shorten the cooking time and lower the need for a large amount of liquid overall. This process can be done in between other steps - so simply work on it when you have pauses during the course of the recipe.

This is how thin the lasagna noodles are!
In a medium sauce pan, melt the butter over medium heat. Once melted, add your shallot and garlic and cook for 2 to 3 minutes or until the shallots are softened. Add your flour and stir constantly until everything is blended. Cook for about 1 to 2 minutes, but do not allow the mixture to brown. Gradually whisk in your milk (we used skim milk as we don't particularly like whole milk) and chicken broth. Stir constantly until the mixture comes to a boil. It's tempting to let this mixture cook from time to time and work on other parts of the recipe. Bad idea. Tonight, I learned the hard way just how fast this sauce will boil if you look away.

I turned my head from the sauce for about 30 seconds while checking on my lasagna noodles (to see how they were drying). I turned back around to find the sauce violently foaming over the edges of the pot, onto the burner and under the surface of the stovetop. An expletive or two may have been uttered during this time. So, no matter how tempting it is to look away here (my sauce was not even showing the slightest hint of boiling when I turned away) DON'T DO IT. Keep focused on the sauce and prevent yourself from having to scrub the entire stovetop of boiled over milk/broth mixture...it's not nearly as fun as it sounds!

Once your sauce has come safely to a boil, add your bay leaf, cayenne pepper and salt. Reduce the heat to medium low and allow to simmer for about 10 minutes. Stir occasionally to prevent the sauce from thickening too much.

After 10 minutes, remove the bay leaf and pour 1/4 of the sauce into the bowl with the ricotta mixture. Stir well until everything is blended. This should turn your slightly thick ricotta mixture into a more paste like mixture. Pour the remaining sauce into the bowl with the gruyere. From here on out, we will be referring to this bowl as the 'sauce'.

On the left, the ricotta mixture. On the right, the sauce

In the bottom of your 13 X 9 oven safe dish (which you have dried out after the lasagna noodles have bathed) spray a light layer of nonstick cooking spray. Then, spread 1/2 cup of the sauce evenly across the bottom of the dish. Place three noodles on top of the sauce (close together, slightly touching but not overlapping). Spread 1/2 cup of the ricotta mixture evenly over these noodles. Then, spread 1/2 cup of the fontina cheese on top of the ricotta mixture. Finally, sprinkle 3 tablespoons of the gorgonzola cheese amongst the fontina cheese. (I'll be honest, I didn't measure the fontina or gorgonzola cheeses in each layer. I simply grabbed the cheese and sprinkled until it looked even. You can 'eyeball' the amount of cheese on each layer and reach a safe conclusion of the right amount) Cover all of this layer with another 1/2 cup of sauce. Place three more noodles on top of the sauce and repeat this process until you've created four layers of noodles. (Noodles, ricotta, fontina, gorgonzola and then sauce)

Start with a thin layer of sauce on the bottom


Then add the noodles

Spread a layer of ricotta 


Top with fontina and gorgonzola 


You should have 3 noodles remaining. Place those three on top of everything and cover with the last of the sauce. Use a rubber spatula to spread the sauce evenly across all sides (and even over the sides of the noodles). Sprinkle the top with the remaining parmesan cheese. Oddly enough, our box of Barilla lasagna noodles, which should have contained 15 noodles - actually had 16. So, I was left with one extra noodle, which I placed horizontally across the top 3.

We must have picked the 'buy 15 get the 16th free' box of noodles

all covered in sauce


Spray a large sheet of aluminum foil with nonstick cooking spray and cover your dish. Place the dish in the oven for 25 to 30 minutes (rotating the dish halfway through cooking) and cook until the edges of the lasagna begin to bubble. Once bubbling, remove the foil and place increase the oven heat to 500 degrees. Cook at 500 degrees for another 10 minutes (or until lightly golden brown on top) and serve.

The Results:


I may have to change my stance on lasagna. While I still don't care for the tomato sauce based classic version of this dish, the four cheese version that I cooked up tonight was pretty darn fantastic. Each individual cheese (and its complex flavors) all combined to make one amazing (not too cheesy) flavor. The white sauce acted as a fantastic bridge, brining all of the flavors together and also helped to 'fuse' all of the individual noodles in to one cohesive dish.

Unlike Maggie's recipe last night, this dish had quite a few ingredients. In the end, however, it was almost as simple as her dish. With 20 minutes of prep time and 30 minutes of cook time you can easily cook up this fantastic lasagna for the whole family after coming home from work. This recipe is certainly worth a return visit (I have an idea to incorporate some chicken pieces in with the layers of fontina...)

Oh and - yes, it is necessary to use a 13 X 9 dish, even though (when you're making up the lasagna) you'll have a lot of room on the edges. When it cooks, it expands and by the time everything is done cooking - the dish will be full.

That's all we have for you this week. We're off for the weekend. If we find something interesting to share with you, we'll be sure to post updates to our Twitter and Facebook profiles to let you know about it. Otherwise, expect us back on Monday with another ingredient list and three new recipes to start the week. As always, thank you for stopping by and reading our blog - and until next time,

~Cheers