Thursday, June 28, 2012

Asian-Inspired Chicken and Noodles

Good evening everyone!  As a chef, I'm constantly learning about different cuisines and how different cultures use ingredients all sorts of ways unique to their own.  One cuisine that I'm constantly intrigued by is Chinese food.  Granted, most of the Chinese food I eat is, more than likely, Americanized in some way, shape, or form.  But in a close second behind Mexican food, I love Chinese food.


I've always been daunted by cooking Chinese, because I feel the techniques are out of my comfort zone and I wouldn't be able to successfully create a recipe that wouldn't be authentic.  Tonight's dish will break my fear of cooking Chinese food.  By making a tasty recipe with great Asian-inspired flavors will help quiet the not-so-fearful tendencies I have about this cuisine.

The Recipe:  Glazed Chicken with Szechuan Noodle Salad
Original Recipe Found In:  Cooking Light, July 2012

What You'll Need:
1 Tablespoon grated peeled fresh Ginger
3 Tablespoons Hoisin Sauce
1 Teaspoon Olive Oil
1 Teaspoon lower-sodium Soy Sauce
8 skinless, boneless Chicken Thighs
6 Ounces uncooked Udon Noodles or Whole-Wheat Linguine
1/4 Cup bottled Szechuan Sauce
1 Tablespoon reduced-fat creamy Peanut Butter
2 Teaspoons lower-sodium Soy Sauce
2 Teaspoons fresh Lime Juice
1 Cup matchstick-cut Carrots
1/2 Cup matchstick-cut Green Onions

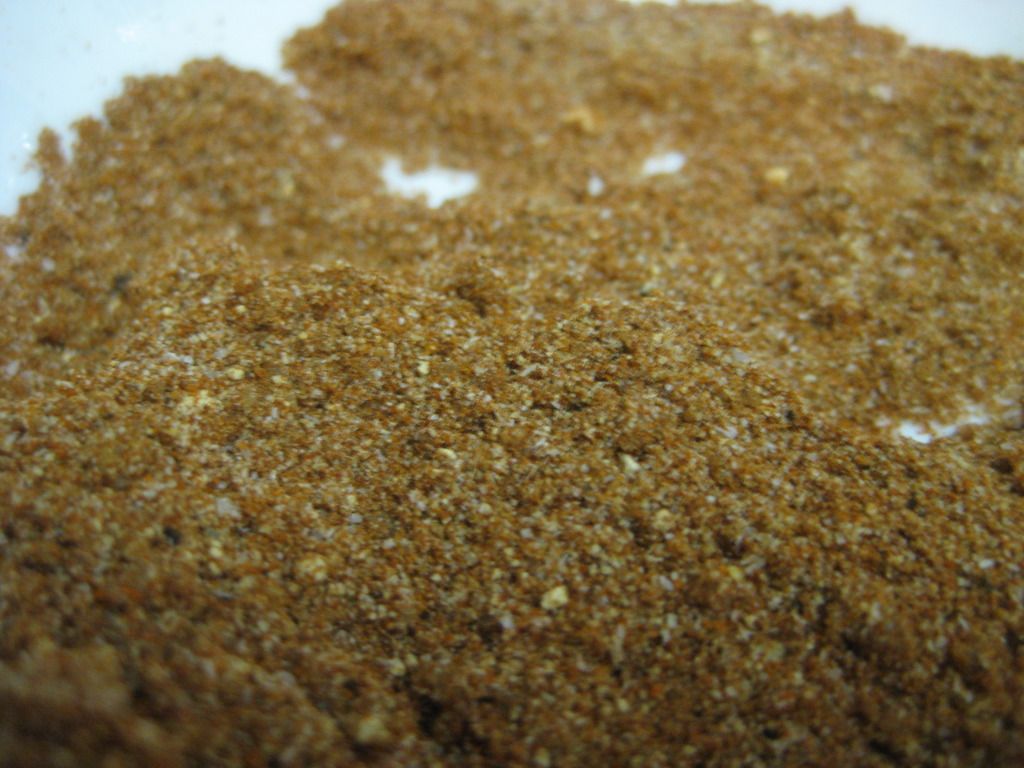
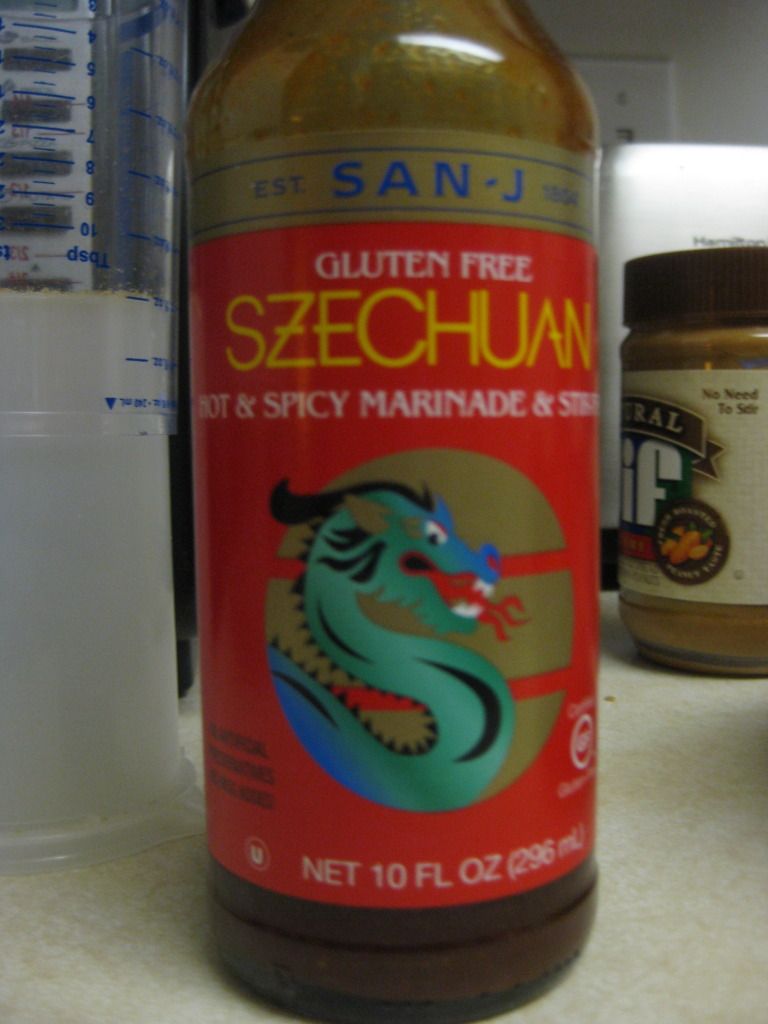
Welcome Szechuan Sauce to Out of the Culinary

*Note:  Since this recipe is originally to use on the grill, I am adapting by using a grill pan on the stovetop, so I will describe how to cook this recipe using a grill pan instead of a grill.


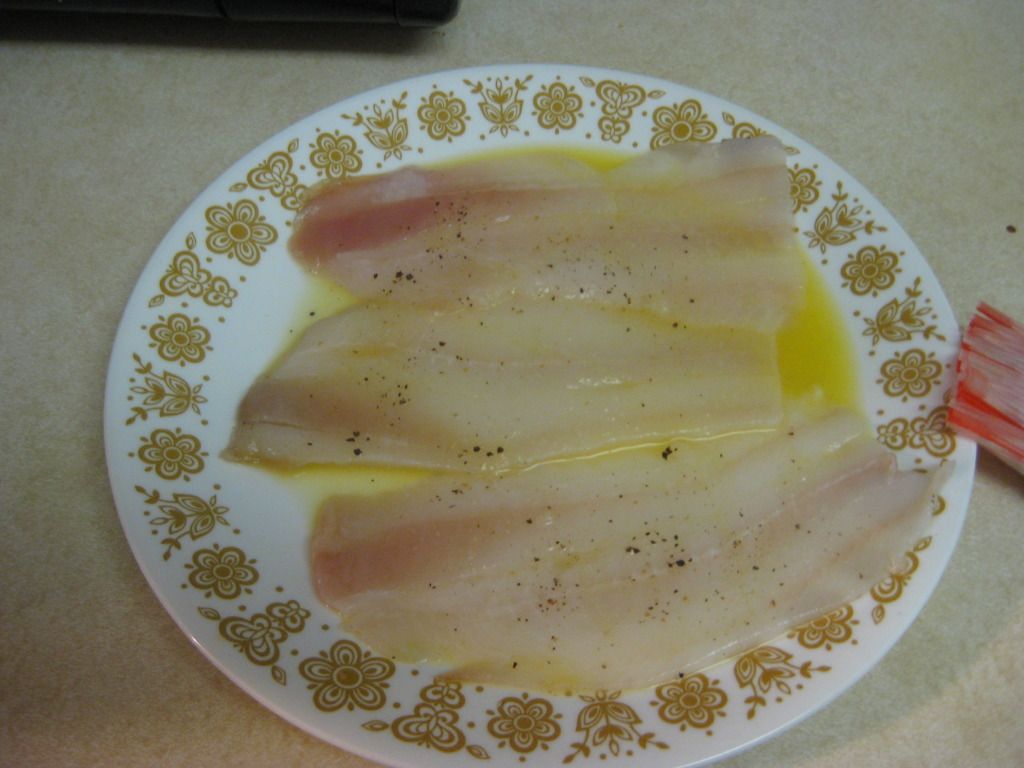
To start, heat a grill pan over medium high heat and coat with cooking spray.  Also, you can start a large pot of water to boil.  In a medium bowl, combine the ginger, hoisin cause, olive oil, and soy sauce and stir well.  Add the chicken thighs and toss to coat.  The fragrant smell that will waft out of the bowl will be a powerful one.  Your nose will get a nice kick in the shins, but it will make the chicken taste delicious.


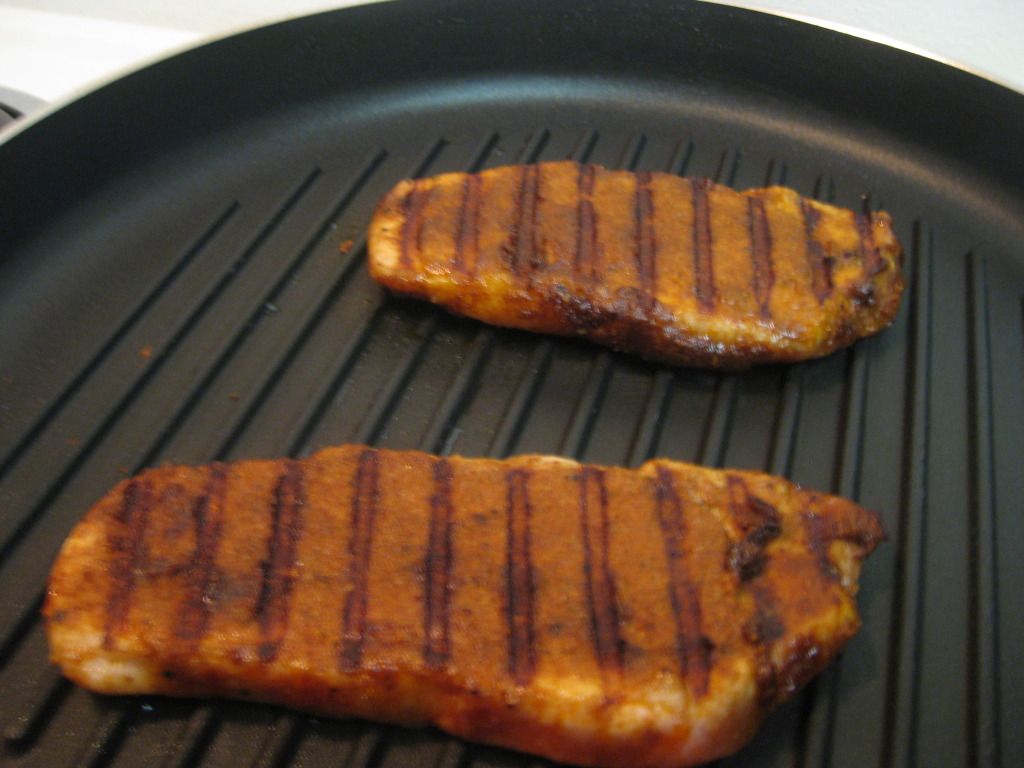
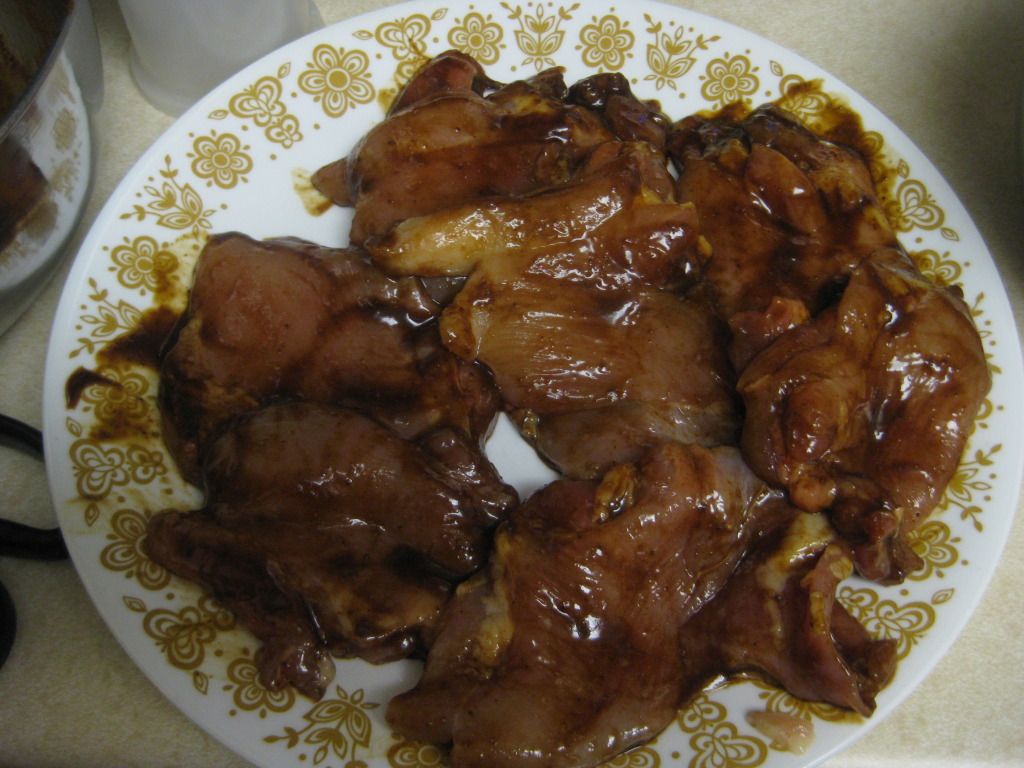
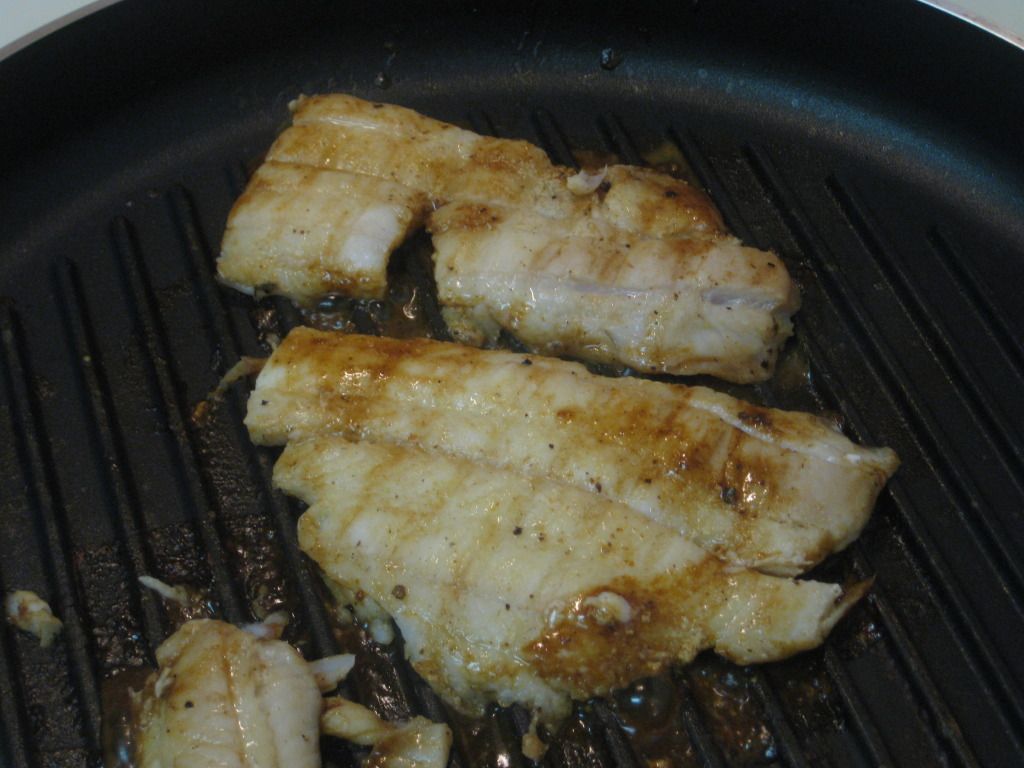
Glazed and ready to grill!


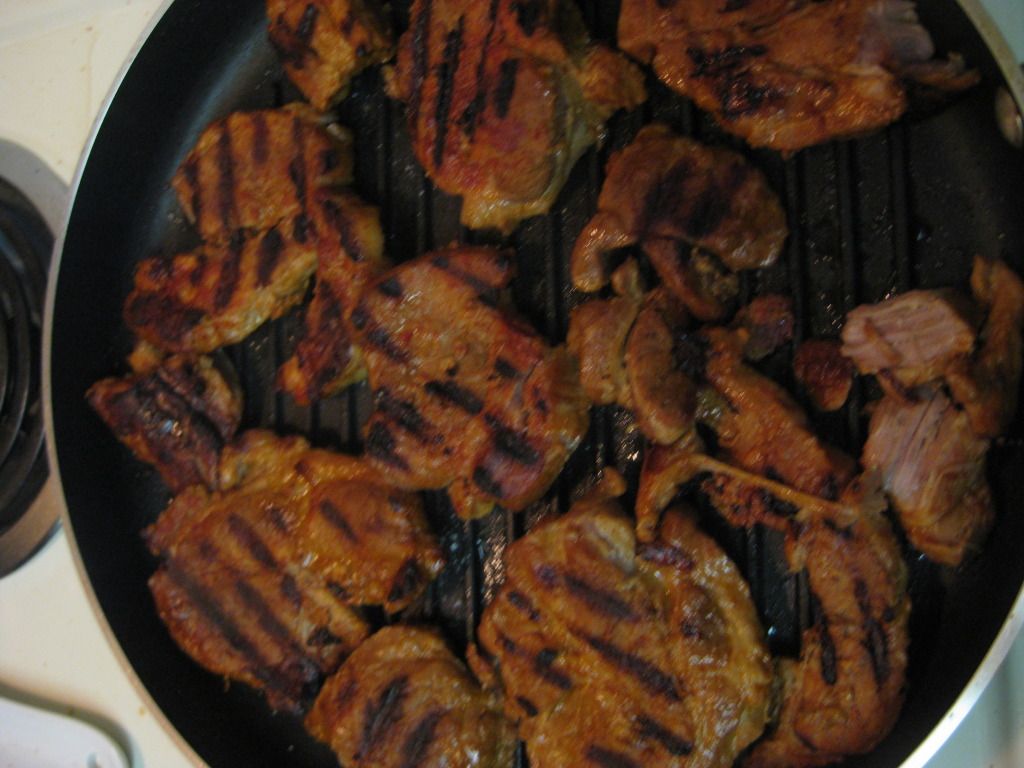
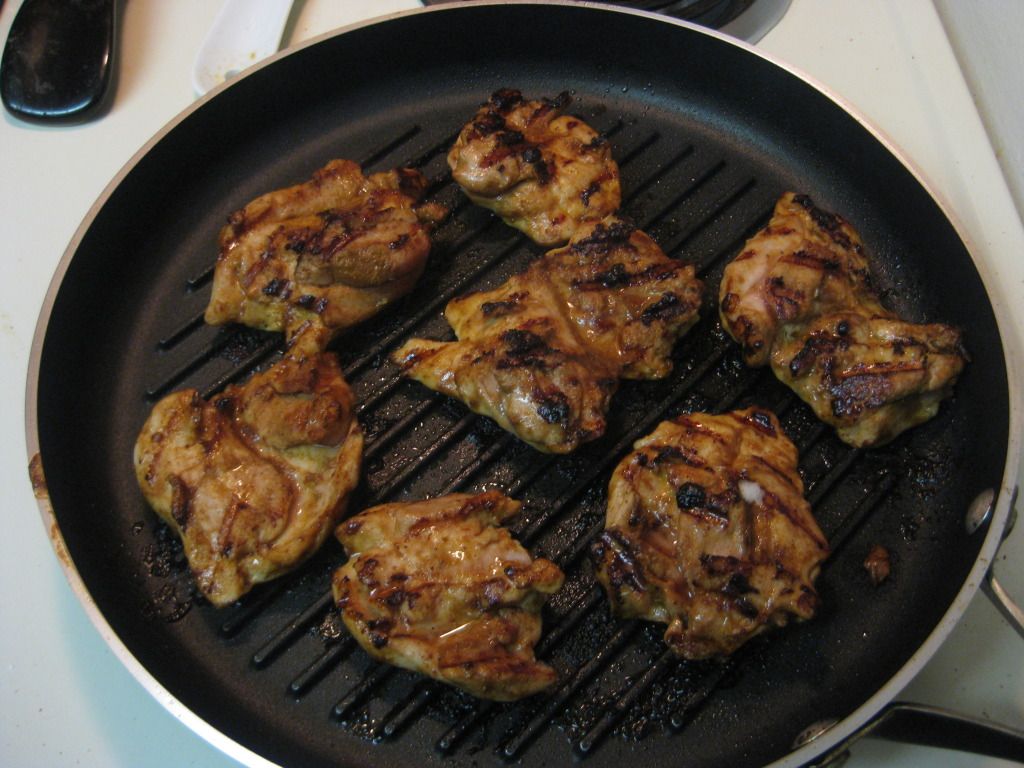
Next, ensure the grill pan is hot and, using a pair of tongs, place the chicken on the grill pan.  Grill the chicken for four minutes on each side, or until a meat thermometer reads between 165 to 170 degrees.  Remove the chicken from the grill pan and cover with foil, allowing the chicken to rest.  Resting the chicken will not only seal in the flavor of the hoisin sauce mixture, but it also keeps the chicken juicy and everybody likes juicy chicken.
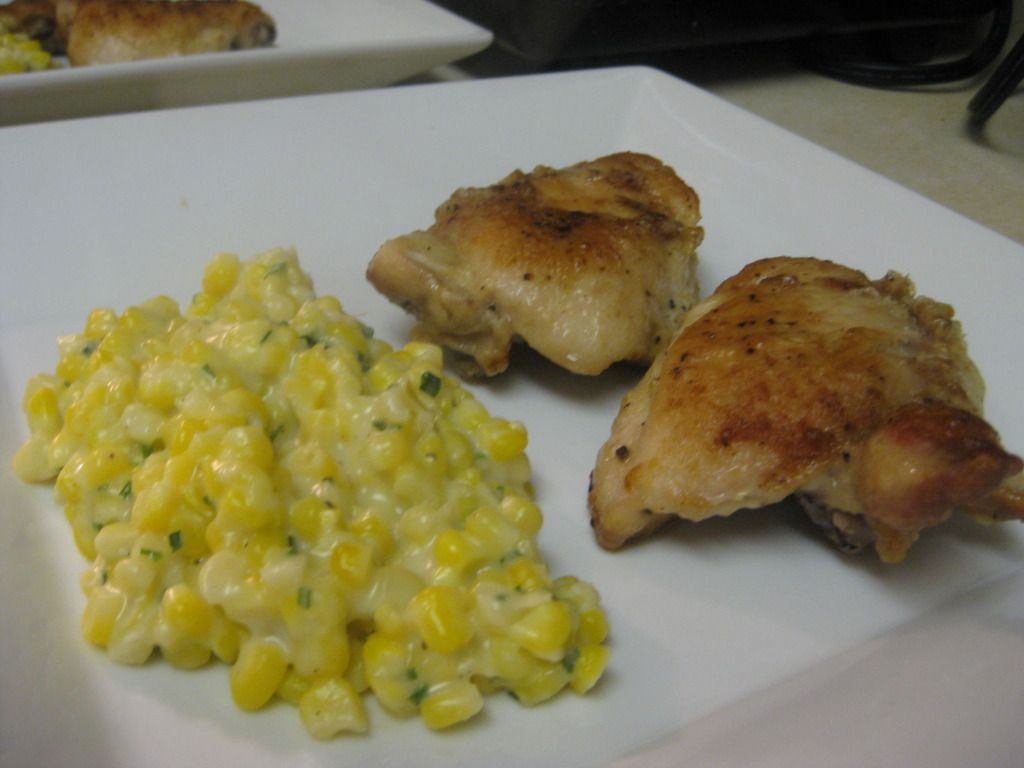
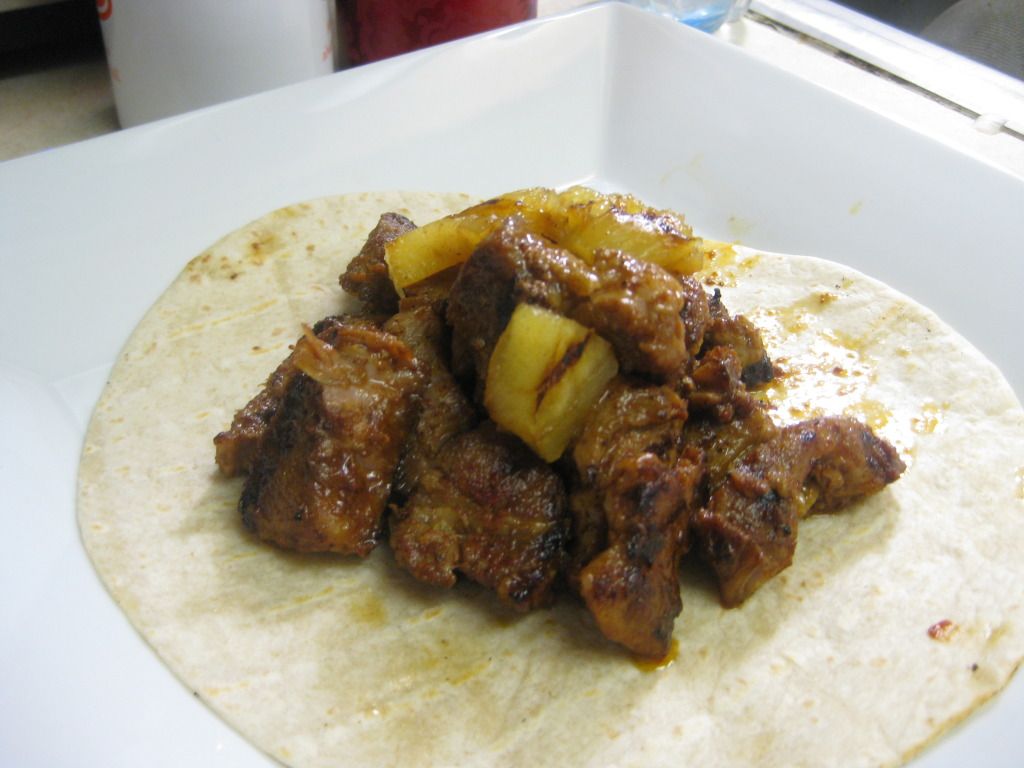
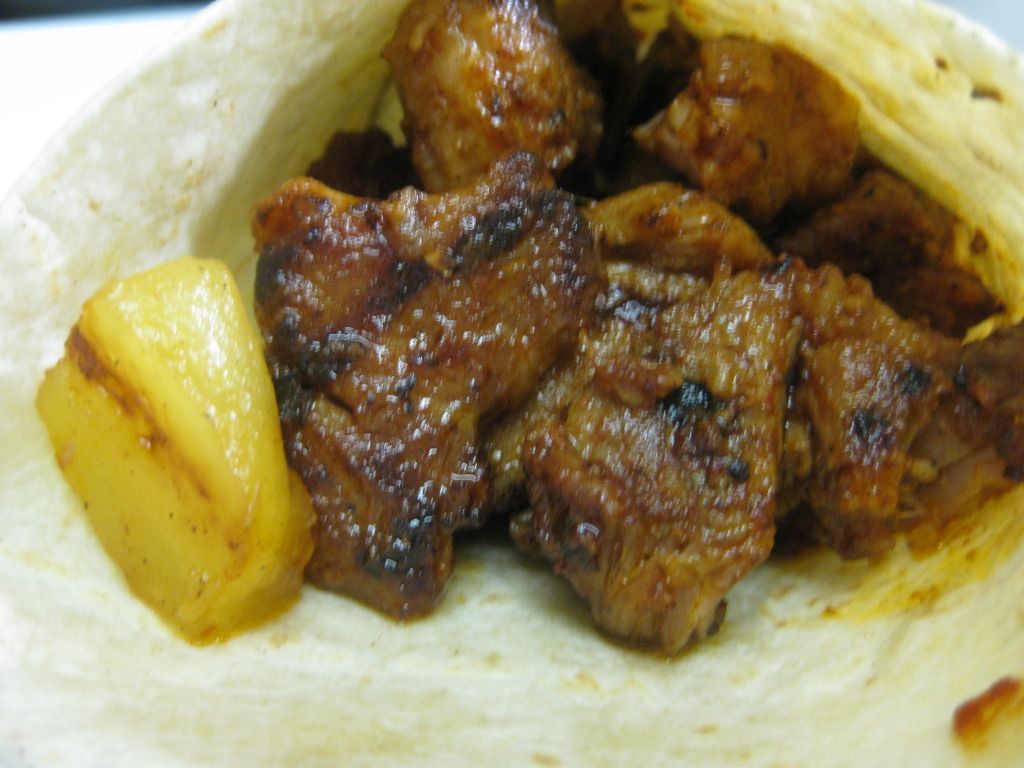
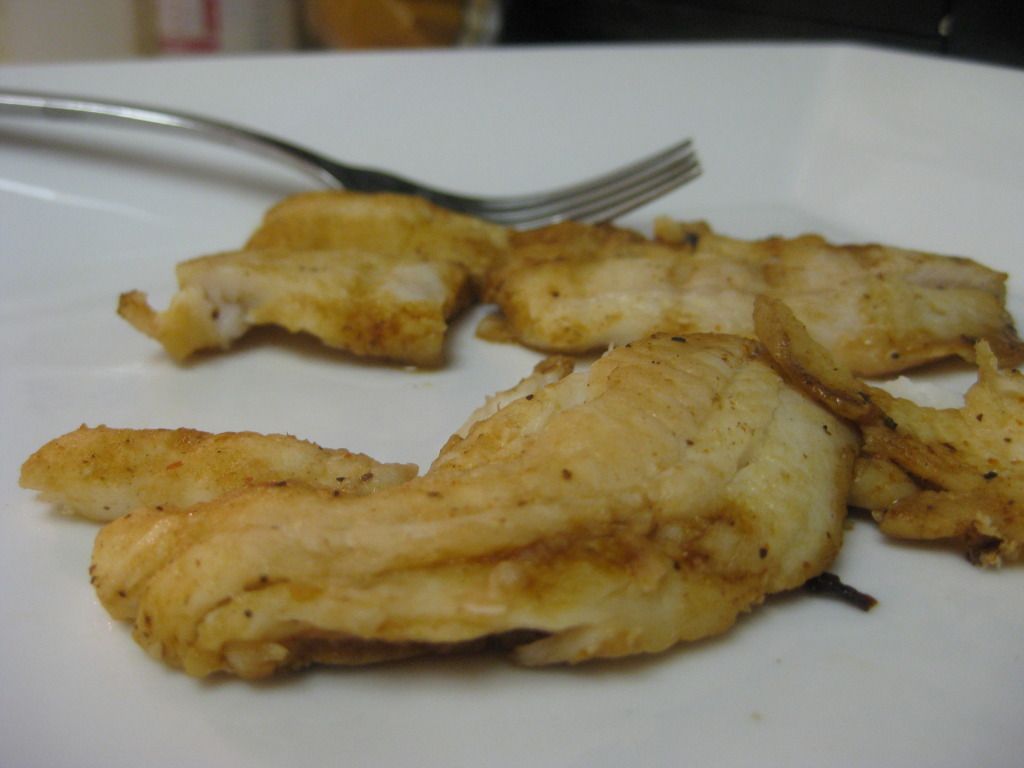


Place the noodles in the boiling pot of water and cook according to package directions.  Rinse the noodles with cold water and drain well.  In a large bowl, combine the Szechuan sauce, peanut butter, soy sauce, and lime juice, stirring with a whisk.  Add the drained noodles, carrots, green onions.  Toss this mixture together, serve immediately with the chicken, and enjoy!

The End Result:


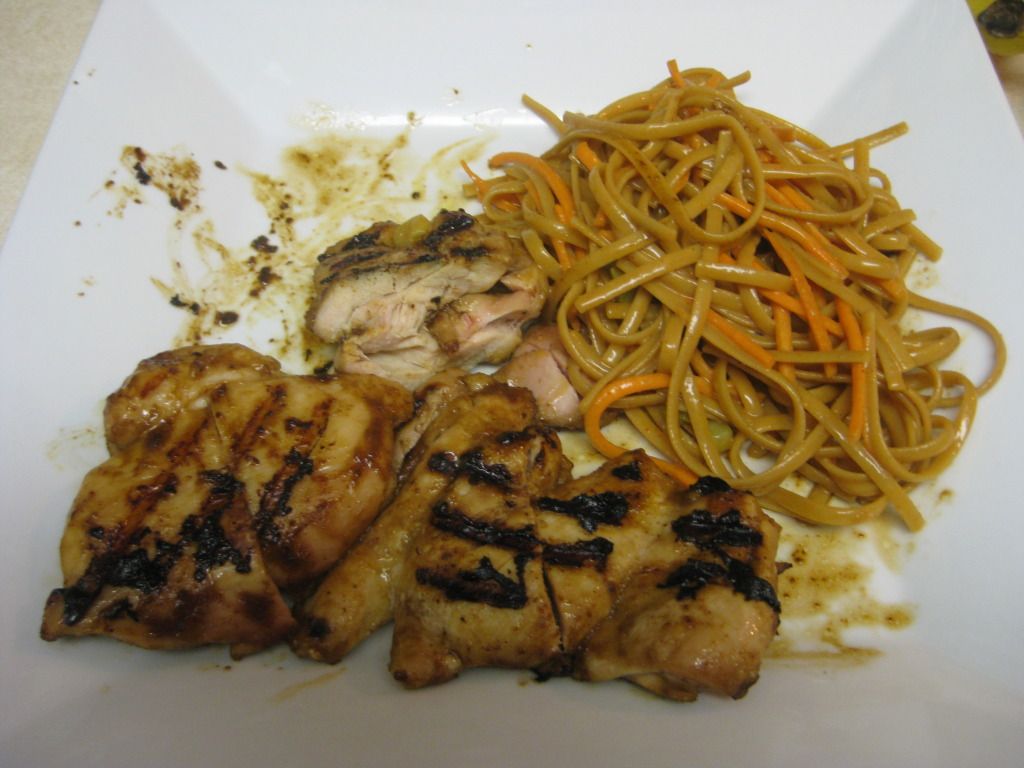
The flavor packed in the chicken from the ginger, hoisin sauce, and soy sauce gives it an incredible punch.  But this is a Chinese-inspired dish and using the ingredients to boost their flavor will make it even more delicious.  The flavor isn't too spicy and hot and that's how I like my Chinese food.  I don't like a lot of heat and even though the chicken has a strong flavor, it doesn't have a strong burn.  The noodles, on the other hand, were a completely different story.  Granted they are a side dish, it boasted was a main dish flavor.  The combination of the Szechuan sauce (which is new ingredient to the blog,) peanut butter, soy sauce, and lime juice, was very powerful.  Again, my sensitivity to spicy ingredients might be in play here, so it might come across as a bit over exaggerated.  I knew this would be a great starting Chinese cuisine recipe and this will get me started in the right direction to begin to cook more and more Chinese dishes.


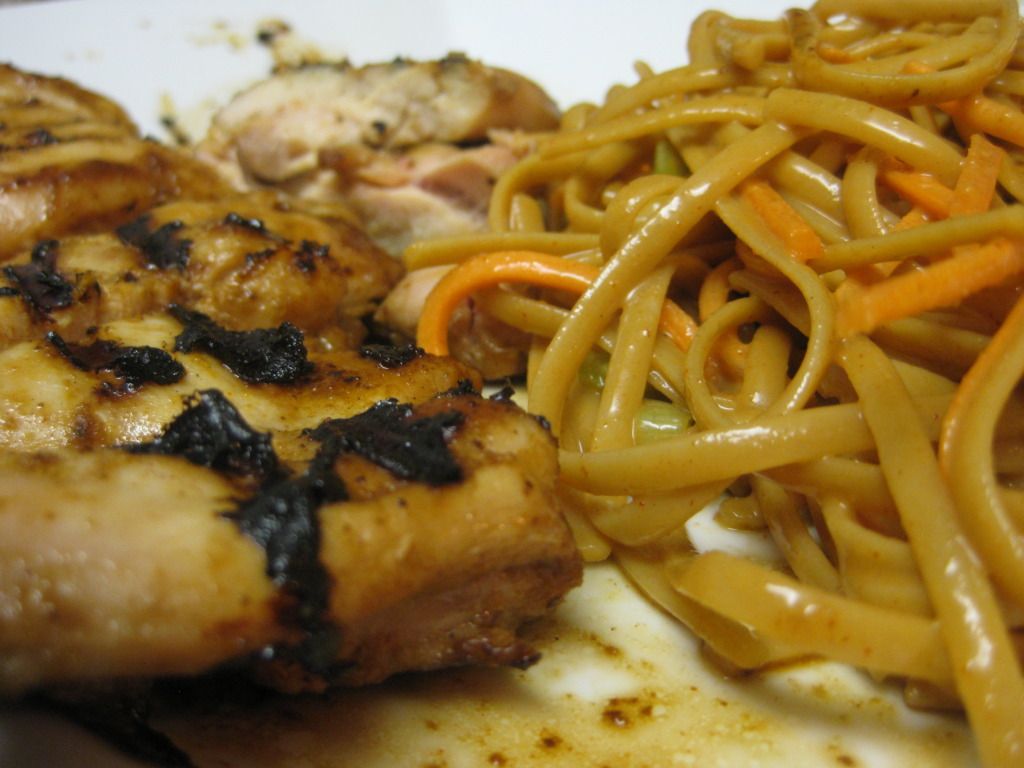
The only thing that threw the dish off was the temperature of the noodles - which are supposed to be served cold with this recipe. While the flavor doesn't change, trying to get your mind to adapt to cold pasta is a harder trick than it seems. It threw Tyler off to the point where he just decided he didn't like the noodles - we're going to try to warm them up later on and see if that changes things. 


That's all we have for you this week.  Join us next week as we continue to cook our way through new recipes.  Until then,


~Cheers!

Wednesday, June 27, 2012

Guilt Free Mac & Cheese


Good evening everyone! We're back after a week off - we were away for Maggie's birthday celebration and are only now getting back into a regular cooking routine. 

Mac and cheese is one of the few foods that kids and adults can agree on. Soft, succulent noodles draped in a rich, creamy cheese sauce - who doesn't like that? As an adult, you are certainly welcome to partake in mac and cheese, however, you may find yourself starting to question what exactly is in that day-glow orange boxed mac and cheese that the kids devour. 

Never fear, we have a way to feed your mac and cheese while still keeping on a healthy diet and feeling like an adult (no dinosaurs or glow in the dark cheese here). 

The Recipe: Lightened Up Mac and Cheese 
Original Recipe Found In: Food Network Magazine April 2012 Issue 

What You'll Need: 
(Serves 4) 

12 Ounces Fusilli or Corkscrew Pasta 
1 Tablespoon Unsalted Butter 
1 Medium Shallot (Chopped) 
2 Tablespoons All Purpose Flour
1 Teaspoon Mustard Powder 
1/2 Cup Skim Milk 
1/3 Cup Low Fat Sour Cream 
2/3 Cup Shredded Part Skim Mozzarella Cheese 
2/3 Cup Shredded Low Fat Swiss Cheese 
3 Tablespoons Grated Parmesan Cheese 
1/4 Cup Fresh Chopped Parsley / Basil / Chives (or a mixture of all 3) 


Begin by brining a large pot of lightly salted water to a boil. Cook the pasta according to package instructions. Drain the cooked pasta, reserving 3/4 cup of the cooking water. 

While the pasta is cooking, melt the butter in an empty pot over medium high heat. Once melted, add the shallot and cook until the shallot is softened (stirring occasionally) this should take about 2 to 4 minutes. Next, add the flour and mustard powder and stir until the mixture is evenly incorporated. Allow the flour to cook until it begins to toast (or darken slightly) this takes about 1 minute. 

Finally, whisk in the milk and reserved cooking water. Be sure to whisk continuously until the mixture thickens - about 1 to 3 minutes. (My experience found this mixture thickened almost immediately - so your results could vary here, adapt accordingly) 


Reduce the heat to medium or medium low. Next, whisk in the sour cream, mozzarella, swiss and 1 tablespoon of the parmesan cheese. Whisk until the cheese melts and is evenly incorporated. Be sure to stir this mixture frequently to avoid burning or browning the cheeses. 

Stir in the pasta along with a sprinkling of salt and pepper. Mix well until the pasta is evenly coated in the cheese sauce. Transfer this mixture to a 2 quart baking dish and preheat your broiler. Sprinkle the remaining parmesan as well as the herb mixture over the top of the pasta. Place this dish under the broiler and cook until the top of the pasta is a golden brown color. This takes about 2 minutes - but be sure to watch the dish closely as the cooking speed of broilers do vary and you can burn the dish easily.


If you don't have or don't want to use a broiler, you can set your oven to 450 degrees and place the baking dish in the oven for 10 to 15 minutes. This will create the same golden brown crust without the need for a broiler.  

The Results: 


The simply creamy combination of cheese, sour cream and milk create a beautiful and flavorful base for this simple mac and cheese dish. The flavors that you love are all there - this is 'back to basics' mac and cheese. The herbs add a nice touch on top of the entire dish - adding a nice adult element to the basic mac and cheese recipe. This quick and easy recipe is full of flavor and is sure to please the whole family on any night of the week. 

That's all we have for you this evening - be sure to stop in tomorrow night as Maggie takes to the kitchen with a brand new recipe. Until then, 

~Cheers 

Wednesday, June 20, 2012

Lemony and Delicious


Good evening everyone! It's no secret that one of our all time favorite dishes to cook on the blog is some variation of breaded chicken. The simple elegance of breaded chicken makes it a champion in our book - it's often a simple or straightforward recipe, but the directions you can go and the complex flavors you can create seem to be limitless. When I received June's edition of Food Network Magazine, and saw that it featured a brand new breaded chicken recipe paired with a new way to create a side dish with a bad reputation - I knew I had to try it out.

The Recipe: Lemon Garlic Chicken With Creamed Corn
Original Recipe Found In: Food Network Magazine June 2012 Issue

What You'll Need:
(Serves 2 - add additional chicken pieces as necessary) 
2 Tablespoons Extra Virgin Olive Oil 
4 Skin-On, Bone-In, Chicken Thighs 
3 Tablespoons All Purpose Flour
12 Cloves Garlic (Peeled) 
2 Lemons (Zest from one, juice from both) 
2 Tablespoons Unsalted Butter
1 Pound Frozen Corn (Thawed) 
3/4 Cup Whole Milk 
2 Tablespoons Chopped Chives 


Creamed corn is a side dish that has a bad reputation due mainly to its canned variant. Most of us, either via school lunches or old family dinners, have run across canned cream corn at one point or another. Canned creamed corn is usually loaded with sodium, visually unappealing and sort of texture-less and flavorless. When it's cooked into dishes it's a functional product - but on its own, canned cream corn (rightly) receives a great deal of scorn. I have never tried to cook up my own version of creamed corn, and seeing this "do-it-yourself" variant gave me the motivation to try it. Surely, if done properly and given the proper attention, this often overlooked side dish could shine.

Begin by preheating your oven to 450 degrees.

Add your oil to  a large (12 inch) oven safe skillet or Dutch oven, and place over medium high heat until the oil begins to lightly shimmer. While your oil is heating up, lightly season the chicken with salt and pepper and then coat the chicken in 2 tablespoons of flour to create a light breading.

This recipe is originally designed to create a crispy and flavorful skin on the outside of the chicken. We are not big fans of chicken skin for any reason - and when you factor in its poor nutritional values, we tend to avoid it all together. For tonight's recipe, I'm removing the skin prior to cooking the dish and simply breading the outside of the chicken. This is a little more risky as you are likely to remove some moisture from the meat - but from my perspective the nutritional boost gained from removing the skin is worth losing a little moisture.

Place the chicken into the skillet and allow it to cook for four minutes per side, or until the breading has turned a nice golden brown. Once browned, add the garlic, lemon zest and lemon juice to the skillet. Turn the chicken to coat. Cover and place the skillet in the oven for 20 minutes to allow the chicken thighs to reach 175 degrees. This should take about 20 minutes.


While the chicken is cooking you can turn your attention to the creamed corn. Add the butter to a medium saucepan over medium heat and allow it to melt before adding the corn. Cook, stirring frequently, until the corn has softened. This should take about 5 minutes.

Next, stir in a sprinkle of salt and pepper and the remaining tablespoon of flour. Allow the mixture to simmer for a minute or two, making sure to stir in everything evenly. Once the flour is incorporated, add the milk to the pan and stir until everything is evenly incorporated. Allow this mixture to thicken and simmer for an additional 3 to 5 minutes. Stir in the chives right before serving.

Once the chicken has finished cooking, transfer the thighs to a serving plate and drizzle them with the cooking liquids from the skillet. Serve with the creamed corn and enjoy.


The Results:


As I said in the opening, breaded chicken is one of the wonders of the culinary world. Simple in premise, complex in flavor - this recipe was no exception. The lemon and garlic combine well to give the crispy chicken breading a nice pop of flavor. Surprisingly, I did not lose as much moisture as I originally thought I would by removing the skin - the thighs tend to be a heartier region of the chicken and maintain moisture even during intense cooking - I think had I tried to do this with breasts or even drumsticks the results may have been slightly different.

The creamed corn turned out splendidly as well. The flour and whole milk base created the creamy undertone of the dish - allowing the natural corn flavor to shine through, yet adding an element to the dish that truly boosted the overall flavor. The chives were a nice touch, adding a "change of pace" to the overall flavor. In the end, this creamed corn recipe may be the one that wins over your opinion on the beleaguered side dish.

That's all we have for you this week. We're back to cooking on Tuesday night next week with a new creation from Maggie. We're working on a theme week - so be sure to stop by to see what next week's recipes will center around. Until then,

~Cheers

Tuesday, June 19, 2012

Marvelous Meatballs...On a Bun!

Good evening everyone!  If you live in the Des Moines metro (or anywhere in the Midwest,) hopefully you haven't melted yet.  Today was the second straight day of over 90 degree temperatures, with heat indexes reaching beyond that.  It seems like the perfect night to stay in and cook!  Tonight I'm creating a great summertime dish; one that won't weigh down your stomach, yet packs all the flavor of a recipe that would take all evening to cook.

The Recipe:  Italian Meatball Sliders
Original Recipe Found In:  Cooking Light, July 2012

What You'll Need:
1/4 Cup Panko
1 1/2 Tablespoons minced fresh Basil
1/2 Teaspoon Salt
12 Ounces Ground Sirloin
1 Large Egg
1 Garlic clove, minced
12 Water Rolls, halved lengthwise
4 Ounces fresh Mozzarella Cheese, cut crosswise into 12 thin slices
1 Cup lower-sodium Marinara Sauce
12 fresh Basil leaves (optional)

To start, preheat an oven's broiler to high and set a broiler pan aside.  While the oven preheats, gently combine the panko, minced basil, salt, sirloin, egg, and garlic in a large bowl, making sure that this mixture doesn't not over mix.  Divide the combination into 24 equal portions, ensuring that each portion is gently shaped into a meatball, and not packed into a meatball shape.  This will help keep the meatballs moist and not completely dried out.  Arrange the water rolls, cut side up, on the broiler pan and broil until they are very lightly toasted, about 30 seconds.  Set these rolls aside.


Meatballs ready for the hopper...er, broiler


Next, spray the broiler pan with cooking spray and arrange the meatballs on the pan.  Broil the meatballs until they are cooked and browned, about three minutes.  Take the meatballs out of the oven and flip them over.  Once back in the oven, broil for another two minutes, or until a desired doneness.  Take the meatballs out and begin assembling the sliders.  Arrange two meatballs on the bottom half of each roll and top each slider with a slice of cheese.  Broil these partially made sliders in the oven again for one minute or until the cheese melts.  Take out of the oven and set aside.


In a microwave safe bowl, pour the marinara sauce in, cover, and heat the sauce for one and a half minutes, or until the sauce is heated through.  Once the sauce is heated, gently spoon the sauce over the each of the sliders and top with a basil leaf (if so desired) and one bun top.  Serve and enjoy!

The End Result:


These sliders were tasty little numbers!  The meatballs were perfectly cooked and were super moist, not dried out.  The panko, basil, and garlic gave the meat a wonderful flavor that will definitely need to be tried outside of the slider realm.  The marinara sauce gave the sliders the perfect zing without it being too overpowering.  The mozzarella topped the entire sandwich off with a nice meltyness, that didn't leave it too oozy-gooey.  Overall, a great, easy dish to whip up any night of the week.


Check back tomorrow as Tyler takes to the kitchen with one of his favorite flavors playing a main role. Until then,


~Cheers!

Monday, June 18, 2012

Quick Hit: Super Summer Smoothie

Greeting everyone and welcome to a new week on Out of the Culinary!  Today in the greater Des Moines metro, temperatures reached the high 90's, with the heat index in the triple digits. With these sweltering temperatures, it seems like perfect timing to feature a quick drink recipe.  It's sure to quench any thirst after a long summer afternoon in the sun.  And it's so versatile that you could put any fruit in it and it will still taste delicious!

The Recipe:  Frozen Raspberry Lemonade Smoothies

What You'll Need:
1 Can Frozen Lemonade Concentrate
1.5 Cups Frozen Raspberries
1 Tray Ice
1 Can Water

Pour all ingredients into a blender.  If you don't have a blender (like us,) adapt to use a smaller blender, like a Magic Bullet.  Adjust accordingly, as to not overflow the small cup.  Pulse the combination until you can't hear any ice cubes rattling around and the mixture is a smooth consistency.


The End Result:


A refreshing and delicious summertime treat!  Like I said before, you could use any fruit, like strawberries, blueberries, or even blackberries and the smoothie will still taste great.  The lemonade flavor content is also up to you - if you like more than what the recipe alots, you could put in lemon peel or even lemon juice to give it a great burst of flavor.  If you don't like a lot of lemon flavor, you could put half a can of lemonade with a can and a half of water to even out the flavor.  If you want to make this an adult drink, mix with the appropriate amounts of your choice of alcohol and it will still be very tasty.  Overall, a very adaptable drink for any flavor.


Join us tomorrow as I create a unique slider recipe and Tyler will follow me on Wednesday with a brand new dish.  Until then,


~Cheers!

Thursday, June 14, 2012

Spae-what?

Good evening everyone!  First off, I want to say that I am very excited about tonight's recipe.  I was watching cooking program the other night and they created a dish called Spaetzle.  At first, I was intrigued at the name and then I saw how they created it and I was blown away.  Before I get to that, a little history of spaetzle.  It's a traditional German dish served all sorts of ways.  One can serve spaetzle with beef stroganoff (instead of the classic egg noodles) or lentils and sausage; it's a very versatile dish.


Five years ago, I went to Germany to visit family I had never met before.  We had all sorts of traditional dishes (including a dish that I want to try to replicate once we get the ingredients in line,) but spaetzle was never on the menu.  As an ode to my German heritage, I'll be serving up this tasty dish, served in a not-so traditional way.

The Recipe:  Fresh Herb Spaetzle
Original Recipe Found In:  www.epicurious.com

What You'll Need:

For the Spaetzle:
2 1/4 Cups All Purpose Flour
1 Teaspoon Salt
1/4 Teaspoon Ground White Pepper
1/8 Teaspoon Ground Nutmeg
3 Large Eggs
3/4 Cup Whole Milk
8 Teaspoons minced assorted fresh herbs (such as parsley, thyme, rosemary, and chives), divided

For the Serving "Sauce":
4 Tablespoons Butter, divided
2 Tablespoons extra-virgin Olive Oil, divided
8 Ounces Mushrooms, thinly sliced
1 medium Onion, chopped
3/4 Cup low sodium Chicken Broth

To start, mix the dry ingredients (flour, salt, pepper, and nutmeg) in a large bowl.  Slowly whisk in the eggs and milk to make a batter.  The batter will be really thick, so be sure to hit the whisk on the side of the bowl to release any batter that gets stuck in the whisk.  To loosen the batter, I also added a 1/4 cup of whole milk to make it not so thick.  The batter will look somewhat "eggy", but this is how it's supposed to look.  After the batter is thoroughly mixed, mix in half of the herbs, stirring well again to incorporate.


Spaetzle batter...doesn't photograph well...


While preparing the batter, bring a large pot of salted water to a boil.  Also, prepare another large bowl with butter by rubbing a tablespoon of butter inside the bowl.  This will be essential later to help keep the spaetzle "noodles" from sticking together.  Once the pot of water is at a boil, start to make the spaetzle.  This is a very unique process, one that I have never used before.  Using small portions of the batter, press the batter through a cheese grater, strainer, or a wide ladle, anything that has 1/4 inch holes.  Press the batter directly into the boiling water with a rubber spatula (or, if you don't mind getting messy, your hands can be a great tool too!)  The instant the spaetzle hits the boiling water, they will begin to cook.  Stir the spaetzle to separate and boil for two minutes.  After they are done cooking, use a fine sieve to scoop it from the pot, drain well, and transfer to the prepared buttered bowl.


And the finished cooked spaetzle


Next, heat a large skillet over medium high heat and melt two tablespoons of butter and one tablespoon of oil.  Add the mushrooms and sauté until they begin to soften, about four minutes.  After the mushrooms cook, add the onion and sauté until become translucent, about five minutes.  Add the remaining two tablespoons of butter, 1 tablespoon of oil, and the spaetzle.  Saute this mixture until the spaetzle begins to brown, about 10 minutes.  Make sure to stir this combination often so the spaetzle doesn't stick to the skillet.  Add the chicken broth to the skillet.  Simmer until the broth is absorbed by all the ingredients.  Add more broth if the mixture is too dry.  Mix in the remaining herbs, serve and enjoy!


The End Result:


The classic combination of sautéed mushrooms and onions never goes wrong in my book.  For this to be a base for the spaetzle to cook in just added a new degree of deliciousness.  The spaetzle almost formed little balls of pasta that cooked in a flash.  The herbs made them very savory and very fresh, coming off the palate cleanly.  Even though the recipe has simple ingredients, the method behind the spaetzle is completely unique and something completely different for me.  The best part of this recipe was combining all the ingredients in at the end and made for one fantastic dish.  I would definitely try this dish again.


Thanks for joining us this week.  Join us next week for new culinary adventures.  Until then,


~Cheers!

Wednesday, June 13, 2012

Magnifico Pork Tacos


Good evening everyone! It's no secret that our favorite food medium to dabble in is Mexican cuisine. We love that Mexican cooking typically uses fresh ingredients and creates amazing flavor combinations. We've tried countless different variations of tacos, burritos, grilled chicken, fried rice - each time seeing new ways these basic building blocks of cuisine (tomatoes, peppers, avocado - etc.) can transform a recipe. When our latest issue of Cook's Illustrated arrived and it had a brand new Mexican recipe within its pages, we knew we had to try it.

The Recipe: Pork Tacos
Original Recipe Found In: Cooks Illustrated May & June 2012 Issue

What You'll Need:

10 Large Dried Guajillo Chiles (Or New Mexican Chiles)
1 1/2 Cups Water
1 1/4 Pounds Plum Tomatoes (Cored) or Cherry Tomatoes
8 Garlic Cloves (Peeled)
4 Bay Leaves
3/4 Teaspoon Sugar
1/2 Teaspoon Ground Cumin
1/8 Teaspoon Ground Cloves
3 Pounds Boneless Pork Butt Roast
1 Lime (Cut into 8 wedges)
1/2 Pineapple (Peeled, cored and cut into 1/2 thick rings) or Canned pineapple rings
1 Small Onion (Diced)
1/2 Cup Coarsely Chopped Fresh Cilantro
6 Inch Corn Tortillas (Quantity based on number being served)


Begin by placing your chiles in a large dutch oven over medium heat. Allow the chiles to warm for 2 to 3 minutes, or until they have softened and become fragrant. Remove the chiles from the Dutch oven and chop off their stems.


In the same Dutch oven, combine the chiles, tomatoes, garlic, bay leaves, 2 teaspoons of salt, 1/2 teaspoon of pepper, sugar, cumin and cloves. Set the heat to medium high and bring the mixture to a simmer. Once the mixture is simmering, reduce the heat to medium low and cover the pot. Allow the mixture to cook for about 20 minutes, stirring occasionally, until the chiles have softened completely and the tomatoes are easy mashed.

While your sauce is cooking, begin slicing the pork. If you have a fattier roast, carve off the excess fat, leaving only about 1/4 of fat around the edges of the roast. Once trimmed, slice your pork against its natural grain and into 1/2 inch thick slices. There is going to be a hefty cooking process for these slices, so don't worry about being too thick on the cuts.

Most pork roast come packaged in a twine "netting" that keeps the roast in a manageable shape. Thankfully, once you cut this twine off, the indentations of where the twine was remains. On most roast, this twine is spaced about 1/2 inch apart, making easy to follow cutting guides right on the roast.


After 20 minutes, transfer the chile mixture to a large blender and process the mixture until it is evenly blended and smooth. Strain this mixture through a mesh strainer, making sure to extract as much liquid as you can. (It helps to use a wooden spoon or spatula to press the solids agains the mesh - that will push out any excess liquid hiding within the solids).


Transfer this liquid back to the dutch oven and bring it to a simmer over medium heat. Carefully layer in your pork slices evenly amongst the liquid. Make sure all of the slices are submerged into the liquid and then partially cover your Dutch oven (leave the lid slightly askew so some steam can work off the top). You may need to assess the amount of liquid here and add an extra 1/2 cup of water based on the quantity you were able to strain from the mixture. I found our liquid to be a little low (it didn't look sufficient to cover the pork in the Dutch oven) so I opted to add some more fluids. You results will vary on the juiciness of your tomatoes.

Allow this mixture to simmer for 90 minutes. About halfway through cooking, turn the pork slices  and give the mixture a slight stir.

After 90 minutes, remove the pork from the sauce and transfer it to a large plate. Lightly season both sides of the pork with salt, and then cover the plate in aluminum foil. Set this plate aside.

Whisk the sauce well to combine (it will have separated during cooking) before transferring 1/2 cup to a small bowl to be used during the next step. Pour off another 1/2 cup of the sauce to be used later. The remaining sauce can be reserved for future recipes (it freezes well).

Bring a grill or grill pan to medium high heat. Using the 1/2 cup of reserved sauce from earlier, brush one side of the pork with the sauce and lay it, sauce side down, onto the grill. Allow the pork to grill until it is brown and crisp, for about 5 to 7 minutes. Brush the other side of the pork with the remaining sauce and flip the pork - allowing it to cook for the same 5 to 7 minutes or until it becomes golden brown. Transfer the finished pork to a cutting board and let rest for 3 to 5 minutes.


Next, lightly brush the pineapple slices with olive oil and lightly season each side with salt. Place the pineapple rings on the grill and allow them to cook until the internal sugar begins to caramelize, 3 to 5 minutes per side. Remove the pineapple slices from the grill and dice with a chefs knife. Transfer the diced pineapple to a serving bowl.

Carve the pork slices with your chefs knife, cutting the slice crosswise into 1/8 or 1/4 inch pieces. Bring the remaining 1/2 cup sauce to a light simmer in a pot and toss in the chopped pork. Stir until all pork pieces are evenly covered.

Spoon a portion of pork into the warmed corn tortillas, followed by a spoonful of the grilled pineapple. Add some of the chopped onion and cilantro on top and season with the lime wedges. Enjoy!


The Results:


These may be some of the best tacos you'll ever have. The guajillo chile is an almost fruity chile that delivers a great smoky flavor to the final dish. The pork tastes like it has been roasting over a smoker for a full day. What's amazing is even after all of that cooking - the pork is still very juicy and (obviously) tender. Throwing the pork on the grill adds a nice crunchy crust to the outside of the pork and greatly intensifies the overall flavor. 

The tomato based sauce is a rich combination of subtle heat from the chile and slightly sweet from the sugar. The grilled pineapple actually ends up being the unsung star of the taco. It's sweet, caramelized flavor balances the tomato sauce nicely. While this is certainly not your standard weeknight recipe, it would make a great weekend feast. If you're a fan of tacos or Mexican cuisine, do yourself a favor and give this dish a try!

That's all we have for you this evening. Maggie takes to the kitchen tomorrow night with a dish that pulls from an entirely different region's cuisine. Be sure to stop in tomorrow night to see what she has cooking. Until then,

~Cheers

Tuesday, June 12, 2012

Far East Fusion

Good evening everyone! We’re starting this week of cooking off with a quick and easy recipe that fuses an American classic – the hamburger – with flavors of Asian cuisine. This marriage of cultures brings savory American beef and spicy Asian seasoning to the plate, when we have a chance to try something as unique as that, you know we’re going to give it a shot. Let’s get cooking!


The Recipe: Hoisin Burger
Original Recipe Found In: Food Network Magazine July 2012 Issue

What You’ll Need:
(Serves 4)

1 Pound Ground Beef (85/15)
½ Cup Low Fat Mayonnaise
1 Teaspoon Sriracha (Or Asian chile sauce)
½ Teaspoon Sesame Oil
1 Cucumber (Sliced very thin – 1/16 inch)
6-8 Ounces Chopped Scallions (Fried or grilled)
1 Tablespoon Hoisin Sauce
4 Sesame Seed Buns (Toasted)


Begin by forming your hamburger patties. You can use any burger recipe you like (IE cracking burger) – or even just form the burgers with the ground beef and a sprinkling of salt and pepper. Set the completed patties aside.

In a small bowl, combine the mayo, sriracha and sesame oil. Whisk well until everything is blended. Your mayo should turn an orange / yellow color (almost like dark mustard). Store this may in the refrigerator until you are ready to serve.

Begin cooking your burgers via grill, steam, oven or grill pan (method does not matter). While the burgers are cooking, add a splash of olive oil to a small skillet and fry the chopped scallions until they have softened and are slightly translucent. This takes around 5 minutes, depending on the quantity of scallions you are cooking. During the last minute of cooking for the scallions, add a small drizzle of sesame oil and toss to evenly distribute amongst all the scallions.


As your burgers are nearing completion, brush the hoisin sauce on the top and bottom of each burger patty. Allow the burgers to cook for an additional minute on each side to cook the hoisin flavor into the patties.

Hoisin sauce is an Asian dipping sauce made from rice, sweet potato and a myriad of other ingredients. It’s a sweeter sauce that’s prevalent in a great deal of Asian cuisine. Flavor wise, it’s very similar to soy sauce, except less salt and with a little more of a ‘bite’ (due to a vinegar base). By brushing it onto the burger during the final stages of cooking, you’re transforming the traditional tasting burger patty into an Asian inspired centerpiece.

Once the burgers have finished cooking, transfer them to a cutting board or plate and allow them to rest for 3 to 5 minutes. While resting, spread the sriracha mayo on the top and bottom portion of the sesame seed buns. On the bottom bun, spread a thin layer of the sliced cucumber.

Rest the burger on top of the sliced cucumber and top the patty with the cooked scallions. Top with the other half of the sesame bun and enjoy!


The Results:


It’s a burger – but it tastes nothing like the classic American hamburger. Instead, this tastes like a dish order off a Thai or Chinese menu – except it morphed on to a burger. The sriracha mayo does pack a decent amount of heat, but is nicely neutralized with the freshly sliced cucumber on the bottom of the burger. We were pleasantly surprised at the lack of heat from the burger - on its own the mayo is quite spicy, but coupled with the buns, cucumbers and scallions the mayo blends in nicely.

(If you’re not sure about cucumbers on a burger – just think about where pickles come from, then you’ll realize it’s not such a stretch)

All in all, this is a flavorful burger recipe that is sure to impress your guests or thrill the family with something new. With its quick prep time and great flavor, this is a recipe you’ll want to try at home.

That’s all we have for you tonight. We’re back with a full recipe tomorrow night. (We’re returning to an old favorite – but trying it in a whole new way). Until then,

~Cheers


Monday, June 11, 2012

This Week's Schedule

Tuesday: We fuse together an American classic with Asian inspiration in a quick-hit recipe. 
Wednesday: Tyler takes to the kitchen to try a new spin on Mexican cuisine 
Thursday: Maggie goes German with her night in the kitchen 


Stop in Tuesday for the start of this week's cooking exploits! Until then, 

~Cheers 

Wednesday, June 6, 2012

Summertime Flavors

Good evening everyone! As Maggie mentioned yesterday, we're doing a little "grill week" theme here on the blog. Of course, grill week takes on new challenges when you don't technically have a grill. As such, we're forced to utilize a grill pan, broiler or any other cooking means to try to duplicate these summer time recipes. Tonight's recipe is a traditional summertime staple - pork chops and corn on the cob. How did we take this seemingly 'grill only' recipe and make it apartment friendly? Read on to find out. (The grilling instructions will be included as well, so you CAN grill at home if you are able).


The Recipe: Grilled Pork Tenderloin With Corn On The Cob
Original Recipe Found In: Food Network Magazine - June 2012 Issue

What You'll Need:
(Serves 4)

For the Pork & Corn:

1 Tablespoon Paprika
1 Teaspoon Packed Light Brown Sugar
1 Teaspoon Cumin
1 Teaspoon Mustard Powder
1/2 Teaspoon Onion Powder
1/2 Teaspoon Garlic Powder
2 Teaspoons Extra Virgin Olive Oil (Plus additional for brushing)
2 Small Pork Tenderloins (1 1/2 - 2 pounds total)
4 Ears of Corn (Husked)*

For The Sauce:

3/4 Cup Apple Cider Vinegar
3 Tablespoons Lightly Packed Brown Sugar
2 Tablespoons Ketchup
1/2 Red Pepper Flakes


*Corn on the cob is a perfect grilling companion. Since we don't have a grill at our disposal, we're opting to use a different variant of corn on the cob. Most summers, my parents acquire a large amount of sweet corn (right before the end of the season) and cook it up, shuck it from the cob and then flash freeze it. The result is fresh tasting Iowa sweet corn that is ready to eat throughout the season. Any time you see corn appear as a side dish on our blog - that is the corn we are using.


Any midwesterner knows that early June is not prime sweet corn season. Sure, there's corn at the grocery stores, but we know the origin of this corn is from Texas, Georgia or other warm southern states. Not meaning any offense to the folks in the south - but that sweet corn is junk. Sure, it's great if you've only had that your entire life. But, once you've had fresh midwest sweet corn - you'll never be able to stomach the "other" offerings. That's why our grocery stores only carry a small quantity of this imported sweet corn in the early summer months. The citizens who know better simply walk on by.

Since we have some frozen Iowa sweet corn, I'm adapting this recipe from grilled corn to foil baked. I'm going to use the same seasonings as the original recipe, but I'm simply going to wrap the shucked corn in foil and bake it in the oven.

To begin, combine the paprika, 2 teaspoons of salt, 1/2 teaspoon ground black pepper, the brown sugar, mustard powder, onion powder, garlic powder and cumin in a small bowl. Rub the olive oil all over each pork tenderloin and then coat each tenderloin in the seasoning. Wrap each tenderloin tightly in plastic wrap and then refrigerate for 3 to 6 hours before cooking.


While the pork is marinating, you can prepare the sauce. In a small saucepan, combine the vinegar, 1/2 cup water, ketchup, red pepper flakes, brown sugar and 1 teaspoon of salt. Place the saucepan over medium heat and bring the mixture to a simmer. Stirring constantly, allow the mixture to simmer until the brown sugar dissolves. Once dissolved, remove the saucepan from the heat.

Once you are ready to grill, remove the pork from the refrigerator and remove the plastic wrap. Allow the pork chops to rest for 10 to 15 minutes before grilling. While you're waiting, bring your grill to medium high (or if you're using a grill pan, place it over medium high heat) and brush the corn on the cob with a light layer of olive oil. (If you'd like, sprinkle some of the excess rub on the ears of corn). If you're going to cook the corn in the oven, place the corn in a aluminum foil pouch and sprinkle some of the excess rub across the corn. Place the foil packed on a rimmed baking sheet and into a 350 degree oven for about 15 to 20 minutes.

Place the pork chops on the grill (or grill pan) and cook, turning occasionally, until the thickest part registers 140 to 145 degrees.  Depending on the thickness of your tenderloin, this can take between 10 to 20 minutes. Our tenderloins were fairly thin, so ours cooked up in just about 5 minutes. When you're down to the last few minutes of grilling (5 minutes to go) throw your corn on the cob on the grill and allow it to roast (turning occasionally) until it's golden brown - this takes about 5 minutes.


Once the pork and corn are done, serve the pork with a drizzling of the sauce and enjoy!


The Results:


This flavorful rub transforms the traditional summertime flavor of grilled pork into an extraordinary dish. The juicy pork absorb most of this great flavoring during its long marinade, making each bite simply burst with the barbecue like flavors. Topped with the smokey BBQ sauce, this pork truly shines.

I like the last minute decision to top the corn with some of the rub. It gave the corn just a hint of the BBQ flavoring that was on the pork. Together, the pork and corn complimented each other well.

There's little comparison to the flavors you can create on the grill in the summertime. However, if you don't have a grill - that's no reason to avoid these great summertime treats. With a simple grill pan and a little ingenuity you too can create a delicious "off the grill" recipe for the whole family.


That's all we have for you this week. We're back again on Monday with another brand new entry (recipe, news story, product review - who knows?!) Until then, enjoy the rest of the week and the weekend!

~Cheers

Tuesday, June 5, 2012

Fancy Fish

Good evening everyone!  Bouncing back from an all vegetarian week, I start off the week with a new theme: Grilling Week.  Most of our readers know that we live in an apartment with no means to a grill.  We do have a portable grill that we could take to a park, but for everyday use, we do not own one.  So when we want to grill, we whip out our grill pan and make due with what we have.  Before this evening, I don't believe I've ever eaten (or attempted to cook) a grilled fish - it was one of those things that I never had thought to try.  Tonight, I will attempt to grill a fish and hopefully, it will turn out just like it would on a "real" grill.

The Recipe:  Grilled Halibut with Hoisin Glaze
Original Recipe Found In:  Cooking Light Five Ingredient & 15 Minute Recipes

What You'll Need:
2 Tablespoons fresh Orange Juice, divided
4 (6 ounce) Halibut fillets*
2 Tablespoons Hoisin Sauce
2 Teaspoons Sriracha sauce (or other hot chile sauce)

*Note:  While we thought picking up halibut at our local grocery store would be an easy task, we weren't able to find it. (All sold out)  So we decided on Dover Sole - a very similar white fish and a new fish variety for the blog.


To start, heat a grill pan over medium high heat on the stove.  Alternatively, if you are actually using a grill, preheat the grill to high heat.  Next, brush 1 tablespoon of orange juice evenly over both sides of the fillets, just so it gets a nice orange hue to it.  Sprinkle both sides evenly with salt and pepper.  In a small bowl, combine the hoisin sauce, sriracha sauce, and the remaining tablespoon of orange juice.


Fish and orange juice...who knew??


If you have never cooked with hoisin sauce or sriracha, be prepared:  both are relatively hot on the heat index.  Although some would claim that neither is really too hot, I would have to disagree.  Then again, my tastebuds are rather sensitive to strong (scorching hot) flavors, so I tend to shy away from using these ingredients most of the time.  But since the fish has a neutral taste, it's good to amp up the flavor.  Plus, using a bit of the sweet flavor from the orange juice should cut out on the heat from the hoisin and the sriracha.


Next, place the fish fillets in the middle of the grill pan and begin to cook.  Brush the fillets with the hoisin mixture.  This next part I would strongly recommend keeping an eye on your fish.  While I nearly scorched pork chops black in a previous blog, it's because I continually brushed the glaze on the chop while it cooked on the grill pan.  That glaze had no where to go, so it burned off rather quickly and the entire apartment had a thick cloud of smoke for the next hour.  The hoisin glaze in the grill pan will have no where to go, so a continual brush of glaze will not be included in tonight's dish. If you're using a real grill, feel free to continuously glaze.


Grill the fillets on each side for three minutes, or until desired degree of doneness.  Serve and enjoy!


The End Result:


As I predicted, the orange juice cut down the kick from the hoisin sauce and the sriracha, but there was still enough heat to provide some flavor.  The sole was cooked to perfection and instantly flaked when you cut into it with a knife.  The flavor of the hoisin glaze was slightly muted, due to the non-consistent brushing of the glaze.  But I leaned on the lighter side to avoid producing a lot of smoke in our apartment.  The white fish is such an incredible diverse base to use, especially when cooking with intense flavorings and spices.


Join us tomorrow as Tyler continues our Grilling Week with another brand new recipe.  Until then,


~Cheers!

Monday, June 4, 2012

Bonus Recipe: Bacon Cheeseburger Pizza


Good evening everyone! Summertime feels like it’s fully upon us (although it’s still technically two weeks away, the weather is saying otherwise). As such, we’re spending more time outside and enjoying the beautiful weeknights. That means a few changes to our normal format. In place of the usual “Around the Culinary World” feature, we’re going to be featuring odds and ends – quick recipes, product reviews and the occasional news story – just over the summer months. The food news has been fairly mundane lately and rather than simply sharing a story or two a week, we decided to shake things up a bit.

We’re starting this shakeup by sharing a great weeknight recipe that the whole family is sure to love. One of our greatest (guiltiest) pleasures is bacon cheeseburger pizza. This blending of burger and pizza reins supreme over most other pizza challengers. The obvious downfall is most commercial bacon cheeseburger pizzas are less than great for your diet or healthy eating lifestyle. While it is certainly true that you can splurge every now and again – we decided to create a healthier version of the standard bacon cheeseburger pizza, one that’s so easy you can cook it up quickly for a weeknight dinner.

The Recipe: Weeknight Bacon Cheeseburger Pizza
This is an Out of the Culinary original recipe

What You’ll Need:

1 Prepared Large Pizza Crust (Whole wheat preferred)*
1 Pound Hamburger (80/20)**
4 Slices Thick Cut Bacon (Turkey bacon works as well)
Thick Cut Dill Pickle Slices (Quantity based on preference)
2 Cups Pizza Cheese (Shredded)
4 Ounces Tomato Sauce (Low or no sodium)

* These can usually be found in the tomato sauce aisle. They are vacuum packed and ready to bake. While you can certainly make your own crust, if you want to make this recipe on the weeknight – using ready made crust is the quick and easy way to save some time.

** Save money here by buying the fattier hamburger. You can rinse the cooked hamburger under warm water in a colander to wash away the excess fat.

To begin, preheat your oven to the temperature instructed on the pre-made pizza dough packaging. (Typically 425-450)

In a large (12 inch) non stick skillet, brown your hamburger oven medium high heat until completely cooked through. Once cooked, pour the hamburger into a colander and rinse under hot water to remove the excess fat and grease from the meat. Set the hamburger aside until needed.

While the hamburger is cooking, cook the slices of thick cut bacon over medium high heat in a small (8 inch) non stick frying pan. Once the bacon is browned and crispy, transfer the sliced to a paper towel lined plate. Blot off the excess fat and grease from the bacon before chopping the slices into smaller bits with kitchen shears. Set the bacon bits aside until needed.

To begin constructing your pizza, spread the tomato sauce across the surface of the dough with a rubber spatula. Once the sauce has been layered to your thickness and quantity preference, add the pickles (don’t knock this until you try it – it may sound weird to have pickles on a pizza, but once you taste it, you’ll know why they’re there.) Next, add about ½ of the hamburger mixture evenly over the pickles and pizza crust. Sprinkle ½ of the bacon bits evenly on top hamburger mixture.

Top this with about ½ of the cheese mixture before repeating with the remaining hamburger and bacon bits. Top these layers with cheese and pop the pizza into the oven for 10 to 15 minutes. Once the cheese is golden brown and delicious, slice up and enjoy!


The Results:

While this isn’t a “healthy” recipe, it is “healthier” than the other options out there. When you can make up a tasty meal at home with quality ingredients, it’s always going to be better than the mass produced commercial offering. This recipe is so quick and easy that you can make it up after a busy workday and not spend the entire evening in the kitchen. With its plethora of flavors, it’s also sure to please just about the whole family (outside of any vegetarians you may have!)

That’s all we have for you this evening. Maggie takes to the kitchen tomorrow night to cook up a brand new recipe that blends two unique ingredients. I’ll follow her on Wednesday with a recipe intended for grilling season – but we’re adapting it for apartment friendly cooking. Stop back in tomorrow night to see what Maggie has cooking. Until then,

~Cheers