Monday, July 30, 2012

Introducing: Couscous

Good evening everyone! If you're a regular viewer of any of the Food Network programs (Chopped, Iron Chef - etc.) you've likely been hearing a lot about couscous and quinoa. While these grains are anything but new, they are relatively new to the foodie scene. These ultra nutritious grains have made their way into many modern menus and are becoming a common kitchen item for those who love to cook.

So, when I stumbled across a recipe that utilized couscous, I knew I had to give it a shot. Tonight, we'll find out what the whole foodie world has been raving about for a while now. Let's get cooking!


The Recipe: Grilled Pork Steaks With Zucchini Couscous
Original Recipe Found In: Food Network Magazine, September 2012 Issue

What You'll Need:
(Serves 4)

1 Cup Whole Wheat Couscous
1 3/4 Pounds Pork Tenderloin
3 Tablespoons Extra Virgin Olive Oil
1 Small Garlic Clove (Grated)
2 Medium Zucchini (Sliced lengthwise into wedges)
1 Tablespoon Fresh Lemon Juice
1/4 Cup Chopped Fresh Parsley

**NOTE: We are heavily adapting this recipe for our personal preferences. We're omitting a fresh chopped tomato from the couscous (not tomato fans) and we're leaving out the plain Greek yogurt dipping sauce (not Greek yogurt fans) if you'd like to add either of those, feel free to copy the original recipe from Food Network Magazine.

Couscous is a new addition to our cooking repertoire. This grain originates from Africa and dates as far back as 13th century. It's been adapted to many different cultures and regions throughout time, including African, Middle Eastern and even French cuisines. From a culinary standpoint, couscous behaves a lot like pasta or rice in a recipe, providing a great grain base to any dish. The upside of couscous, however, is that it is one of the healthiest grains you can eat. Couscous has 3.6 grams of protein for every 100 calories (compared to 2.6 grams found in white rice) and its fat to calorie ratio is 1% while pasta is 5% and white rice is 3%. In addition, couscous has riboflavin, niacin, vitamin B6 and folate in comparison to pasta and four times as much thiamine and pantothenic acid. This is one healthy grain!


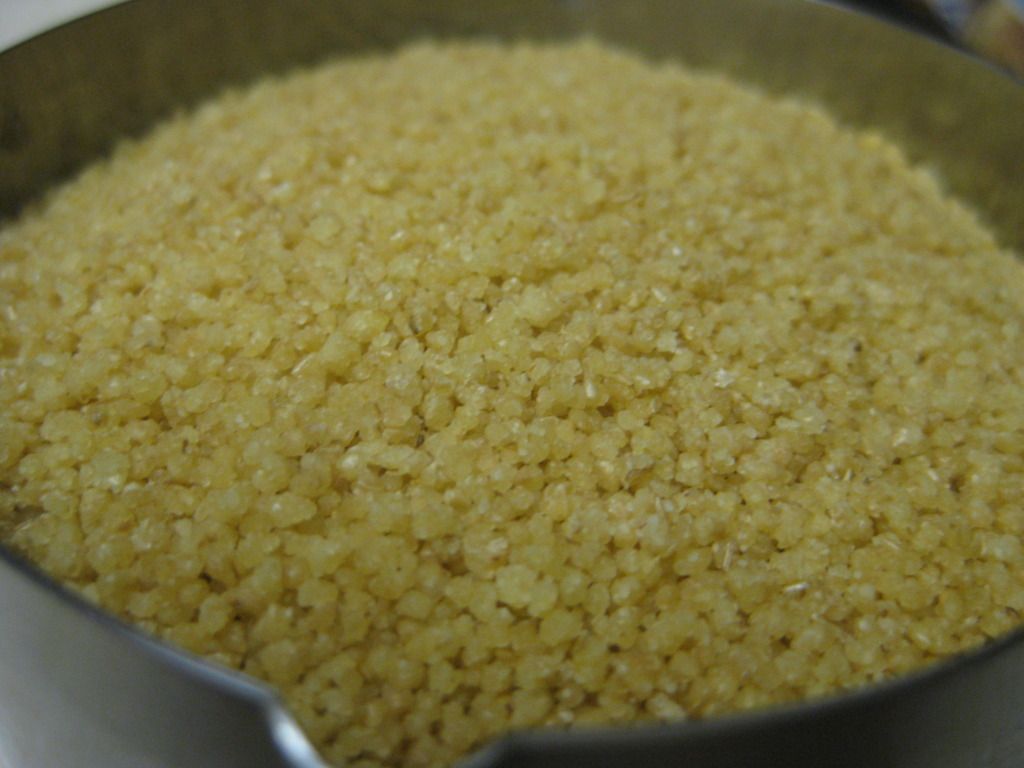
The best part about couscous is that it is not at all hard to find in your local grocery store and it is extremely affordable (around 1.99 for a box).

To begin preparing this dish, preheat your grill or grill pan to medium high and begin preparing the couscous according to package instructions.

If you're using a full sized pork tenderloin, take a few moments to butterfly the loin (slicing it nearly in half lengthwise) and pound it out with a meat tenderizer. This flattening will speed up cooking time latter on. We're using a center cut tenderloin that is fairly diminutive in size, meaning we don't have to butterfly our cuts.

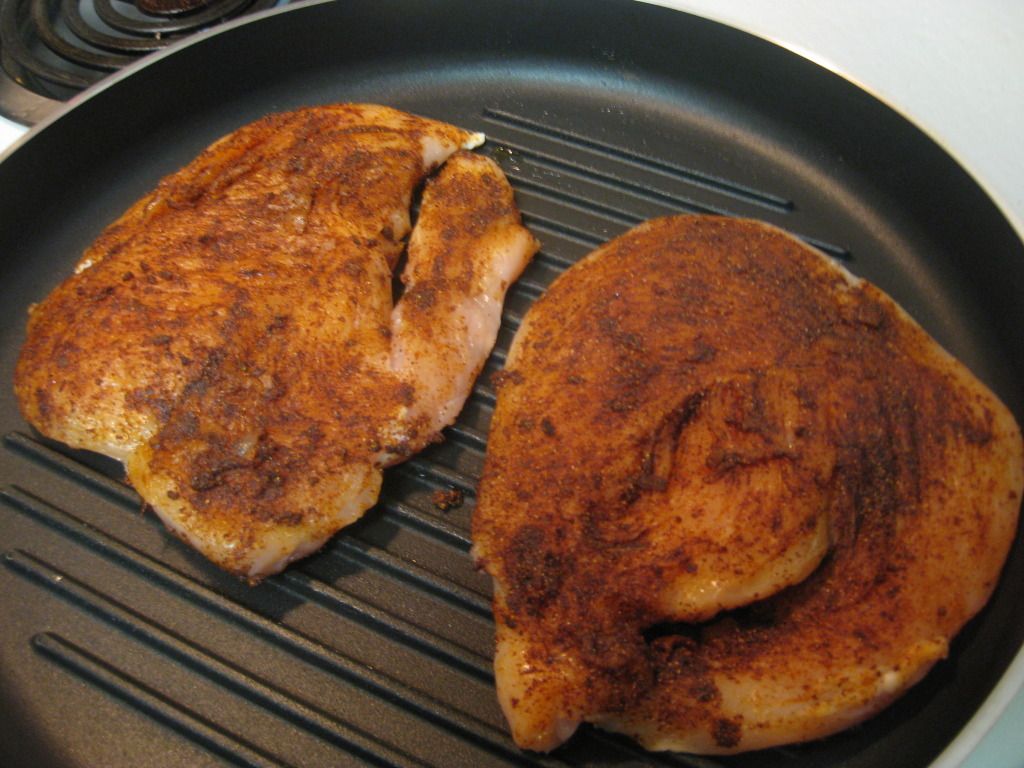
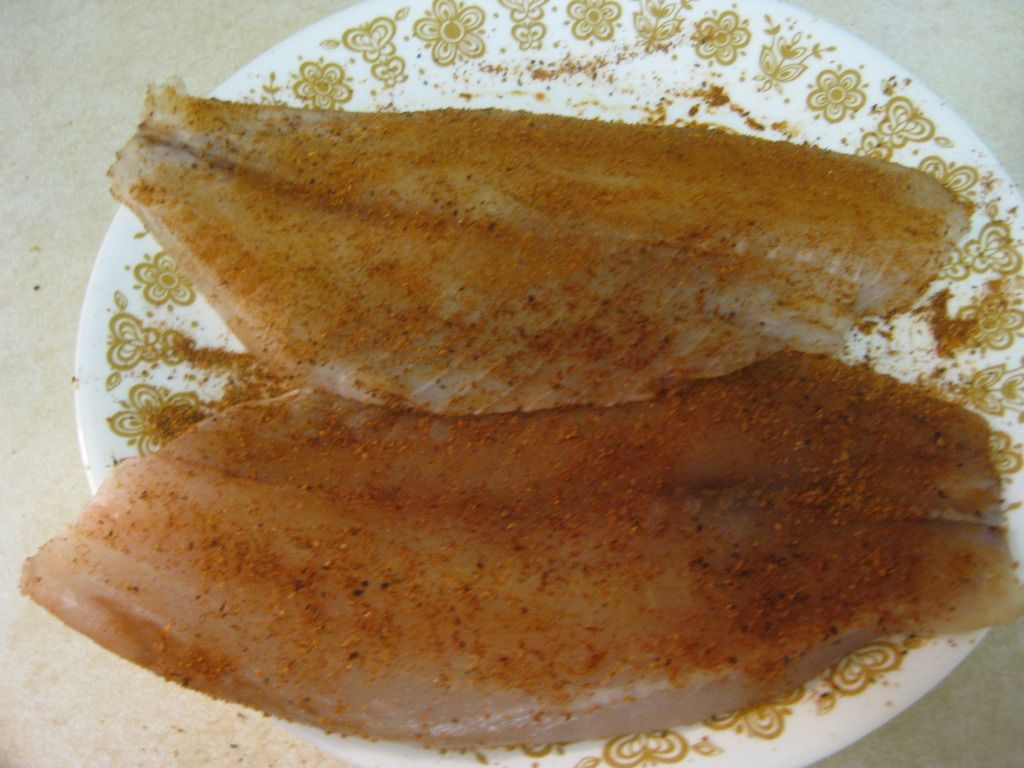
In a small bowl, combine 1 tablespoon of olive oil with the garlic and 1/2 teaspoon of salt and pepper. Rub this mixture evenly over the pork.

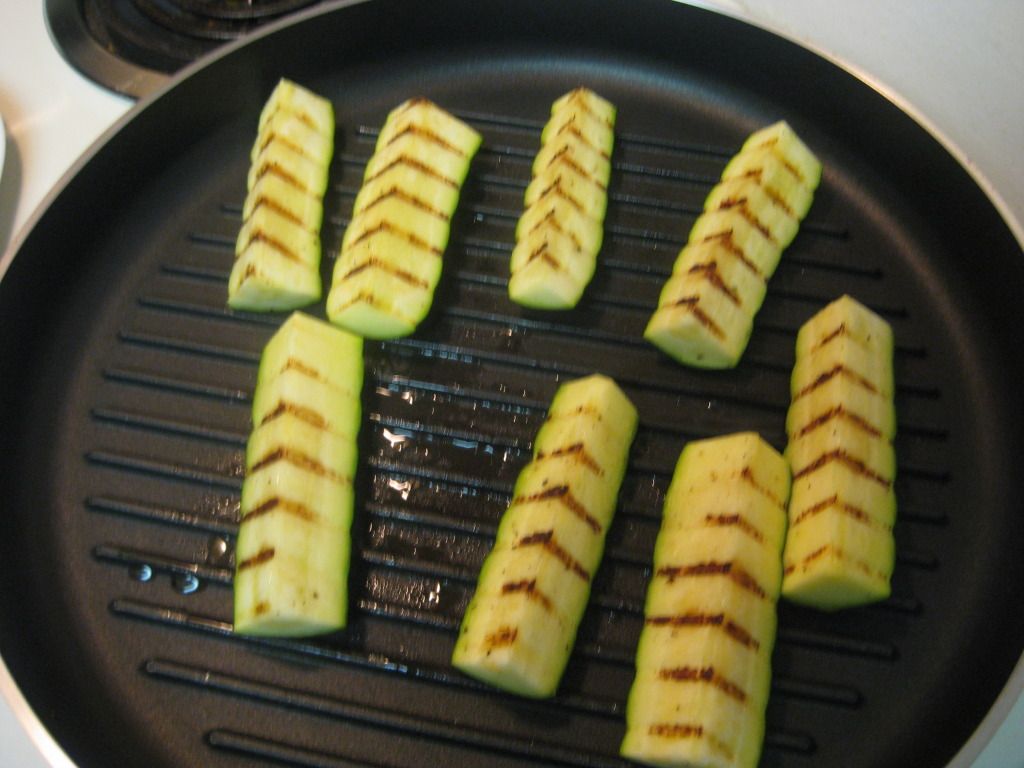
Meanwhile, toss the zucchini in 1/2 tablespoon of olive oil and 1/4 teaspoon of salt and pepper. Place the zucchini on the grill and cook for about 3 minutes per side, or until the zucchini is lightly charred. Transfer the cooked zucchini to your cutting board and chop it into small wedges.


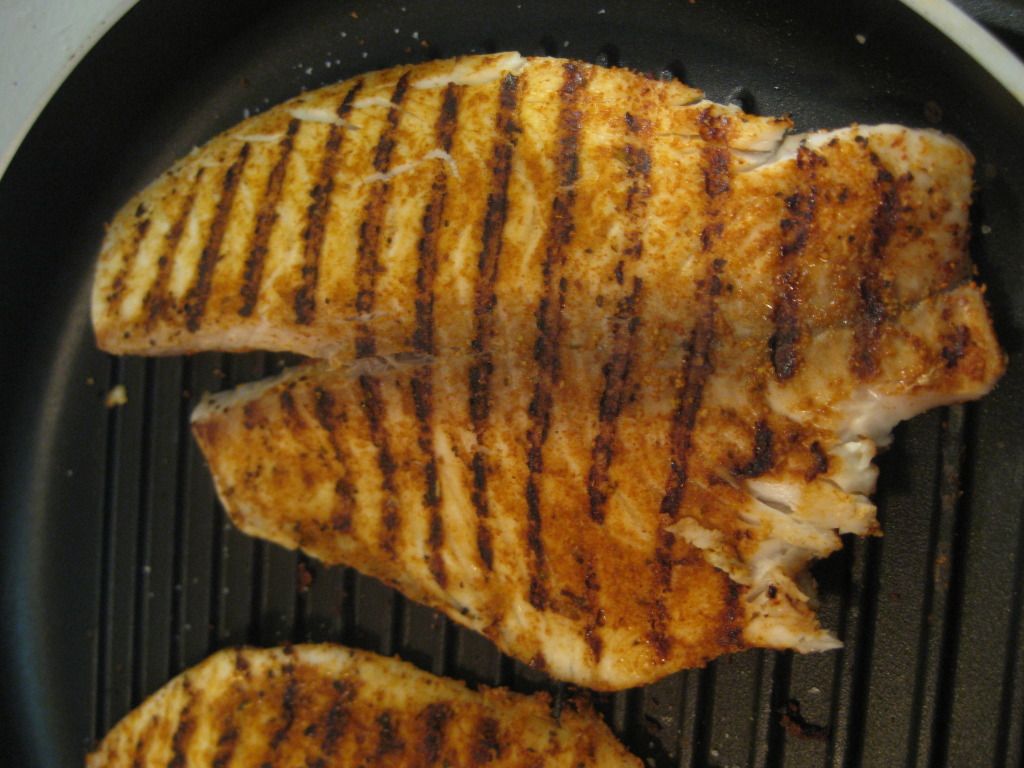
Next, add your pork to the grill. Cook for 3 to 5 minutes per side or until the pork is cooked through and registers at least 145 degrees. Transfer the tenderloin to a cutting board and allow it to rest for 5 minutes before slicing it into pieces (if you were using one large loin).

Finally, toss the couscous (already cooked) with the zucchini, lemon juice, parsley and 1 1/2 tablespoons of olive oil and a pinch of salt and pepper. Serve with the pork and enjoy!
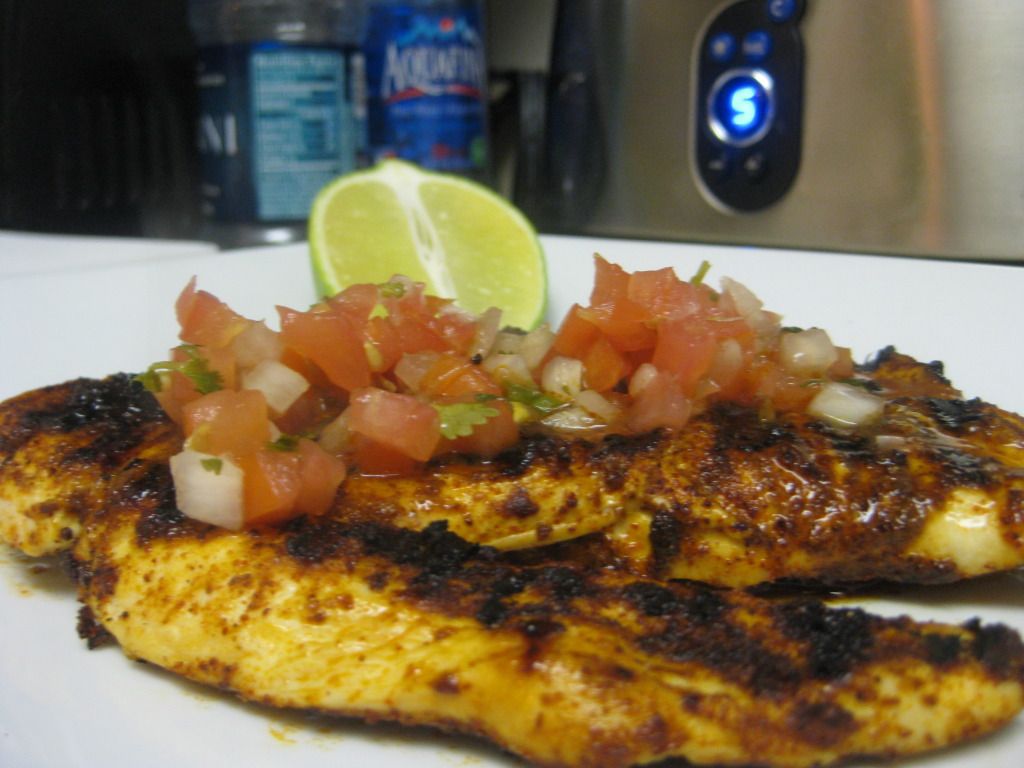

The Results:


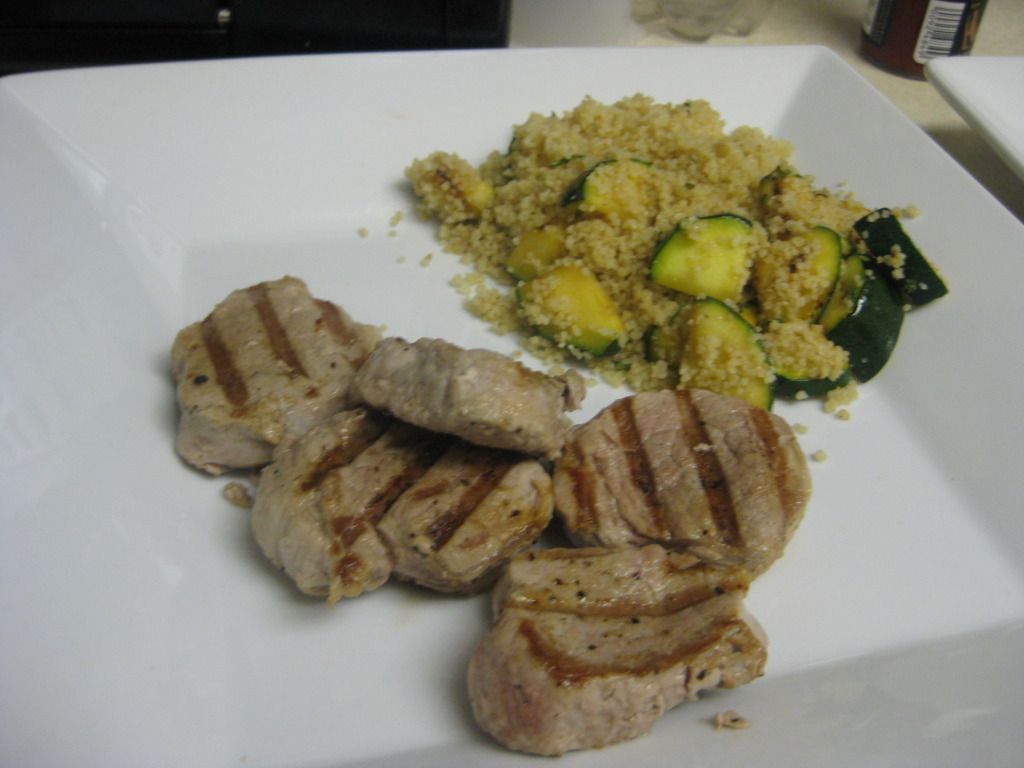
The pork tenderloin was amazingly soft, juicy and bursting with flavor thanks to the nice garlic rub. On it's own this pork recipe works well for summertime grilling season and could be cooked up on any weeknight.

The real reason behind this recipe was to try couscous, however, and I'm happy to say this popular grain didn't disappoint. It lives up to its billing and acts like a hybrid of rice and pasta. It has a fairly neutral flavor that allowed it to blend nicely with the zucchini and compliment the pork.

All in all, I was very pleased with the outcome of this dish. Couscous will certainly be making more appearances on our blog in the future. Its neutral "pasta-like" flavor and small granular size make it easily adaptable to many dishes - something that any at home chef can appreciate and utilize.

That's all we have for you this evening. Maggie takes to the kitchen Thursday night with a blending of her two favorite cooking mediums. Be sure to stop in then to see what she has cooking. Until then,

~Cheers

Wednesday, July 25, 2012

Simple & Savory

Good evening everyone! While we certainly enjoy the complicated recipes from time to time (myself especially) it's nice to every now and again return to a simple dish. The greatest part of cooking is that whether you attack a complicated dish or a simple recipe - the end result can truly shine. Tonight's dish is a perfect example of this concept. On the surface, their isn't much more of a simple recipe than scalped potatoes - but simple doesn't mean basic in flavor. Let's get cooking!


The Recipe: Mini Scalloped Potatoes
Original Recipe Found In: Food Network Magazine April 2012 Issue

What You'll Need:
(Serves 6)

1 Tablespoon Unsalted Butter (Metled) For Ramekins
1 1/4 Cup Grated Sharp White Cheddar Cheese
1/2 Cup Parmesan Cheese
1 Tablespoon Freshly Chopped Chives (1 Teaspoon Dried)
1/4 Teaspoon All Purpose Flour
1 1/2 Pound Yukon Gold Potatoes (Unpeeled)
Pinch of Cayenne Pepper
1 Cup Heavy Cream

Begin by preheating your oven to 350 degrees.

Using a basting or pastry brush, rub the insides of each ramekin generously with the melted butter. Set buttered ramekins aside.

In a small bowl, combine the cheddar, parmesan, chives, flour and cayenne. In addition, add a pinch of salt and freshly ground black pepper. Set this mixture aside.

Beging preparing your potatoes with a mandoline. Set the blade to 1/4 inch thickness and slice the potatoes (unpeeled) until all have been chopped. If you don't have a mandoline, you can use a chef's knife, but be careful of the thickness. A thinner slice will allow the potatoes to cook faster.


Add the sliced potatoes into the bowl with the cheese mixture. Toss to coat, making sure that the mixture is evenly distributed across all of the potatoes.

Begin spooning half of the potato cheese mixture evenly amongst the ramekins. Fill each ramekin about halfway and then pour roughly half of the cream over each of the ramekins (dividing 1/2 cup of heavy cream evenly between 6 ramekins). Add the remaining half of the potato cheese mixture to each ramekin and top that with the remainder of the cream.


Transfer the ramekins to a baking sheet and cover each one with aluminum foil. Place the baking sheet in the oven and allow the ramekins to bake for around 40 minutes, until the mixture is bubbly and the potatoes have softened significantly. Remove the baking sheet from the oven and increase the oven temperature to 425. Remove the aluminum foil from the ramekins and return the baking sheet to the oven for another 15 to 20 minutes or until the potato mixtures turn a nice golden brown color and the potatoes have cooked through.


Once the potatoes are golden brown, remove the baking sheet from the oven and allow the ramekins to cool slightly, around 10 minutes, before serving. Use a paring knife around the edges of the potato mixture to separate the potato and ramekin (in case any of the potato mixture became 'stuck' during cooking). Serve and enjoy!


The Results:


As I alluded to in the opening, this recipe is the perfect example of why cooking is such a satisfying endeavor. This recipe was as simple and straightforward as you could ask for - just a few ingredients, minimal steps and easy to follow - but the end result is an amazing and savory dish. Even if you're a new at home cook, this recipe will be right up your alley and easy to follow. With such a great dish and easy execution, there's no reason not to try this one at home!

That's all we have for you this week. We're back next week with two more brand new recipes. We might have a feature or two pop up along the way as well, so be sure to follow us on Twitter or 'Like' us on Facebook to see any updates as we post them.

Until then,

~Cheers

Tuesday, July 24, 2012

Summer...Rolled Into One Pasta Dish

Good evening everyone!  If you live in the central Iowa region and you're under 30 years old...congratulations, yesterday was the hottest day on record since you were born!  Might not sound like an accomplishment, since it felt like the face of the sun, but it might be a fun fact of the day at some point in time.  Since it has been so hot, it almost seems like a chore to warm up the kitchen for an hour to make dinner.  Tonight, I have a recipe that won't heat up your living space, yet has all the favorite flavors of the warmest season of the year.

The Recipe:  Pasta Salad with Melon, Pancetta, and Ricotta Salata
Original Recipe Found In:  Bon Appetit Magazine, August 2012

What You'll Need:
2 Ounces thinly sliced Pancetta
4 Ounces Orecchiette
3 1/2 Tablespoons Extra-Virgin Olive Oil
2 1/2 Tablespoons White Wine Vinegar
2 Cups cubed pieces peeled Cantaloupe
1/3 Cup coarsely chopped fresh Mint, divided
3 Tablespoons thinly sliced Scallion
Pinch of crushed Red Pepper Flakes
1 Ounce crumbled Feta

Begin by heating an oven to 350 degrees.  Arrange the pancetta in a single layer on a large rimmed baking sheet.  Bake the pancetta until brown and crisp, about 20-25 minutes.  If you prefer not to heat up the oven, place the pancetta on folded layers of paper towels on a microwave-proof plate.  Microwave on high until brown and crisp, about 5 minutes.  In either case, let the pancetta stand until it is cool enough to handle.  Once cool, break into bite-size pieces.


Pancetta...Italian's version of bacon


Meanwhile, start a pot of water and bring to a boil.  Cook the pasta according to package directions and stirring occasionally.  Drain the pasta and set aside.


In a large bowl, whisk the oil and vinegar together.  Add half of the pancetta, cooked pasta, melon, half of mint, scallion, and red pepper flakes.  Toss this combination to coat.  Season with salt and pepper to taste.  Transfer this combination to a serving dish and sprinkle with remaining pancetta and mint.  Garnish with feta and enjoy!

The End Result:


This salad is bright, fresh, and delicious!  The saltiness from the pancetta becomes subdued when mixed with the sweetness of the melon.  The pop of flavor from the mint almost acts as a pallet cleanser as you continue to eat this dish.  It almost seems weird adding flavors like pancetta, cantaloupe, mint, and feta into one dish.  But all the ingredients meld together and make it super savory.  And since all the ingredients are summertime favorites, it's easy to find them and whip up this tasty dish!


That's all we have for you this evening, join us tomorrow as Tyler takes to the kitchen to make little pots of goodness.  Until then,


~Cheers!

Sunday, July 22, 2012

'Won' Unique Taco


Hello again everyone! We have a special treat for you this afternoon in the form of a unique new recipe that’s perfect for any quick family meal or even as a weekend treat. Today's ‘quick hit’ recipe combines Asian cuisine with Mexican flavors. Intrigued? You should be! Let’s get cooking!


The Recipe: Won Ton Tacos
Original Recipe Found On: Pinterest

What You’ll Need:
(Serves 2-4)

Won Ton Wrapers
1 Pound Ground Beef
1 Packet Low-Sodium Taco Seasoning
Shredded Mexican Cheese
Various Taco Toppings (Your choice: sour cream, hot sauce – etc.)


Begin by preheating your oven to 350 degrees.

For this recipe you’ll want to find refrigerated won ton wrappers in your local grocery store. If you’re unaware of what a won ton wrapper is – they’re simply a little square of thin dough that’s lightly floured. They’re very common in Asian cuisine – and they’re not hard to find in any major grocery store chain.

Won ton wrappers come dried, where you have to soak the dough to return moisture to it or soft. The soft forms are much easier to use and will be more cooperative for this recipe – so be sure you find the soft variants if possible.

Begin by browning the hamburger, draining off the excess fat and then adding the taco seasoning and cooking as indicated on the seasoning packet.


While the taco meat is cooking, you can begin to prepare the won ton wrappers. Using two to three large muffin tins (depending on the number of people you are serving) lay a square of won ton over one muffin opening and press down on the center to fold the wrapper into the cup. You’re trying to create small “cups” out of the wrappers – you may have to tweak sides of the wrappers to ensure there are no low spots or large openings. We found that laying the won ton so it was like a diamond shape (with the bottom pointing down towards you) was the best method for creating an equal sized cup.


Once all of the wrappers have been placed into the muffin tin and the hamburger meat has transformed into taco meat – you can begin assembling the won ton tacos. Simply scoop a small helping (we found one wooden spoonful to be the ‘sweet spot’) into the won ton wrapper. Top each won ton with a sprinkling of cheese and then pop the muffin tins into the oven for 8 to 15 minutes, or until the won ton wrappers turn a light golden brown and then cheese is perfectly melted.


Once cooked to your preference, pop the won ton tacos from the muffin tin, top with your choice of taco toppings and enjoy!

The Results:


These little taco cups are simply superb! The won ton shell, after baking in the oven, turns into a crispy little tortilla cup, making this blending of two cuisines taste simply like mini tacos. The recipe is easy, it’s fun and it’s fast. You can’t beat that combination! Give this one a try at home – you won’t be disappointed.

Wednesday, July 18, 2012

Pork + Pork = Perfection

Good evening everyone! The common 'turn-of-phrase' these days seems to be "everything's better with bacon on it". It seems the amazing flavorful properties of bacon lend themselves to just about any dish. In recent months, restaurants have launched bacon flavored EVERYTHING included (but certainly not limited to) bacon flavored milkshakes.

While we're not going to be as crazy bacon flavored milkshakes - we are working on the theory that everything is better with bacon on it - including pork products. In addition to our pork on pork main attraction, we're trying a new tweak on potato salad (hint - it's hot).

Let's get cooking!


The Recipe: Bacon Wrapped Pork Chops With Warm Dijon Potato Salad
Original Recipe Found In: America's Test Kitchen: Cooking For Two

What You'll Need:
(Serves 2)

12 Ounces Small Red Potatoes (Halved)
2 Tablespoons Olive Oil
4-6 Slices of Bacon
2 X 6 to 8 Ounce Boneless Center Cut Pork Chops
1 Teaspoon Ground Fennel Seed
1 Small Shallot (Minced)
2 Tablespoons Low Sodium Chicken Broth
1 1/2 Teaspoon White Wine Vinegar
1/2 Teaspoon Dijon Mustard
1 Tablespoon Fresh Minced Parsley

Preheat your oven to 375 degrees. Line a rimmed baking sheet with aluminum foil.

In a medium bowl, toss your halved potatoes with 1 tablespoon of olive oil and lightly season with salt and pepper. Arrange the potatoes on half of your rimmed baking sheet (cut side down) and place the baking sheet in the oven for 20 minutes or until they are tender.


While the potatoes are roasting you can begin preparing your bacon. Lay the strips of bacon on a microwave safe plate and place another plate on top of the bacon (making what looks like a bacon / plate sandwich). Cook the bacon in a microwave for 2 to 3 minutes until it is lightly shriveled but still pliable. Microwave cooking is the best option because it allows the bacon to stay pliable (which is key for wrapping the pork chop) while still cooking the bacon.

Bacon / Plate Sandwich 


Pat your pork chops dry with a paper towel before rubbing each chop with the ground fennel. Season the rubbed chops with a sprinkle of salt and pepper. Next, begin wrapping the pork chops with your bacon. Lay the bacon lengthwise across the pork chop, making sure to overlap the slices slightly. Once covered, tuck the ends of the bacon under the sides of the pork chop.


By this time, your potatoes should be about done with their initial 20 minute roast. Remove the baking sheet from the oven and lay the pork chops on the other half (left empty) of the baking sheet. Return the baking sheet to the oven and allow the pork chops and potatoes to cook for 12 to 15 minutes or until the pork chops register 135 degrees on an instant read thermometer.

Remove the baking sheet from the oven, adjust the top rack of the oven to 6 inches below the broiler and preheat the broiler element on the oven. Broil the pork and potatoes until the bacon is crispy and brown and the pork register 140 to 145 degrees on an instant read thermometer. This should take about 2 to 5 minutes. Watch the bacon closely as the broiler element will cause it to brown quickly.

Transfer the pork to a plate and allow it to rest for 5 minutes before serving.

While the pork is resting, you can begin preparing the dressing for the potatoes. In a microwave safe bowl, whisk 1 tablespoon of olive oil with the shallot, vinegar, mustard, chicken broth and a pinch of sugar. Cook this mixture on high in your microwave (uncovered) for 2 minutes. Whisk to recombine all of the ingredients, then stir in the parsley and pour the dressing over the roasted potatoes (in a serving bowl). Toss until the potatoes are covered.

Serve with the pork chops and enjoy!


The Results:


Everything really is better with bacon on it - even if that item is pork based to begin with. The bacon wrapped pork chops were simply amazing. The crispy, salty bacon accented the succulent juicy pork chops very nicely, creating a superb blending of savory pork and crispy bacon.

Our side dish, warm dijon potato salad, will be the only way I'll ever eat potato salad. I'm not a fan of the cold variant but this slow roasted potato version with warm dressing was unlike anything I've ever tried. It was full of flavor and complimented the pork chops nicely!

That's all we have for you this evening. We'll be featuring a unique "quick hit" recipe later on this week - so be sure to stop in over the weekend or simply follow our Facebook page or Twitter feed for updates when that recipe goes live. Until then,

~Cheers

Tuesday, July 17, 2012

Enchiladas: The More You Make Them, The Better They Get

Good evening everyone and welcome to another week of Out of the Culinary!  I'll be kicking off this week with brand new and fresh inspired recipe.  It's no secret that I love Mexican food and will try almost anything within that cuisine.  But with so many variations of the same recipe, it's hard to replicate a dish, even though it's been done before.  I love enchiladas to no end and there are endless alterations to this classic dish.   Tonight, I'm trying a 'white sauce' version and I'm hoping that the end result will be the same delicious taste.

The Recipe:  White Chicken Enchiladas with Green Chile Sour Cream Sauce
Original Recipe Found On:  www.pinterest.com

What You'll Need:
8 soft taco size Flour Tortillas
2 Cups shredded Monterrey Jack cheese, divided
2 Cups shredded cooked Chicken
3 Tablespoons Butter
3 Tablespoons Chicken Broth
1 Cup Sour Cream
1 (4 oz) can diced Green Chiles

To start, preheat an oven to 425 degrees.  Spray a 9x13 baking dish with cooking spray and set aside.  In a small mixing bowl, mix the chicken and one cup of cheese together.  Amongst the tortillas, distribute the chicken and cheese mixture.  Make sure the tortillas get an even coat of the mixture to prevent having too much chicken in one part of the tortilla or no chicken in another part.  Roll the tortillas up and place in the baking dish, seam side down.


You can't see it, but there's a lot of tastiness inside those tortillas.


Next, heat a large saucepan over medium high heat.  Add the butter and melt to a smooth consistency.  Once the butter is liquified, add the flour.  Stir and cook this mixture for about one minute, just before the flour becomes a golden brown.  Next, add the chicken broth, whisking this mixture until smooth.  Continue cooking the mixture over medium heat until the sauce is thick and heated through, about five minutes.  Stir in the sour cream and green chiles until it forms a smooth creamy sauce.


A little sauce can go a long way


Once the sour cream and green chiles are incorporated into the mixture, pour the sauce over the tortillas in an even layer.  Sprinkle the remaining cheese over the top of the dish.  Place the baking dish in the oven and bake for 20-25 minutes, until the top is a light golden brown.  Serve and enjoy!


The End Result:


As I said before, no matter the variation, the classic enchilada recipe still tastes amazing.  The dish itself is smooth, creamy, and incredibly tasty.  The sauce is what gives the dish it's smooth consistency.  By building the sauce one step at a time, it really enhances the depth of flavor and is super savory.  The chicken and cheese in the tortillas melted together and tasted great together.  The only heat in the dish comes from the green chiles and they don't give that much of a kick.  This recipe would be great for those who love Mexican food, but can't handle all the spice that is usually associated with Mexican dishes.  Overall, another great enchilada recipe that is fairly simple to whip up any weeknight.


That's all we have for you this evening.  Tyler will join us tomorrow with a brand new dish of his own. Until then,


~Cheers!

Friday, July 13, 2012

Friday Dessert Bonus

Welcome again, one and all, for this bonus Friday blog.  I made this delicious recipe about a week ago and we were instantly hooked.  The one great feature about this dish is that it doesn't involve any baking.  Since we're caught in the middle of a toasty summer, it is a super tasty addition to any meal.  Hopefully, this recipe will inspire you to make this incredible dessert.

The Recipe:  No Bake Strawberry-Lemon Cheesecake
Original Recipe Found On:  www.pinterest.com

What You'll Need:

For the Crust:
3/4 Cup Graham Cracker Crumbs
1 Tablespoon Sugar
3 Tablespoons unsalted Butter, melted

For the Filling:
2/3 Cup Sugar
Zest of 2 Lemons*
1 (8 ounce) package Cream Cheese, softened
2 Teaspoons fresh Lemon Juice
1 Teaspoon pure Vanilla Extract
1 (8 ounce) tub frozen Whipped Topping, thawed
1 Cup fresh Strawberries, slightly mashed with a fork

*Although we love the taste of fresh lemon zest, we didn't want to waste 2 lemons in the process of this dish.  So I used a 1/2 teaspoon of lemon extract, less if you don't want a strong lemon zing in your dish.


To start, stir together the graham cracker crumbs, one tablespoon sugar, and butter in a medium bowl.  In a glass baking dish, press the graham cracker mixture evenly on the bottom of the dish to form a crust layer.


In a large bowl, mix together the 2/3 cup sugar and lemon zest, until the sugar becomes fragrant and moist.  Add the softened cream cheese and beat with an electric mixer until smooth.  Add the lemon juice and vanilla extract, mixing well to combine.  Using a rubber spatula, fold in the whipped topping until well blended, then fold in the strawberries.


Next, evenly spoon the filling into the glass baking dish over the graham crust.  Cover with plastic wrap  and refrigerate for at least two hours before serving.  Cut with a serving spatula, serve, and enjoy!

The End Result:


This is an incredibly delicious dessert.  If you're a fan of strawberry lemonade, this cheesecake is for you.  It might take a little more time to mash the strawberries, but if you don't want the strawberry skin poking out in the filling, it's worth the extra time.  The original recipe called for raspberries, but other options were strawberries or blueberries; the berry option is up to you.  This recipe makes about 12 servings, so there will be more than enough to share with everyone you know.


That's all we have for you this week.  Thanks for joining us as we journey further into our culinary trip.  Join us next week as we cook up more delicious recipes.  Until then,


~Cheers!

Thursday, July 12, 2012

Popular Potstickers

Good evening everyone!  After this week, I will hopefully have the theme of cooking Asian out of my system.  Tonight, I'm featuring a recipe of Asian inspiration that I've never eaten nor cooked...ever...  I have always wanted to try potstickers, but I haven't had the nerve to try it.  Once I saw what was in the potstickers, it seemed like a pretty good dish.  Enough about new dishes, let's get cooking!

The Recipe:  Perfect Potstickers
Original Recipe Found On:  www.foodnetwork.com

What You'll Need:
1/2 Pound Ground Pork
1/4 Cup finely chopped Scallions
2 Tablespoons finely chopped Red Bell Pepper
1 Egg, lightly beaten
2 Teaspoons Ketchup
1 Teaspoon Yellow Mustard
2 Teaspoons Worcestershire sauce
1 Teaspoon light Brown Sugar
1 1/2 Teaspoons kosher Salt
1/2 Teaspoon Black Pepper
1/4 Teaspoon Cayenne Pepper
35-40 small Wonton Wrappers
3-4 Tablespoons Vegetable Oil
1 1/3 Chicken Stock, divided

To start, preheat an oven to 200 degrees.  While the oven is preheating, combine the ground pork, scallions, red bell paper, egg, ketchup, mustard, worcestershire sauce, brown sugar, salt, pepper, and cayenne pepper in a medium mixing bowl.  This combination will almost look like meatloaf, but it will yield a very different result.  Set this mixture aside.


To form the dumplings, place one wonton on a small plate.  Brush two of the edges of the wrapper lightly with water.  Using two spoons, round 1/2 a teaspoon of the pork mixture and place in the center of the wrapper.  Fold the wrapper over on itself, seal the edges, and shape as desired.  I decided to shape mine with the outer most edges and the top edge inward, so all the edges are folded into one side.  This will hopefully keep the mixture inside the wrapper and not spill out when cooking it.  Set the folded potstickers on a sheet pan and cover with a damp cloth or damp paper towel.  Repeat this process until all of the pork mixture is gone.


Little envelopes of tastiness


Next, heat a large nonstick skillet over medium heat.  Brush the skillet with the vegetable oil once it's hot.  Add 8-10 potstickers at a time to the pan and cook for two minutes, without touching.  Once the two minutes are up, gently add 1/3 cup of the chicken stock to the skillet and turn the heat down to low.  Cover the skillet an cook for another two minutes.  Remove the potstickers from the skillet and return to the sheet pan and place in the oven.  Clean the pan in between batches by pouring water into the skillet, allowing it to deglaze.  Repeat this process until all the wontons are cooked.  Serve and enjoy!


The End Result:


I can see why these are popular items at an Asian restaurant.  The filling was cooked to perfection and was incredibly tasty.  It wasn't too dry and had almost a savory flavor to it.  The not-so-traditional Asian ingredient mixture, ketchup, mustard, worcestershire sauce, and sugar worked harmoniously to create a unique flavor.  But like I mentioned before, it worked so well together that you forget that it's such a strange combination.


The cooking method was something new too.  The process seems a bit lengthy, but the potstickers are worth it in the end.  If your skillet fits more than 10 potstickers, then you can add more to the skillet, but make sure they aren't touching each other.  The potstickers with soak up the chicken broth and will make the wonton wrappers softer and easier to eat.  Overall, a great Asian-inspired dish to end my Asian theme.


Join me tomorrow as I attempt an incredibly delicious dessert that will make everyone in your family want more.  Until then,


~Cheers!

Wednesday, July 11, 2012

The Versatility Of Chicken


Good evening everyone! We’re back after another brief birthday hiatus (this time it was my turn). Tonight we have a simple seasoned chicken dish that’s perfect for summertime. Utilizing fresh ingredients that are in their prime during the summer months and incorporating the grill this straightforward dish is built this season. Let’s get cooking!


The Recipe: Chile Rubbed Grilled Chicken With Salsa
Original Recipe Found In: Food Network Magazine April 2012 Issue

What You’ll Need
(Serves 4)

4 Boneless, Skinless Chicken Breasts
1 Tablespoon Extra Virgin Olive Oil (Plus additional for grill)
1 Small Clove Garlic (Finely grated)
1 ½ Teaspoons Ancho Chile Powder
1 ½ Teaspoons Ground Cumin
1 ½ Teaspoons Ground Coriander
1 Teaspoon Paprika
½ Teaspoon Chipotle Chile Powder
1 Teaspoon Lime Juice
Lime Wedges (For serving)

For The Salsa:
2 Tomatoes (Diced)
2 Tomatillos (Husked, diced, rinsed)
¼ Cup Red Onion (Diced)
3 Teaspoons Fresh Lime Juice

We introduced ancho chile powder to the blog’s repertoire a month ago when we tried to duplicate Chipotle’s famous grilled chicken burritos. We found that ancho was surprisingly mild and almost slightly fruity as far as chile seasonings are concerned, making it unique and hard to duplicate with other spices. We also found that this powder is not very hard to find – so be sure to track it down in your local spice shop or grocery store.

Tomatillos, for those who have never heard of them before, are small husked fruits that originated in Mexico. The bright green fruit can be tracked down in most grocery store Hispanic aisles or even in the fresh produce section. If you don’t feel ambitious to try a new region’s fruit, you can simply purchase fresh salsa (the kind without the tomato sauce base) and use that in place of making the salsa in this recipe.

To prepare the salsa, toss the tomatoes, tomatillos and red onion in a small bowl with the 3 teaspoons of fresh lime juice. Season the mixture lightly with salt and store in the refrigerator (covered) until needed.

Begin preparing the chicken by taking a sharp chefs knife and butterflying each breast. To butterfly, simply begin slicing the breast at or around the center and cut from one edge to the other – stopping about ½ inch to ¼ inch from the other edge. Spread the breast open like a book and press the chicken lightly so it lies flat.

In a medium bowl, combine your spices (garlic, ancho, cumin, coriander, paprika, chipotle and 1 teaspoon lime juice) with the teaspoon of olive oil. Whisk lightly until everything has blended. The original recipe calls for you to dredge the chicken through the seasoning - after adding the olive oil and mixing the spices, everything clumps up making dredging impossible. Instead, simply use a spoon (or if you're not too worried about messy fingers, simply use your hands, making sure to coat each side evenly in the seasoning.

Once seasoned, place the chicken on a plate and cover with plastic wrap. Store the chicken in the refrigerator for 30 minutes to 2 hours to allow the seasoning to marinade the breasts.

Once your chicken has marinated for a satisfactory amount of time, begin preheating your grill to medium heat. (If you’re cooking indoors, feel free to use a grill pan over medium high heat). Once heated, lightly brush the grill with olive oil and then place your chicken on the grill.


Cook the chicken for 4 to 6 minutes per side or until the chicken is cooked through (it should register 165 degrees on an instant read thermometer). Once the chicken has finished cooking, transfer it to a serving plate and top with the fresh salsa. Serve and enjoy!


The Results:


Grilled chicken is a classic component of summer. Its basic flavor profile and ease of cooking make perfect for recipes such as this. The spice marinade blends rich, warm spices (ancho, coriander, cumin) with a few hot spices (chipotle, paprika) to create a balanced flavorful dish. The neutral flavor of the juicy chicken breast acts as a great vessel to deliver this combination and the fresh salsa is just a nice ‘cherry’ on top of the whole dish.

At 340 calories per serving and with how easy this dish is to prepare, it makes a great summer weeknight meal. Be sure to give it a shot yourself!

That’s all we have for you this evening. Maggie takes to the kitchen tomorrow night with a brand new recipe – one that features a new food type for Maggie. Following that, Maggie will share a recipe for a no-bake desert that’s sure to please the whole family. Look for that recipe on Friday or Saturday. Until tomorrow,

~Cheers

Thursday, July 5, 2012

Summertime In A Taco


Good evening everyone! As our regular readers are likely well aware, when we find new and unique recipes, we’re very eager to give them a try. Some of more fun culinary discoveries have been when we dove into a dish not knowing exactly how it would come out. Tonight’s recipe features an old favorite – fish tacos – and creates a brand new medley of flavors right from summer’s best menu. Let’s get cooking!


The Recipe: Fish Tacos With Watermelon Salsa
Original Recipe Found In: Food Network Magazine July 2012 Issue

What You’ll Need:
(Serves 4)

4 Cups Diced Seedless Watermelon
½ Small Red Onion (Diced)
½ Cup Chopped Cilantro
1 Jalapeno Pepper (Seeded, diced)
Juice of 2 Limes (Plus additional for wedges)
1 Tablespoon Extra Virgin Olive Oil (Plus 2 teaspoons and additional for brushing)
1 Pound Wild Striped Bass Fillets (Skin removed)*
1 Teaspoon Chipotle Chile Powder
1 Romaine Lettuce Heart (Thinly sliced)
8 Corn Tortillas
1 Avocado (Sliced)


*Wild striped bass isn’t likely to be found in your average grocery store. If you’d rather not run all over creation chasing down this particular cut of fish, you can substitute with any white fish fillet of your choice.

Begin by preparing the watermelon salsa. In a large bowl, combine the watermelon, red onion, cilantro, lime juice and jalapeno. Add the tablespoon of olive oil and ½ teaspoon of salt. Toss this mixture until it is well blended and set aside.


Preheat your grill to high (or grill pan). Sprinkle both sides of your fish with the chipotle chile powder and ½ teaspoon of salt. Drizzle both sides of the fillets with the remaining 2 teaspoons of olive oil. Lightly rub the grill with olive oil and add the fish to the grill. Cook, 4 to 5 minutes on each side, until the fish is cooked through and flaky.


Once cooked through, transfer the fish to a plate and break it off into smaller chunks (think about the size of the tortilla you’re using and bread the pieces accordingly).

In a small bowl, toss your sliced lettuce with 2 teaspoons of the juices from the watermelon and set aside. Warm your corn tortillas until they soften.

Add the fish, avocado slices, lettuce and watermelon salsa to the tortilla and enjoy! Serve with a lime wedge.

The Results:


If you were to put the entire season known as summer into a dish – this recipe would likely be the result. The summertime heat is reflected nicely in the chipotle seasoned fish and the jalapeno adds a nice bite to the salsa. The fish is almost too hot on its own – but luckily, the watermelon salsa works wonders to balance it out. The cooling flavors of the salsa add an amazing depth and flavor to the final dish, while keeping your mouth from burning up. The avocado and lime juice add the final flare to the recipe – creating a true summertime – light, fresh and healthy recipe. At around 220 calories per taco, you cannot go wrong with this dish!

That’s all we have for you this week. Thank you, as always, for stopping in and sharing in our culinary adventures.  Until next week,

~Cheers

Tuesday, July 3, 2012

Stir-Fry Madness

Good evening everyone!  Once again, in the greater Des Moines metro, it is flipping out outside!  With temperatures ranging in the middle to upper 90's, with heat indexes reaching three digits, it's no fun to be outside.  It makes me thankful that I get to work in an air conditioned building, but I think about those folks who have to work outside and get few downtime when working in such extreme temperatures.  It always nice to come home and cook up something fast and delicious without too much work.


Last week, I was inspired by my Chinese-inspired grilled dish to continue with the Asian cuisine trend. One of the many dishes I love is stir fry.  The technique is so simple: throw a meat with some veggies into a giant wok, stir until everything is cooked, and bland ingredients get transformed into something delicious.  I've been searching for a while for a better-for-you version of stir-fry, but I have never been able to find a lower calorie variation that would taste amazing.  Tonight, I am trying to blend these two variables and produce something incredible.

The Recipe:  Chicken-Peanut Stir-Fry
Original Recipe Found In:  Food Network Magazine, June 2012

What You'll Need:
1 Cup Basmati Rice
3 Teaspoons Soy Sauce
1 Tablespoon plus 1 Teaspoon Cornstarch
1 Tablespoon plus 1 Teaspoon Rice Vinegar (not seasoned)
1 Pound boneless skinless Chicken breasts, cut into 1-inch pieces
2 Teaspoons packed light Brown Sugar
2 Tablespoons Peanut or Vegetable Oil
1 2-inch piece Ginger, peeled and thinly sliced
1 Bunch Scallions (whites roughly chopped, greens thinly sliced)
1 Jalapeño pepper (red or green,) seeded and thinly sliced
1 small head Napa Cabbage, cored and cut into 2 inch pieces
1/4 Cup roasted salted Peanuts

*Note:  Since I am carrots leftover from last weeks dish, I will be adding 1/2 cup of thinly sliced carrots.


To start, cook the rice as the package instructs.  As the rice cooks, whisk 2 teaspoons soy sauce and  1 tablespoon each cornstarch and rice vinegar in a bowl.  Add the chicken pieces to the bowl and toss to coat.  In another small bowl, whisk the brown sugar, 1/3 cup water, and remaining 2 teaspoons cornstarch and 1 teaspoon each of the soy sauce and rice vinegar.  It's so important to get all these flavors melding and combined first, otherwise the dish would have no flavor base to go off of and it would taste very bland.


Next, heat 1 tablespoon of the peanut/vegetable oil in a large nonstick skillet over high heat.  When the oil is almost smoking, add the chicken and stir-fry until the chicken is lightly golden, for about 2 to 4 minutes.  Remove the chicken from the skillet into a bowl and cover with foil to keep warm until you're ready to use the chicken.


So this is what stir-frying chicken looks like...


After the chicken is removed, wipe out the skillet with a paper towel, return the skillet to a high heat and add the remaining 1 tablespoon of peanut/vegetable oil.  When it begins to smoke, add the ginger, scallion whites, and jalapeño.  Stir-fry this mixture for 45 seconds, or just until you begin to get a whiff of either the scallions, the jalapeño, or both!  Next, add the cabbage and stir-fry until crisp-tender, 3 to 5 minutes.  The cabbage will begin to wilt, but don't over cook the cabbage, you want it to be still crisp when you eat the stir-fry.  Stir in the brown sugar mixture and add in the chicken.  Stir-fry until the sauce is thick and the chicken is cooked through, 1-3 minutes.  Stir in the scallion greens, peanuts, and carrots until the mixture is heated through.  Serve with the rice and enjoy!

Everyone getting cozy in the skillet

The End Result:


Although, I am a bit disappointed I did not get to use my wok, I am very pleased at how well this dish turned out.  As I mentioned before, stir-fry is one of those dishes that takes normal ingredients, mix them with a sauce, and cook them all together to make one heck of a delicious dish and this recipe did not disappoint.  The chicken was cooked perfectly and add the soy sauce, cornstarch, and vinegar as a "coating" made it taste great.  The brown sugar sauce was sweet but not too sweet, due to the soy sauce and rice vinegar, but added a nice base and a real depth to the dish.


The scallions, jalapeño, cabbage, and last minute add-in of carrots really brought a well-roundedness to the dish that I never thought vegetables could do.  I was willing to try a jalapeño for this dish and it didn't add a strong heat, like I thought it would, which was really great.  The only qualm about this dish is that the peanuts got top billing in the name of this recipe, but really didn't play the star of the show.  I guess adding the peanuts in when adding the sauce and the chicken probably would have enhanced the flavor of the peanuts and really made it a Chicken-Peanut Stir-Fry, instead of a Chicken with Peanuts Stir-Fry.  Otherwise, the dish performs superbly and tastes incredible.


Before I sign out, I want to wish everyone a Happy Independence Day, remember the reason why we celebrate, stay safe during our mid-week break!  Join us Thursday as Tyler takes to the kitchen with a new variation of recipe done many times here on the blog.  Until then,


~Cheers!