Wednesday, February 29, 2012

Reinventing the Casserole Dish

Good evening everyone!  As Tyler mentioned yesterday, I am cooking from the world wide web for tonight's recipe.  It's always hit or miss when finding user submitted recipes.  I distinctly remember a recipe from the Internet that I made when we first started the blog.  It was my first attempt at risotto and while I got the technique down, the recipe called from five tablespoons of pepper.  The dish was 98% inedible, due to the pure pepper flavor the dish had.  It was good in small doses, but taking a big bit would cause instant tears and a complete pallet cleanse.


From that one recipe, I've learned from my mistake and be sure to check any ingredient amount in any recipe before I start.  Tonight, I'm attempting another Internet inspired dish, but I'm altering it enough to make it my own and have it be health conscious.  While the premise behind the recipe is great, I felt the need to switch several ingredients.  Making these switches will hopefully make the dish better for you without sacrificing the flavor.

The Recipe:  Pizza Casserole
Original Recipe Found At:  www.allrecipes.com

What You'll Need:
(Changes noted in parenthesis)
2 Cups uncooked Egg Noodles
1/2 Pound Lean Ground Beef
1 Onion, chopped
2 Cloves Garlic, minced
1 Green Bell Pepper, chopped (1 Red Bell Pepper)
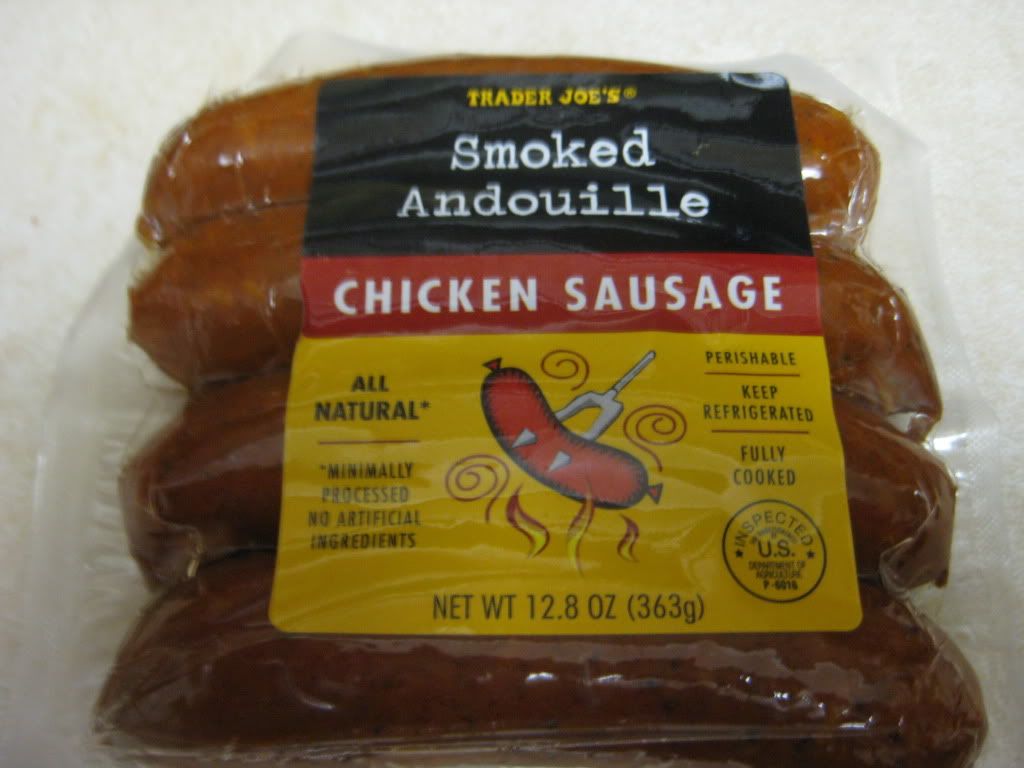
1 Cup sliced Pepperoni Sausage (8 Ounces Andouille Sausage, sliced)
16 Ounces Pizza Sauce (15 Ounces Crushed Tomatoes)
4 Tablespoons Milk
1 Cup Shredded Mozzarella Cheese

Before I begin, I want to mention the switches I made to the dish.  To give the dish a little bit of spicier taste, I opted for a red bell pepper, instead of a green one.  Hopefully, this spicy flavor will be infused throughout the dish and make it a little more mellow.  Next, instead of the pepperoni sausage, I replaced it with Andouille sausage.  I wanted to add more flavor because the dish was originally fairly generic and bland.  The sausage will, no doubt, liven up the dish and take it up a notch.  Finally, instead of pizza sauce, I will be using crushed tomatoes.  Pizza sauce has quite the quotient for sodium and I felt that cutting it out and replacing it with something more natural, like crushed tomatoes, would make the dish more healthy.


Begin by preheating the oven to 350 degrees.  This next part will require careful observation, since there will be three parts of the recipe cooking at the same time.  You could cook any two combinations, but to save some time, cooking three at a time would be a lot helpful.  Start a large stockpot filled with salted water and bring to a boil.  Cook the noodles according to package directions and drain.


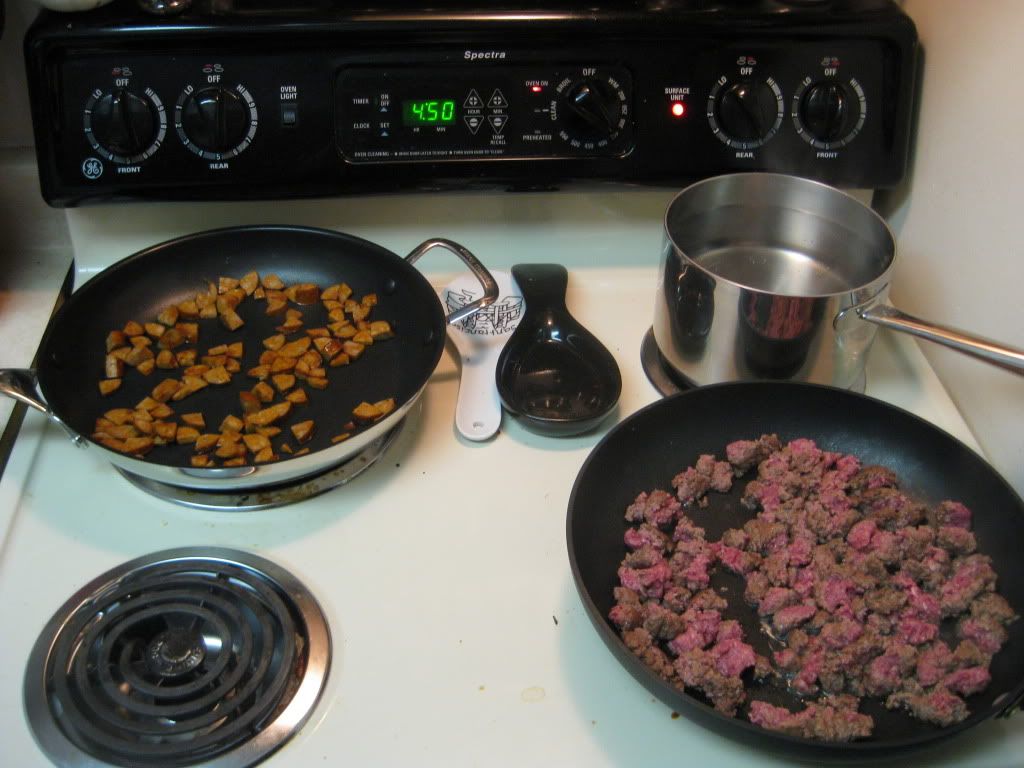
Multi tasking at its best


In a medium skillet, brown the ground beef over medium-high heat.  Drain the excess fat and return to the skillet.  Add the onion, garlic, and red bell pepper and sauté until onions are just beginning to go soft, between 3 to 5 minutes, depending on how soft you want your onions.  In another medium skillet over medium high heat, add the andouille sausage and cook until the sausage is browned and becomes fragrant, 7 minutes.  Add the beef mixture to the noodles, followed by the sausage, milk, and crushed tomatoes.  Stir this combination until it's well incorporated.  Pour the entire mixture in a two quart casserole dish.


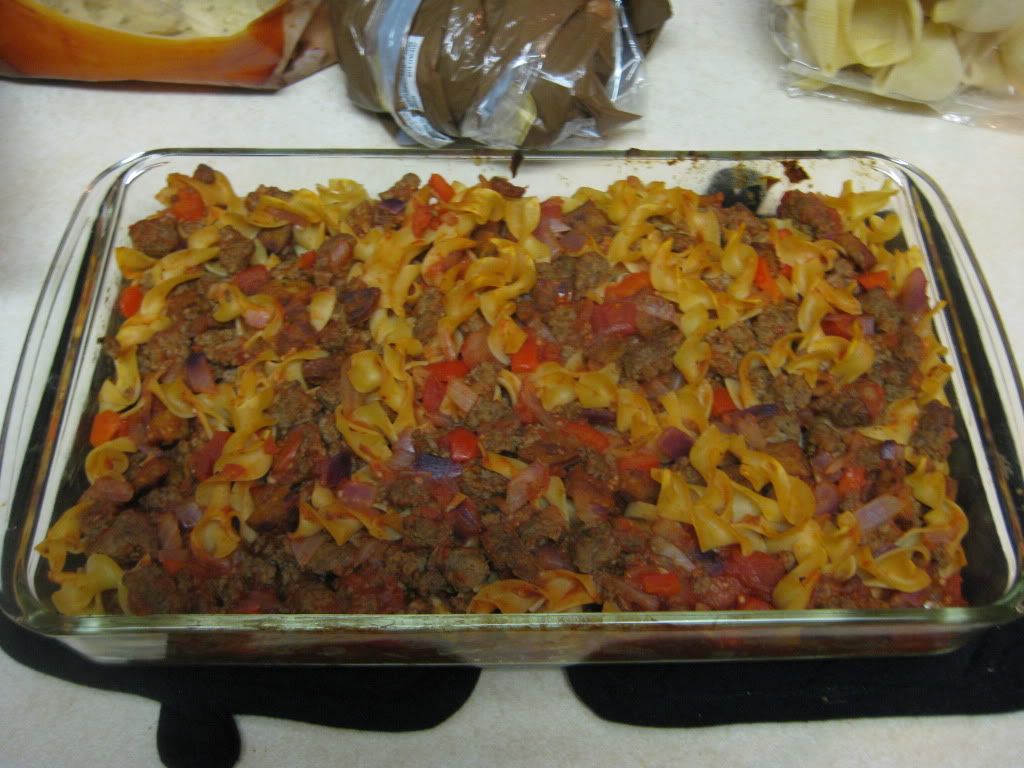
Bake the dish at 350 degrees for 20 minutes, or until the top is browned and someone crusty.  Top with the mozzarella cheese.  Continue to bake for five minutes until the cheese is melted.  Serve and enjoy!
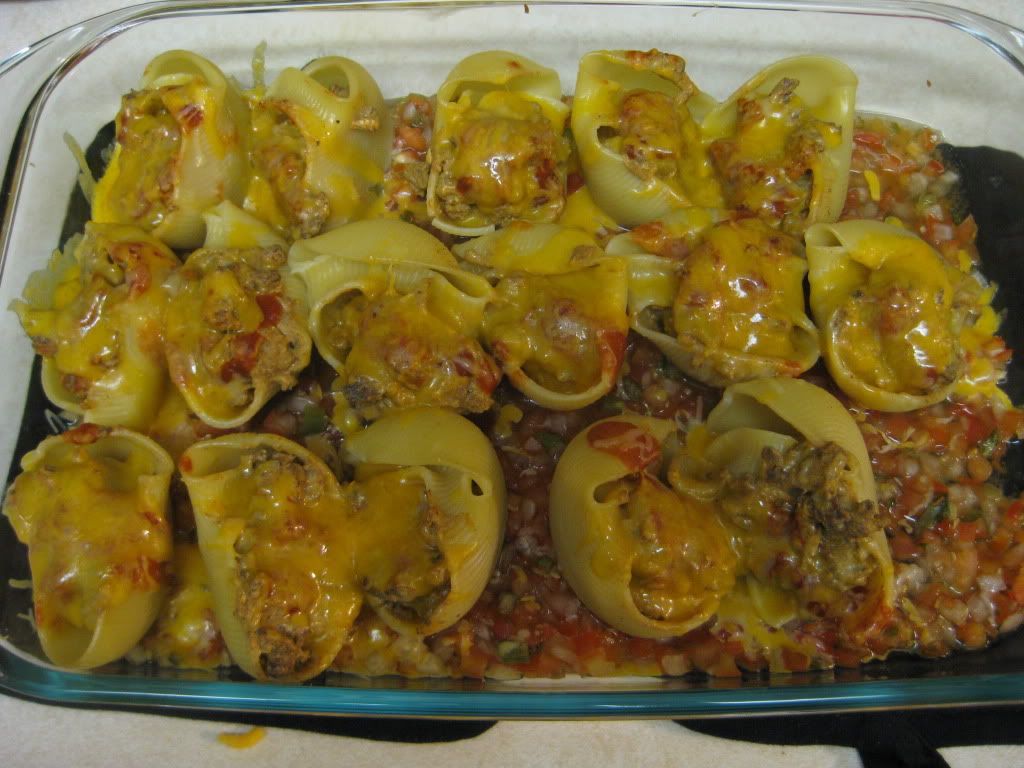
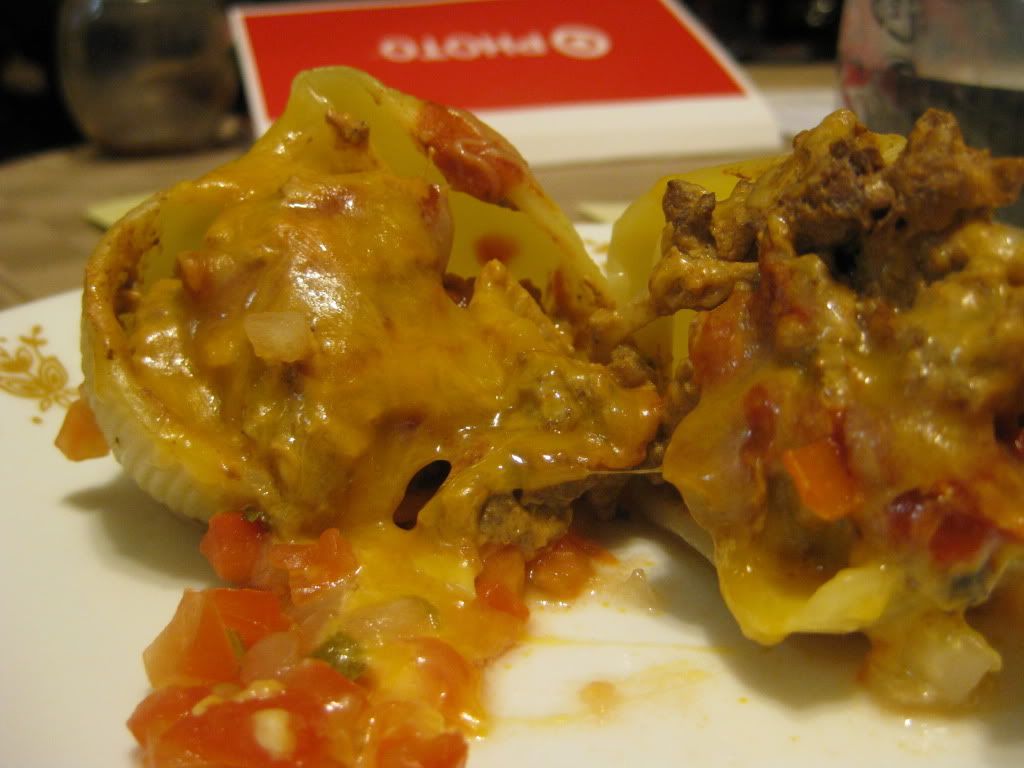
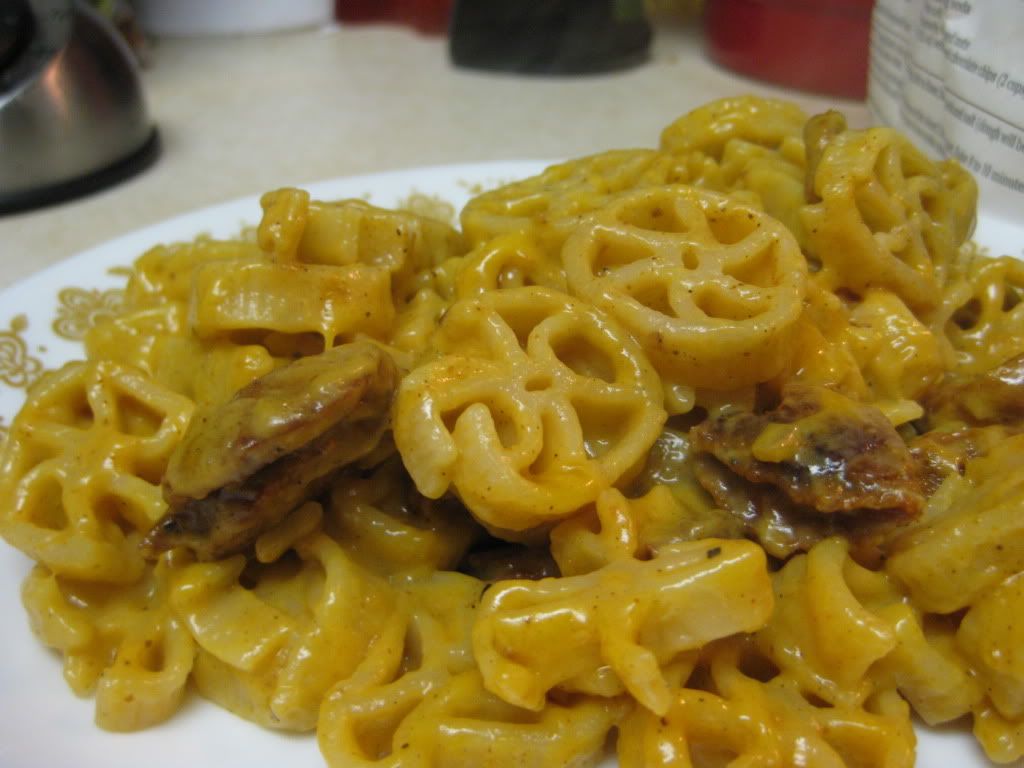
The End Result:


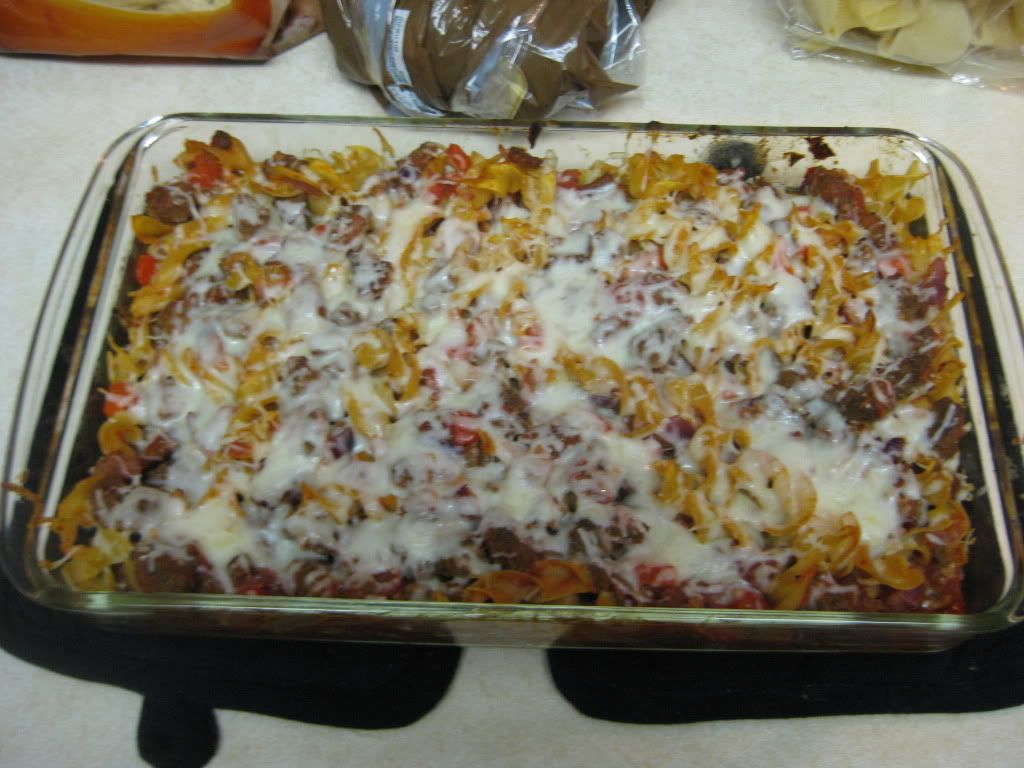
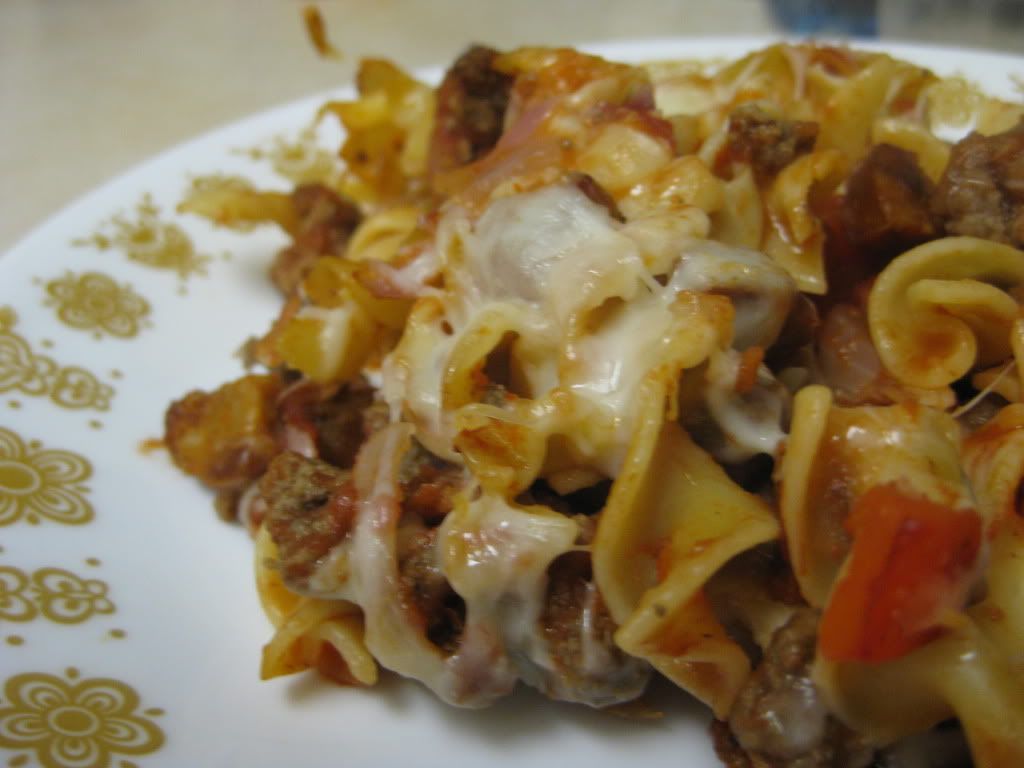
Making these changes to the original dish not only amped up the flavor, but made it into something completely different.  If I went with the original recipe, it would have been too generic for my liking.  But this made it different enough that it was completely unique.  Adding the sausage did give it an incredible flavor that not regular pizzas would have.  The crushed tomatoes seemed to round out the dish and the sweetness from the red bell pepper seemed to add just enough of a sweetness that didn't seem too overpowering.  Tweaking the recipe just enough made it my own and I couldn't have been more proud.


Join us tomorrow as Tyler tackles a new menu item for the blog. This high end slice of meat is famous for its flavor - and tomorrow's recipe is designed to make that natural flavor even better.  Until then,


~Cheers!

Monday, February 27, 2012

Around The Culinary World

Hello again everyone! Welcome back to another Monday and a new week of recipes and cooking adventure here at Out Of The Culinary. For the first time in a long while, Maggie and I actually had two days off, during a nice weekend, with no other obligations or places to be. We were able to enjoy the weekend and recoup a little bit – which means it’s extra hard to get into the Monday routine!


The easiest way to get back into the normal workflow is to ease into it with a little culinary news (in my opinion anyway…) It was an interesting, if not slightly eclectic week for news – so there’s sure to be a story for everyone in the list below. Let’s get this week started and dive right into the culinary news!


Last week we featured the best strawberry jellies on the market. It only makes sense to follow that up with a feature on the best natural peanut butter options on the market. Over the past few years, the natural peanut butter industry has become a booming business. Essentially, natural peanut butter is regular peanut butter, sans trans fat. Most natural peanut butters do use a coconut or palm oil in place of hydrogenated oils – in order to preserve the creamy texture. This creates a much more rich and…well, natural tasting peanut butter. Many consumers (ourselves included) prefer the natural flavors of peanut butter over the oily, waxy and sometimes oddly sweetened ‘less-than-natural’ varieties. This rise in popularity has brought many competitors to the table and just as many variations of natural peanut butter flavor. So, which brand stacks up as the best of the best? Check out the results HERE.


The early leader for a*% of the year has to go to one Wall Street banker who likes to flaunt his position on the whole 99% to 1% debate that has cropped up over the past few months. This self righteous scum likes to ‘preach’ his supposed ‘power’ in an way that can only be described as “being an absolute and utter tool” see this jerk’s actions HERE (including a redeeming ‘fix’ from his employer possibly in the works)


Panera Bread is expanding their trial market for a unique new restaurant concept. The popular bread and sandwich maker launched a ‘pay what you want’ store in order to feed the hungry “in a dignified way”. The concept is simple, while the restaurant does list the price of a product on their menu, the customer is only asked to pay what they think is fair. Interestingly, some actually pay more than the price on the menu, while others pay what they can and a (surprisingly lower than expected percentage) pay nothing at all. Panera notes that the store has been able to break even every month with this approach. Panera is planning on adding two more ‘pay what you want’ stores in the St. Louis area over the coming months. Check out more on this interesting concept HERE.


We have featured a story like in the past, but it’s always good to have a reminder. Just how long can you store certain foods in the refrigerator before the go from amazing leftovers to “did that takeout box just move?!”? KitchenDaily has a handy little infographic that serves as a reminder of just how long to keep that opened package of brie before it goes bad. Check it out HERE.


Onions are probably the most common thing we buy at the grocery store. There is hardly a week that passes that we don’t need to pick up a red, yellow or white onion for some reason or another. After all, onions are an essential piece of cooking. Many recipes use onions (and shallots) as the foundation. Without the onion, many flavors you know and love simply would not exist. However, it can sometimes be hard to know which onion to use in a certain situation (handy hint, it’s almost always yellow if not specified in a recipe). KitchenDaily has a great onion profile this week highlighting all of the major onions and where (and when) to use them. Check it out HERE.


Finally, we have a blog related announcement. Last month, we posted a poll asking for your feedback on a potential Out Of The Culinary Cookbook. We finally pooled enough of a response to announce a decision – although the numbers that actually voted and the numbers that read this blog daily were pretty far apart, we did receive enough “yes” votes to undertake the effort. (Essentially ¼ of our daily readership voted ‘yes’ – no one voted ‘no’ but the non votes are likely composed of readers who were not interested. That being said, even 25% return was a strong enough response to make this a worthy undertaking).

That means we’ll be releasing a new cookbook in the coming months. I have already begun working on the project and am about 75% done with typing up the recipes. We still need to edit, add pictures and format the book. This is a relatively time consuming process as we have to take (sometimes verbose) blog posts and break them down into cookbook friendly length, without compromising the lessons learned and helpful tips to each dish.

While some details are still TBD (such as the price) we can tell you the following details on the book. Based on voter feedback, it will be a paperback cookbook, roughly 5 X 10 and spiral bound. While there was some interest in a hardcover cookbook – not one voter felt a fair price for such a book was over $25. Unfortunately, it costs US $25 to make – so that was out, paperback is in.

Our current aim is to feature over 100 recipes from the first two years of the blog. Our goal is to have the book typed, edited, formatted and ready for purchase by this summer. Stayed tuned for future announcements regarding our new cookbook!

Also, as a special offer with the announcement of our new cookbook, we have put 2010's cookbook on sale. Follow the Blurb link on the upper right hand side of our blog to check out the previous edition of our book and pick up a copy for yourself today!


That’s all the news that’s fit to blog about this week. We’ve got two new recipes lined up for you this week. Maggie is taking a dish she found online and turning it healthier – and boosting the flavor at the same time. I’m tackling a brand new cut of meat – a high end piece that deserves a high end recipe. Maggie will feature her dish on Wednesday, and I’ll follow her on Thursday to close out the week. Stop in Wednesday night to see what Maggie has cooking. Until then,

~Cheers

Wednesday, February 22, 2012

Mexican Pasta

Good evening everyone!  Tonight, I'm treading on familiar territory.  I've made it no secret that I love Mexican food.  In my attempt, I feel that I have been quite successful with duplicating authentic dishes and flavors.  The majority of these have been fairly accurate to traditional dishes that are served.  Tonight, I'm whipping up a not-so genuine Mexican dish.  Hopefully, there will be similar flavorings with the same deliciousness that occurs with every Mexican recipe.

The Recipe:  Mexican Stuffed Shells
Original Recipe Found In:  Multiple sources - original location from www.pinterest.com

What You'll Need:
1 Pound Ground Beef
1 Package Low-Sodium Taco Seasoning
4 Ounces Cream Cheese
14-16 Jumbo Pasta Shells
1 1/2 Cups Salsa
1 Cup Taco Sauce
1 Cup Shredded Cheddar Cheese
1 Cup Shredded Monterrey Cheese

To start, preheat an oven to 350 degrees.  In a large, nonstick skillet, brown the ground beef over medium high heat and strain once the beef is completely cooked.  Add the beef back to the skillet and add the taco seasoning, preparing to package instructions.  Add the cream cheese; cover the skillet and simmer until the cheese is melted and the three ingredients are blended well.


While the beef is browning, heat a large pot of water over high heat to boiling and cook the jumbo pasta shells, according to package directions.  When I first took a look at this recipe, I was quite taken aback at how large these pasta shells were.  So accordingly, I didn't think they would be too hard to find in the pasta section of our local grocery store.  Like the wagon wheel pasta, from last week's recipe, they proved to be very tricky to find, despite their large size.  Alas, Tyler found the shells and we were both shocked at the price of this pasta.  Come to find out, these were made and imported from Italy, thus the high price.  It would only make sense to have an semi-authentic south of the border dish have an ingredient come from half way across the world.


GIANT PASTA!!


Once the pasta is done cooking, drain the shells and set on a cutting board.  Lay them fairly spaced out so they can cool evenly and not stick together.  Once they are cooled down to handle, stuff each shell with the meat mixture, just enough to not overflow the shell with the stuffing.  In a 9x13 baking dish, spread the salsa on the bottom for a nice even layer.  Place the stuffed shells open side up in the baking dish.  Cover the shells with taco sauce and cover the entire dish with foil and bake for 30 minutes.


GIANT PASTA cooked


Stuffed and ready to cook


After the first 30 minutes, remove the foil and add the shredded cheeses and place back in the oven.  Continue to cook for another 10 to 15 minutes, until the cheese is melted and is starting to get a light golden brown or crispy.  Top with more salsa, cheese, sour cream, hot sauce or whatever your favorite Mexican condiment is, serve, and enjoy!

The End Result:


It was quite interesting to have all that Mexican flavor wrapped in large pasta shell.  I think that the majority of us who have Mexican food would be used to having those ingredients in a tortilla or taco shell.  But the fact that all those harmonizing flavors encase themselves in pasta makes is even more delicious.  I was quite satisfied to have all those flavors but in a different packaging made it a completely different result.  The taco seasoning/beef was standard fare, but adding the creaminess of the cream cheese made is more irresistible.  Plus adding the dose of taco sauce also pumped up the flavor quotient.  Another simple and easy Mexican dish that won't take all night to create.


That's all we have for you this week.  Thank you for reading and enjoying cooking with us - we truly appreciate all of our readers and supporters on our culinary journeys.  Join us next Monday as we take a spin Around the Culinary World.  Until then,


~Cheers!

Tuesday, February 21, 2012

Pizza On A New Level

Good evening everyone! Have you ever gone out to eat at a restaurant, ordered something off the menu and, upon receiving it, looked at it and thought, “I can make that at home”? It’s something Maggie and I do every so often, in fact we’ve tried duplicating local restaurants menu items in the past with reasonable success.


On a related tangent, one of my favorite foods is BBQ chicken pizza. I’m not just talking shredded chicken drenched in BBQ sauce on an otherwise normal pizza. Rather, I prefer the pizza with whole chicken breast chunks served atop a BBQ sauce base, complimented by fresh ingredients (red onion, green peppers, etc.) We’ve had multiple BBQ chicken pizzas from the surrounding Des Moines metro, and we’ve found some that are very good. However, no matter how often we order them, and no matter how go they turn out, I always end up thinking “I can do this at home, and I think I could do it better”. Tonight, I’m trying that theory out.


The Recipe: BBQ Chicken Pizza
An Out Of The Culinary Original Recipe

What You’ll Need:

1 Batch Prepared Pizza Dough*
½ Batch ‘Out of the Culinary’s Savory BBQ Sauce’
2 Medium, Boneless, Skinless Chicken Breasts (Trimmed)
Ancho Chile Powder
1 Small Red Onion (Diced)
1 Garlic Clove (Thinly sliced)
8 Ounces Smoked Mozzarella Cheese

*You are more than welcome to make up your own fresh pizza dough from scratch, but there are some great, natural, from scratch choices on the market that make this process a little easier. The best in our area is Trader Joe’s pizza dough. It comes in handy premade blobs (that’s really the best description for it…) and it greatly cuts out a lot of extra prep time.

You can prepare the savory BBQ sauce ahead of making the actual pizza and store it in the refrigerator in a jar. We frequently cook up batches of the sauce and use it in or on our dishes and store the rest for later. We’ll be using the sauce in place of a tomato sauce for this pizza, so the exact quantity is strictly up to your personal preference. If you’re making the sauce up fresh, it’s safe to assume about ½ of the batch will be used for the pizza. You can adjust as necessary.

One of my biggest gripes with most BBQ chicken pizzas lies in the chicken. It’s typically added onto the pizza simply as cooked, cubed chicken breast, with the surrounding pizza expected to do most of the heavy lifting in regard to flavor. I wanted to create a flavorful chicken piece that could shine on its own, but that would really burst when surrounded by the rest of the pizza.

To do that, I created an easy marinade for the chicken. Lay a large piece of plastic wrap on your counter and place a chicken breast in the center of it. Lightly season the chicken breast with a pinch of salt and pepper and give it a generous sprinkling of ancho chile seasoning. Flip the breast and give equal treatment to the other side. Tightly wrap the breast in plastic wrap and store in the refrigerator. Repeat for each chicken breast you’ll be preparing. Allow this seasoning to marry with the chicken breast overnight or for at least 4 hours.


We used ancho chile powder in a previous recipe (where we attempted to duplicate Chipotle’s famous burritos) and found it to be not at all spicy (much to our surprise) and that it actually held a very smoky flavor. That flavor should combine nicely with the surrounding pizza, adding a much needed element to the chicken.

When you’re ready to begin preparing the pizza, preheat the oven to 450 degrees and cook the chicken breasts for 20 minutes or until they reach 150-160 degrees at their thickest point. They will finish cooking later on. Once they have reached the desired temperature, transfer the breasts to a plate to allow them to cool slightly.

While the chicken is cooking, set your prepared pizza dough out on a lightly floured counter. (Most prepared pizza dough calls for it to rest at room temperature for around 20 minutes before use, but you’ll want to follow the individual package instructions based on the dough you’re using). Once the dough has risen slightly, you can begin to work it out into a 12 to 16 inch circle (depending on the size of your pizza pan) with a lightly floured rolling pin. Make sure to flatten the dough evenly (you don’t want any puffy pockets) and transfer the dough to the pizza pan.

By this time your chicken should be done cooking and have cooled slightly. Once the chicken is out of the oven, reduce the temperature of the oven to 350 degrees.

Use a chef’s knife to slice the chicken breasts into cubes. Next, turn your attention to assembling your pizza. Begin by ladling a couple spoonfuls of BBQ sauce onto the center of the pizza and spread it evenly across the surface. I prepared by pizza as a flatbread style, meaning I didn’t turn up the edges to create a crust. To compensate, I simply left about ½ inch of space around the edge free of sauce.


Lightly sprinkle the diced red onion, thinly cut garlic and chicken cubes across the surface of the pizza. Top this layer with the cheese, making sure it’s evenly distributed across the pizza. Finally, add another few chicken cubes, and some more diced red onion on top of the cheese layer and place the pizza pan into the oven. Allow it to bake for 12 to 15 minutes, or until the cheese turns lightly golden brown and the crust is crispy to the touch. Sprinkle the top of the pizza with the chopped cilantro and enjoy!


The Results:


This is one delicious pizza. The BBQ sauce base creates a great, new flavor for the dough/cheese and toppings. My favorite aspect of this dish was the marinated chicken breasts. By oven baking the chicken, we created a nice, crispy outer edge that really added great texture to the pizza. The ancho chile powder added an amazing layer of smoky depth to the pizza that most BBQ chicken pizzas seem to lack.

My only gripe was with the crust. While Trader Joe’s whole wheat pizza crust was very good, I found it a little too soft for my liking. I prefer my pizza to have a crispy crust and by following the package instructions we simply did not achieve that. In hindsight, I think I would cook the pizza dough on its own for about 5 minutes prior to placing the pizza into the oven. This would allow the crust to crisp up slightly. Other than that minor gripe, this ended up being one delicious pizza. The best part? The total cost of the dish came in around $8 ($1 pizza dough, $6 organic chicken, $1 cheese – the BBQ sauce was already prepared and could have been made again with everything in our pantry) that’s about ½ price of the same pizza at a local restaurant.

That’s all we have for you this evening. Maggie will take to the kitchen tomorrow night where she puts her favorite style of cooking into a whole new dish. Be sure to stop in then to see what she has cooking. Until then,

~Cheers

Monday, February 20, 2012

Around The Culinary World

Hello again everyone! It’s Monday once again, and in some areas of the country, it’s beginning to show hints of spring. Of course, those of us who live in the Midwest know this is all a big scam. We get hints of warm weather and then BAM 2 feet of snow in March. Still, we’ll enjoy the warmer than usual temperatures while we can.


Outside of warmer temps and some hints of spring, Monday brings with it another reason to celebrate – it’s time to take a trip ‘Around The Culinary World’ and check out all of the food news for the week. It was an interesting week to say the least, food living up to its name, a big change in legislation and a change of perspective for one candy manufacturer. Let’s dive into the food news for this week!


Jelly: the unsung hero of the sandwich world; peanut butter’s best friend, breakfast’s ally, a sidekick for sandwiches everywhere. Fruit based jellies (as well as jams and preserves) are great, versatile culinary tools that add a touch of sweetness and a whole lot of flavor to whatever medium you choose to use them in. The problem is, the jelly market is crammed full of competition. From the big players like Smuckers to small, regional brands, there are a lot of options out there for the jelly buyer. Luckily, Kitchen Daily has compared the best available mass market (strawberry) jellies so you don’t have to. The winner of the competition may surprise you. Check out their ‘best of’ list HERE.


Last week we talked about the inhalable caffeine product, AeroShot, which boasted the ability to transfer about 1 large cup of coffee worth of caffeine to the user via inhalable powder. AeroShot was able to skirt around FDA rules and regulations at the time of its release because it hit the shelves as a dietary supplement, rather than a food product. At the time, I noted that the product would begin growing, barring a setback from the FDA. Well, the FDA has come knocking and AeroShot has some questions to answer. According to the FDA, they’re not sure that AeroShot has the grounds to call itself a dietary supplement (meaning they could be intentionally avoiding the FDA rules in order to sell their product) in addition the FDA wants to test the product to make sure it’s safe for consumer use. AeroShot stands behind the safety of their product, stating that so long as the consumer follows the instructions on the label, it is safe for consumer use. Read more about the FDA’s look into this new medium HERE.


Mars Inc. manufacturer of products such as Skittles, Juicy Fruit chewing gum and the Snickers candy bar, among others, announced last week that they will be making a dramatic change to their product offerings. The company stated that beginning in 2014 (or by the end of 2013) they will no longer offer any candy bar over 250 calories. The company stated they were making this change “as part of their broad-based commitment to health and nutrition”. In addition to the shrinking sizes, Mars also announced that they intend to reduce the sodium levels in their products by 25% by 2015.

This is a bold move for a candy manufacturer, but one that should not go unnoticed. It’s refreshing to see a major candy manufacturer actually taking steps to make their product healthier, to admit that some portions of their product are simply not sensible serving sizes and then make the changes themselves, rather than passing the responsibility off on the consumer. While this will likely mark the end of the ‘king size’ candy bars made by Mars, I’m interested to see if the company actually adjusts the size of their candy bars or if they simply adjust the ‘serving size’ region of their nutritional information. (Taking a candy bar and breaking it into two servings for example, in order to get the calories below their threshold). My initial reaction is that they are in fact changing the size, but we’ll keep an eye out for any future updates on this story. Read more about this change HERE.

Sometimes, you get exactly what is advertised. If a restaurant sells itself in a certain way, sells products based on a certain theme and constantly makes references to a theme or event, they just might mean it. One customer found out the hard way that this particular restaurant chain wasn’t kidding in their advertising. What happened and where? Check it out for yourself HERE.


The organic food industry is still sort of jumbled and scattered depending on the product and region it originates from. Occasionally, farmers have had difficultly in getting a legitimate organic product onto their certified list, simply because the price of becoming certified offset any potential profit. In addition, others complained it was too easy to become certified organic, citing some competition that did not offer a sustainable product. What complicated matters even further was the fact that there were two standards for organic; depending on the region of the world the food was produced in. U.S and Canadian farmers found it difficult to export their USDA certified organic products overseas, where EU regulations would not certify the product as organic. The same was true for EU farmers who attempted to send their certified organic products to the US. This closed off another large market for any organic farmer, greatly impacting their ability to continue operating an organic farm.

Last week, both groups finally reached an agreement that will help both organic farmers and consumers alike. The European Commission of Agriculture and the USDA agreed to begin accepting certified organic products from each other and will allow them to be marketed without prejudice. This change goes into effect on June 1st, and should allow the world of organic food offerings to grow, which is always good from the consumer’s perspective. You can read more about this agreement, including each department’s guidelines, and where they found common ground, HERE.


That’s all the culinary news that’s fit to blog about this week. We’ve got an exciting week of recipes lined up for you. I’m taking to the kitchen tomorrow night to create a 100% original, brand new dish. It’s actually a medium we haven’t dabbled into too often on the blog, so I’m eager to give it a try. Maggie follows me on Wednesday with a very unique concept that features one of her favorite flavors. Be sure to stop in tomorrow night to see what I have cooking. Until then,

~Cheers

Wednesday, February 15, 2012

A Trip To Cajun Country

Good evening everyone! Classic mac and cheese has to be one of the all time great comfort foods. Creamy cheese over soft pasta noodles, it’s culinary simplicity (and indulgence) at its best. Last weekend, while perusing a few sources for new recipe ideas, I stumbled across a variation of the classic comfort food that would take this dish to a whole new place. Tonight we’re taking mac and cheese to Cajun country.

The Recipe: Cajun Mac and Cheese
Original Recipe Found In: Food Network Magazine (March 2012 Issue)

What You’ll Need:

12 Ounces Wagon Wheel Pasta
2 Tablespoons Extra Virgin Olive Oil
6 Ounces Andouille Sausage (Diced)*
2 Bunches Scallions (Finely diced)
1 Red Bell Pepper (Chopped)
1 Tablespoon Cajun Seasoning
2 Tablespoons All Purpose Flour
2 Cups Whole Milk
8 Ounces Sharp Cheddar Cheese

* Andouille sausage is French in origin but is better associated with Cajun style cooking. Andouille (pronounced an-DOO-wee) is typically made of a blend of ground pork (typically stomach and intestines), peppers, wine and other seasonings. It’s also known as ‘hot link’ sausage and is famous for its heavily seasoned flavor. Andouille shouldn’t be too hard to find at your local grocery store either, simply look in the same area breakfast sausages and bacon are sold. We ended up going with a slightly healthier option of andouille – chicken andouille, which is made from ground chicken breast in place of ground pork intestines. Swapping the fatty pork product for chicken is a good way to cut out some excess calories and fat.


To begin preparing this dish, bring a large pot of lightly salted water to a boil and add the pasta. Cook, following the package instructions until the noodles are al dente. Because of added steps later on in the recipe, you may want to pull the pasta out of the water about 1 minute prior to the package instructions.

While your pasta is cooking, add the olive oil to a large (12 inch) non stick skillet over medium high heat. Warm the oil until it begins to shimmer lightly. Add the diced sausage and cook, stirring occasionally until the sausage begins to brown. This should take around 2 minutes. Next, stir in the scallions and red bell pepper and cook until they soften slightly. This should take an additional three minutes.


Add the Cajun seasoning to the skillet, making sure to stir well to distribute the seasoning evenly. Finally, add the flour to the skillet and mix until everything is well combined. The mixture should become a thick, paste like substance at this point. Allow this mixture to simmer for about 2 minutes before whisking in the milk. Stir until the flour has evenly dissolved into the milk mixture. Allow the sauce to simmer lightly for 5 to 7 minutes or until the sauce has thickened and has become smooth.


Once you pasta has nearly finished cooking (again, about 1 minute from directed time) drain the pasta and reserve 1 cup of the cooking water. Add the finished pasta to the skillet with the sauce mixture along with the shredded cheese. It’s easier to incorporate the cheese if you add it in small handfuls, rather than all at once. Simply toss the pasta in the sauce mixture to make sure the pasta is evenly covered in sauce and the cheese has completely melted. Toss and incorporate the cheese until everything has been added and the cheese has completely melted. You may thin out the sauce with the reserved cooking water if you prefer a thinner sauce or you find your sauce is slightly thicker than you’d prefer. Allow the mixture to simmer for about 1 minute and serve!


The Results:


This was a unique twist on a classic dish. The red bell pepper and andouille sausage added a nice ‘pop’ to the creamy and smooth cheese base of the dish. This was not our first foray with Cajun seasoning, so we knew what to expect – a little extra spice without too much heat added overall. While the Cajun seasoning on top of the andouille did pack a little heat, the cheesy sauce neutralized any overwhelming heat nicely.

Wagon wheel pasta works fantastically in this recipe because its design (I.E. the wheel ‘spokes’) grabs a hold of the cheese and carries the sausage bits, bell peppers and scallions nicely. If you wanted, you could substitute the wagon wheel pasta for another form of hearty pasta, such as shells, but wagon wheel is the preferred pasta for this dish.

That’s all we have for you this week. Thank you, as always, for stopping by and sharing in the adventure of cooking with us. We’re back on Monday with another edition of Around The Culinary World. Until then,

~Cheers

Tuesday, February 14, 2012

Not Your Average Quesadilla

Good evening everyone and Happy Valentines Day!  As another nasty weather system looms into our area, it's time to hunker down and enjoy some good home cooked meal.  Sometimes, life happens and we get caught in a flurry of busyness and don't have time to savor a home cooked meal, let alone cook one.  The majority of my recipes here on the blog are quick and easy to make, besides delicious and nutritious.  Tonight is no exception:  a simple meal that is ready with little effort and packs quite a nutritional punch.  Without further ado, let's get cooking!

The Recipe:  Turkey & Balsamic Onion Quesadillas
Original Recipe Found On:  www.eatingwell.com

What You'll Need:
1 small Red Onion, thinly sliced
1/4 Cup Balsamic Vinegar
4 10-inch Whole-Wheat Tortillas
1 Cup shredded sharp Cheddar Cheese
8 slices deli Turkey, preferably smoked

I wanted to start off with a little history about the quesadillas before we jumped into the recipe.  Quesadillas originated in Mexico and the word derived from the Spanish word for cheese, which is queso.  Any quesadilla I have ever seen is primarily two tortillas stacked on top of one another with delicious innards grilled in the middle.  But originally, quesadillas were half-moon shaped, using one tortilla and folding on itself.  Another differentiation between the American quesadilla and the Mexican/Central & South American quesadilla is that the latter uses a flavored corn tortilla, whilst the American uses a flour tortilla.  Now that we are all enlightened with a brief history on the quesadilla, let's get cooking!


To start, combine the onion and vinegar in a bowl and let stand for five minutes, letting the vinegar marinate the onion.  When the marinading process is complete, drain the excess vinegar.


Next, warm the tortillas in a skillet over medium-high heat for 45 seconds on each side.  Place the warmed tortillas on a plate and start to assemble the quesadilla:  using the half-moon technique, sprinkle 1/4 of the cheese on the tortilla covered by two slices of turkey, and top with a 1/4 of the onions.  Fold the tortillas in half and gently flatten with a spatula and cook until the cheese begins to melt, about two minutes.  


Assembled quesadilla


Flip the tortilla and cook until the second side is golden, about two minutes.  Continue with the remaining ingredients to finish the quesadillas.  Serve and enjoy!


Now, here's the part where I usually tell you what the end product tastes like.  But tonight, I am cooking a side dish with my quesadillas.  A couple of weeks ago, Tyler tried his hand at making sweet potato fries.  And tonight, I thought I would try a different version to accompany my quesadillas.

The Recipe:  Oven Baked Sweet Potato Fries
Original Recipe Found In:  Adaptation of many recipes
What You'll Need:
2 Pounds Sweet Potatoes
1/4 Cup Olive or Vegetable Oil
1 Tablespoon Salt


To start, preheat an oven to 450 degrees.  You can kick it up to 500 degrees if you want your fries to be super crispy.  Peel and trim the potatoes and cut into wedges.  You can also make these into disks with either a mandolin or a sharp knife.  


Place the sweet potatoes in a bowl and add the oil.  Mix well to combine.  From here you can add your salt, ensuring all the potatoes are well coated.


Fully coated and ready to cook


Spread the sweet potatoes in a single layer over a baking sheet.  The oil that has coated the wedges should keep them from sticking to the baking sheet.  Place in the oven and bake for a total of 25-30 minutes.  After the first 15 minutes, remove the baking sheet from the oven and flip all the wedges over and return to the oven, baking for another 10 to 15 minutes.  Let cool for five minutes before serving and enjoy!

The End Result:


The quesadillas packed quite a punch from the balsamic onions.  They were actually kind of sweet - the vinegar cut the bite out of the onions and added a real depth to the quesadilla.  The melted cheese and smoked turkey made a wonderful combination.  Since the majority of quesadillas are either just cheese or cheese and chicken, it was really great to see something completely different for an old favorite.  Plus, the entire dish had only 328 calories, which is a low calorie meal, with flavor bursting at the seams.


The sweet potato fries were also superb.  Only having the salt as its flavor quotient made these fries completely unique.  They were crispy, yet weren't completely rock hard.  And baking these potatoes, instead of frying, cut the caloric value way down, and were still really healthy for you.  Overall, these two dishes make a great combination for any night of the week.


Join us tomorrow as Tyler dabbles into one of my favorite categories of recipes and sets a whole new spin on it.  Until then, 


~Cheers!

Monday, February 13, 2012

Around The Culinary World

Hello again everyone! It’s Monday once again, and it’s snowing in Iowa. Snow and a Monday? There ought to be a law about that… My typical 15 minute commute took 50 minutes this morning, we’re barely into Monday and I’m all set to go back to bed! On snowy, cold days like these, there’s nothing better to do than to peruse the stories from the culinary world. We’ve got quite a few stories lined up this week, so let’s dive right in!


The individual coffee maker phenomenon has always flummoxed me. While I can understand the great convenience of single serve coffee canisters (no cleanup, makes the perfect amount) all I ever see is a wasteful product. Each canister goes into the trash, making a great deal more waste than a traditional pile of (biodegradable) coffee grounds would from a standard machine. The other strike against these single serve machines always seems to be cost. These 6 pack containers of single serve coffee are not cheap – I understand you can buy them in bulk, thereby reducing the cost, but I still always felt that people were paying an exorbitant amount for convenience.

As it turns out, they are. A recent study conducted by the New York Times estimates that the cost of K-Cup coffee is around $51 per pound. That’s higher than any premium roast or high end coffee on the market. You can read more about the story HERE including a different perspective on the product HERE.


As a society, we cannot get enough caffeine. People (on average) get too little sleep, try to cram their day with too many tasks and cut corners on key nutritional elements because there simply isn’t enough time in a day. This leaves people overworked and rundown. We compensate for all of these shortfalls with caffeine; either in coffee, energy drinks, soda or even tiny bottles of pure “energy”. A new product, known as “AeroShots” is hoping to add “inhalable powder” to that list.

The $2.99 single serve product contains about 100 milligrams of caffeine, or the equivalent of one large cup of coffee. Some lawmakers have expressed concerns over the potential for the product to be abused like a drug, and others have cautioned about long term health risks from a product such as this. Initial feedback from consumers seems positive, however, so barring a set back from the FDA, look for AeroShots to begin popping up all over the country. You can read more on this new caffeine delivery system HERE.


The Arby’s restaurant chain has been trending downward over the past few years. In 2011, their parent company separated them from the Wendy’s chain and sold them outright. They’ve since tried an aggressive marketing campaign and slight redesign in order to find their niche in the fast food industry. It looks like they’re going to be getting a little more aggressive in the future.

It’s being reported that in the third quarter of 2012, Arby’s will undergo a large scale change, including a new logo, new menu and new marketing campaign. You can read more about this rebranding effort HERE.


Tomorrow is Valentine’s Day, a great day to be Hallmark, local restaurants and chocolate manufacturers. It’s also a nice day to spend with a loved one and enjoy their company. Maggie and I picked up a bottle of pink champagne for the holiday and plan to spend a quiet evening indoors, away from the crazed crowds. Pink champagne makes an appearance on the shelves about once per year – and can be found for a relatively manageable price. Check out this collection of pink champagne variants and find the price point and flavor that suits you best. (We found a Trader Joe’s brand for around $6 – we’ll keep you posted on how that brand fares).


You may have noticed, while wandering from one grocery store to another or even shopping in one region and then moving to another, that some brands have very similar labels and packaging. Brands such as Hellmann’s have identical labeling and packaging as Best Foods. How can these brands get away with such blatant copyright infringement? Simple, they’re the same company – in fact, they’re the same product. It turns out that companies will vary the name of their product based on the region they’re selling it. This practice is a lot more common than you might think. Check out the story HERE, including a list of a few more companies engaging in the ‘same product, different name’ game.

That’s all the news that’s fit to blog about this week. We have another story involving the dark underbelly of a food product – but I want to do a little more digging and research before we share that one – expect that story in next Monday’s edition of Around The Culinary World. We’ve got another good week of cooking lined up. Maggie takes to the kitchen on Tuesday with a quick dish that I’m eager to try. I’ll follow her on Wednesday with a very unique twist on a classic comfort dish. It’s sure to be a fun week of cooking, so stop back in on Tuesday to see what Maggie has planned. Until then,

~Cheers

Wednesday, February 8, 2012

Back For More Butternut

Good evening everyone! Last year, I attempted a butternut squash risotto recipe that had me very hopeful and excited for a beautiful, flavorful dish. Butternut squash is one of our all time favorite flavors, and working that rich, earthy flavoring into a risotto seemed like an easy win. What I ended up with instead was a lot of disappointment. While the risotto was by no means a bad dish – it simply didn’t have the butternut flavor that I wanted. The texture was very bland and the end recipe simply tasted like risotto with a little butternut squash tossed in.


Last weekend, while I was flipping through the 2011 recipe collection from Jamie Oliver’s magazine “Jamie” ($14.99 at most bookstores) I stumbled upon a butternut squash risotto that gave me a few ideas. Using Jamie’s recipe as a guide, and a few changes that I’ve added myself, I’m going to try to create the beautiful tasting risotto that I was looking for the first time around.

The Recipe: Butternut Squash Risotto
Original Recipe Found In: Jamie Magazine, 2011 Recipe Collection (Framework taken from this recipe, but much of it has been slightly adapted to create our own dish)

What You’ll Need:

4 Slices Pancetta
2 Tablespoons Olive Oil
½ to ¾ Cup Butternut Squash Pieces (Cubes)
3 Thyme Sprigs
1 Small Onion (Diced)
1 Garlic Clove (Minced)
1 Cup Risotto Rice (Arborio)
½ Cup White Wine
3 Cups Chicken Broth
Parmesan Cheese


Begin by preheating your oven to 350 degree and lightly greasing a rimmed baking sheet with cooking spray. In a large bowl, combine 1 tablespoon of olive oil with a pinch of salt and pepper. Whisk until blended. Add your butternut squash pieces to the bowl and toss until everything is evenly coated. Pull apart the thyme and lightly use to season the butternut squash pieces. (Dried thyme works well here as a substitute).


Trader Joe’s sells their butternut squash precut and already diced into sections. I would recommend spending the extra $1 to buy precut squash. It saves a lot of time and effort. Even if you buy a precut squash, you’ll still have to do a little chopping to reduce the size of the pieces. They don’t have to be uniform or even cubed, just make sure that they are chopped down into bite sized pieces.

Spread the squash pieces evenly across the rimmed baking sheet and place it in the oven. Allow the squash to bake for 25 to 30 minutes, or until they begin to turn a nice golden brown color.  While the squash is baking, you can begin preparing the rest of the recipe.

Place a large non stick skillet over medium high heat, add the olive oil and bring to a light shimmer before adding the pancetta. Fry the pancetta until it becomes crispy and brown. This should only take 1 to 2 minutes as pancetta is very thin and will cook fast. Once browned, remove the pancetta from the skillet and lightly dice it with a chef’s knife (or pull apart by hand). Set aside.


Pancetta, for those who may not be familiar, is known as Italian bacon. Pancetta is essentially thinly sliced pork belly that is salt cured and sometimes lightly seasoned with nutmeg, pepper or other spices. When raw, it tastes slightly like ham and when fried it becomes a crispy (slightly less greasy) stand in for bacon. Pancetta’s flavors are not quite as aggressive as bacon, so you can typically add it to dishes that bacon would simply overwhelm – like risotto.

In the same skillet, add the onion and cook for 3 to 5 minutes or until it becomes translucent. Next, stir in the garlic and allow it to cook for 30 seconds before adding your rice into the skillet. Stirring regularly, allow the rice to cook for 1 to 2 minutes.

Add the white wine to the skillet and allow the mixture to simmer until the wine absorbs into the rice. This takes about 1-2 minutes. Next, gradually add the chicken broth to the skillet about ½ cup at a time. Allow each ½ cup of broth to be absorbed by the rice before adding any additional broth. This will take about 3 minutes per 1/2 cup. You only want a small amount of excess liquid, as risotto is not a liquid heavy dish, so if you begin to notice that the liquid is not getting absorbed into the skillet do not add any more. You can always add splashes of broth to the risotto later on if you feel it is a little too dry or sticky for your liking.


By this time, your butternut squash should be done or very near completion. Once it is a nice golden brown and fork tender (it should fall apart easily if prodded with a fork) stir it into the risotto mixture on the skillet along with the pancetta pieces you prepared earlier. Once everything is evenly blended, sprinkle the mixture with a pinch or two of parmesan cheese and serve!

The Results:


I knew from experience that oven roasting butternut squash greatly boosted its flavor over simply pan frying or boiling it. Instead of following the original recipe, which called for the squash to be fried in a skillet and then allowed to finish cooking it a bit of water, I called an audible and decided to keep the butternut squash out of the risotto until the very end. While this would lower the butternut squash flavor amongst the risotto, I hoped it would boost the flavor of the squash itself by enough of a margin to offset this change.

I was right. The oven roasted squash was absolutely bursting with that great, earthy flavor that butternut squash is known for. The risotto presented a nice, neutral flavor to compliment the squash, and while the butternut flavors did not work in amongst the risotto, I think the trade off was worth it. The pancetta added the nice layer of texture that my first foray into butternut squash risotto was missing. A nice crunch and an almost bacon like seasoning really made the pancetta an important member of this dish.

I have to say I’m very pleased that my second go-round with butternut squash risotto finally yielded the flavors I was looking for. This is a fairly easy recipe that only takes about 45 minutes total time. With its great flavors and decent preparation time, you can serve the whole family a healthy and delicious meal with very little effort.

That’s all we have for you this week. We’re back on Monday with another edition of Around The Culinary World. Until then,

~Cheers

Tuesday, February 7, 2012

Mexican Paradise

Good evening everyone!  There are a lot of Mexican dishes that tempt my pallet, but enchiladas have got to be number one.  Unfortunately, the "stuffing" is mostly filled with a fat-filled concoction of cheese and sauce.  While I wouldn't be opposed to that, one of our goals here on the blog is to provide fast, fresh, and healthy recipes for you and yours.  


So the quest began to find a delicious enchilada recipe that wouldn't weigh too much on the waistline.  Lo and behold, it was quite difficult to find a lower calorie version of one of my favorite dishes.  Finally, I had found a version in my Eating Well Magazine and I was all set to make it.  Upon reading the details of the recipe, it was a rather lengthy process (an almost two hour cook time) and the list of ingredients was almost like a roll call in a college lecture.  After some searching, yet again, I had come across another enchilada recipe that kept the calories at bay and didn't take half the night to bake.  But would this dish live up to my enchilada dreams?

The Recipe:  Cheesy Chicken Enchiladas
Original Recipe Found On:  www.myrecipes.com

What You'll Need:

2 1/2 Cups chopped cooked Chicken Breast*
2 Cups preshredded reduced-fat 4 Cheese Mexican Blend Cheese
1 2/3 Cups plain, low-fat Yogurt
1/3 Cup Butter, melted
1/4 Cup chopped Onion
1 Teaspoon minced Garlic
1/4 Teaspoon freshly ground Black Pepper
1 (10 3/4 ounce) can condensed, reduced-fat, reduced sodium Cream of Chicken Soup, undiluted
1 (4.5 ounce) can chopped Green Chiles, drained
8 (8 inch) Flour Tortillas
1 Tablespoon Canola Oil
1/2 Cup finely shredded reduced-fat Sharp Cheddar Cheese
1/4 Cup chopped Green Onions

*It was more cost effective for us to cook chicken breasts from our grocery's meat aisle.  These were cooked in a 350 degree oven for 25 minutes, or until a meat thermometer read 165 degrees.  After these were cooled, I shredded them by hand, tossing any parts that were over cooked or under cooked.  After shredding, I set them aside with a foil tent over them.


Chicken breasts - cooked, not shredded


To begin, preheat an oven to 350 degrees.  Whilst this is warming up, you can heat up your tortillas.  Start by brushing both sides of the tortillas with oil - not too much to saturate it, but just enough to give a nice sheen.  Heat a large skillet over medium high heat and heat each side of the tortillas for five to ten seconds, depending if you want the tortillas just warm or slightly crunchy.  This is a very quick process, so you'll want to focus your attention on the tortillas before starting the next step of the recipe.  (Personally, it's really up to the cook if they want to do this step.  I didn't see any differentiation of heating the tortillas before they were cooked, but if you are an adamant believer of giving a good crisp to tortillas before cooking, then you are more than welcome to do so.)  


Tortillas, ready to become enchiladas


Next, combine the chicken, Mexican blend cheese, yogurt, butter, onion, garlic, black pepper, cream of chicken soup, and green chiles in a large bowl.  Remove one cup of the chicken mixture and set aside.  Place the heated tortilla on a plate and spoon about a half a cup of the chicken mixture in the middle of the tortilla.  Arrange the mixture so it is evenly dispersed down the center of the tortilla.  Fold the vertical sides of the tortilla together and lay it folded side down in a greased 9x13 inch baking dish.  Continue this process for the next seven tortillas.  Don't be too surprised if you'll end up squeezing all the tortillas together so all of them can fit.  This just depends on how spacious your baking dish is.


Tightly packed tortillas


Spread the reserved chicken mixture over the top of the tortillas.  Cover the baking dish with foil and bake at 350 degrees for 20 minutes.  After this time has passed, remove the dish from the oven, sprinkle with the cheddar cheese and green onions and cook uncovered for five more minutes.  Serve by itself or a side of low-fat sour cream and enjoy!


The End Result:


This was everything I had hoped for in an enchilada recipe!  Enchiladas have a distinct flavor, perhaps the filling or the green chiles, but it makes it quite memorable.  I've had numerous types of enchiladas in my time, but today really blew the others out of the park.  It was the perfect amount of cheese and chicken and nothing incredibly spicy to send my tongue to a bowl of water.  The calorie count of this dish was only at 454 calories.  Considering that most Mexican dishes are way more than that (typically residing in the area of 800 to 1000 calories), I felt I did pretty good with the specific calorie reducing ingredients.  Overall, a truly superb dish that I cannot wait to make again!


Join us tomorrow as Tyler revisits a previously attempted dish, but attempts to improve upon it. Until then,


~Cheers!

Monday, February 6, 2012

Around The Culinary World

Hello again everyone! It’s Monday, and for some Americans, it feels like the day after a big holiday. Last night was, of course, the Super Bowl, a culmination of football, entertainment and food. Lots of food. Most of it not too good for you either. The game was good, the commercials were sub par (as usual) and the food was delicious, but not that good for you. All in all, another good Super Bowl, right? The best way to ease back into the work week after a night full of fun is to catch up on all of the culinary news! Unfortunately, the Super Bowl took top billing in most of the food related stories for this week, so it’s a little bit of a lighter week on the news front. That won’t deter us from diving into the stories worth sharing for this week!


The biggest culinary news story currently making the rounds involves another product recall. This time, eggs are the culprit. A Minnesota based egg manufacturer is recalling cases of their hard cooked eggs after testing revealed a possible listeria contamination. You may recall that this isn’t the first listeria outbreak in recent months. The end of 2011 saw a large listeria outbreak surrounding tainted cantaloupes. Listeria typically has the most effect on the elderly and young children or anyone with a weakened immune system. Most adults may feel short term effects such as fever and nausea.

The company believes that a project in their packing room resulted in the contamination and has announced that over 1 million eggs are currently being recalled as a precaution. There currently have not been any illnesses reported due to this contamination. This particular line of product is only sold to institutions for mass (commercial) use, so you don’t have to be concerned over the supply you may have purchased from your local grocery store. The company claims that over 34 states have received shipments of the tainted eggs and that multiple brands of their product are part of the recall. You can read more about this recall HERE. We’ll keep you posted as we find out new information, but for the time being it looks like the company may be ahead of the curve enough to avoid any serious health consequences from this contamination.


A perfect storm in the meat market will cause the price of beef to rise again in 2012 according to industry experts. Over the past few years, demand for meat has shifted more towards pork, chicken and fish, which caused American cattle producers to lower the number of cattle they were raising and focus their resources elsewhere. Recently, an increased demand for corn (in the form of ethanol) has driven the price of corn and corn byproduct up, which obviously means that it now costs more to feed your already low numbered cattle herd. These facts combined with a particular devastating drought in the south during the 2010 & 2011 summers have caused the cattle market to take a true beating over the past two years.

In addition, in 2011, foreign demand for beef increased, pulling on an already lower number of available livestock. Low numbers mixed with high costs of production mean that the end user is going to see a rise in the price per pound of beef and steak. In 2011, beef averaged $4.83 per pound. In 2012, the price is expected to balloon to $5.10 - $5.15 per pound. The real downside is that until the Texas and Oklahoma region sees a return to their normal rainfall, they will not be able to increase cattle production to meet demand. Even if the rain returns, experts say that the supply line will not be able to catch up to demand for almost three years. That means you can expect to be paying more per pound for your steak for the foreseeable future. Check out more information about this shortage HERE.


Pistachios have seen a recent boom in popularity thanks to an aggressive marketing campaign from the Wonderful Pistachio brand and the growing trend for major grocery stores to carry a wider and more diverse selection of nuts. In addition, pistachios are a healthy nut that is full of flavor. Good for you and tasty? It's no wonder why they’re becoming popular. The difficult part of pistachios arises when you try to crack them. For the most part, the legume has a nice easy split in their shell that allows them to be easily parted. Every once in a while, you may encounter a shell that is barely cracked. Luckily, instructables.com has a handy “How to” guide on cracking open a difficult pistachio, and the tool they use saves your hands and teeth and won’t cost you any extra cash. Check out the how to HERE.


Tomato paste is a handy kitchen aid and recipe enhancer with a small problem. It comes in too big of a can. Typically, you only need 1 to 2 tablespoons of tomato paste for a dish. The result leaves you with about ½ a can (if you’re able to find the really small cans) of tomato paste. While you can cover the can in foil and store it in the freezer, you’ll have to remember that you’re going to need it hours before you actually use it. This means that you cannot add tomato paste to your dish ‘on the fly’ like many chefs prefer to do. So, what’s the easy solution to this national tomato paste nightmare? It’s not as complicated as you might think. Check it out HERE.


That’s all the news that’s fit to blog about this week. As I said, it’s a pretty sparse week thanks to an over abundance of Super Bowl recipes and stories. We’ve got another full week of new recipes lined up. Maggie is taking to the kitchen on Tuesday night with a new version of a recipe she just recently tried. I’ll be following her on Wednesday night with another new variant on an old recipe, this one is a recipe I’m trying to improve upon after my first foray with the dish yielded less than desirable results. Stop in tomorrow night to see what Maggie has cooking. Until then,

~Cheers

Wednesday, February 1, 2012

Introduction To Ancho

Good evening everyone. Tonight, I’m trying to recreate one of our favorite recipes from one of our favorite places to eat. Chipotle Mexican Grill is a fantastic burrito/taco establishment that uses fresh ingredients and focuses on making good food out of healthy, natural products. They have two styles of burrito, steak and chicken that pack an absolutely amazing flavor. Their burritos usually consist of white rice, sour cream, cilantro, black beans, cheese and the meat of your choice, although they can be customized to any ingredients you prefer. Maggie and I usually go for the rice, sour cream, cilantro, cheese and chicken combination.


The true standout of their burritos is the seasoning that their meat has. It walks a fine line between spicy and seasoned – bursting with bits of heat complimented with amazing surrounding flavors. Last week, I stumbled across a recipe to recreate the marinade for Chipotle’s burritos (which we shared on 1/23/12’s Around The Culinary World) and I was intrigued. I set out to try to duplicate the amazing flavor of Chipotle’s burritos – and while I was at it, I decided to try to trim about 300 calories from the dish by changing the burrito to a bowl. Can this tasty Mexican dish be easily duplicated? Let’s find out:

The Recipe: Chipotle’s Chicken Burritos
Original Recipe Found On: Kitchen Daily

What You’ll Need:

For the marinade:
2 Ounces Dried Ancho Chiles*
1 Teaspoon Black Pepper
2 Teaspoons Cumin Powder
2 Tablespoons Fresh Oregano (Chopped)
6 Cloves Garlic
1/2 Red Onion (Quartered)
¼ Cup Vegetable Oil
Chicken of Beef Cuts (2 Chicken breasts were used for our recipe)

For the burrito:
White Rice (Quantity based on the number you’re serving)
Sour Cream (Optional)
Cilantro For Serving (Optional)
Fresh Salsa (Optional)

* You can used dried ancho chiles or ground ancho chile powder. If you opt to use the dried chiles, you will have to soak them in a small bowl of water overnight until they soften. Discard the water and the seeds and then dice the chiles. If you use ground ancho chiles, simply substitute the 2 ounces for about 2 teaspoons of the powder. We’re using the powder for our recipe.

An ancho chile is actually a poblano pepper that has been dried. The green poblano pepper is actually a fairly mild pepper, although each pepper can vary wildly when it comes to heat. (Some are significantly hotter than others, despite being grown in the same patch). Ancho chiles are dried forms of the hotter red poblano pepper. Ancho chiles are midnight black after drying and smell a lot like raisins. Ground ancho chile powder is simply rehydrated ancho chiles ground into an easy to use seasoning. Your local spice store will likely carry both dried and ground ancho chiles.

You’ll need to prepare the marinade the night before you want to make the recipe. To truly have the chicken or beef absorb the flavor, you’ll want it to marinade for at least 2 hours but overnight or even up to 24 hours is preferred.

To make the marinade, place the red onion, garlic, ancho chiles (powder or diced), black pepper, vegetable oil, cilantro and cumin into a small food processor. Pulse the mixture until it is well blended and any large chunks have been removed.


After I had mixed our marinade, I leaned over the bowl and gave it a sniff to see just how intense the ancho chile smell was. At first, I didn’t smell anything, which caused me to assume that the seasoning wasn’t sufficient. I leaned in a little more to verify this and that’s when it hit me. Like a ball of fire, the marinade’s spicy smell shot up my nostrils, down my throat and into my lungs. I know that’s the path it took because I could FEEL the smell burning through my nostrils, down my throat and into my lungs. Yup, that marinade is packing some serious heat! I’m sure glad I didn’t add any more ancho to the mix…

Place your chicken (or beef) in a large bowl or baking dish. Using a rubber spatula spread the marinade across the top and bottom of each chicken breast. Make sure that all sides of the breasts are evenly covered in the seasoning. Tightly cover the pan or bowl in plastic wrap and refrigerate for at least 2 hours or up to 24 hours.


Once the marinade has had an opportunity to settle in (the longer the better), place 1 teaspoon of vegetable oil in a large non stick skillet over medium high heat and warm the oil until it begins to shimmer. Begin to prepare your rice according to the package instructions at this time as well.

Meanwhile, cut the chicken or steak into ½ inch strips. Try to leave as much of the marinade on the meat as possible while slicing. Place the sliced meat into the skillet and cook for 2 to 4 minutes per side, or until the chicken is cooked through and registers 165 degrees on an instant read thermometer.


Combine the chicken, rice, cilantro and sour cream in a serving bowl and enjoy!


The Results:


I’m always slightly hesitant to try ‘duplicate’ restaurant recipes because most restaurants don’t share EXACTLY what their original recipe is (why would they?). This recipe was no different, the seasoning wasn’t quite the same thing that Chipotle offers - in fact you can certainly tell that SOMETHING is missing.

That being said, this seasoning was no slouch. It doesn't pack much heat (surprisingly) but what little heat is present was nicely offset by the rice/cilantro/sour cream combination. In the end, this recipe helps create a very flavorful meat that goes well with a burrito bowl or even wrapped in a tortilla. If you’re a fan of Mexican cuisine or just like things with a little kick of heat, this dish is certainly one to try.

That’s all we have for you this week. We’re back on Monday with another edition of Around The Culinary World. Until Monday,

~Cheers