Monday, April 30, 2012

Around The Culinary World

Hello again everyone! It’s Monday once again…and whether you choose to look at that as a bad thing or a good thing is entirely up to your personal disposition and present employment situation. One thing I’m sure the glass half full and half empty crowd can agree on is that our weekly trip through the culinary news makes the work week all that much easier to get going. We’ve got an eclectic mix of stories this week (then again, when aren’t they a little eclectic?) but due to a buggy blogger platform, we’re sans photos this week (Sorry!) Let’s dive in to the culinary news for this week!


The burrito is one of the shining examples of culinary simplicity and delight walking hand in hand. While this Mexican dish is anything but complicated, it does pack an amazing flavorful punch that’s hard to beat. Many Americans love the dish – and with good reason. Is it possible, however, that some love the burrito a little TOO much? One newspaper thinks so. After erroneously running a story stating that their local Mexican restaurant was closing, The Appalachian, a student run news paper for Appalachian State University, was bombarding with emails, phone calls and Twitter messages. Obviously, this case of misreporting greatly inflamed their readers. How did the newspaper respond? By taking their readers to task for misplaced priorities (of course!) Read the newspaper’s full response HERE.
***

Late last year, we shared a story about a grocer watchdog group that did a little digging into the breakfast cereal industry. The Cornucopia Institute released a report titled “Cereal Crimes” that took many producers to task for improper product processes, misleading labels and flat out bad content in their cereals.

One of the companies named in this report was Kashi brand cereal. The report cited Kashi for advertising that it was 100% natural, yet using products that contained GMOs (Genetically modified organisms). For the most part, that story went unnoticed in the mainstream media, with very little attention being paid to the culprits. (Kashi included)

Last week, however, the story came to the forefront once again. An innocuous sign, posted by Kashi (a health centric subsidiary of Kellogg’s) on the shelves of one grocery store quickly became viral across social media. The sign caused people to ask questions and last year’s report was quickly brought to the forefront once again. This time, consumers made the connection and Kashi is experiencing a great deal of backlash.

You can read more about what Kashi posted on the grocery store shelves, along with the problem with GMOs and the consumer’s response to this controversy HERE.
***

Late last week, Burger King announced it was making a big change in the type of products it would be using in the future. The fast food giant plans to only use eggs and pork that were raised in cage free environments by 2017. This announcement was pressured by rising consumer demand for humane treatment of farm animals. Reports have shown that consumers are willing to pay a little more when they know a product was fairly produced. Burger King is hoping this point proves true and helps raise sales of their products in the coming years.

The food production industry (egg and pork producers) is largely opposed to the move, citing the increased production costs such a move would cause. However, if the market (restaurants in this case) dictates a change needs to happen, many producers will be forced to comply or simply be squeezed out of the lucrative supply chain for the major buyers.

You can read more on this story, including how other fast food chains are following the humane treatment of animals trend HERE.
***
The knife is the most versatile and important instrument for any chef. From a paring knife, serrated knife all the way to the most important – the ever adaptable chef’s knife, many at home cooks have arsenal of trusty blades that make at home culinary exploits easy and fun to undertake. (Ever try to carve a chicken with a bad knife? Not very fun. Switch that bad knife for a high quality blade and watch the party start!)
Such important instruments need to be treated with the utmost care and respect. (Especially since the high end knives carrying a hefty price). However, many people routinely use and abuse their knives, causing them to wear out and fail much before they actually need to be replaced. How can you ensure you’re taking the best care of your kitchen cutlery? Avoid these common mistakes of knife care by reading THIS.


***
The refrigerator is produce’s best friend, right? After all, the lifespan of many popular fresh products is extended tenfold by simply sticking them in the refrigerator and preserving them for future use. Those products stay fresh, they last longer and you save money. While this is certainly true, you have to be careful not to get refrigerator happy as there are actually produce and other foods that are done more harm by being stored in your refrigerator. Check out the list of the 5 foods you SHOULDN’T refrigerate HERE.


***

That’s all the culinary news that’s fit to blog about this week. We’ve got another full week of cooking on the docket this week. Maggie leads things off on Tuesday with a brand new recipe that plays in her favorite theme. I’ll follow her on Wednesday with my dish from last week that got bumped (due to illness) and I’ll have another new recipe on Thursday to share as well. As a bonus, two of the recipes this week feature products that Maggie and I have never tried in our lifetime. It’s a week of new recipes and new foods, so it’s sure to be fun! Be sure to stop in Tuesday night to see what Maggie has cooking. Until then,


~Cheers


Thursday, April 26, 2012

Cupcakes from Heaven

Good evening everyone...again!  The cooking world can be defined into two (loose) categories:  Cooking and baking.  Typically, you can be good at both or good at one or the other.  I'm still getting in touch with my baking side - generally if it looks incredibly delicious, I will bake it.  This recipe is no exception.  A coworker of mine brought these cupcakes in and I knew I had to make them.

The Recipe: Lemonade Cupcakes

What You'll Need:

For the cupcakes:
1/2 Cup frozen Lemonade Concentrate, thawed
18 1/4 Ounce package White Cake Mix
8 Ounce container Sour Cream
3 Ounce package cream cheese, softened
3 Eggs, beaten
2 Tablespoons Lemon Zest

For the frosting:
8 Ounce package Cream Cheese, softened
1/2 Cup Butter, softened
2 Teaspoons Vanilla Extract
16 Ounce package Powdered Sugar

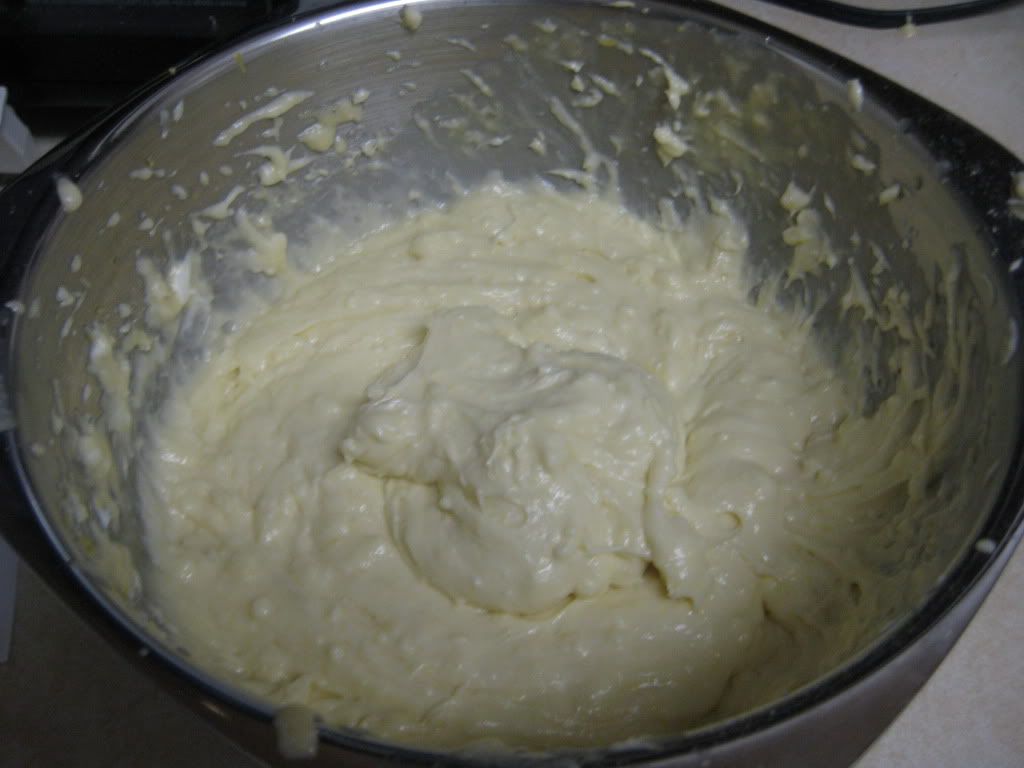
To start, preheat an oven to 350 degrees.  In a large bowl, combine the lemonade concentrate, cake mix, sour cream, 3 ounces cream cheese, eggs, and lemon zest.  Beat all these ingredients with an electric mixer for three minutes. Fill paper-lined muffin cups 2/3 full.  Bake the cupcakes for 22-25 minutes or until a toothpick inserted in the center of the cupcake comes out clean.  Let cool, in either in the muffin trays or on cookie racks.


Sweet, lemony goodness


In another bowl, beat together 8 ounce cream cheese and butter until smooth.  Blend in the vanilla.  Gradually, adding about 1/2 cup at a time, beat in the powdered sugar until smooth.  To top the cupcakes, you can either pipe the frosting with a frosting bag or take an offset spatula and smooth the frosting.  Be sure the cupcakes are cooled when placing the frosting on top.  Serve and enjoy!

The End Result:


Cupcakes have inserted themselves in the American mainstay the last few years and flavors like this will help keep them popular.  They were incredible moist and tangy, but not incredibly tart.  I made one slight error when I baked them:  I put the 1/2 cup of butter in the batter and it made it incredibly rich.  I'm sure without the butter, the cupcakes would be light and fluffy.  Regardless of my mistake, they are a delicious dessert and makes for an awesome treat.


Thanks for joining us this week.  Check back on Monday as we take a spin Around the Culinary World.  Until then,


~Cheers!

Wednesday, April 25, 2012

Crispy Cornbread

Good evening everyone! I was originally scheduled to be taking to the kitchen tonight to cook up my recipe for this week. However, I've been under the weather so to speak this week and will be pushing back my recipe into next week. (Maggie appreciates not being exposed to whatever plague has latched itself to me, I'm sure!)

Instead, I thought today would be a good time to share an original cornbread recipe that I mocked up last week. While I was in the kitchen working on the pomegranate roast chicken recipe, I noticed that we had corn meal, flour and eggs. I began to wonder if I could create a cornbread recipe with what I had. So I gave it a shot and was pleasantly surprised with the results.

The Recipe: Crispy Cornbread
This is an Out of the Culinary Recipe

What You'll Need:

3/4 Cup Corn Meal (Yellow)
1 Cup All Purpose Flour
2 Teaspoons Baking Powder
2 Tablespoons Light Brown Sugar
2 Tablespoons Honey
2 Eggs
3/4 Cup Milk*
3 Tablespoons Butter

* Maggie and I are actually slightly lactose intolerant (milk doesn't really 'sit' right with us). So, we don't keep standard milk in our home. Instead we use almond milk (vanilla flavored) - the downside is that almond milk (when flavored) doesn't lend itself to baking. In its place, we used water. If you're using a leaner type of milk (skim, low fat) the difference between milk and water in a recipe is negligible. The only thing your recipe will miss is the fat in the milk (making the bread drier). You can replicate this fat by adding about 1 tablespoon of vegetable oil to the mixture (if you're using water).

Preheat your oven to 400 degrees.

To begin, combine the dry ingredients (corn meal, flour, brown sugar and baking powder) in a large bowl and whisk until everything is well combined. Next, add the eggs, honey, butter (melted) water (or milk) and whisk until everything is well blended and no lumps remain.

Lightly grease an 8 X 8 baking dish with cooking spray and pour the mixture into the baking pan. Once the dough has been evenly distributed into the baking dish, pop the pan into the oven and allow it to cook for about 25 minutes or until the bread is golden brown and passes the toothpick test. (Stick a toothpick into the center of the bread, if it comes out clean, it's done).

The Results:

I prefer my cornbread to act as a vessel for butter and honey. Sure, the cornbread is great, but slathering it in butter and honey makes it extraordinary. This cornbread recipe created a nice, porous bread that absorbed the melted butter and honey without making a sticky mess or crumbling all over the plate. This is a drier cornbread - but as I said it was sort of designed that way intentionally. If you like to pair your cornbread with chili or simply like to serve it with honey, jelly or other toppings, this recipe works great and can easily be made with things you likely have in your pantry.

That's all we have for you tonight. Maggie will post her cupcake recipe either tomorrow night or Friday (more likely Friday) so be sure to stop in to see what tasty desert treat she cooked up last weekend. Until then,

~Cheers

Tuesday, April 24, 2012

Meatloaf Madness

Good evening everyone!  Here on the blog, we love to do adaptations and re-creations of classic dishes.  Not only does it stir our palettes, but it's exciting trying something that is similar to an old favorite.  Tonight is no different:  the meatloaf has comfortably secured a place on our dinner tables.  Heck, we've produced enough of them to make this.  But I would have to disagree with aforementioned product by stating that the "perfect meatloaf" doesn't have to do with shape or consistency.


Without a doubt, meatloaf can be whipped up in a flash and served probably sooner than that.  But there's definitely one thing that regular meatloaf lacks is flavor.  Tonight, I will challenge the standard meatloaf recipe and give it an ultimate makeover.  If you aren't careful, this slab of meat might knock you off your feet!

The Recipe:  Chipotle Meatloaf
Original Recipe Found In:  Bon Appetit Magazine, May 2012

What You'll Need:

1/4 Pound Applewood Smoked Bacon, coarsely chopped
1 3/4 Pound Ground Beef Chuck
1 Cup chopped Onion
1 Cup Heavy Cream
1 Cup Panko (Japanese breadcrumbs)
3 large Eggs, beaten to blend
1/2 Cup chopped celery
1 1/2 Tablespoons chopped fresh Cilantro
1 Tablespoon kosher Salt
1 1/2 Teaspoon minced flat-leaf Parsley
1 1/2 Teaspoon minced fresh Rosemary
1 1/2 Teaspoon minced fresh Thyme
1 1/4 Teaspoon ground Ancho Chiles
1 1/4 Teaspoon Smoked Paprika
3/4 Teaspoon ground Black Pepper
3/4 Cup plus 2 Tablespoons Ketchup
2 Tablespoons pureed Chipotle Chile (from canned chipotle chiles in adobo - about one large chile)*

*Note: to kick down the heat a little bit, we are going with ground Ancho chiles, instead of pureed chipotle chile.  Powder is a little easier to find than canned chipotle chiles and a bit better to handle in the mouth.


To start, preheat an oven to 400 degrees.  Coat the bottom and sides of a 13x9 baking pan with nonstick spray.  This is probably one of the most crucial steps in this whole recipe.  There's nothing worse than stuck-on meatloaf to a pan and trying to scrap it off, while scrapping the entire bottom of the pan off with the meat.  Not the best scenario in the world.  


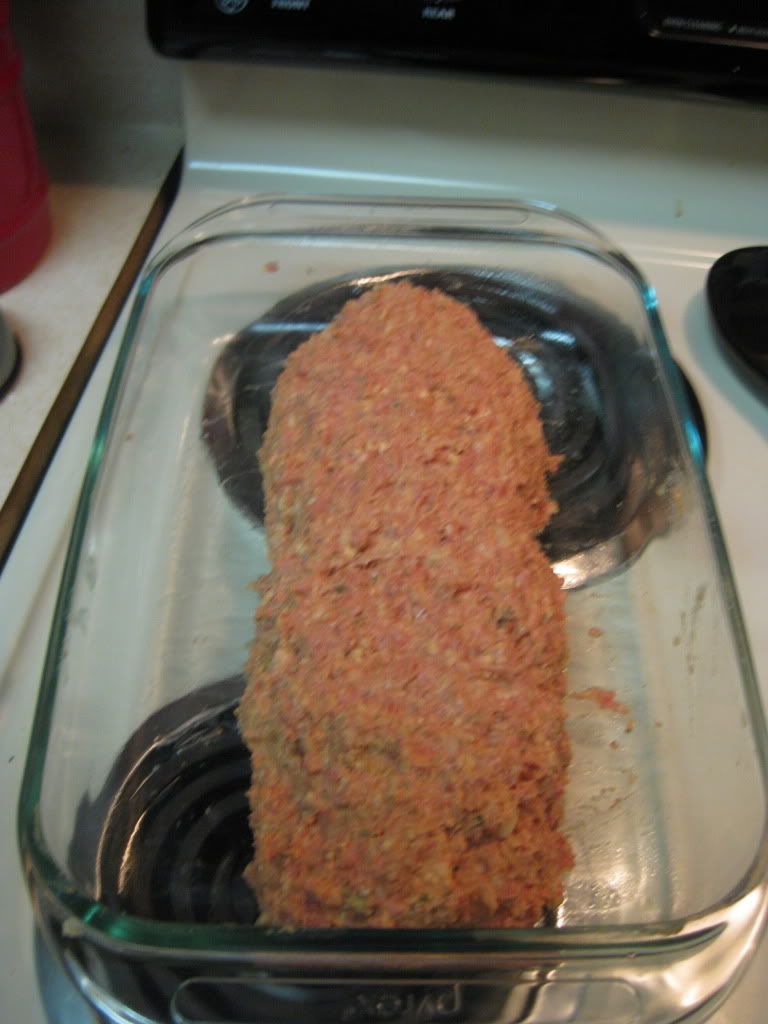
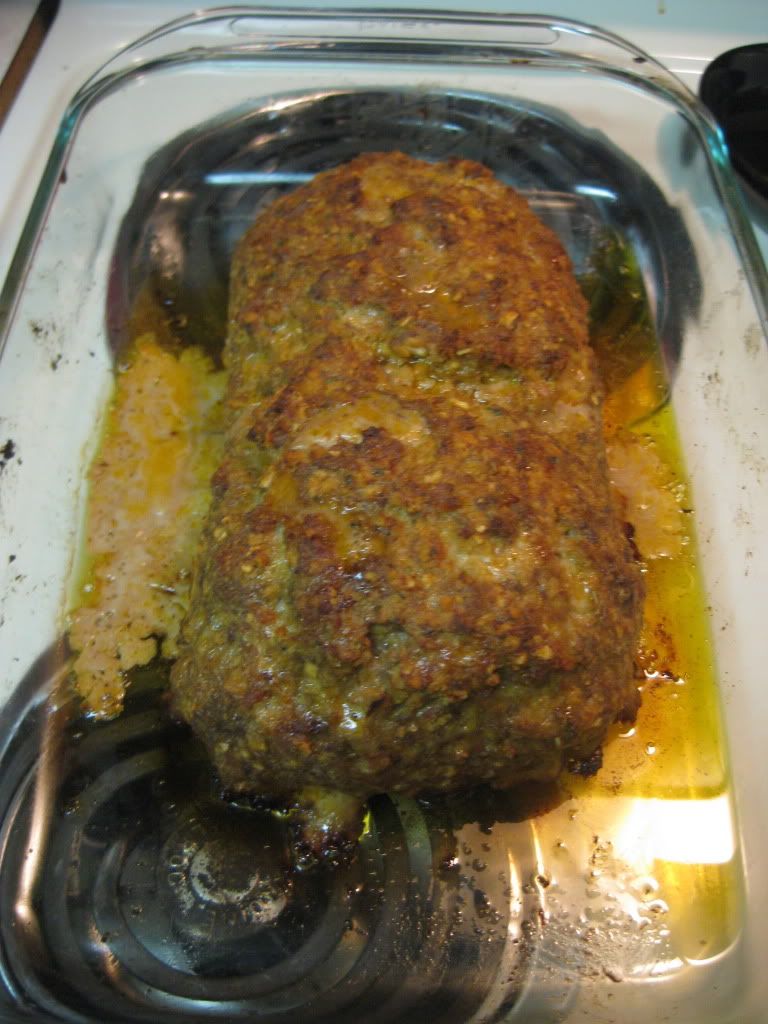
Next, pulse the bacon in a food processor until the coarsely chopped pieces are now coarsely ground.  Transfer these bacon bits to a larger mixing bowl.  Add the ground chuck, onion, heavy cream, panko, eggs, celery, cilantro, salt, parsley, rosemary, thyme, ground ancho chiles, paprika, and black pepper (pause to breathe,) and mix well to incorporate.  Transfer the meatloaf mixture to the prepared pan and form into a long log, smoothing to keep an even consistency.  (Alternatively, you can use a meatloaf pan and shape the mixture in this.  This will hold its shape better and you won't have to shape a log out of meat.)  Bake the meatloaf for 35 to 45 minutes, or until an instant read thermometer reads 150 degrees.


Meatloaf log...such an interesting combination of words


Next, stir the ketchup and pureed chipotle chiles in a small bowl.  Spread 1/2 cup of the chipotle barbecue sauce all over the top and sides of the meatloaf.  Bake the meatloaf for another 10 minutes, until an instant read thermometer registers 165 degrees.  Serve the remaining chipotle barbecue sauce alongside of the meatloaf and enjoy!


The End Result:


I am quite pleased with the adaptation I made, although I can't imagine how the pureed chipotle chili would affect my mouth (not well, more than likely!)  The meat was super moist with the addition of bacon.  And with all the spices and herbs that amped up the flavor even more.  This version made a bland meatloaf into something superb.  It's also fun to experiment with generic recipes, especially when you can create something new entirely.


Join us tomorrow as Tyler tries his hand at making a quintessential dish homemade.  Until then,


~Cheers!

Sunday, April 22, 2012

Around The Culinary World

Good evening everyone! We cover some interesting and varied ground in our weekly trips through the culinary news cycle. We find stories ranging from product recalls, to best of lists to great ideas to organizing your kitchen. Every week provides us with some new, exciting, occasionally odd and unique to enjoy. This week, more so than others, the news shifted to "odd". Every story that we're sharing this week features some strange circumstance, unusual food offering, bizarre eating habit or some other culinary oddity. We didn't save up these stories - we didn't even try for this 'theme' it just so happened that the culinary news this week was - well - weird. Let's dive into this week's culinary oddities stories!


Drinking soft drinks is bad for your health. This much is almost a given anymore. Even those who enjoy the beverage on a daily basis know that Coke, Pepsi or whatever name their preferred carbonated sugar water is sold under is, in the end, bad for their health. (Yes, even the zero calorie versions are bad for you as well...) It turns out, one woman's obsession to Coca-Cola was more than bad for her health; it killed her. A 30 year old woman from New Zealand who consumed around 2 gallons (!) of Coca-Cola PER DAY died last week of a heart attack. While doctors are not sure as of yet to the exact reason of her death (popular theories include hypokalemia - low potassium in your blood supply, or even caffeine overdose) it is almost certain that her diet (which also included heavy smoking) was the contributing factor. You can read more about this story HERE.

Always in moderation. 


Baseball stadium food exists in its own world. By some magical property, the food served up in our nation's ballparks transforms from ordinary hotdogs, nachos and street vendor fare into culinary wonders of the world. There are foods at a ballpark that can never be duplicated. Why does a ballpark hotdog simply taste better than any other hotdog on the planet? The world may never know, but the fact remains, ballpark food (while expensive and horribly bad for you) is a wonderful adventure for your tastebuds.

Riding on that wave, more and more modern ballparks have been taking advantage of their fans' love for ballpark food and expanding their offerings into unique (and absolutely delicious) offerings. For example, Target Field, the home to the Minnesota Twins (Go Twins!) has a varied menu full of culinary delights (this isn't your dad's ballpark menu). However, sometimes a ballpark can get carried away and begin to offer products that aren't revolutionary or even unique - just over the top. The Daily Meal has composed a list of the 10 most over the top stadium food offerings - and even a avid ballpark food lover such as myself can admit - these dishes go too far. Check out the full list HERE.

THAT is 10,000 calories worth of burger. (Serves 10 - 12) 


There is a lot of fraud and deception when it comes to retail settings. Commercials businesses are trying to sell their products to as many consumers as possible and they will adapt their message accordingly to assure that they can tap into each and every potential market. Even if that message 'bends' the truth from time to time.

The one place you think you're fairly safe from such marketing is the grocery store, however, right? Sure, while the products themselves may not be honest (advertising "gluten free" like it has some form of diet benefit) or (saying "whole wheat" when it is anything BUT whole wheat) but if your grocery store labels a certain cut of fish behind the butcher's counter as cod - then it's cod...right? Well, it turns out that might not always be the case.

Smartmoney.com recently ran a story on the 8 biggest food frauds at your local grocery store. Some are a result of less than honest grocers, some are the result of less than reputable suppliers. All are a reason for you to pay a little more attention to what you're really buying the next time you go to the grocery store. Check out the full story HERE.

Shelves and shelves of LIES! (*possibly) 


Foods that go to far, foods that are fraudulent - why not segue right into foods that don't deserve to exist anymore? That's right, there are certain foods that are simply overproduced, a mockery of what they're trying to duplicate or that just don't serve a purpose. For the most part, these products always exist in one place - you local mall's food court. Bon Appetit has drudged up 10 of those foods and is calling for them to be axed. Check out the 10 most 'ban worthy' food court offerings HERE.

Actually, ice cream doesn't really NEED improvement...thanks anyway. 


I told you it was a weird (and brief) week of culinary news. Hopefully our recipes this week won't follow that trend! (We're not planning on that happening - but you never know...) We've got a lot of recipes to share this week. Maggie will get us started on Tuesday night with a new variation on an American classic. I'll follow her on Wednesday night with a brand new use for one of my favorite food groups. Later on in the week, Maggie will share a recipe for a special treat that you're sure to love and I'll be sure to throw in a recipe for cornbread that we made up on the fly - with tasty results. That's 4 (4!) recipes for this week! There's sure to be something for everyone to enjoy in this batch of recipes. Stop in Tuesday night to see what Maggie has cooking. Until then,

~Cheers


Friday, April 20, 2012

Taco By Name Only

Good evening everyone! For the first time in a long while, we’re adding a third recipe to the weekly rotation. Tonight’s dish warranted its own special blog post simply because of the unique nature of this recipe. This recipe comes from the same “50 Taco Recipe” Food Network Magazine insert that last week’s egg and chorizo tacos dish came from. However, unlike last week, which had some foundation in Mexican cuisine, tonight’s dish is taco in name only. Let’s get cooking!


The Recipe: Sweet Potato Tacos
Original Recipe Found In: Food Network Magazine (50 Taco Recipe Insert)

What You’ll Need:
(Serves 4)

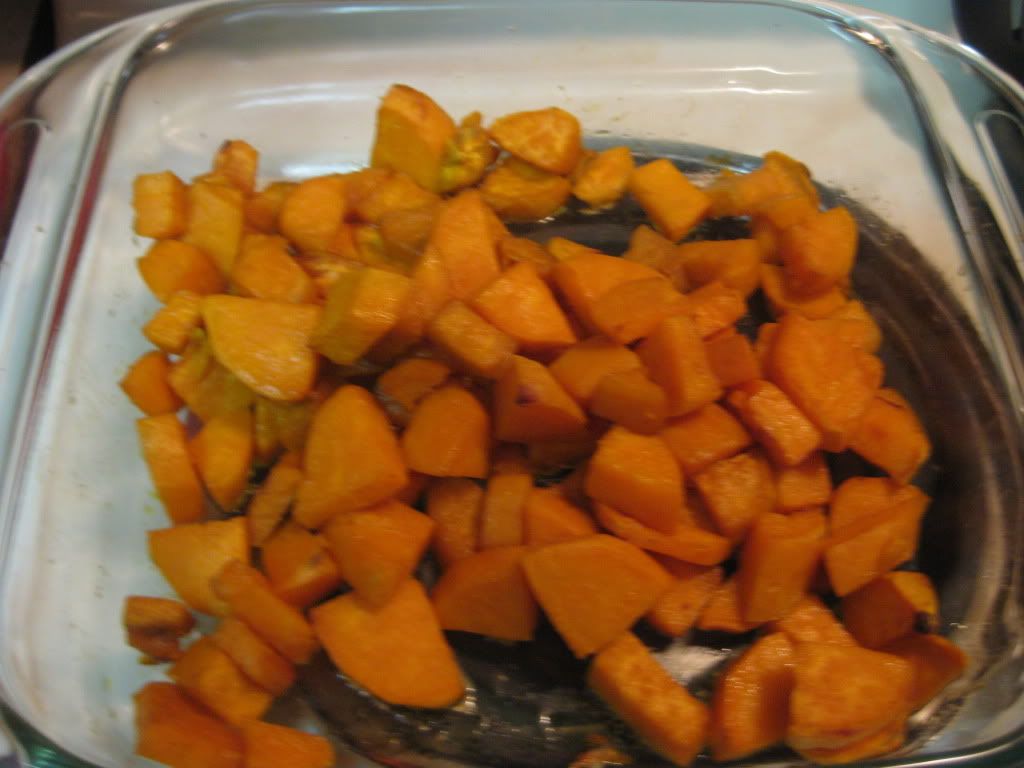
3 Cups Peeled, Diced Sweet Potatoes (Roughly 2-3 medium sweet potatoes)
1 Can Black Beans (Rinsed)
Low Fat Sour Cream
4 Flour Tortilla Shells

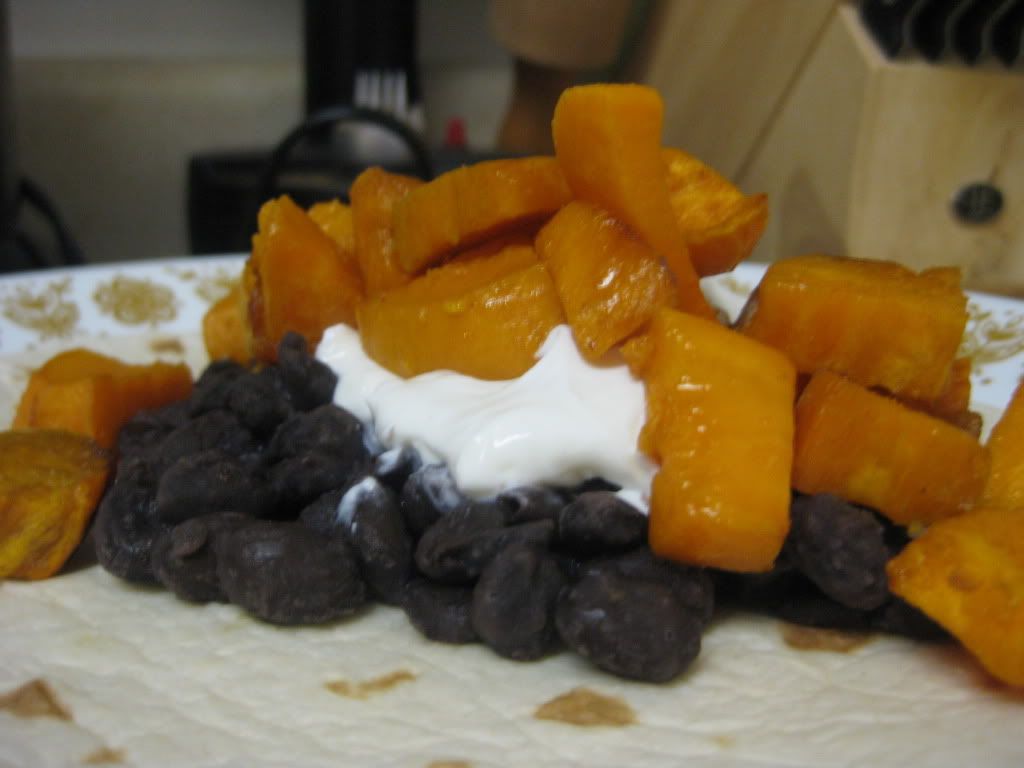
A few months ago, we tried a baked sweet potato recipe that used these very same ingredients, so we came into this recipe knowing that the flavor combination works well. If you haven’t even tried these three ingredients together, give it a shot before you judge. It’s surprising just how well these three blend together.

Preheat your oven to 425 degrees.

To begin, toss the sweet potatoes in a drizzling of olive oil and season with a pinch of chili powder. Place the sweet potatoes into a small roasting pan and into the oven to roast for about 30 to 45 minutes, or until they’ve become tender.


While the potatoes are cooking, drain your black beans and rinse them in a colander to remove any of the solution that the beans are packed in. (This water / sludge mix is very high in sodium. Rinsing the beans before cooking them allows you to reduce the sodium in the beans by about 20% depending on the manufacturer). Heat the beans until they are evenly cooked through (according to the directions on the can). Keep warm until the sweet potatoes are finished.

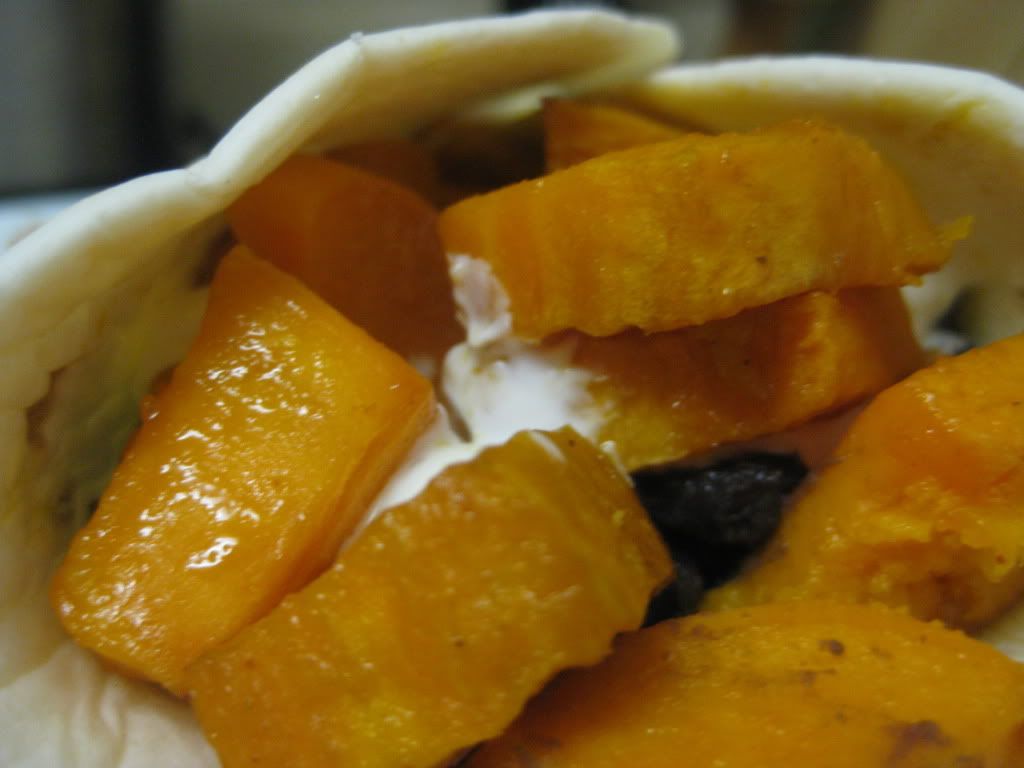
Once the sweet potatoes are tender and the beans are cooked, you can begin construction of these unique tacos. First, spread a spoonful of the black beans onto a (warmed) tortilla. Follow this with a generous helping of sweet potatoes and finally top the mixture off with a dollop of low fat sour cream. Roll the tortilla into a tight taco and enjoy!

The Results:


Like I mentioned in the opening, we have tried this flavor pairing before so it wasn’t a surprise when these tacos came out delicious as well. It’s truly hard to describe how well the black bean / sweet potato / sour cream mixture blends, to put it simply – it’s a harmonious union of flavor. This dish is a great way to get in your daily amount of protein and fiber without having to use any meat. With the flavor and texture of the black beans, you’ll hardly notice there isn’t an ounce of ground beef in this taco.

That’s all we have for you this week. We’re back next Monday with another installment of the culinary news in Around the Culinary World, followed by another week full of new and tasty recipes. Until then,

~Cheers

Wednesday, April 18, 2012

A New Version of Meat and Potatoes

Good evening everyone!  I, like Tyler, felt very ambitious this week when taking on my night of cooking.  As I was searching recipes, I came across one that I could do in a snap.  But I felt that it needed something a little bit more, not just the main course.  So tonight, I am making two (count 'em, TWO) recipes to share with you all.  Both are relatively easy and can make creating a meal easy as cake (although I won't be making cake, I'm not that ambitious.)

The Recipe:  Pan-Grilled Flank Steak with Soy-Mustard Sauce
Original Recipe Found In:  Cooking Light, April 2012

What You'll Need:

1 Pound Flank Steak
1 Teaspoon Canola Oil
1 1/2 Teaspoons Garlic (Minced)
2 Tablespoons Dijon Mustard
3/4 Teaspoon Sugar
1 1/2 Tablespoons Heavy Whipping Cream
2 Tablespoons Chopped Fresh Cilantro

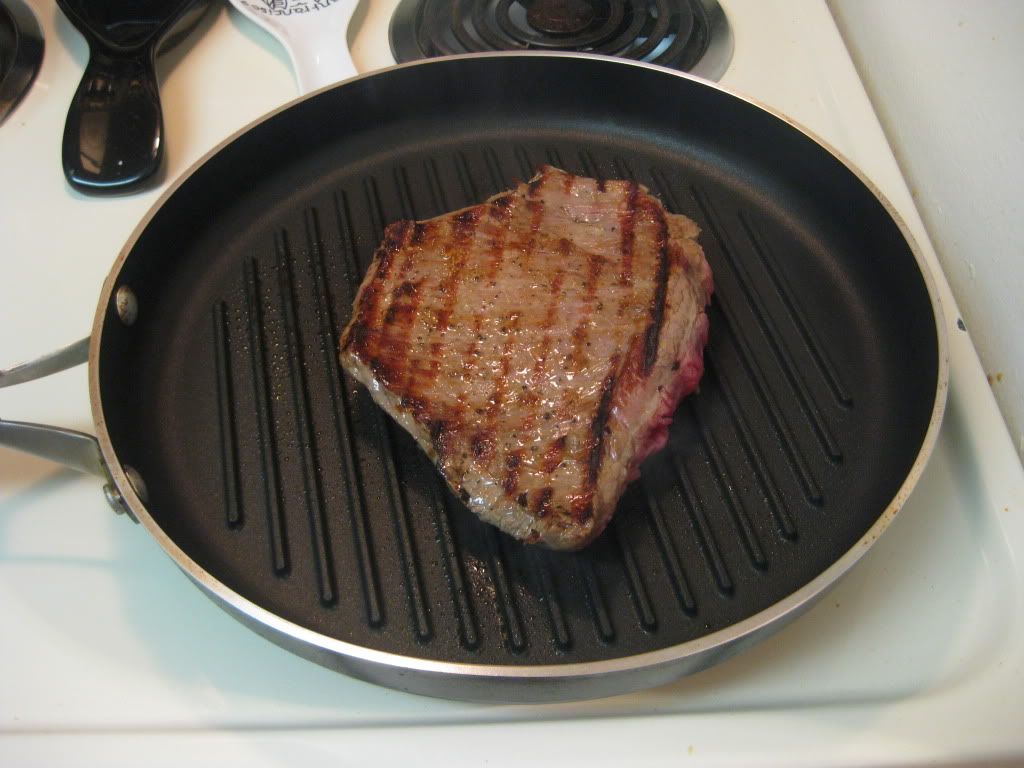
To start, heat a grill pan on the stove over high heat.  Sprinkle the steak with salt and pepper and lightly coat the grill pan with cooking spray.  Once the grill pan is nice and toasty, add the steak to the pan.  Grill each side of the steak for five minutes or until desired doneness (add 1 to 2 minutes for each level of doneness you're searching for. 5 minutes = medium rare, 6-7 minutes = medium - etc.)  Once the steak is done grilling, remove the steak from the grill and let it stand for three minutes.


Typically, when a recipe lists an exact time to grill a steak, it's usually for a medium rare doneness.  I enjoy a well done steak that's not completely burnt, meanwhile, Tyler enjoys a medium steak.  Finding a happy medium when grilling is always a task since we like our steaks two different ways.  Hopefully, with enough grilling opportunities I can perfect this daunting task (as such I am doing this evening.)


This was taken before the billows of smoke came from the steak.


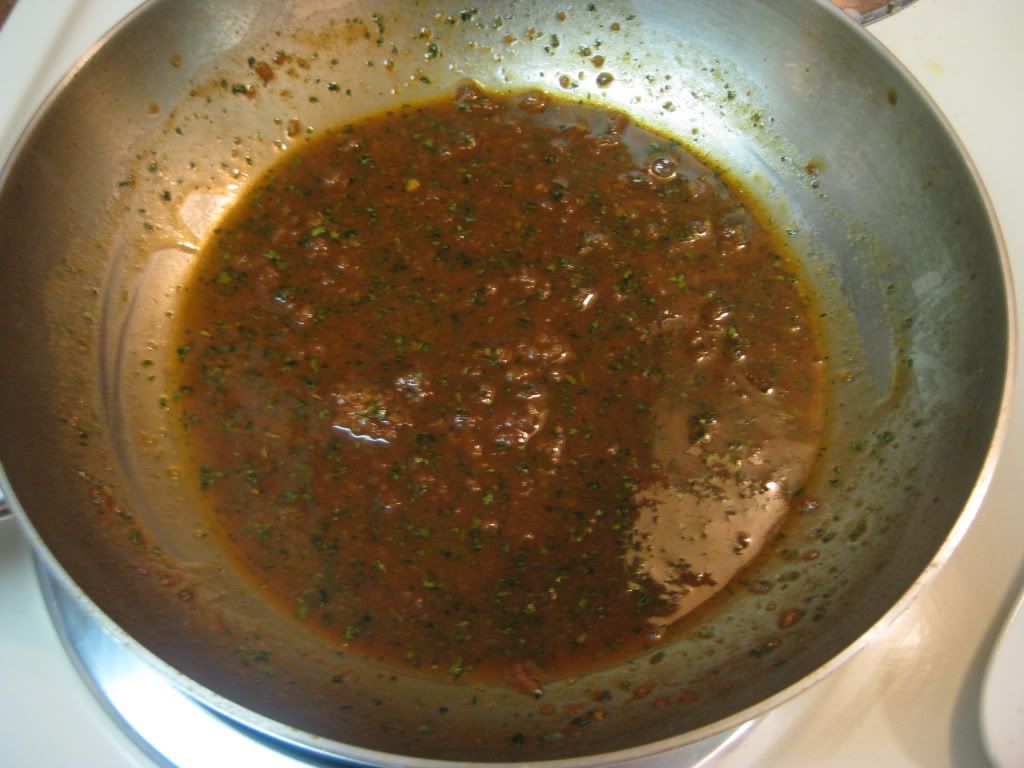
Once the steak is resting, heat a small skillet on the stove over medium-high heat.  Add the oil to the pan and swirl to coat.  Add the minced garlic and cook for 30 seconds, just long enough so the garlic becomes fragrant.  Add the soy sauce, mustard, and sugar.  Cook the mixture for one minute, or until it just begins to bubble.  Remove the pan from the heat and stir in the cream and one tablespoon of cilantro.


Doesn't look that great, but a surprise lurks beneath the surface.


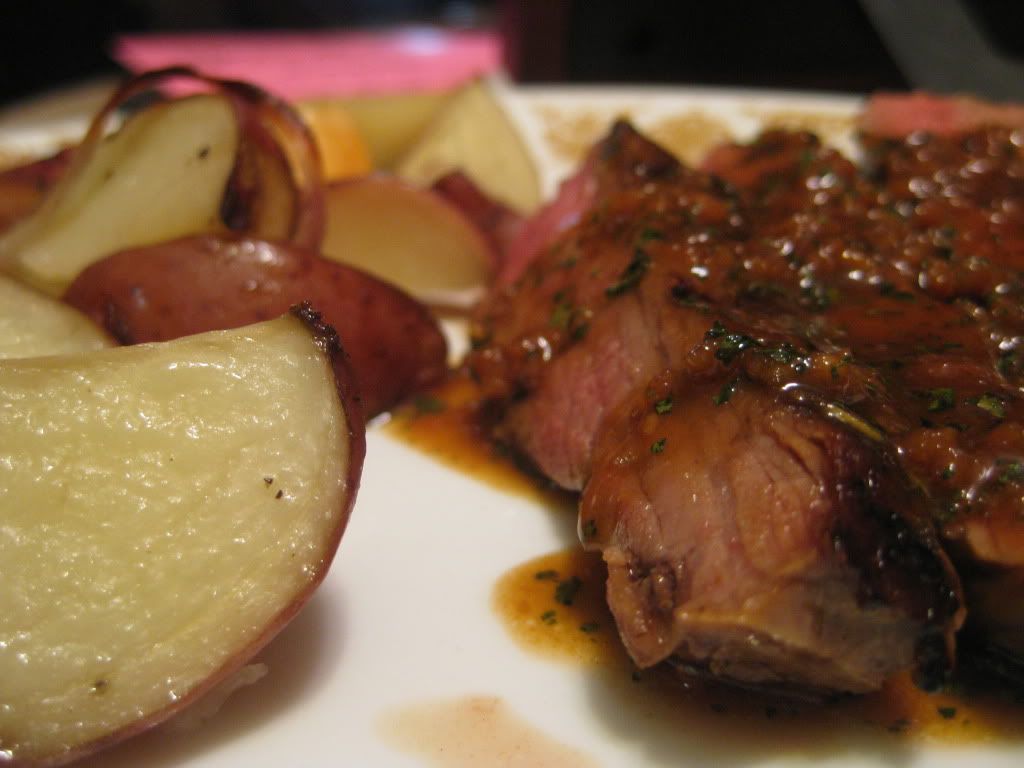
Returning to the steak, cut it diagonally, across the grain, into thin slices.  Sprinkle the steak with the remaining cilantro, serve with the sauce, and enjoy!

But that's not all!  As I mentioned, I had the time this evening to create another dish to have the perfect pair of recipes.

The Recipe:  Roasted Red Potatoes
Original Recipe Found In:  Cooking Light, April 2012

What You'll Need:

1 Tablespoon Olive Oil
2 Shallots (Sliced Thin)
1 (20 ounce) Bag Refrigerated Red Potato Wedges

(You can easily make your own red potato wedges by slicing up whole red potatoes - don't spend the extra money on pre-cut wedges when whole potatoes are much cheaper.)


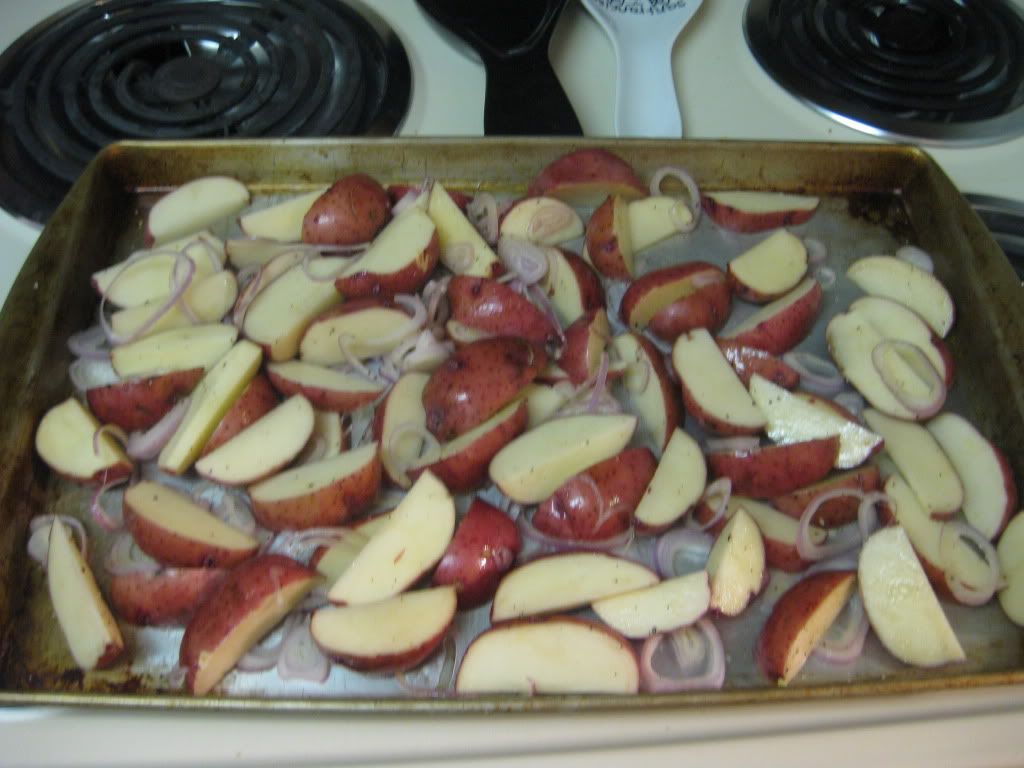
To start, preheat an oven to 400 degrees.  Next, combine all the ingredients on a large jelly roll pan (or baking sheet.)  Sprinkle the mixture with salt and pepper and toss well.  Roast the coated potatoes at 400 degrees for 20 minutes or until throughly cooked, stirring after 15 minutes.  Serve with the steak and enjoy!


The End Result:


Like I mentioned in the title, this a modern twist on the classic Meat and Potatoes dish.  Granted, you could take any meat and throw it with any style of potato.  But roasting the red potatoes with shallots gives it a bit of an oniony kick and adds a new depth of flavor that I haven't experienced before.  The steak, with the soy-mustard sauce, not only had a slight Asian influence, but made the steak super savory and rich.  The sauce was probably one of the best sauces I've had or made for a dish.  I tried pairing it with the potatoes and it didn't have that same delicious taste, so it's definitely "with only steak" type of sauce.  Overall, a great pairing of flavorings for an old favorite.

Join us tomorrow as Tyler tackles another recipe - but this one may be like something you have never tried before. Until then,


~Cheers!

Tuesday, April 17, 2012

Turkish Inspiration, Classic Chicken

Good evening everyone! As I mentioned last week, today I had a scheduled day off which means I had all day to get ambitious with a new recipe. After browsing a few of our favorite recipe sources, I came across the perfect recipe for just such a day - with an added bonus of it being from a completely new region (Turkey) of cuisine that we haven't tried before. Let's get cooking!


The Recipe: Roast Chicken With Pomegranate Glaze
Original Recipe Found On: Eatingwell.com

What You'll Need:

1 Tablespoon Ground Sumac*
1 Tablespoon Kosher Salt
1 - 4 Pound Chicken (Giblets / neck removed)
6 Cups Sliced, Cored Fennel (2-3 Large Bulbs)**
1 Large Yellow Onion (Chopped)
2 Teaspoons Extra Virgin Olive Oil
1/2 Cup Pomegranate Molasses***
2 Tablespoons Honey
1 Teaspoon Freshly Ground Pepper


* Sumac is made from the ground berries of a sumac plant. The sumac plant has over 250 different species ranging from relatively benign to poison oak, poison ivy and poison sumac. (Thankfully, the berries are not the poisonous part!) Sumac is common in Turkish and Arabic cuisine. Sumac berries add a lemon like or citrus flavor to whatever dish they are being added to. (Oddly, the smell like vinegar). Sumac will be somewhat hard to track down (speaking from experience) your best option is to visit your local Penzeys or mail order the spice from a large company. Alternatively, you can zest two lemons and substitute that for the sumac.


**If you are unable to find whole fennel bulbs, you can simply use the fennel seeds (at a much reduced quantity as the seeds pack more punch than the whole bulb).

*** Pomegranate molasses can be found in the vinegar aisle of many grocery stores (especially Trader Joe's & Whole Foods). However, it's also quite easy to make your own. Simply combine: 4 Cups of Pomegranate Juice, 1/2 Cup Sugar & 1 Tablespoon Lemon Juice in a small saucepan. Place over medium heat and stir constantly until the sugar has been absorbed. Once the sugar is dissolved, reduce the heat to medium low and allow the mixture to simmer (stirring occasionally) for about 1 hour (or an hour and a half) until it becomes thick and syrup like (it will cling to the back of a spoon). Keep an eye on the mixture after 40 minutes as it can  (and will) thicken up quickly. If it becomes too thick you'll end up with more of a gel and less of a molasses. Let the mixture cool for 30 minutes before transferring it to a glass jar and storing it in the refrigerator until needed.


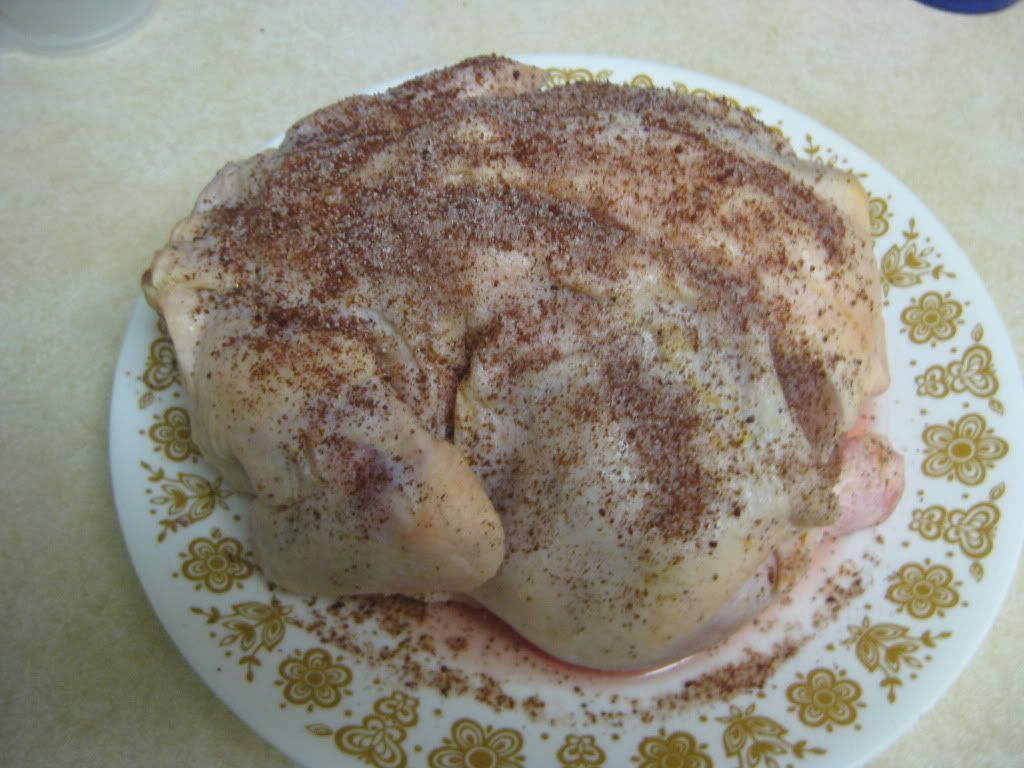
If you'd like, you can prepare the first step a day ahead of time. In a small bowl, combine the sumac and salt. Loosen the skin over the breast and thighs of the chicken and spread the mixture across the meat under the skin. (Depending on how cooperative your chicken is, you may have to use kitchen shears to slice your own pockets into the skin). Once the breast and thighs have been covered, sprinkle the remaining seasoning on the skin. Store the seasoned chicken in the refrigerator overnight or for at least 1 hour before cooking. This allows the salt/sumac to act as a marinade or brine and adds a great flavor to the meat while ensuring the moisture will stay inside the meat while cooking.


Once you're ready to cook, preheat your oven to 425 degrees.

Combine the yellow onion and fennel in the bottom of a large roasting pan and toss with the olive oil. Place the chicken, breast side up, on top of the vegetables.

Meanwhile, combine the pomegranate molasses, honey and pepper in a small bowl. Transfer about 1/2 of this mixture to a small saucepan and set aside for later. Reserve the other half for a later step.

Place the chicken in the oven (covered) and all it to cook for 20 minutes. After 20 minutes, remove the chicken from the pan, stir the vegetable mixture, rotate the chicken (so the breast side is now down) and return it to the roasting pan and back in the oven (covered) for another 20 minutes.

After the second 20 minute roast, remove the chicken again and stir the vegetable mixture. Place the chicken in the roasting pan (breast side up this time) and spread the reserved pomegranate sauce over the entire chicken. (A pastry brush is the best method as the molasses is predictably soft and sticky and otherwise cumbersome to manipulate). Reduce the oven temperature to 400 degrees and return the chicken to the oven (covered) until the thigh reaches 165 degrees on an instant read thermometer. The original recipe states this will take 20 to 30 minutes, however, our version took closer to 45. Monitor the chicken closely (I'd recommend taking the temperature during the basting portion of the recipe to gauge just how close the chicken is to being fully cooked).

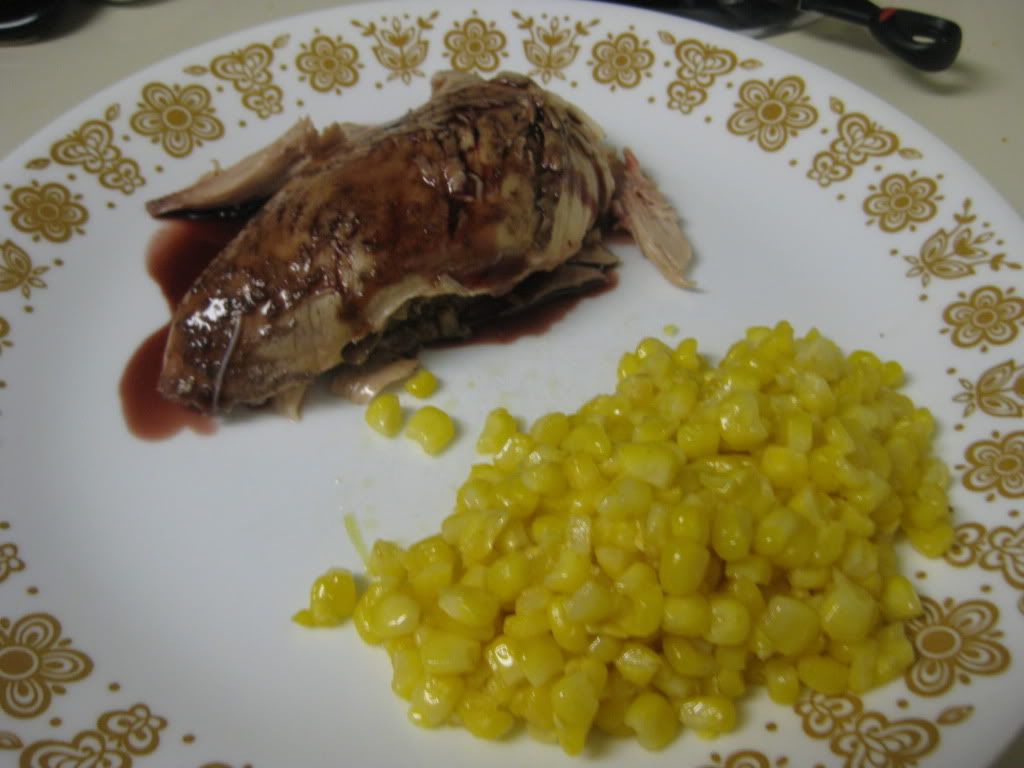
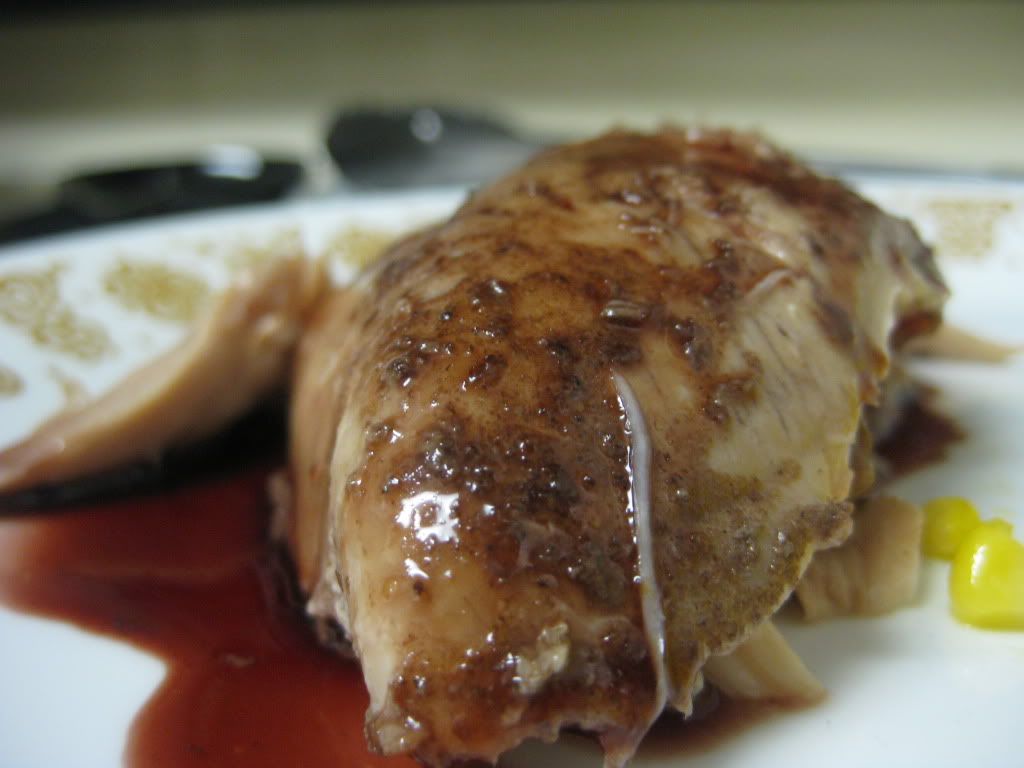
Once the chicken has reached the perfect temperature, remove it from the roasting pan and allow it to rest on a cutting board for 10 minutes before carving (so all those juices move back towards the center of the chicken and not all over the cutting board while you're carving). Warm the other half of the pomegranate sauce from earlier until it is heated through. Serve the carved chicken with a drizzling of the pomegranate glaze over the roasted onions. Enjoy!

The Results:


Refreshingly new and delicious! This recipe, while being technically just like every other roasted chicken dish we've tried had a flavor that we had never created before. The sumac berries were just as described - a bright and almost lemon like flavor (sort of lemon meets raspberry) that blended beautifully with the pomegranate glaze (which was very sweet, almost candy like). The end result was a bright, almost fruity chicken that was full of moisture and deep flavors. The onions (nicely caramelized after the roasting process) added a nice depth to each bite.

That's all we have for you this evening. Maggie will take to the kitchen tomorrow night with a dish she's excited to try. Stop in tomorrow night to see what she's cooking. Until then,

~Cheers
Monday, April 16, 2012

Around The Culinary World

Hello again everyone! Welcome back to a new week of recipes and excitement here at Out of the Culinary! We’re chocked full of recipes this week (we have three to share, just like old times!) Just like every week, however, we’ll get things started by sharing what’s up and coming in the culinary news. Let’s dive in!


We were doing so well too… It has been at least a month since our last food contamination recall related story and this week brings TWO (two!) of them.

Moon Marine USA Corp. (MMI) is recalling 58,828 pounds of raw yellowfin tuna following a large outbreak of salmonella poising that is believed to have been caused by their product. The tuna, sold in grocery stores and to restaurants, was labeled Nakaochi Scrape AA or AAA. While this product was unavailable to consumers for individual purchase – it likely could have been served to consumers via restaurant menu items or a grocery store’s prepared menu items (sushi platters – etc.) Making things a little more complicated – MMI notes that the product may have passed through multiple distributors and may not be clearly marked as to its origin.

So far, the FDA is reporting 116 illnesses believed to be linked to this contaminated tuna ranging from Washington DC to Louisiana. So far there have not been any deaths linked to this contamination and only 12 individuals have had to be hospitalized due to illness. However, the FDA notes that there is usually a 30 day lag between people becoming ill and the illness being reported to the FDA, so these numbers are likely to rise.

With the inability to confirm where this product ended up, it may be in your best interest to avoid raw yellowfin tuna from your favorite sushi place or grocery store for the time being. You can read more on this recall HERE.


Yesterday, Dole foods announced they are recalling over 756 cases of bagged lettuce due to the threat the product could be contaminated with salmonella. The company claims that the (possible) contaminated products were shipped to Alabama, Florida, Illinois, Indiana, Maryland, Massachusetts, Michigan, Mississippi, New York, North Carolina, Ohio, Pennsylvania, Tennessee, Virginia and Wisconsin.

(In a cruelly ironic twist – a majority of those same states are part of the yellowfin tuna recall too. Talk about a double whammy of contamination!)

The contaminated bags have a ‘Use by’ date of 4/11/2012. So far, no illnesses related to this possible contamination have been reported. For more on this outbreak (including UPC codes for the possible contaminated bags) look HERE.


The popular saying “An apple a day keeps the doctor away” has been around for years. The premise is simple; eating an apple everyday will keep you healthy and out of the doctor’s office. On the surface, it always seemed like this slogan was a simple way to subtly advertise the benefits of healthy eating. It turns out this slogan may not only be true (we’ve known apples are good for you for a long time after all) but it actually may be UNDERSELLING the apple. In fact, the apple seems to be the doctor repelling, weight loss causing super fruit that no one talks about. Check out more (including new research results) on how to eat healthy and lose weight with the simple apple HERE.

Wonder Fruit (Cape optional)


One major candy company was in the need of a brand refresh and decided to take things in an unusual direction; divorce. Check out the full details on how one major brand is tearing up their image and name in order to generate a little buzz HERE. (Somehow, I get the feeling things will all ‘work out’ in the end – but frankly, I don’t really care either way!)


Finally this week, we’ll continue or theme of featuring Kitchen Daily’s “Best Of” lists. We’ve looked at instant coffee, peanut butter, jelly – now the Kitchen Daily spotlight moves over to a favorite late night / movie time dish of many; microwave popcorn. Check out who reigns supreme in their taste tests HERE.


That’s all the news that’s fit to blog about this week. As I mentioned earlier, we’re going back to our “old” format this week (probably for this week only) and featuring three recipes. I’ll be cooking on Tuesday and Thursday and Maggie will bring her recipe to the blog on Wednesday. It’s sure to be a great week of cooking! Stop in tomorrow night to see what I have cooking. Until then,

~Cheers
Wednesday, April 11, 2012

A Simple Fix For Breakfast or Dinner

Good evening everyone! It’s well established that one of our all time favorite ‘themes’ to use in our recipes is Mexican. From the simple taco to casseroles and soups, if there’s a way to move in the great flavors from the Mexican cookbook into a recipe we like to try it once.


Tonight, I’m moving the Mexican flavor profile into another new category (for the blog anyway) – breakfast. Tonight’s recipe asks a simple question. What happens when you take the flavors of a taco (specifically chorizo tacos) and combine them with a classic breakfast food? Let’s find out together, shall we?


The Recipe: Egg & Chorizo Tacos

What You’ll Need:

¼ Pound Ground Chorizo Sausage
6 Eggs
Fresh Cilantro
4 Flour Tortillas
Mexican Cheese (Optional)

This certainly isn’t the first appearance of chorizo on our blog. In fact, we’ve used just about every variant of the spicy sausage available. From soy to traditional, it’s all been incorporated in some form. The ONLY variant we hadn’t used was ground chorizo – until tonight. Outside of the obvious difference (I.E. it’s ground) there is little difference between ground chorizo and traditional chorizo sausage. Ever grocery store varies slightly, but odds are you will find ground chorizo in your grocer’s sausage or Mexican section (near the tortillas)


To begin, add the chorizo to a large (12 inch) non stick skillet over medium high heat. Cook the chorizo, stirring regularly, until it begins to brown. This should take about 5 to 10 minutes. At first, it will be a little hard to determine when the chorizo is actually ‘browned’ as the sausage is predominately a reddish-orange hue. (Due to the paprika in the sausage) However, as it cooks, the sausage will darken slightly and actually start to look just like browned hamburger.


While the chorizo browns, crack your eggs into a medium mixing bowl and lightly beat with a wire whisk until they are combined. If you’re feeling adventurous, you can add a light sprinkling of Spanish cheese into this egg mixture to add a little variety to mixture.

(Side Note: This recipe could very easily be coverted to an omelte by adding a little milk to the egg mixture and omitting the tortillas shell entirely.)

Once the chorizo has evenly browned, carefully add the egg mixture into the skillet – making sure to evenly distribute the eggs across the entire skillet. Reduce the heat to medium and allow the mixture to simmer until the eggs set (I.E. become firm to the touch). If you find that the eggs are not cooking evenly (depending on the quality of your skillet, the edges could set well before the center) reduce the heat to medium low – that should lower the heat at the edges of the skillet, preventing the eggs on the other portion from overcooking. (You may have to scramble the eggs slightly to expedite the process.

Once the eggs have set to your desired level, serve the mixture into warmed tortillas (see note below) and top with a pinch of fresh cilantro and a dash of cheese (optional). Serve and enjoy!

(Note: If you prefer a crispier tortilla, toss them onto a lightly oil grill pan on high heat for about 3 minutes. That should give the exterior of the tortilla a nice crispy consistancy while keeping the natural soft pliability of the tortilla in place).


The Results:


The beauty of tacos is that they’re are almost always a quick and easy recipe, making them great for weeknight meals or just an easy “craving fix”. At the same time, they can be amazingly complex and versatile; adapting to any flavor combination or situation you can conjure up.

These tacos continue that traditional. While they were amazingly easy to prepare, they managed to create this great flavor mash-up of both breakfast and dinner. The spicy chorizo was neutralized nicely by the fluffy eggs, creating the perfect blend of seasoning and heat. The Mexican cheese was not originally called for in this recipe, but I’m glad I added it as it created a whole new layer of flavoring to enjoy.

That’s all we have for you this week. We’re back next week with brand new recipes – I’ll actually have a full day off next week, meaning my recipe is sure to be highly ambitious (I tend to get that way when given the whole day to cook). As always, we’ll start the week off with a trip Around The Culinary World. Until then,

~Cheers
Tuesday, April 10, 2012

Add Another to the Tasty Total

Good evening everyone!  We've had our fair share of mac'n'cheese adaptations here on the blog.  Whether it's been baked or as a pizza crust, we've explored the endless variations of this classic American dish.  Tonight, I'm exploring yet another version of this dish, one that will have fans of spicy dishes of our blog very excited.  I am also excited about this dish, as it will not only incorporate our friend, mac'n'cheese, but another tried and true partner of the blog.

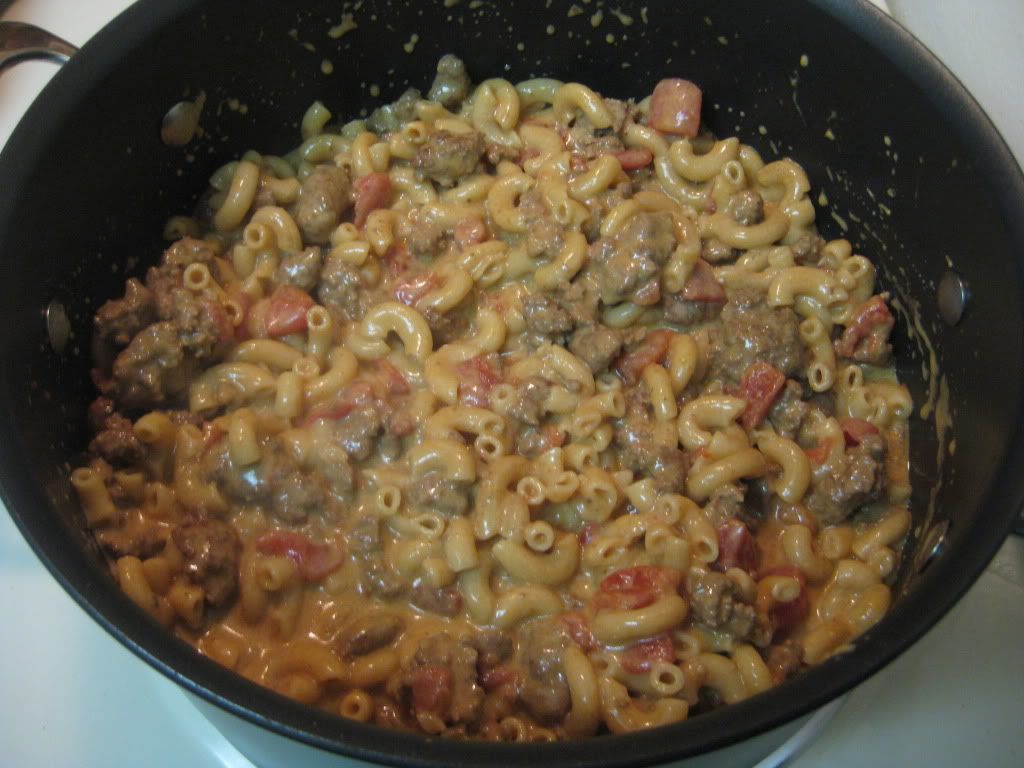
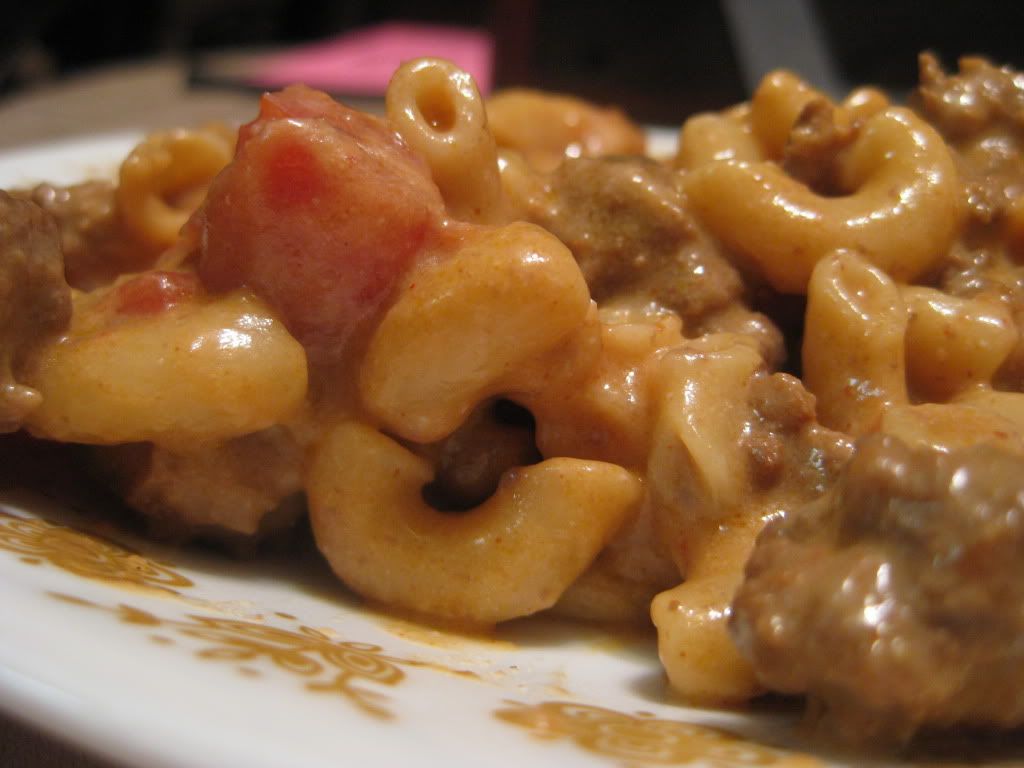
The Recipe:  Chili-Cheese Mac
Original Recipe Found In:  Cooking Light, April 2012

What You'll Need:

1 Teaspoon Canola Oil
3/4 Pound Ground Round
1 Teaspoon Garlic Powder
1 Teaspoon Ground Coriander
1 Teaspoon Ground Cumin
2 Teaspoons Chili Powder
2 Cups fat-free, lower sodium Beef Broth
1 Cup Water
1 (10 ounce) can mild diced Tomatoes and Green Chiles, undrained
8 Ounces uncooked Elbow Macaroni
1/2 Cup Fat-Free Milk
4 Ounces 1/3-less-fat Cream Cheese
4.5 Ounces finely shredded reduced-fat sharp Cheddar Cheese

*Note:  Since we don't want our mouths to be completely on fire whilst eating this dish, we opted for diced tomatoes sans green chiles.  We figured the dish would have a milder taste without the green chiles.


I think the reason why there are so many adaptations of the classic mac'n'cheese recipe is that one: it's a versatile dish.  You can add almost anything to it and it will add an extra 'oomph' to the standard fare.  Throw peas in it for an extra serving of vegetables or add tuna for a bit of different flavor (my favorite - thanks Dad!), it will still be great.  And two: it's easy to change it into something completely different and yet have that same mac'n'cheese appeal.  A four cheese pasta dish could have some exquisite name, but in the end, it's still noodles with cheese.  Anyway, enough waxing about the dish, let's get cooking!


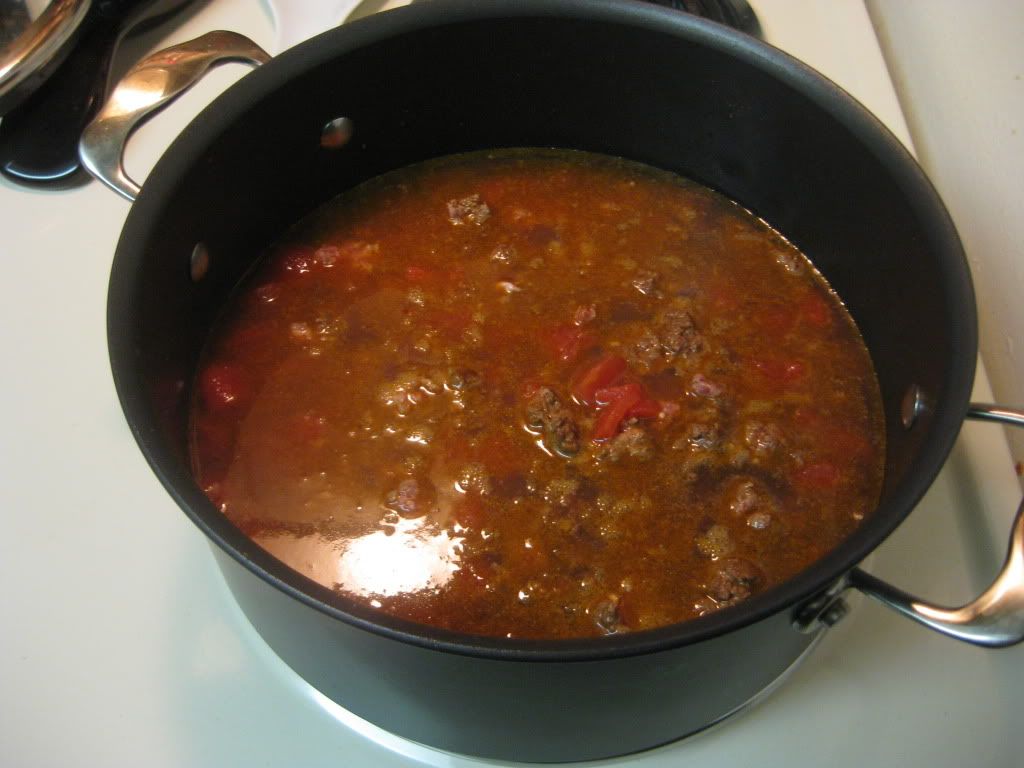
To start, heat the oil in a Dutch oven over medium high heat.  Add the beef, garlic powder, ground coriander, ground cumin, and chili powder and cook for three minutes, crumbling up the beef so it gets cooked evenly.  Add the broth, water, and tomatoes.  Bring this combination to a boil.  Stir in the macaroni and cover with a lid.  Cook for 10 minutes or until the macaroni is done cooking.


Getting ready for the macaroni noodles


Next, add the milk and cream cheese to a saucepan and heat over medium high heat.  Cook for four minutes or until the cheese has melted.  You'll want to keep an eye on the saucepan - if the cheese and milk get overheated, you'll have scalded lactose products and not a very good smell arising from the kitchen.  After this combination is throughly combined, remove the saucepan from the heat.  Slowly stir in the cheddar, careful again not to burn the cheese.  After both pots are done cooking, add the cheese sauce to the macaroni mixture and toss to coat well.  Serve and enjoy!

Homemade cheese sauce!


The End Result:


Oh, my, tasty!  I originally thought that with all the spices going into this dish it would be too hot to handle.  But actually it's incredibly flavorful and very tasty.  It definitely had a unique flavor that leaves normal mac'n'cheese in the dust.  Making your own cheese sauce is something quite to behold too and it won't leave a 'processed' taste in your mouth.  Everything seems fresh and not from a box.  I would make this again with some additions to make it even more of a better dish.


Join us tomorrow as Tyler tackles a not-so standard Mexican regular.  Until then,


~Cheers!

Monday, April 9, 2012

Around The Culinary World

Hello again everyone! Welcome to another Monday and a brand new edition of Around the Culinary World. For those who are new to the site, we like to highlight a few culinary based stories each and every Monday, just to keep up with what’s happening in the culinary world. This week features a plethora of stories across the culinary news – there’s sure to be something for everyone to enjoy. Let’s dive into the culinary news for this week!


About a month ago, we talked about the fraudulent word of olive oil and how legitimate producers were being forced out of the market by lower quality products advertising themselves as high end (or extra virgin) olive oil. There’s even a book covering the topic – “Extra Virginity: The Sublime & Scandalous World of Olive Oil”. Recently, the Journal of Food Science took a look at the food industry as a whole and found that there are quite a few products that are heavily copied or highly fraudulent. Using the foodfraud.org database, the April issue of the Journal of Food Science composed a list of the most ‘adulterated’ food ingredients / products. Check out the full list HERE. Obviously, olive oil tops the list, but there are quite a few other products here that could surprise you.


Odwalla Milk brand has announced a nation wide recall of their chocolate protein ‘monster’ drink after reports that some consumers are suffering allergic reactions to the product. It seems the milk might have been contaminated with peanuts or some other tree nut during production, prompting allergic reactions from those who suffer allergies from the legumes. This recall affects all products with the ‘best by’ date on or prior to May 23. Read more about this recall HERE.


Easter and ham go together like turkey and Thanksgiving. It’s likely that a large majority of Easter gatherings yesterday had some form of baked or roasted ham on the table for dinner. Equally likely is the large quantity of leftover baked or roasted ham today. So, what do you do with that leftover Easter ham? Kitchen Daily has composed a short list of recipes featuring all sorts of uses for that extra pork in the refrigerator. Check them out HERE.


A few months ago we shared the story regarding a change in a San Francisco law that prevented Burger King and McDonald’s from including toys in their kid’s meals. Critics argued that the inclusion of the toy was a way to entice children to purchase the low quality food, thereby contributing to the obesity problem that America’s youth are currently facing. McDonald’s responded by simply ‘charging’ for the toy (by adding .10 to the cost of the meal, then turning around and donating that .10 to their Ronald McDonald charity) At the time, I commented that while the concept was a nice idea (attempting to reduce the consumption of fast food by children) the method to do so was misplaced and probably a bit of an overreach.

Since that time, a lawsuit was placed in the state of California, challenging the right of McDonald’s (specifically named in this lawsuit) to give away toys with their Happy Meals in the state of California. Once again, the company was accused of using the toys as a way to lure children into their restaurants and purchase their food. However, on Wednesday, a San Francisco judge threw out the lawsuit, effectively ending the quest to ban toys in kid’s meals in California.

My 2 cents on this story are pretty straightforward. Yes, children should be encouraged to avoid a reliance on fast food. No, I don’t think banning toys from the meals will make any difference in this movement. First and foremost, the fast food producer will simply “charge” for the toy to skirt around the new law. Secondly, the children are not making these purchases, their parents are. So, in order to slow the consumption of fast food by children, I believe the movement has to start by targeting parents – not kids. Education for both parents and kids about the quality of food are a great way to start. Banning toys seems like the wrong way to fix what is otherwise a good idea.


Finally, continuing in our recent trend of “best of stories” we have a product that makes an appearance in quite a few kitchens across the world; instant coffee. Yes, the simple to brew pick-me-up is a popular (if not critical) element in the average worker’s morning routine. With great popularity comes great competition, and the instant coffee market greatly reflects that. There are literally hundreds of instant coffee choices in each and every super market and corner store across the planet. So, which brand of instant coffee rises above the rest? Check out the taste test results HERE.

Without this, much of America would fail to function before 11 AM


That’s all the news that’s fit to blog about this week. We’ve got a unique collection of recipes to share this week. Maggie will start us off on Tuesday with a brand new recipe that plays into her ‘wheelhouse’ but adds a new twist. I’ll follow her on Wednesday with a Mexican dish that I am very eager to try. It’s sure to be a fun week of cooking, so be sure to stop in Tuesday night to see what’s on the menu. Until then,


~Cheers
Wednesday, April 4, 2012

Tasty Little Pasta Shells

Good evening everyone! The weather has returned to a bit of normalcy here in the greater Des Moines metro. Last week we were reaching 80+ degrees and now, we are a bit cooler in the high 60's. I wouldn't mind if the temperatures stayed like this all summer, but we all know that it probably won't. With temperatures and nights like these, it's nice to not slave all evening over a dish and not being able to enjoy the weather. Tonight's recipe is no exception: a light pasta that won't weigh you down and it can be created in a snap. Plus mixing different flavor combinations will make this a unique dish. 

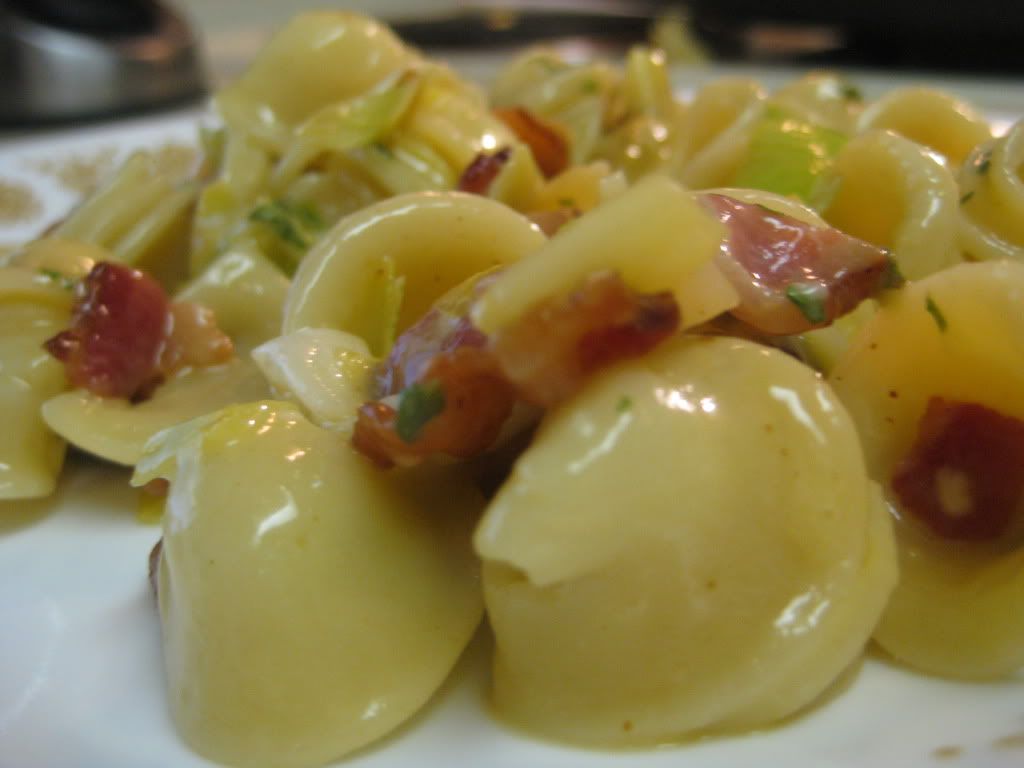
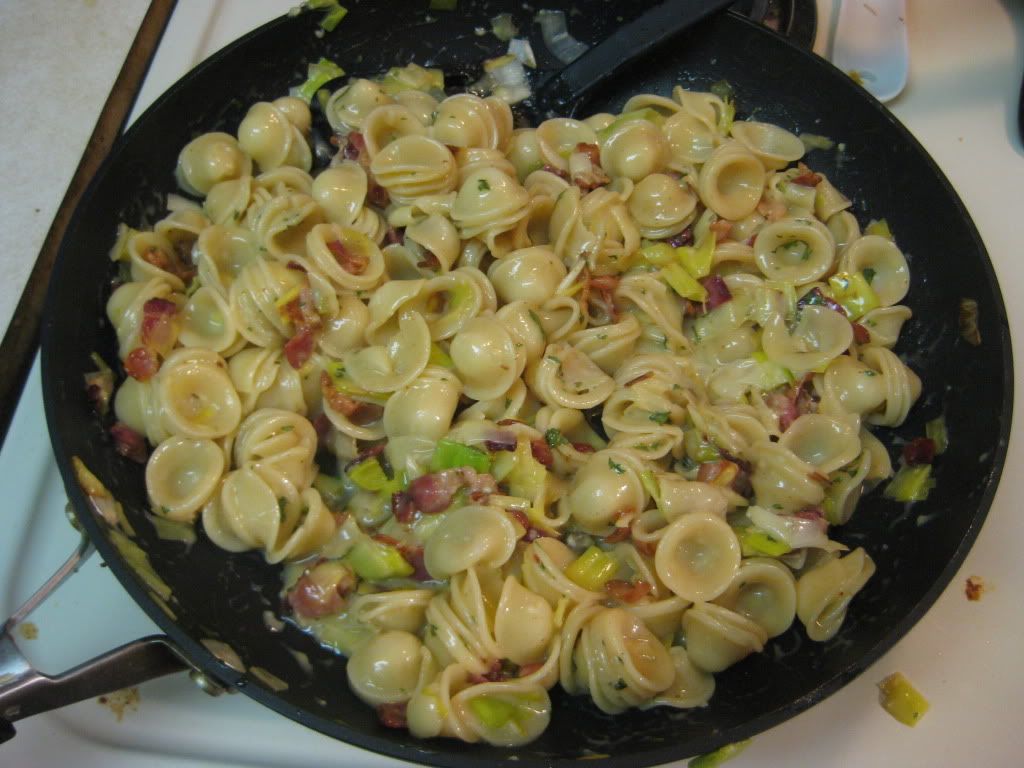
The Recipe: Orecchiette Carbonara with Leeks
Original Recipe Found In: Bon Appetit Pasta Perfect

What You'll Need:

4 Applewood-Smoked Bacon slices, diced
2 medium Leeks, halved lengthwise, cut crosswise into 1/3 inch pieces
10 Ounces Orecchiette (or small shell pasta)
2 large Eggs, room temperature
1/2 Cup freshly grated Parmesan cheese
1 Tablespoon freshly chopped Italian Parsley

To start, cook the bacon in a large skillet over medium high heat until the bacon is crispy, which should take about 8 minutes. Transfer the bacon to a paper towel lined plate to drain. Reserve two tablespoons of the bacon drippings in the skillet. Add the leeks to the skillet and sauté until they are softened, about six minutes. 


Meanwhile, bring a pot of salted water to boil and add the orecchiette. Cook the pasta to package directions or al dente. Reserve a 1/2 cup of pasta water before draining the pasta in a colander and reserve until later. Orecchiette pasta is shaped like little ears, which makes them distinctly different in the pasta world. Last time I used them (almost two years ago!), they were incredibly hard to find. Since our local Trader Joe's opened a year and a half ago, they have opened up a lot of different food options that we weren't able to use before. This includes the orecchiette, which was mingled together with regular pastas, such as spaghetti and penne. 


Nothing like multitasking during cooking!


Next, in a small bowl, whisk the eggs and Parmesan cheese together to blend. Slowly add a 1/4 cup of the reserved pasta water into this mixture.  Add the drained pasta to the skillet with the leeks and stir to heat the combination through. Pour the egg mixture to the pasta and leeks and stir until the sauce is just creamy and the eggs are no longer raw. This should take about two minutes: if the sauce is still runny, keep the skillet on over very low heat. But do not, I repeat, DO NOT overcook - the eggs with curdle and not create a sauce. Add the remaining pasta water if the mixture looks dry. Add the bacon and parsley and stir to incorporate. Serve with sprinkled Parmesan cheese and enjoy!


The End Result:


I've never created a carbonara before and I had my reservations about creating a silky, smooth sauce from just eggs and cheese. But lo and behold, it was actually quite simple and not that daunting of a task. The orecchiette soaks up the sauce and adheres to the leeks and the bacon. Since that flavor is soaked in, it just melts in your mouth and creates something completely unique. I would make this again in a heartbeat and I'm just thrilled to have an easy, great tasting pasta dish added to my 'return to' recipes.


That's all we have for you this week. We hope we have stirred some culinary inspiration into your thoughts and you can share it with you and yours. Join us on Monday for another excursion for Around the Culinary World. Until then,


~Cheers!

Tuesday, April 3, 2012

Dressing Up The Pig

Good evening everyone! Ever since we introduced pork to our 'menu' late last year, we've been experimenting with its rather versatile flavor. While the standard pork chop on its own is bland and uninspiring (dry, sometimes tough (as it is easily overcooked) and overall a forgettable flavor) pork spruced up with a sweet or citrus inspired glaze becomes a culinary delight. We've tried both ends of the flavor palette for pork; sweet in our Skillet Glazed Pork Chops recipe and citrusy in our Pineapple Pork Chop recipe. Tonight, we're blending the two by creating a glaze with a sweet apple cider and adding natural 'sour' flavors from a granny smith apple. Will pork's amazing versatility shine again? Let's find out:

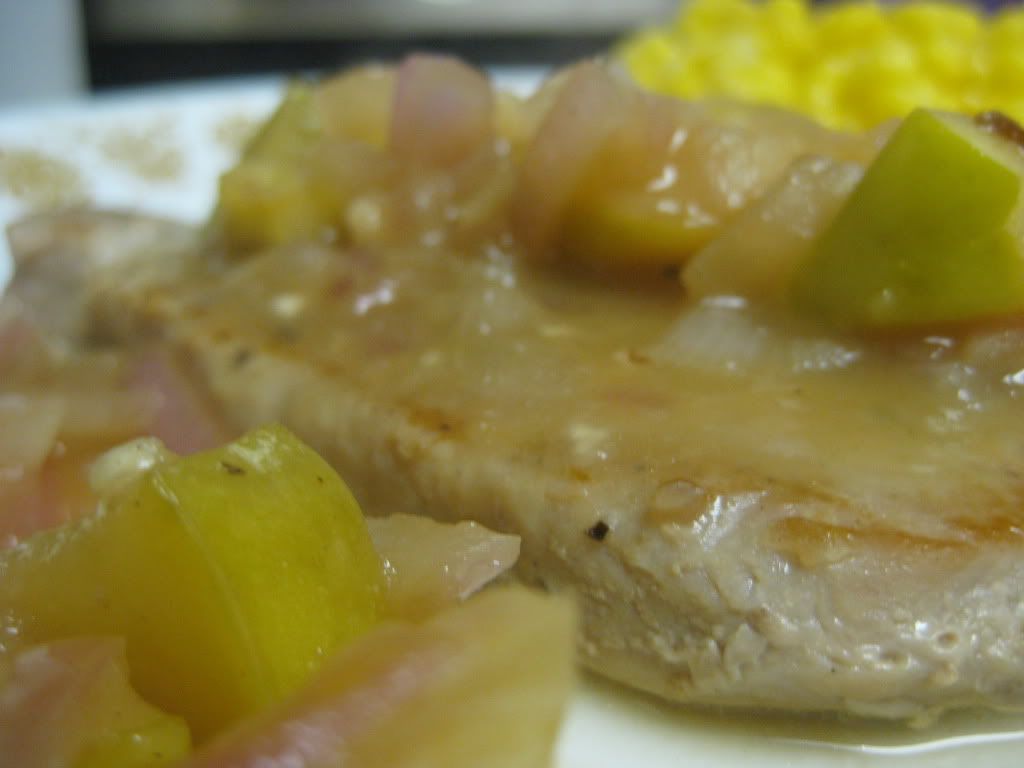
The Recipe: Apple Cider Pork Chops
Original Recipe Found On: foodnetwork.com

What You'll Need:

2-4 Boneless Pork Loin Chops (Trimmed of fat, about 1/2 inch thick preferred)
2 Teaspoons Fresh Sage (1/2 Teaspoon dried)
1 Tablespoon Extra Virgin Olive Oil (Divided)
1 Medium Red Onion (Cut into 1/2 inch wedges)
1 Granny Smith Apple (Cut into 1/2 inch pieces)
1/2 Teaspoon All Purpose Flour
3/4 Cup Apple Cider

Begin by lightly rubbing both sides of the pork chops with the sage (if fresh) or sprinkling the sage evenly over all sides (if dried). Lightly season the pork chops (again, both sides) with a sprinkling of salt and pepper. Set the pork chops aside.

In a large (12 inch) non stick skillet, add 1 teaspoon of olive oil and set the heat to high. Warm the oil until it begins to shimmer lightly before adding the pork to the skillet. Allow the pork to cook, undisturbed, for about 3 minutes on each side, or until a nice golden brown crust forms on the edges of the pork chop.


Remove the pork from the skillet and transfer the chops to a plate lightly tented with aluminum foil. The original recipe calls for you to wipe the skillet clean with a paper towel and add the remaining 2 teaspoons of olive oil to the skillet. However, I prefer to leave the residue behind (it's great flavor) and simply add the oil right in on top of it all. Reduce the heat to medium high and add the onion and apples. Allow this mixture to cook for about 5 or until the onions become translucent and the apples have slightly browned. Sprinkle this mixture lightly with salt and add the cider to the skillet.


Bring the mixture to a light boil before returning your pork to the skillet. Nestle the pork chops in amongst the apple and onion mixture and allow them to cook for 4 to 6 minutes, making sure to turn the chops about halfway through cooking. Once the chops have reached 145 degrees at their thickest point, they're ready to serve. Drizzle the chops with the sauce from the pan and enjoy. This dish pairs well with mashed potatoes or sweet corn.

*Note - if you'd like a thicker sauce all you have to do is add a little flour at the end. Just before serving, remove the pork chops from the skillet and stir in 1/2 teaspoon to 1 teaspoon of all purpose flour. This should help thicken up the sauce, creating a nice glaze rather than the 'soupy' result the original recipe produces. This step isn't part of the standard recipe, but we highly recommend this light deviation - the end sauce is much more enjoyable when it's slightly thicker.

The Results:


There's a reason they also stick an apple in the pig's mouth when roasting it over an open fire - apples and pigs go together splendidly!
As far as a nice and easy weeknight meal goes - it doesn't get better than this. We've shown with past recipes that the best way to keep pork moist is to allow it to stew in some form of sauce or juice and that method continues to work in this dish. The result was an amazing juicy pork chop that was infused with a perfect blend of sweet (from the cider) and sour (granny smith) the natural 'bite' of the red onion managed to play a great mediator to all of the flavors - resulting in a tasty and quick recipe that the whole family can enjoy.

That's all we have for you tonight. Maggie takes to the kitchen tomorrow night with a pasta dish that she has been eagerly waiting to cook up. It's sure to be another tasty dish, so stop in and see what she's got cooking tomorrow night. Until then,

~Cheers
Monday, April 2, 2012

Around The Culinary World

Hello again everyone! I find it hard to believe that it is already April, but that's what the calendar is telling me this morning. It seems like only a few weeks ago it was still snowy and cold outside and now we're waking up to 60's, finding highs in the 80's and having a very pleasant spring here in the greater midwestern states. This beautiful weather has me excited to return to the farmer's market in downtown Des Moines - Saturday mornings in the spring and summer just aren't complete without wandering the blocks of vendors and picking out the freshest foods...

I digress! It's Monday once again, meaning the first (and most important) thing we have to do is take a trip around the world of culinary news. This week, we have stories ranging from the healthy change of one grocer's supply to kitchen organization tips all the way to the secret behind one of life's greatest mysteries. Let's dive in!


Whole Foods is already synonymous with fresh and healthy ingredients. A majority of their products are organic, or are at the very least top quality and naturally made. This past week, Whole Foods announced they would be taking another step to keep that fresh, natural reputation going. The company announced that they would only be selling sustainable fish by Earth Day of this year. This is a big move for any grocery supplier, especially one with the size of Whole Foods. As the commercial economy (grocers) begins to move to sustainable fish, the impact on the environment and demand for large scale wild fishing should decrease. The one surprising point in all of this (to me) is that Whole Foods isn't ALREADY only selling 100% sustainable fish. Given their reputation and business philosophy when it comes to ingredients and their products, one would think this move would have been completed before any other grocer or big box store. You can read more about this change for Whole Foods HERE.


One of my favorite beverages (when I'm 'rewarding' myself) is root beer. To me, there are very few carbonated beverages out there that can compare to the great, deep flavors of a well made root beer. Just like any other product, however, there is a lot of competition in the root beer market. While I prefer the micro-brewed root beers (small manufacturers seem to have the best product) they are harder to come by than the big producers. (Especially when you're at a restaurant). So, which of the big producers is the top dog when it comes to root beer? By now, we all know the only way to settle that dispute for sure is via a Kitchen Daily taste test. Check out the results HERE.



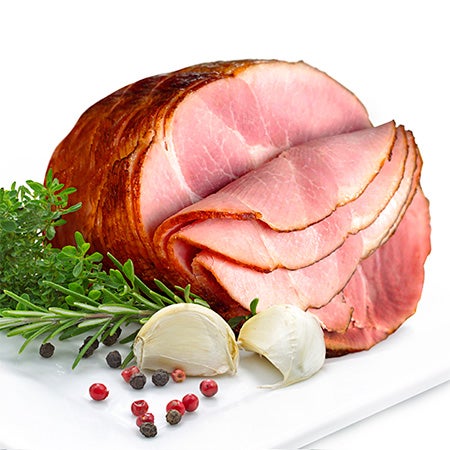
Life has many unanswered questions. Why are we here? Which culture has the true answer to religion? What dictates human nature and decision making? What if I were to tell you that we were going to find an answer to one of life's biggest unknowns today? That's right, one of the big questions will today find an answer. What's the question you ask? Why is ham pink? (Told you it was a biggie) See the answer for yourself HERE.


Flour is a staple in many recipes. But we commonly see folks confused as to which type of flour to use or why we always recommend a certain type of all purpose flour (unbleached). Why can't you just use this flour? Why don't we use whole wheat flour in everything if it's so much better than everything else? All of those questions and more can be answered by reading THIS flour breakdown. It looks at the most common types of flour, explains their uses and culinary properties. It's a good refresher for those who don't use flour very often, but want to the best result when they do.


With the season officially being spring, now's the time when most people do a little organizing. From cleaning out their closets to simply giving their house and old fashioned scrub down, spring cleaning is traditional endeavor that signifies the changing of the seasons. The one area that could use a good spring clean from time to time is your kitchen. From overcrowded shelves to expired ingredients, the kitchen needs a good "scrub down" of it's own just to keep things running smoothly. While you're at it, why not work on organizing your kitchen a little better? Kitchen Daily has some great organization products to help you do just that. They may even help take the crowded spice rack and turn it into an organizational masterpiece. Check out their tips on organization HERE.


That's all the news that's fit to blog about this week. I'm taking to the kitchen tomorrow night with a brand new recipe featuring a flavor pairing that signifies spring. Maggie will follow me on Wednesday night with a dish that is sure to delight. Until then,

~Cheers