Wednesday, April 24, 2013

Beer Butt Chicken

Good evening everyone! Most at home chefs have one or two recipes that they've always wanted to try, but just have never gotten around to cooking. Maybe it's something daunting like beef bourguignon or beef wellington. Maybe it features an ingredient you're not comfortable with using. Or, maybe you just don't have the necessary tools to create the recipe properly.

For me, the latter is accurate. I have one recipe that I've wanted to make for three years. A dish that I have found multiple variants for, but have never had the tools to tackle. Tonight that ends - tonight, I'm making...

Beer butt chicken

Laugh all you want, but this delightfully simple premise of roasting chicken on a grill has always fascinated me. We're not ones to shy away from using alcohol in our cooking and the process of slow roasting a chicken while marinating it inside with a can of beer just seemed like such a brilliant way to develop a great flavored chicken. Alas, we didn't have a grill to treat this recipe properly. As we've documented over the past two weeks - we now HAVE a grill and we are using it. Tonight, I'm crossing off one of my dream recipes. Let's get cooking!

The Recipe: Beer Butt Chicken
Original Recipe From: Jamie's America

What You'll Need:
(Serves 4)

1 Large Whole Chicken (3.5 LBS and up)
1 Can of Pilsner Beer
1 Teaspoon Ground Fennel
1 Teaspoon Ground Cumin
1 Teaspoon Smoked Paprika
1 Teaspoon Light Brown Sugar
1 Teaspoon Mild Chili Powder
Olive Oil

Begin by preheating your grill and cleaning the grates. Your manufacturer's recommendation may vary, but our grill maker (Weber) suggests brining the grill to 500 degrees prior to cooking.

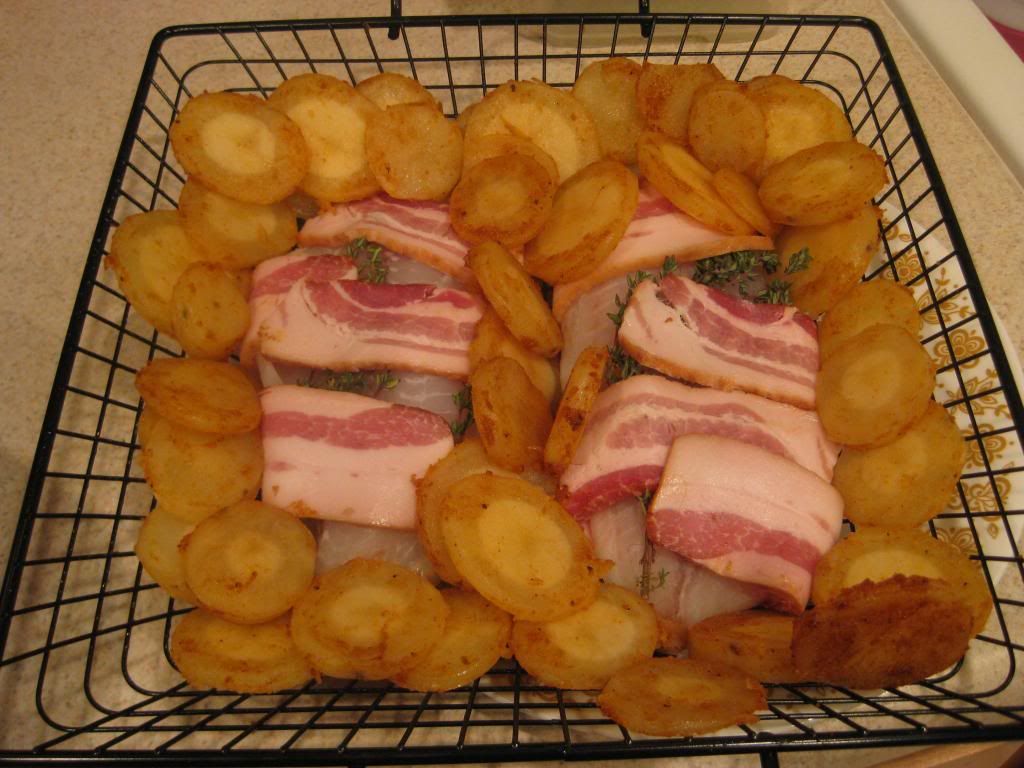
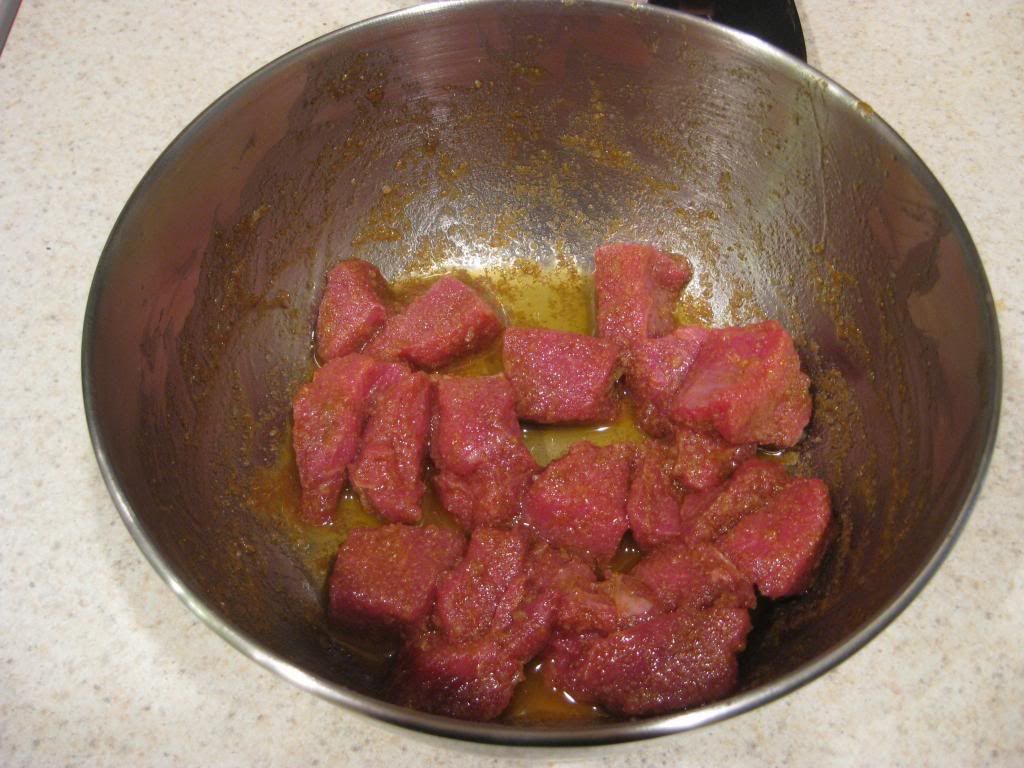
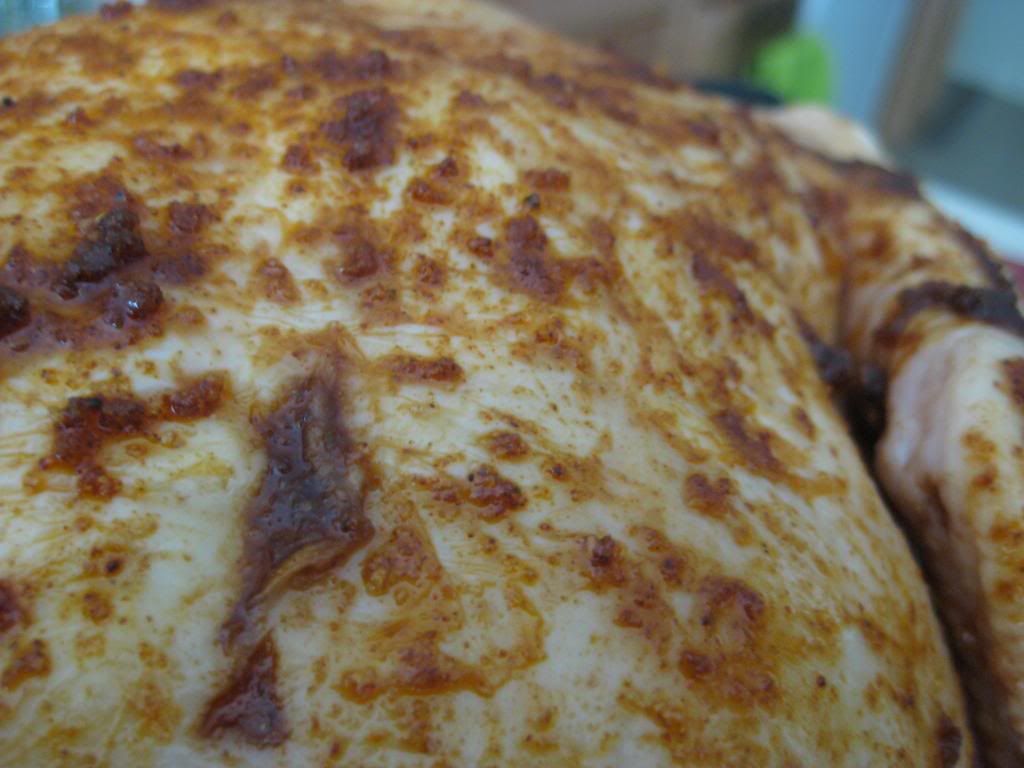
In a medium bowl, combine all of the spices with about 3 tablespoons of olive oil. Whisk together until you've created a nice blend, then use this rub to cover the entire chicken - inside and out, making sure to fill every nook and cranny of the bird. If possible, try to work some of the rub under the skin of the chicken as well.


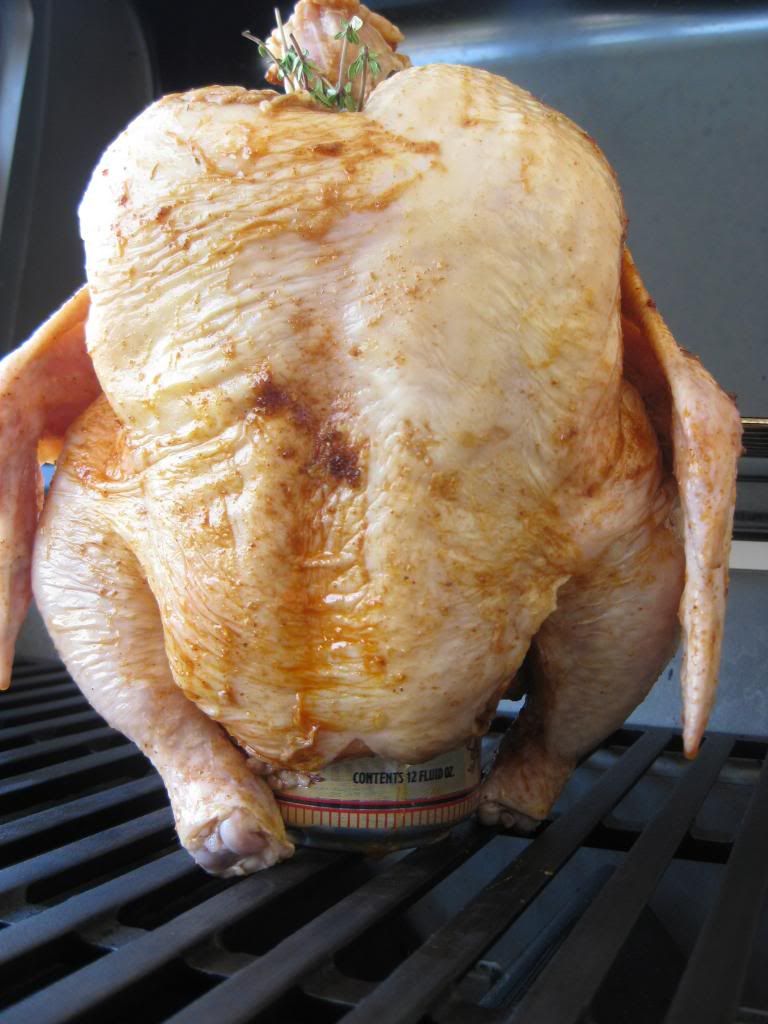
Next, open your beer and help yourself to half of the can. (Nice bonus right? Dinner AND drinks!). There's not delicate or proper way to describe this next part...so I'll just say it. Take the beer can and place it in the chicken's...rear cavity. Stick it in far enough that only the last 1/2 inch of the can or so is sticking out (it will appear like the chicken is 'sitting' on the can).

Comfy?


Cook the chicken using the two zone system of grilling, if you have multiple burners, leave one burner on, but set the chicken on the other side (over the burners that are off) if you're using charcoal, arrange the coals to one side of the grill and place the chicken on the opposite side. Just like in last week's chipotle orange chicken recipe, the indirect heat allows the chicken to slow roast, keeping all of the juices inside the bird.

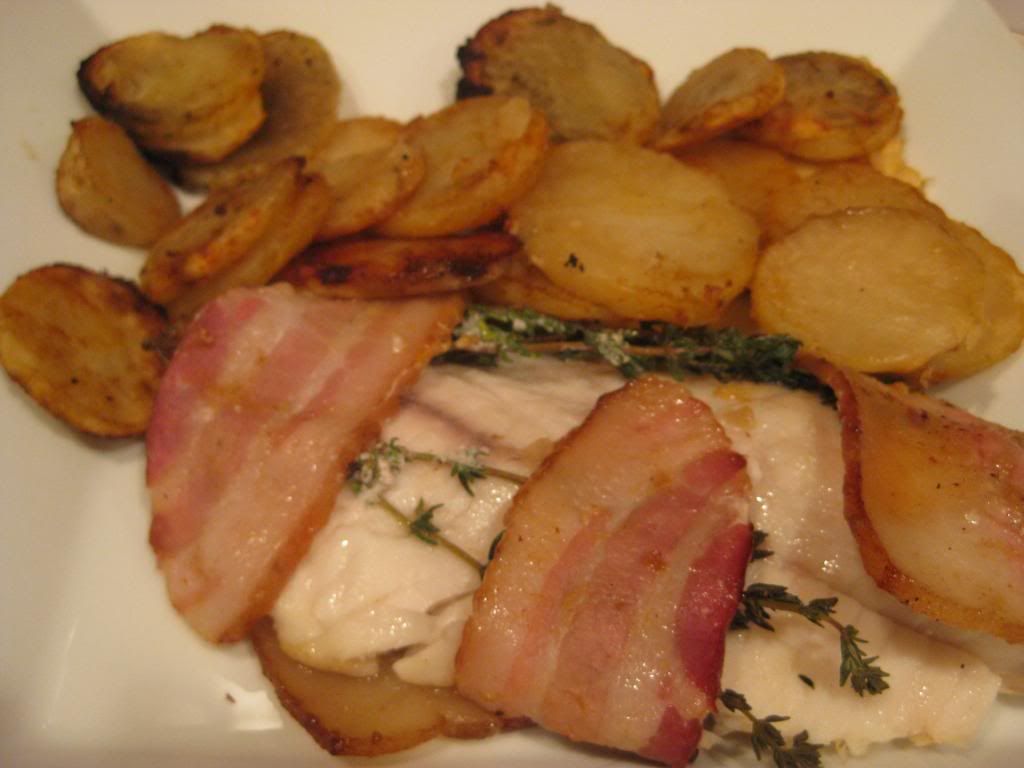
Carefully rest your bird on the grill grates, making sure it wont tip over during cooking. Stick a few extra sprigs of thyme into the 'neck' of the chicken if you have them available, that will add a nice layer to the smoked flavor of the chicken.

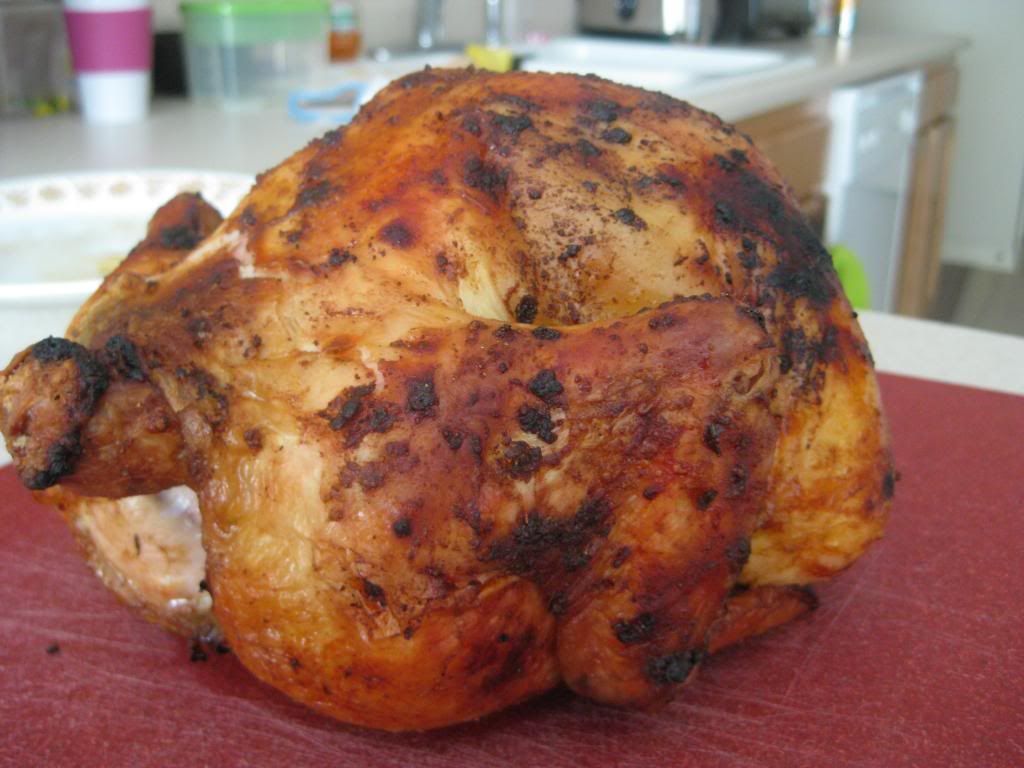
Once everything is situated, close the lid of your grill and let the chicken roast for 70 to 90 minutes - or until the chicken is golden brown and the meat pulls away from the bone easily. Remove the chicken from the grill, carefully pull out the beer can, carve and enjoy!
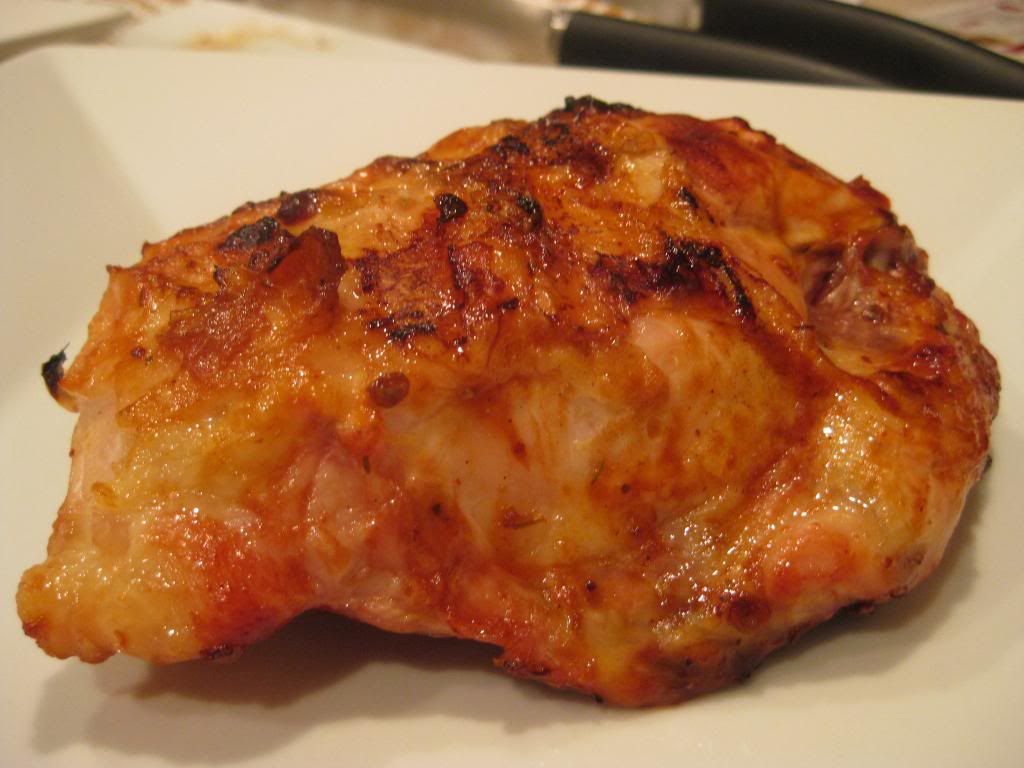
The Results:
Note: Flavor does not translate through the monitor - do NOT lick your screen


This recipe was worth the wait. Slow roasted chicken, be it in the oven or on the grill, always packs great flavor. Slow roasting chicken that was marinated with the vapors of a light ale? Even better. The chicken was juicy, packed full of smokey -fresh off the grill - flavor and yet had a great undertone of a crisp light ale. DELICIOUS!

That's all we have for you this week. We're back next week with two brand new fresh and flavorful recipes. Until then,

~Cheers

Tuesday, April 23, 2013

Fresh Grilled Fish and Potatoes

Good evening everyone!  More often than not, most recipes that use a grill, add extras (like a heavy sauce or other ingredients) that pack on the calories and make this summer time method of cooking not too calorically appealing.  Tonight, I'm going to show you a recipe that will show you that having a great tasting grill recipe that adds all those extras, without all those extra calories.

The Recipe:  Bacon-Wrapped Tilapia with New Potatoes
Original Recipe Found In:  HyVee Seasons Magazine, Spring Issue

What You'll Need:
8 small New Potatoes, halved
8 Sprigs fresh Thyme
4 (6 ounces each) Tilapia Fillets
8 Slices sweet smoked Bacon
2 Teaspoons Canola Oil
1 Teaspoon Onion Salt
1/2 Teaspoon Paprika
1/4 Teaspoon Black Pepper

To start, bring a grill up to temperature to medium-high heat.  Also, spray a grilling basket with nonstick cooking spray and set aside.  Next, over medium high heat, bring a pot of water of a boil.  Add the potatoes and boil for five to seven minutes, until they are cooked almost all the way through.  Drain the pot of potatoes through a colander and once the potatoes are cool enough to handle, pat them dry.

Next, prepare the fish:  wrap each fish with two slices of bacon, with two sprigs of thyme wrapped between the fish and the bacon.  Set these aside on a clean plate.  In a medium mixing bowl, combine the oil, onion salt, paprika, and black pepper until it is well combined.  Add the cooked potatoes and toss to coat.

In the grilling basket, arrange the fish and the potatoes and begin to cook.  Add the basket to the grill and cook for eight to ten minutes or until the bacon has browned.  Depending on what type of grilling basket you have, either flip the basket over or flip the fish and potatoes over and continue to cook for an additional eight to ten minutes, until the bacon is crisp and the potatoes are completely cooked through. Transfer onto plates, serve, and enjoy!


The End Result:


Tilapia is known for infusing any flavor it is cooked with, whether it's from seasonings or other foods.  Tonight is no exception:  the tilapia completely surrounds itself with a hearty, smokey flavor from the bacon.  But cooked from the grill makes the fish ever so tender and melts in your mouth with how flakey it tastes.  I, personally, love grilled potatoes - it doesn't matter how you grill them or with what seasonings, it just tastes good.  These potatoes are truly exceptional.  The slight additives of flavor from the onion salt, paprika, and black pepper is all you need to create fresh, flavorful grilled potatoes.  The best part about this dish?  A serving is only 280 calories - grilling light never tasted so good!

A couple of quick hints if you want to substitute any of the ingredients.  If you plan to use russet potatoes, instead of new potatoes, it's helpful to slice them up before boiling.  This will help cook the potatoes throughly before they hit the grill.  Also, if you want to use a thicker cut bacon, instead of a thinner version, the cook time will need to be adjusted.  It will take about 15 minutes per side.  The bacon will crisp up better, plus the flavor in the fish will be that much greater.

Thanks for joining us tonight.  Join us tomorrow as Tyler finally gets his hands on a recipe that he's been itching to try.  Until then,

~Cheers!

Thursday, April 18, 2013

Fresh off the Grill: Chipotle Orange Chicken


Good evening everyone! As Maggie mentioned last night, we’ve been waiting for a full sized grill for a long time. While we have a small camp style stove, it wasn’t easy to use at our apartment complex and the logistics of driving to a park just to make supper were too frustrating to tackle. So, for three years, while we lived in our little apartment, we waited.

Now that we own our very own house, we CAN grill and you better believe this summer we WILL grill. Maggie debuted our newest ‘kitchen’ gadget last night, choosing to feature a whole new variety of ingredients on the blog. Tonight, I’m returning to the grill but cooking up a much more traditional dish. Let’s get cooking!

The Recipe: Chipotle Orange Chicken
Original Recipe From: The Complete America’s Test Kitchen Cookbook

What You’ll Need:
(Serves 2-4)

2 to 4 Large, Bone In, Skin On Chicken Breasts
2/3 Cup Juice Plus 1 Teaspoon Grated Zest From 1-2 Large Oranges
1 Small Shallot (Minced)
1-2 Tablespoons Chipotle in Adobo Sauce*
2 Teaspoons Fresh Thyme Leaves (Minced)
1 Tablespoon Light Molasses
¼ Teaspoon Cornstarch

* You can find a few variants of chipotle in adobo sauce at your local grocery store. Some sauces have the chilies already minced in the sauce while other versions will have the entire chili. The minced version will be significantly hotter simply because you cannot avoid the chili. We had the version with the whole chili in the sauce. I’d encourage you to either mince or discard the whole chili in this sauce – otherwise your final dish (for whatever you use it for) will be VERY hot. I opted to leave the whole chili in while preparing the glaze, but I will not be serving the chili with the final dish.

Begin preparing the glaze by combining the shallots, orange juice, orange zest, thyme, chipotle sauce, molasses and cornstarch in a small sauce pan. Set the pan over medium heat and bring the mixture to a simmer, whisking constantly until the sauce thickens and reduces slightly. This should take about 5 minutes. Once the sauce is thickened, remove it from the heat and set it aside. You can prepare this sauce one to two days ahead of time if you’re pressed for time.

Bring your grill up to temperature and thoroughly clean the grate. If you have a two burner gas grill, leave one burner off while setting the other to medium heat. If you’re using a charcoal grill, set up a two zone system by arranging the coals on one half of the grill. This two zone grill system allows you to cook your food via indirect heat – which prevents the meat from drying out. This works by removing the direct heat from the cooking equation. Direct heat causes the proteins in the meat to shrivel up and squeeze all of the moisture from the meat. Indirect heat, meanwhile, allows the meat to warm up slowly – much like slow roasting a turkey in the oven. By using the direct heat as radiant heat, you can get great grill flavors without drying out the meat.

The downside to indirect heat cooking is the same downside as roasting anything in the oven – a crisp outer crust is near impossible to achieve. When you want a crispy exterior and you need to use the oven, you typically pan fry that item for a few minutes on each side. With the grill it’s no different.

Place the chicken breasts on the direct heat side of the grill for 6 to 8 minutes per side, or until the exterior is golden brown and grill marks appear on the meat. Next, lay a piece of aluminum foil over the grates that are serving as your indirect cooking zone (caution: just because the heat is off on ½ of the grill – that does NOT mean the grates are cool – use tongs to lay the foil in place). Transfer the chicken to the cooler side of the grill with the thicker portion of the breasts facing down towards the heat. Cover the chicken with a second sheet of aluminum foil (loosely tent it over the breasts) and close the grill. Allow the chicken to cook until the thickest of each breast registers 150 degrees on an instant read thermometer. This should take about 15 to 25 minutes.


Once your chicken reaches 150 degrees, you can begin applying the glaze equally to each side both on and below the skin (apply as much or as little of the glaze as you’d like). Transfer each breast back to the ‘hot’ side of the grill and allow the glaze fully cook into the breast this should take about 5 minutes. When the chicken is a nice golden brown (the glaze should be a deep, rich color) flip the breast and cook the other side for 3 to 5 minutes longer.  Check the thickest part of each breast with an instant read thermometer, once it reads 165 degrees, you’re ready to serve and enjoy! If you chicken isn’t quite up to temperature, move it back to the foil covered indirect heat zone and allow it to cook until it reaches 165 degrees.

The Results:


It was a cold, rainy (and occasionally snowy) day here in Iowa, but this recipe still made it feel like summertime despite the fact I was wearing a coat and using the grill as warmth when I checked on the food! Chicken breasts cooked on the grill carry this great, powerful flavor naturally. Grilling allows the moisture of the meat to stay within the breast and the smoky heat from the fire really penetrates the whole dish. The chipotle and orange glaze ends up taking on a flavor similar to a barbeque sauce – with subtle hints of sweet orange and an undertone of heat from the chipotle sauce.

This dish is simple, relatively quick and only registers at about 250 calories. Factor in the bonus of getting to grill and enjoy the outdoors while you’re cooking (even if it’s only 40 degrees and rainy) and you’ve got a dish that can’t lose!

That’s all we have for you this week. We’re back next week with two more brand new grilling recipes. Until then,

~Cheers

Wednesday, April 17, 2013

New Appliances, New Ingredients, Same Adventurous Spirit

Good evening everyone!

Before I turn the keyboard over to Maggie for her dish tonight, I'd like to share why we were absent over the past week.

We received word on Thursday, April 4th, that my grandmother was having some pain issues and was taken to the hospital.  By Friday, "pain issues" had been diagnosed as cancer of the kidneys (among other areas) and by Friday evening, my grandmother was moved to a Hospice facility.  We spent Friday and Saturday with her and almost every member of our entire family (20+ member strong.)  Grandma was fooling the nurses; who would look at the chart, look at her sitting in the chair in good spirits, sharing stories and cracking jokes, and they would wonder...is this the right chart?  We had two great days filled with stories, laughter, and lots of love.

By Sunday, the illnesses she was battling began to show themselves.  By Tuesday morning, she was gone.

My grandmother was an amazing woman of compassion, faith, and conviction.  She never has a cross word for anyone, and didn't have an enemy in the world.  I was fortunate enough to know her for 25 years of my life.  For that I will always be thankful.  She taught me many things, courage, following what you love, and never giving up.

That spark to follow what you love - to pursue your passion - is evident in the pages of this blog.  We love to cook, we love to write.  Out of those passions, this large portion of our lives was born.  For that reason, I dedicate this blog (not just tonight's post - but the entire concept of this blog) to my grandmother's memory.

I realize a large portion of our audience has never met my grandma and really could care less about how great of a lady she was.  I don't care.  This blog is my voice, and tonight, a portion of that voice is going out in tribute to a wonderful lady.

Love you always and forever Grandma.

- Tyler

I mirror what Tyler said - she was a great woman to know and someone to reflect your life upon.  Such a wonderful tribute to a wonderful lady, thank you Tyler.  Since Tyler has eagerly awaited the grilling season to arrive, I thought he would be the first one to blog about it, but it looks I am the first one to delve into the grill realm.  Not only am I grilling for the first time, I am also using two other ingredients that I have never used before: it's a bunch of firsts for the blog tonight!  If you want something completely unique, this the recipe for you:

The Recipe:  Coriander-Spiced Lamb Kebabs with Simple Lemon Yogurt Sauce and Pita Bread
Original Recipe Found In:  Relish Magazine, May 2013

What You'll Need:

For the Lamb Kebabs:
1 1/2 Tablespoon Olive Oil
1/2 Teaspoon Red Wine Vinegar
1 Large Garlic clove, minced
1 Teaspoon ground Cumin
1 Teaspoon ground Coriander
1/4 Teaspoon Cayenne
1/4 Teaspoon Salt
1 1/2 Pounds Lamb shoulder chops, trimmed, boned, cut into 1 inch pieces

For the Simple Lemon Yogurt Sauce:
1 Cup plain Greek Yogurt
1 Tablespoon chopped fresh flat-leaf Parsley
1 Garlic clove, crushed
1 Tablespoon Lemon Juice
1/2 Teaspoon finely grated Lemon Rind
1/4 Teaspoon Salt
1/4 Teaspoon Black Pepper

In a medium mixing bowl, whisk together the olive oil, red wine vinegar, garlic, cumin, coriander, cayenne, and salt, until everything is well mixed.  Add the lamb pieces and toss evenly to coat.  Let the pieces marinate up to two hours.

It might not look it, but the lamb is being prepared for one powerful, flavor punch

While the lamb marinates, you can prepare the yogurt sauce:  in another small mixing bowl, add the Greek yogurt, parsley, garlic, lemon juice, grated lemon rind, salt, and pepper.  Whisk all these ingredients until throughly blended.  You can keep this bowl out or place the bowl in the refrigerator until you're ready to serve, depending on how long you marinate the lamb.


Also while the lamb marinates, prepare the grill to begin the cooking process.  Depending on the size of your grill, the time will depend on how long to preheat it for.  Once it maintains a steady 400 degree temperature, it is ready to cook.  After the grill is ready to use, pierce the pieces of lamb with metal skewers, keeping a small gap between the pieces of meat.  Place the skewers on a kebab holding plate and grill them for 12 minutes, rotating every three minutes to maintain a charred brown color and is no longer pink in the middle.

Lamb, ready to be grilled!

On a plate, slice open a pita bread pocket, to reveal two halves.  Spread the yogurt sauce in the pocket and layer the lamb inside.  Serve and enjoy!

The End Result:


The only lamb I've ever had has been in gyros, but this dish could be a very close second to one of my favorite dishes.  The lamb was cooked perfectly and was very moist.  The selection of spices gave it a good amount of heat, but not completely overwhelming.  The yogurt sauce helps cool down the heat and adds another flavor dimension to this dish.  If you like lemon flavor, the sauce is definitely for you. The pita pockets are perfect little capsules to hold the dish together and is a great even base for the spicy lamb and tangy sauce.  Overall, a great grilled dish, if you're feeling adventurous with your pallet.  

Tyler takes to the grill tomorrow night and tries his hand at an intensely flavored chicken.  Until then,

~Cheers!

Thursday, April 4, 2013

Good Grinds Yield Great Meatloaf


Good evening everyone! We’ve addressed the misconceptions that follow meatloaf previously on the blog, we’ve talked about, when done correctly, how meatloaf can be quite the culinary delight. We’re all on the same page here then, right? Meatloaf = good. If note, take a look HERE and revisit our last meatloaf foray.

I’ll wait.

Are we all square? Okay! Tonight we’re returning to meatloaf, not because I feel like the last iteration needs to be improved upon, but simply because it’s been a while since we’ve cooked up meatloaf. Plus,  we discovered a new recipe last weekend that just begged to be tested out. So, let’s get cooking!

The Recipe: Good Eats meatloaf
Original Recipe From: “Good Eats: A Grind is a Terrible Thing to Waste”

What You’ll Need:
8-12 Ounces Chuck Roast (Ground)*
8-12 Ounces Sirloin (Ground)*
6 Ounces Garlic Croutons
1 Teaspoon Chili Powder
1 Teaspoon Dried Thyme
½ Teaspoon Cayenne Pepper
½ Teaspoon Ground Black Pepper
½ Yellow Onion (Chopped)
1 Carrot (Peeled, chopped)
3 Garlic Cloves
½ Red Bell Pepper
1 Egg

For the glaze:
½ Cup Ketchup
1 Teaspoon Ground Cumin
Dash Worcestershire Sauce
Dash Hot Sauce
1 Tablespoon honey

* Don’t worry if you cannot find ground sirloin or ground chuck – in fact, the whole premise of this episode of Good Eats is that you shouldn’t buy the pre-ground meats. Instead, look simply for whole chuck steaks or roast and a whole sirloin steak and grind it yourself.
(Yes, it matters that the two meats are chuck and sirloin. You need a high quality meat if you want a high quality finished product – thus the sirloin – but you also need fat for moisture. Sirloin is lean, but chuck roast is higher quality, but contains about 30% fat per pound. That’s the secret to keeping your roast flavorful but not dry.)
I know what you’re thinking, “I don’t have a grinder!” or “I’m not taking the time to grind all of that meat!” Well, fear not dear reader, because those worries are both erroneous. You don’t need a fancy grinder; all you need is a food processor, which, if you do much cooking at all, you likely already have. As far as time, do you have 20 seconds? Because that’s about how long it takes to grind each cut of meat.
More on the grinding later. First, set your oven to 325 degrees and place the oven rack in the center slot.

In a food processor bowl, combine the croutons, black pepper, cayenne pepper, chili powder and thyme. Pulse this mixture until everything is ground to a fine texture. Transfer this mixture to a large bowl and set aside.

Next, combine the onion, carrot, garlic and red pepper in a food processor (you can even use the same bowl) and pulse until the contents are diced. Don’t over pulse to the point that the mixture becomes a puree, however. Transfer this mixture to the same large bowl that you placed the dry mixture in earlier.

Now, turn your attention to grinding the meat. Begin by chopping your steaks into 1 inch cubes. Next, add the meat to a large food processor (you may have to work in smaller sections, don’t overload the bowl) and pulse, 10 times, in one second bursts. By the 10th pulse, you should have a nicely ground cut of meat. Transfer the completed grind to the large bowl with the other ingredients and repeat this process until all of the meat has been ground.


Crack your egg into the large bowl with all the ingredients and then begin mixture the contents by hand. Carefully turn or fold the ingredients until everything is evenly incorporated. Try to avoid grabbing, crushing or balling the meat here, you want the herbs and other ingredients to mix evenly throughout the meat, and clumping the meat up into balls here will prevent that even distribution.

Once everything is mixed, grab your loaf pan. Don’t worry about spraying it with cooking oil or otherwise prepping it for the oven – it’s not going in the oven. See, while a loaf pan is great for giving a meatloaf its shape, it allows the fat from the meat to simply sit and stew on the bottom of the pan. We don’t want that – so we don’t want to cook in the pan.

Press the meat mixture into the pan, now you can compact the meat – in fact, it’s important that you do. If you don’t compress the meat here, when you go to slice the loaf after cooking, it will simply fall apart (I’m speaking from experience here!) Once all of the meat is in your loaf pan and nicely compacted, you can prep your cooking surface by laying a piece of parchment paper on top of a rimmed baking sheet.

Turn the loaf pan over on the parchment paper and give the pan a solid tap. The loaf should drop out easily, leaving you with a beautiful loaf shape standing free on the baking sheet.


Pop the loaf into the oven for 10 minutes. During this time, you can begin working on your glaze. In a small bowl, add all of the glaze ingredients and stir until completely combined. Set this mixture aside until the first 10 minutes of cooking have passed.

After 10 minutes, remove the meatloaf from the oven and brush the glaze over the top and sides until the loaf is completely covered. By letting the loaf cook for 10 minutes, you’re allowing the outside of the meatloaf to form a nice crust, which gives some great texture to the finished loaf. Return the loaf to the oven and allow it to roast until the internal temperature reaches 155 degrees. This can take anywhere between 45 to 90 minutes (depending on the density of your loaf).
Once your loaf reaches 155 degrees, remove it from the oven and allow it to rest for 10 minutes prior to serving. Slice and serve with a side of veggies or on a lightly toasted bun for a meatloaf sandwich. Enjoy!

The Results:


The entire point of the recipe is to show that final dish quality comes right down to which cuts of meat you choose. Simply using ground hamburger for your meatloaf isn’t doing it justice. Premium flavors come from grinding your own blend of chuck and sirloin.

Point proven! This meatloaf is simply delectable, juicy, savory and full of great flavors. The glaze is a welcome departure from most meatloaf glazes – the honey allows the glaze to crust up nicely while the ketchup hot sauce blend keeps the glaze from being overly sweet or overly spicy.

This dish clocks in a little higher on the caloric scale – around 300 calories per slice of meatloaf, but you’ll get about 8 to 12 servings out of it, so it can feed a whole family for a few days or a family of two for an entire week.

That’s all we have for you this week. Next week, we’ve breaking into new territory – a mode of cooking that we’ve previously been unable to harness. Stop in next week for brand new recipes and more culinary adventures. Until then,

~Cheers


Tuesday, April 2, 2013

Flavorful Springtime Soup

Good evening everyone!  Spring has (finally) arrived in the Des Moines metro and I think all residents can breath a sigh of relief.  Although the trees haven't budded and the grass hasn't turned green, warmer temperatures and stable weather has brought a calm to an usually rough winter.  With spring making a triumphant entrance, the return of spring ingredients has also arrived.  Tonight, I'm making the perfect springtime soup, filled with fresh flavors that are light to the pallet and the stomach too.

The Recipe:  Lemony Chicken and Orzo Soup
Original Recipe Found In: Bon Appetite Magazine, April 2013

What You'll Need:
1 Tablespoon Olive Oil
1 medium Leek, white and pale-green parts only, halved lengthwise, sliced crosswise 1/2 inch thick
1 Celery stalk, sliced crosswise 1/2 inch thick
12 Ounces boneless, skinless Chicken Thighs
6 Cups low-sodium Chicken Broth
1/2 Cup Orzo
1/4 Cup chopped fresh Dill
Lemon halves (for serving)

To start, heat the olive oil in a large heavy pot over medium heat.  Add the leak and celery and cook until softened and stirring often, about five to eight minutes.  Add the chicken and the broth to the pot, season with salt and pepper.  Bring the contents of the pot to a boil.  Once at a boil, reduce the heat to simmer and cover with a lid.  Simmer until the chicken is cooked completely through, about 15 to 20 minutes or, with a meat thermometer reads 165 degrees.  Transfer the chicken to a clean plate.  Let the chicken cool and shred into bite size pieces.

Meanwhile, return the broth in the pot to a boil.  Add the orzo and cook according to package directions or until al dente, about eight to ten minutes.  Once the orzo is done cooking, immediately remove the pot from the heat.  Stir the chicken back in and add the dill.  If you are using dried dill (in which you'll need a tablespoon of dried spice,) you may find you'll only need half of a tablespoon.  Of course, you can add more, if you want more dill flavor to your soup.  Serve, with the lemon halves to squeeze over the soup, and enjoy!

The End Result:


This might be the best and quintessential spring inspired soup.  All the ingredients are incredibly light, but they all work together harmoniously to give the soup a well rounded flavor.  The leeks and celery cook down, so as to not overpower with a vegetable flavor.  The chicken, infused with the broth, doesn't have a strong poultry flavor.  Also, the dill, surprisingly, won't hit your tastebuds with an herby punch.  The lemon might be the only ingredient that shines on its own in the soup.  While I preferred a hint of lemon in my soup, Tyler was squeezing the lemon dry and he loved it in his dish.  I would definitely recommend using the lemon at your discretion:  try the soup, if you want more flavor, add the lemon; if you enjoy that lemon flavor, add more until your hearts content.  Overall, a great soup that is perfect for any springtime evening.

That's all we have for you tonight.  Join us Thursday as Tyler cooks up a family favorite dish, but this recipe will be immediately added to your recipe book.  Until then,

~Cheers!