Wednesday, August 29, 2012

Beef Brisket Tacos: It's Okay To Drool


Good evening everyone! A few weeks ago, Maggie and I made a stop at the Mexican restaurant franchise "On The Border". I gave their brisket tacos a try and was very pleased with the delectable morsel they placed in front of me. Of course, when you combine brisket and barbeque sauce you're almost always guaranteed a successful dish. That got me inspired to cook up my own version of brisket tacos. I had a barbeque sauce recipe that was sitting around begging to be used - so tonight seemed like a great opportunity to break it out. I should note, this recipe is not an attempt to recreate the On The Border version, rather it's a brand new creation simply inspired by my first encounter with this dish. Let's get cooking!


The Recipe: Brisket Tacos
An Out Of The Culinary Original Creation

What You'll Need:
(Serves 4-6)

2.5 - 3 Pounds Beef Brisket
3 Cups Low Sodium Beef Broth
3 Cloves Garlic
12 Ounces Prepared Onion Fries / Strings (AKA Fried onions) 


Memphis Style BBQ Sauce
Original Recipe From: Food Network Magazine July 2012 Issue

What You'll Need:

2 Tablespoons Vegetable Oil
1 Cup Chopped White Onion
2 Cloves Garlic (Minced)
3 Cups Ketchup (Store brand - go as cheap as you can find)
1/2 Cup Apple Cider Vinegar
1/4 Dark Brown Sugar (Packed)
1/4 Steak Sauce (Brand of your choice)
1/4 Cup Worcestershire Sauce
3 Tablespoons Molasses (Dark)
3 Tablespoons Yellow Mustard
1/2 Teaspoon Ground Celery Seed
1 1/2 Teaspoons Liquid Smoke


We've perfected two barbeque sauce recipes on the blog so far. One was an Out of the Culinary original, the other was based on a sauce my mom makes. With two well established and tested sauce recipes, why are we trying a new one? Well, what's life with out a little adventure, right? This Memphis style BBQ is thick and suited for serving amongst beef and shredded meat - it's built to be used in a dish like this. Who knows, if this sauce turns out fantastic, we might have a trio of perfect BBQ sauce recipes on our hands!

Begin preparing your brisket by seasoning the top side with salt and pepper (you can ignore the bottom half of the brisket as that contains a thick "fat cap" that seasoning won't really impact). Place the brisket in a 4 quart slow cooker and toss in the garlic cloves (they can be whole) and add the 3 cups of beef broth ( you want the brisket to be covered by the liquid - the quantity of broth may have to be adjusted based on the size of your brisket and slow cooker). Set your slow cooker to low, cover and allow the brisket to slow roast for 6 to 8 hours.

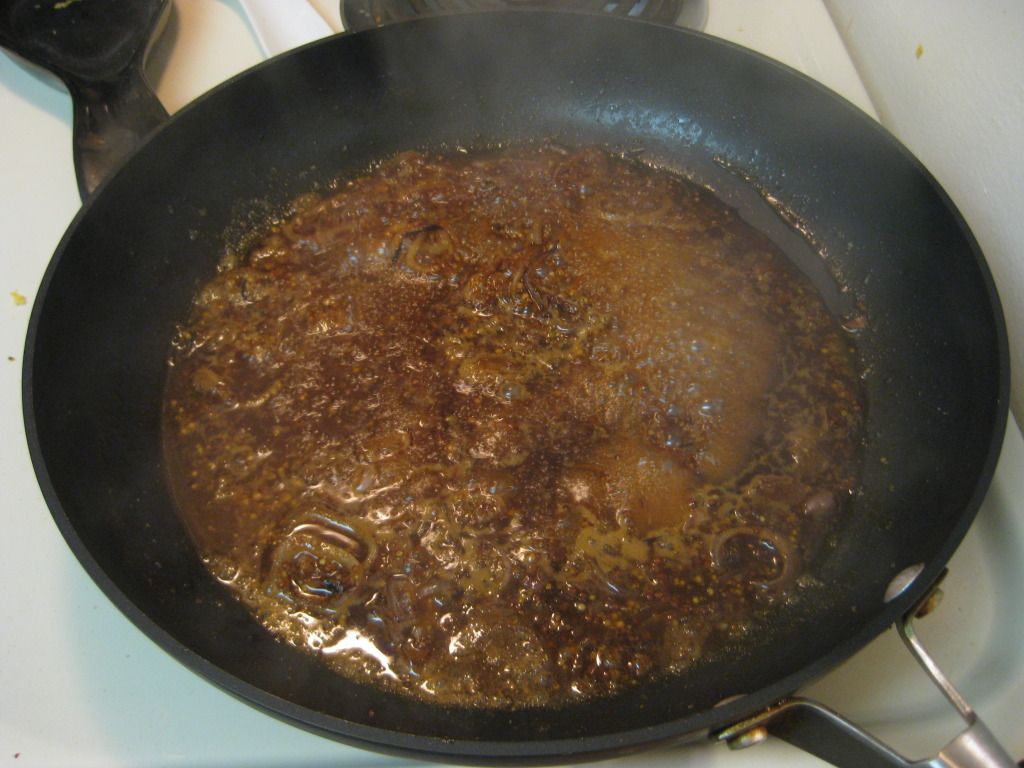
While your brisket is cooking, begin constructing your BBQ sauce. In a medium sized saucepan, add the vegetable oil and warm over medium high heat until the oil begins to shimmer slightly. Add the onion and garlic and allow the onions to cook until they become slightly translucent. This takes about 5 minutes.

Next, add all of the remaining ingredients (seriously - all of them) and stir well. Bring this mixture to a boil before reducing the temperature to medium low and allowing the mixture to simmer. Let this sauce cook for about 15 minutes or until the onions have cooked through.

Pour the sauce through a mesh strainer to remove any large pieces and store in your refrigerator in an airtight jar or canister for 3-4 months.

Once your brisket has slow roasted all day, remove it from the slow cooker and transfer it into a large mixing bowl. (You may have to do this in sections as it's very likely that the brisket will be falling apart). Once all of the brisket is transferred, add in the BBQ you prepared earlier. The exact quantity is up to your personal preference. You can make the brisket be the star of the taco or simply slather it in sauce - the choice is yours and yours alone. If you want to add an extra bit of flavor to your brisket, add in a few splashes of the cooking liquid - that beefy flavor will add an extra layer of flavor to the sauce.

Serve up the brisket on a warm flour tortilla and top with the onion fries.


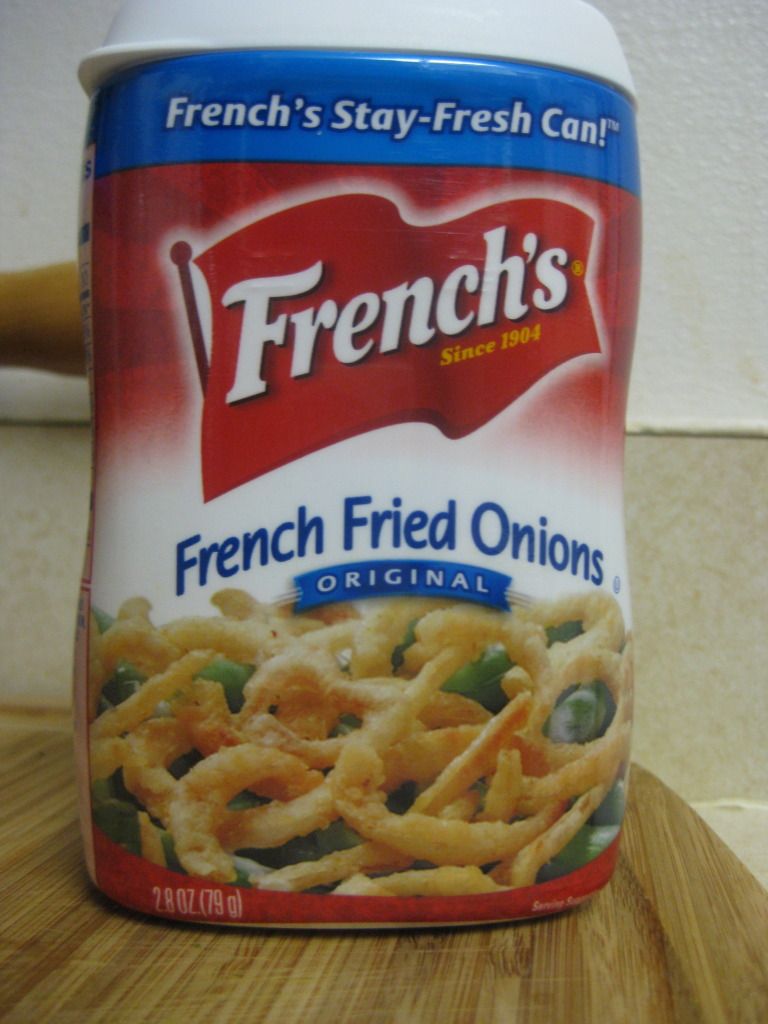
Now, you certainly can make these fries on your own at home, and we're usually the champions of making ingredients yourself, but there are times when it is just way more practical to use the ready made version. You can cut up an onion, make the batter, and fry the pieces to make your own onion strings or you can spend the $2 on a prepared container and simply add them at the end. Your call - but we (the cook-it-yourself happy chefs) opted to go premade.

Unless you despise onions, I'd encourage you to add them to the taco (don't omit them!) the fries add a nice texture contrast to the dish and create a great contrasting flavor from the beef brisket and BBQ sauce. It's an element that seems trivial on the surface, but is actually a large block of this dish's final flavor.


The Results:


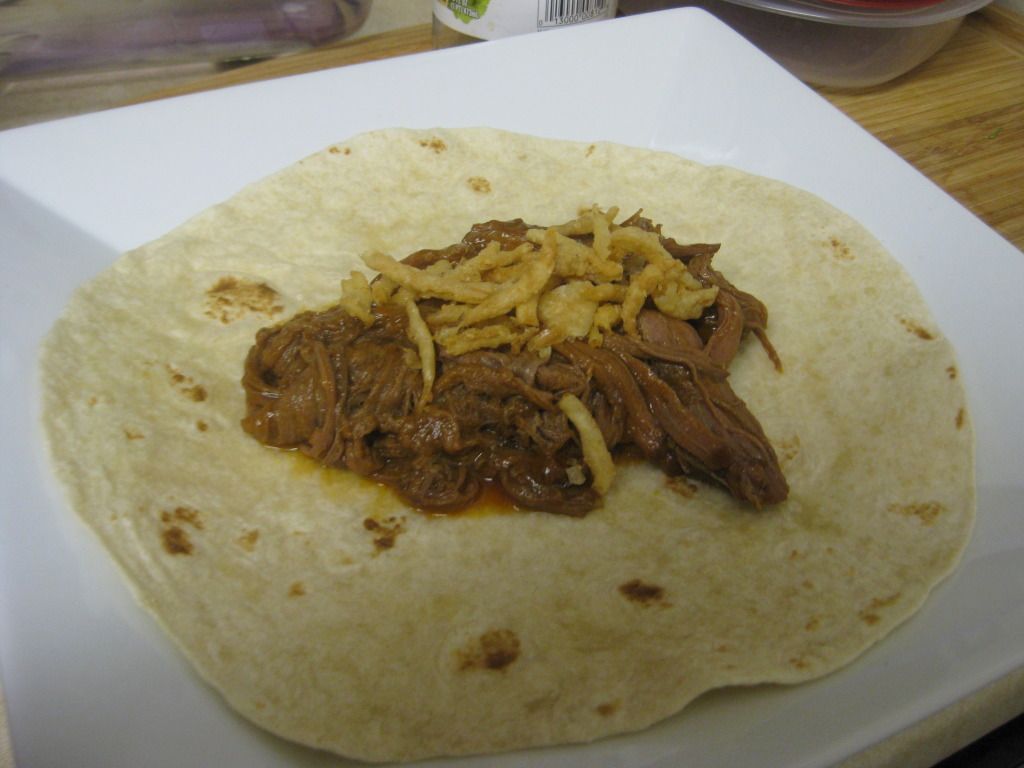
Like I mentioned in the open, you really can't go wrong with BBQ beef brisket. It's a flavor pairing that was created in flavor heaven. The tortilla shell acts as a nice vessel to carry and meld all of the final flavors. I suppose adding the shell makes it a "taco" but this dish is Mexican in the way that Taco Bell is authentic Mexican cuisine; it has the elements, but lets not call it a cultural dish.

Region, naming or culture inspiration aside - you can't go wrong with this easy to prepare and flavorful dish. If you're too busy to cook at home most nights, this recipe is right up your alley. The sauce can be prepared ahead of time and the brisket is about as hands off as you can get. All in all a great recipe!

That's all we have for you this week. We're back next week with two brand new recipes and more culinary adventures. Until then,

~Cheers

Tuesday, August 28, 2012

The Diverse World of Frittatas

Good evening everyone!  When cooking the evening meal (dinner, supper, etc.) it's always nice to "switch it up" every once in a while.  For us, that means having breakfast for dinner.  Tonight, I'll be creating a not-so common breakfast dish, suitable for any time of the day.  That not-so-common dish has actually been featured on the blog numerous times: the frittata.  I've probably made about 6, 981 variations of frittatas for the blog (number slightly exaggerated).  But since it's such a versatile dish, it's impossible to duplicate the same results.

The Recipe:  Onion Frittata
Original Recipe Found In:  Bon Appetite

What You'll Need:

8 Large Eggs
1/2 Cup finely shredded Parmesan Cheese
3 large Basil leaves, torn into pieces*
3 large Sage leaves, torn into pieces*
1 Teaspoon minced fresh Rosemary*
1/4 Teaspoon Salt
1/8 Teaspoon Black Pepper
3 Tablespoons Extra Virgin Olive Oil
1 Cup thinly sliced Onion
1/3 Cup Whole-Milk Ricotta

*Note:  We tend to opt for dried herbs over fresh, so the rule of thumb is always 1 teaspoon dried equals to 1 tablespoon fresh.  Since the basil and sage isn't exactly a tablespoon amount, I would do 1/2 teaspoon of dried basil and sage.  Also, using 1/4 teaspoon of dried rosemary would equal to 1 teaspoon of fresh rosemary.

To start, preheat an oven to 400 degrees.  In a medium, nonstick, ovenproof skillet, heat the olive oil.  In a medium mixing bowl, whisk together the eggs, parmesan cheese, basil, sage, rosemary, salt, and pepper.  Set this mixture aside.  


Eggs, parmesan cheese, and herbs, in perfect harmony.

At this point, the oil should be to the point of heated to almost smoking.  Add the onion and saute until soft, about six minutes.  Make sure to stir about every minute, to be sure the onions won't stick to the pan.

Reduce the pan heat to low.  Once the pan is cooled considerably, add the egg mixture to the skillet.  This will reduce the risk of the eggs cooking instantly on impact and not burning them.  Spoon dollops of the ricotta evenly into the egg mixture in the skillet.

Next, cook the frittata until it begins to set, about two minutes.  Place the skillet in the oven and bake until the frittata is just set, about seven to nine minutes.  You'll want to make sure that the frittata isn't completely runny, yet when shaking the skillet, it will be firm.  Prepare a platter and, once removed out of the oven, slide the frittata on to the platter.  Cut into wedges, serve, and enjoy!


The End Result:


Even though the onion get the name sake for this recipe, it should be renamed Onion and Herb Frittata. The herbs play just an equal role in the dish as the onions do.  The onions also aren't overwhelming, which makes the frittatas delectable.  This recipe also won't be too time consuming.  It's not an overly complicated dish and it's something you can create almost instantly.  There are so many additions to this recipe you can add to make this dish uniquely yours.  Whether adding more, or different, types of cheese (cheddar or even pepper jack,) any type of meat (canadian bacon or mushrooms comes to mind,) and more vegetables (green peppers, green onions, asparagus, and more,) would really give this dish a flavor boost and make for one incredible frittata.  Overall, an easy, lightweight meal with incredible diverse results.

Join us Wednesday as Tyler whips up a delicious variant on one of our favorite recipes.  Until then,

~Cheers!

Thursday, August 23, 2012

Tasty Taco Salad

Good evening everyone! While it was great to be away on vacation for a few weeks, Maggie and I are happy to be returning to a little bit of a routine. Plus, you don't exactly eat as healthy on vacation - so returning to home cooking is a welcome thing for our stomachs too!

Tonight, we're focusing on healthy cooking by going vegetarian. We try to cook up a vegetarian dish every few weeks on the blog for two reasons. First, vegetarian dishes are much healthier for you than dishes that feature meat - even those healthy white fish recipes. While Maggie and I love meat too much to ever go 100% vegetarian, the flavors in vegetarian dishes are usually comparable if not equal to those in a meat dish, so it makes it easy to forgo meat every now and again. Secondly, vegetarian dishes are much cheaper to prepare than meat based dishes. Much of your grocery bill can be allocated to a cut (or cuts) of meat. By removing those elements you can cook up a healthy dish for pennies on the dollar versus their meat based counterpart.

Healthy, great tasting and affordable - why wouldn't we want to go vegetarian every now and again?

Tonight's dish is a spin on our favorite medium, Mexican cooking. We're cooking up a vegetarian taco salad that's packed so full of flavor that you wouldn't even know there's no beef to be found. Let's get cooking!


The Recipe: Vegetarian Taco Salad
Original Recipe Found On: Eatingwell.com

What You'll Need:
(Serves 4)

2 Tablespoons Extra Virgin Olive Oil
1 Large Onion (Chopped)
1 1/2 Cups Fresh Corn Kernels (Frozen works well too - just thaw them first)
4 Large Tomatoes*
1 1/2 Cups Cooked Brown Rice
1 15 Ounce Can Black Beans (Drained & Rinsed)**
1 Tablespoon Chili Powder
1 1/2 Teaspoons Dried Oregano
1/4 Teaspoon Salt
1/2 Cup Fresh Cilantro (Chopped)
1/3 Cup Prepared Salsa (Fresh / whole chunk style - not jarred)
2 Cups Shredded Romaine Lettuce
1 Cup Shredded Pepper Jack Cheese
2 1/2 Cups Crumbled Tortilla Chips

* I've said it before on the blog - but we'll say it again for any new readers - we don't like tomatoes. Okay, that's not entirely true. We do like tomatoes in salsa and occassionally thinly sliced on a burger, but the majority of the time in our recipes tomatoes are not welcome. I'm omitting them from this dish, but will keep the original instructions in place so you can use them if you so choose.

** Be sure to drain the beans before cooking with them. They come canned in what is supposed to be "water" but usually resembles some form of "creature form the black lagoon" sludge. Plus, that sludge is full of sodium that you don't want in your recipe. By rinsing and draining the beans, you can remove up to 25% of the sodium content from the beans.

Begin by heating your olive oil in a large (12 inch) non stick skillet over medium high heat. Once the oil begins to shimmer lightly, add the onions and corn. Cook the onions until they begin to brown slightly. This should take about 5 minutes.


Next, add the chili powder, beans, oregano, rice, 1 chopped tomato (if using) and 1/4 teaspoon salt to the skillet. Mix well and allow the mixture to simmer for about 5 to 10 minutes or until everything has cooked through and the tomato has completely broken down and is incorporated into the dish.


Meanwhile, coarsely chop the remaining three tomatoes and combine them in a medium bowl with the salsa, cilantro and remaining oregano. Mix well and set aside.

In a large serving bowl, toss the chopped lettuce with the bean mixture and the salsa/tomato mixture from the previous step as well as 2/3 of the shredded cheese. Mix well until nicely combined. Sprinkle the tortilla chips over the top of the mixture and add the remaining cheese. Serve with a lime wedge and some additional fresh salsa and enjoy!


The Results:


Like I mentioned in the opening, vegetarian dishes usually do such a nice job at creating flavors that you don't even notice that there is no meat in a dish. This recipe certainly follows that trend. The blending of the fresh veggies with the salsa creates a beautiful harmony of Mexican flavors. This dish tastes like any authentic taco salad you've ever tried - but is much, much healthier for you than its meat based counterparts.

That's all we have for you this week. We're back once again next week with some more brand new recipes including what we can easily call the greatest corn muffins you will ever consume in your life.

Until then,

~Cheers

Tuesday, August 21, 2012

Unique Chicken

Good evening and welcome back to Out of the Culinary!  Our goal here on the blog is to provide healthy, and relatively simple, recipes that are easy to duplicate for you and yours.  I think sometimes there are titles of recipes that tend to deter people from cooking them because of what it has in it.  Tonight is no exception - with beer in the title, most would shy away from the alcoholic persuasion.  But, in fact, it's another flavor component of an incredibly easy recipe.  

The Recipe:  Chicken with Honey-Beer Sauce
Original Recipe Found In:  Cooking Light, September 2012

What You'll Need:

2 Teaspoons Canola Oil
4 (6 Ounce) Boneless Skinless Chicken Breast halves
1/4 Teaspoon freshly ground Black Pepper
1/8 Teaspoon Salt
3 Tablespoons thinly sliced Shallots
1/2 Cup Beer (an inexpensive, full flavored beer will do)
2 Tablespoons lower-sodium Soy Sauce
1 Tablespoon whole-grain Dijon Mustard
1 Tablespoon Honey
2 Tablespoons fresh flat-leaf Parsley leaves (optional)

To start, heat a large nonstick skillet over medium high heat.  Add the oil to the pan and swirl to coat.  Sprinkle the chicken evenly with salt and pepper.  Once the skillet is hot, add the chicken to the pan, saute the chicken for six minutes on each side, until the chicken reads 160 degrees with a meat thermometer.  Remove the chicken from the pan.  Keep warm by covering with foil on a plate.

Perfectly browned chicken

Next, add the shallots to the pan.  Cook the shallots for one minute or until translucent.  In a small bowl, combine the beer, soy sauce, dijon mustard, and honey and whisk until thoroughly combined.  Add the beer combination and bring to a boil, scraping the pan to loosen any brown bits.  Cook for three minutes or until the liquid is reduced to a half a cup.  If you are concerned about using alcohol for this dish, the majority of the alcohol will be cooked out and only the flavor will be left behind.  Also, most grocery stores sell individual bottles of beer, so you don't have to buy more than one and not use the other five.

Such a unique blend of flavors into one pan

Remove the chicken from under the foil and return to the skillet.  Turn the chicken to coat with the sauce.  Sprinkle evenly with parsley, serve, and enjoy!

The End Result:


The chicken is moist and juicy, which is the great basis for any chicken dish.  The sauce is well, quite something else.  The combination of shallots, beer, soy sauce, mustard, and honey is very delicious.  The beer and mustard flavor is definitely cooked out.  But the honey, and hints of soy sauce, is what amp up the sauce to a whole new level.  It's the perfect combination of sweet and tart and neither are too strong, which is perfect for a coating sauce, such as this.  The best part of this dish?  Each chicken breast is 245 calories, so it's a light dish with plenty of flavor to spare.

That's all we have for you this evening.  Join us Thursday as Tyler takes to the kitchen with brand new recipe.  Until then,

~Cheers!

Thursday, August 2, 2012

A Guilty Pleasure

Good evening everyone!  Here on Out of the Culinary, we tend to focus on the healthy, yet delicious, aspects of cooking and for the majority of the time, we stick to those recipes.  However, there are those recipes that speak to you that aren't really the best for you and I usually try out those recipes.  Tonight, I have a tasty dish that will make your mouth water and hopefully, you won't feel too guilty about gobbling up a few bites of this.

The Recipe:  Cheesy Taco Pasta Bake
Inspired by Various Sources

What You'll Need:

8 Ounces uncooked Rigatoni
1 Pound Ground Beef
1 package Taco Seasoning
1 Cup Water
4 Ounces Fat-Free Cream Cheese
1 1/2 Cup shredded Colby Jack Cheese (shredded Mexican cheese would be an acceptable substitute as well)

To start, bring a large pot of salted water to a boil.  Once the water has started to boil, slowly pour the uncooked rigatoni into the pot and cook the pasta until package directions indicate al dente.  Once cooked, drain the pasta, shaking to remove the excess water.  Pour the pasta into a large baking dish and cover with aluminum foil.


Once the pasta is cooked, preheat an oven to 350 degrees.  While the oven is preheating, heat a large nonstick skillet to medium high heat.  Once the skillet is heated, brown the ground beef.  If you use a higher percentage of fat in the ground beef, you will need to drain the excess fat.  In a small bowl, mix the taco seasoning and water together.  Add the browned beef back to the skillet after draining the fat and add the taco seasoning water over the beef.  Let this mixture simmer for about five minutes, or until the liquid has reduced.  Add the cream cheese and stir until the cream cheese is melted and combined.  Remove the skillet off the heat.


In the baking dish with the pasta, stir in one cup of the shredded cheese.  Next, add the ground beef mixture and stir the beef and pasta together until everything is throughly mixed and the pasta is coated.  Top the beef and pasta with the remaining half cup of shredded cheese.  Put the baking dish in the oven and bake for 30 minutes.  Serve and enjoy!

The End Result:


As I mentioned before, this recipe might not be the healthiest, but it is definitely cheesy goodness.  The cream cheese with the taco seasoned beef added an extra flavor boost that you don't usually get with taco beef.  Mixing the cheese with the pasta also helps with the savory flavor.  There are multiple ways of add more flavor to this dish.  You could add crushed taco chips, diced tomatoes, (if you like a little heat) diced jalepenos - there are multiple ways to add even more delicious flavor to this original dish!


That's all we have for you this evening.  This will be the last recipe for the next two weeks, as we are off during this time.  We could never thank our loyal readers enough for joining us every week as we share our cooking experiences with you.  We will keep you updated via Facebook or Twitter when we will be sharing another recipe with you.  Until then,


~Cheers!