Wednesday, March 28, 2012

Meatballs To Marvel

Good evening everyone! Spaghetti and meatballs are forever entrenched in the ‘classic recipe’ Hall Of Fame. This beautiful pairing exists in almost every chef’s recipe book and is a great family meal staple for the folks at home. We’re no exception to this rule. We’ve created a spaghetti and meatball recipe twice on the blog. The first time, we followed Jamie Oliver’s recipe and (despite purchasing the wrong type of tomatoes…ours had jalapeƱos…HOT) we thought we had found the perfect recipe. I revisited that recipe a few months later, this time using my own concoction for the tomato sauce. This one set the bar; truly nothing else we could find could top the beautiful blending of rich, flavorful meatballs and a hearty tomato sauce.


However, one recipe kept nagging at me. The ever knowledgeable chefs at Cooks Illustrated (America’s Test Kitchen) insisted that the secret to the perfect meatball was in using a blending of meats. Now, I stand by the cracking burger meatball variant that we’ve made in the past. They are, in a word, outstanding. However…that little voice kept poking at me. This 3 meat blending kept popping up in other cookbooks – professional chefs swear by it, calling other meatballs ‘junk’ if they only used one type of meat. So, tonight we’re putting this recipe to the test. Is the secret to the best meatballs all in the 3 meat blend? Or, can you achieve the same flavorful results with a lot lower cost?

The Recipe: Nonna’s Spaghetti & Meatballs
Original Recipe Found On: Eatingwell.com

What You’ll Need:

For The Meatballs:

2 Large Eggs
½ Cup Dry, Whole Wheat Bread Crumbs
½ Cup Grated Parmigiano-Reggiano Cheese
½ Cup Chopped Onion
¼ Cup Fresh Minced Parsley (1/2 Teaspoon dried)
3 Cloves Garlic (Minced)
1 Teaspoon Salt
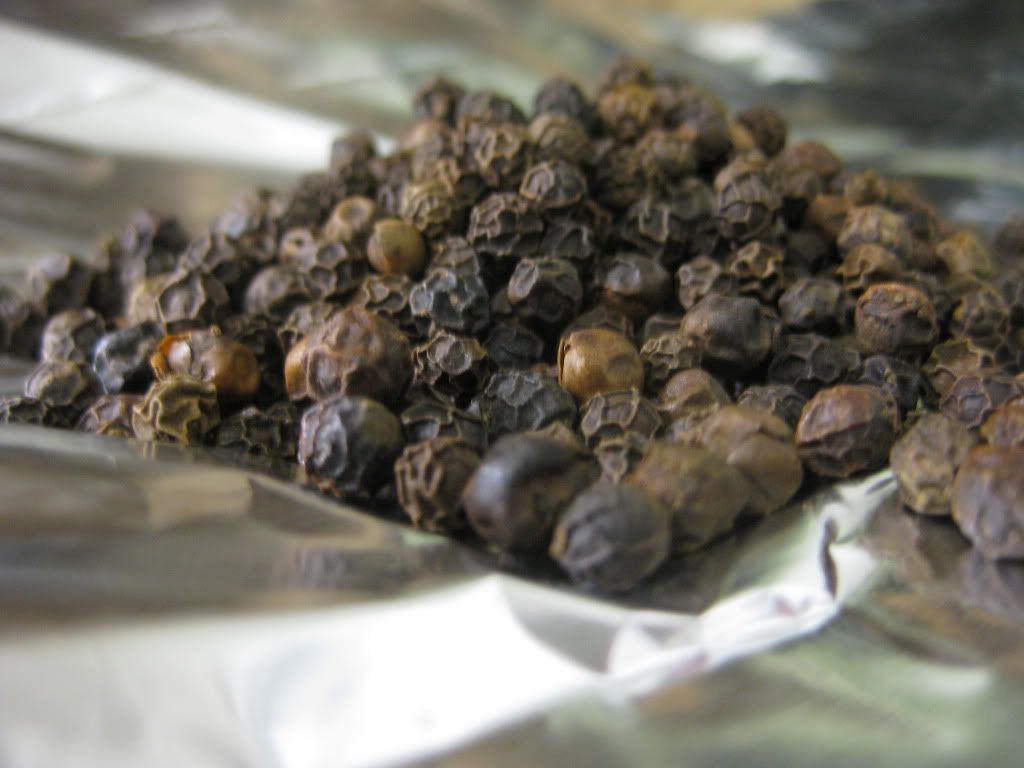
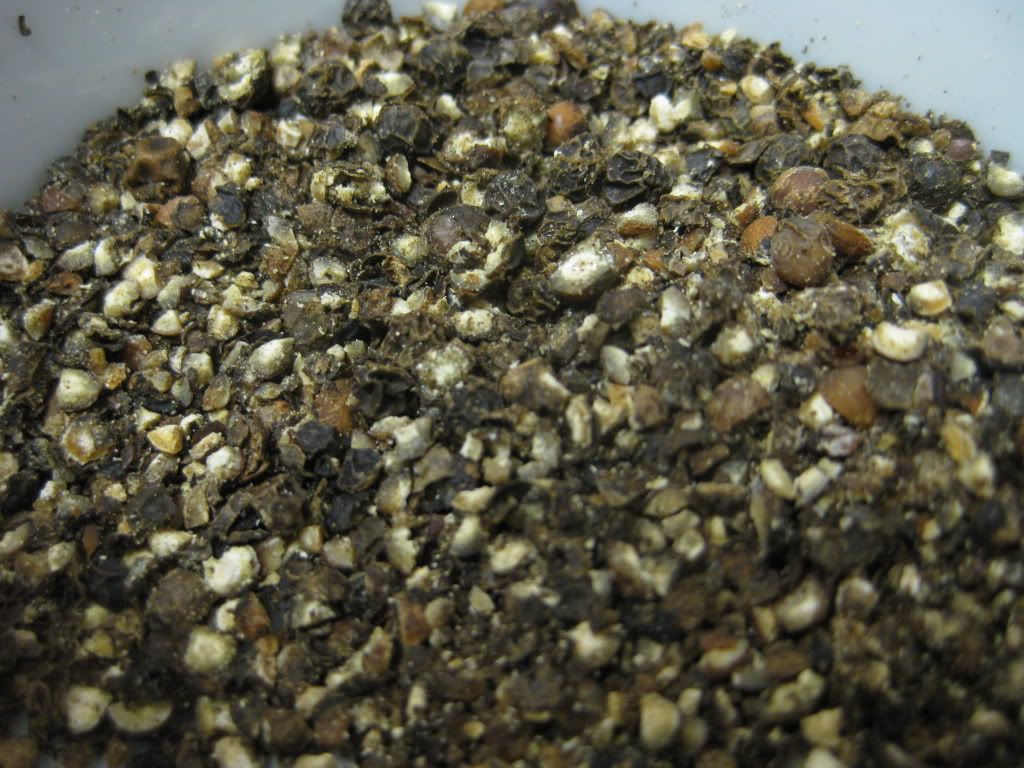
½ Teaspoon Ground Pepper
8 Ounces Lean Ground Beef (90/10)
8 Ounces Ground Italian Sausage or Pork
8 Ounces Ground Veal

For The Sauce:

1 Tablespoon Extra Virgin Olive Oil
1 Cup Chopped Onion
3 Cloves Garlic (Chopped fine)
2 Teaspoon Italian Seasoning
¼ Teaspoon Crushed Red Pepper (Or red pepper flakes)
1 Cup Dry Red Wine
28 Ounces Crushed Tomatoes
14 Ounces Diced Tomatoes (Drained of excess water)
1 Pound Whole Wheat Spaghetti


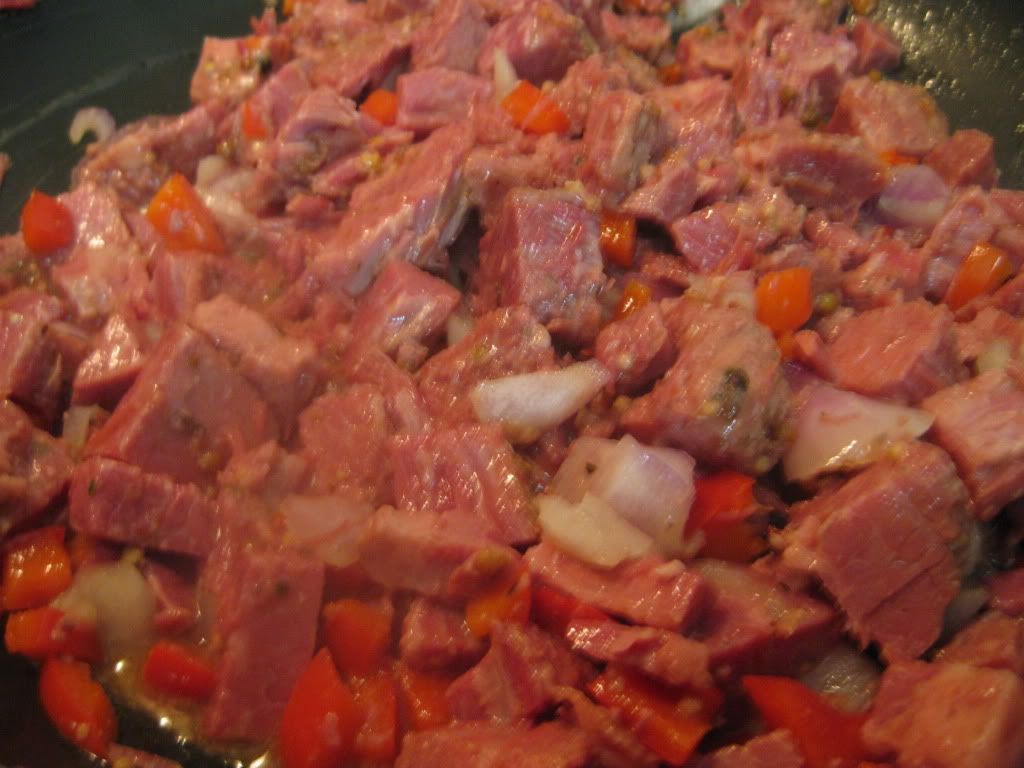
The secret to the perfect meatball, according to America’s Test Kitchen and a multitude of professional chefs, is in the blending of 3 completely different meats. Lean ground beef is the staple, but by combing both ground pork and ground veal, you achieve an incredibly complex meatball that is juicy, tender and a harmonious symphony of flavor. (The bar’s set pretty high for these little guys right out of the gate).

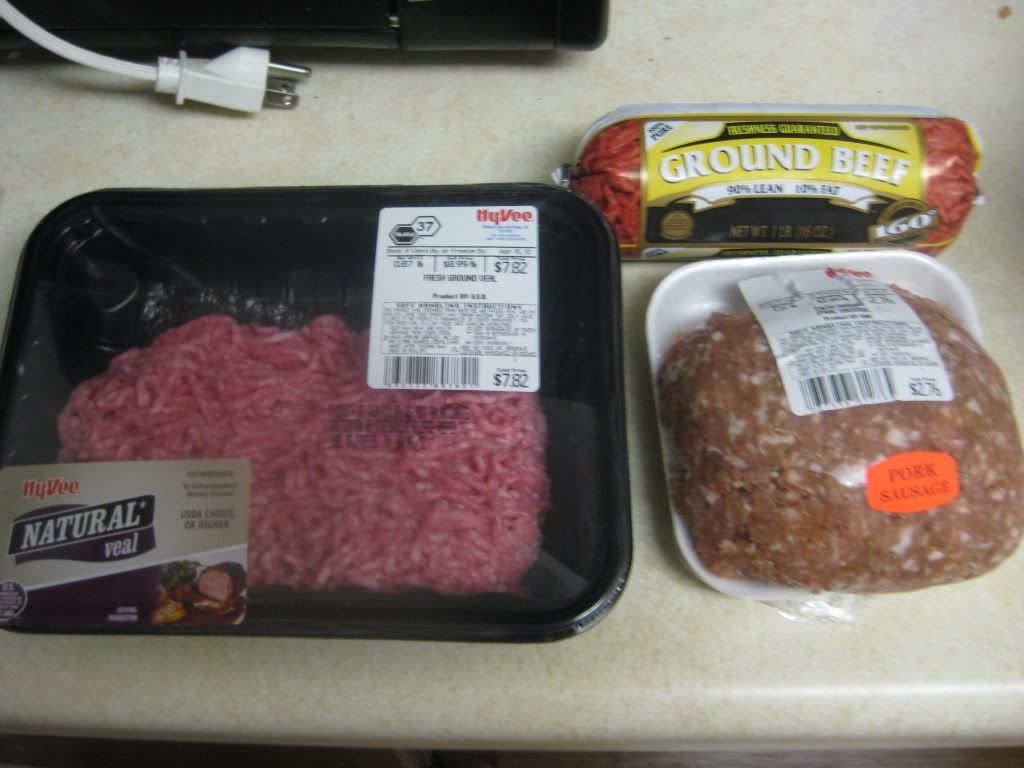
The Holy Trinity of Meatballs


Those who regularly read or blog or who at the very least checked out the previous spaghetti and meatball recipes I linked above will likely notice some similarities between our meatball recipe and tonight’s recipe. Both recipes use a leaner ground beef (to prevent a greasy meatball) and compensate for the drier beef by using eggs and breadcrumbs (in our recipe, unsalted saltines are used but they perform the same function).

That tells me two things right off the bat. First, these meatballs are going to be juicy and tender, because I’ve already used the technique that is being utilized in this recipe and I know it works. Secondly, it means our meatball recipe (adapted from Jamie Oliver’s recipe) cannot be too far off from the best of the best because even the ‘best’ recipe for meatballs uses the same ingredients we do.

Enough background, let’s actually start cooking these things!

(Note: the meatballs and sauce can be made a day ahead of time and stored in the refrigerator overnight before use).

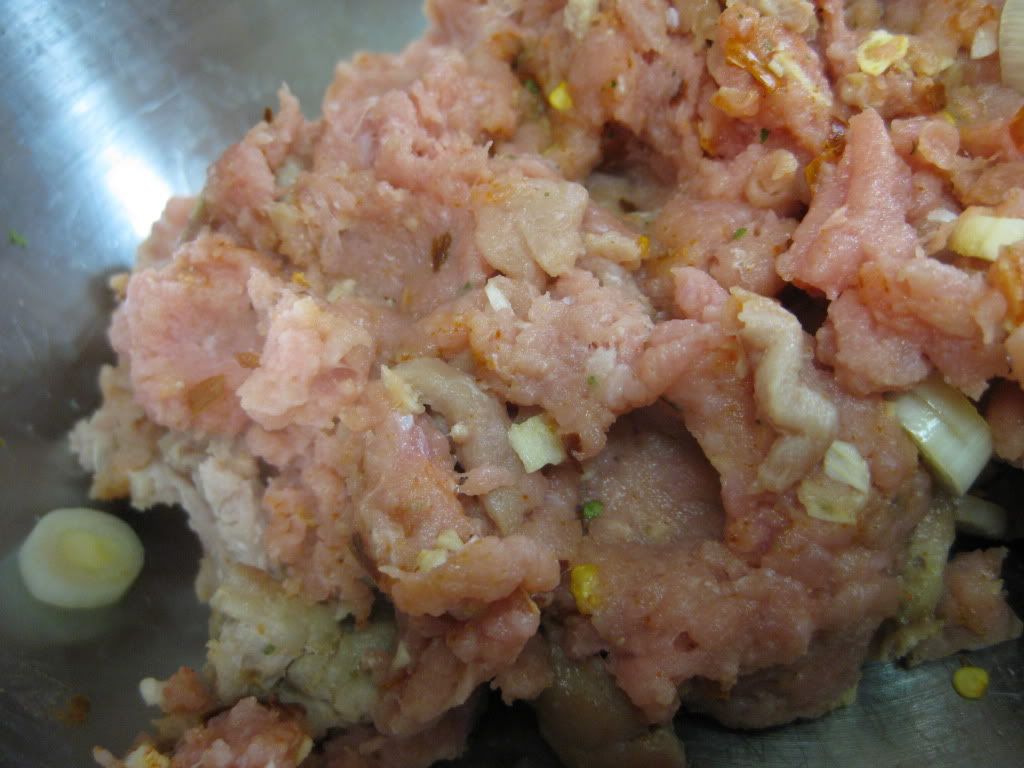
To make the meatballs, add the breadcrumbs, parmigiano-reggiano cheese, eggs, parsley, chopped onion, salt, pepper, veal, pork and beef into a large mixing bowl. Using your hands (things are gonna get messy…) mix all the ingredients well until they are perfectly blended. This will take some patience and elbow grease, but the better you blend the meats and other fillings here, the better meatball you’ll create in the end.

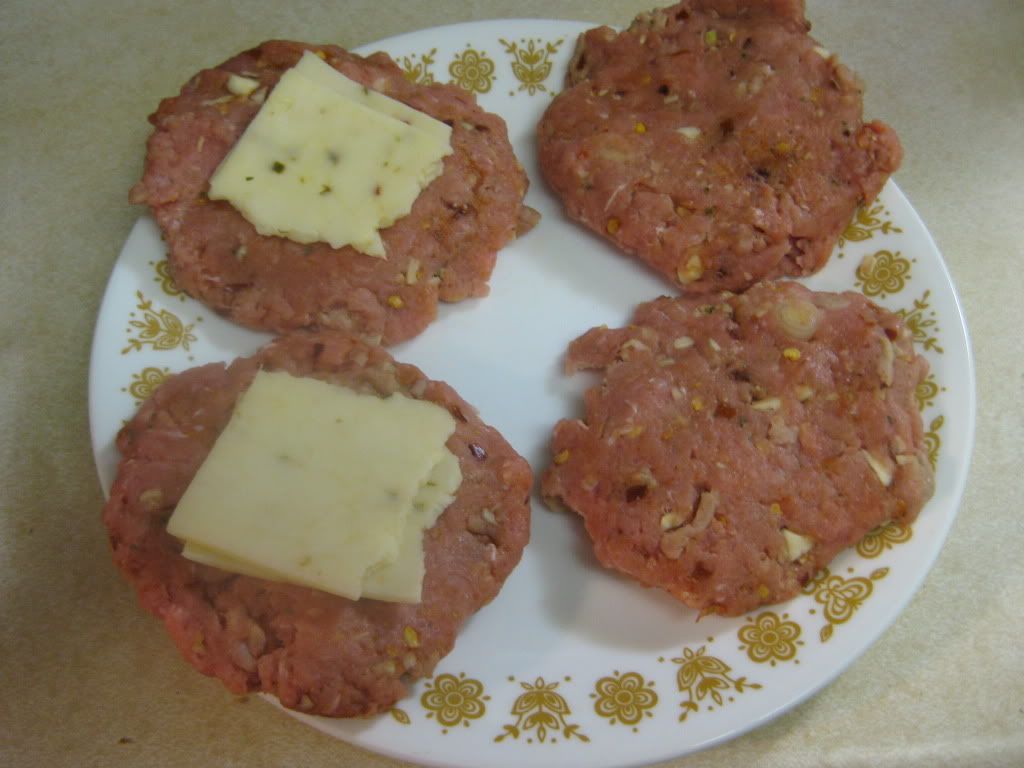
Now you can begin to break your meat mixture into meatballs. The best method I found for doing this is using a small (metal) ¼ cup measuring cup. Simply dip the cup into the meat blend and pull out approximately a ¼ worth of meat. Roll the meat between the palms of your hands until it forms a nice, compact little ball and repeat until all of the meat has utilized. The original recipe states that you’ll make about 16 meatballs this way, which may be true – but we ended up with a considerable amount more due to using higher quantities of all the meats (everything was sold by the pound, not the ½ as originally required in this recipe).


Set your meatballs aside (or, if you’re going to store them overnight, move them into a glass dish with a lid and store them in the refrigerator).

Next, begin preparing the tomato sauce. Add the tablespoon of olive oil to a large (12 inch) non stick skillet over medium high heat. Warm the oil until it begins to shimmer before adding the onion. Allow the onion to simmer and brown for about 3 to 5 minutes or until it begins to turn a nice golden brown color. Once browned, add the garlic, Italian seasoning and red pepper to the skillet and let the mixture simmer for 30 seconds.


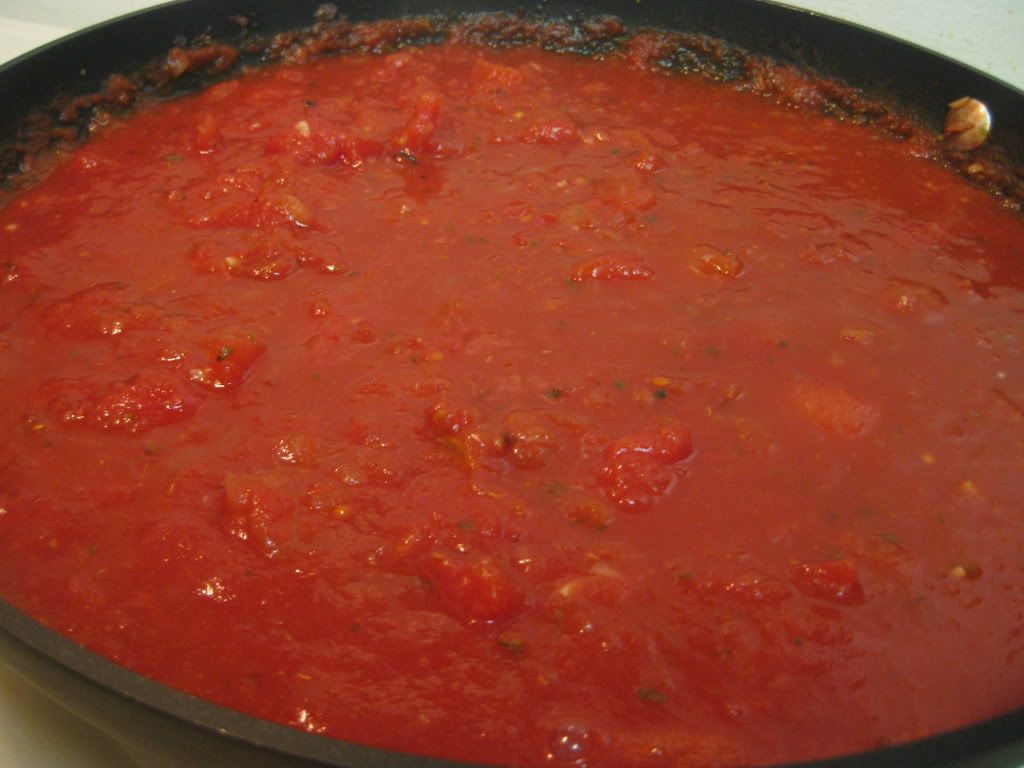
Add the wine to the skillet and let the mixture boil for one minute. Finally, add the crushed tomatoes and the diced tomatoes (drained of excess water – I find that the water with the diced tomatoes tends to make the sauce too runny) to the skillet and bring the mixture to a light simmer. Stirring often, allow the sauce to simmer for about 3 to 5 minutes to make sure everything is evenly heated through.

If you’re making the sauce the night before, pour it into a glass bowl or other dish with a sealable lid and then store it in the refrigerator overnight.

The beauty of this dish is that it allows you to prepare a great, healthy meal with only that little bit of work upfront. Why? It’s designed for a slow cooker! While you can use a Dutch oven (add everything to the pot, medium high heat for and hour to hour and a half, covered) to cook it up, the slow cooker is the easier (and preferred) method here.

Begin by placing your meatballs into the bottom of a 4 to 6 quart slow cooker. (We have a 4 quart slow cooker and more meatballs – so don’t feel obligated to use a 6 because the recipe said so – ours turned out just fine). Next, pour the sauce over the meatballs, making sure everything is evenly covered. Set the slow cooker to low and allow the mixture to cook for 5 to 8 hours.

Just before you’re ready to serve, bring a large pot of lightly salted water to a boil and cook the spaghetti according to the package instructions. Drain the pasta and serve with a helping of meatballs and tomato sauce. Enjoy!


The Results:


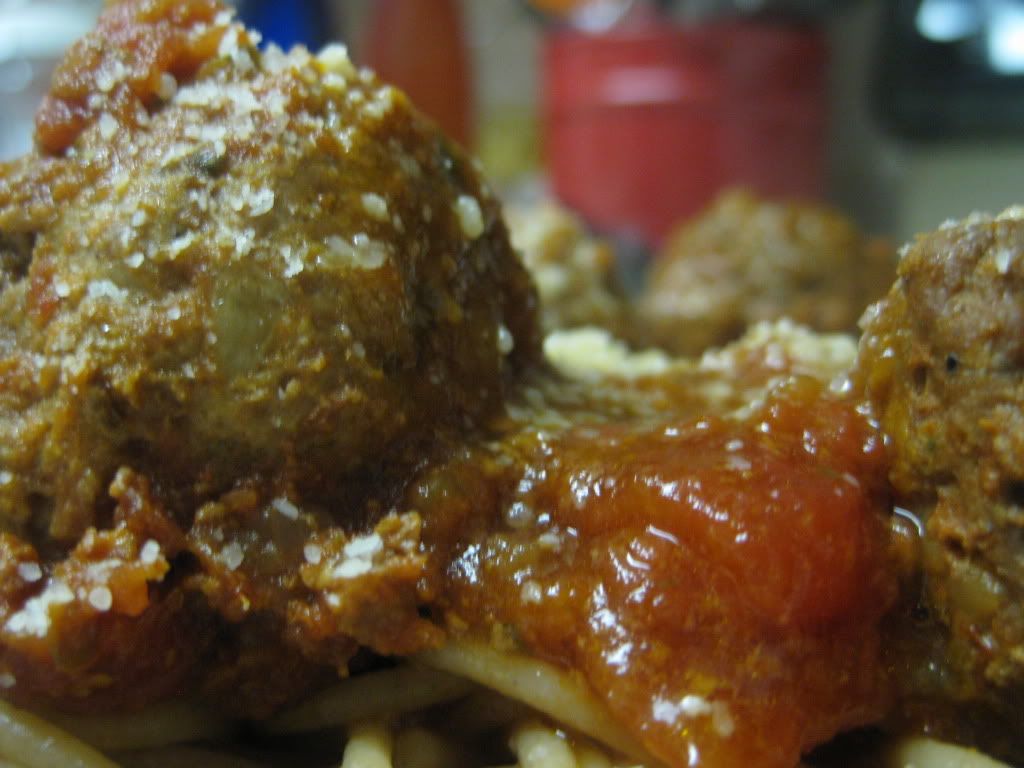
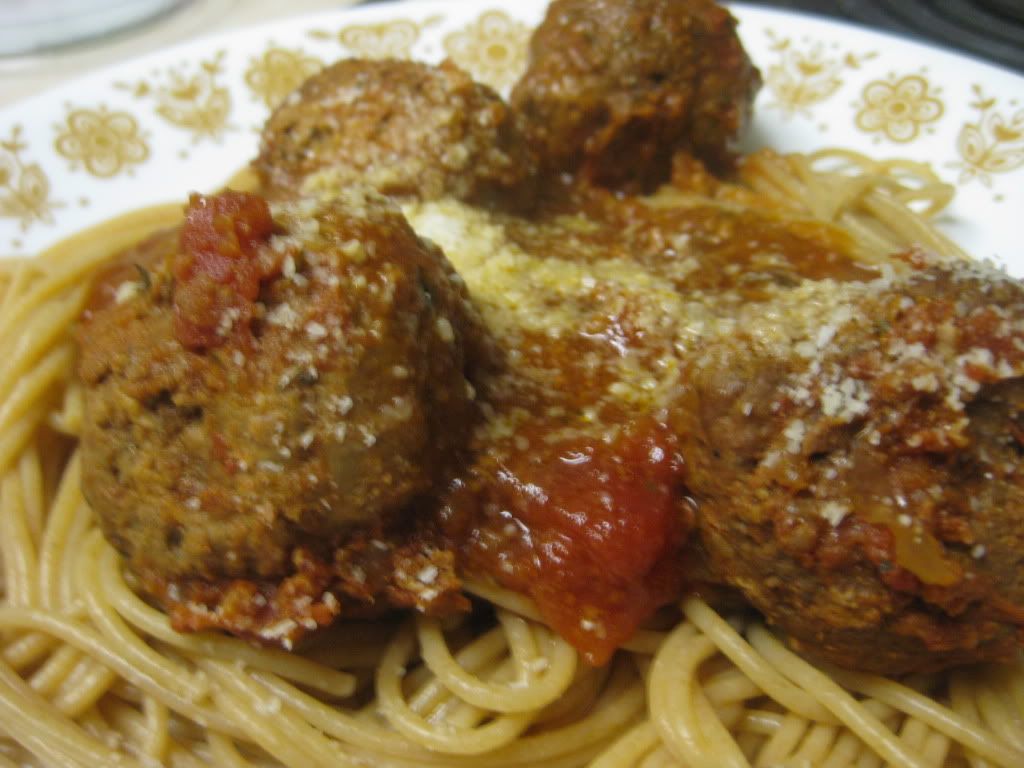
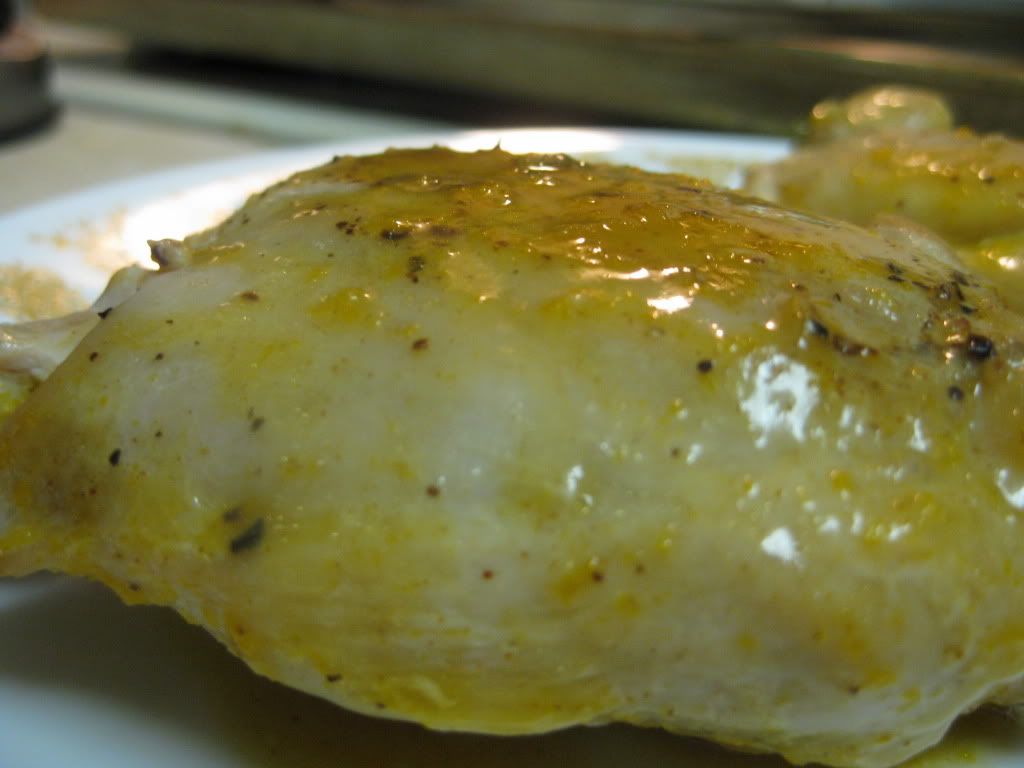
Well, the professionals were not wrong (not that we ever really expected them to be). This blending of veal, beef and pork is quite simply the king of the meatball crowd. Tender, juicy and absolutely flavorful – these are the meatballs that set the bar for all other meatballs to measure up to.

The tomato sauce was a pleasant surprise as well. Rich, full of great Italian flavor and it didn’t have that ‘from a jar’ taste that the big manufacturers’ products have. It’s also lower in sodium and made of all natural ingredients – you can’t go wrong.

(As an aside, I can’t figure out why people shy away from making their own tomato sauce and choose instead to spend money on the canned or jar variant. Making the sauce yourself is not complicated – it took us 10 minutes, which is about the same amount of time you would have spent warming up the jarred variant – and the “DIY” sauce is so much better for you than the processed stuff from the shelf. There shouldn’t be a market for jarred tomato sauce…and yet there still is… But, I digress)

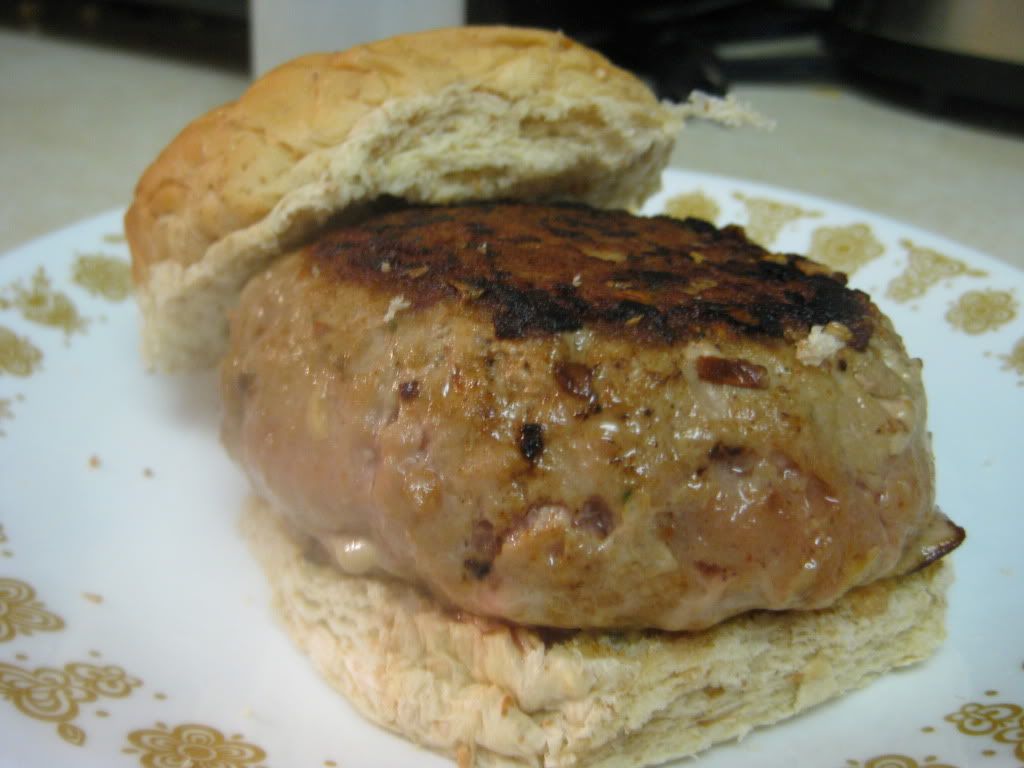
Together, this simple yet tasty sauce and these fantastic meatballs created a very impressive and delicious dish.

I would recommend this recipe with reservations, however. Why it’s true that this recipe is the pinnacle for spaghetti and meatballs, it comes at a cost. Literally. Veal was about $8 a pound, pork $3.50 and 90/10 beef was between $4-$5 per pound. Factor in the parmigiano-reggiano cheese ($4 for the good quality product) and you have a dish that carries a hefty price tag. While it will feed a large family (or a small family several times) it does weigh heavier on the pocket than our standard recipe does.

I’d recommend this recipe if you have a big family gathering or special occasion coming up and you want to impress those around you with your culinary prowess. However, if you’re simply craving spaghetti and meatballs and it’s just a Wednesday night at home, I’d recommend following our original spaghetti and meatballs recipe. It’s delicious and much cheaper.

That’s all we have for you this week. As always, thanks for following along in our culinary adventures. We’re back on Monday with the news of the culinary world. Until then,

~Cheers

Tuesday, March 27, 2012

A Snazzified Grilled Cheese

Good evening everyone! After last week's successful venture in the difficult cooking scheme (which turned out to be not-so-difficult), I've returned to a recipe that is rather simple in premise. My recipe tonight blends two flavors that you wouldn't normally associate with one another. However, after doing some browsing on the web I found that the concept behind this dish is relatively popular, in fact it seems that the dish I'm creating tonight has amassed quite the following.

The Recipe: Apple and Artisan Cheddar Panini
Original Recipe Found In: Williams-Sonoma Cooking From the Farmer's Market

What You'll Need:
8 Slices Sourdough Bread, sliced about 1/2 inch thick
2 Tablespoons Olive Oil
6 Ounces Artisan Cheddar Cheese, thinly sliced
1 Red Apple, cored and cut into 1/4 inch slices*

*We were using a pink lady apple for tonight's recipe. It's a relatively soft apple and will add a sweet hint to this salty dish.


The title of this book reminds me of one of our summer pasttimes: the farmer's market. We have sung the praises of the market on the blog and will continue to do so. Nothing sounds like summer quite like browsing tables of fresh, locally produced food. As I was reading the ingredient list, I made a mental checklist in my head of all the things we could get at our local farmer's market. Surprisingly, we can pick up every one of these items. From freshly baked bread to homemade cheese and apples picked right from the tree that day, this is a straight from the market meal.


Enough about me reminiscing about farmer's market, let's get cooking!


Preheat a sandwich grill or grill pan over medium high heat. Brushing one side of the bread with the olive oil, place four slices on the pan. Layer a nice, even sheet of cheese on the toasting bread. Next, place two apple slices over the cheese. Top the apples with another slice of bread, ensuring the side facing out is coated with olive oil as well. Gently press the sandwich layers together to compress them.


First layer the cheese...


Then layer the apples...


Using a heavy object, press the sandwich into the grill to ensure all ingredients are cooked thoroughly. One of the presents we got this year for Christmas was a sandwich press, which definitely pulls its weight. The heavy glass helps to create those fantastic grill marks and make the whole sandwich warm and toasty. Cook the sandwich until the bread is toasted, the cheese is melted, and the apple is warmed through, about three to five minutes. Flip the sandwich over, ensuring none of its contents spill out and cook for another three to five minutes. Repeat with another prepared sandwich, serve, and enjoy!


Quite the impressive sandwich press


The End Result:


Oh my melty goodness! The sourdough bread gives the panini a good solid crunch. Next, the cheese, when melted, adds a sharp overtone. Finally, the apple adds a bit of a crunch, but adds a sweetness that this panini desperately needs. There are endless possibilities that you can do to make this dish completely unique and different. Since cheese is naturally salty and apples tend to be sweet and juicy, the combination of both makes it wonderfully perfect. It's a blending you wouldn't normally associate with culinary delights - but the abundance of apple and cheese recipes both online and in cookbooks proves that this is one pairing that is popular for a reason.


Join us tomorrow as Tyler creates a recipe we've tried (and found success with) in the past, but uses a brand new technique. Until then,


~Cheers!

Monday, March 26, 2012

Around The Culinary World

Hello again everyone! It’s hard to believe, but we’re not even a week into the start of the spring season. Why is it so hard to believe? Well, we’ve been experiencing spring like temperatures and weather for what feels like 2 to 3 weeks now. Spring usually signifies spring cleaning. Some people clean their homes, others work on cleaning cars and patio furniture. While you’re busy cleaning things up for spring, why not focus on spring cleaning your diet and health too? This week’s stories focus on cleaning up your diet and giving your cooking habits a tune up. We’ve got a few other stories to sprinkle in too (the word ‘Tacocopter’ is used…it’ll be fun!) Let’s dive in!


Bleary eyed and staggering outdoors into the sunlight, you let out a long yawn and absently mindedly scratch your hind quarters. Disheveled, weary and somewhat discombobulated, you take stock of your surroundings. Obviously, I’m describing those first few moments you experience as you step outdoors into the spring air after a long cold winter. (Don’t pretend that doesn’t describe you… we all know better.) Yes, spring has arrived and there’s no better excuse to clean up your diet and maybe shake away some of that excess winter weight. Eatingwell.com has put together a list of 4 foods that you can ditch from your diet to begin the great dietary spring clean. While some may be harder than others (Much as I might want to, I don’t think I’ll ever be able to 100% ditch sugar…it’s too darn GOOD. We’re shooting for moderation on that one!) Check out their list of foods to boot HERE.

Spring clean your diet


If you’re starting a dietary spring clean, you’ll likely start to focus on buying fresh groceries and searching out foods that are packed full of nutrients and other good things for your body. As such, you’re likely to find yourself discounting some food groups because (from a nutritional standpoint) they’re often deemed as ‘worthless’. Don’t be so quick to judge – there are some (seemingly) worthless foods that actually pack a nutritional punch. Eatingwell.com (once again) has a great list of 6 ‘worthless’ foods that are anything but. Check out the list HERE.


Continuing the theme of cleaning up your health (culinary wise) for spring, Eatingwell.com (they’re on a roll this week) has a set of tips for fixing your cooking abilities. If you’re going to take stock on what you’re eating and clean that up, you might as well try to fix some cooking bad habits as well, right? While some of the tips are no-brainers (don’t use metal utensils on a nonstick pan…DUH) and others are questionable (the debate between bringing oil to a smoke and not seems to have equal, valid arguments for both sides) there are some useful reminders in this list. Check out all 10 tips HERE.


File this one under “I wish I would have thought of this myself.” A new startup is changing the world of fast food and food delivery. You thought food trucks were the future? Guess again. Subs on scooters? Nope. Try “Tacocopter”. Yes, tacocopter. The concept is simple. Order a taco via your smartphone and an aerial drone picks up the taco, flies to your location and delivers it. This is the future folks, tacos via helicopter. Check out more on this culinary innovation HERE.

TDA (Taco delivery apparatus)


Last week, Starbucks made a few large announcements regarding their business plan and their products for their future. In addition to the announcement of a new JUICE BAR, they also announced the launch of a new energy drink line. As Maggie so astutely put it “They already sell energy drinks…it’s called coffee”. Read more about the energy drink line HERE.


Calorie: “A unit of energy given by food” That is the official definition of calorie. Again, let’s stress “A unit of ENERGY given by food”. Calories are energy. Are well on board with this concept? Calorie = energy. Now that we’re in agreement, you’ll see why this announcement by Red Bull strikes me as ironic / oxymoronic all at the same time. Red Bull announced last week that they are releasing a zero calorie energy drink. Let that settle in. Zero calorie…energy drink. So, using our equation from a few sentences ago (calories equal energy) Red Bull fundamentally announced a zero energy energy drink. These are the things that entertain me folks…


On that note, that’s all the news that’s fit to blog about this week. We’ve got two new recipes lined up for you this week, including an old favorite that is being cooked ‘the right way’ (we’re excited for that one) and a completely new flavor combination that you wouldn’t expect to work. Maggie starts the week off for us on Tuesday and I’ll follow her on Wednesday. Tune in Tuesday to see what Maggie has cooking. Until then,


~Cheers

Wednesday, March 21, 2012

Slightly Tangy Chicken

Good evening everyone! As most of our followers are aware, I have two pitfalls when it comes to cooking: I have a certain favoritism towards a particular ingredient (pasta - I'm looking at you) and I have a tendency to try a recipe that is usually easy. While I have a whole new slew of pasta receipes to share I don't particularly want to go carb heavy this week. Instead, I decided on trying a not-so easy recipe. The preparation might be simple, however, preparing the sauce and outer layer might not be. Tonight, I'm breaking new ground and stepping out of my comfort zone, but will it be successful?

The Recipe: Chicken Piccata
Original Rcipe Found In: Cooking Light, January/February 2012

What You'll Need:

4 (6 Ounces) skinless, boneless Chicken Breasts halves
2 Ounces All-Purpose Flour, divided (about half a cup)
1/2 Teaspoon kosher Salt
1/4 Teaspoon freshly ground Black Pepper
2 1/2 Tablespoons Butter, divided
2 Tablespoons Olive Oil, divided
1/4 Cup finely chopped Shallots
4 medium Garlic cloves, thinly sliced
1/2 Cup White Wine
3/4 Cup fat-free, lower-sodium Chicken Broth, divided
2 Tablespoons fresh Lemon Juice
1 1/2 Tablespoons drained Capers
3 Tablespoons coarsely chopped fresh Parsley

To start, place each chicken breast half between two sheets of plastic wrap and pound to a half inch thickness using a meat mallet. This extra effort in making the chicken thinner will result in less frustration in the cooking process. Place one teaspoon of flour in a small bowl and place the remaining flour in a shallow dish. Sprinkle both sides of the chicken with salt and pepper and dredge the chicken in the flour, ensuring an even coat and shaking off any excess of flour.


Next, melt one tablespoon of butter in a large skillet over medium high heat. Add one tablespoon of oil and swirl to coat. Add the chicken to the pan and sautƩ the chicken for four minutes on each side or until done (which is 160 degrees in the middle of the chicken using a meat thermometer.) Once the chicken is done cooking with a golden brown layer, remove from the pan and keep warm in a tin foil covered dish or plate.


Chicken, lightly browned


Heat the remainder tablespoon of oil in the pan and swirl to coat. Add the shallots to the pan, and sautƩ for three minutes, stirring frequently. Next, add the garlic, sautƩ for another minute and stir constantly. Add the wine and bring to a boil, scraping the pan to loosen any browned bits. Cook until the liquid is almost evaporated and stirring occasionally. Adding any alcoholic liquid to a hot pan is always an adventure, just be sure none of that liquid splashes on the burner. A very explosive situation might occur.

Step three or four in the sauce process


Next, add 1/4 cup of broth to the reserved 1 teaspoon flour in a separate bowl and stir until smooth. Add the remaining 1/2 cup of broth to the pan and bring to a boil. Cook until this liquid is reduced by half, about five minutes. Stir in the flour mixture and cook for another minute or until slightly thickened. Remove the skillet from the heat and add the remaining 1 1/2 teaspoons of butter, lemon juice, and capers until everything is well incorporated.


Place the chicken on serving plates, top with the sauce and chopped parsley, and enjoy!

The End Result:


While the chicken by itself is quite traditional, the piccata sauce (for a lack of better term) is quite tangy, due to the reduced down wine and chicken sauce. The extra oomp from the lemon juice and capers give it the distinct zing that makes this dish quite memorable. I've never built a sauce from the ground up before in a recipe and it was nice to see the enhancing layers while creating this sauce. I'm quite pleased with how this turned out and although it isn't quite as difficult as once presumed, it's always nice to step out of my comfort zone and try something unique and different.


That's all we have for you this week. Thanks for joining us in our culinary adventures and we will see you next week with another batch of fresh news stories. Until then,


~Cheers!

Tuesday, March 20, 2012

How 'Bout Them Home Fries?

Good evening everyone! I'm eager to try tonight's recipe as it utilizes an ingredient that has had my mouth watering since we found it in the store. Let me back up and bit - I found a recipe for home fries (also commonly called farmhouse hash) in the newest issue of Food Network Magazine that looked absolutely outstanding. This blending of red potatoes, onions, peppers and corned beef looked like a perfect flavorful meal to try to recreate for the blog.

We set out to the grocery store on Sunday to procure all of the necessary ingredients. That's when I saw it - corned beef...brisket. Maggie and I both knew instantly that we would have to pick this particular cut of beef up and try it ourselves. I've always been a fan of corned beef flavor and the thought of adding that amazing flavor to a brisket simply has my mouth watering. Enough build up - let's get cooking!

The Recipe: Corned Beef Home Fries
Original Recipe Found In: Food Network Magazine, April 2012 Issue

What You'll Need:

2 Pounds Red Potatoes (Cut into 1/2 inch  pieces)
8 Ounces Corned Beef (Diced)
1 Red Bell Pepper (Chopped)
2 Garlic Cloves (Minced)
1 Small Red Onion (Diced)
1 Tablespoon Unsalted Butter
5 Tablespoons Extra Virgin Olive Oil
1 Teaspoon Paprika
Finely Shredded Cheddar Cheese

NOTE: We discovered that corned beef comes in a large assortment of varieties (cuts) including flat round, brisket and tips. While the orignal recipe doesn't specify what type of corned beef is preferred, we opted for the brisket. We did this for two reasons, first - the brisket is nice high quality cut of meat that packs great flavor and amazing tenderness and second - while packing a hefty price (almost $7 per pound) the brisket was actually the cheapest option available to us. The flat round weighed in at 4 pounds ($6 per pound) making it both impractical and expensive. The tips were quick frozen and we were unable to verify their quality or origin - I.E. they were never really in contention for use.


Also note, we have modified the original version of this recipe to suit our own tastes and preferences. The original dish, created by Guy Fieri packs a lot more heat and is topped with avocado and an assortment of other ingredients. Our version tames the dish down and focuses on the great flavor that beef and potatoes create on their own.

To begin, bring a large pot of lightly salted water to a boil and add the potatoes. Allow them to cook until they become fork tender. This should take about 5 to 10 minutes, depending on the thickness of your potatoes (a finer dicing when preparing the potatoes will result in a quicker cooking time here). Once tender, drain the potatoes and set aside.

Steamy 


While your potatoes are cooking, add the 2 tablespoons of olive oil and the butter to a large (12 inch) non stick skillet over medium high heat. Add the onion, red bell pepper, corned beef and garlic to the skillet and allow it to simmer for around 5 minutes. Next, stir in the paprika and a pinch of salt and pepper. Let this mixture simmer for an additional 2 minutes before removing the skillet from the heat and transferring the mixture to a covered dish to keep warm.

It's important to note that our brisket was precooked and simply needed to be heated through. In fact, most cuts of corned beef will be pre cooked and ready to go right from the package (this at least applied to all the cuts we found this past week). However, if your cut doesn't indicate that it has been precooked, you may want to increase cooking time slightly (adding the beef ahead of everything else) for a few minutes.

Using the same skillet, add the remaining 3 tablespoons of olive oil and heat until the oil begins to shimmer lightly. Add the red potatoes (now cooked) to the skillet and allow them to fry for about 10 to 12 minutes, making sure to stir occasionally, until they become golden and crispy on all sides.

Next, stir in the corned beef mixture (your potatoes will be extra soft by this point in time, so take a little extra time to make sure they don't become mashed while stirring) combine everything completely and allow the mixture to evenly heat through. Transfer to a serving dish, top with a light helping of shredded cheddar cheese and enjoy!


The Results:


As I mentioned earlier, there is very little that can compete with the amazing flavor that potatoes and beef create when brought together. When you factor in the extra twist to this beef, the flavor was simply outstanding. The corned beef brisket was everything we wanted and then some. The already deep and succulent flavor of brisket was enhanced when it became corned beef - leading to flavors that almost should be illegal. Tender, juicy, full of flavor, this cut of corned beef was certainly worth the higher price of admission.

At a little over 30 minutes, this farmhouse hash (or home fry) concoction will be a quick and easy fix for a weeknight supper or a great way to get your weekend morning started. This dish can easily be enhanced with scrambled eggs (mixed right in) to become a true breakfast hash or even kicked up with diced chiles or srirachi sauce to create a spicy meal. The only limit is your creativity.

That's all we have for you this evening. Maggie will take to the kitchen tomorrow night with a brand new recipe of her own. Until then,

~Cheers

Monday, March 19, 2012

Around The Culinary World

Hello again everyone and welcome back to another Monday full of culinary news and adventure here at Out of the Culinary! I can’t speak for the entire country, but in the greater Midwest, the weather has been absolutely outstanding over the past week. We’ve hit 80 degrees for four straight days in the Des Moines metro and look to stay in the 70s all of this week as well. Even with rain in the forecast, it’s hard to be discouraged with temperatures like those.


With the beautiful weather, Maggie and I have been spending the evenings taking nice long walks and enjoying the outdoors. Hopefully a large majority of you have been able to do the same. Even when the weather’s nice and the evenings are long, the culinary news doesn’t stop. This week is no exception as we have quite an assortment of stories to share ranging from scandal in seafood to a consumer letter calling out one particular food product. Let’s dive into all the culinary news for the week!


Let’s get our mouths watering right off the bat: Alton Brown (one of our personal favorites on this blog) has found a way to make the delicious waffle even better. He added sweet potatoes (which are scientifically proven to make almost everything better). Check out this tasty concoction HERE (and you can bet this recipe will be getting a trial on the blog in the near future).

Scientifically Proven To Be Awesome


Coconut water has become somewhat of a culinary phenomenon over the past year. It has infiltrated every grocery store, gas station and corner store imaginable. With a multitude of flavors and offerings, there seems to be a variant of coconut water for just about everyone. Except those who despise coconut (like myself). I haven’t found a variant of coconut water that I can even swallow – let alone enjoy. According to KitchenDaily, even if you think coconut water tastes like gym socks (it does) the health benefits warrant the beverage finding a way into your everyday diet. So, how do you utilize coconut water if you cannot swallow the stuff? Easy, you cook with it. Check out some recipe ideas utilizing coconut water HERE.

Gym Sock Flavored


Sriracha hot sauce has an almost cult like following here in the US. The Thai based hot sauce is known for its great flavor and packs a decent punch of heat along with it. Sriracha almost becomes drug-like for some, once you have it, you simply cannot ignore it – it has to be used on all dishes or they seem lacking. While Maggie and I have tried sriracha, we were not as enamored as most (mainly because we don’t like overly hot or spicy foods). However, we understand that our readers are a diverse group, so for those of you who have heard the call of sriracha – HERE is a list of sriracha recipes to whet your appetite for the white rooster.


There’s scandal in the seafood industry and you’ve likely been involved. The FDA is launching an investigation into the advertised weight of seafood products. Recent investigations have found that about 40% of seafood has some form of ‘label fraud’. This can range from substituting lower quality fish in place of the advertised higher quality filet, or (more commonly) seafood that is sold at a lower weight than listed on the label.

The FDA states that if a product is advertised as containing 10 pounds of fish, that it should actually contain 10 pounds of fish (amazing, right?) and that glazing or ice must be in excess of the listed weight – not a contributing factor of it. (I.E. the ice cannot be part of the advertised 10 pounds). Studies have found this fraud occurs in about 8 of 10 cases.

The main culprit behind this weight disparity is the MSG like solution that many manufacturers package their scallops (and other seafood) in. We’ve actually covered this solution in the past; in our lemon herb scallop recipe we discussed wet (MSG treated) vs. dry (non treated) scallops. The wet scallops have a different (chemical like) flavor and we recommended that you avoid them altogether. It turns out that wet scallops are likely to cost you more while you get less actual product. The FDA found that most wet scallops used the MSG weight in the advertised weight, meaning people were paying for the salty solution in place of actually seafood weight.

This is an interesting development that we’ll have to keep an eye on going forward. For the time being, we’d recommend paying attention to the origin and packaging style of any seafood your purchase. Always opt for dry scallops over wet and read the label of any packaged fish to ensure you’re actually getting what you are paying for. You can read more about this story HERE.


There has been a rise in a new type of restaurant fraud recently. Unscrupulous individuals have begun posing as health inspectors in order to gain access to restaurants. Once inside, they either demand free food or blackmail the owners into paying a deposit or bribe in order to receive a better grade. In reality, actual health inspectors will not make any claims of that nature. There have even been cases of health inspector fraud reported in our own neck of the woods. You can read more about this story HERE. (You have to wonder what these people could accomplish if they used their creativity and talent in a constructive way…)


Speaking of health inspectors and the Department of Health’s letter grading system – it turns out some restaurant owners are not fans. Check out THIS fascinating piece from Foodrepublic.com in which the system of letter grading and Department of Health's inspection policy are called into question for both their purpose and motivation.


Finally, in what could be the funniest thing you read all week, one particular 12 year old is angry – and not going to take it anymore. This young girl is calling out plain doughnuts in her (adorably funny) well thought out attack letter. Check it out for yourself HERE.

IMPOSTER!


That’s all the news that’s fit to blog about this week. Once again we have a full week of new recipes lined up for you. I’ll take to the kitchen on Tuesday to create a brand new dish that utilizes a new ingredient (one we’ve never tried before). Maggie follows me on Wednesday with a tantalizingly tasty dish of her own. Tune in Tuesday night to see what I’ve got cooking. Until then,

~Cheers

Wednesday, March 14, 2012

Burgers Worth Gobbling Up

Good evening everyone! It’s hard to believe that winter’s cold grasp may finally have been broken. As I sit here today, it’s March 14, and it reached an incredible 80 degrees outside today. 80. In Iowa. In March. Whoa. Whether or not this is actually the first sign of spring or just Mother Nature messing with us has yet to be determined, however. That being said, the nice weather prompts the same reaction from almost everyone; you find the urge to go outside and enjoy the beautiful weather.


That means, even for the avid at home chef, you don’t really want to spend a lot of extra time in the kitchen cooking up tonight’s dish. That’s why, this week, we’re featuring incredibly easy and fast weeknight dinners. They are still healthy and full of flavor, but they’re also incredibly quick and easy to prepare so you can eat a great meal, then make your way outside to enjoy the beautiful weather.

As an accidental bonus, Maggie and I both chose recipes that we had tried previously (slightly different than the ones we prepared this week, but very similar) that had us wanting more. They were ‘dud’ recipes, but they certainly had room for improvement. Tonight, I’m taking a second take at the tasty and delicious turkey burger. Can this healthy lean burger be improved and made into a delicious savory weeknight meal? Let’s find out:

The Recipe: Stuffed Turkey Burgers
Original Recipe Found On: Allrecipes.com

What You’ll Need:
(Serves 4)

1 Pound Ground Turkey
1 Garlic Clove (Minced)
3 Tablespoons Minced Onion (Dried, grated onion can work as a substitute here)
2 Tablespoons Minced Red Bell Pepper (Red pepper flakes works as a substitute here)
1 Tablespoon Minced Green Onion
1 Teaspoon Cayenne Pepper
1 Teaspoon Ground Cumin
2 Slices Pepper Jack Cheese (Cut into quarters)

In a large bowl, combine the turkey, garlic, minced onion, red bell pepper, green onion, cayenne and cumin. Mix well until everything is evenly combined. Next, break the mixture into about 8 equally sized balls (approximately 1 to 1 ½ inches thick) work these balls into patties either by using your hands or with a hamburger patty press.


Place 4 of the patties onto a plate and top them with two pieces of the pepper jack cheese. Positioning is key here. You want the pepper jack to be as close to the center of the patty as possible. We’ll expand on this in a minute.

Top each of the four patties with another burger patty (the 4 that didn’t receive cheese on top) and create a seal around the edges of the patty. You’ll want to spend a few moments making a nice tight seal. Don’t leave any aggressive ‘pinch’ marks as they will weaken during cooking and cause your cheese to jailbreak and burn up in the skillet. However, don’t be too gentle when making your seal either – you really want to ensure that there is no way molten hot cheese can break free from the patty.


This is why you’ll want to keep your cheese as close to the center as possible. If it gets too close to the edge, it could get caught up in the seal that you create, causing a ‘breach’ during cooking and resulting in the loss of all that melt-a-licious goodness.

Another method for making a great cheese infused patty is to follow the above methods (make a patty, top with cheese, plate the other patty on top) but, rather than pinching the edges to make a seal, simply smash the patties up into another large meatball and then work that ball into a larger patty. You’ll create one unified patty and the cheese will (90% of the time) still be sealed away in the center. Either method works well, it’s all based on what you feel comfortable doing.

Once you feel that your cheese is safely sealed away, place a large (non stick) skillet on medium high heat and add the patties. Cook, undisturbed for 6 minutes before flipping the patties and cooking for an additional 6 minutes. Once the patties are no longer pink and the juices are clear, you’re ready to serve. Top the patties with lettuce, jalapeƱos (for the adventurous) avocados or any other burger topping you desire and enjoy!


The Result:


The only drawback to a turkey burger when compared to a traditional burger is that turkey meat has a tendency to be rather bland and uninspired, typically relying heavily on its toppings for flavor. This burger breaks that tradition by being simply alive with flavor.

The turkey itself is seasoned to a (surprisingly) spicy point – it’s not “holy cow that’s hot” but it certainly falls in the “wow, taste that spice” category. That’s not something you usually associate with turkey and is a nice surprise with this burger. The melted pepper jack cheese is the true star of this burger, however. It adds a great level of moisture to the burger (that the lean nature of turkey makes it lack) as well as a great deal of flavor to the final dish.

In about 15 to 20 minutes you can have a delicious, healthy meal on the table for you or anyone to enjoy. On week’s like they one we’re currently having, recipes like these are perfect to try at home.

That’s all we have for you this week. We’re back on Monday with another edition of Around the Culinary World and another batch of healthy and fun to make recipes. Until then, enjoy the nice weather.
~Cheers

Tuesday, March 13, 2012

Lemon Spaghetti...Part Deux

Good evening everyone!  I begin this week with a slightly used recipe.  I recreated this recipe over a year and a half ago (while I still went by my maiden name - my how time flies!)  The blog was still quite a baby back then and we were still novice chefs.  Whilst the premise is still the same for tonight's dish, adding a few more tricks of the trade, incorporating new techniques and adding a few more ingredients, I hope that tonight's recipe will, at least, improve upon an old favorite.

The Recipe:  Spaghetti with Lemon and Olive Oil (al Limone)
Original Recipe Found On:  www.cooksillustrated.com

What You'll Need:
1 Pound Spaghetti
1/4 Cup Extra Virgin Olive Oil
1 Medium Shallot, minced
1/4 Cup Heavy Cream
2 Teaspoons finely grated zest and 1/4 Cup juice from 3 Lemons
1/2 Cup finely grated Parmesan Cheese
2 Tablespoons shredded fresh Basil Leaves

Note:  I will try to keep my comparisons of the two recipes until the end, as not to confuse myself and you, the reader.


To start, bring a large Dutch oven with four quarts of water to a boil over high heat.  Add freshly ground salt to the boiling water and add the pasta in.  Cook according to the package directions.  Most in the cooking world would call this al dente.  Since I haven't got the 'al dente' part quite figured out, I usually say about one to two minutes before the pasta is completely done cooking.  This keeps a bit of a bite to the pasta without crunching down on a uncooked noodle.  Reserve 1 3/4 cups of the pasta water and set aside.  Drain the pasta in a colander and set aside.


Oh boiling water, always so boring to watch...


While the spaghetti is cooking, zest all three lemons into a small bowl.  After zesting is complete, cut the lemons in half and, using a lemon juicer, squeeze the juice into another small bowl.  I ended up with about a 1/2 of cup of juice and since the recipe calls for 1/4 cup, it worked perfectly.


The whole kitchen will smell like lemons for days


Next, using the Dutch oven, turn the heat down to medium high and heat one tablespoon of oil until shimmering.  Add the minced shallot and 1/2 teaspoon of salt.  Cook until the shallot is softened but not yet browned, about two minutes.  Whisk in 1 1/2 cups of the reserved pasta water and cream into the pot.  Bring this mixture to a simmer and cook for two minutes.  Remove from the heat and return the pasta to the  pot, stirring to coat.  Stir in the remaining three tablespoons of oil, lemon zest, lemon juice, cheese, and 1/2 teaspoon of oil.


Cover the Dutch oven and let the pasta stand for two minutes.  Toss the pasta after letting it stand to incorporate the sauce and cheese.  After this, let the pasta stand again.  Repeating this process will help the sauce adhere to the pasta and give it a good even coat.  Use the 1/4 cup of reserved pasta water if the sauce is too thick.  Stir in the basil and season with salt and pepper to taste. Serve, sprinkling cheese if desired, and enjoy!

The End Result:


The major difference between the two dishes is the "flavor melding" time.  Tonight's dish let the pasta adhere to the sauce, allowing it to soak in that great citrus flavor that lemon is known for.  Meanwhile, the previous dish added the sauce just at the very end and gave a great emphasis of lemon, but didn't quite have the depth of flavor that tonight's did.  Tonight's dish had a great base "sauce" - the starch from the pasta water plus the heavy cream gave the lemon something to stick to without being too overpowering.  The previous dish, however, had an oil and lemon juice base "sauce" and while this stuck to the pasta, it didn't quite have that soaking quality that tonight's did.


Overall, the spaghetti had, quite literally, melt in your mouth flavor.  The amount of lemon seemed somewhat subtle, but that's not always a bad thing. Letting those flavors sit and soak, really helped to give it a great lemon flavor without it being too overpowering.  This is definitely one of those 'supper in a flash' meals, without a lot of fuss or hassle.  A great dish to add to any weeknight rotation!


Join us tomorrow as Tyler tackles another quick and easy weeknight meal.  Until then,


~Cheers!

Monday, March 12, 2012

Around The Culinary World

Hello again everyone! It’s Monday AND it’s the first week after we’ve sprung forward and lost a whole hour of sleep for daylight savings time. In other words, most people probably won’t be in the best of moods today! On the positive side, that means that it will be brighter later into the day, it will be warming up with each passing week and the NCAA basketball tournament (I.E. the best month of the sporting year) begins this week. To sweeten the good news – it’s also time for another edition of Around The Culinary World. See? The good news trumps the bad when you look at it that way! It’s another full week of culinary stories and reports, so let’s dive right in!


Green Mountain Coffee found a great market with the Keurig single serving coffee maker. It turns out that there was a market to be found in the instant – no clean up – quick and easy coffee category (go figure...) Green Mountain has benefited greatly from tapping into this market and holding the patents to the Keurig brewing system. Their revenues have increased over the past year and their stock price has risen considerably during this time as well. Unfortunately for Green Mountain, their patents expire in 2012, meaning the single serve coffee market will be open for competition in the coming years.

Last Thursday, Starbucks announced their own version of a single serve coffee machine dubbed ‘Verismo’. While it is a single serve coffee maker, the Verismo is targeting a different audience. Starbuck’s machine is a high pressure coffee brewer, meaning it will make espressos and other higher end drinks. Starbucks has yet to announce the price of the Verismo, but it is widely expected to command a high price point due to the type of machine it will be.

Starbucks also makes a K-Cup variant of their coffee for Keurig machines. Although nothing was specifically outlined, analysts are speculating that Starbucks will maintain this relationship and approach the at home coffee market on three fronts; ground coffee, K-Cups and the high end Verismo.

So, while Green Mountain may not have to worry specifically about Starbucks taking away their market share, they will have to be concerned with other manufacturers entering the market once their patent expires. The end result for consumers, however, is likely to be greater competition and lower prices. You can read more about Starbucks announcement HERE.


Expiration dates are always a big topic of debate at our house. Maggie is the type who likes to throw things away as soon as they hit their ‘best by’ or ‘use before’ date. I like to be a little more investigative and look at what the product is, if it’s been opened and other variables before I decide to toss something. In the past, we’ve shared stories backing up my point of view on this topic – essentially saying that most ‘best by dates’ rarely impact the quality of the food.

This time, however, I’ve found a story that backs Maggie’s point of view (Drat). HERE are 5 interesting facts about expiration dates that may just change the way you analyze expired foods in your own home.


Whole grain pasta has inexplicably earned a ‘bad tasting’ reputation. 100% wheat or grain pasta is better for you in almost every nutritional category when compared to traditional pasta, and (from our personal experience) typically tastes exactly like or even better than traditional white flour based pastas.

Yet, despite these facts, most consumers associate whole grain pasta with a ‘cardboard’ taste or even lower quality texture. That could just be chalked up to buying the wrong brands – so, which brands avoid tasting like the box they came in and are actually worth giving a shot? Check out the results of a head to head taste test HERE and find out.


Imagine for a moment that you were a massive chocoholic (Okay, for some readers – this won’t be much of a stretch) and you particularly enjoy the Nestle Crunch chocolate bar or the occasional Butterfinger. Now, imagine one day you wake up and find that these products are completely gone from the store shelves and will not return for the foreseeable future. One country doesn’t have to imagine this situation – it really happened. Which country did Nestle cut off from its candy supply, and what was the reason behind it? Check out the story HERE.


Salt is an essential element of our diets. Without it, our bodies could not function. From a culinary perspective – salt is a very wide and varied category with countless options for the chef to use. Even with all of these options available– you really cannot use the wrong form of salt in your recipe (in most situations). Well…except for one form.

Polish authorities have recalled over 500,000 of pickles, bread and other locally produced products due to the wrong type of salt being included in production. So, what was the gaffe? Sea salt instead of kosher? Nope – the recall occurred after inspectors found ROAD SALT in a large number of products.

While the levels of toxins present in the salt were not high enough to pose a serious health risk if consumed by humans, authorities are erring on the side of caution and recalling all of the products in question to ensure that consumer safety is maintained.

Poland is a large exporter of pickles, canned vegetables and other products. A widespread oversight like this can do a lot of damage to the food industry of a region. We’ll keep an eye on this story as it develops – it will be interesting to see how the rest of the culinary world reacts to this announcement. You can read more about this story (and there’s a lot to read) HERE.

NOT for consumption


That’s all the news that’s fit to blog about this week. (road salted pickles, whole wheat pasta comparisons and a coffee battle – doesn’t get more varied than that!) We’ve got a couple of quick and easy recipes lined up this week that are perfect for the weeknight cook. Be sure to stop in Tuesday to see what Maggie has cooking. I’ll follow her on Wednesday with a great weeknight meal of my own. Until Tuesday,

~ Cheers

Wednesday, March 7, 2012

Pasta and Cheese...These Are a Few of My Favorite Things...

Good evening everyone!  Tonight, I'm returning to some of my favorite ingredients to create something entirely different.  In our pantry, we still had half a bag of jumbo pasta shells remaining from the Mexican stuffed shells recipe.  Using that dish as my inspiration, I sought to find another recipe that featured jumbo shells.  This task was not quite as easy as I expected.  Although there were quite a few recipes that looked promising, in the end, they would of had to been altered drastically due to a multitude of ingredients that we aren't really fans of. I was determined to find a recipe I wouldn't have to modifiy as much.  Then I stumbled upon tonight's recipe and I was quite pleased with not only the simplicity, but the lack of alterations we would need to make.  Without further ado, let's get cooking!

The Recipe:  Stuffed Shells with Arrabbiata Sauce
Original Recipe Found On:  www.foodnetwork.com

What You'll Need:
(Original recipe serves 8-10, the following is modified for 2 servings.)

6 Ounces (half a box) Jumbo Pasta Sauce (between 15-20 shells)
1 Tablespoon Olive Oil
3 Ounces thinly sliced Pancetta, diced
1 Teaspoon dried Crushed Red Pepper Flakes
1 Garlic Clove
3 Cups Crushed Tomatoes
1 (15 ounce) container whole milk Ricotta Cheese
3/4 Cup grated Parmesan Cheese
2 Large Egg Yolks
1 1/2  Tablespoons dried Italian Parsley
1 1/2 Tablespoons dried Basil
1/2 Teaspoon dried Mint
1 Teaspoon Salt
1/4 Teaspoon Pepper
1 Cup shredded Mozzarella Cheese

The original recipe called for marinara suace to be used as a base, rather than crushed tomatoes. Much like my recipe last week, however, I opted to use crushed tomatoes to greatly reduce the sodium level in this recipe.


To start, bring a large pot of water to a boil and cook the shells until they are slightly tender, but not cooked all the way through, roughly between four to six minutes.  I found that six minutes seemed to work the best.  (The shells will continue to cook when they are in the oven, so you don't want them to be perfectly al dente.)  Pour the shells into a colander to drain, ensuring that all the water is dumped out of the shells so they will cool.  Arrange the shells on a lightly oiled baking sheet or dish so they don't stick together as they are allowed to cool.


Next, preheat an oven to 350 degrees and heat a large nonstick skillet with the oil over medium heat.  This will begin the process of making our arrabbiata sauce:  Once the oil is barely shimmering, add the pancetta and sautĆ© until golden brown, around five minutes.  Add the red pepper flakes and garlic, sautĆ© until tender and fragrant, about one minute.  Add the crushed tomatoes and stir until all the ingredients are well incorporated.  Turn the heat down to low and let the sauce simmer, stirring often to prevent the sauce from sticking to the pan.


Traditionally, the arrabbiata sauce is a Roman sauce that consists of garlic, tomatoes, and red chili, cooked in olive oil.  The added pancetta gives the sauce a nice kick without overwhelming the entire  sauce.  It's kind of similar to a hamburger based meat sauce, but with a unique twist.  arrabbiata would be traditionally served over pasta and today is no different.


While the sauce is simmering, you can start on the stuffing:  stir the ricotta, parmesan, egg yolks, basil, parsley, mint, salt and pepper together until well incorporated.  Depending if the pasta is done and the sauce is finishing its simmer, you can keep the stuffing out to move to the next step - if your pasta still needs a few minutes, stick the stuffing in the refrigerator until needed.


Cheesy and herb-y stuffing


Pour two cups of the arrabbiata sauce over a 12 by 9 baking dish.  Fill the cooled, cooked shells with the cheese mixture, about one and a half to two tablespoons per shell.  Arrange the shells in the baking dish until they fit snugly.  Spoon the remaining sauce over the shells and top with the mozzarella cheese.  


Place the baking dish in the lower third of the oven until the filling is heated through and the cheese is a golden brown, which will take between 25 to 30 minutes.  Serve and enjoy!

The End Result:


The flavor premise behind this dish is quite promising.  Stuff pasta shells with cheese and herbs and top with a tangy tomato sauce.  Although that taste premise is promised, there were several things that could have been tweaked to be made better.  The mint was incredibly overpowering, even in its small, dried amount.  I'm not sure if this was because we had just purchased the dried mint - so it was still very strong, or if the recipe just needs to reduce the quantity used. The mint was so strong in this dish that all the other herb flavors were lost.  The mint could have been almost omitted or reduced, even simply sticking with the basil and parsley would have made the dish quite pleasant.  I would highly recommend to cook the dish the entire 30 minutes to heat the stuffing better, especially since the stuffing contains raw eggs.  Overall, the dish showed great promise and the flavors were top notch.  Adjusting a few things would have made it a truly superb dish.


That's all we have for you this evening.  Thanks for joining us this week and come back on Monday with another batch of stories from the cooking world.  Until then,


~Cheers!

Tuesday, March 6, 2012

Abundance Of Citrus

Good evening everyone! If yesterday was a hint of spring, today is a bold, full brass section enhanced proclamation of its arrival. With temperatures in the great Des Moines area reaching 72 degrees, it’s easy to very quickly slip into a spring time state of mind. Nothing goes better with spring than bright and fresh flavors. Tonight’s dish delivers on that front in a big way.


I originally found this recipe on eatingwell.com and was intrigued by the flavor combination. However, the more I looked at this recipe the more my creative side became inspired to adapt it and make it something of my own. The result of my deviation was a delightfully citrus result. Check it out:

The Recipe: Chicken With Five Spice Citrus Glaze
(Originally called Clementine & Five Spice Chicken)

Original Recipe From: Eatingwell.com
(Heavily adapted to a new creation)

What You’ll Need:

6 Navel Oranges
¼ Teaspoon Chinese Five Spice Powder
2 Teaspoon Canola Oil
4 Large Bone-In Chicken Thighs (Skin removed, trimmed of fat)
1 Tablespoon Chopped Fresh Cilantro
¼ Teaspoon Sesame Oil


Five spice powder has been featured a few times on our blog now. It’s a unique blending of cinnamon, cloves, fennel, star anise & Sichuan pepper (the ingredients can vary slightly, but these are the most common components). This seasoning creates a beautiful blend of sweet and spicy – adding a layer of almost smoky depth to any dish. It’s not at all hard to find and priced competitively compared to other seasonings in your local grocery store’s spice aisle. (Essentially, we’re saying “DON’T SUBSTITUE!”)

First, zest your oranges using a micro-plane or box grater until you have about 1 teaspoon of orange zest. (Be sure to take only the outer orange layer, not the white ‘pith’ beneath. The pitch is very bitter and you don’t want to add it to your dish). I found that it took about 2 orange peels to achieve the desired quantity. Next, juice the oranges until you’ve obtained about ¾ to 1 cup’s worth of liquid. There will be some variation here as to the amount of liquid you can actually pull from the oranges, so you may need to increase or decrease the number of oranges used accordingly.

In a small bowl, combine the orange zest, juice and five spice powder. Use a whisk to vigorously incorporate all of the ingredients. You’ll know you’ve achieved the perfect mix of spice and liquid when the mixture turns a light, rusty orange color. Set this mixture aside.

This combination (five spice and oranges) is a classic culinary pairing of opposites. Five spice powder can be a little on the sweet side, so the tart ‘bite’ of the oranges will help neutralize that extreme. Conversely, the tartness of the orange is greatly mellowed with the sweet flavors of five spice powder. By taking out both extremes, you create a sauce that has the best of both worlds. A great citrus burst from the oranges, complimented with the sweet undertones of five spice powder.

Lightly season both sides of your chicken thighs with salt and pepper (make sure the skin has been removed and excess fat is trimmed). In a large (12 inch) non stick skillet, heat 2 teaspoons of canola oil over medium high heat until the oil begins to shimmer. Once shimmering, place the chicken thighs (smooth side down) into the skillet and cook, undisturbed, for 3 to 5 minutes or until the skin has developed a nice golden brown crust.


Flip the thighs and cook for an additional 3 to 5 minutes before adding the orange juice mixture to the skillet. Bring the mixture to a simmer before reducing the heat to medium low (to achieve a light, consistent simmer). Allow the thighs to marinate in the juice for 15 to 18 minutes or until they reach about 165 to 170 degrees.

The original recipe called for the juice to be made into a form of sauce, utilizing scallions, cilantro and sesame oil to create a lively finish to the chicken. As I was reading this recipe, however, I came up with my own idea. Rather than creating a sauce, I decided to create a glaze. I’ve learned from other recipes that orange juice when allowed to simmer long enough will essentially caramelize, creating a beautiful glaze.

Once your chicken has reached the desired temperature, increase the heat to medium and flip the thighs. Bring the sauce back to an active simmer and continue to flip the thighs every two minutes or so. After about 5 minutes, the remaining sauce should be very sticky and glaze like (you’ll be able to judge this by the amount that sticks to the chicken when you flip the thighs – if it covers the thigh without dripping off, you’ve reached the glaze stage). The exact time to go from sauce to glaze will vary slightly based on how much juice you were able to get from the oranges – the less juice, the shorter time it will take to glaze.

Toss the chicken in the skillet a few more times to build up a nice layer of glaze before transferring the thighs to a serving dish. Meanwhile, remove the skillet from heat and stir in tablespoon of fresh cilantro and the sesame oil. Mix until well combined and then drizzle this remaining glaze over the chicken. Serve with a side of brown rice and enjoy!


The Results:


You’re always taking a slight risk when you decide to abandon a recipe and forge your own path. I was playing off of my experience and a ‘hunch’ that this recipe would come out great. In the end, I’m glad I followed my hunch because this resulting dish was absolutely delicious.

The orange glaze was the perfect marriage of sweet and citrus. The chicken burst with orange flavor without being too tart or overwhelming. As a nice bonus, most of the liquid from the orange juice mixture cooked into the thighs, rather than evaporating. This infused the already juicy chicken with a great burst of orange juice. Adding the cilantro and sesame oil at the very end took the glaze to an entirely new place. The sesame oil created an almost ‘Asian’ style of flavoring, while the cilantro broke up the sesame flavoring to keep it from running the whole dish.

The end result was a recipe that tasted the way spring feels – bright, fresh and sunny. Clocking in at just under 250 calories, the healthy nature of this dish adds to its appeal. This one is certainly worth trying at home!

That’s all we have for you tonight. Maggie is taking to the kitchen tomorrow night with a brand new recipe that incorporates some of her favorite things to cook with. Be sure to stop in and see what she has cooking. Until then,

~Cheers

Monday, March 5, 2012

Around The Culinary World

Hello again everyone! It’s a beautiful Monday morning here in the greater Midwest. Temperatures are gaining ground and spring is beginning to show signs of returning. We all know the real reason to be excited today, however. Today marks a new edition of ‘Around The Culinary World’! Lately, we’ve been graced with a plethora of great stories to share; in fact the past month of culinary news has been varied and quite interesting. Today’s batch of news is no exception. While the quantity is lower from past weeks, the quality and diversity of today’s stories more than makes up for the difference. Enough grandstanding – let’s dive right into the culinary news for this week:


A few months ago, we shared a story about a pending change for the meat packing industry. The FDA was requiring that the most popular cuts of chicken and beef begin displaying their nutritional information on the side of the package. Well, the deadline has come for this change. Starting on 3/1/12 – all ground beef, steaks and poultry packaging (I’ve not been able to confirm if pork is included in on this change, however, I haven’t read anything specifically exempting it from the change) will have to include caloric values and fat content. Interestingly, even products that advertise their fat percentage on the package (I.E. ground beef that states “85/15”) will still have to list their fat percentage on the label. This could pose a problem for manufacturers who like to ‘round off’ their numbers on the packaging. In the end, it’s a move that benefits consumers as more transparency will help them make better decisions. You can read more on this change HERE.


The garbage disposal may be one of the most handy kitchen gadgets. Whether it’s reducing the leftover scraps from pan into a fine pulp or simply quickly clearing out a sink full of soapy water, this kitchen gadget is indispensable for the everyday chef. The hungry little blades seem like they’re able to chop up just about anything that comes its way. There are some things, however, that the garbage disposal cannot do. Check out this collection of things NOT to put into your garbage disposal HERE.

As a funny side note to this story, Maggie learned the hard way about rice and garbage disposals. After cleaning a pot that was used to cook rice earlier in the evening, Maggie had collected a large amount of rice in the bottom of the sink. Flicking on the garbage disposal, she pushed a fair amount of rice down the drain and out of sight. She then proceeded to wash the remaining dishes. Typically, when we’re washing dishes our sink fills up with soapy water, so it wasn’t too concerning as the water level rose. Normally, a flick of the disposal switch remedies this situation. Except…this time it didn’t. The water stubbornly stayed in the sink. A few more flicks of the disposal did remove the water from one sink, but much to Maggie’s horror the adjoining sink promptly filled up with said water. That night resulted in a pipe’s seal leaking, spraying water all over the under-sink cabinets (and about 3 to 5 buckets of water being rushed from under sink to tub as we tried to keep our kitchen from going under water) and forced us to call our apartment’s emergency maintenance line to snake the line clear. It was a wet, soapy mess (one that I got stuck cleaning up somehow…) and (in hindsight) a funny lesson about what DOESN’T go in the disposal.


A few weeks ago, we shared a story regarding the candy manufacturer Mars Inc. and their plans to lower the caloric content of all of their candy offerings. Well, Nestle has decided to go one better. Finishing a plan that launched in 2005, Nestle has axed all artificial ingredients (including coloring and dyes) in their UK product line. There are no plans to roll out these changes to the US market yet, but Nestle is apparently looking at making the same changes overseas. The UK is one of the world’s largest candy consumers, and many new products or concepts debut there and then move across the world. Don’t be surprised if sometime soon, your Kit-Kat or Smarties start boasting all natural ingredients. Read more on this change HERE.

Much like the Mars announcement, I’m happy to see a company that is taking initiative to make their products better for their consumers. The health world cannot reach a consensus about the effects artificial flavorings and colors have on individuals – but I tend to believe that any opportunity you have to use a natural ingredient over an artificial ingredient is one you should take. Cheers to Nestle for their health conscious move – and here’s hoping this change makes it way to the US.


Every chef has an ingredient or flavoring they don’t like. Whether it’s simply a pain to cook, hard to prepare or just plain gross – there’s something that each and every chef (amateur or professional) just detests. My ‘foods I detest’ are green beans (hate – hate –hate – HATE! Their flavor) and mushrooms (the texture simply ruins a dish for me). While there are certain exceptions to the rule (I have found uses for mushrooms that I enjoy) I usually go out of my way to avoid either ingredient if at all possible.

The difference for amateur chefs and professional chefs is even though professional chefs may detest an ingredient – they still have to use it if the customer requests it. So, which ingredients do professional chefs dislike the most? Check out the list HERE.


Beer – the ubiquitous alcoholic beverage. Beer often gets unfairly lumped into an “uncultured” drinking category –labeled as the low brow drink. This is an unfortunate notion, however, as beer, when done well, can be just as full of life and personality as the finest wines or whisky. Typically it’s the mass-produced ‘cookie-cutter’ beers that earn this label (Budweiser, Miller Lite, Coors Lite – (the big boys) are internationally famous for being “American beer” which is not exactly a good classification in the beer world).

If your world of beer doesn’t range outside of the major players, you might not ever even realize why the big brands are so detested for being flat, bland or tasting like things that rhyme with “miss”. No, the real beauty of beer isn’t in the mass produced offerings, but in the microbreweries. It’s here that beer takes on a new life, picking up hints of flavor – depth and amazing quality. If you’ve never had a microbrewery beer, you owe it to yourself to try one. Most grocery stores carry microbrewery offerings – you just have to move away from the grand Bud-Lite displays to find them. (I’m particularly fond of Red Hook’s ESB at the moment – check them out if you get a chance).


Microbreweries are booming right now – and the resulting trend has caused its own spinoff; home brewing. Yes, the DIY beer market has become quite the playground for hobbyists over the past few years and the product has greatly improved as the players become more experienced. No longer are hobby beers for the single male crowd – and they certainly are no longer looked at as mere fermented water. Recently, the New York Times ran a profile of home brewing and the strides its made over the past few years. It’s an interesting read and it has quite a bit of information on the DIY brewing trend. Check out the full story HERE.


That’s all the culinary news that’s fit to blog about this week. We’ve got another full week of recipes lined up. I’ll be taking to the kitchen tomorrow night to try out a very unique dish that blends some flavors you don’t commonly associate with each other. Maggie will follow me on Wednesday night with a recipe that pulls in some of her favorite things to cook with. Be sure to stop in Tuesday night to see what I’ve got cooking. Until then,

~Cheers

Thursday, March 1, 2012

The Finest Filet

Good evening everyone! We've mentioned previously that one of the Christmas presents that Maggie and I received from my parents was a box of Omaha Steaks. Ranging from top sirloin, high quality franks, stuffed fish fillets - this was quite a diverse box of goodies. We've already cooked up pork chops and a couple of top sirloin from this box, but the slice of meat that I most wanted to cook was still calling to me - filet mignon.

Yes, tucked away in our box of goodies was two filet mignon steaks. Filet mignon, for those who are not aware is taken from the smaller part of the tenderloin in beef. The meat runs along the portion of the spine and is incredibly tender and soft because it is a non weight bearing muscle with no connective tissue. The standard cow only has about 4 to 6 pounds of actual filet mignon, so this cut of beef can be very expensive.

Filet mignon is famous in the culinary world for its incredibly soft texture and amazing moisture level. Oddly enough, this highly coveted piece of steak is actually one of the more subdued (flavor wise) cuts. It has a very mild, almost hidden beefy flavor that can lead to an underwhelming dish if handled incorrectly. Luckily, the fine folks at America's Test Kitchen have devised a way to coax out this great steak flavor.


The Recipe: Pepper Crusted Filet Mignon With Port-Cherry Reduction
Original Recipe Found In: The Complete America's Test Kitchen Cookbook

What You'll Need:

5 Tablespoons Black Peppercorns (Cracked)*
5 Tablespoons Plus 2 Teaspoons Olive Oil
1 1/2 Teaspoon Table Salt
4 Center-Cut Filet Mignon (Dried with paper towels to remove surface moisture)

For The Port-Cherry Reduction
1 1/2 Cups Port**
1/2 Cup Balsamic Vinegar
1/2 Cup Dried Tart Cherries
1 Large Shallot (Minced)
2 Sprigs Fresh Thyme
1 Tablespoon Unsalted Butter

* Cracked peppercorns are different than standard pepper mill ground peppercorns. While you can use freshly ground pepper in a pinch, there is better flavor to be had in cracking whole peppercorns yourself for this recipe. To crack the peppercorns, simply spoon the 5 tablespoons of whole black peppercorns into a tin foil pouch. Seal the pouch tightly and place it on a cutting board. Using a meat tenderizer, whack the pouch a few times to break the peppercorns down into a coarse mixture. Alternatively, you can use a pestle and mortar to grind the peppercorns by hand. Or, (if you're feeling especially lazy), a spice grinder works well too.

I attempted all three methods and found the meat tenderizer to be the least effective. The pestle and mortar worked the best - but there was a lot of effort involved. In the end, the lazy way wins. A spice grinder is the easiest way to go here.


** Be sure to use a port wine here rather than a sherry. Port is a sweeter wine, which is necessary for this dish. We're creating a sauce to compliment the filet while cutting some of the potency of the peppercorn, so a sweet red wine or port is crucial to this task.

If you haven't already deduced from the ingredient list, the solution to coaxing out the most flavor from the filet is to create a black peppercorn breading. Black peppercorn greatly compliments the natural flavors of the beef and actually kicks the flavors up a notch - creating a great beefy burst of flavor. Other methods for filet mignon include puff pastry or bacon wraps, but they compensate for the lack of natural flavor by covering it with another texture or flavor. I was partial to the concept of black peppercorns because they will enhance the natural flavor of the filet, rather than hide it under another flavor.

However, there is one obvious problem in creating a breading using black peppercorns. If left alone, the flavor is going to be really intense and almost overwhelmingly spicy. So, how do we balance creating a flavorful breading without overwhelming the dish? It's actually easier than one might imagine.

The first step to creating a the peppercorn crust is to reduce the natural heat of the peppercorns. Add the peppercorns and 5 tablespoons of olive oil to a small saucepan and warm over low heat until light bubbles begin to form. Continue to cook the peppercorns at a very light simmer for 7 to 10 minutes, making sure to swirl the pan occasionally to encourage even cooking. The original recipe states to cook the peppercorns until they become fragrant, however, they are fairly potent right away - so sticking to a 7 to 10 minute clock is easier here.

Remove the saucepan form the heat and allow the mixture come to room temperature. Once at room temperature, stir in the salt and spread the peppercorn mixture evenly across all of the steaks. Next, tightly wrap each filet in plastic wrap, pressing down on the them to work the peppercorns into the steak, and allow the steaks to rest 1 hour at room temperature.

While the steaks are resting, you can begin to make the port cherry reduction. In a small saucepan, combine the port, vinegar, shallot, cherries and thyme and place over medium heat. Allow the mixture to simmer until it reduces to about 1/2 cup of total liquid. This should take about 30 minutes. Once properly reduced, remove the pan from heat, cover, and set aside.

When the hour is almost up, preheat your oven to 450 degrees and place a rimmed baking sheet on the top rack. Meanwhile, add 2 teaspoons of olive oil to a large (12 inch) non stick skillet and place the skillet on medium high heat. Heat the oil until it begins to lightly smoke (you'll see thin trails of smoke rising from the skillet). Add the filets to the skillet and allow them to cook, undisturbed, for 3 to 5 minutes or until a nice golden crust has formed on one side of the filet. Flip the filets and allow them to cook for an additional 3 minutes to create a nice brown crust on the other side as well.


Next, transfer the filets to the rimmed baking sheet and allow them to cook in the oven for 3 to 5 minutes to bring the center of the filet to 120 degrees for rare, 5 to 7 minutes to bring the center of the filets to 125 degrees for medium rare or 7 to 9 minutes to bring the center of the filets to 130 degrees for medium. Finally, transfer the filets to a wire rack and tent them loosely with foil. Allow them to rest for 10 minutes before serving.

While the steaks are resting, return the saucepan with the port cherry reduction to medium heat. Fish out the thyme sprigs and bring the mixture to a light simmer. Remove the sauce from heat and whisk the butter into the sauce until it is completely melted. Serve the sauce over the steaks and enjoy!


Alongside this dish, I decided to cook up a few red potatoes. Luckily, red potatoes are so easy to roast, you can easily throw them alongside any dish and make any modifications you'd like. For our version of this side dish, I opted to use:

2 Pounds Red Potatoes
1 Minced Garlic Clove
2 Tablespoons Unsalted Butter (Melted)
1 Teaspoon Salt
1 Tablespoon Lemon Juice
Pinch of Parsley


Quarter the red potatoes and toss them in a baking dish with the melted butter, minced garlic and salt. Place the covered baking dish into a 400 degree oven and allow them to roast for one hour. Be sure to stir the mixture once or twice during the cooking process to make sure everything is evenly covered. Once the potatoes are tender, add the lemon juice and toss to coat evenly. Serve and enjoy! (You can also use the microwave for this recipe, simply cook them on high for 15 to 20 minutes, add the lemon juice and serve).

The Results:


Filet mignon certainly earns its reputation as the highest quality of steak. These filets were incredibly tender and moist - they almost melt in your mouth, which is simply unheard of when it comes to steak. The peppercorn breading really did coax out a great beefy flavor without overwhelming the dish. Combined with the sweet port cherry reduction, the filet was able to shine without being overwhelmed by all of the supporting cast. The sharp bite of the peppercorn, the sweet touch of the sauce, everything worked together to create an amazing harmony for this fantastic steak. If you're ever in possession of filet mignon and are not quite sure what to do with it - you simply cannot go wrong with this recipe.

The side dish of roasted red potatoes was impressive too - especially for being an 'off the cuff' recipe that I decided on at the last minute. You simply cannot go wrong with slow roasting potatoes and adding lemon and butter. Italian herbs or even bacon would make great substitutes for the lemon in this side dish too.


That's all we have for you this week. As always, thank you for stopping in and sharing our cooking adventures with us. We're back on Monday with another edition of culinary news, until then,

~Cheers