Good evening everyone! As I alluded to on Sunday, I've been trying to make this week's recipes for 3 straight weeks now; only to be foiled by rain, cold or rain AND cold. So, when I awoke this morning to yet another day of rain and cold I had a choice to make. Push this recipe back once again or tackle the elements to get this recipe on the blog?
As the popular refrain goes - the show must go own. So, despite the rain and the cold - we're grilling!
Tonight's dish is not a new concept to the blog, in fact we've featured a variant of this recipe at least four other times (that we can find, it's possible that total is higher) in the past. What's different about tonight's dish is that we're trying another new variant for glazing and a new cooking method. Rain or no rain, let's get cooking!
The Recipe: Chipotle Orange Glazed Chicken
Original Recipe From: Eatingwell.com
What You'll Need:
(Serves 2)
2 Boneless Skinless Chicken Breasts (Trimmed of excess fat)
1 Tablespoon Orange Juice Concentrate (Thawed)
1 1/2 Teaspoons Chipotle Chiles In Adobo Sauce (Chiles chopped fine)
1 1/2 Teaspoons Balsamic Vinegar
1 Teaspoon Molasses
1/2 Teaspoons Dijon Mustard
Salt (Pinch)
Preheat your grill to 500 degrees, then clean the racks and lightly oil one grate. Reduce the grill temperature to medium (300 degree range).
While your grill is heating up, combine the orange juice, chipotle chiles, vinegar, molasses and mustard in a small bowl. Whisk until well blended, then store in the refrigerator until ready to use.
Lightly season each chicken breast with salt before placing them on the lightly oil grill grate. Cook for 2 to 3 minutes or until the outside of the chicken turns golden brown. Flip and repeat cooking the opposite side for 2 to 3 minutes.
After flipping the chicken, coat the cooked side with generous portion of the glaze. Once the second side has achieved a golden brown color, flip the chicken again and spread the glaze on that side as well. Allow the chicken to cook for an additional 3 to 5 minutes, or until the center registers 165 degrees on an instant read thermometer.
The key here is to watch the chicken after you apply the glaze. If you notice that one side is cooking or browning a little too quickly, simply flip the breast to even out the cooking. The recipe calls for only two rotations, but our grill runs a little hot and I found that a few more flips were necessary to achieve perfect cooking without a burnt finish. As always, just watch what you're doing and you'll be fine.
Once the chicken reaches the safety zone of 165 degrees, simply serve and enjoy!
The Results:
As I mentioned in the open, orange glazed chicken is hardly a new concept to the blog. That being said, each iterations seems to bring a whole new flavor. We've cooked up some very citrusy chicken breasts and even some sweet concoctions as well - but this is the first that balanced the sweet and heat quite well. There's certainly a bite from the chipotle, but it's not enough to scare anyone off (the orange and molasses balance the bite nicely). At just over 150 calories per serving, this quick and healthy meal is a sure fire way to change up weeknight meals.
That's all we have for you this evening, we're back on Thursday when Maggie takes to the kitchen with a brand new recipe of her own. Until then,
~Cheers
Tuesday, April 29, 2014
Sunday, April 27, 2014
Sunday Special: Chipotle Mayo Sliders
Hello again everyone! 95% of the time, I really enjoy living in the midwest. The people are great, the prices are low and the quality of life just feels better. What's the other 5%, you ask? The weather. More specifically, midwestern spring weather. This week will be the third straight that I've set out to with a recipe destined for the grill and (hopefully) this week will be the week I finally prepare said dish. Two weeks ago, we dipped into an unusual polar plunge, falling from 70 degrees the day before to a chilly 40. (Not grilling weather, obviously). The second week, the temps dropped into the mid 40 once again, but came with a bonus - rain! Washed out, I was once again forced to postpone my recipe into the next week.
Long story short, when you're cooking (especially grilling) it's not a bad idea to have 'Plan B'. For this week's "Sunday Special" I thought I'd share one such plan B recipe that I cooked up last week. By utilizing everything you typically have in your kitchen this recipe can be a good "emergency dish" in case something goes wrong with your original plan (alternatively, you can just cook it because it looks tasty. Either option works.)
The Recipe: Chipotle Mayo Sliders
This is an Out of the Culinary original recipe
The Recipe:
(Serves 2-3)
1 Pound 80/20 Ground Beef
1/4 Cup Bread Crumbs
1 Tablespoon Yellow Mustard
1 Egg (Beaten)
2 Tablespoons Mayo
1 Tablespoon Sriracha Seasoning
6 Tea Rolls (Fresh baked are better, but store bought work in a pinch)
Preheat your oven to 300 degrees.
In a small dish, combine the sriracha and mayo with a fork until well blended. Store in the refrigerator until just before serving.
Form you hamburgers by combining the beef, egg, mustard and bread crumbs in a large bowl. Once the mixture is well mixed, simply form the meat into golf ball sized portions, flattening them slightly in your hand.
Transfer the burgers to a lightly seasoned grill pan and cook for 3 to 5 minutes on each side or until they are evenly browned.
The one issue with sliders is that they are a bit thicker than a standard burger. This means that they take a bit longer to cook through than your standard burger and if you simply cook them like a standard burger, you're likely to chard the outside long before the centers are done. The solution? Your oven.
If your grill pan is oven safe (and it should be - don't buy pans if they can't go into the oven - multitasking pans are your friend!) simply pop in into the oven for 10 minutes to allow them burgers to cook through (you can also use a baking sheet, if necessary).
After 10 minutes, your sliders should be cooked through. Top the burgers with some shredded cheese if you so choose and pop them back into the oven for an additional minute to melt the cheese. Then, simply spread a layer of the sriracha mayo on each bun, add the burger and enjoy!
The Results:
Thursday, April 24, 2014
You Can Take Your Flatizza, We've Got a Better Version!
Good evening everyone! While certain restaurants are taking akin to a particular style of bread and trying to make it its own, it's very simple to try your own style of flatbread. Tonight's recipe can be the launching point trying flatbread and experimenting different variations of ingredients and styles.
The Recipe: Vegetable & Cheese Flatbread
Original Recipe Found In: Cooking Light, May 2014
What You'll Need:
1 (8.8 ounce) package Whole-Wheat Tandoori Naan bread
8 Green Onions, cut into 3 inch pieces
1 Garlic clove, halved
4 Teaspoons Extra-Virgin Olive Oil
1 (7 ounce) Yellow Squash, thinly sliced (about 1 1/3 cups)
1 Cup frozen Corn Kernels
2.5 Ounces part-skim Mozzarella Cheese, shredded (about 2/3 Cup)
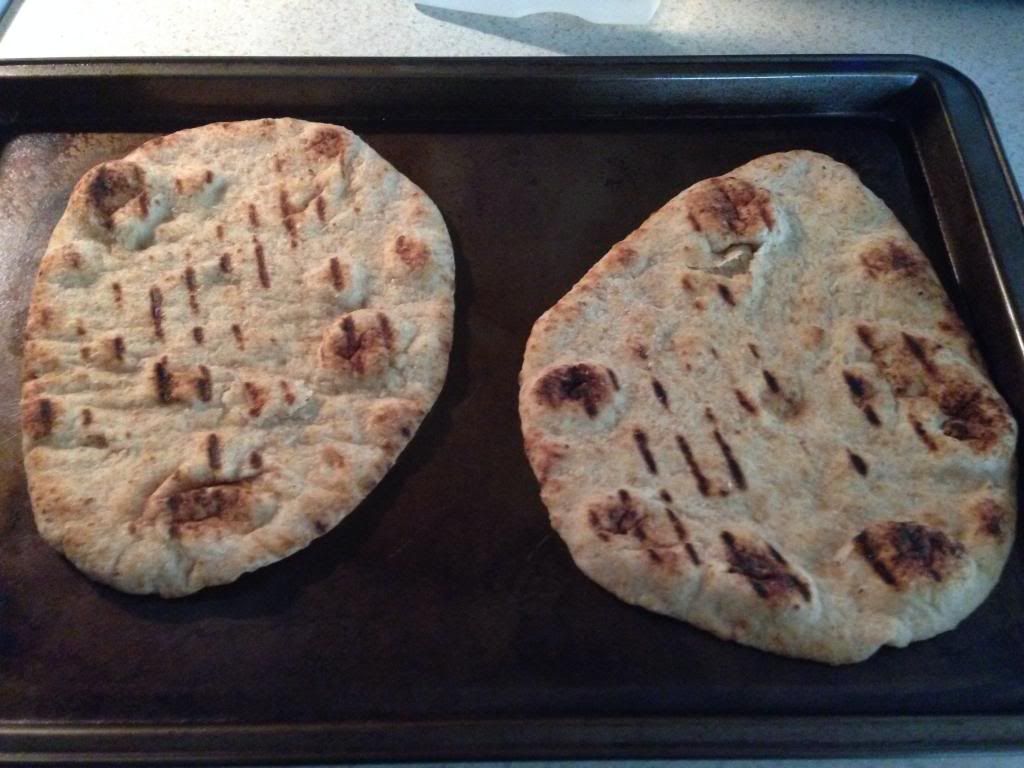
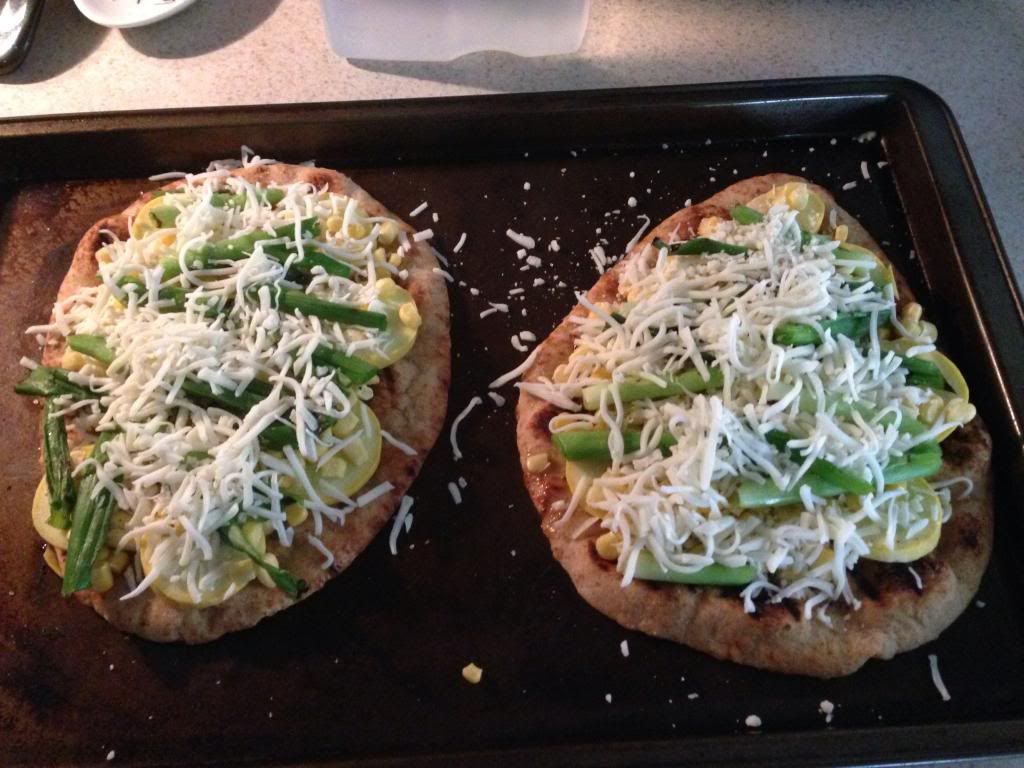
To start, position a rack in the upper third portion of the oven and preheat to 400 degrees. While the oven heats, heat a grill pan over high heat and lightly coat with cooking spray. Add the naan bread and grill for one minute on each side or until grill marks appear. Move the naan to a baking sheet. Place the onions in the grill pan and grill for two minutes, turning the onions once.
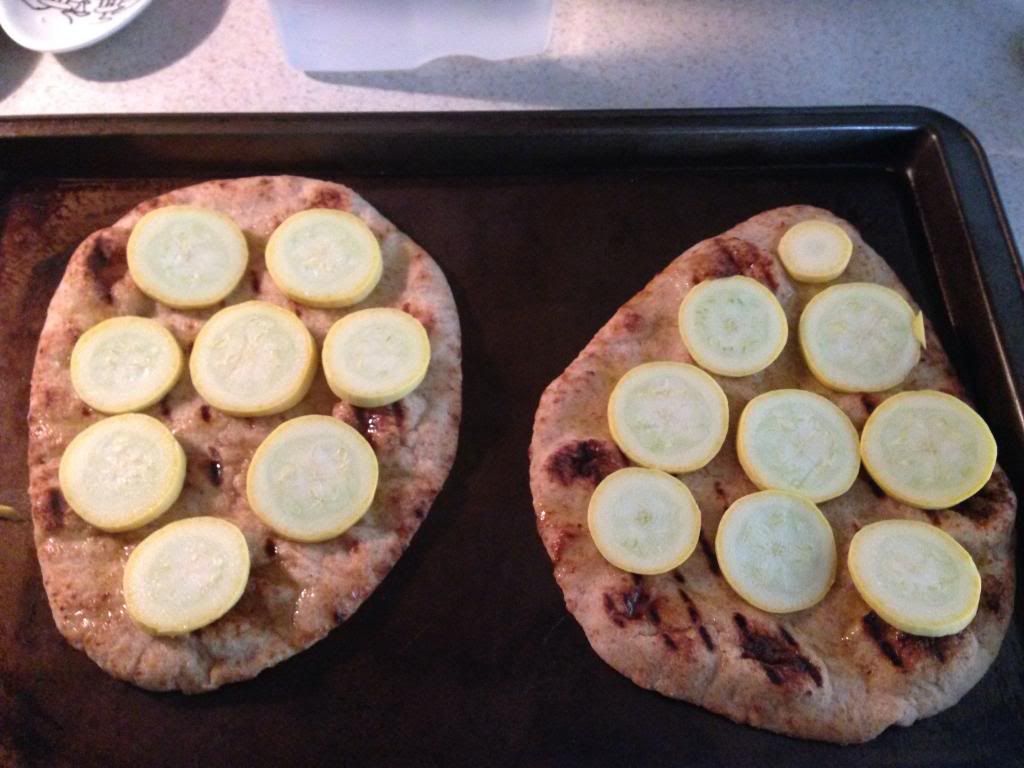
Next, on the warmed naan bread, rub the cut side of the garlic over the top side of the naan. You'll start to smell the garlic and that is what you'll want. Once rubbed down with garlic, drizzle with two teaspoons of oil.
From here, you can begin to assemble the flatbread: Layer the squash pieces over the naan, leaving an 1/2 inch gap around the edges.
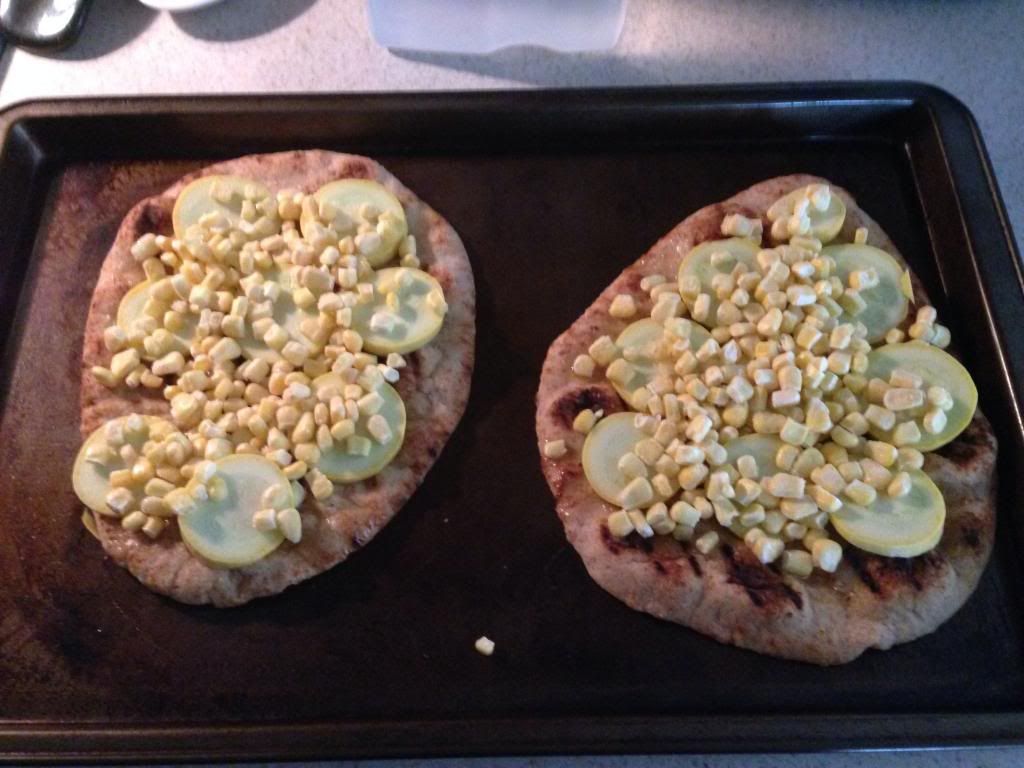
Next, sprinkle the corn in an even layer on top of the squash.
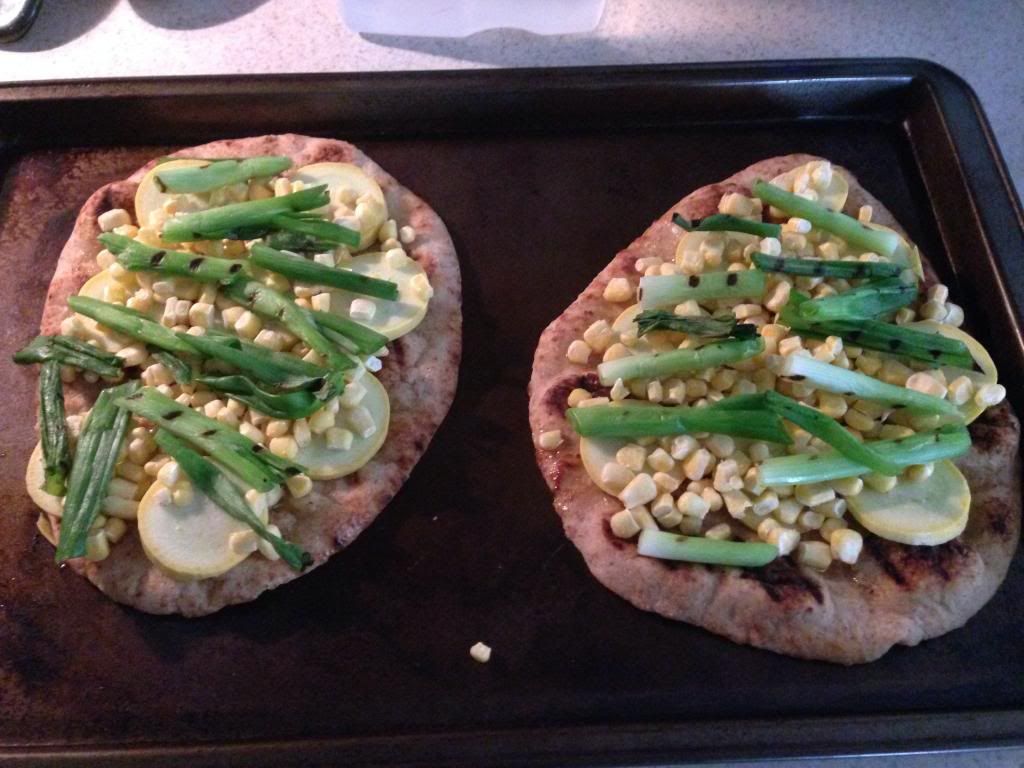
Finally, top with the green onions.
Sprinkle with salt and pepper and evenly coat with cheese.
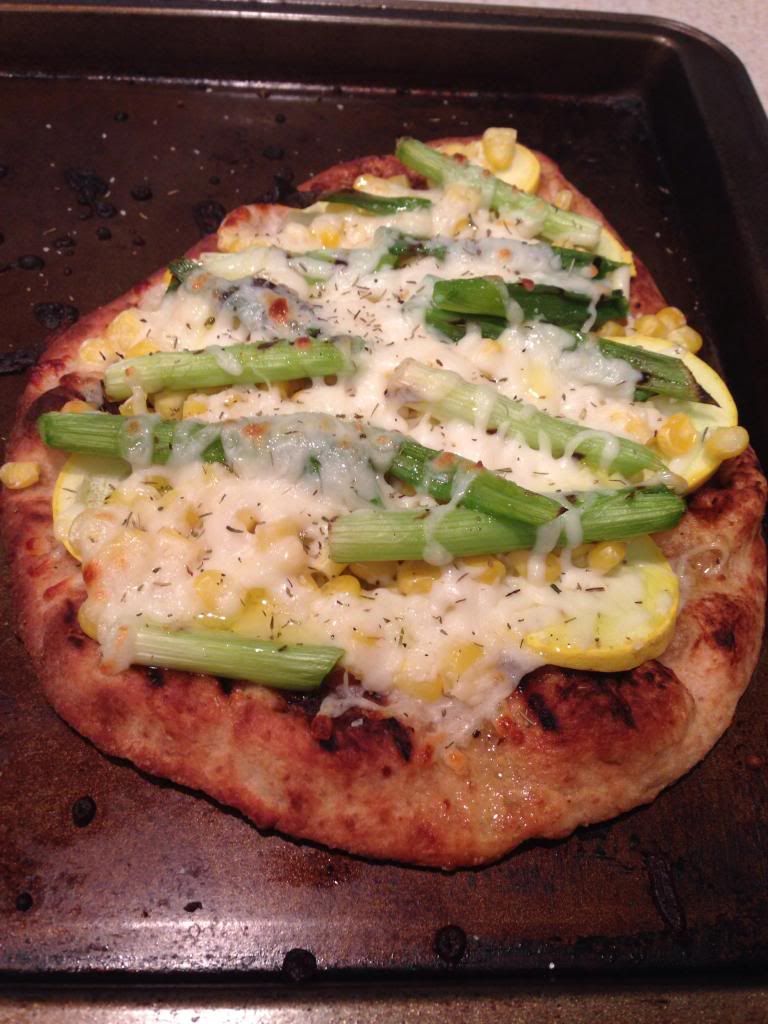
Place the baking sheet in the oven and bake the flatbreads for eight minutes. After this, while the baking sheet is still in the oven, turn the broiler on and broil for two minutes or until lightly browned. Take the baking sheet out of the oven and sprinkle with the remaining oil and dried thyme. Cut each flatbread in quarters, serve, and enjoy!
The End Result:
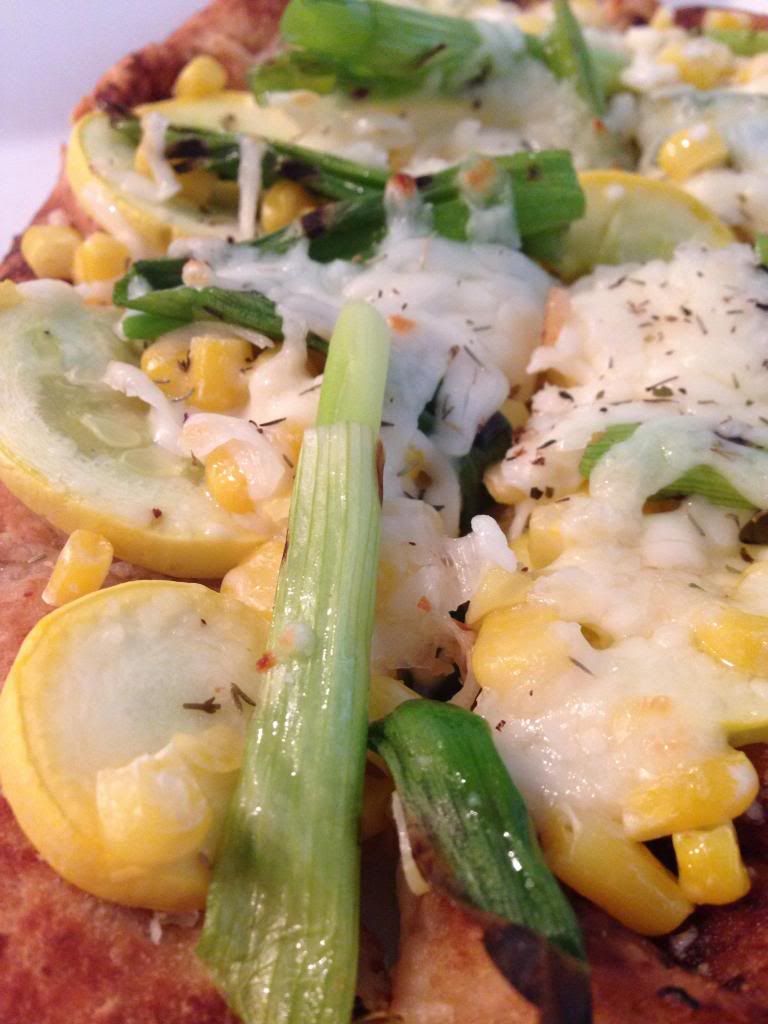
These were tasty, little creations! While written on paper, these vegetables probably didn't sound the best together. But baked in the oven and topped with cheese, the squash, onions, and corn made a great trio of flavor. The naan was a great base for all these ingredients and didn't interfere with its own flavor. If I made this again, I would probably cut the enormity of the size of the vegetables down, so that it didn't make it so awkward to eat. Trimming the onions to either an inch or even smaller wouldn't end up having giant onion bites in your mouth. Same goes for the squash - cutting into quarters would have made the flatbread easier to eat. Overall, a great veggie dish that will be like nothing you've had before!
Thanks for joining us tonight. Check back this weekend for a special post from Tyler. Until then,
~Cheers!
Saturday, April 19, 2014
Quesadillas Made Healthy
Good afternoon everyone! I was introduced to the world of quesadillas in my freshman year of college, and I have not looked back. I love any sort of meat and/or cheese combination that inhabits two tortillas and serves itself as melty goodness. It's quite simply, the best, and a dish that has memories laced in. While those quesadillas in college might have been chock full of calories, I strive for something that's a little bit more healthy these days. Today's recipe is a nice alternative for anyone wanting a quesadilla without having the guilt.
The Recipe: Crispy Vegetables Quesadillas
A variation of a recipe found in Cooking Light, May 2014 Issue
What You'll Need:
1 Teaspoon Canola Oil
1/2 Cup frozen whole-kernel Corn
1 Cup cooked Couscous
1/4 Teaspoon Salt
1/2 Cup precooked Spinach
1/2 Cup precooked white Onion, chopped
3 Ounces shredded Sharp Cheddar Cheese (about 3/4 Cup)
1 (15 Ounce) can unsalted Black Beans, rinsed and drained
2 Teaspoons Mexican Hot Sauce
8 (6 inch) Flour Tortillas
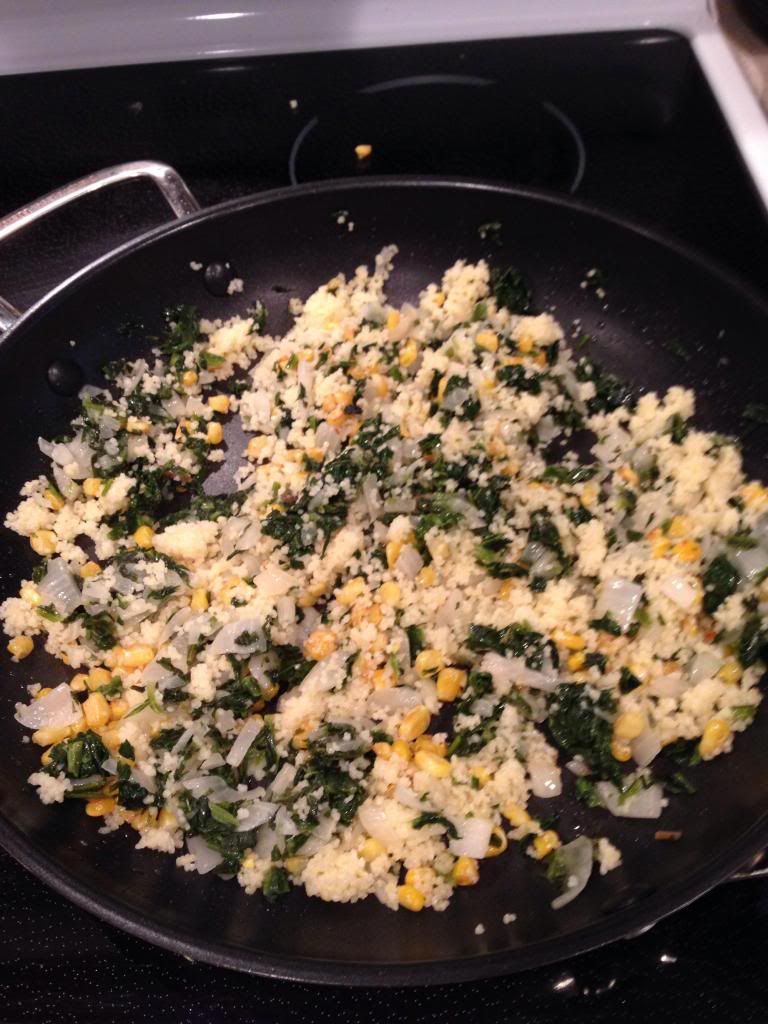
To start, place a baking sheet on the middle rack of an oven and preheat a broiler to high. Keep the pan in the oven as it preheats. Next, in a large nonstick skillet, heat the canola oil over medium-high heat. Once heated, swirl the oil to coat and add the corn, cooking for five minutes, or just until the kernels have touches of light brown to them. Next, add the couscous, salt, spinach, and onions and cook until all ingredients have heated through, about three to five minutes. Take the skillet off the heat and stir in the cheese until is has melted.
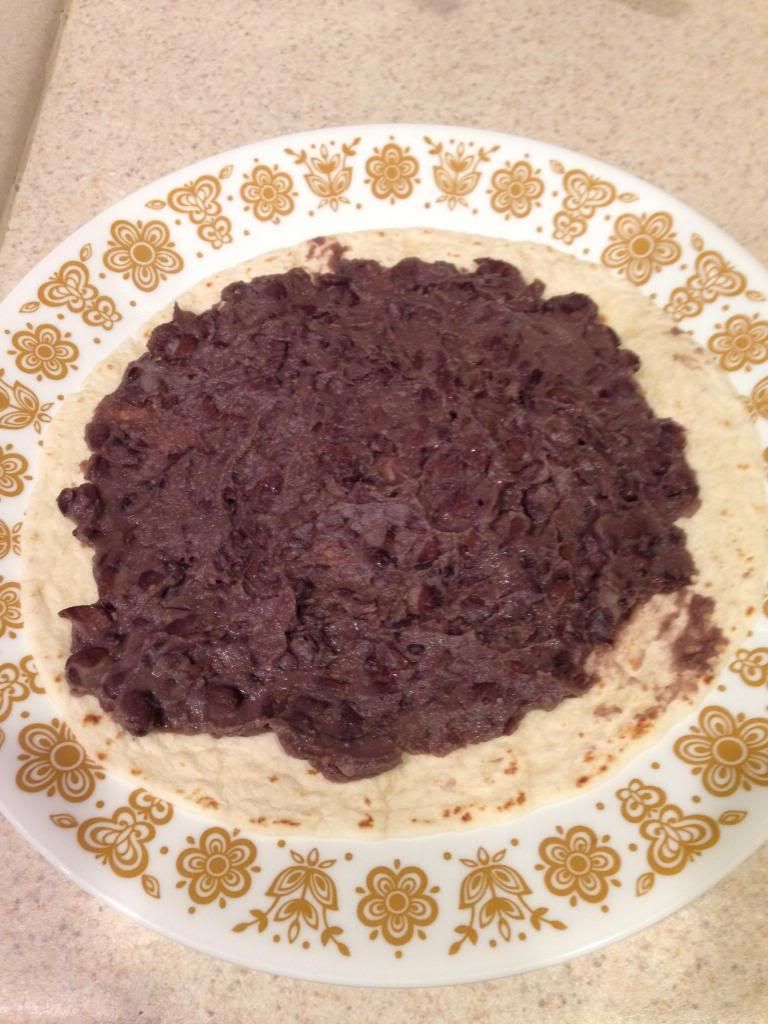
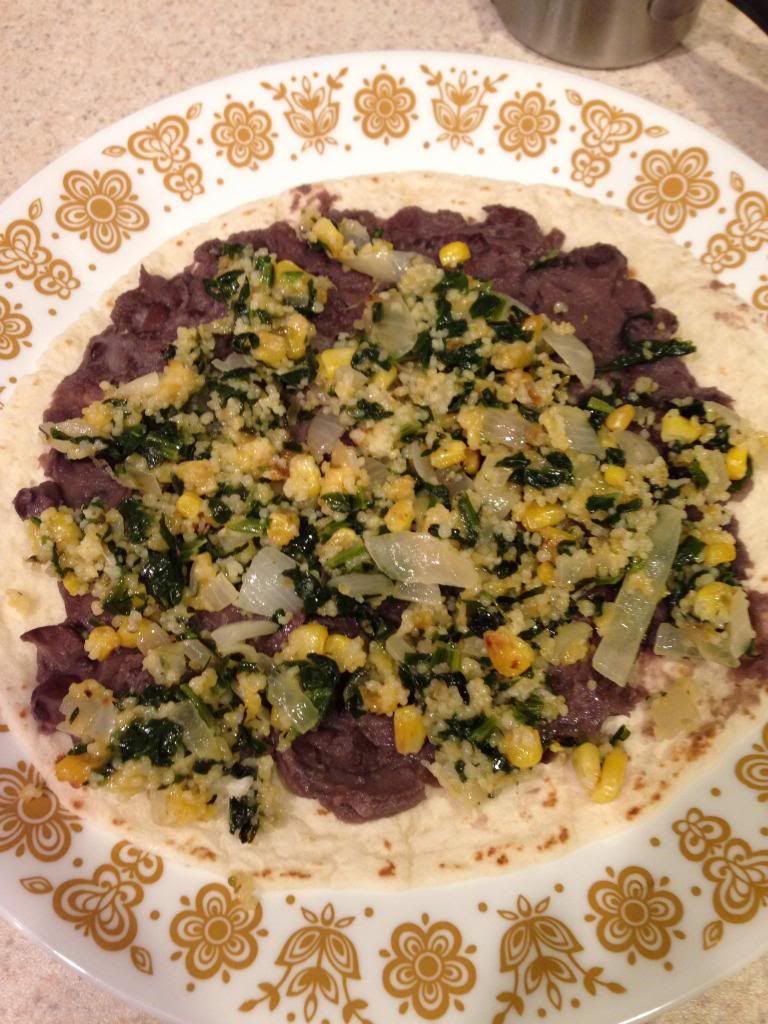
Next, pour the beans in to a medium mixing bowl and mash with a fork until smooth. Add the hot sauce and stir until the sauce has mixed in. Place one tortilla on a clean plate and spread 2 1/2 tablespoons of the bean mixture until the entire tortilla is covered, except 1 inch from the edge. Next, top 1/2 cup of the spinach/corn mixture and spread like before. Finish the quesadilla with another tortilla. Repeat this process until the bean mixture, spinach/corn mixture, and tortillas have been used up.
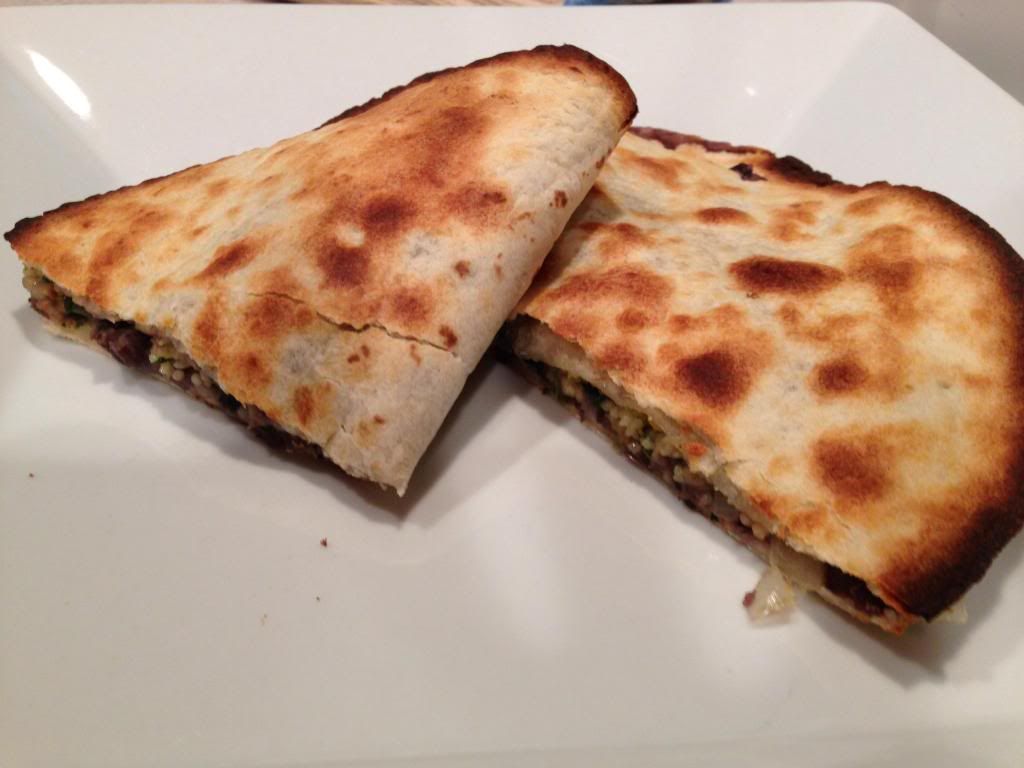
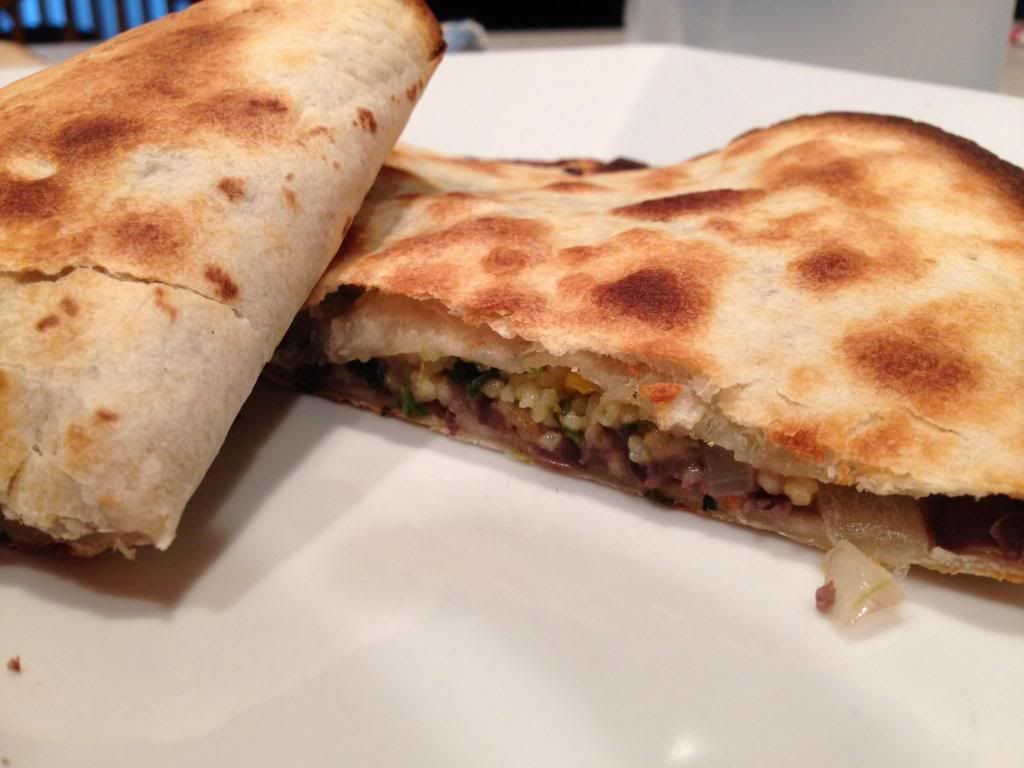
Bring the preheated cooking sheet out of the oven onto hot pads. Lightly coat each quesadilla with cooking spray and gently place on the cooking sheet. Place the baking sheet back in the oven and broil the quesadillas for a total of three minutes or until lightly browned, turning once for even cooking. Cut each quesadilla into six wedges, serve with a tablespoon of sour cream, and enjoy!
The End Result:
While there isn't any meat to be had in these quesadillas, they have enough substance to hold their own. The layer of black beans, as proved before, are the multitool and provide a good amount of protein, and, when mixed with hot sauce, adds a whole new depth to this Mexican dish staple. The couscous is an interesting player in this dish. While by itself doesn't add a lot of flavor, cooked with the spinach, onion, corn, and cheese, it acts almost as a binder and is good to use in the this situation. While I was worried about the lack of cheese, I'm satisfied with how little can be used and it works in this recipe. If you are looking for a quesadilla that is hearty, vegetarian, and low calorie (try 300 calories for four wedges!) this dish is definitely worth a try.
Thanks for joining us today. Check back tomorrow as Tyler showcases another Sunday Special. Until then,
~Cheers!
Thursday, April 10, 2014
What Good Could Come from Fish and Cheese?
Good evening everyone! In the culinary world, there are some combinations that are meant to be together, then there are those that shouldn't be touched. While it's somewhat intriguing to try to understand why these flavors just don't match up, it's almost tempting to just try and find out what would happen. Tonight, we take a basic no-no in the cooking realm and found out what happens when you marry the two together.
The Recipe: Baked Stuffed Flounder
Original Recipe Found In: Good Eats: Flat is Beautiful III
What You'll Need:
2 Tablespoons unsalted Butter
1 medium Onion, chopped
1/2 Teaspoon kosher Salt
1 clove Garlic, minced
1 (10 Ounce package) frozen chopped Spinach, thawed and squeezed dry
1 Lemon, zested
1/4 Teaspoon freshly ground Black Pepper
2 Tablespoons chopped fresh Parsley
1 Cup Heavy Cream
1/4 Cup White Wine
10 Ounces grated Cheddar cheese
1 1/2 to 2 Pounds Flounder fillets
3 Cups cooked White Rice
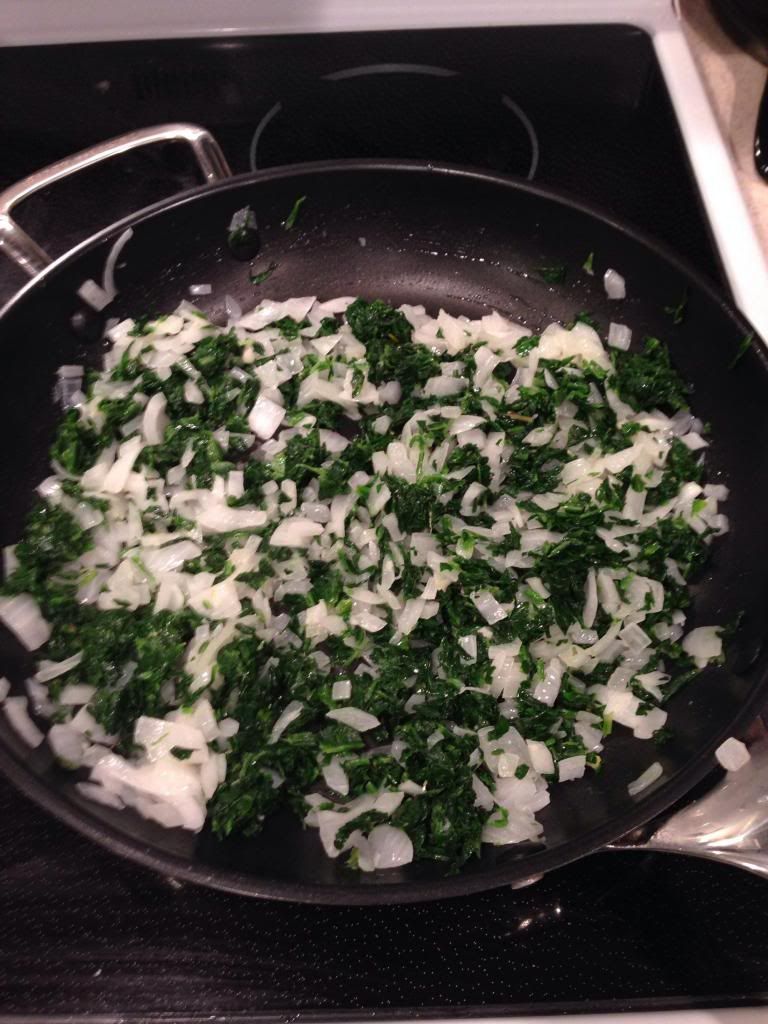
To start, preheat an oven to 350 degrees. Meanwhile, heat a large, nonstick skillet over medium heat. Once the pan has heated, add the butter to melt. Add the onion and a pinch of salt and sweat the onions down until they become translucent, about five to seven minutes. Add the garlic and continue to cook until the garlic becomes fragrant, about one minute. Next, add the spinach and lemon zest and stir to cook through. Season with salt and pepper and add the parsley and stir to combine. Once all the ingredients are combined and fully heated, remove from the heat.
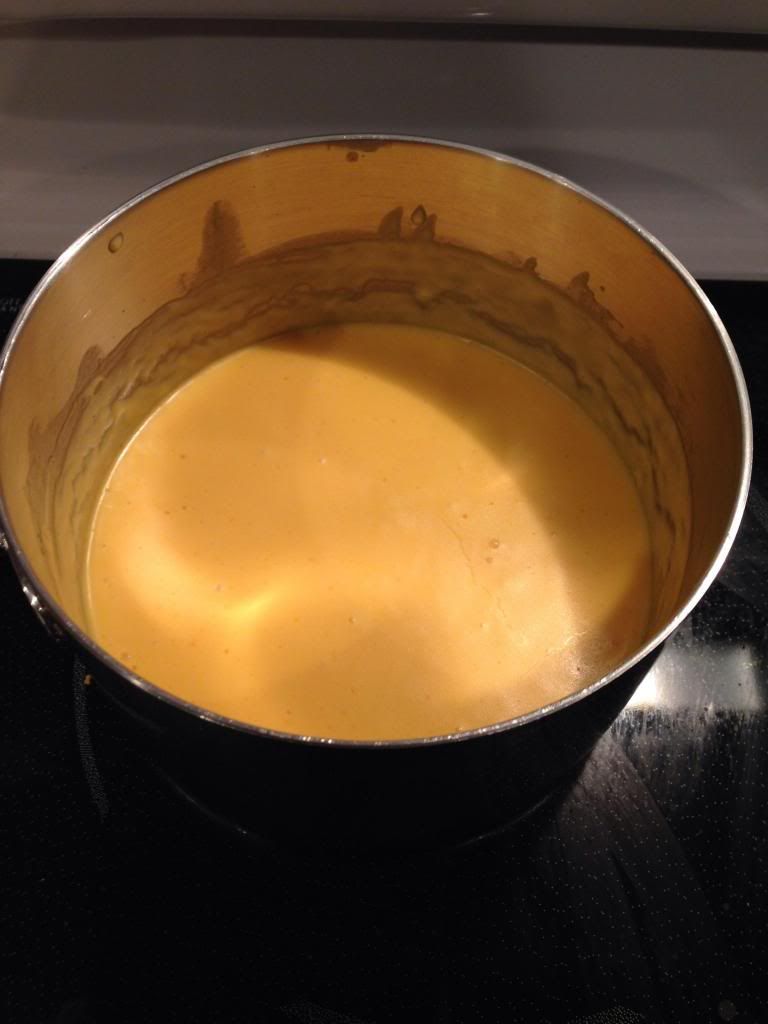
While the onion and spinach mixture is cooking, you can begin to cook your sauce. In a medium saucepan, add the heavy cream and wine and heat over medium heat. Once the mixture begins to come to simmer, about three to four minutes, gradually add the cheese. Add the cheese about one hand pinch at a time and stir with a whisk until each batch of cheese is melted, about thirty seconds. Once all the cheese has melted, set aside and keep warm.
Next, place the fillets on a clean baking sheet and season each side with salt and pepper. Divide the spinach mixture evenly among the fillets and roll the two ends of the fish on top of the spinach mixture. In a 2 1/2 quart casserole dish, add the risk and spread evenly. Place each fish roll on top of the rice, seam side down.
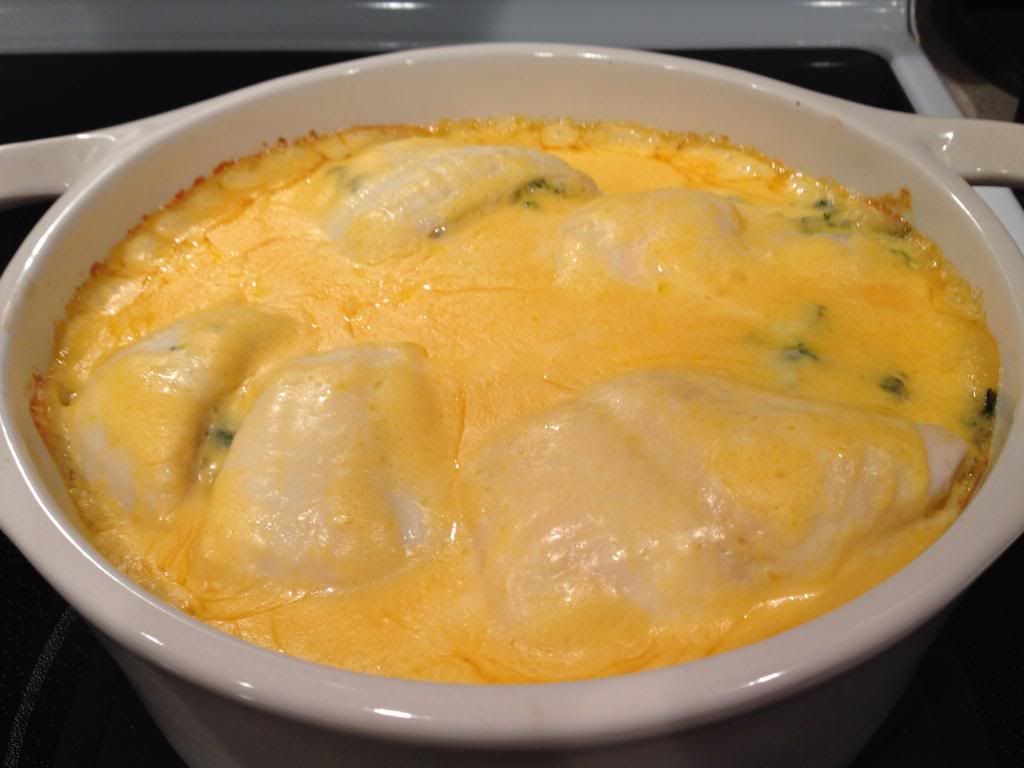
Pour the cheese sauce over the fish and rice. Place the casserole dish in the oven and bake uncovered for 25 minutes. Remove from the oven and allow to cool for five minutes. Scoop each fish roll and some rice with two serving spoons, serve, and enjoy!
The End Result:
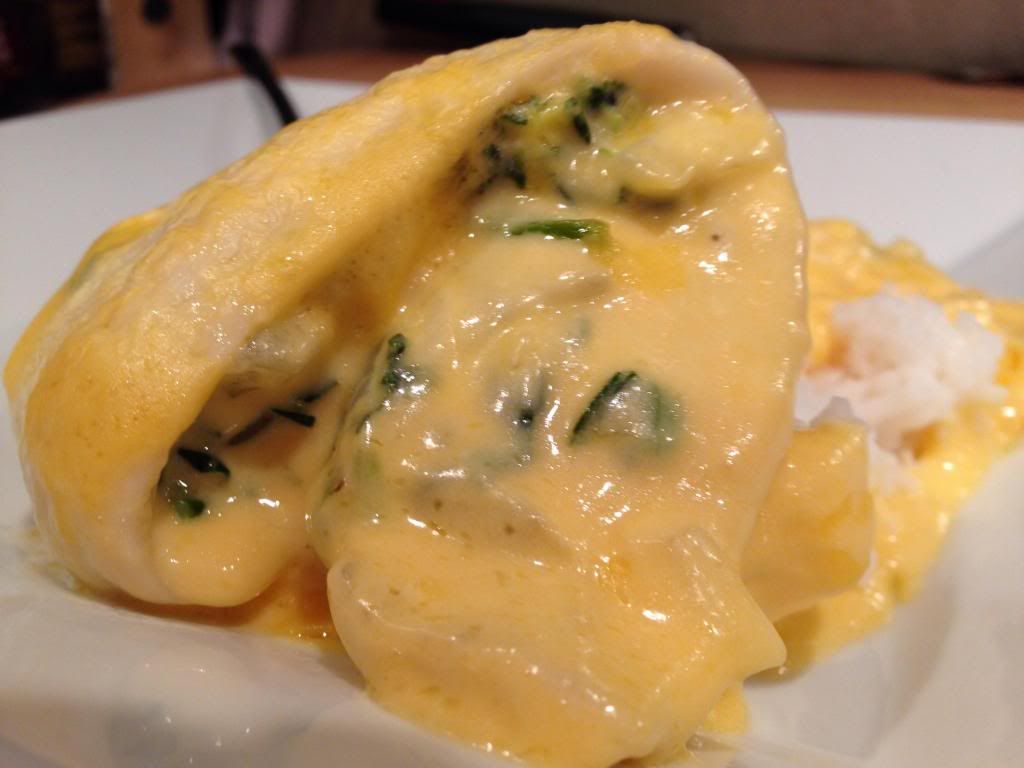
We have always kind of shied away the combination of fish and cheese, knowing that these two are meant for each other. But this dish definitely proved that notion wrong. The fish was light and fluffy and didn't weigh the rest of the recipe down. The spinach and onion stuffing was just enough to add to the fish flavor. But I think the real winner was the cheese sauce and rice. The fish does soak up some of that sauce, and it does add quite a bit of flavor. But the rice definitely soaks in that cheese and makes in a whole new dish on its own. The cheese might be a bit too much for some, but I love how all these flavors together created something new!
That's all we have for you this evening. Thanks for checking out what we've been cooking this week and check back soon for brand new updates. Until then,
~Cheers!
Wednesday, April 9, 2014
Turkey Piccata
Good evening everyone! Chances are, if you have a moderately equipped kitchen, you’ll find a meat tenderizer / mallet in one of the drawers. It’s a common item to find in many kitchens, yet it seems many at home chefs only break it out once in a long while. We’re just as guilty of this as anyone. We have a nice sturdy meat tenderizer that only gets use once every few months.
It’s a shame because a meat tenderizer can be a useful tool in the kitchen that allows you to modify or adapt countless recipes. It can shorten cooking times, allow you to play with different cooking methods and, as always, it’s a built in stress reliever.
Don’t have a meat tenderizer? No biggie – you can achieve the same results with a pie plate and a heavy canned good. However, if you’re in the market for a meat tenderizer, here are a few things to remember:
1) Metal, not wood – Metal is heavier, meaning less effort and easier to clean than wood
2) Avoid the “prongs” – those little “teeth” on the end of a tenderizing mallet do little to tenderizer and tend to tear things apart. Good for a flat, smooth surface
3) Look for a matte finish – the matte finish reduces friction, meaning your mallet won’t grab the meat and pull at it.
Once you have a mallet and the ambition, you’ll find there are quite a few recipes out there that take advantage of flat(tened) cooking. We’re getting started tonight with a recipe from Alton Brown’s ‘Good Eats’:
The Recipe: Turkey Piccata
Original Recipe From: ‘Good Eats: Flat is beautiful II’
What You’ll Need:
1 Large Turkey Breast
6 Tablespoons Butter (Divided)
2 Tablespoons Olive Oil
½ Cup Flour
1 Shallot (Diced fine)
½ Cup White Wine
Juice From 1 Lemon
Parsley
Preheat your oven to 200 degrees.
Begin preparing your turkey by slicing it horizontally into ½ inch thick pieces. Next, place a large sheet of plastic wrap on top of a cutting board. Place a slice of turkey on the plastic wrap (favoring the left side) then give the right side of the plastic wrap a light misting of water from a spray bottle. Fold this part of the plastic wrap over the turkey and then spray the top of the plastic wrap as well. The water reduces the friction to the turkey, meaning it will flatten evenly, rather than “catching” onto the mallet or plastic wrap and tearing while you pound.
Using your mallet or the pie plate / can (or even a heavy frying pan) pound the turkey until it is approximately doubled in size and reduced to 1/8 inch thickness. Remember, turkey is relatively delicate and will tear if you just go to town on the meat. Use efficient, well placed strikes to flatten each piece carefully. Transfer the flattened turkey to a plate and repeat until all pieces are flattened to the desired thickness.
Next, add the flour to a shallow dish or pie plate. Season the top of a turkey cutlet with salt and pepper (we’ll call this side A) and then place side A down into the flour. Season the other side (side B) with salt and pepper before flipping the cutlet and dredging that side through the flour as well. Shake the cutlet to allow the excess flour to fall off before transferring it to a plate. Repeat this process until all of the cutlets are covered in flour. (Discard any remaining flour).
In a large (12 inch) non stick skillet, melt 4 tablespoons of butter alongside 2 tablespoons of olive oil over medium high heat. Once the butter begins foam and develops a nutty aroma, place two turkey cutlets into the skillet. Cook for approximately 1 minute before flipping and cooking the other side for an additional minute. This should develop a deep golden brown crust on the outside of the cutlets. (If the cutlets are not browned to your liking, alternate cooking 30 seconds per side until they develop the correct color. Keep a close watch on them, however, as they are thin and will cook quickly). Transfer the completed cutlets to a baking sheet lined with aluminum foil and store them in the 200 degree oven until all of the cutlets have been cooked.
Once each cutlet is cooked and safely store in the oven, you can begin making the sauce. Add the remaining 2 tablespoons of butter to the skillet (leave all the remnants from prior cooking). Once the butter is melted, add the shallots and cook for 1 to 2 minutes or until they become softened and translucent.
Add the white wine and allow the mixture to simmer for about 1 minute before adding the lemon juice. Stirring occasionally, allow the mixture to simmer and reduce until it thickens slightly. This takes about 3 to 5 minutes.
Transfer the turkey cutlets to a serving platter and pour the sauce over the cutlets. Top with parsley and enjoy!
The Results:
These flavor little cutlets were quite delectable. They were perfectly cooked, while still moist in the center and the light breading complimented the turkey beautifully. The star of the dish is the sauce, full of rich nutty flavor while being accented by the bright white wine and lemon juice flavors, it truly took the dish to a whole new plane.
These little cutlets only took about 30 minutes to prepare from start to finish – adding further credence to the need to break out our mallet more often (thinner meats equals quicker eats...ha!)
That’s all we have for you this evening. Maggie will take to the kitchen tomorrow evening with a brand new dish of her own. Until then,
~Cheers
Friday, April 4, 2014
Mexican Inspired Dip: Will you Take the Plunge?
Good evening everyone! As one for innovation, I'm always one up for trying flavors from different cooking styles and reinventing it for a completely unique recipe. Tonight, I'm infusing flavors from the Mexican style cooking to give way to a new style of serving this dish.
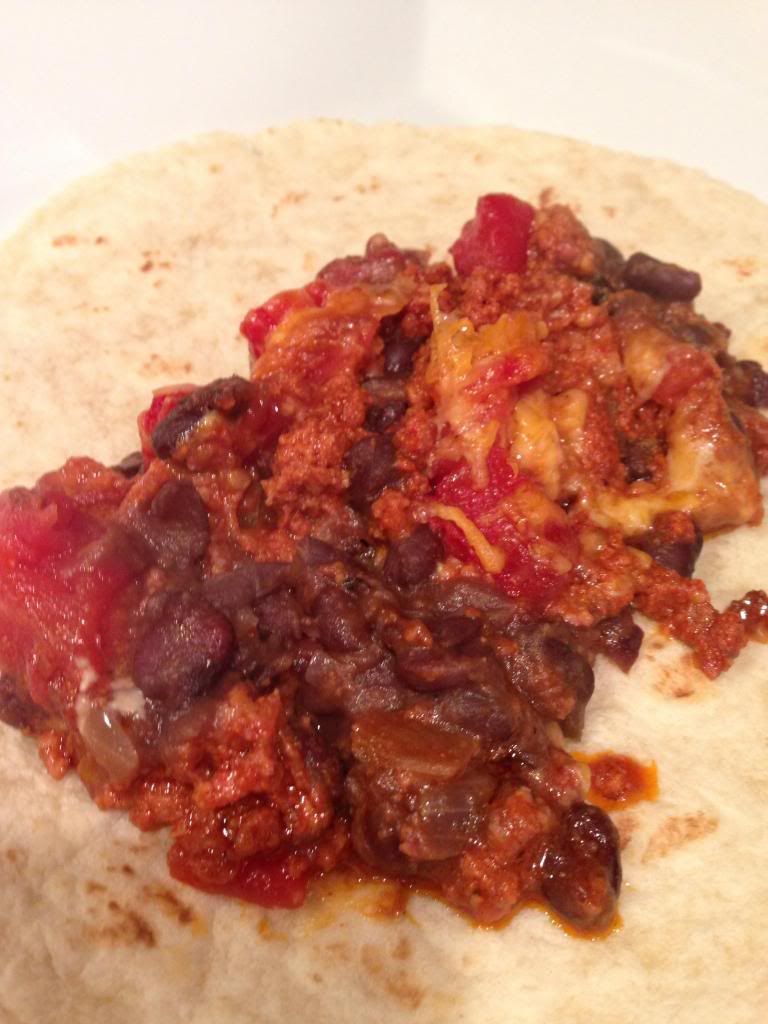
The Recipe: Baked Black Beans with Chorizo
Original Recipe Found In: Cooking Light, April 2014
What You'll Need:
1 Tablespoon Olive Oil
1/2 Cup diced Spanish Chorizo
1 1/2 Cups chopped Onion
1 Jalepeno Pepper, diced and seeds removed
1/2 Teaspoon Salt
1/2 Teaspoon ground Cumin
1/4 Teaspoon ground Red Pepper
5 Garlic cloves, minced
3/4 Cup fat-free, lower-sodium Chicken Broth
2 (15-ounce) can unsalted Black Beans, rinsed and drained
1 Cup chopped seeded Tomatoes
2 Ounces shredded Monterey Jack Cheese (about 1/2 Cup)
1/4 Cup thinly sliced Green Onions
To start, preheat an oven to 425 degrees and prepare a 8-inch square glass or ceramic baking dish by spraying cooking spray inside. Next, heat a large, nonstick skillet over medium-high heat. Add the olive oil to the pan and swirl to coat. Once the skillet and oil have heated, add the chorizo and sauté for two minutes. After the chorizo has cooked, remove from the pan to a clean plate and keep covered until later.
Next, add the onion and jalepeno and sauté for four minutes, stirring occasionally. Add the garlic, cumin, ground red pepper, and garlic and continue to sauté for one minute, stirring consistently. Next, stir in the broth and the beans and bring to a boil. Proceed to cook for five minutes. After the mixture has cooked, using a fork or potato masher, mash the mix until desired consistency.
Spoon the bean mixture into the prepared baking dish. Top the beans with the chorizo, tomatoes, and cheese. Place the dish in the oven and bake at 425 degrees for 30 minutes, or until lightly browned. Top with green onions, serve, and enjoy!
The End Results:
I will warn you: this dish has quite the heat kick to it, due to the jalepenos and the chorizo. While the dish would probably taste the same without the jalepeno, the same can't be said for the chorizo. If you want to try without the chorizo, it will more than likely be a very bland dish. But as for serving this dish? You can spoon 1/3 cup mixture into warmed tortillas, top with more Monterey Jack cheese, and wrap up in a burrito. The true winner was Tyler's variation, which he used corn tortilla chips and used it as a dip. The recipe could definitely be enhanced by a cooling agent, such as sour cream. It might cut the heat, without killing the flavor. Overall, a surprisingly good flavored dish, that could have potential to be so much more.
Thanks for joining us this week. Check back next week as we continue to inspire culinary adventures. Until then,
~Cheers!
Thursday, April 3, 2014
Lemon Herb Butter Steaks
Good evening everyone! One of my favorite pastimes has to be recreating restaurant dishes. This particular hobby started a few years back after Maggie and I had dinner at a higher end seafood restaurant in the Des Moines metro. I ordered a delicious lemon butter tilapia – and while I enjoyed every bite, I was left…wondering… at the end of the meal.
What exactly did they do that I couldn’t do? Sure they smoked the tilapia and slow roasted it, but the star of the dish was the butter sauce, and I didn’t see any reason why that couldn’t be duplicated. That started the process of meal duplication (for lack of a better phrase) that I still continue to enjoy today.
Tonight’s recipe may be familiar if you spend time at steakhouses or watch any cooking programs on Food Network or Cooking Channel. I first stumbled across the dish on Chopped, but I’ve also seen it on steakhouse menus for upwards of $50. Tonight, I’ll show you that you too can cook up this delectable steak dinner for about $3.50 a plate.
The Recipe: Lemon Herb Seared Steak on Garlic Toast
What You’ll Need:
2 Steak Cuts (Your choice of quality and cut. Filet Mingon to Strip Steak all work well)
1 Leaf French or Italian Bread, Sliced Thick (2 slices per steaks served)
Side Salad (Watercress works well for visual flair, if you’re looking to “Show off”)
1 Tablespoon Butter (Softened)
1 Tablespoon Olive Oil
1 Tablespoon Marjoram
1 Tablespoon Chives
1 Teaspoon Lemon Juice
Begin by placing your butter in a small dish. Using a spoon, mash the butter until it becomes creamy and slightly “airy”. Slowly add the olive oil to the dish and continue mashing until it is blended nicely with the butter. Next, add the marjoram and the chives. Continue mashing until the herbs are evenly worked into the butter. Finally add the lemon juice, once again mashing with the back of a tablespoon until the mixture is evenly blended. Set this mixture in the freezer to chill until you’re ready to serve.
Lightly season each steak with salt and pepper and allow them to rest at room temperature for about 15 minutes. (This is the ideal amount of time to heat your grill, so it works well).
Bring your grill up to 500 degrees before cleaning the grates and lowering the temperature to 300 degrees. Place the steaks over direct heat, and allow them to sear for 3 to 5 minutes before flipping them and cooking for an additional 3 to 5. Depending on the thickness of your steak, cooking times may vary. For a standard, ½ inch thick steak, this cooking method will yield a medium rare steak. Add additional minutes (1 to 2) for each “step” of doneness you prefer.
While you’re steaks are cooking, apply a healthy layer of butter to each side of your bread slices. Season each side with a few shakes of garlic powder as well. As your steaks are nearing completion, place the garlic bread onto the grill. Allow the slices to cook for 30 seconds to 1 minute per side, or until they turn golden brown and crispy. Transfer the garlic bread to your serving plates.
Once the steaks have cooked to your liking, place them atop two slices of garlic bread and serve with a dollop of the her b butter. Allow the steaks to rest for a few moments, so the butter can melt and the steaks natural juices can settle. Serve and enjoy!
The Results:
I had never tried this concept before, so I didn’t really know what to expect. The result is simply delectable. The garlic bread adds both a garlic flavor and a crispy texture to the steak which you cannot duplicate by any other means (it’s almost like a breading for the steak – without overwhelming the natural flavors of the beef). I can see why this recipe is a steakhouse favorite – and now that I know I can cook it up for pennies on the dollar (our steaks were 2 for $5, plus the bread was $1.29 – that’s $6.29 total cost for 2 meals. MUCH better than $50, no?)
That’s all we have for you this evening. Maggie will make her triumphant return to the kitchen tomorrow with a brand new dish of her own. Until then,
~cheers
Subscribe to:
Posts (Atom)


