Friday, February 28, 2014

Wine Saves the Day

Good evening everyone!  We always say that the simplest recipes are often the best.  Whether the ingredient list is short and sweet or the preparation is ready in a snap, there are dishes that don't require a lot, yet they taste the best.  Tonight, I'll be preparing one of those dishes and you'll be blown away at how incredibly tasty this dish is.

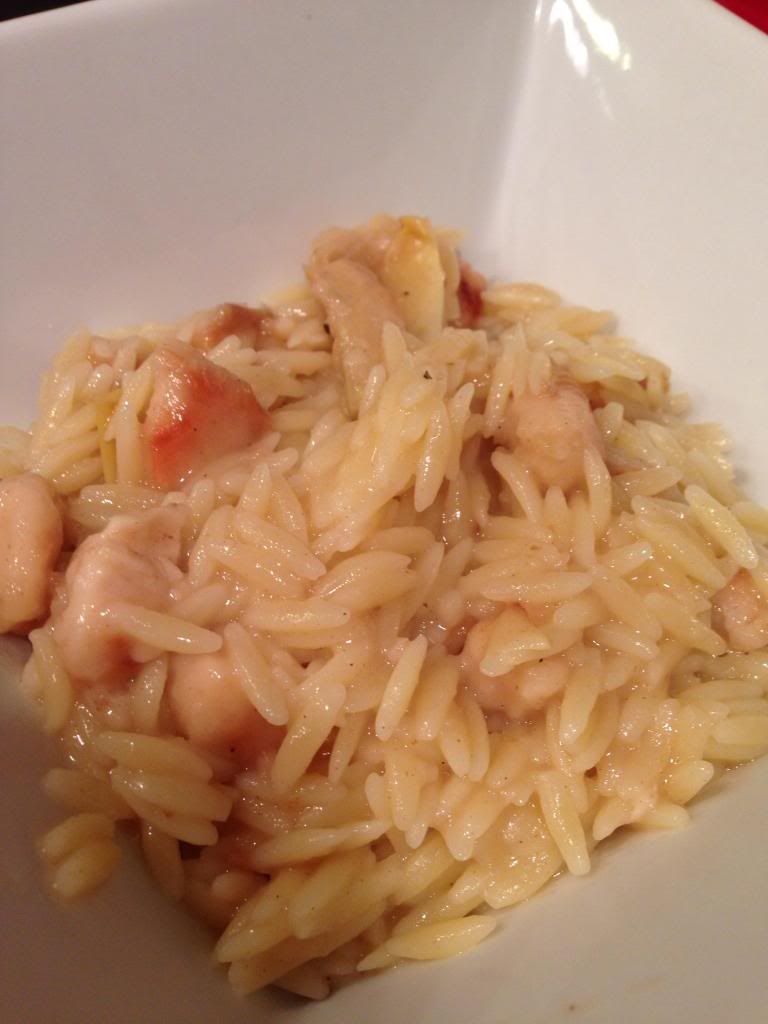
The Recipe:  Chicken and Artichokes in Wine Sauce
Original Recipe Adapted from a recipe found on:  www.pinterest.com

What You'll Need:
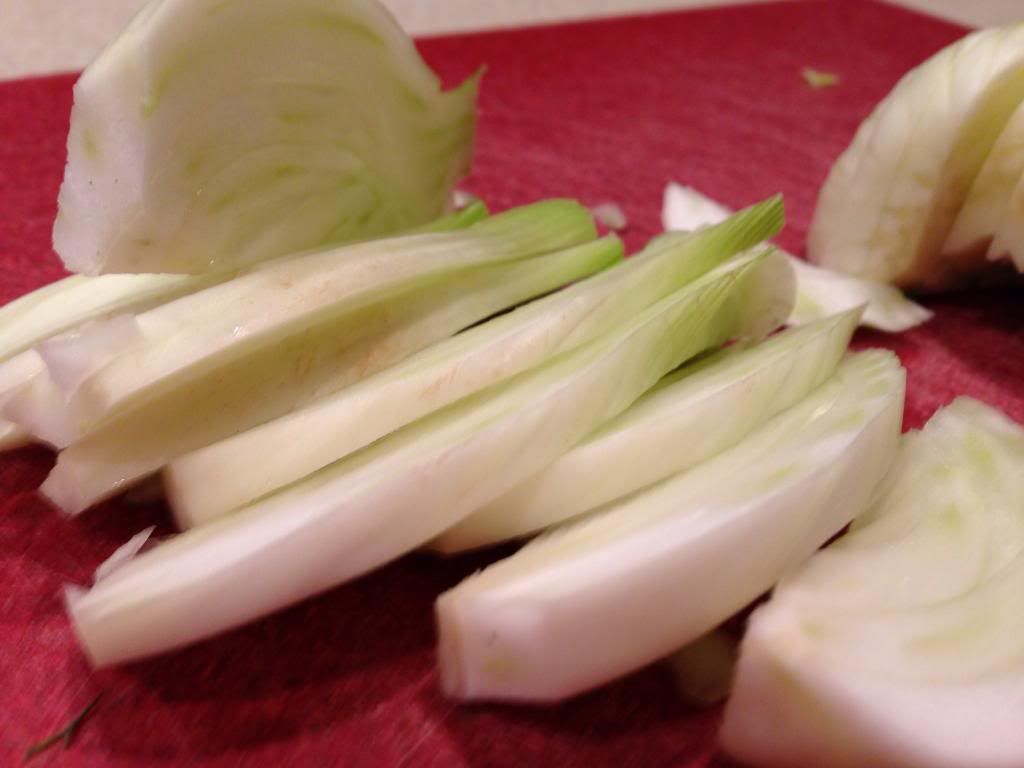
2 Cups Artichoke Hearts
2 boneless skinless Chicken Breasts, about one pound
1 Cup Flour
2 Tablespoons unsalted Butter, divided
2 Tablespoons Olive Oil, divided
2 Cups dry White Wine
1 Teaspoon Lemon Juice
1 Cup Orzo pasta

To start, preheat a medium saucepan with water over medium-high heat.  Once the water is at a boil, add the uncooked orzo and cook according to package directions.  To drain, cover with a lid and pour over a colander.  The majority of orzo will stay in the saucepan, any leftovers will be caught in the colander.  Scoop any leftover pasta back into the saucepan, cover, and set aside.

Next, cut the artichoke hearts in half lengthwise and set aside.  On a cutting board, cut the chicken breasts into bite-sized pieces, about one inch to a side, and set aside.  In a medium mixing bowl, add the flour and season with salt and pepper and mix until well combined.  Add the chicken pieces to the bowl and toss to coat.

Once the chicken is coated, heat a large, nonstick skillet over medium-high heat.  Heat one tablespoon of butter and one tablespoon of olive oil.  Once the butter is melted and the skillet is heated through, add the artichokes and cook for about five minutes, or until lightly browned on each side.  Carefully removed the artichokes from the skillet to a plate and set aside.

After the artichokes have cooked, melt the remaining tablespoon of butter, along with one tablespoon of olive oil.  Once heated again, lift the chicken pieces out of the flour and arrange in the skillet.  Saute the chicken pieces for five to seven minutes or until well-browned on both sides.  After the chicken is done cooking, add the browned artichokes back to the pan.

Slowly, add the wine to the skillet and scrape any browned bits on the bottom of the pan.  Bring the skillet to a simmer and cook for another eight to ten minutes over medium heat or until the liquid begins to thicken.  Add the lemon juice and orzo and stir to coat all the ingredients.  Serve and enjoy!

The End Result:


All the flavors in this dish are super bright and give a crisp to the pallet.  Unfortunately, the artichokes don't enhance the flavor of the dish too much, because they give an incredible flavor boost.  But the real star of this dish has to be the wine sauce.  If you don't enjoy white wine, I would not advise to cook this recipe.  I felt like there could have been other ingredients to mellow out the flavor of the wine, but when a simple wine sauce is all that's needed, it's pretty good.  Overall, a few tweaks could have made this recipe a superstar, but when only a few ingredients are needed to create a lovely dish, there's no room to complain.

Thanks for joining us this week.  Check back next week as we present a batch of new recipes for you to try.  Until then,

~Cheers!

Wednesday, February 26, 2014

Ancho Chops

Good evening everyone! Ancho chile powder has become one of my favorite go-to spices when I’m looking to add a bit of heat to a dish. Unlike traditional chile powder, ancho has a richer, more smoky flavor that adds an element of heat to dish – but doesn’t turn your mouth into a burning pit of despair. Ancho is versatile enough to be worked into any dish that needs a bit of spice, so it’s not too hard to find uses for the seasoning. However, whenever I find a dish customized specifically for ancho, I know I have to give it a try. Tonight, we’re blending the smoky flavor of ancho with pork (and a few other surprises) to create a flavorful main dish.

The Recipe: Ancho-Honey Pork Chops
Recipe Adapted From: Eatingwell.com Ancho-Honey Pork Tenderloin

What You’ll Need:
(Serves 2)

4 Tablespoons Honey
1 Teaspoon Lime Juice
1 Teaspoon Reduced Sodium Soy Sauce
1 Teaspoon Ancho Chile Powder
¼ Teaspoon Onion Powder
2 Large Pork Chops or a pork tenderloin (your choice of specifics)
1 Tablespoon Olive Oil

Preheat your oven to 425 degrees.
In a medium bowl, whisk the honey, lime juice, soy sauce, ancho powder and half of the onion powder until combined. Set this mixture aside.
Lightly season each pork chop with salt and pepper and the remaining onion powder. Add the oil to a large (12 inch) oven safe skillet and place the skillet over medium high heat until it begins to shimmer. Add the pork and cook until each side develops a light golden brown color. Time will vary based on the thickness / style of your pork product. The average time needed is about 4 minutes per side, but be sure to reduce this time if your using smaller cuts of pork.
Once the pork has been browned on both sides, transfer the skillet to the oven and allow the pork to roast for 5 to 10 minutes. Remove the skillet from the oven and brush the pork with the reserved honey / ancho mixture you prepared earlier. Return the skillet to the oven and cook the pork until it registers 145 degrees at its thickest point with an instant read thermometer. Allow the pork to rest for 3 to 5 minutes before serving.

The original recipe called for cheesy grits to accompany the pork. We’re not big grits fans, so I opted to go in another direction. For our side, I prepared a cup of couscous per the package instructions and stirred in a bit of the of the remaining honey ancho mixture right before serving. You’re free to add a side of your choice – any healthy grain would pair quite well with the main dish.

The Results:


I’ve dabbled with the ancho / soy sauce combination in previous recipes, so I was prepared for the almost “BBQ” flavor that results when the two are combined. I have never cut the two with lime juice and honey, however, and that flavor combination was a bit of a surprise. Instead of a rich, savory BBQ flavor (from the ancho and soy sauce alone) we ended up with an almost tropical (think, Hawaiian or Caribbean) flavor. There are elements of BBQ, but they’re accentuated with bright citrus and sweet honey. The flavor recalls pictures of tropical beaches and summer cookouts – a welcome addition for those suffering through yet another Midwestern cold snap!

That’s all we have for you this evening. We’re back tomorrow night with a brand new recipe. Until then,

~Cheers

Thursday, February 20, 2014

Quick and Easy Taco's - With A Twist

Good evening everyone! If you regularly watch any form of TV, you’ve likely seen your fair share of kitchen gadgets advertised as miracles and timesavers. There’s one ad in particular that’s been making the rounds lately that I find extra humorous. The “Perfect Tortilla Pan” promises to turn your average everyday tortilla into a delicious taco bowl and all you have to do is use this $10 gadget! (Plus additional shipping and processing) Wow!

What if I told you, you already had the means to make your own taco bowl? Don’t believe me? Take this short quiz. Do you have one of these:


Can you do THIS with it? (flip it upside down):


If you answered yes to both questions – congratulations! You too can make your own delicious taco bowls. All for the low, low price of $0. I think my way is better – and when you top it with tonight’s recipe, I think you’ll agree.

The Recipe: Chicken Taco Bowls
Original Recipe From: Eatingwell.com

What You’ll Need:
(Serves 2)

2 Large Chicken Breasts (Diced into ½ inch cubes, trimmed of fat)
4 Corn Or Flour Tortillas (Small – 6 inch)
1 Teaspoon Garlic Powder
½ Teaspoon Salt
1 Cup Salsa (Your choice of variety)
Taco Toppings (Lettuce, tomatoes, sour cream) of your choosing


Preheat the oven to 375 degrees.
If you’re using corn tortillas, remove them from their packaging and soften them in the microwave for a few seconds before you begin. Corn tortillas have the tendency to crack if they’re not softened before you cook them fully. If you’re using flour tortillas, you can skip this step. They’re typically soft and pliable enough to avoid cracking even under intense heat.

Spray each tortilla with a light spritz of cooking oil (just enough to lightly coat each side). Next, position the tortilla over an upside down cupcake / muffin pan (the tortilla should go in the center of four cups – as pictured). Press down in the center of the tortilla and work with the edges until the rest between the crevices to form a bowl. Repeat until all of your tortillas are on the tray (you may need to do multiple batches if you have a shortage of muffin tins or a surplus of mouths to feed).


Place the muffin tins in the oven and allow the shells to cook for 10 to 15 minutes, or until they turn golden brown and crispy.

While the tortillas are cooking, turn your attention to the chicken. Toss the diced breasts in a bowl with the garlic powder and salt until they are completely coated. Next, heat 1 tablespoon of vegetable oil in a medium skillet over medium high heat until the oil begins to shimmer. Add the chicken and cook for 3 minutes, undisturbed, until the pieces turn golden brown. Flip the pieces and allow them to cook for an additional 3 to 5 minutes, or until they’re cooked through.

Next, add in the salsa and bring the mixture to a simmer. Reduce the heat to low and stir constantly until the salsa thickens around the chicken. (This takes about 5 minutes). Your tortillas should be nearly done by now (amazing how that worked!)

Spoon about ½ cup of the chicken mixture into each tortilla bowl and top with lettuce, tomato or whatever you prefer (we went with sharp cheddar cheese). Serve and enjoy!

The Results:


This was the first time I’ve crisped a tortilla in the oven, and I can safely say it will not be the last. The taco bowl was crispy and yet full of really great flavor. We didn’t add anything to the shells at all, but the flavor seemed enhanced by the short time in the oven. The chicken taco filling was no slouch either. Juicy chicken surrounded by fresh salsa and topped with a sprinkle of cheddar cheese – it’s hard to beat those simple flavors. The best part is, two of these little bowls weigh in at 400 calories. They’re filling, delicious AND low calorie. The culinary trifecta.

That’s all we have for you this evening. We’re back next week with two brand new recipes. Until then,

~Cheers

Wednesday, February 19, 2014

Mexican Breakfast...For Dinner?

Good evening everyone!  Any restaurant that serves a breakfast, typically serves a hash dish.  These usually have hash browns and any variety of cooked eggs, with any number of ingredients cooked in.  These ingredients include some sort of meat and/or vegetables mixed in and cooked until the hash browns are super crisp.  Tonight, I'm trying a hash, that is definitely not standard restaurant fare.

The Recipe:  Mexican Chorizo Hash
Original Recipe From:  Cooking Light, March 2014

What You'll Need:
2 Ounces raw Mexican Chorizo
1 Cup prechopped Onion
1/4 Cup coarsely chopped bottled roasted Red Bell Peppers
1/2 Teaspoon Salt
1/2 Teaspoon freshly ground Black Pepper
1 (6 Ounce) package of Baby Spinach
2 Teaspoons Olive Oil
2 1/2 Cups refrigerated shredded Hash Brown Potatoes
2 Large Eggs

To start, heat a large, nonstick skillet over medium-high heat.  Once heated, add the chorizo to the pan and cook for three minutes, until browned.  Next, add the onion, bell peppers, salt, and pepper and cook for an additional three minutes, until the onion just begins to soften.  


After this, add the spinach and stir constantly until the spinach wilts.  Transfer the chorizo mixture to a clean plate and cover with another plate to keep warm.


Next, add the oil to the pan and swirl to coat.  The skillet is already quite hot so it won't take very long from the oil to heat up.  Add the potatoes and cook for eight to ten minutes or until the potatoes begin to become crispy.  Don't stir the potatoes as often as the onions, bell peppers, and the spinach did - the potatoes will need to firm up.  Once the potatoes have cooked, stir in the sausage mixture until everything is well incorporated.  Make two small circles in the potato/chorizo mixture and crack one egg into each space.  Cover the skillet and cook the eggs for four minutes or until the yolks are slightly set.  Spoon some hash, with a cooked egg, onto a plate, serve, and enjoy!

The End Result:


This is a great version of a classic hash dish.  Granted, any number of ingredients served with hash browns and eggs is a good base for a hash, using these ingredients makes it completely unique.  Personally, the chorizo gives enough heat to last me into next week, it's a wonderful meat source and adds plenty of flavor to a potentially bland dish.  The jarred red bell pepper is definitely something I would not have considered, but it's neutral enough to not shine on its own.  Overall, this hash is great to try, when you want something different!

Thanks for joining us tonight.  Check back tomorrow as Tyler takes unique twist on the typical tortilla.  Until then,

~Cheers!

Thursday, February 13, 2014

Spring Comes in a Pasta Dish

Good evening everyone!  With warmer temperatures on the way, everyone is thinking about spring (and generally having a better attitude!)  While this mindset is an excellent trend, it's great to shift our blog to spring ingredients and flavors.  Tonight, we highlight a new ingredient to be featured on the blog that will pave the way for the changing of seasons.  (I know it's the middle of February, but it's great to optimistic.)

The Recipe:  Tortellini with Crispy Prosciutto and Spring Vegetables
Original Recipe Found In:  America's Test Kitchen Cooking for Two 2011

What You'll Need:
4 thin slices Prosciutto, cut into 1/4-inch pieces
1 Tablespoon unsalted Butter
1 small Fennel bulb, trimmed of stalks, cored, and cut into 1/2-inch pieces*
2 Garlic cloves
2 Cups low-sodium Chicken Broth
1 (9 ounce) package fresh cheese Tortellini
3 Ounces Baby Spinach (about three cups)
1/2 Cup frozen Peas
1/4 Cup Heavy Cream
1/4 Cup grated Parmesan Cheese
 2 Teaspoons fresh Lemon Juice

*Most cooks are familiar with the spice of fennel seeds and adding them to a broth for a pinch of flavor.  The actual fennel vegetable is somewhat finicky in handling.  But armed with the proper knowledge, it's a snap to prepare for cooking.  First, cut off the stems and feathery fronds (they look like wisps of dill.)  After this, cut a very thin slice off the base and remove any blemished or tough outer layers.  Next, cut the bulb in half and remove the pyramid shaped core from the inside.  Finally, cut the halves into quarters and slice into 1/2-inch slices crosswise.  You won't notice any sort of smell when you cut or cook, but it will definitely add some flavor to what you're cooking with.

Before
After
To start, cook the prosciutto in a large nonstick skillet over medium heat until the slices are crispy and lightly browned, about five minutes.  After cooking, transfer the prosciutto to a paper towel lined plate and reserve for later.  Next, melt the butter in the skillet and stir in the fennel and cook until browned, about six to nine minutes.  If you are afraid that the fennel is getting too brown, turn down the heat and sauté lightly.  After the fennel is cooked, add the garlic and cook until fragrant, about 30 seconds.

Next, add the broth and the tortellini and bring the heat of the skillet to a rapid simmer.  This shouldn't take too long if the skillet is shallow enough.  Let the broth to continue to simmer vigorously and stir often until the tortellini is tender and the sauce has begun to thicken, between six to nine minutes.  It's okay to check a piece of tortellini to see if it has cooked completely before moving to the next step.

After the tortellini has cooked, stir in the spinach, peas, and heavy cream and cook over low heat, stirring gently, yet consistently, until the spinach has wilted and the peas have cooked through, about three minutes.  Next, take the skillet off the heat and stir in the Parmesan cheese and lemon juice and season with salt and pepper to taste.  Spoon into individual bowls, top with the crisped prosciutto and any additional Parmesan cheese, serve, and enjoy!

The End Result:


The overall dish is light and perfect on the pallet.  The tortellini isn't too heavy with cheese and cooked perfectly in the chicken broth.  The chicken broth thickened up just enough that it almost doesn't taste like a sauce, yet it lightly coated all the ingredients and gave it a great taste.  The wilted spinach doesn't add too much to the flavor quotient, but it adds a pop of color and a boost of healthy vitamins.  The fennel isn't too flavorful also, but it really rounded out the dish.  The crispy prosciutto gives the pallet a textural difference to enjoy with all the other "soft" ingredients.  Overall, a great, light pasta recipe that will have anyone ready for spring!

Thanks for joining us this week, check back next week as we continue our culinary adventures.  Until then,

~Cheers!

Wednesday, February 12, 2014

Country Style-d & Delicious

Good evening everyone! While I do enjoy cooking and spending time in the kitchen, most of my favorite meals are ones that fall under the “simple” category. Don’t get me wrong, there are great rewards to be found in working with a coq au vin recipe or crafting a complex main course – but the combination of a simple recipe with savory flavors is simply hard to beat.

Tonight’s recipe certainly falls into the second category. It features a scant number of ingredients with only a handful of steps – and yet – it may be one of the richest, most full of flavor recipes you’ll ever cook up. The secret to this dish is tenderizing – and not in the way you might think.

Anyone who has been around a butcher’s counter or in the meat department of your local grocery store is likely aware of the countless options presented to today’s consumer when it comes to cuts of meat – beef in particular. Top, choice, prime – rounds, flanks, shoulders – bottom round, top round – top choice round – top bottom round (that one’s my favorite).  It seems daunting at first, but with a little seasoning in the kitchen (ha!) many chefs pick up on the basics. Rounds and flanks work well for stews, loins are tender cuts better served as steaks –etc. While this summarization works well in most cases, simply playing by the “hard and fast rules of beef” means you could be missing out. For example, did you know that bottom round – the steak with connective tissues and muscly fibers right in the center of it will be the most tender (and I mean – hot knife through butter – tender) steak you could ever cook up?

It’s true – and the secret lies in tenderizers. Not just any tenderizer will work, however – you need the right tool for the job. In this case, that’s the 48 Blade Meat Tenderizer (you can buy your own HERE). This little tenderizer works by jabbing the meat with 48 small little pins (or blades) that help break up the connective tissue and soften the meat. While you can achieve the same result by using a fork, the process takes much longer and is quite a bit more work – at $25 – any chef who works with beef frequently will get their money’s worth in short order.

Enough “behind the scenes” for today – let’s get cooking.

The Recipe: Country Style Steak
Original Recipe From: Good Eats: “Cubing Around”

What You’ll Need:
(Serves 4)

2 Pounds Beef Bottom Round (Trimmed of excess fat) Sliced into ½ Inch Steaks  (This should yield 4 steaks)
2 Teaspoons Kosher Salt
1 Teaspoon Freshly Ground Black Pepper
¾ Cup All Purpose Flour
¼ Cup Vegetable Oil (Amount will vary)
2 Cups Chicken Broth
1 Teaspoon Dried Thyme

Preheat your oven to 300 degrees.

Lightly season both sides of each steak with salt and pepper. Using a meat tenderizer (like the one described above) tenderize each piece of meat on both sides. (Working top to bottom, then rotate the steak and work “side to side” flip the steak and repeat).  Add the four to a shallow dish or plate. Dredge each steak through the flour, making sure both sides are evenly covered in a light coating of flour. Set aside until all of the steaks are covered in flour.

Add ¼ of vegetable oil to the bottom of a 4 to 5 quart Dutch oven (you should add enough to barely cover the bottom of the dish – adjust the amount of oil as necessary). Set the Dutch oven over medium high heat and bring the oil to a shimmer. Once shimmering, place two steaks into the pan and allow them to cook (undisturbed) for two minutes, or until golden brown. Flip the steaks and allow them to cook for an additional two minutes before removing them to a plate tented loosely with aluminum foil . Repeat the process for the remaining two steaks.

Once all of the steaks are browned, assess the state of your Dutch oven. If you find there’s still a lot of excess oil in the bottom of the pan, pour it out. A small amount of residual oil is okay and even welcome. Be sure you don’t WIPE the bottom of the pan, however. The browned on bits on the bottom of the pan are going to be great flavor for the sauce – we don’t want to lose those.

Add the chicken broth to the Dutch oven along with the dried thyme. Place the pot over medium high heat and bring the mixture to a boil. Be sure to use a whisk to work up the browned on bits from the bottom of the pan. Once the mixture comes to a boil – return the steaks to the pot (making sure each steak is covered completely by the liquid). Cover the pot and place it in the center of your oven for 2 hours.

After 2 hours, all that’s left to do is serve and enjoy! The broth should have reduced into a nice, thick sauce to serve atop your steak. Add a side of fresh veggies and you’ve got a great meal.

The Results:


As I alluded to in the open – this steak is one of the most tender cuts of meat you’ll ever have. It simply falls apart at the slightest prodding of the fork. That’s due to the tenderizing and then the two hour braise in chicken broth. What you end up with is a steak full of flavor and moisture yet is soft like it’s been in a slow cooker all afternoon. The best of both worlds!

That’s all we have for you this evening. Maggie returns to the kitchen tomorrow evening with a brand new dish of her own. Until then,

~Cheers