Wednesday, November 30, 2011

Basic But Brilliant

Good evening everyone! As Maggie mentioned yesterday, it’s nice to return to cooking after 3 weeks to Thanksgiving themed dishes. Not that cooking turkey day treats wasn’t fun, it was just a challenge to shoehorn ourselves into a certain ‘region’ or style of recipes for such a long period of time. Maggie celebrated our return to ‘free choice’ cooking by using a favorite Out of The Culinary ingredient – white fish fillets. Tonight, I’m returning to regular cooking by using a favorite Out Of The Culinary method – breading!


There was a time, not too long ago, when we couldn’t nail a breading dish on this blog. The breading fell off, overcooked, lacked flavor or sabotaged the meat underneath of it. We’ve come a long way since then – we’ve successfully breaded cod (twice!), chicken, turkey, halibut, flounder, salmon – each with its own breading and style. We’ve said it multiple times on the blog before, if you want to spice up a dish, introduce it to breading. Tonight, I decided to take things in a new direction, what if you spiced up the breading in a completely new way? Check out this new twist on breaded chicken:

The Recipe: Italian Breaded Chicken Breasts
An Out Of The Culinary original creation (inspiration from Eatingwell.com & Cooks Illustrated)

What You’ll Need:

1 Pound, Lean Chicken Breast (2 Large)
¼ Cup All Purpose Flour
1-2 Large Eggs (Depending on just how large your eggs are)
1 Tablespoon Italian Seasoning*
1 Teaspoon Garlic Powder
1 Cup Breadcrumbs (Non Panko breadcrumbs for this recipe – whole wheat are best)
½ Cup Parmesan Cheese

*Italian seasoning is simply a blend of basil, oregano, rosemary and thyme. It’s not all that hard to find in your local grocery store – but you can blend up your own if you’re trying to be frugal or just like to make your own spices. (Tone’s does sell a .99 variant, however, so it’s not at all expensive)

Preheat your oven to 450 degrees and prep a wire baking rack with non stick cooking spray. Place this wire rack over a baking sheet. Set aside.

If you’re a regular reader of the blog – you’re familiar with the assembly line method of breading chicken, fish or whatever dish you’re cooking. If you’re new to the blog (hi!) or just need a reminder, the best method for breading works like this:

In a small bowl, combine the Italian seasoning and garlic powder, this bowl is first in line. Next, place your flour in a shallow (wider is better) bowl. Next, lightly beat your eggs in a third shallow bowl. Place that bowl next to the flour. Finally, combine the parmesan cheese and bread crumbs in a fourth bowl and place that one last in the line.

Carefully blot off any excess moisture from the chicken breasts (moisture is the enemy of breading after all). Roll the chicken into the seasonings until evenly covered. Next, dip the breasts into the flour, making sure that the entire surface area of the breast is completely covered by flour. Carefully dip the chicken into the egg mixture, allow the excess egg to drip off. Finally, press the breasts into the bread crumb mixture, making sure that they are completely and evenly covered with the crumbs.


Place the newly breaded breasts onto the wire rack and into the oven for about 20 minutes, or until the inner most portion of the chicken registers 165 degrees on an instant read thermometer.


Serve with marinara or BBQ sauce and enjoy!

The Results:


The big tweak to this dish was to add the seasonings to the ‘base’ of the chicken. Rather than adding the Italian and garlic seasonings to the flour, we added the seasoning right to the chicken right off the bat. The result was a more intense flavor – hidden beneath that beautiful crunchy shell was a burst of Italian seasoning with a slight garlic kick. All in all, this is a delicious and simple week night fix for anyone looking to spice up plain ol’ chicken.

That’s all we have for you tonight. Maggie has a surprise recipe that she will be sharing with you later this week. Something that fits right into fall cooking and is sure to please any crowd you have in your house this season! Stay tuned for that recipe to be posted (it will be on our Facebook fan page – be sure to ‘like’ us on Facebook to stay in touch with our updates). Until then,

~Cheers

Tuesday, November 29, 2011

Flavorful Fast Fish

Good evening everyone! I'm sure, like everyone else, our readers are as tired of Thanksgiving leftovers as we are. Only ours lasted 2 days, but it's nice to get away, far, far away from any T-Day related dishes as possible. Tonight, I'm doing just that. With a dish that is a complete 180 of the turkey obsessed week we had, tonight's dish is a new spin on a blog favorite.


The Recipe:  Chip-Crusted Fish Fillets
Original Recipe Found In:  Cooking Light, December 2011

What You'll Need:
4 (6 ounce) Cod Fillets (or other firm white fish; we are substituting with a flounder for our version)
2 Teaspoons Canola Mayonnaise
1/8 Teaspoon Salt
1 (2 ounce) package of Salt and Vinegar Kettle-Style Potato Chips, crushed
1/2 Cup Light Ranch Dressing.

To start, preheat the oven to 400 degrees.  On a parchment-lined baking sheet, arrange the fillets at an equal space apart.  Brush 1/2 teaspoon of mayonnaise over the top of each fillet and sprinkle evenly with salt.


Placing the fish
Brushing it with mayo.
Sprinkle with crushed chips.


Gently press about two tablespoons of the crushed chips evenly on top of each fillet.  Cook the fish at 400 degrees for ten minutes or until the fish flakes easily when cut into.  Serve with the ranch dressing, or any dressing of your choice, enjoy!  It's just that simple!

The End Result:


This fish was fast, fresh, and flavorful.  The salt and vinegar chips really mellowed out in the oven and gave it a really great crunch.  The mayo also gave a good base for the chips to stick to the fish.  Of course, the fish itself was great and was a good starting point for this dish.  Overall, a superb, any night of the week dish! 


This an extremely easy recipe, but after all the baking you (or a loved one) did last week, you deserve a break!  It's great to have dishes that take half a day to prepare and quite honestly, it should happen more than one day a year.  But when these dishes are often soaked in calories and it's not so much fun the day or two after.  This recipe is under 300 calories and won't give you a big caloric intake, like so much of us did last week.


Tune in tomorrow as Tyler returns to an old favorite and adds a new twist.  Until then,


~Cheers!

Monday, November 28, 2011

Pizza As A Vegetable: An Out Of The Culinary Editorial

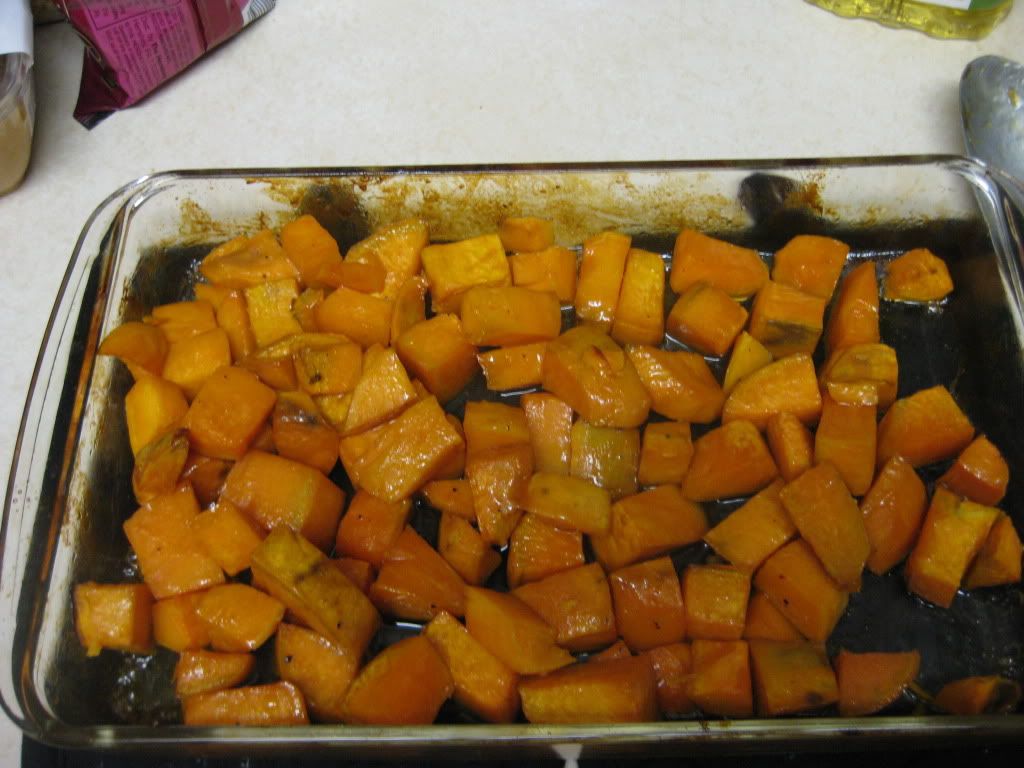
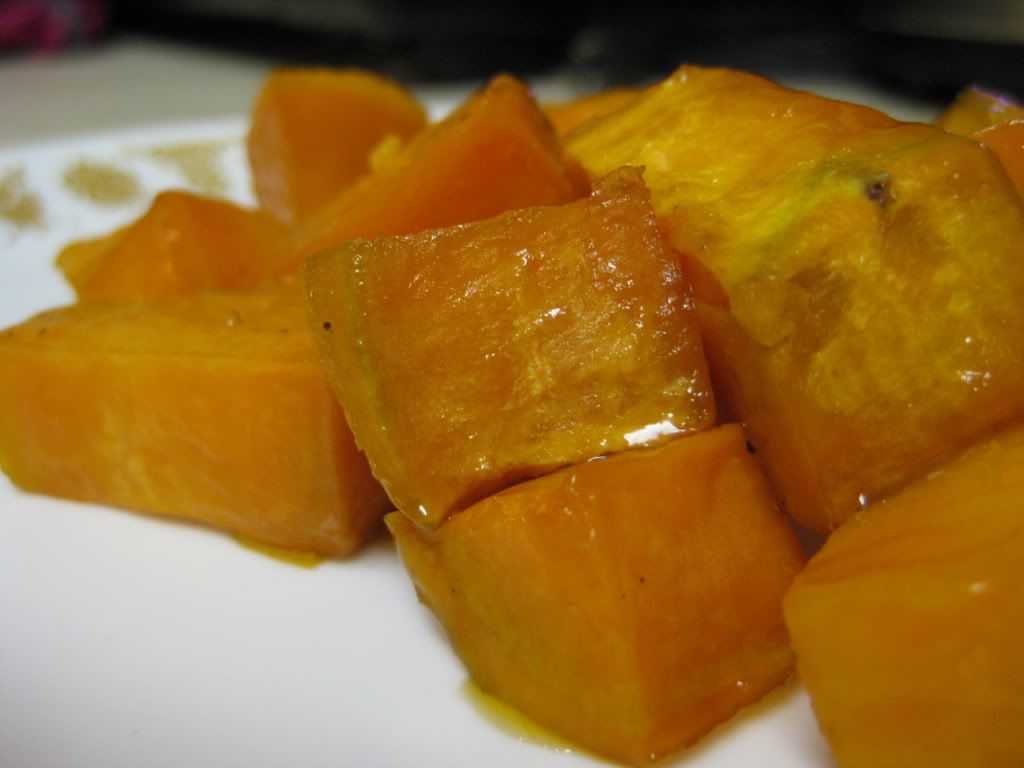
Good evening everyone! We hope all of you had a fantastic Thanksgiving spent with family, friends and of course, good food! Did anyone cook for themselves? Perhaps try a new recipe or two? Or, are you more of the ‘consumer’ type? Either way, it was a great – enjoyable holiday for your two favorite amateur chefs. We cooked up some side dishes, spent time with family and all in all had a relaxing weekend.

While we were focused in on cooking turkey day dishes, some news broke in the culinary world that we were not able to get to – but we will certainly address now. I’m sure you’ve heard of it by now – it was all over the news. Last week, in an inexplicable ruling that left many Americans scratching their heads, Congress declared that pizza was a vegetable.


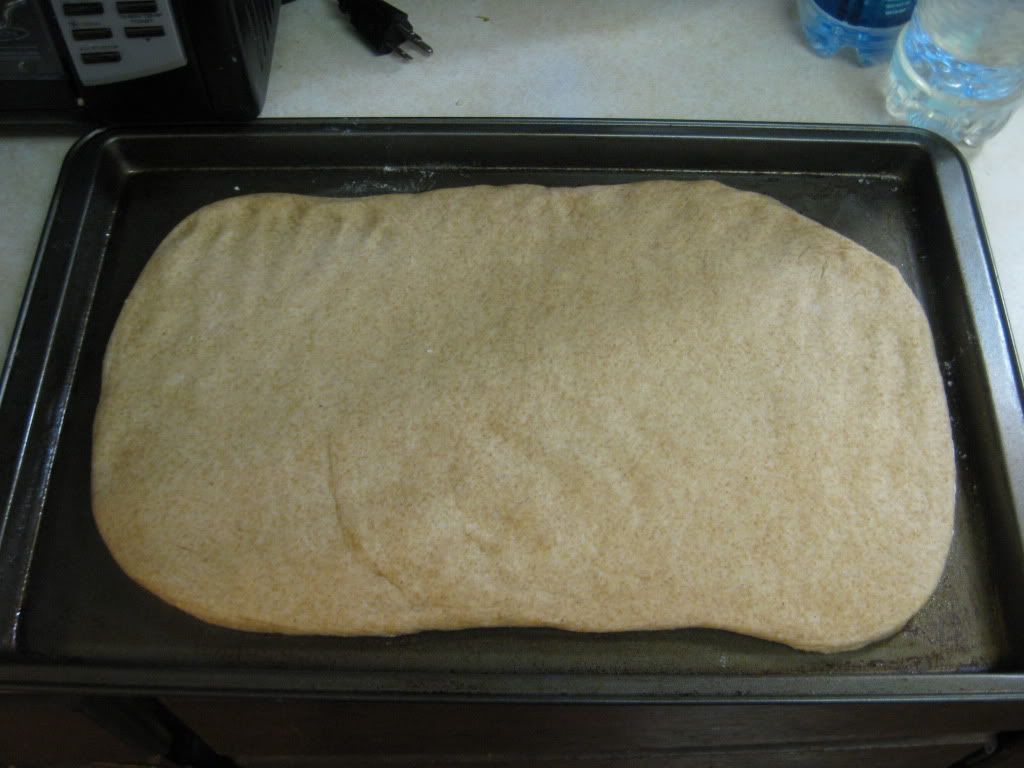
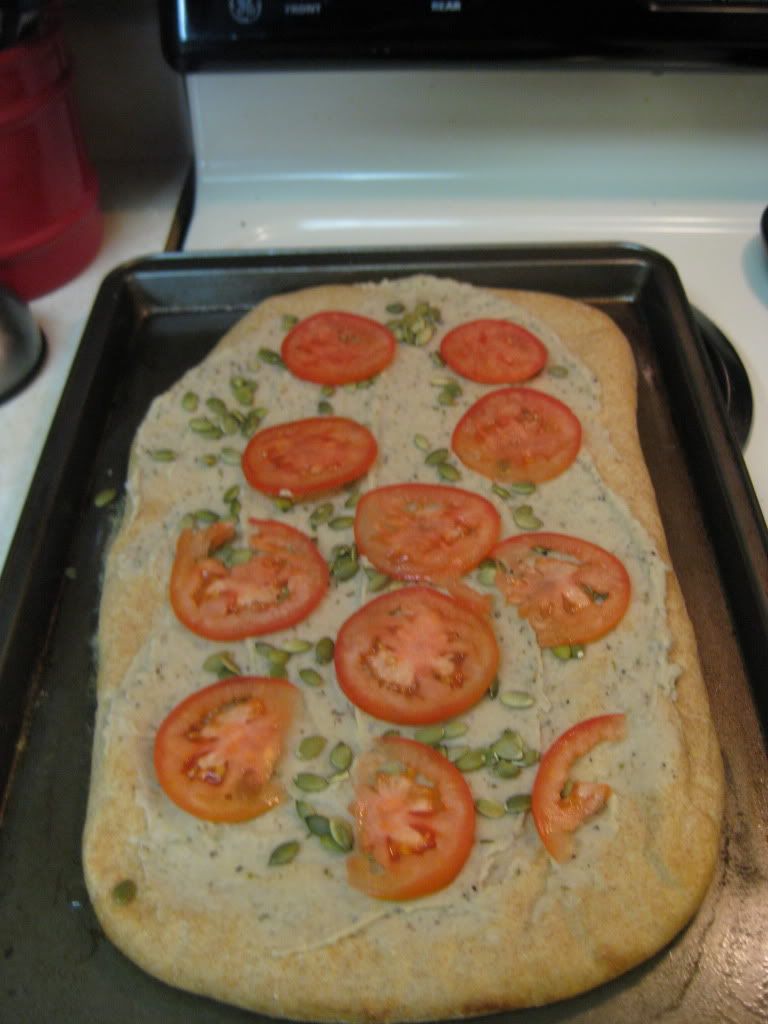
Yes, pizza, which has an average nutritional profile that looks like this:


Is now a vegetable. You had better believe that your ‘eat right, healthy school food menus, focus on nutrition culinary blog’ is going to weigh in on this one!

First and foremost, let’s clean up some misconceptions. The government did not declare that pizza was a vegetable. In fact, nowhere in their new health guidelines does the word ‘pizza’ appear. What they did do, however, was declare that 1/8 of a cup of tomato sauce (or paste - more on that later) now constitutes as a serving of vegetables.

As you can probably infer, this (surprisingly low) serving of tomato sauce has opened the door so foods such as spaghetti and pizza now contain a serving of ‘vegetables’.

Let’s begin the debate on the side that supports pizza (for all intents and purposes) becoming a vegetable. Here are the main points in favor of the new legislation:

  • When compared directly with other fruit (apples for example) tomato sauce is actually pretty healthy
  • Tomatoes are a fruit – they are on the pizza – fruit is good for you - it should count as a serving
  • Don’t tell me what I can feed my kids
Now, here are just a few counter points to those arguments:

While it is true that tomato paste is comparable to an apple when you weigh them side by side – you are losing the forest through the trees. Tomato sauce might not be that bad for you on its own, but the kids are not eating tomato sauce only. That tomato sauce is coming attached to enriched (AKA bleached) white flour (Click: Why that’s bad for you), covered in fatty cheese (schools can usually only afford the lower quality cheeses or in most cases buy from manufacturers who are looking to increase their bottom line. Lower quality cheese means lower cost. Lower cost means higher profit margins.) What covers this cheese? Usually sodium filled meats (ham, pepperoni and sausage are some of the worst meats from a pure nutritional standpoint). When you add it all up, any benefit you’ve gained from tomato paste is lost in enriched flour, fatty (low quality) cheese, and sodium laced meats.

Secondly, yes tomatoes are fruit and they are present on the pizza. So, from a simple standpoint of ‘it’s better to have it on there than to not have it at all’ it certainly isn’t all a bad thing. However, I’d like to point out that there isn’t even 1/8 of a cup of tomato sauce on an average slice of pizza. The regulation is written in such a way that allows for the aggregate amount of sauce used to be counted and then divided against number of children served as well as the aggregate used on the entire pizza - rather than the individual slices. The math works out in such a way that pizza just clears the guidelines (funny – it’s like they planned that…) In fact, some studies have found that there is as little as 1/16 of a cup (1 tablespoon) of sauce on an average slice of pizza. 1/8 of a cup of tomato sauce is already a small amount (2 tablespoons) – but, on average, most slices of ready made, frozen pizza (the type that will be served in schools) don’t even reach that portion size. What's even worse is that most of these pizzas don't even use tomato sauce they use a form of tomato paste which is diluted with water and other additives. This lowers the actual amount of nutritionally viable tomato to nearly nothing. To get that 1/8 of a cup of tomato sauce that is actually a serving kids would have to eat an entire pizza.

This last argument really irks me. No, we (the health conscious public and sane folks of the world) are not trying to tell your kids what to eat. Mrs. Obama is not ‘breaking into your kitchen and packing your kids lunches’ (A quote I heard this past week from a source whose stupidity will not be revealed here). First and foremost, these guidelines were put into place to ensure that schools were providing healthy meals to their students. While we would all like to believe that all school administrators would act on behalf of the best interest of their students, that simply is not the case. Many school officials are presented with ever decreasing budgets and are forced to feed a higher density of students with less funding. As a consequence of this – schools are going to opt to save money every place they can. In the 80's & 90’s some schools were caught serving what could barely constitute as a lunch to their students. This bare minimum meal was blamed on the fact that the schools simply could not afford to feed their students. Federal aid was put into place, which came with guidelines as to what the schools could buy and what they should include in their meals.

This gave us the standards for schools lunches that we’ve had over the past 15 years or so. While flawed, these standards attempted to keep all schools on or at least close to a federally mandated health guideline. (The guideline is out of date, works by old nutritional standards and in some places is flat out ridiculous – but that’s an argument for another day).

Finally, the government is not telling you what to feed your kids. You’re still free to feed them chocolate cake and Coca-Cola for breakfast, send them with a large plate of nachos for lunch and take them to McDonalds for dinner. If you want to feed your kid crap – you’re free to do so. What the government is doing (or at least was trying to do) is offering a health(ier) option for kids. Frankly, most parents won’t admit this, but they need the help. Here are the simple facts:


  • Over the past 30 years, childhood obesity has tripled
  • In 1980, the percentage of 6-11 year olds that were obese was 7%. In 2008 the percentage for the same age range was 20%. That means that 1-5 kids are obese. Not overweight – OBESE. (Overweight is defined as having excess weight for a particular height caused by excess water, fat, bone or muscle or any combination thereof. Obese is defined by having excess FAT)
  • Obese youth are more likely to have risk factors for cardiovascular disease. In a population sample of 5-17 year olds, 70% of obese youth had at least one risk factor for cardiovascular disease
  • Obese children have a greater risk to develop bone and joint problems, sleep apnea and many other health related disabilities (Source: CDC)
What’s the cause of this great waistline expansion in our youth? According to the CDC:

“The dietary and physical activity behaviors of children are influenced by many sectors of society, including families, communities, schools, child care providers, medical care providers, faith based institutions, government agencies, the media, the food and beverage industries and the entertainment industries”

Simply put, a children’s health is greatly influenced by the world around him/her. We are living in a world where food and beverage manufacturers are looking to sell to kids (Click: how advertisers target children) and where they are looking to sell food as an addiction (Click: 60 Minutes behind the scenes look at the flavoring industry). Combine this with lowered quality in many foods (Source) and the fact that – simply put, parents are not making the best decisions when it comes to feeding their kids (Some of this results from the great food stamp debate (subsidized stamps can only buy low quality goods) – some of it is just lazy parenting) and you end up with what we have today. Overweight kids and a nation with weight related problems.

For what’s it’s worth, the CDC has a solution to fixing this issue:

“Schools play a particularly critical role by establishing a safe and supportive environment with policies and practices that support healthy behaviors. Schools also provide opportunities for students to learn about and practice healthy eating habits and physical activity”
(Underlining added for emphasis by Out Of The Culinary)


Once again, simply put – it starts at the school level. A healthy menu, healthy practices and education and you’re halfway to a healthier youth population. The government is not telling you what to feed your kids – it is trying to make your kids healthier, more informed and better decision makers when it comes to nutrition.


So How Did We Get Here?

The bane of everything that is government reform – lobbyists. On November 17th, 2011 – Congress was addressing the new guidelines for school lunch menus and the nutritional standards that they would need to follow. The early reports were that it was not shaping up good to be a potato manufacturer or a supplier of frozen foods. Early indications were fruit and veggies were in – potatoes were being shown the door and frozen foods were getting squeezed off the menu too.

Enter the lobbyists. With a great push from some powerful dollars – Congress not only backed off of removing potatoes and frozen goods – but they also tweaked some nutritional guidelines to let more of these foods ON to the menu (lowering amounts and standards).

The end result? Congress valued the almighty dollar over the nutrition and well being of school children. I don’t want to paint this as a total loss; the new standards do call for the doubling of fruits and vegetables currently being served as well as reduce the overall limits for calories, fats and sodium. It’s a shame that Congress bent on this issue when they had a chance to make real changes, however.

What We Can Do About It:

Jamie Oliver, the champion of better nutrition when it comes to school food – started a campaign to let Congress know that this action is not okay. He is encouraging constituents to call, write and email their local congressman to let him/her know that the American public will not stand for haphazard and careless policies like this. Check out Jamie’s page HERE on this issue for more.

The biggest thing you can do is not stand by on this issue. Continue to encourage the betterment of school food and food programs. If you have children, teach them healthy eating habits and really encourage smart choices. Whether you have kids or not – we all have a dog in this fight. These kids are the future of America – a future that could be plagued with problems and health costs if we don’t take sufficient action to fix what has gone wrong in recent years.

With that, I’ll conclude my soapbox rant for today. If you made it all the way to the bottom of this article, I thank you for reading our perspective. While we are certainly not unbiased on this issue (we’re obviously pro-reform on school food) we tried to present clear, logical and fact based reasons to our debate. I hope you enjoyed this ‘editorial’ of sorts and I encourage you to read more into the issue and get involved!

We’re back to cooking normal (non turkey day related) dishes this week. Maggie will take to the kitchen on Tuesday night and I’ll finish off the week on Wednesday. Tune in tomorrow night to see what we’ve got cooking. Until then,

~Cheers

Tuesday, November 22, 2011

Taking Spuds to A Whole New Level

Good evening everyone!! I think my mind and body is preparing for T-Day Thursday because I seem to be stuffing myself with a bunch of food. But seriously, I am so excited and thankful for this year's Thanksgiving. Tyler and I get to cook a couple of dishes for our families and there is a lot to be thankful for this year. Anyway, enough of me being nostalgic, let's bring on the food! 


A couple of weeks ago, Tyler added a new twist to the standard mashed potato dish.  With panko bread crumbs and different cheeses, he added a new contender to the potato dish norm.  Tonight, I'm trying something completely different, even for Tyler and me. With heat from a particular spice packing a punch and endless amounts of new cheese flavor, it's bound to be a good dish.  


The Recipe: Smoky Scalloped Potatoes 
Original Recipe Found In: Food Network Magazine, November 2011


What You'll Need: 


3 Tablespoons Unsalted Butter 
1 Small Shallot, finely chopped 
4 Garlic Cloves, minced 
1 Tablespoon All-Purpose Flour 
3 Cups Half-and-Half 
1 to 2 Teaspoons Smoked Paprika 
2 1/2 Pounds Russet Potatoes, peeled and thinly sliced 
1 Cup Grated Sharp White Cheddar Cheese 
1/3 Cup Fresh Grated Parmesan Cheese 


To start, preheat an oven to 350 degrees. Butter a 9x13 casserole dish with 1 tablespoon butter. Melt the remaining 2 tablespoons butter in a large saucepan. Once the butter starts to foam, add the shallot and garlic and sauté until softened, 3 to 4 minutes. Add the flour and cook, stirring frequently, until golden, about 2 minutes. Season with salt and pepper. Add the half-and-half, smoked paprika, and potatoes. Being to a low simmer and cook for five minutes. 


All the ingredients ready for a good flavor soak.


The really great thing about this dish is that two kitchen devices helped to speed up the process in making this dish.  I don't know how many times we've mentioned it, but the Rotato has been a great addition to our kitchen.  Not only does it speed up the process of peeling potatoes, but it gives us a chance to pull out other ingredients and do other items whilst these are being trimmed.  The mandolin is also another great utility.  Granted you can't just set it and walk away, but it gives consistent slices of potato, or another other vegetable/fruit you are cutting.  The only bad thing about the mandolin is that you really have to watch when you are slicing, because your finger could end up in the sliced end of mandolin.  It always helps to have kitchen know-how and pass it along to fellow cooks and/or food fanatics.

Pour half of the potato mixture into the buttered casserole dish. Shake the pan to arrange the potatoes in a single layer. Sprinkle half of each of the cheese on top of the bottom potato layer. Add the remaining potatoes and shake again to arrange in a layer. Sprinkle on the remaining cheese, cover with foil and bake for 45 minutes. Remove the foil and place back in the oven for another 15 minutes or until the potatoes and cheese are golden and browned. Let stand for 15 minutes before serving. Serve and enjoy!! 


The End Result:


Oh my goodness!  This dish should not be just reserved for Thanksgiving, but it should be used all year round!  The smoky depth of paprika gave the dish an incredible flavor.  The cheeses weren't really as prominent as I thought they would be, but they gave the entire dish an well rounded flavor.  The potatoes were sliced thinly enough to be cooked in the oven and were evenly cooked.  Overall, a superb dish to share with anyone that you love.


That's all we have for you this (short) week.  We are heading home tomorrow evening and enjoying Thanksgiving with both of our families.  Like I have said before, we are incredibly thankful for a lot this year, including you, the readers of our blog.  We hope you have enjoyed our Thanksgiving dishes over the last couple of weeks and hopefully, you found some inspiration to create something new this year.  We will be back on Monday, with a whole new set of recipes to share.  Until then, have a Happy Thanksgiving and


~Cheers!

Monday, November 21, 2011

Turkey: The Sequel

Good evening everyone! It’s almost that time of year; the calendar is slowly ticking closer and closer to the big day – T-Day if you will. Yes, Thanksgiving is almost upon us! Feasting, family and friends and the official kickoff of the holiday season all commence this coming Thursday. We’ve been featuring Thanksgiving dishes for the past two weeks – trying to give you tips on fixing up traditional holiday dishes in more healthy (and tasty) forms.

Of course, what's the point of a turkey day feature without actually talking turkey? Now, it’s neither practical nor cost effective for us to cook up a whole turkey just for the purpose of the blog. Even a tiny turkey is a little too much for the two of us to eat in a week. Last year, we improvised with a turkey breast recipe (essentially Thanksgiving dinner for two). This year, we’re taking another approach – let’s say turkey day has passed. Family is fed and you’ve run over a few other shoppers on black Friday. What do you do with that leftover turkey? Sure, turkey sandwiches are great – but why not kick things up to another culinary level? Tonight’s recipe is all about what to with the leftovers. Let’s dive in!

The Recipe: “Mud-Honey” Turkey Sandwich
Original Recipe Inspired By: Turkey – The Sequel: Recipes from Food Network November 2011 Issue

What You’ll Need:
(Note: Quantities not used as they will vary between desired sandwich size and the crowd you’re feeding)

Soft Italian Baguette or French Baguette
Shredded Turkey (Breast, leg, light or dark – doesn’t matter)
Roast Beef
Thick Cut Bacon - Cooked (2 Slices per sandwich)
White Cheddar Cheese (Slices preferred)
Barbeque Sauce*

* Sure, you can use just any store brand BBQ sauce here – but why compromise and make a sub-par sandwich? With just a few extra ingredients and about 10 extra minutes, you can make up our own BBQ sauce recipe that will blow the others out of the water. Here’s what you’ll need for that:

The Recipe: Out Of The Culinary’s Savory BBQ Sauce
What You’ll Need:

1 Cup Ketchup (Store brand or generic brand)
3 Tablespoons Molasses*
3 Tablespoons Cider Vinegar
2 Tablespoons Grated Onion (Tone’s Onion Flakes work well too)
2 Tablespoons Worcestershire Sauce
2 Tablespoons Dijon Mustard
2 Tablespoons Maple Syrup
1 Teaspoon Chili Powder
¼ Teaspoon Cayenne Pepper

*Use a ‘Mild’ or ‘Original’ flavored molasses

To make the BBQ sauce – combine everything in a medium bowl and stir until well blended. Pour this mixture into a small saucepan and heat over medium low heat until slightly bubbling. Make sure to stir this mixture every few minutes while cooking. Store the sauce in a jar or tightly sealed container. Keep refrigerated and enjoy frequently!

Now onto the sandwich – there’s not much “instruction” to putting this together (It is, just a sandwich after all). Simply layer the white cheddar cheese, roast beef, turkey and BBQ sauce into a fresh Italian or French baguette. Place the sandwich on a baking sheet and into a 500 degree oven for about 2 minutes to heat everything through. Add the bacon at the end and enjoy!

Mouthwateringly DELICIOUS 


This is certainly the way to enjoy leftover turkey! Delicious sandwich, it doesn’t get any simpler than that. This is just a delicious sandwich. Try it yourself with your leftover turkey!

That’s all we have for you this evening. Maggie will finish us off this week (short week of cooking for us!) on Tuesday with one last Thanksgiving side dish. Tune in tomorrow night to see what she’s got cooking. Until then,

~Cheers

Thursday, November 17, 2011

Pop-up and over

Good evening everyone! It's Thanksgiving dish month here on the blog - so far we've covered green bean casseroles, two kinds of roasted sweet potatoes and improved on the classic mashed potato side dish. Tonight, we're continuing the great turkey day dish theme by tackling another staple of the dinner table - the dinner roll.

It seems like every holiday meal I can remember has been accompanied by some form of dinner roll. Whether they were made from scratch or (more commonly) from a can with a tiny little dough boy fond of getting his belly poked (I always found that odd...) no holiday dinner was complete without some form of roll. So, how do you improve on this often overlooked - but no less important side dish? Simple, you make sure it fits your needs at the table.

It's Thanksgiving, and while you want to have a roll on the side, you don't want to fill up on bread before you get to the turkey, potatoes, green beans, corn and other goodies. The solution is to make a light and fluffy bread that is full of flavor but won't weigh down your stomach. Enter the popover.

The Recipe: Basic Popovers
Original Recipe Found In: Food Network Magazine (November 2011) Recipe by Alton Brown

What You'll Need:

1 Tablespoon Unsalted Butter (Melted and cooled) Plus 1 Tablespoon for the pan
4 3/4 Ounces of All-Purpose Flour
1 1/2 Teaspoons Kosher Salt
2 Large Eggs (At room temperature)
1 Cup Whole Milk (At room temperature)


I don't know what rock I was living under for the first 24 years of my existence, but I had never even heard of popovers until I read about them in this month's Food Network Magazine. Apparently they are pretty common (so common that they then even have their own pans!). You can fill popover with all sorts of fillings and goodies - they really are quite the culinary playground. Tonight, we're just making a basic popover - and only using a muffin pan...so we'll see how that goes. Baby steps, right?

The key to making a perfect, fluffy popover is in the batter and the cooking technique. A hot oven and wet batter will create a perfect popover. The heat causes the sides and bottom of the popover to set quickly, which traps a lot of moisture in the bottom of the popover. This moisture quickly turns into steam, which rises to the top of the popover, creating a great fluffy, air filled pocket on top.

To begin making the popover, preheat the oven to 400 degrees. Grease the baking pan with 1 tablespoon of butter. Next, combine the melted butter, milk, eggs, flour and salt in a food processor and blend until everything is combined, about 30 seconds.


If you are using a muffin tin rather than a popover pan be sure to leave on space between each cup so the popovers have room to expand. If you can, use a dark muffin tin as they will absorb and maintain the heat for a longer period of times than a light muffin tin. 


Pour the batter into the baking pan, filling each cup about 1/3 to 1/2 full. Place the baking pan into the 400 degree oven for about 40 minutes. Make sure you don't open the oven during cooking. You are trying to keep the temperature high so the steam can raise the tops of the popover - opening the door will reduce the heat and you'll lose your steam powered cooking.


Once the popovers are golden brown, remove them from the pan and place them on a cooling rack. Using a knife, pierce each popover on the top to release the steam. Allow to cool slightly and serve while still warm. Enjoy!

The Results:

Just as advertised, these rolls were puffed full of air - making them light and fluffy. They're light on flavor (more of a neutral bread) which means that it absorbs its surrounding flavors very well. We had ours with butter and honey - but jam, or even gravy would be great on these biscuits. Considering there are variants including garlic, cheddar and whole wheat at your disposal - you should never be bored with a popover recipe.

As a side note - we were underprepared for this dish. We didn't have a popover pan, we didn't even have a deep muffin pan. Our shallow muffin pan worked out okay - but the popovers stuck something terrible because our pan was designed to be used with cupcake papers, not used 'au natural'. Despite that - we still ended up with an edible (albeit not too pretty) dish!

That's all we have for you this week. We're back on Monday as we continue to delve into more turkey day recipes. Until then,

~Cheers

Wednesday, November 16, 2011

And Now, For Something Completely Different...Well, Almost...

Good evening everyone! It might come as a surprise to everyone, but I cannot recall if I've ever had sweet potatoes until I met Tyler. Now that Thanksgiving is in full swing, we are delving right into that delicious goodness of sweet potatoes.


It's typical to have sweet potatoes matched with something, well, sweet.  Sweet potatoes have a natural sweetness that is almost nuetrally sweet - this lends the dish to be a good companion to any super sweet addition and in turn creates a great blending of sweet but not too sweet. We are all familiar with the dish that involves marshmallows, usually roasted on top of the potatoes. On Monday, we paired sweet potatoes with brown sugar and cinnamon. Tonight, I'm keeping the sweet tradition alive. By using a roasting method with a saccharin accessory, the results should be predictable, yet totally delicious.


The Recipe: Maple Roasted Sweet Potatoes
Original Recipe Found In: www.eatingwell.com


What You'll Need:

2 1/2 Pounds Sweet Potatoes (peeled and cut into 1 1/2-inch pieces - about 8 cups)
1/3 Cup Pure Maple Syrup
2 Tablespoons Butter, melted
1 Tablespoon Lemon Juice
1/2 Teaspoon Salt


Begin by preheating an oven to 400 degrees.  Arrange the cut sweet potatoes in an even layer in a 9x13 in glass baking dish.  Combine the maple syrup, butter, lemon juice, salt, and freshly ground black pepper in a small bowl.  Carefully pour the mixture over the sweet potatoes, toss to coat.


Ready to be coated potatoes.
It's hard to see, but the potatoes have a nice coat of maple syrup.


Sure, the majority of us who love sweet potatoes know that these tubers are extremely tasty, but did you know they are a super food?  They pack a punch of Vitamins A and C, which have loads of antioxidants which prevent the damage of cells.  They are good for stomach ulcers and inflammation of the colon.  They are beneficial for low blood pressure and may be helpful for hemorrhoids.  Sweet potatoes are also good for those who have high physical activity during the day, because of all the high content of vitamins and minerals.  They are also good for those who are diabetic, because it helps stabilize blood sugar.  Also, because we are adding a fat to our potatoes (butter and syrup,) the nutrients in the potatoes can be better absorbed by the body.  With all these reasons, why not enjoy and love sweet potatoes??

Cover and bake the sweet potatoes for 15 minutes.  Uncover the baking dish, stir, and cook, stirring every fifteen minutes, until tender and starting to brown, 45-50 minutes more.  Serve and enjoy!


After 45 minutes of roasting


The End Result:


The maple syrup adds a nice depth of sweetness, not a blanket of sweetness.  I think the adding the salt made this possible.  Adding a little salt to an overly sweet dish will not only enhance the flavor, but make it incredibly deep.  Roasting the potatoes gave them a nice soft texture that we are accustomed to in sweet potato dishes.  Overall, a very tasty sweet potato dish that is not only easy, but appealing to the taste buds.


Tyler takes to the kitchen tomorrow as he whips up another Thanksgiving side dish.  Until then,


~Cheers!

Monday, November 14, 2011

Simple, Sweet & Savory

Good evening everyone! It’s Monday once again, which usually means a trip Around The Culinary World. This week, however, we’re changing things up a little bit and throwing a recipe into Monday’s mix. As our dedicated readers are aware – we will be featuring Thanksgiving dishes for the next few weeks. We’ve started the festivities off last week with two turkey day dishes. This week, due to the overwhelming number of recipes we’ve found, we’re featuring three dishes. Tonight’s dish is one of the easiest turkey day treats you will ever make! It’s a bonus recipe quick hit! Let’s dive in!


The Recipe: Crock-Pot Sweet Potatoes
Original Recipe Found On: Multiple Sources (There is a variation of this recipe in about every cookbook and website I read)
What You’ll Need:

3 Sweet Potatoes (Peeled, sliced into ½ inch cubes)
¼ Cup Brown Sugar
3 Tablespoons Butter (Melted)
½ Teaspoon Cinnamon
¼ Cup Applesauce
¼ Cup Pecan Pieces

Are you ready for these directions? They’re pretty complicated. Here we go –

Add the sweet potatoes into the bottom of the slow cooker. In a medium bowl, combine the cinnamon, applesauce, 2 tablespoons of the butter and brown sugar. Pour this applesauce mixture over the sweet potatoes and cover the slow cooker. Cook on low for 5 to 8 hours or until the potatoes have become completely tender. Alternatively, you can cook the sweet potatoes in the oven at 375 degrees for about an hour and a half to two hours (again, or until tender)

Before you serve the potatoes, melt the remaining tablespoon of butter in a small skillet. Add the pecan pieces and cook until they become a light golden brown, roughly 5 to 7 minutes.

If your potatoes have not completely turned into mush (some of mine were completely soft – others still held a small portion of their original shape) you’ll need to mash them slightly. It’s actually best to give everything a few good stirs either way – you wont need to use a potato masher, just a solid spoon will do the trick.

Add the pecan pieces to the top of the potatoes before serving and enjoy!

The Results:

Simple, sweet and savory! You cannot beat recipes that are this easy to make but deliver such amazing results. The cinnamon and brown sugar add a great layer of sweet yet spicy depth to the dish and the applesauce provides a very unexpected sweetening to the entire dish. When it comes to turkey day sides, this sweet potato dish is sure to be a popular one. The best part is you can start it early in the day and never worry about it until it’s dinner time!

(Yes, this is a photo free blog tonight – it’s not that we don’t want to share pictures, it’s just that photographing potatoes in a slow cooker…well, it’s not riveting photography!) That’s all we have for you tonight, Maggie takes to the kitchen on Wednesday night with a brand new Thanksgiving dish of her own. I’ll be back on Thursday with another new dish. It’s a busy week here on the blog! Tune in Wednesday to see what Maggie has cooking. Until then,

~Cheers

Wednesday, November 9, 2011

Giving a Makeover to an Old Favorite

Happy Wednesday everyone! If you live in the greater Des Moines metro you probably awoke to several inches of snow on the ground this morning. Worst of all, it was the wet, sloppy kind - not the fluffy pretty kind. Alas, I, like many of my fellow metronians, felt this snowfall was too early but the cool winter wind it brought with it brought a smile to my face. Moving on to better things; like tasty comforting food. For me, Thanksgiving is a wonderful holiday, spent with family and friends, celebrating the day reminiscing about things to be thankful for and gorging yourself on food. Green Bean Casserole is my favorite holiday dish to devour.  Give me a bowl of Green Bean Casserole and a slice or two of pumpkin pie and I'm set!  Unfortunately, the dish itself is a caloric nightmare and is probably not the best thing for you to eat.  


Tonight, much to the woe of my hubby, (who cannot stand green beans) I'm trying my hand at making a healthier alternative to the holiday staple. Special thanks in advance to Tyler who actually typed up tonight's blog (I cooked it - he wrote it!) 

The Recipe:  Green Bean Casserole with Crispy Shallots
Original Recipe Found In:  Food Network magazine, November 2011

What You’ll Need:

¼ Cup Olive Oil
6 Medium Shallots (Sliced into rings)
1 ½ Pounds Thin, Fresh String Beans (Trimmed)
1 Pound Button Mushrooms (Sliced)
6 Large Garlic Cloves (Minced)
1 Tablespoon Chopped Fresh Thyme
3 Cups Low Fat Milk (1%)
3 Tablespoons All Purpose Flour
½ Cup (Plus 2 Tablespoons) Freshly Grated Parmesan Cheese
½ Cup Finely Chopped Parsley
¼ Teaspoon Ground Nutmeg

Begin by preheating your oven to 350 degrees.

Heat the olive oil in a small skillet over medium high heat until the oil is shimmering but not quite smoking. Add ¼ cup of the shallots (roughly ¼ of the shallots) and cook, stirring constantly until they are golden brown and crispy. This should take about 2 minutes. Transfer the shallots (via slotted spoon) to a paper towel lined plate. Repeat this process (1/4 cup at a time) until all of the shallots have become golden brown, crispy and are drained of excess oil. Make sure you reserve the excess oil in the skillet – you’ll need it later on.

This step allows you to create the great crispy “onion ring” crunch that green bean casserole is famous for. Instead of deep fat fried, sodium enriched glorified chips – these crispy shallots are much better for you!

Getting the shallots all nice and crispy


Next, add your green beans to a steamer basket and place that basket over a large pot of boiling water (do not submerge the beans). Cover the basket and steam until the beans have become a brighter green and are still slightly crisp. This should take about 3 to 5 minutes.

If you do not have a steamer basket, you can use a wire strainer and a pot lid – improvising in the kitchen is always necessary unless you’re equipped like the pros are!

Look at those perfectly cut beans - all those years of cutting beans from my parents garden have FINALLY paid off!


Remember that reserved shallot oil from earlier? It’s time to use it now – add 1 tablespoon of this oil to a large (high sided) non-stick skillet. Over medium high heat, bring the oil to a light shimmer. Next, add the mushrooms and cook (stirring occasionally) until all of the liquid has been absorbed into the mushrooms and they begin to brown. This takes about 10 to 15 minutes. Finally, add the garlic and thyme and cook until they are fragrant – roughly 30 seconds to one minute. Transfer the mushroom mixture to a bowl and set aside.

Nothing smells better than frying up some mushrooms!


In a small bowl, combine the flour and milk. Whisk the mixture until all of the flour has been blended with the milk (I.E. no clumps). Add this mixture to the deep sided skillet you used previously. Stir the mixture constantly on high heat until the milk begins to simmer. At that point, reduce the heat to medium low and allow the mixture to simmer until it thickens. Be sure to stir occasionally. This process should take about 10 to 15 minutes.

This stage allows you to recreate the classic ‘cream’ flavor that traditional green bean casserole contains. The original version of this dish obtains that flavor from cream of mushroom soup – while that is an easy alternative, you are adding a lot of extra fat and sodium (especially sodium) to the dish. By adding an extra (10 minute) step, you greatly enhance the health aspect of this dish!

Next, add the green beans, mushrooms, ½ cup of parmesan cheese, parsley, nutmeg, ¾ teaspoon of salt and ½ teaspoon of pepper to the skillet. Stir the mixture until everything is well combined.

Coat a large (2 quart is ideal) baking dish with cooking spray. Spoon the green bean mixture into the dish and sprinkle the top with the crispy shallots and the remaining parmesan cheese. Place the baking dish into the oven and bake until the cheese is golden brown, roughly 20 minutes. Serve and enjoy!


The Results:


In every sense, in flavor and in looks, this is a Green Bean Casserole.  Except it looks nothing like your typical Green Bean Casserole.  The beans aren't drenched in soup and the top of the dish isn't completely coated in fried onions.  Instead, the beans are lightly coated in the thickened milk/flour mixture along with the mushrooms and the top is sprinkled with lightly cooked shallots.  The beans could have used a little bit more time steaming to get a better cooked taste, but the flavor was there and that is what I was aiming for.  This is a great spin on an old Thanksgiving staple!
 
The irony of this recipe is that Tyler's public enemy number one is green beans. He's never been a fan. For the good of the blog - he volunteered to eat a green bean based recipe. I love green bean casserole, so I was eager to cook up this dish. The greatest part? Because of a scheduling crunch - Tyler had to type up a majority of the recipe. Not only did he have to eat the green bean dish - but he now knows how to cook it in excruciating detail! (Sorry, I found that part funny)  And even though he still doesn't like green beans after eating four, I gotta give it up for him for at least trying.


That's all we have for you this week.  Thanksgiving month continues with more recipes next week.  Until then,

~Cheers!

Tuesday, November 8, 2011

A Potato Makeover!

Good evening everyone! Welcome to the start of Thanksgiving month here at Out Of The Culinary! Our goal for the coming weeks is to feature a few dishes, with a healthy focus, that you can cook up for turkey day to astound and impress your family with your culinary prowess. Some of the dishes will be new developments on standard table staples (such as tonight's recipe) others will be completely unique twists that you may want to debut on the table this holiday season.

Tonight's recipe is a twist on a turkey day tradition - mashed potatoes. While there is certainly nothing wrong with standard mashed potatoes; they are welcome on my Thanksgiving table any day, however, why simply settle for pretty good when you can put a brand new twist on the classic dish and bring a whole new flavor to the table?

The Recipe: Mashed Potato Casserole
Original Recipe Found In: Cooking Light November 2011 Issue

What You'll Need:

1 1/2 Pounds Yukon Gold Potatoes (Peeled and cut into 1/2 inch slices)
1 1/2 Pounds Baking Potatoes (Peeled and cut into 1/2 inch slices)
5 Garlic Cloves (Thinly sliced)
1 1/4 Teaspoons Kosher Salt (Divided)
3/4 Cup 1/3 Less Fat Cream Cheese (About 6 ounces - softened)
1/2 Cup Grated Parmigiano-Reggiano Cheese (About 2 ounces)
1/2 Cup Panko Bread Crumbs
4 Green Onions (Thinly sliced)

(This recipe is reason #3,500 why I enjoy my Rotato)


Begin by preheating your oven to 350 degrees.

In a large saucepan, combine the potatoes, garlic and 1/2 teaspoon of the salt. Fill the pan with water until the potatoes are covered by about a 1/2 inch to 1 inch of water. Set the pan on high heat and bring the mixture to a boil. Once the boiling, reduce the heat and allow the mixture to simmer until all of the potatoes are tender. This should take about 15 minutes.

Drain the potatoes through a colander, but be sure to reserve about 1/2 cup of the cooking water for later use. This is easily accomplished by draining the potatoes over a large bowl and simply dipping a 1/2 cup measuring cup into the water after the potatoes have been properly drained.


Place the potatoes into a large bowl and add the reserved 1/2 cup of liquid. I found that the original recipe called for a larger than needed amount of liquid to be added to the mixture. It seemed after I added the water that the mixture was a little 'soup-like'. The best way to handle this is to simply start by adding 1/4 cup of the water and adding more as necessary. Depending on the type of potato you have and the particular make-up of said potatoes, your mixture could be a little starchier and require more liquid. You want to make the mixture soft and creamy without being overly runny or too sticky.

After you add the water, add 1/4 teaspoon of salt and the cream cheese to the mixture. Using a potato masher, work and smash the potatoes until all of the lumps have been worked out.

Next, cover a broiler safe baking dish with cooking spray. (A 11 x 7 dish is the ideal size here). Spoon the potato mixture into this dish and place into your 350 degree oven. Bake the potatoes for about 20 minutes or until they have been completely cooked through.


Remove the dish from the oven and preheat your broiler. If you do not have a broiler safe dish, increase the heat to 450 degrees in the oven.

In a small bowl, combine the panko bread crumbs and the Parmigiano-Reggiano cheese. Sprinkle this mixture over the top of the potatoes. Broil the dish for about 4 minutes or until the bread crumbs have turned golden brown and the cheese has melted. If you're using the oven method, it will take about 10 to 15 minutes of high heat cooking to reach the desired golden brown finish. Once golden brown, sprinkle the green onions over the top of the dish and serve!

The Results:


Mashed potatoes, welcome to your makeover! It's really that simple, this is the "A-list" of mashed potato dishes. The yukon gold potatoes and baking potatoes combine into a great, creamy burst of flavor. The panko adds a nice touch of crunch to the dish (always enjoyable) and the Parmiginao-Reggiano cheese added a great, mild, cheesy finish to the whole dish. If you're making mashed potatoes for your Thanksgiving meal, you may want to consider this unique and delicious dish!

That's all we have for you this evening. Maggie takes to the kitchen tomorrow night with another Thanksgiving side dish. This one will be a big challenge for me, as she is cooking with one of the few ingredients that I really cannot stand. Can Maggie cook up this ingredient in such a fashion to win me over? Find out tomorrow night! Until then,

~Cheers

Monday, November 7, 2011

Around The Culinary World

Good evening everyone! It's Monday once again which means a brand new week of cooking! We're starting our Thanksgiving dishes this week - continuing all the way up to turkey day. Each week, we'll feature side dishes and eventually a few main dishes to help make your Thanksgiving feast the best it possibly can be. In the meantime Monday means a trip Around The Culinary World - while this week was sparse on news stories, we'll take the trip nonetheless! Let's dive in!


Dippin' Dots, once proclaimed as the ice cream of the future, may quickly be finding that it's the ice cream of the past. Late last week, the Wall Street Journal broke a story reporting that the cryogenically frozen ice cream ball manufacturer was filing for Chapter 11 bankruptcy. If you're not familiar with bankruptcy rulings and procedures - Chapter 11 is the form of bankruptcy that allows a company to restructure their debt in order to continue operating as a working entity. In essence, while this filing doesn't end Dippin' Dots from existence, it does cast some serious issues into light. At one time, Dippin' Dots was looking like it would live up to its claim as 'the ice cream of the future' - the frozen little beads were infiltrating every street corner, amusement park and stadium vendor. Then, in 2008, the economy took a turn for the worse. The company believes that this economic downfall is the cause of their struggles.

 I would argue that they were facing struggles with or without an economy on the collapse. To sum it up simply, their product was a fad. They attack first interest and then little in the way of return customers. Speaking from experience, their product is simply 'okay' by no means does it replace ice cream or even surpass other frozen treats. Factor in the relatively high price with low appeal to purchase again and - ta da - the solution to your companies woes are fairly clear. Either way, it looks like Dippin' Dots is facing a rocky road ahead. Read more about this filing HERE.


In 1996, the world food markets experienced a panic. Forecasters feared that the world would be facing another food shortage and prices of commodities such as rice and wheat sky rocketed as a response. The main culprit for this surge in prices was the loss of 200,000 tons of rice. Now, how exactly does one lose 200,000 TONS of rice? Check out this interview with Peter Timmer, a food security expert casts some light into the food markets and exactly how 200,000 tons of missing rice caused the food markets to panic. Check out the interview HERE.


Kitchen gadgets - some are great, others are useless drawer cloggers that are only after your cash. The Huffington Post has a list of 10 utterly useless kitchen gadgets that you should avoid. (Be sure to click the link HERE to see how you can peel garlic in 10 seconds. It blew my mind that garlic was actually so easy to peel!). Check out the gadgets to avoid HERE.


If you're a dieter, you're well aware of all of the trendy diets that are currently being share on the internet as 'the way' to lose weight. Which ones actually deliver on the promised results? US News has ranked the top 20 diets on the market today. Which ones deliver? Surprisingly, quite a few. Check out the results HERE.


That's all the news that's fit to blog about for this week. (Sort of a sparse week for stories...) We're starting our Thanksgiving dishes this week. I'm taking to the kitchen tomorrow night to get the week started and Maggie will take to the kitchen on Wednesday night with another dish to accompany your turkey on the big day. Be sure to stop in tomorrow night to see what I've got cooking. Until then,

~Cheers

Wednesday, November 2, 2011

Regular Pizza Wishes It Could Taste This Good!

Good evening everyone! Last week, we featured 100% vegetarian recipes and (hopefully) showed that vegetarian is a great way to eat healthy without compromising on flavor. These recipes had me motivated to keep the trend going. Don’t worry, we’re not turning into a vegetarian cooking blog – we still very much enjoy using meat in our recipes – but the success of last week’s recipes made me eager to try my hand at a larger slice of vegetarian dishes. When I came across this week’s recipe, a vegetarian flat bread (AKA pizza) it was so unique and completely out of the ordinary from what I usually cook that I had to give it a try.


The Recipe: Caramelized Onion & White Bean Flatbread
Original Recipe Found On: EatingWell.com

What You’ll Need:

3 Tablespoons Extra Virgin Olive Oil
1 Large Onion (Thinly sliced lengthwise)
¼ Teaspoon Salt
20 Ounces Whole Wheat Pizza Dough*
2 Teaspoons Dried Oregano
½ Teaspoon Ground Pepper
15 Ounces White Beans (Canned)
3 Tablespoons Water
2 Teaspoons White Wine Vinegar
2 Plum Tomatoes (Thinly sliced)
1 Cup Smoked Cheddar Cheese (Finely shredded)
2 Tablespoons Pepitas**

* Frozen or fresh pizza dough is required here as you need to be able to work the dough onto a baking sheet. Surprisingly, our local grocery store did not have frozen pizza dough – in its place we found frozen whole wheat bread dough and will be rolling that out as needed. In a pinch, frozen bread dough will work as a nice substitute, you’re just a little more likely to have a ‘fluffier’ crust

** Pepitas are the hulled ‘meat’ of pumpkin seeds. They have a great ‘nutty’ flavor and are actually pretty easy to track down. They can likely be found either in the health market section of your grocery store, or if you’re grocery store sells bulk nuts & seeds, they would be found in that section as well.


Begin by placing your oven rack in the lowest position and preheat the oven to 450 degrees. Spary a large (non insulated) baking sheet with cooking spray. Insulated baking sheets will retain heat and mess with the browning of the bottom of your dough. Great for cookies – not great for pizza dough.

Next, combine the oil, onion and salt in a medium saucepan. Cover and cook over medium high heat until the onion softens. This should take about 5 to 7 minutes. Stir every minute or so to make sure the mixture is evenly heated. Remove the lid and reduce the heat to medium low. Stirring occasionally, allow the onions to simmer for an additional 5 to 8 minutes or until they turn a light golden brown. (Thus creating the caramelized onions named in the recipe!)

While the onions are cooking, you can begin rolling your dough into the shape of your baking sheet. On a well floured surface, slowly work the dough into an even rectangular shape, slightly less than the size of the baking sheet (the dough will expand while cooking). Transfer this dough to the baking sheet and place into the oven. Bake for about 10 minutes or until the dough becomes lightly crisped on the edges and bottom. Remove the dough from the oven and set aside.


Add the oregano and pepper to the onion mixture. Remove about ½ of the onion from the saucepan and set aside. Add the beans to the remaining onion mixture and return the saucepan to heat. Cook the mixture until the beans are heated through (roughly 3 to 5 minutes).

Once the beans have finished cooking, add the mixture into a food processor along with the water and white wine vinegar. Pulse the mixture until it forms a nice paste. This paste will act as your ‘sauce’ for the pizza.


Spread this bean paste across the surface of your crispy pizza dough. Top the pizza with the reserved onions, sliced tomatoes, pepitas and cheddar cheese.


Return the dough to the oven and bake until the crust is a deep golden brown and the cheese has melted. This should take about 10 to 15 minutes. Slice up the pizza and enjoy!

The Results:


While this certainly can’t be called a pizza in a true form– I would argue that this is one of the best ‘pizza-like’ dishes I have ever had! The bean/onion sauce creates a fantastic base of flavor for the tomatoes and onions. The pepitas, an ingredient first for me (much like the lentils of last week) were surprisingly delicious. They hold a great natural nutty flavor that really complimented the smoked cheddar very well. The best part of this recipe, however, is the great aroma that will fill the apartment while you’re cooking. The smell alone is sure to draw a crowd into the kitchen. The great natural flavors of this healthy dish will keep them around! This recipe is a must try for the at home chef.

That’s all we have for you this week. Next week, we’re starting a theme month of cooking. With Thanksgiving coming up, or next two to three weeks of recipes will all be featured around the big culinary day. It’s turkey month here at Out Of The Culinary starting with next week’s recipes! It all gets started with a trip Around The Culinary World on Monday – so be sure to stop in then to see the news of the week. Until Monday,

~Cheers

Tuesday, November 1, 2011

Pasti-what?

Good evening everyone!! As our last 'nice' fall days end, we're shifting our focus more towards fall-ish flavors and dishes. But we can have a little fun before we do so, right?? Tonight's dish is a classic Maggie dish, with all my favorite fixings: pasta and cheese. Although there is a brand new twist on this classic favorite. I'll delve into that deeper later, but now, onto the recipe!


The Recipe: Quick Pastitsio
Original Recipe Found In: Cooking Light, October 2011

What You'll Need:

8 Ounces uncooked Penne
1 Pound Ground Sirloin
1 Tablespoon Olive Oil
1 1/2 Cups Chopped Onion
5 Garlic Cloves, minced
3/4 Teaspoon Salt
2 Cups Fat-Free Milk
1 (14.5) can diced Tomatoes, drained
1/2 Cup (4 Ounces) 1/3-less-fat Cream Cheese
1 (3 Ounce) package Fat Free Cream Cheese
3/4 Cup Shredded Part-Skim Mozzarella Cheese

For those of you who don't know what pastitsio is (including myself until I did a little research,) it is a Greek or Mediterranean dish, which includes, quite literally, pasta, meat, and cheese.  Although to it's simplest form, it could be classified under another pasta dish.  Without all the sauce and fancy fixings, this is just a stripped down version of lasagna.  Since I am a huge lasagna fan and Tyler isn't, I'm hoping this will be the happy medium for us.


To start cook the pasta according to package directions.  Next, heat a large skillet over medium-high heat and coat the pan with cooking spray.  Add the beef to the pan and sauté until browned or five minutes.  Remove the crumbled beef and drain well.  Wipe the pan clean with a paper towel.  


Add the oil to the pan.  Saute the onion for four minutes.  Add the garlic and sauté for one minute, stirring constantly.  Add the beef back to the skillet and sprinkle with salt.  Add the flour and cook for one minute, stirring frequently.  Stir in the milk tomatoes, and cream cheeses, stirring until smooth and bring to a simmer.  Cook for until thoroughly heated and stir in the pasta.


Preassembled Pastitsio


Spoon the mixture into a 13x9 inch baking dish coated with cooking spray.  Sprinkle the mozzarella cheese over the top to coat evenly.  Bake at the lowest temperature until golden brown for five minutes.  Remove from oven, serve, and enjoy!

All baked and ready to roll!


The End Results:


The quintessential pasta dish.  The penne soaked up all that liquid from the milk and melted cheeses.  Although I wouldn't call it a cheese sauce, because it wasn't overtly cheesy, just hints of cheese.  The beef also soaked up all that flavor too which blended the dish quite nicely.  Personal preference, I would have liked to enjoy more of the cheese flavor by adding another cheese in...but that's just me (an admitted cheese addict).  To me, the flavor didn't quite hit the mark.  I felt it needed something more, whether it would be another cheese, a spice, or something.  Overall a great recipe to whip up and feed a crowd, but to make that crowd want more, it needed something extra to give it that great lasting appeal. (Even a good seasoning with salt & pepper would give it a little more kick). 

Come back tomorrow as Tyler tackles a new dish for us and the blog - we're heading into uncharted ground with this dish.  Until then,


~Cheers!