Thursday, October 31, 2013

Halloween & Healthy Eating: An Editorial

Good evening everyone! Maggie is in the last stages of recovering from a cold, so her recipe for this week will be bumped into next week. That means we’re taking things in a different direction tonight – one we don’t go very often – an opinion column.

Today, October 31st, 2013 is Halloween, the one time a year where it’s deemed okay to dress up in some ridiculous costume, knock on a stranger’s door and ask for candy. (Sounds silly when you type it out like that, doesn’t it?).

Recently, there’s been a movement by more than a couple of groups to make Halloween a healthy (or healthier) holiday. Groups that we support, including Jamie Oliver’s Food Revolution cause, have shared links/stories/opinions about making Halloween healthier while others have talked about alternatives to candy or how to cut candy out of Halloween altogether.

There are even stories about some citizens taking things into their own hands. A North Dakota woman is intending to give out letters to children she deems to be “obese”. The woman sees it as her duty to inform these children and their parents that the child’s weight is an issue and that eating free sugar will not help anything.

Now, clearly ‘North Dakota woman’ is going too far. Trust me; these kids are acutely aware they’re overweight. Our society does everything it can to make physical appearance and weight a priority and marketers and other groups make sure that this ‘self awareness’ begins early. Kids today are no less mocking and predatory than they were when you were in school either – these children are getting barraged from all sides about their weight.

Don’t get me wrong, I’m in no way making an excuse for the children who are overweight nor am I trying to pass this issue off like it isn’t a problem. Obesity is a problem in America and children are NOT eating healthy. These are core issues that we feel strongly about and they are the foundation of our blog. However, giving out letters to kids you deem to be “obese” under the pretense you’re “making them aware” is moronic. All you’re going to do is add another emotional scar to a child that is already acutely aware of their weight. Instead of a letter, how about giving out an apple (even a candied apple) to ALL the kids. Then you’re encouraging healthier habits without being such an ass about it. Hopefully common sense stops this woman from making this mistake – but I fear it might be too late for common sense for her.

Let’s loop back to the main issue at hand – is it time to make Halloween healthy? Well, as we’ve said we’re all about healthier eating and believing that a change in dietary habits starts young. Groups we respect are with this movement as well, so we’re about  to hit you with some facts to show you the horror of Halloween (pun accidental, but appreciated) and try to convince you it’s time to make the holiday healthier…right?

Wrong.

It’s true; we believe that childhood obesity is a serious issue. It’s true that we feel children should be eating healthier school meals. We think people need to return to home cooking. We want to show people that cooking isn’t hard and that healthy cooking CAN have flavor (that’s the whole reason we blog!). All of these things are beliefs we hold very strongly. So why aren’t we behind the movement to make Halloween a healthy holiday?

It’s a concept known as “picking your battles”. A massive campaign to cut the candy from Halloween or to encourage parents to stop their kids from eating candy will not have the intended effect these groups are going for. Rather than opening minds and encouraging a change, a healthy eating campaign focused at Halloween is like to enrage and then entrench parents and decision makers.

I’ve read articles on both sides of the aisle when it comes to school lunches and healthier eating for kids and what I’ve found is that when facts are presented and arguments are made logically, things are accomplished and changes are made rationally. There’s actually been a fair amount of discourse and improvements (albeit slowly) as these groups talk things out. The issues arise when the changes take aim at nostalgia – the best example is when Jamie Oliver’s Food Revolution campaign took aim at chocolate milk.

Suddenly, what had been rational discussion waded quickly into “These health groups are trying to take chocolate milk away from our kids!” or simple polls like “Do you believe schools should BAN chocolate milk” which of course ended in landslide victories for “No” and came with comments like “these healthy eating advocates are out to take everything fun away from children”.

Of course, had any of these media outlets or “outraged” individuals taken time to read the other side’s argument (rather than cherry pick snippets like many media outlets did), they would have seen that the Food Revolution group was not out to ban chocolate milk. They were pointing out (correctly so) that present day chocolate milk served in schools was loaded with sugar – more sugar than standard sodas in some cases. The group’s point was not that chocolate milk had to go but that the milk being served currently had to go. Stop offering it everyday to children and explore other alternatives. Healthier options (even chocolate milk) options can be had, if people are willing to make a stand. Unfortunately, that argument fell on deaf ears – all the headlines read was “Group aims to ban chocolate milk” and the riots began.

(This example says a lot about our media – but that’s an entirely different article for another day).

My point is simple, what was a rational and well thought out argument with many valid points was quickly washed away due to the item it was focusing on. I’m curious if given the chance, the Food Revolution organization would have taken a different approach – perhaps changed their wording so the story could not be flipped so easily to “ban chocolate milk” - unfortunately, there’s no real way to start this campaign in the near future and try again. Public outcry destroyed any momentum this change had right out of the gate.

I fear if the groups take their attention to Halloween the same thing will happen. It’s too easy for a story about substituting candy for healthier alternatives to be flipped to “Group looks to take candy from Halloween” which will inevitably lead to the massive public backlash and another wise and worthy cause being stamped out before it could be heard.

Too many of these failed campaigns and the entire movement starts to lose the punch it had. PETA is a group with good intentions, but their overreactions to some events / causes have created a “little organization that cried wolf” phenomenon. Now you’re likely to tune out everything PETA says simple because they haven’t learned to pick their battles. If these healthy eating groups keep trying to wage war against entrenched traditions, they’re likely to lose the ear of the public and then slow any progress they had been making.

I think the smarter message would be to preach moderation. There’s no problem with children going out and enjoying the candy filled holiday. Let them run around, receive free sugary treats and heck, let them eat them too. Candy is a part of growing up and is something all kids should be able to enjoy. The change needs to come from the parents. Step in and teach moderation – candy is fine, so long as you don’t eat too much of it. This requires monitoring your kids and maybe even (gasp!) actively engaging them in a discussion about good eating habits.

Unfortunately, the concept of moderation is frequently lost on our overindulgent society. We pig out, we use things in excess and we’ve been conditioned to think that’s okay. THIS is where these advocacy groups should focus their attention – especially around these holidays that support overindulgence.

Don’t attack Halloween; attack the traits that cause Halloween to be a problem. You’re less likely to get instant backlash and may even make the impact you’re looking for.

If you’ve made it all the way to the end, thanks for reading! I’m interested to hear everyone else’s input on this issue. Agree? Disagree? Let us know in the comments!

That’s all we have for you this week. We’re back next week for a pair of brand new recipes. Until then,


~Cheers

Monday, October 28, 2013

World's Greatest Chili (?)


Good evening everyone! We’ve always argued that there’s never truly a “season” for any dish – you can make soup in July (and we have). Is soup better in the fall? Of course it is – but it’s not a duck – it isn’t off limits until a certain point of year. (Cut to Bugs Bunny vs. Elmer Fudd: “Stew season!”, “Soup season!”)

Now allow me to immediately contradict myself. Fall is most certainly chili season. Sure you CAN make chili during the summer months, but through something that can only be described as “magic” it simply doesn’t taste the same as chili in the fall.

I’ve always had a love / hate relationship with chili. I am not a fan of any dish that is too tomato based (the acidity gives me heartburn and the flavor is off-putting to me) so standard chili recipes have always been a bit of a gamble. Many are tomato heavy and just don’t amount to anything I like to eat.

We’ve played around with chili recipes, and have a found a few good ones – especially white chili recipes – but I’m still longing to find that “traditional” chili recipe that will deliver the rich meaty flavor without the tomato sauce heavy vessel.

Tonight, I’m trying an adaptation of a recipe I found in our local Hy-Vee’s magazine “Seasons”. The original recipe is more tomato based, and set for a larger serving (27!) – So I adjusted the dish slightly and scaled down the proportions – is this the chili recipe we’ve been searching for? Let’s get cooking and find out!

The Recipe: Calico Bean Chili
Recipe Inspired By: “Calico Beans” From Hy-Vee Seasons Fall Issue

What You’ll Need:
(Serves 8)

1 Pound 85% Ground Beef
½ Pound Bacon
1 Medium Onion (Diced)
15 Ounces (Canned) Red Kidney Beans
15 Ounces (Canned) Great Northern Beans
15 Ounces (Canned) Butter Beans
16 Ounces (Canned) Pork and Beans in Tomato Sauce
1 Cup Packed Light Brown Sugar
¼ Cup Apple Cider Vinegar
1 Tablespoon Mustard
¼ Cup Ketchup

Begin by preheating your oven to 450 degrees. You can also use a large slow cooker to finish this recipe.

Brown the beef in a large, 12 inch, non stick skillet over medium high heat. Once mostly browned, strain off the excess fat and add the onion to the beef. Allow the two to simmer together until the beef is completely browned and the onion is translucent – this takes about 5 to 7 minutes. Transfer this mixture to a bowl. Set aside and wipe the skillet clean with a paper towel.

Add the bacon to the same skillet and cook until browned and crispy. Transfer the bacon to a paper towel lined plate and allow it to cook. Once cooled, chop the bacon into ½ inch pieces. Set aside for later.

Drain all of the fluid from your beans and rinse them in a colander. We’ve said it many times on the blog – but I always rinse off canned beans. They come packed in a sodium rich liquid that not only hurts the nutritional value of your dish but it can throw off the flavor as well. Give the beans a good rinse before adding them to any recipe allows for that nasty sodium fluid to go down the drain, instead of in your dish. (Obviously you won’t rinse the pork and beans, as we will need the tomato sauce that they come in).

(We’re using a slow cooker for our recipe – if you want to use an oven, simply replace “slow cooker” with oven safe stew pot and follow the same directions).

Add the beans, cider vinegar, mustard, ketchup and brown sugar to a large slow cooker and stir well. Next, stir in the ground beef / onion mixture and the bacon. Once all the ingredients are evenly blended, cover the slow cooker and let it cook on medium heat for 3 hours. (In the oven, allow it to cook for 3 hours at 450).

After 3 hours, the chili should have thickened up nicely. Give it a good stir before serving and enjoy!


The Results:

Full disclosure - I did not expect this recipe to be the answer to my long quest for low acidity chili. With a base consisting entirely of tomatoes, it didn't seem like this dish would differ from many of the others I had tried. 

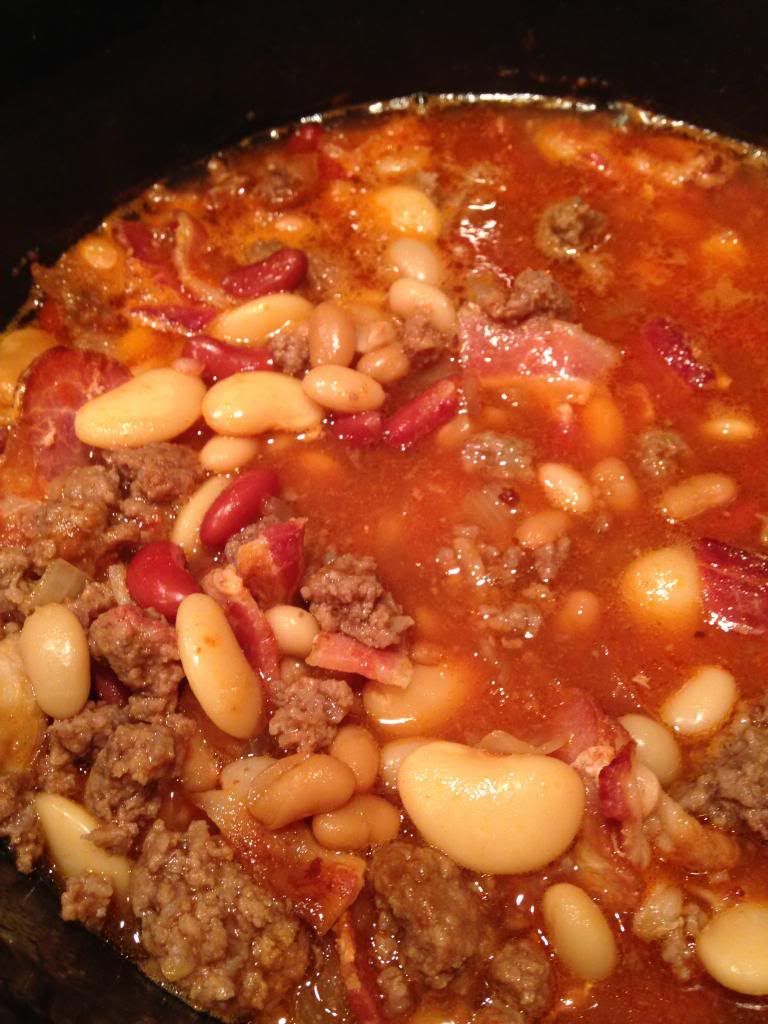
I was wrong, and couldn't be more happy about it. The base of this chili is almost sweet. It's a beautiful melding of brown sugar and ketchup (which sounds odd on the surface, but actually provides for a rich compliment to the beef of the dish). This is, without a doubt, the best chili I have ever had. 

It won't be for those that add tabasco to their chili or that like hearty tomato bases, but if you're always looking for something a bit different when it comes to chili - you've found it with this dish. (Oh, and it's only 250 calories per serving!). 

That's all we have for you this evening. The rest of the week is up in the air schedule wise, pending a few things. Either way, we'll have a new post for you Thursday night. Until then, 

~Cheers
Tuesday, October 22, 2013

Pumpkin...In a Pasta Dish?

Good evening everyone!  One of the great things about fall is that it brings out one of the best flavors known to man:  pumpkin.  Whether it be in a hot beverage, or it be in a delectable dessert, pumpkin is fall's favorite flavor.  Since Tyler and I are such fans of this ingredient, we are willing to try any dish that includes pumpkin.  Tonight, we're getting a bit creative and throwing it in a pasta recipe and hopefully, not going to ruin a good thing.

The Recipe:  Fettuccine with Pumpkin Sauce
Original Recipe Found In:  Cooking Light, November 2013

What You'll Need:
8 Ounces uncooked Fettuccine
2 Applewood-Smoked Bacon slices, chopped
2 Tablespoons finely chopped fresh Sage, divided
2 Garlic cloves, minced
3/4 Cup canned unsalted Pumpkin Puree*
2 Ounces Parmesan Cheese (about 1/2 Cup)
3/8 Teaspoon Salt
1/4 Teaspoon Black Pepper
2 Tablespoons Heavy Cream
2 Tablespoon chopped fresh flat-leaf Parsley

*Note:  To save some hassle, and measuring cups, one 15 ounce can of pumpkin puree is just shy of 3/4 cup.  It is easier to open the can and pour the puree right out, instead of trying to measure it out.

To start, bring a large stockpot of water to boil over medium-high heat.  Once at a boil, add the fettuccine and cook according to package directions, typically between 10-12 minutes.  Once cooked, drain the pasta in a colander over a bowl.  In this bowl, reserve 3/4 cup of the cooking liquid.  Set pasta and cooking liquid aside.

Next, heat a large nonstick skillet over medium heat.  Add the chopped bacon and cook for four minutes, or until the bacon is just about crispy, stirring occasionally.  After the bacon is cooked, add one tablespoon of sage and the garlic.  Stir these ingredients constantly until everything has become fragrant, about one minute.  Next, stir in the pumpkin puree, Parmesan cheese, salt, and pepper.  When these ingredients are incorporated, add the pasta, 3/4 cup cooking liquid, and heavy cream.  Stir until the pasta has become completely coated.  Cook for an additional two minutes or until everything is heated throughly.  Sprinkle with remaining sage and parsley, serve, and enjoy!


The End Result:


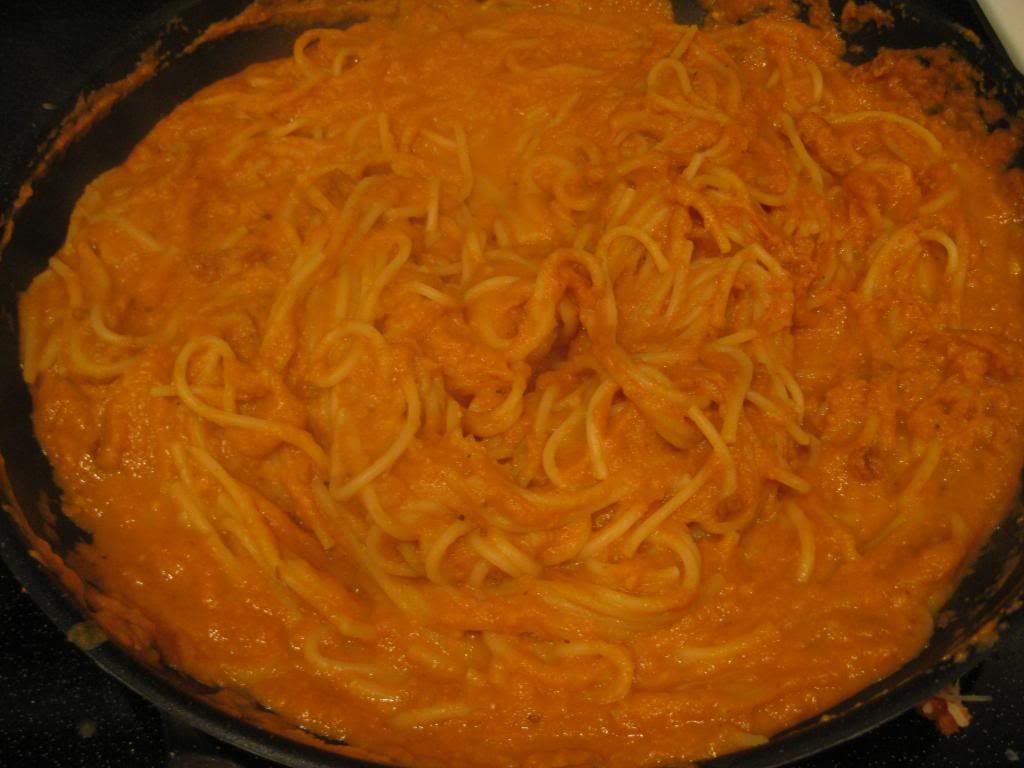
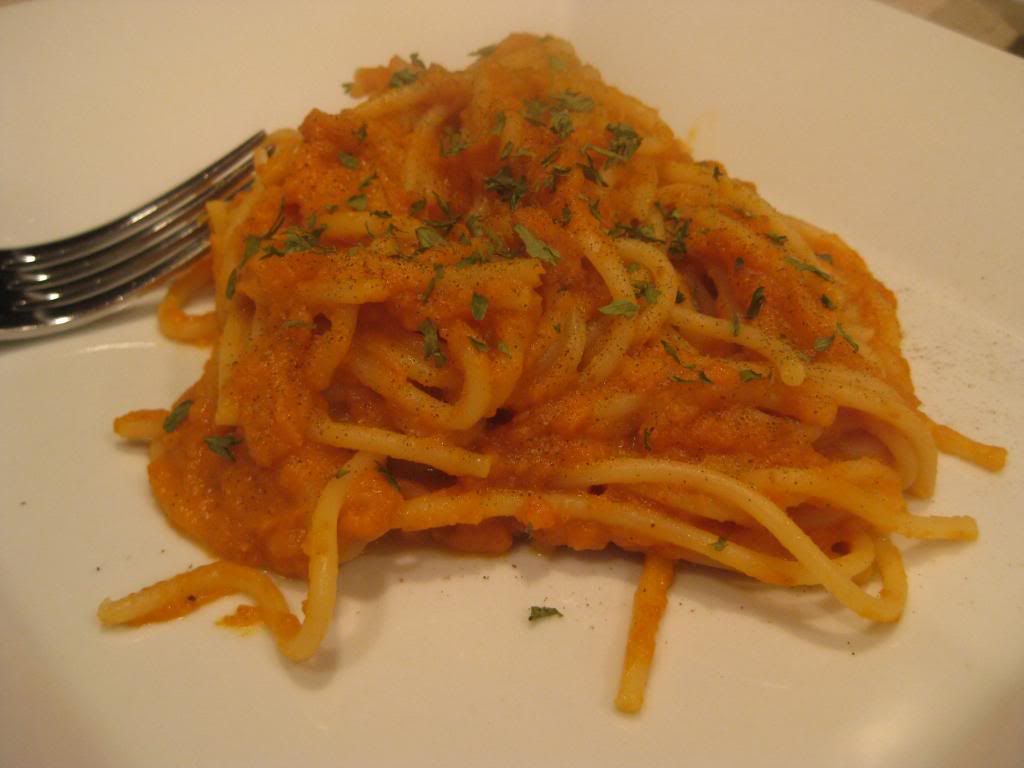
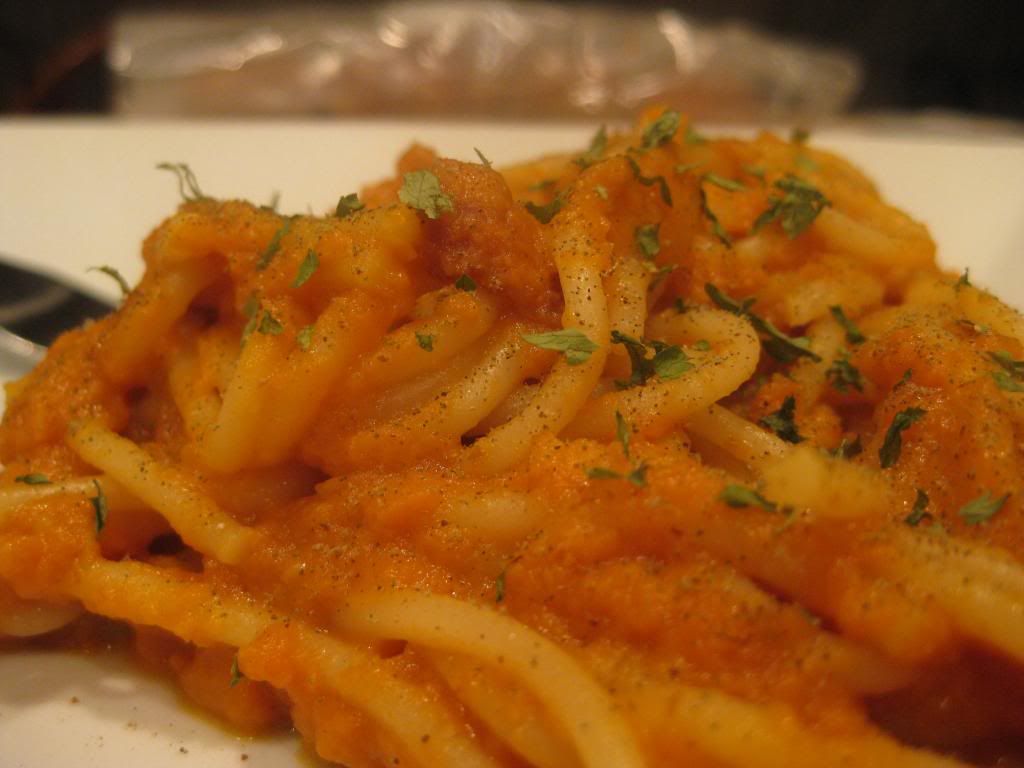
I always base my finished dish with the picture supplied by the source of the recipe.  The original picture looked like there was light pumpkin bits attached to the fettuccine.  In my dish, it looks like the puree has completely swallowed the pasta.  As you would imagine, I was worried that the pumpkin flavor would overtake the dish...wrong!  The pasta had a light pumpkin flavor without over indulging your pallet.  The cooking liquid also helped to subdue some of the pumpkin flavor.  The cooked bacon bits and hints of sage also helped to balance out all the flavors.  Overall, a great pasta dish, one without a traditional marinara or alfredo sauce that can be enjoyed especially during the fall season.

That's all we have for you tonight.  Check back next week as we continue to share our culinary adventures.  Until then,

~Cheers!

Monday, October 21, 2013

Runzas, Apparently Famous In Nebraska

Good evening everyone! The most recent Food Network Magazine had a feature titled "Made in the Midwest". The featured looked at signature dishes from Midwestern states, such as Minnesota's infamous "hot dish". Given that we hail from the Midwest ourselves, we thought we'd certainly find familiar dishes across the pages of this feature - we immediately found we were wrong.

The first dish featured was a Nebraskan concoction known as a Runza. Now, as I said, we live in the Midwest and Nebraska and Iowa are neighbors (Nebraska is immediately to the west of Iowa, for those who are geographically challenged) and yet I've never ever heard of the dish is that (supposedly) ubiquitous in Nebraska? Needless to say, I was surprised.

A runza, as it turns out, is a beef and spinach stuffed pastry, baked into individual servings. The dish has German roots which makes the fact that I've never heard of it even more curious (Maggie is a Germanic dish connoisseur and she had never come across the dish either).

Tonight, I aim to right the (apparently) egregious wrong - we'll make up our very own runzas...with a bit of a twist.


The Recipe: Nebraskan Runzas
Original Recipe Found: Food Network Magazine, October 2013 Issue

What You'll Need:
(Serves 8)

For The Dough:

1/4 Ounce Packet Active Dry Yeast
3 Tablespoons Sugar
4 Large Eggs
3 3/4 Cups Bread Flour
12 Tablespoons (1 1/2 Sticks) Butter (Softened)
2 Teaspoons Fine Sea Salt

For The Filling:

1 Pound 85% Ground Beef
1 Large Vidalia Onion
3 Cloves Garlic (Minced)
1 1/2 Teaspoons Dried Thyme
1 Tablespoon Canola Oil
8 Ounces Baby Spinach*


* I immediately made some adaptations to this recipe. First, I reduced the amount of butter the dish called for. In the dough, I dropped the butter to 1 stick, rather than 1.5 sticks. Next, I removed the 3 tablespoons butter called for when making the filling and replaced it with vegetable oil. Also, where the recipe called for something to be greased with butter, I substituted cooking spray. Finally, I pulled the baby spinach from the recipe and replaced it with a vegetable medley. Perhaps this ruins the integrity of the runza (as it is now essentially a baby beef wellington) but I'd rather a mixture of vegetables be amongst my meat than spinach. If you want to follow the original recipe to the letter, I suggest picking up a copy of the October issue.


Begin by preparing the dough. Add 3/4 cup warm (110 degree) water to a mixing bowl and stir in the yeast and a pinch of sugar. Once stirred, allow the mixture to rest until the yeast begins to foam and the bowl becomes warm to the touch (10 minutes).

Next, whisk 3 eggs into the bowl with the yeast. Transfer this mixture to the bowl of an electric mixer (you can do this by hand, and the original instructions call for it to be done this way - but we have a kitchen aid mixer that was made just for these kinds of jobs - if you have one, use it!)

Set the mixer to low and slowly work in half of the flour, allowing the mixer to incorporate the flour before adding more. Once half the flour has been worked in, drop in the butter (softened and sliced into smaller pieces) and allow the mixer to work it in. Next, add the sugar and let the mixer work it in, 1 to 2 minutes.

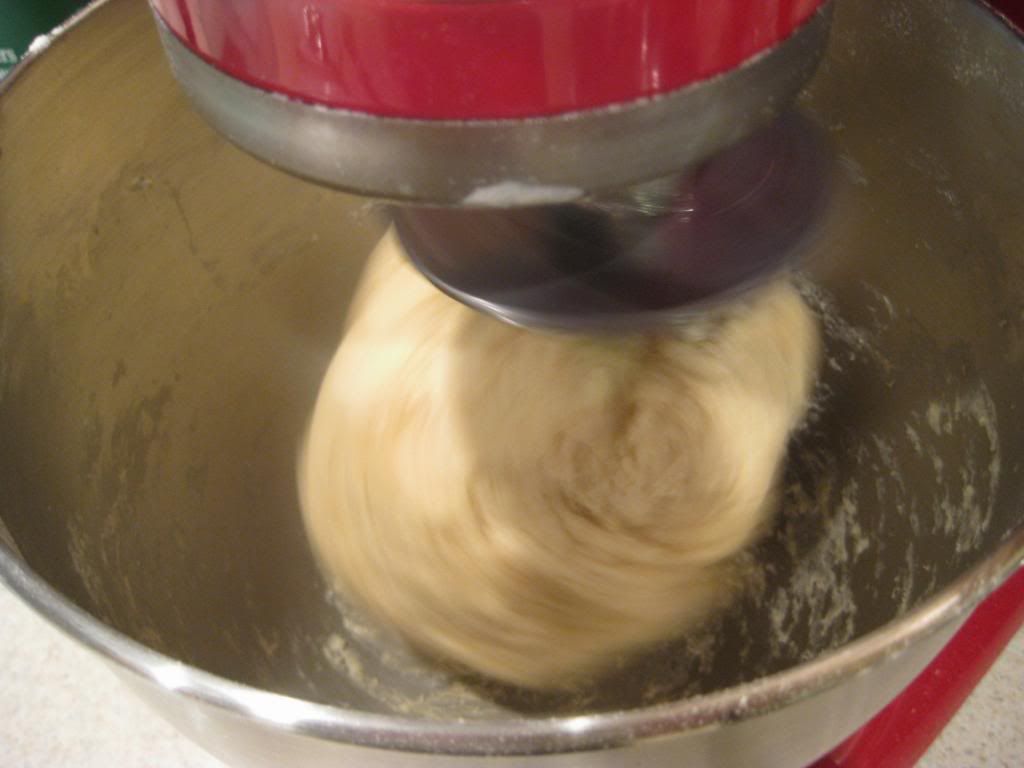
Finally, slowly add the remaining bread flour, allowing the mixer time to work in the flour evenly. Next, remove the mixing paddle from you stand mixer and attach the dough hook (dough hooks come standard with many stand mixers - it looks...well, like a hook). Set the speed to low and allow the dough hook to turn and knead the bread until it forms a cohesive ball that sticks to the hook. The dough should be lump free, smooth in appearance and slightly sticky to the touch. Once the dough reaches this point, turn off the stand mixer and remove the dough.


Lightly grease a large bowl with cooking spray and transfer the dough to the bowl. Cover with a tea towel and let the dough rise for 1 hour at room temperature. After this, transfer the covered bowl to the refrigerator and allow the dough to rise for 1 to 2 more hours or overnight.

Remove the dough from the refrigerator and separate it into 8 even pieces. Work the dough into balls and set them on the counter (loosely covered) for 30 minutes.

While the dough rests, you can begin working on the filling.

Brown the beef in a large, non stick skillet over medium high heat along with the onion. Strain out any excess fat after browning and transfer the beef/onion mixture to a bowl. Set aside.

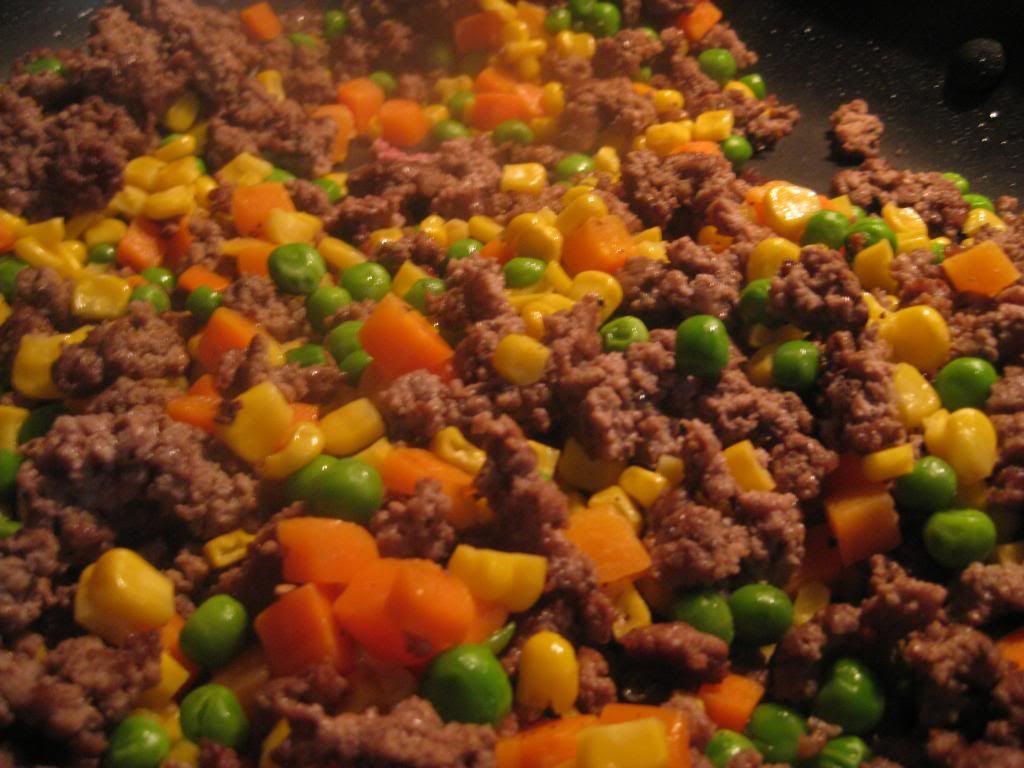
In the same skillet, add a small amount of vegetable oil (1 tablespoon) and heat your vegetable medley (or chose veggies) until cooked through and softened - 8 to 10 minutes, depending on the type of vegetables you are using. Stir this vegetable mixture into the bowl with your beef and set aside to cool.


While your filling is cooling, begin readying your dough.

Roll each dough ball out into a 3X5 inch rectangle. Use a rolling pin to flatten each of the corners of the rectangle extra thin, so you create "wings" or elongated triangles on each corner. (If you're like me and simply cannot roll a ball of dough into a rectangle, simply roll the dough flat and then fold the dough like a burrito when you've added the filling. Pinch the seams and roll the ends - it won't look as pretty, but it works!)


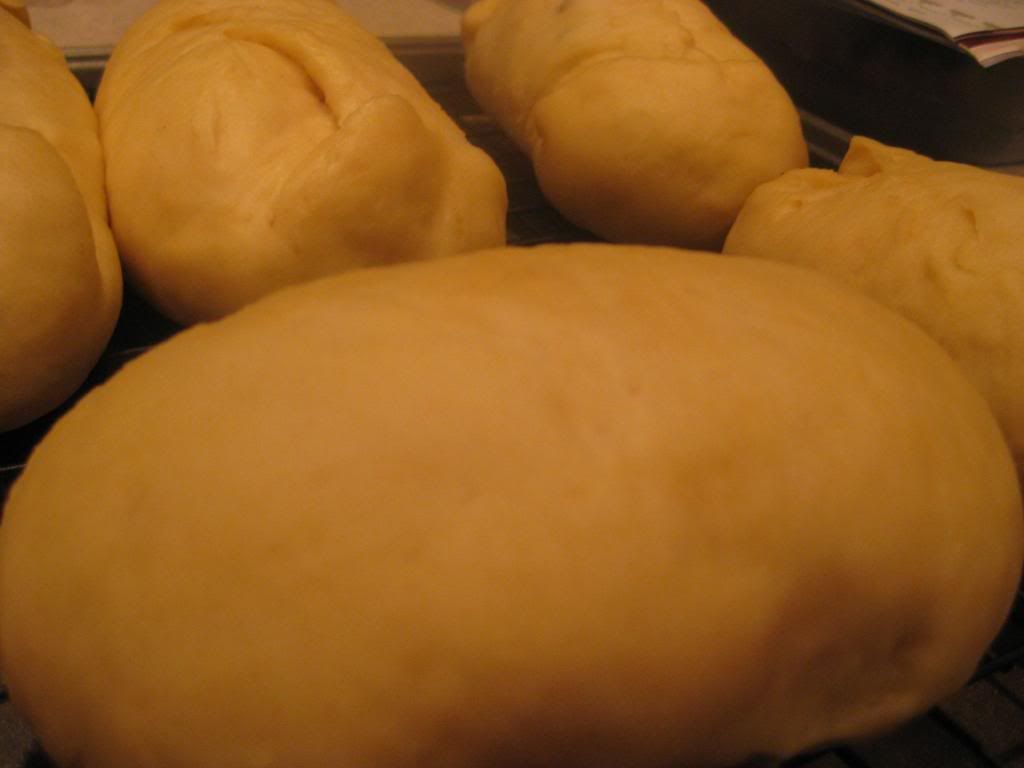
Next, spoon 1/2 cup of the filling in the center of each runza. Grab the "wings" you mad earlier and fold them in towards the center. Work the dough around the filling until you've create an elongated loaf (football shape). Repeat this process with the remaining dough balls until you've made 8 runzas. Transfer them to a baking sheet and allow them to rise for an additional 45 minutes. Towards the end of those 45 minutes, preheat your oven to 375 degrees.

Crack the remaining egg in a bowl and whisk it with 2 tablespoons of water. Use a pastry brush to rub this egg wash over the outside of each runza. Place your baking sheet in the oven and bake the runzas until they are golden brown - 30 minutes. Serve and enjoy!


The Results:


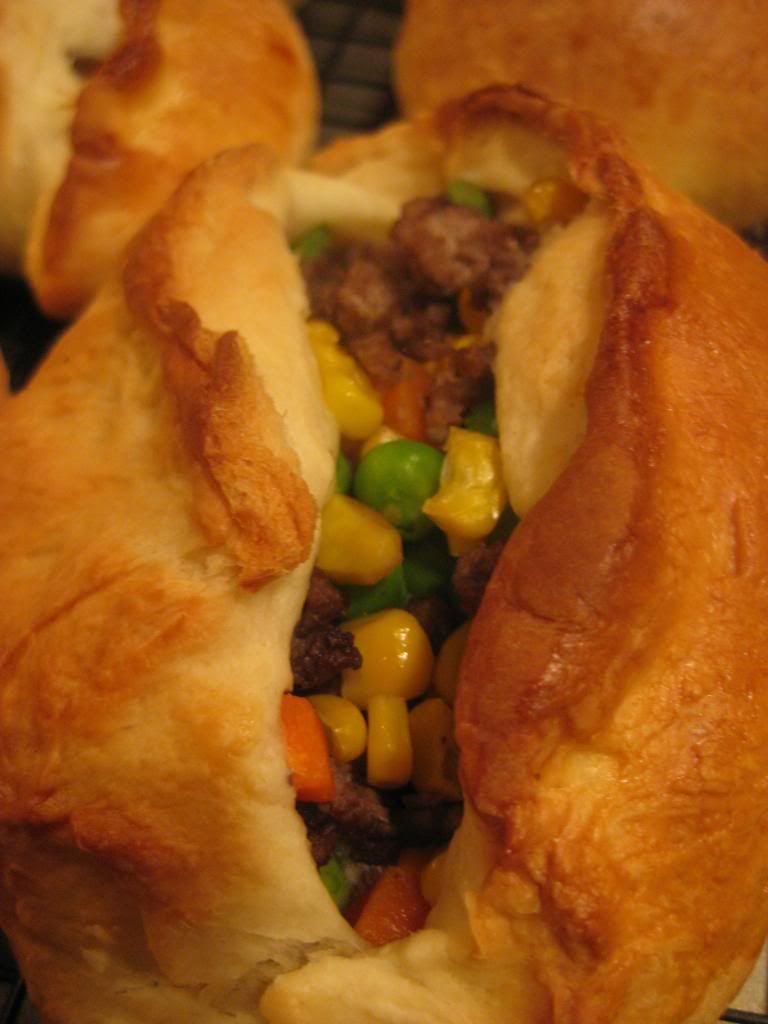
I likely destroyed the sanctity of runzas by swapping out the spinach, and I'm sure cutting out the copious amounts of excess butter has angered the runza society of Nebraska - but in the end, I was pleasantly surprised with the final dish all the same. The easiest comparison to make is that a runza is a lot like a mini beef wellington - crispy outer crust, delicious meat and veggie centers. They're a bit time consuming and a little heavy on the steps, but these runzas make for a good "change it up" meal. If you're feeling adventurous - give them a try!

That's all we have for you this evening. Be sure to stop back tomorrow night to see what Maggie has cooking. Until then,

~Cheers

Thursday, October 17, 2013

Smothered 'Chops: A Fall Delight

Good evening everyone! The cool fall weather we were all expecting has certainly descended upon the Iowa area. Our high temperatures barely break into the 50's and the nights are downright cold. Last night, I noticed I could see my breath while stepping outside. There's no surer sign of fall weather than being able to see one's breath!

While we've already been dabbling with a fall menu, the cooler weather has motivated us to start cooking even more fall friednly dishes. The slow cooker is about to get a workout - because many fall treats involve this easy to use kitchen gadget. Tonight's recipe uses the slow cooker to create perfectly succulent pork chops and a flavorful gravy.


The Recipe: Slow-Cooker Smothered Pork Chops
Original Recipe Found In: America's Test Kitchen - Cooking for Two

What You'll Need:
(Serves 2)

2 X 7 Ounce Pork Chops
2 Slices Bacon (Chopped)
1 Large Onion (Diced)
2 Teaspoons Brown Sugar
2 Garlic Cloves (Minced)
1/4 TEaspoon Dried Thyme
7 1/2 Teaspoons All Purpose Flour
1/2 Cup Low Sodium Chicken Broth
1 Tablespoon Soy Sauce
1 Bay Leaf
1 Tablespoons Fresh Parsley
1 1/2 Teaspoon Apple Cider Vinegar


Begin by browning your bacon in a large non stick skillet. Once browned, remove the bacon and transfer to a paper towel lined plate. Chop the bacon into pieces once it cools slightly.

Without cleaning the skillet, add the onion and cook for 8 to 10 minutes, or until the onion turns golden brown. Add in the garlic and thyme and cook until fragrant, 30 seconds. Stir the flour slowly to prevent clumps from forming. All the flour mixture to cook for 1 minute before slowly whisking in the broth.

Remove the skillet from the heat and stir in the soy sauce and brown sugar.

Spray a slow cooker with non stick cooking spray and place the two pork chops in the bottom of the cooker. Slowly pour the sauce mixture from the skillet over the chops and set the slow cooker to low. Allow it to cook for 7 to 8 hours. If you're in a hurry, set the cooker to high and the cooking time is reduced to 3 to 4 hours.

Before serving, transfer the chops to a plate and tent them with foil. Allow the sauce to settle (off heat) for 5 minutes, or until the fat in the liquid rises to the surface. Skim off the fat and then stir in the bacon bits and the apple cider vinegar. Take stock of your sauce at this point as well - if it's too runny or thin, add another teaspoon of flour until the mixture reaches the right consistency.

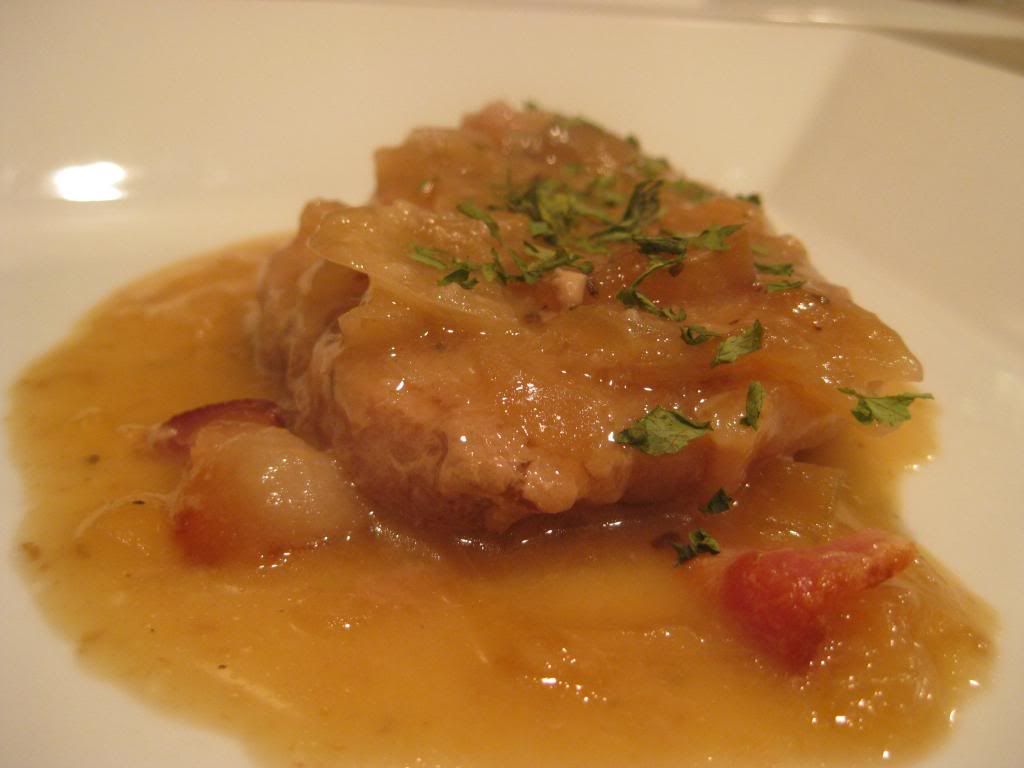
Serve the sauce over the pork chops with a sprinkling of fresh parsley and enjoy!

The Results:


I've never made a pork chop in a slow cooker before and am happy to report that the results were fantastic. Much like any other form of meat that spends all day stewing in its own juices, the pork chop essentially fell apart coming out of the slow cooker and was predictably tender and moist. The gravy was a nice surprise as well - it was rich and creamy and full of nice subtle flavors that blended well with the chops. At just over 270 calories per serving, this is a warm, filling fall meal that's sure to please even those on a strict diet.


That's all we have for you this week. We've got a busy weekend ahead of us, so there won't be any posts hitting the blog until next Monday. Enjoy your weekend and, until next time,

~Cheers

Monday, October 14, 2013

Decadence without Indulging

Good evening everyone!  Fall has finally arrived here in the greater Des Moines metro:  the leaves on the trees are changing and falling as soon as they change and cooler temperatures have come to stay.  I, personally, LOVE fall!  The changing between summer and fall is a beautiful sight, plus warm beverages to drink, warmer clothes to wear, and hearty meals to share make this season the best.  Tonight, I'll be presenting one of those dishes that showcases fall in its hearty goodness, but won't overdo it on the calorie scale.

The Recipe:  Beef Bourguignon
Original Recipe Found In:  25 Dinners on a Diet, a Relish Recipe Collection

What You'll Need:
1 1/2 Teaspoons Olive Oil
1 1/2 Pounds lean Beef Stew Meat
2 Cups vertically sliced Onions
2 Cups sliced Carrots
1 Cup diced Green or Red Bell Peper
1 (14 ounce) can diced Tomates, undrained
1 (12 ounce) package Button Mushrooms, cut into quarters
1 (14 ounce) can reduced-sodium Beef Broth
1 1/2 Cups dry Red Wine
2 Garlic cloves, pressed
2 Tablespoons Tomato Paste
1 Bay Leaf
1/2 Teaspoon dried Thyme leaves
1/2 Teaspoon coarse Salt
1/2 Teaspoon Black Pepper
3 Tablespoons All-Purpose Flour
2 Tablespoons Butter, softened

To start, add the oil to a Dutch oven and bring to heat over medium-high heat.  Once the oil is warmed, but not to a smoking point, add the beef in batches and cook until the meat to browned, about five to ten minutes, depending on the thickness of the pieces of meat.  Once the beef is browned, pour the beef and juices into a deep bowl and set aside.

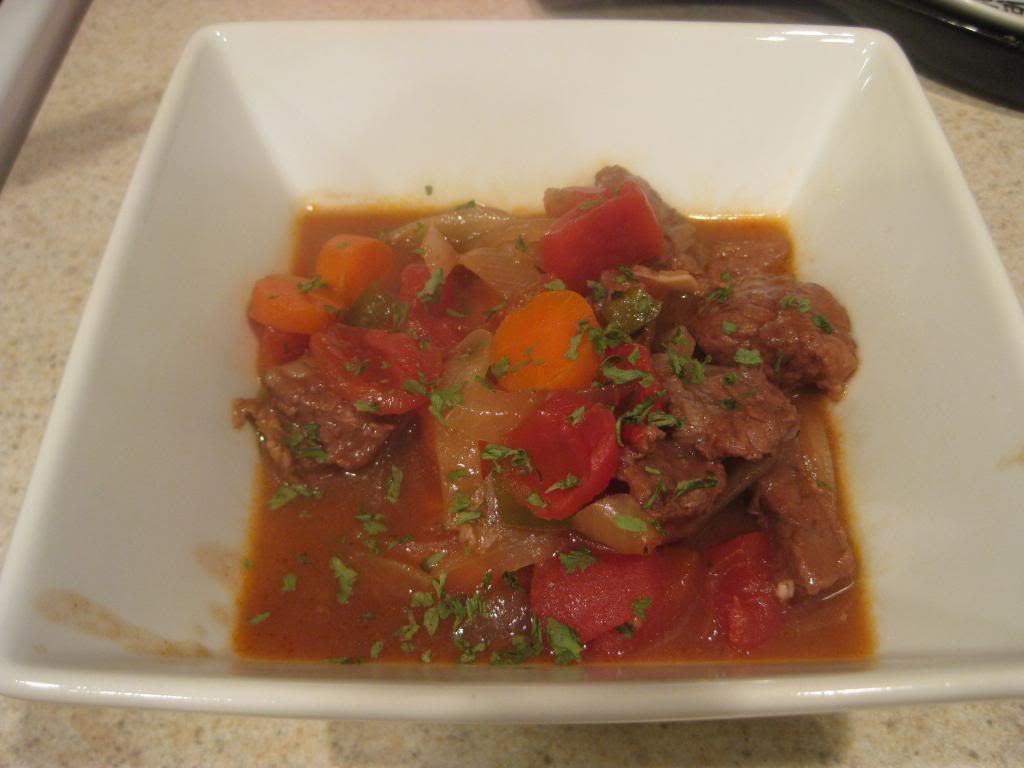
Next, add the onion, carrot, mushrooms, and bell pepper to the pan.  Cook, stirring occasionally until the onion is lightly browned and the rest of the ingredients are softened, about ten minutes.  Add the beef and the juices back to the pan and stir to combine.  Next, add the tomatoes, beef broth, red wine, garlic, tomato paste, bay leaf, thyme, salt, and black pepper, to the Dutch oven.  Bring the heat of the pan to a simmer, just until the liquid begins to bubble.  Cover the Dutch oven with a lid and cook for two hours, or until the beef and vegetables are tender.  After this, discard the bay leaf.

In a small bowl, combine the flour and butter with a fork until the mixture becomes a paste.  Ladle 1/4 cup of the pan juices to the bowl and whisk until very smooth.  Add the flour mixture back to the pan and stir very well.  Sprinkle with parsley, serve in a soup bowl, and enjoy!

The End Result:


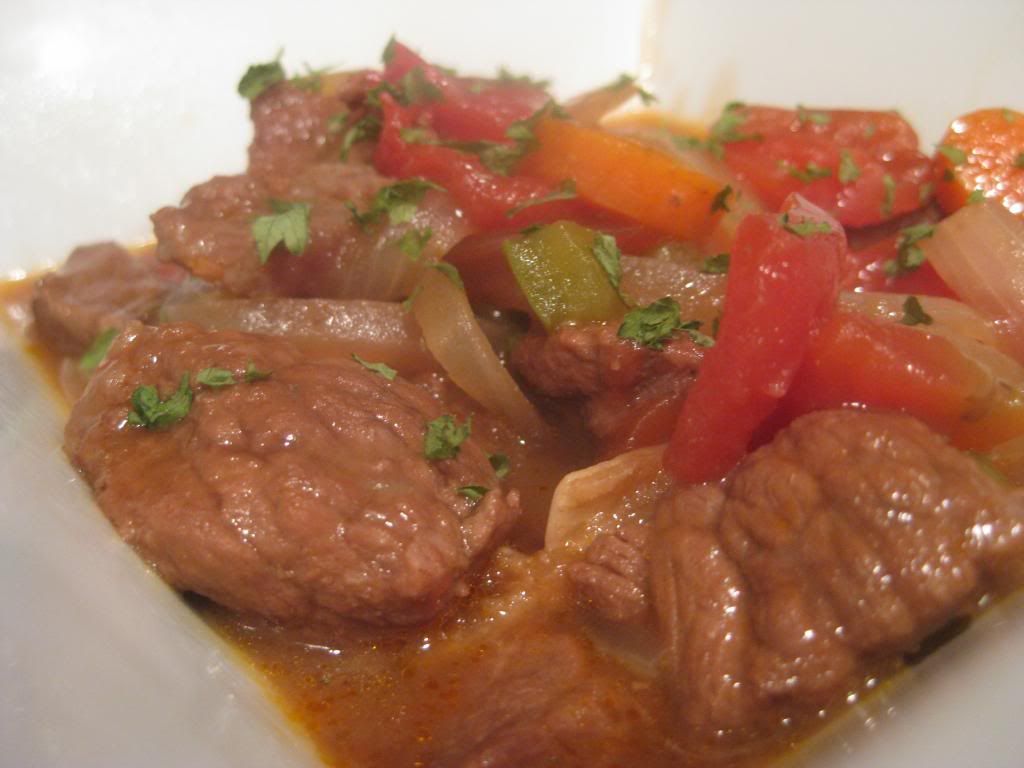
This French-style soup is incredibly delicious.  Letting the beef and the vegetables sit in a broth and wine bath for two hours soaked up a lot of their flavor.  The ingredients almost just melt in your mouth because of how long everything was cooked.  If you want, you can add a bread element, a simple biscuit or a baguette, will soak in that yummy broth and create more of a tasty dish.  The best of all?  A serving is 335 calories, so you won't feel like you're overindulging.  Overall, a great fall dish that will leave you wanting more.

That's all we have for you tonight.  Check back tomorrow as Tyler presents another (soon-to-be) fall classic.  Until then,

~Cheers!

Thursday, October 10, 2013

Mac & Cheese Makeover


Good evening everyone! We stumbled upon an accidental theme with this week’s recipe – revisiting old favorites. Maggie got us started by making another variant in the endlessly customizable world of frittatas and I’ll close out the week by paying another visit to a blog classic – baked pasta dishes.

There is a plethora of pasta options available to the average consumer, so it makes sense that there are endless possibilities when it comes to cooking up these variants. One particular favorite of ours has been to bake the pasta with some form of meat and cheese combination and crispy topping. This process takes something normally geared towards kids (say, mac & cheese for instance) and ‘matures’ it for the whole family.

Food Network is celebrating its 20th anniversary, and to commemorate the occasion, it featured its most popular recipe (by online views) in the October issue of Food Network Magazine. When I saw what the recipe was and who it was by, I was taken by surprise. Not only was it a baked macaroni and cheese dish – but it was created by none other than blog favorite Alton Brown. How we had not tried this recipe for ourselves, I have no idea – but we’re amending that wrong tonight!

The Recipe: Baked Marconi and Cheese (With bacon!)
Original Recipe Found In: Food Network Magazine, October 2013 Issue

What You’ll Need:
(Serves 6)

½ Pound Elbow Marconi
3 Tablespoons Unsalted Butter
3 Tablespoons All Purpose Flour
1 Tablespoon Powdered (Ground) Mustard
3 Cups Milk
½ Cup Onion (Diced)
1 Bay Leaf
½ Teaspoon Paprika
1 Large Egg
12 Ounces Sharp Cheddar Cheese (Shredded)
4 Strips Thick Cut Bacon (Cooked crispy & diced into small pieces)

For The Topping:
3 Tablespoons Unsalted Butter
1 Cup Panko Bread Crumbs

* The original recipe does not call for bacon, but I opted to add it for two reasons. 1) I thought the salty bacon flavor would contrast nicely with the cheese flavors and 2) bacon makes everything better. Omit if you want to keep the dish meat free.

Preheat your oven to 350 degrees.

Prepare your macaroni according to package instructions. Drain of excess water and set aside.

While your macaroni is cooking, melt 3 tablespoons of butter in a large pot or dutch oven over medium high heat. Once the butter is melted, add the flour and mustard, whisking constantly until the mixture thickens. Make sure to whisk until all clumps and dry spots are gone. Allow this mixture to simmer for 1 minute, but stir occasionally to prevent burning.  

Next, slowly whisk in the milk, onion, bay leaf and paprika. Bring the mixture to a light simmer and then allow it to cook for 10 minutes. After 10 minutes, remove the bay leaf.


Crack your egg into a small bowl and whisk it vigorously with a fork. Next, temper your egg by adding 2 tablespoons of the sauce from the large pot into the bowl. Whisk again to incorporate evenly. Slowly whisk the egg into the dutch oven. (We temper the egg to prevent instant scrambling when we add the cold egg to the hot sauce. By adding a tablespoon or two of the sauce, we raise the egg’s temperature and make sure it takes evenly to the sauce without cooking immediately).

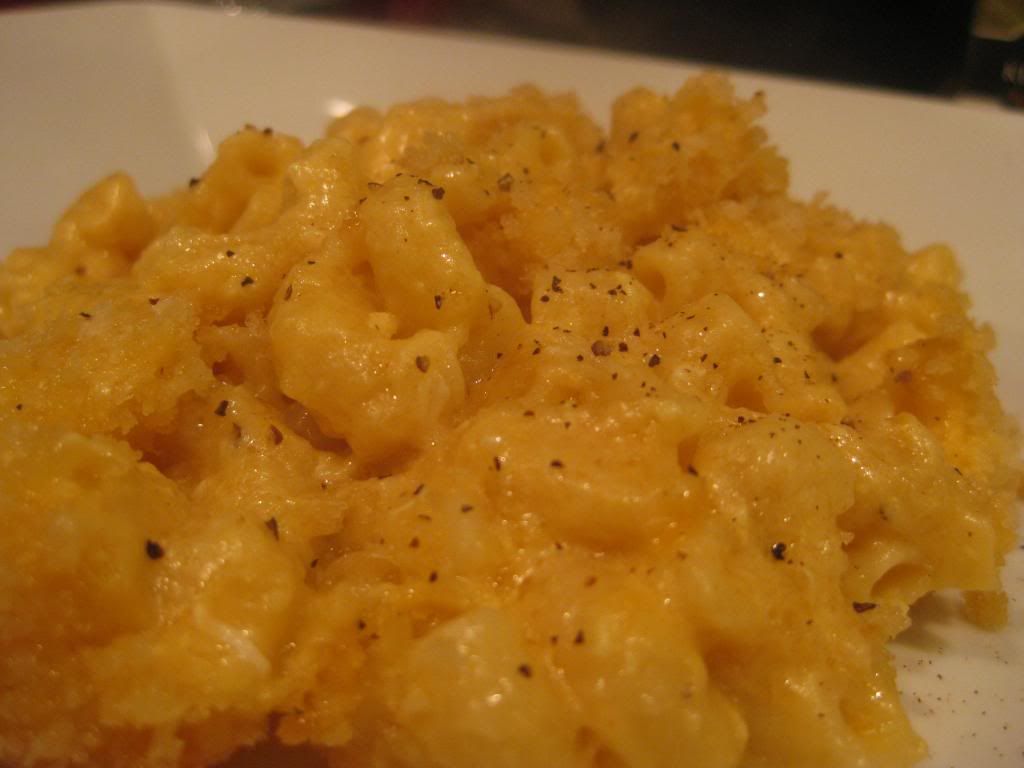
Stir in the cheese in small handfuls, making sure the cheese is melted completely before adding another handful. Add a pinch of salt and pepper to the sauce prior to folding in the macaroni and adding the bacon (if using). Stir well and then transfer the macaroni to a 2 quart casserole dish. Set the dish aside while you prepare the topping.

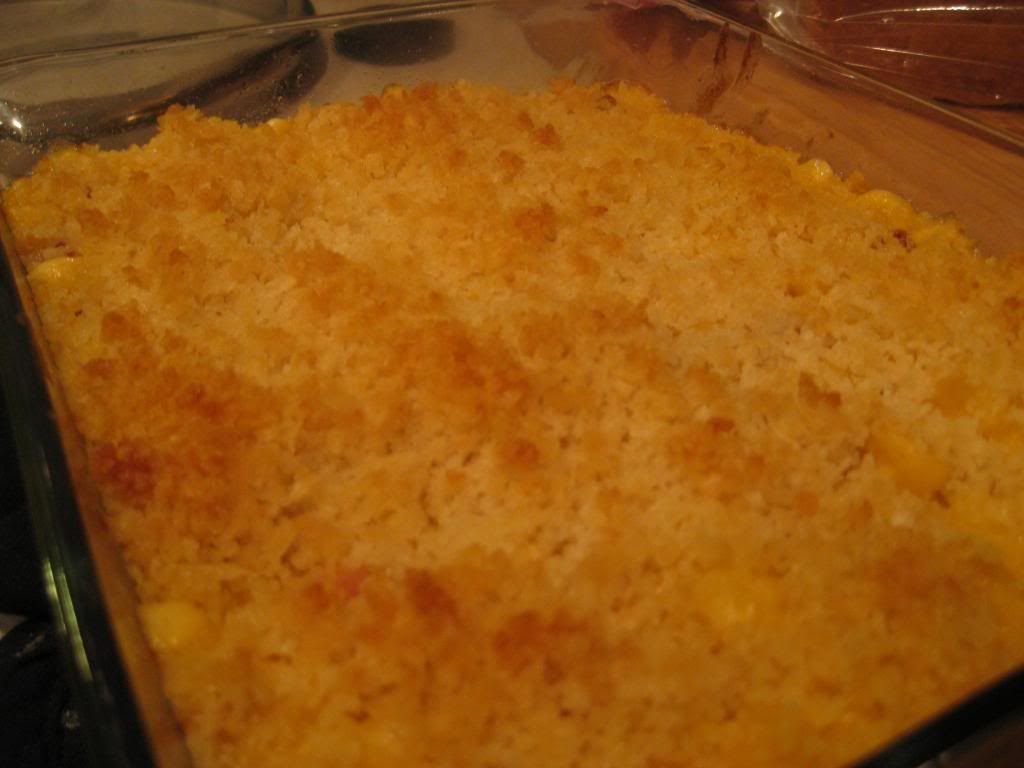
In a small saucepan or pot, melt 3 tablespoons of butter over medium high heat. Toss in the bread crumbs and stir until most of the crumbs have absorbed the butter. Sprinkle these crumbs across the top of the casserole dish and then place the dish in the oven for 30 to 40 minutes, or until the bread crumbs have turned a nice golden brown color. Once browned, simply serve and enjoy!


The Results:


There are few things that can compare to the classic ‘home cooking’ flavors of baked mac & cheese. The sauce was a perfectly balanced blend of not to rich or creamy cheddar, which complimented the bacon beautifully. The best part of this dish, however, was the bread crumb topping. After 30 minutes in the oven, the crumbs became extra crispy and added a perfect contrasting texture to the soft macaroni. Simply put, there’s a reason this recipe is #1 on Food Network’s website. If you’re looking for a warm and filling dish for a cool fall evening, you cannot go wrong with this baked mac & cheese recipe!

That’s all we have for you this evening. We’ll be back on Monday with a brand new recipe from Maggie, followed by a new dish from me on Wednesday. There’ll also be another bonus post coming along sometime next week – so be sure to stop in and see what we’ve got cooking. Until then,

~Cheers
Wednesday, October 9, 2013

The Frittata Files: Inside Out Egg Sandwich

Good evening everyone!  Tyler and I like to joke that my go-to recipe for the blog is the humble frittata.  Although I've lost track of how many variations I have made, I can't emphasize the true beauty of this dish.  While the concept is simple and consistent, the possibilities of ingredients are endless.  Tonight is variation #672 (or thereabouts,) with contrasting flavors and textures, this frittata is one that won't be forgot.

The Recipe:  Mushroom, Cheddar, and Toast Frittata
Original Recipe Found In:  Everyday Food magazine, October 2013 Issue

What You'll Need:
10 Large Eggs
1/4 Cup Whole Milk
2 Tablespoons unsalted Butter, divided
2 slices Sourdough Bread, cut into 3/4-inch cubes
1/2 Pound Button Mushrooms, trimmed and sliced
6 Scallions, thinly sliced, white and green parts separated
1/2 Cup shredded Cheddar Cheese

To start, preheat an oven to 425 degrees.  In a large bowl, add the eggs and milk and whisk together until both ingredients are well combined.  Season with salt and pepper and set aside.  Over medium-high heat, heat a large, oven-safe, nonstick skillet.  Once heated, add one tablespoon of butter and let melt.  After the butter is heated, add the bread cubes and cook, until all sides are golden brown, about four minutes.  Once cooked, transfer the bread to a plate.

To the empty skillet, add the remaining tablespoon of butter and mushrooms.  Cook until the mushrooms have shrunken slightly and become softened, about four minutes.  Lower the heat to medium and add the scallion whites.  Cook until these are soft, about three minutes.  After the onions are cooked, season with salt and pepper.

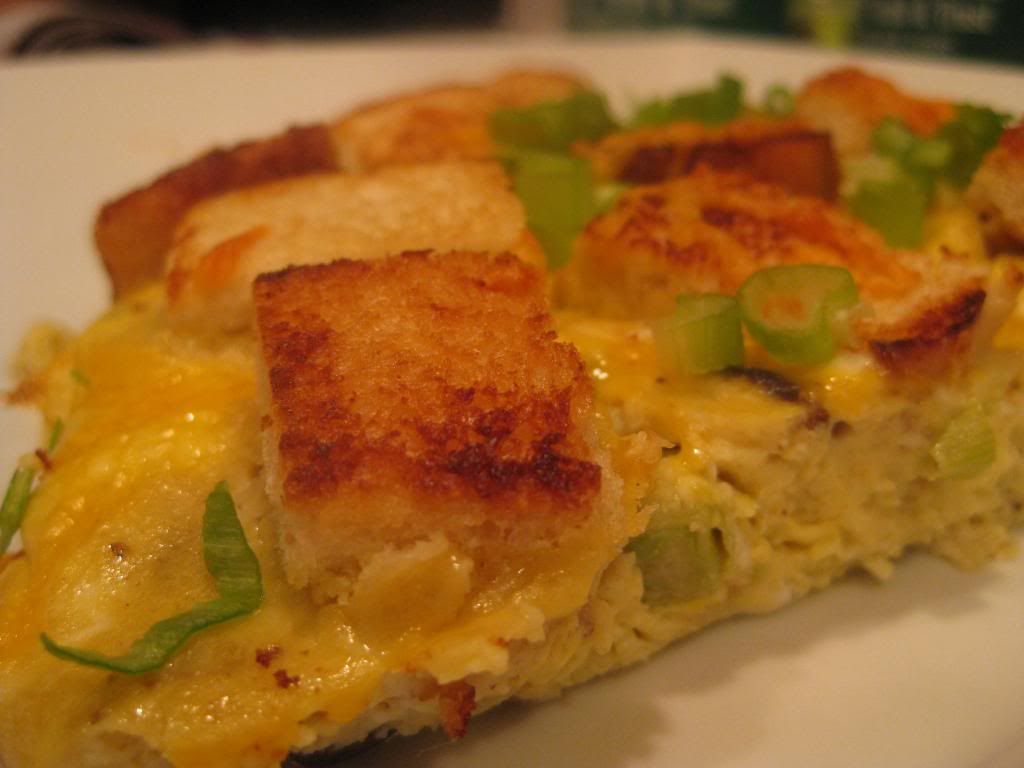
Next, gently pour the egg mixture to the skillet, stirring with rubber spatula until large curds form and the eggs become halfway set, about two minutes.  Taking the bread cubes, gently press each cube into the eggs.  Sprinkle the top of the egg mixture with the cheese and and place the skillet in the oven.  Bake until the egg mixture is puffed and the center is just set, about five to seven minutes.  Take out of the oven and sprinkle with the scallion greens.  Cut into individual slices, serve and enjoy!


The End Result:


The frittata set exactly the same - super light eggs, seasoned with just enough flavor that won't be too harsh on the pallet.  The mushrooms with the scallion whites, they create a flavor base that is undeniably refreshing.  The bread cubes add a great crunch that not too many frittatas have and are a great addition to this dish.  The cheese is melted perfectly and is just a hint of cheese without being too cheesy.  Overall, another great frittata to add to the Frittata Files and an easy dish for you to try at home!

Thanks for joining us tonight.  Check back tomorrow as Tyler creates an awesome upgrade to a family classic.  Until then,

~Cheers!

Sunday, October 6, 2013

Perfect Pumpkin Bread


Good evening everyone! My absolute favorite part of fall is the great pumpkin invasion. The orange gourd works its way into coffee, beer, baked goods and nearly any other culinary offering that will have it. This is good for me, because I absolutely love pumpkin flavoring (and the cinnamon, nutmeg, brown sugar flavors that typically accompany it).

Despite the wide range of foods pumpkin can lend itself to, I’m partial to the most basic offering – pumpkin bread. (If you’re not familiar, think banana bread…but with pumpkin…) There is a myriad of pumpkin bread recipes out there, and a whole slew of strategies for preparation. I’ve taken a few components from a couple of recipes and have come up with what feels like the best balance of moist, flavorful bread that each recipe has to offer. To make things even better, I adapted a simple buttercream frosting recipe to take on a whole new ‘cinnamon’ twist. Let’s get cooking!

The Recipe: Pumpkin Bread
Original Recipe From: Various sources – including but not limited to America’s Test Kitchen, Good Eats, Food Network Magazine

What You’ll Need:

1 Can Pumpkin Puree
1 ¾ Cups All Purpose Flour
½ Cup Canola Oil
¾ Cups Packed Brown Sugar (Light)
1/3 Cup Granulated Sugar
1 Teaspoon Baking Soda
1 Teaspoon Baking Powder
1 ½ Teaspoon Cinnamon
½ Teaspoon Salt
½ Teaspoon Nutmeg
½ Teaspoon Allspice*
2 Large Eggs

Cinnamon Buttercream Frosting

What You’ll Need:

¼ Stick (2 Tablespoons) Softened Butter
1 Teaspoon Ground Cinnamon*
½ Teaspoon Vanilla Extract
1 ½ Cups Powdered Sugar
2 Teaspoons Milk
¼ Cup Chopped Pecan Pieces

* This recipe mirrors many popular recipes I found, but the largest difference seems to be whether to use allspice or ground cloves. (Nutmeg is a frequent substitute amongst different recipes as well). I prefer allspice in my pumpkin dishes, so I used that in place of ground cloves. You’re free to adapt as you see fit.
Preheat your oven to 325 degrees.

In a medium bowl, combine the flour, allspice, nutmeg, cinnamon, baking powder and baking soda with a wire whisk until all ingredients are evenly incorporated. Set this bowl aside.

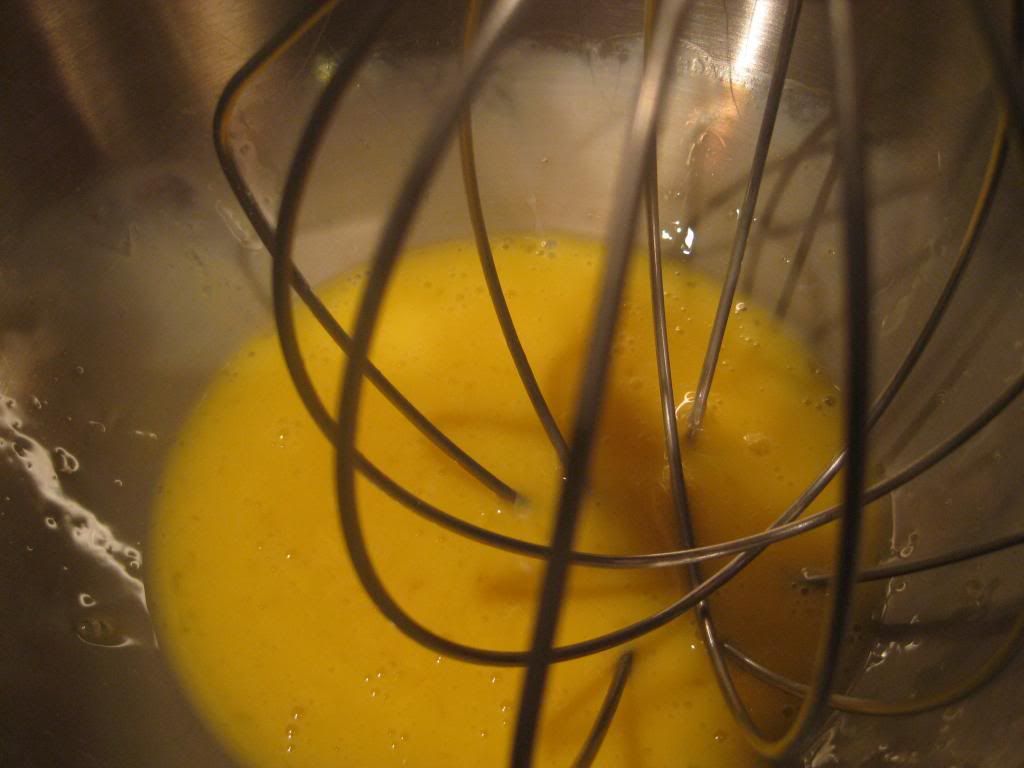
Using an electric mixer (a stand mixer is ideal – I’d highly advise against whisking by hand. You’ll need to do a lot of mixing in the coming stages and to keep things uniform and your arm intact you’ll want a motorized partner) beat the eggs on medium low until they begin to lighten in color. This typically takes two minutes, but you’ll want to key an eye on them to make sure they don’t begin to form peaks.


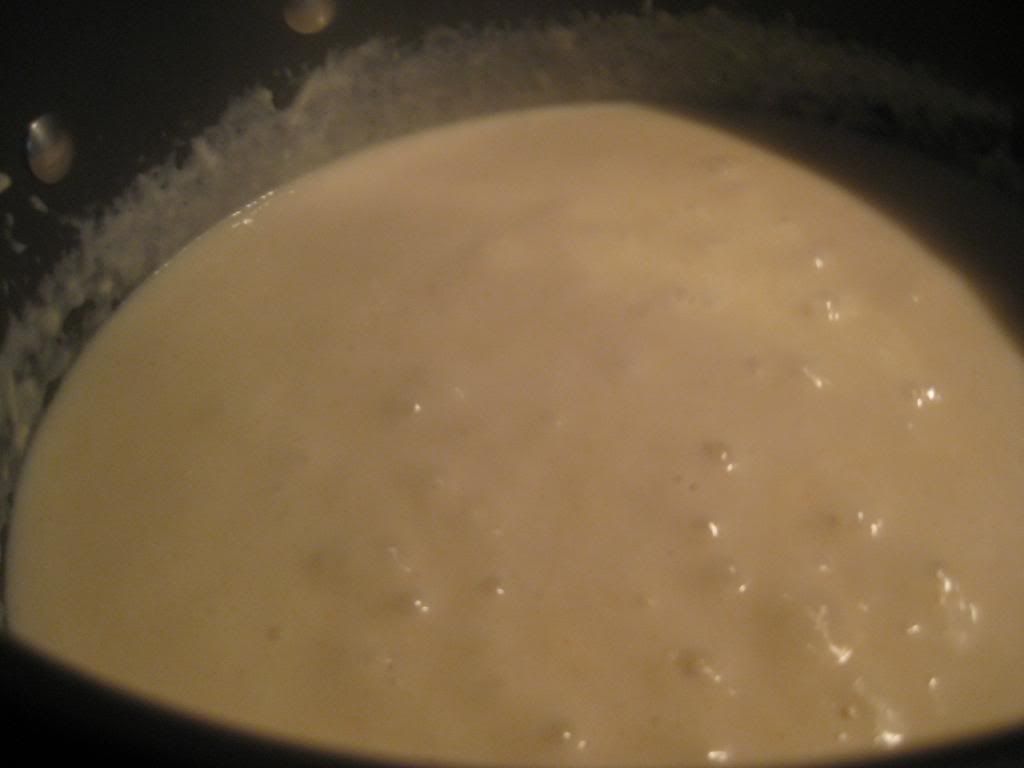
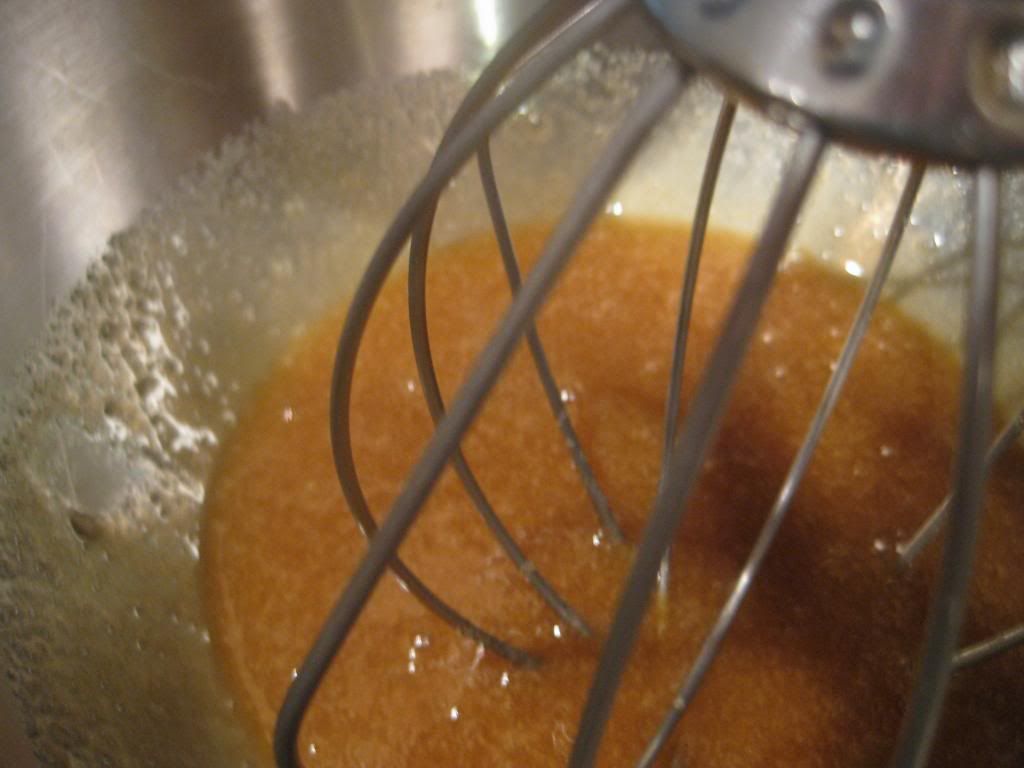
Next, add the brown sugar and mix on medium until the sugar is evenly incorporated with the eggs. You’re looking for a thick, sugary consistency like the picture below:


Once the brown sugar is mixed well, add in the granulated sugar and mix on medium until the sugar is completely absorbed. The mixture should have a very thick consistency at this point.

Return the mixer speed to medium and slowly add the canola oil. Adding it in a slow pour, rather than dumping all of the oil in at once will allow the oil to work in with the other ingredients. Take a few extra seconds to slow down, and you’ll end up with a much more even mix.

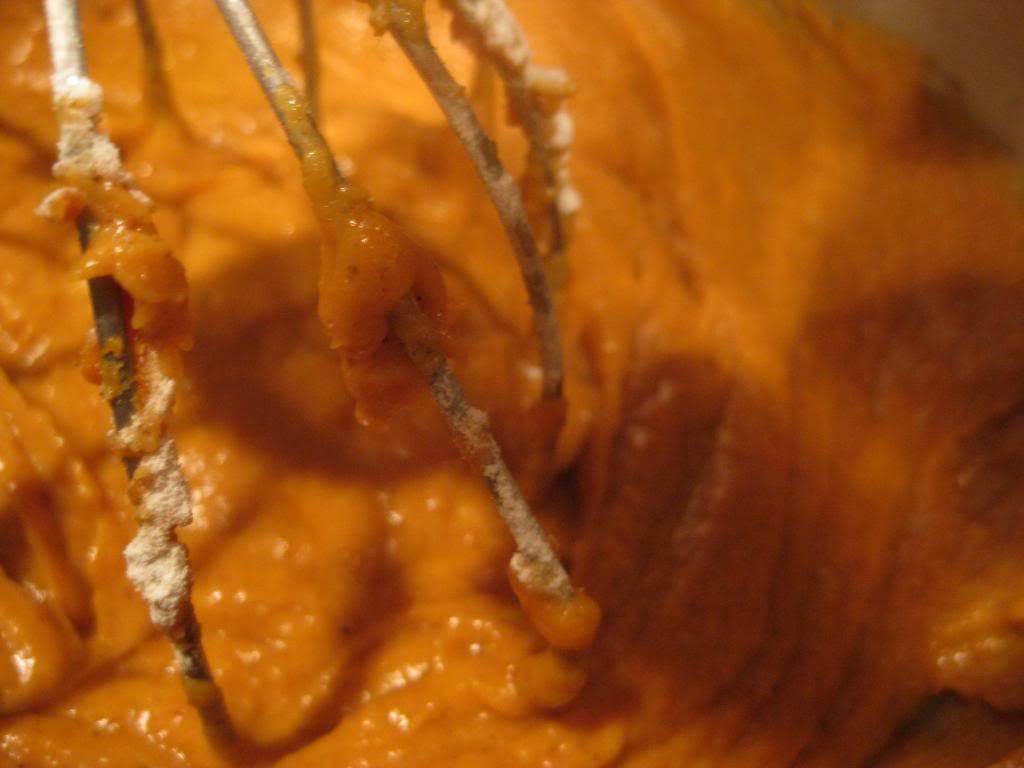
Once the oil is distributed, scoop in the canned pumpkin. Set the mixer on medium and allow it to fold the puree into the sugar mixture. Use a rubber spatula to work down any of the mix that works its way up the bowl. Allow the mixer to stir for 3 minutes, or until the mixture is completely smooth (as pictured below):


Next, slowly add the dry ingredients to the bowl while leaving the mixer on medium. Allow 30 seconds between additions of the dry ingredients so the mixer can evenly work in the flour to the pumpkin sugar concoction in the bowl. Use the rubber spatula to scrape down any batter that climbs beyond the reach of the mixer.

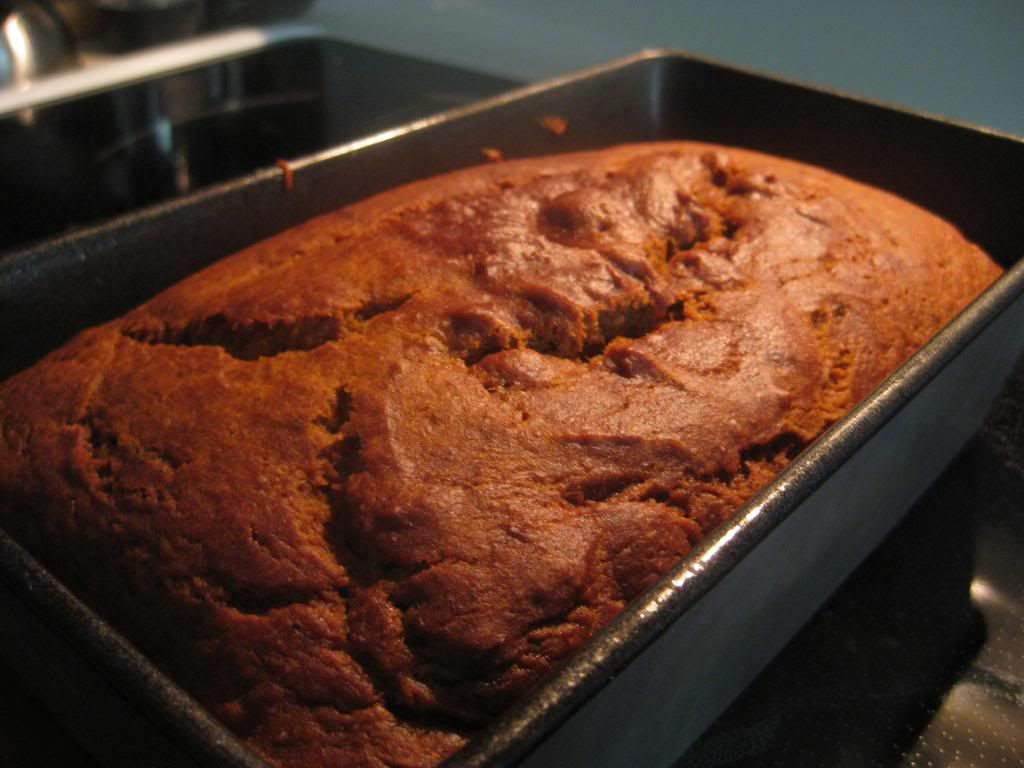
Once your batter is mixed and smooth, prepare a large loaf pan with a light coating of butter (or a quick spray of cooking spray) before pouring the batter into the pan. Set the pan on the center rack of the oven and allow it to cook for 70 minutes before removing the loaf and checking the center with a toothpick. If the toothpick comes out clean, remove the pan from the oven and allow it to cool for one hour before serving. I found that my loaf needed an additional 15 minutes (85 minutes total cook time) so your time may vary here.

While you’re waiting for your bread to cool, you can begin making the buttercream frosting. This recipe doesn’t deviate from the standard buttercream frosting recipe (butter + powdered sugar + milk or cream) but it does have a unique twist that’s completely customizable to your own personal tastes.


I chose to add 1 teaspoon of cinnamon to my frosting, however, you can create pumpkin flavored frosting by adding a teaspoon or two of pumpkin puree. Cream cheese frosting is created by adding a tablespoon of softened cream cheese. Up the vanilla to create a vanilla frosting – the possibilities are endless and easily adaptable, experiment and find your sweet spot (pun not intended).

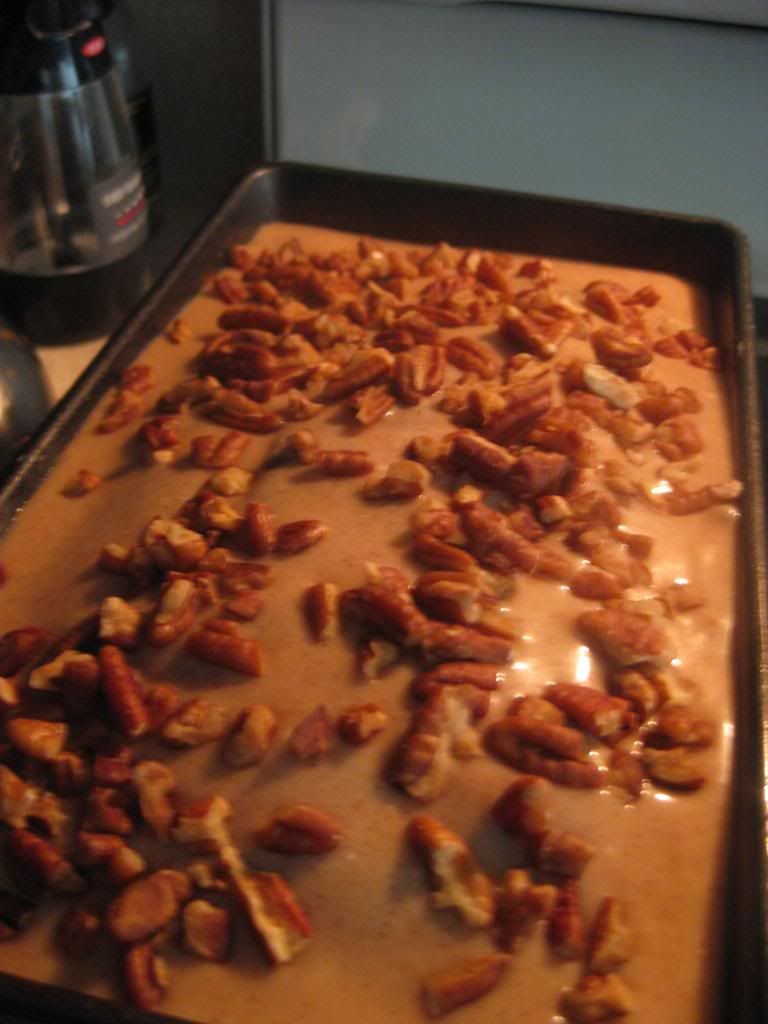
To prepare the frosting, simply add all of the ingredients to a blender and pulse until the mixture is thick and creamy. This made a bit runnier frosting, add more powdered sugar if you’d like a thicker frosting. Once the frosting is creamy, simple pour it over your cool pumpkin bread. Sprinkle the pecan pieces on top of the entire loaf and then chill the loaf in the refrigerator for one hour to allow the frosting to set. Once set, simply slice up a few pieces and enjoy!

The Results:


This recipe produces one of the most moist and flavorful pumpkin breads I’ve ever had the pleasure of eating. The frosting is a nice bonus, especially with the added cinnamon, which really draws out the natural rich flavors of the pumpkin within the bread. This recipe is easily one of my all time favorites, and absolutely a must try for fans of pumpkin bread.

That’s all we have for you this week, we’re back next week with more new recipes and other culinary adventures. Until then,

~cheers

Wednesday, October 2, 2013

Tasty Taco Tango

Good evening everyone! If you read this blog with any regularity, you're likely well aware that our favorite medium in which to cook is Mexican cuisine. The beauty of Mexican cuisine is it is so wide open and easily adaptable that you can make many similar dishes (burritos, tacos, stews - etc) and never once duplicate a dish with the same ingredients or processes.

Tonight's recipe takes us to one of the most basic and popular forms of Mexican cuisine, the taco. True to our style, however, this taco is unlike any we've made before as it features a two meat blend and manages to come in at just over 250 calories per serving.

The Recipe: The EatingWell Taco
Original Recipe Found On: Eatingwell.com

What You'll Need:
(Serves 6)

12 x 6 Inch Corn Tortillas*
8 Ounces 99% Lean Ground Turkey
8 Ounces 90% Ground Beef
1/2 Cup Chopped Onion
1 Can Diced Tomatoes With Green Chiles (Drained)
1/2 Teaspoon Ground Cumin
1/2 Teaspoon Chili Powder
1/2 Teaspoon Dried Oregano

* Note: The original version of this recipe has instructions to make your own hard shell taco. I'm a soft shell taco fan myself (not opposed to hard shell, just prefer soft) so I opted to skip those steps. However, I'd encourage you to look at the original recipe (HERE) if you're interested in creating your very own hard shell tacos.

Begin by setting a large (12 inch) skillet over medium high heat and browning the turkey and beef until both meats are completely cooked through and all signs of pink are gone. Transfer the meat mixture to a large colander and rinse off an excess fat. Wipe the skillet clean with a paper towel before moving on to the next step.

Return the meat to the skillet and add the tomatoes, cumin, chili powder and oregano. Stir well to incorporate all of the ingredients, then bring the pan to a simmer. Stirring occasionally, allow the mixture to cook until some of the liquid from the tomatoes has cooked off - 6 to 8 minutes. (This produces a 'thicker' meat filling - if you like a looser, more 'wet' -for lack of a better word - meat filling, reduce the cooking time to 3 minutes).


Spoon 3 tablespoons of the meat into your taco shell and top with fresh salsa, chopped romaine lettuce, cheese and hot sauce (or any variation you prefer) serve and enjoy!

The Results:


The two meat blend was a pleasant surprise. I've only tackled tacos with one meat - typically beef, but I've also dabbled in pork. The beauty of turkey is that its not only lean, but fairly flavor neutral (bland...but in a good way). This means the turkey will pick up whatever flavors you surround it with. In this case, the chili powder and cumin are those flavors. The result is a low fat blend that tastes just like its all beef counterpart.

The combination of cumin, chili powder and oregano is hardly unheard of - in fact, if you go into your kitchen right now and look at those 'taco seasoning' packets that people like to use for easy Mexican cooking (not judging...) its likely the first three ingredients are chili powder, cumin and oregano. If you want to be a little more bold, add in some cayenne pepper. If you're looking for something even more adventurous, a pinch of garlic salt will really change the final flavor. The main point is simple, this recipe is HIGHLY adaptable. Experiment as you see fit and enjoy!

That's all we have for you this evening. We're back this weekend with a special 'fall treat' recipe that you're sure to love. Until then,

~Cheers
Tuesday, October 1, 2013

A Classic Hit, Now Retuned!

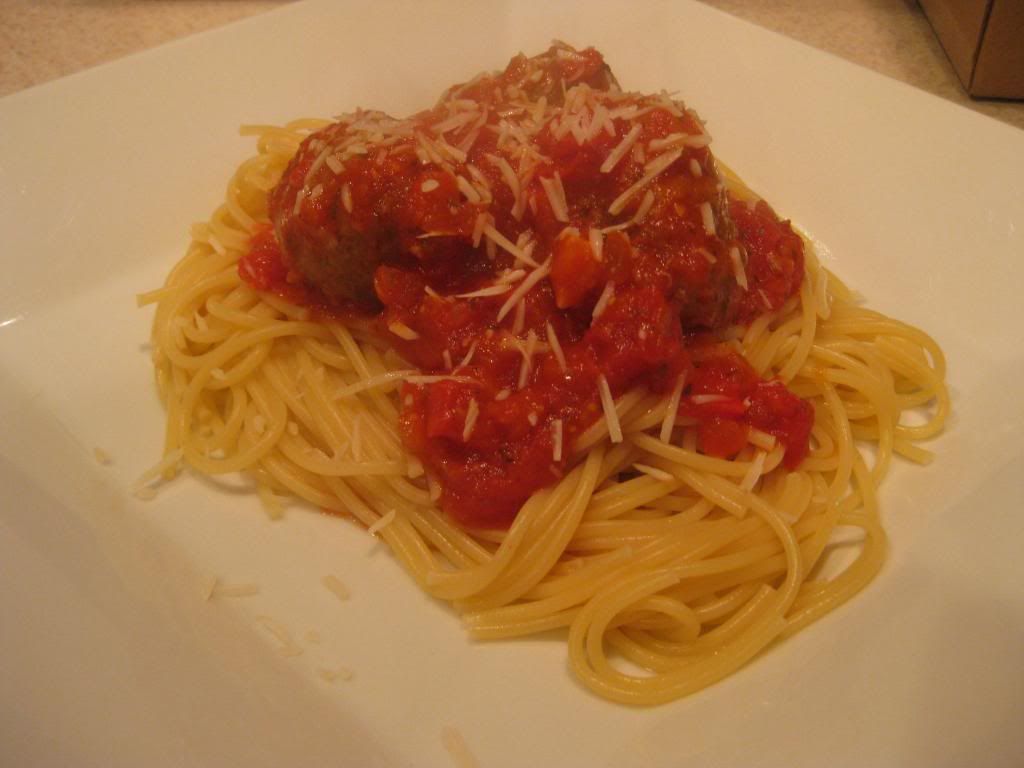
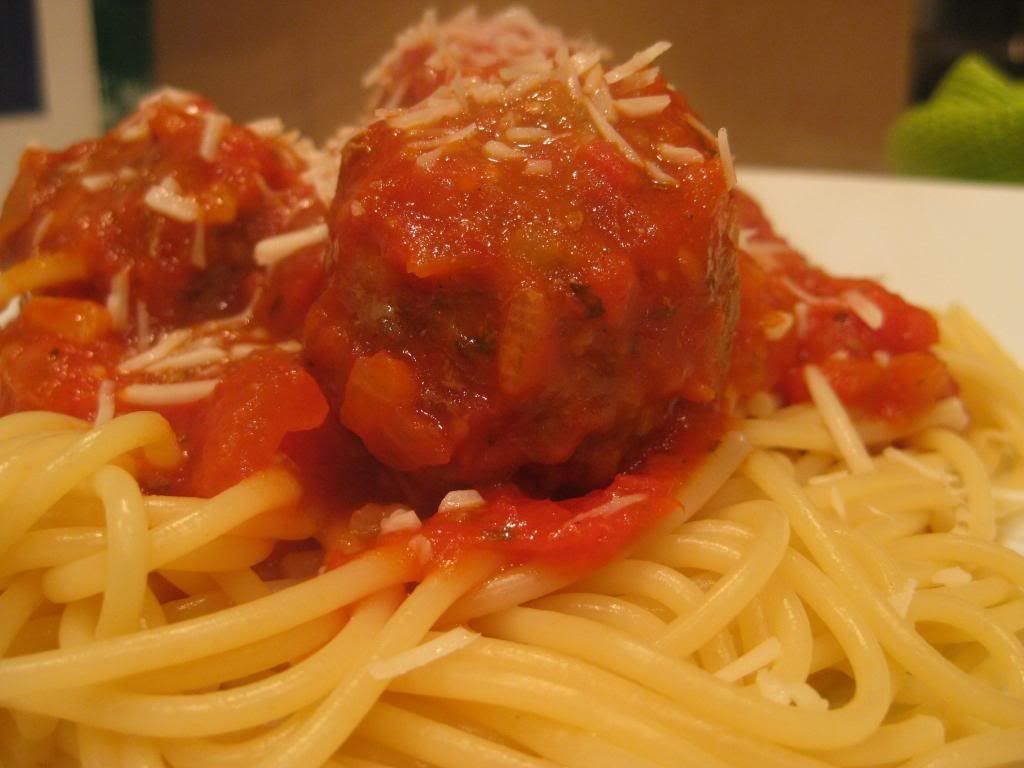
Good evening everyone!  There's nothing quite like a classic dish.  Everyone has a different definition of what recipes would fit under that genre, but I would like to think that spaghetti and meatballs would be in everyone's list.  Not only is it a classic, but it's comforting:  having a big plate of pasta with marinara sauce and round morsels of meat; there's nothing quite like it.  Tonight, I'm recreating this recipe that's stood the test of time, with a few tweaks to make it a bit more better for you.

The Recipe:  Spaghetti and Meatballs
Original Recipe Found In:  Cooking Light, September 2013

What You'll Need:
3/4 Cup chopped Onion
2 Teaspoons Canola Oil
6 Garlic cloves, divided
1 Pound Plum Tomatoes, halved lengthwise
1 1/3 Cups lower-sodium Marinara Sauce
1/2 Teaspoon Salt, divided
1/3 Cup Panko (Japanese breadcrumbs)
1/4 Teaspoon Crushed Red Pepper
12 Ounces ground Sirloin (90% lean)
1 large Egg
6 Ounces uncooked Spaghetti
1.5 Ounces fresh Parmesan Cheese, grated (about 6 tablespoons)

To start, preheat a broiler to high.  Then begin to prepare the sauce:  to a bowl, combine the onion, oil, tomatoes, and three garlic cloves and toss to coat the vegetables.  On a foil lined baking sheet, arrange the tomato mixture to an even layer.  Once the broiler is preheated, add the baking sheet and broil the mixture for 10 minutes, taking the sheet out after five minutes to stir.  Once the tomato mixture is done cooking, spoon nto a food processor.  Pulse the mixture six times or until coarsely chopped.  In a medium saucepan combine the tomato mixture, marinara sauce, and 3/8 teaspoon of salt and bring to a simmer.

While the sauce is heating, begin to prepare the meatballs.  On a chopping board, mince the remaining garlic cloves.  To a large bowl, add the garlic, remaining 1/8 salt, panko, red pepper, beef, and egg.  Mix gently until everything is just combined.  With damp hands, quickly and gently shape the beef mixture into 12 meatballs, but do not pack the meat mixture.  Spray another baking sheet with cooking spray.  Arrange the meatballs in a single layer on the baking sheet.  Add the baking sheet to the broiler and cook for ten minutes, turning the meatballs over once during cooking. Once cooked, remove the meatballs from the oven and add to the tomato mixture.  Simmer the sauce and the meatballs for four minutes, or until the meatballs are done.

As the meatballs are cooking, prepare a large saucepan with water over high heat.  Once at a boil, add the spaghetti and cook to package directions.  Drain the pasta with a colander.  Serve the meatballs and sauce over pasta, sprinkle with cheese, serve, and enjoy!

The End Result:


There is something so delightful about a recipe that been repeated so many times, and yet tastes delicious every time.  That's why this dish is a treat:  the meatballs have added flavor from the garlic and the red pepper flakes.  The sauce isn't too heavy and preparing part of it fresh adds another dimension of flavor.  One never goes wrong with spaghetti and when it absorbs the sauce, it's quite the tasty treat.  At 476 calories, it's hard to find another spaghetti and meatball recipe that can beat this wonderful classic!

Thanks for joining us tonight.  Check back tomorrow as Tyler prepares a new twist on another classic dish.  Until then,

~Cheers!