
Last weekend, while I was flipping through the 2011 recipe collection from Jamie Oliver’s magazine “Jamie” ($14.99 at most bookstores) I stumbled upon a butternut squash risotto that gave me a few ideas. Using Jamie’s recipe as a guide, and a few changes that I’ve added myself, I’m going to try to create the beautiful tasting risotto that I was looking for the first time around.
The Recipe: Butternut Squash Risotto
Original Recipe Found In: Jamie Magazine, 2011 Recipe Collection (Framework taken from this recipe, but much of it has been slightly adapted to create our own dish)
What You’ll Need:
4 Slices Pancetta
2 Tablespoons Olive Oil
½ to ¾ Cup Butternut Squash Pieces (Cubes)
3 Thyme Sprigs
1 Small Onion (Diced)
1 Garlic Clove (Minced)
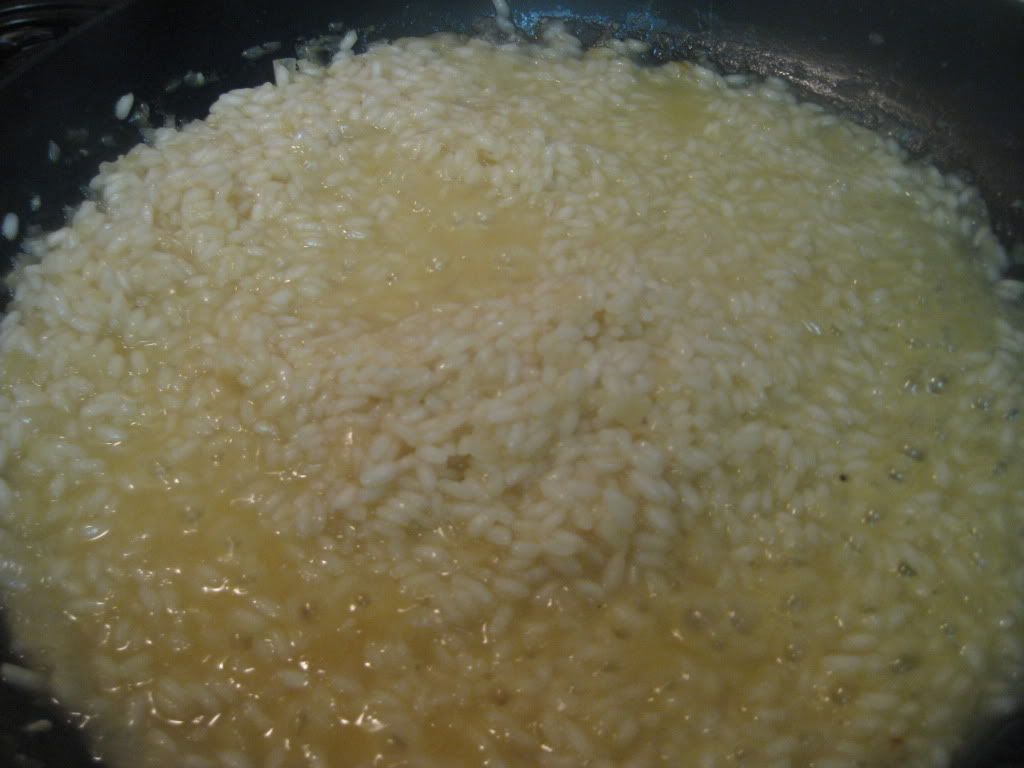
1 Cup Risotto Rice (Arborio)
½ Cup White Wine
3 Cups Chicken Broth
Parmesan Cheese
Begin by preheating your oven to 350 degree and lightly greasing a rimmed baking sheet with cooking spray. In a large bowl, combine 1 tablespoon of olive oil with a pinch of salt and pepper. Whisk until blended. Add your butternut squash pieces to the bowl and toss until everything is evenly coated. Pull apart the thyme and lightly use to season the butternut squash pieces. (Dried thyme works well here as a substitute).
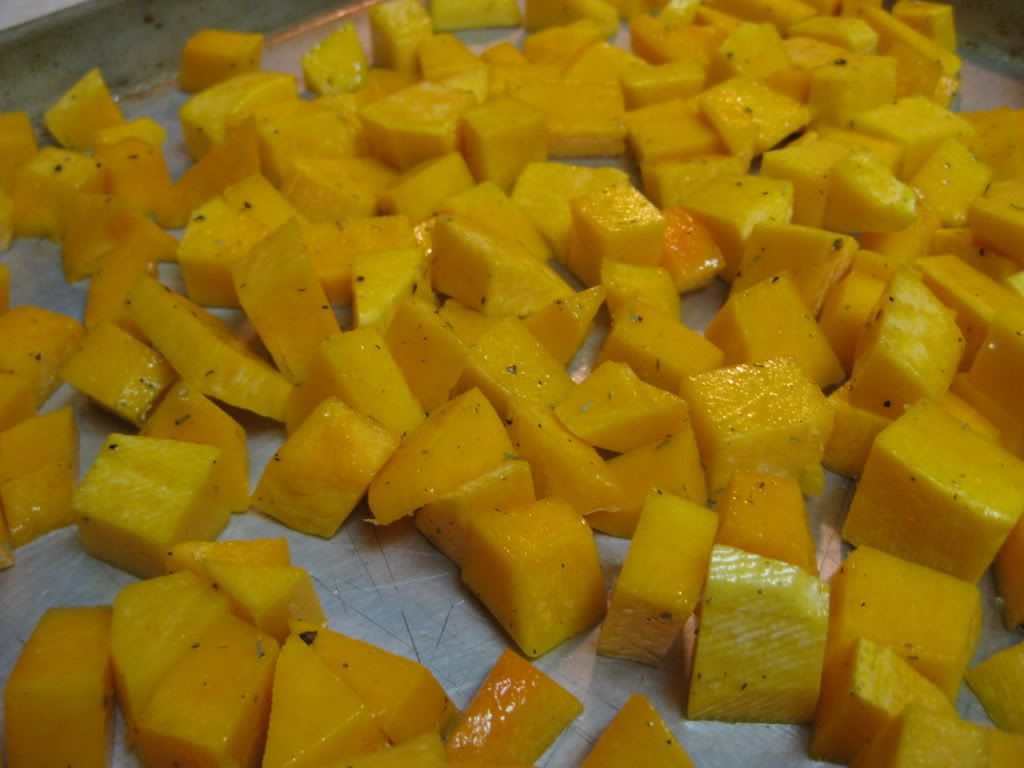
Trader Joe’s sells their butternut squash precut and already diced into sections. I would recommend spending the extra $1 to buy precut squash. It saves a lot of time and effort. Even if you buy a precut squash, you’ll still have to do a little chopping to reduce the size of the pieces. They don’t have to be uniform or even cubed, just make sure that they are chopped down into bite sized pieces.
Spread the squash pieces evenly across the rimmed baking sheet and place it in the oven. Allow the squash to bake for 25 to 30 minutes, or until they begin to turn a nice golden brown color. While the squash is baking, you can begin preparing the rest of the recipe.
Place a large non stick skillet over medium high heat, add the olive oil and bring to a light shimmer before adding the pancetta. Fry the pancetta until it becomes crispy and brown. This should only take 1 to 2 minutes as pancetta is very thin and will cook fast. Once browned, remove the pancetta from the skillet and lightly dice it with a chef’s knife (or pull apart by hand). Set aside.
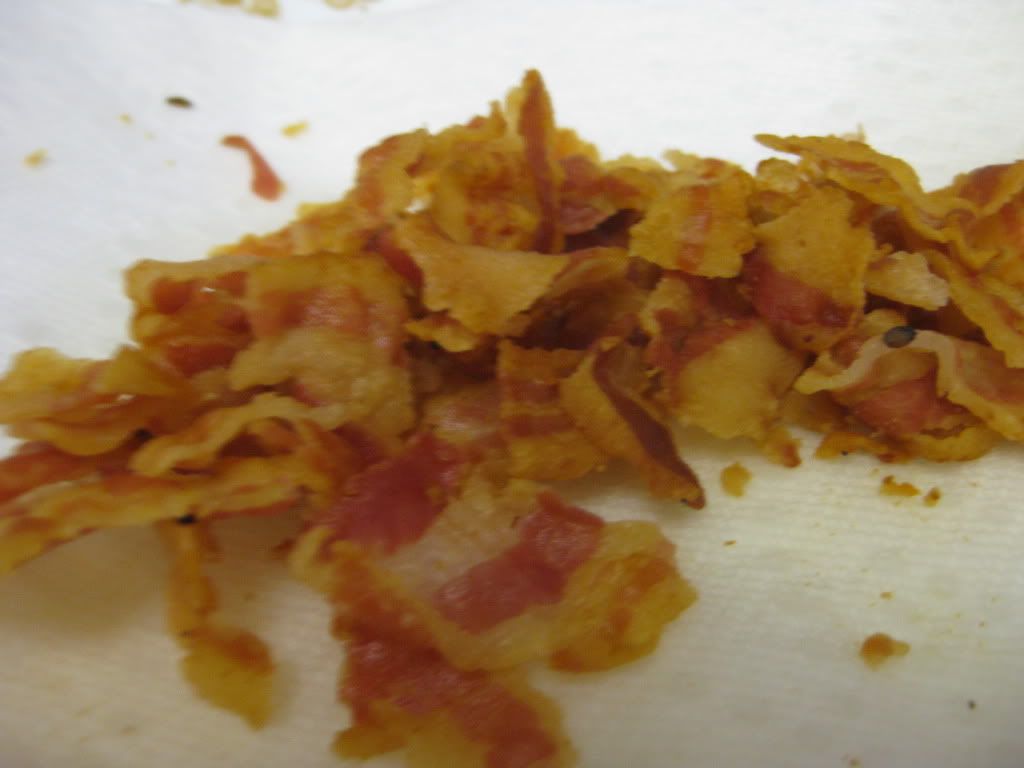
Pancetta, for those who may not be familiar, is known as Italian bacon. Pancetta is essentially thinly sliced pork belly that is salt cured and sometimes lightly seasoned with nutmeg, pepper or other spices. When raw, it tastes slightly like ham and when fried it becomes a crispy (slightly less greasy) stand in for bacon. Pancetta’s flavors are not quite as aggressive as bacon, so you can typically add it to dishes that bacon would simply overwhelm – like risotto.
In the same skillet, add the onion and cook for 3 to 5 minutes or until it becomes translucent. Next, stir in the garlic and allow it to cook for 30 seconds before adding your rice into the skillet. Stirring regularly, allow the rice to cook for 1 to 2 minutes.
Add the white wine to the skillet and allow the mixture to simmer until the wine absorbs into the rice. This takes about 1-2 minutes. Next, gradually add the chicken broth to the skillet about ½ cup at a time. Allow each ½ cup of broth to be absorbed by the rice before adding any additional broth. This will take about 3 minutes per 1/2 cup. You only want a small amount of excess liquid, as risotto is not a liquid heavy dish, so if you begin to notice that the liquid is not getting absorbed into the skillet do not add any more. You can always add splashes of broth to the risotto later on if you feel it is a little too dry or sticky for your liking.
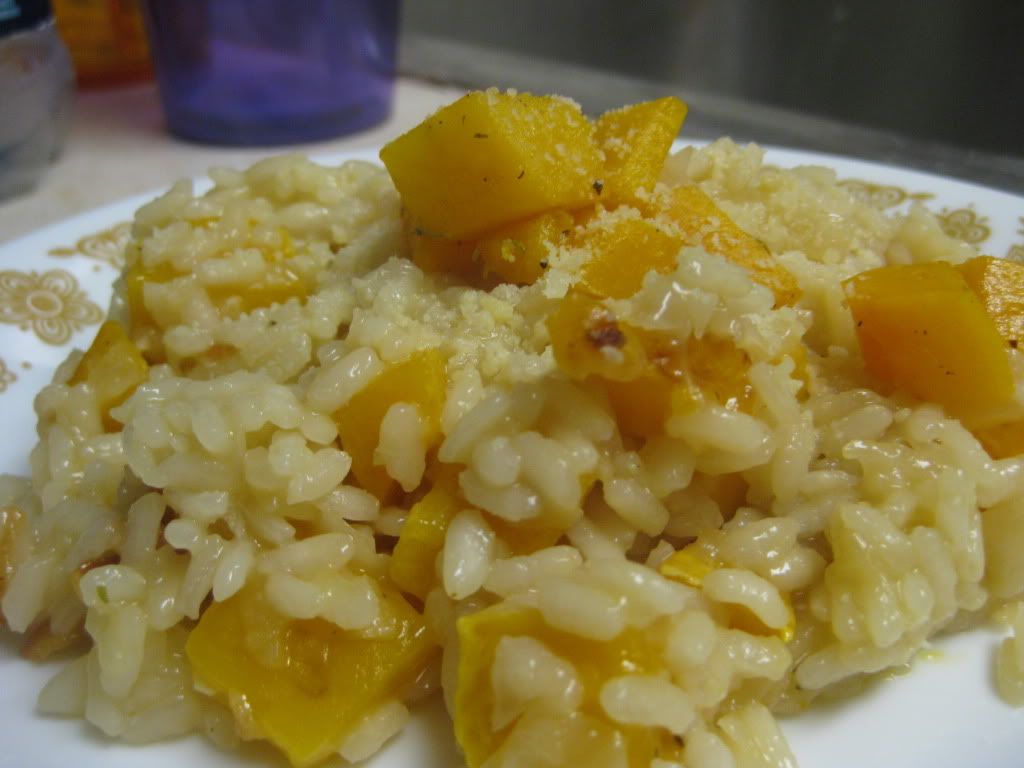
By this time, your butternut squash should be done or very near completion. Once it is a nice golden brown and fork tender (it should fall apart easily if prodded with a fork) stir it into the risotto mixture on the skillet along with the pancetta pieces you prepared earlier. Once everything is evenly blended, sprinkle the mixture with a pinch or two of parmesan cheese and serve!
The Results:
I knew from experience that oven roasting butternut squash greatly boosted its flavor over simply pan frying or boiling it. Instead of following the original recipe, which called for the squash to be fried in a skillet and then allowed to finish cooking it a bit of water, I called an audible and decided to keep the butternut squash out of the risotto until the very end. While this would lower the butternut squash flavor amongst the risotto, I hoped it would boost the flavor of the squash itself by enough of a margin to offset this change.
I was right. The oven roasted squash was absolutely bursting with that great, earthy flavor that butternut squash is known for. The risotto presented a nice, neutral flavor to compliment the squash, and while the butternut flavors did not work in amongst the risotto, I think the trade off was worth it. The pancetta added the nice layer of texture that my first foray into butternut squash risotto was missing. A nice crunch and an almost bacon like seasoning really made the pancetta an important member of this dish.
I have to say I’m very pleased that my second go-round with butternut squash risotto finally yielded the flavors I was looking for. This is a fairly easy recipe that only takes about 45 minutes total time. With its great flavors and decent preparation time, you can serve the whole family a healthy and delicious meal with very little effort.
That’s all we have for you this week. We’re back on Monday with another edition of Around The Culinary World. Until then,
~Cheers
No comments:
Post a Comment