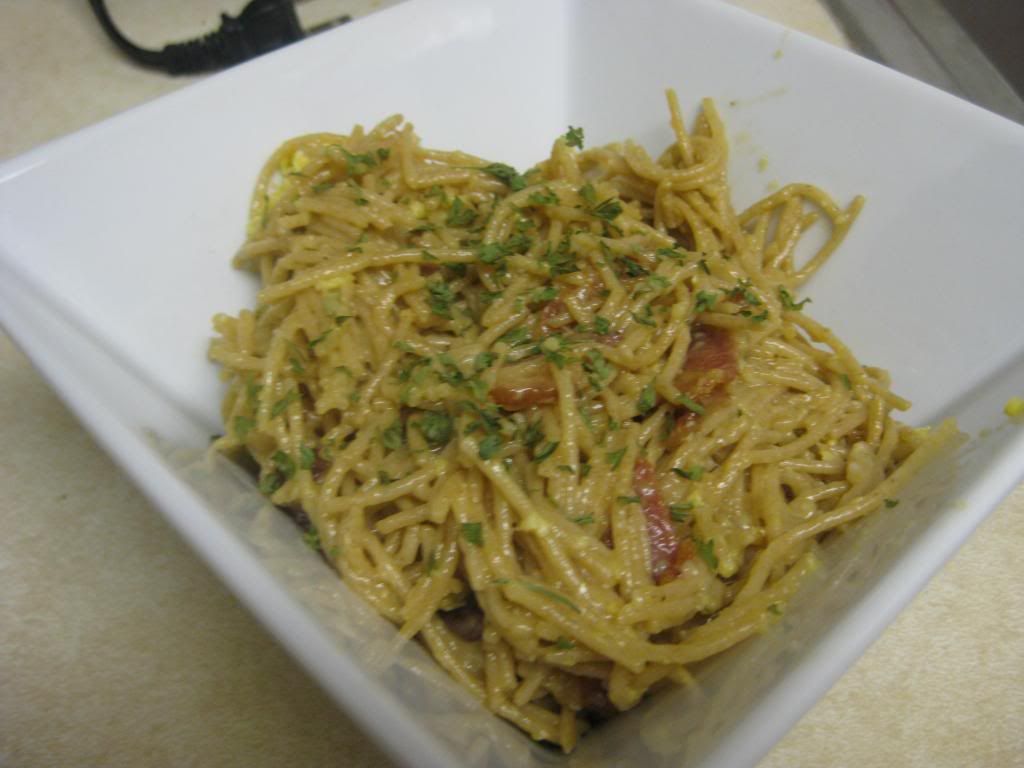
Hello again everyone! After a long and sometimes stressfull process, Maggie and I have now moved into our brand new home. It's been an exciting process and a whole lot of work - but it's one of life's great moments and I'm proud to have shared it with my loving wife.
We were originally intending to be up and running today and returning to cooking meals this week.
Perhaps...we got a bit ahead of ourselves.
While our kitchen is completely unpacked, there is still much to do as far as unpacking and moving in goes. So, the new plan is for us to return to cooking our own meals NEXT week. (December 3rd). We won't leave you high and dry on content. We're going to post a few recipe revisits (suitable for the winter) and we'll post a old kitchen / new kitchen comparisson too.
In short, yes - we're still alive. Yes, the blog is still active and yes, we will be cooking again soon. Just not as soon as we originally thought. Thanks for your understanding!
~Cheers
Monday, November 26, 2012
Friday, November 16, 2012
Thanksgiving Recipes: Pumpkin Pie
There are many challenges when it comes to making pumpkin pie. The first is to develop and soft and flaky crust that isn't overly dry or overly tough. On top of that challenge, you also have to make a light, fluffy and flavorful pie filling that won't dry out or cook unevenly. These challenges have led many to turn to store brand pies and 'instant mixes' to satisfy their pumpkin pie urge during the holiday season. Hopefully, with the help of my recipes tonight - the need to go to the store and buy a subpar pumpkin will be erased. My pumpkin pie recipe this evening so straightforward and easy to follow - and the best part is, you likely have not tasted a better pumpkin pie in your lifetime. (Okay, maybe you have, but this one is in the top 3 anyway!)
The Recipe (s): Fool Proof Pie Dough & Pumpkin Pie
Original Recipes Found In: The Complete America's Test Kitchen TV Show Cookbook 2nd Edition: Every Recipe from the Hit TV Show With Product Ratings and a Look Behind the Scenes
Fool Proof Pie Dough
What You'll Need:
2 1/2 Cups Unbleached All Purpose Flour
2 Tablespoons Sugar
1 Teaspoon Salt
12 Tablespoons (1 1/2 Sticks) Unsalted Butter - Cut into quarters
1/2 Cup Vegetable Shortening (Chilled)
1/4 Cup Vodka*
1/4 Cup Ice Water
* Now, I'm sure the first question that comes to your mind is, "why vodka?" The problem with many pie dough recipes is that they are low on water - this lack of water helps the crust stay softer after baking. However, the trade off is that the dough is very tough to roll out and manipulate. Adding more water to the dough allows the dough to be easily manipulated and rolled, however, as you can imagine the trade off is that the crust becomes very tough and dry. The good folks at America's Test Kitchen discovered that vodka is the perfect solution to this problem. How? Well, I'll quote directly from their explanation:
"While gluten (the protein that makes crust tough) forms readily in water, it doesn't form in ethanol, and vodka is 60 percent water and 40 percent ethanol. So adding 1/4 cup of vodka and 1/4 water produces a moist, easy-to-roll dough that stays tender because the alcohol vaporizes in the oven, leaving the final crust with only about 6 tablespoons of water. This dough bakes into a crust that is tender, flavorful, and that rolls out easily every time."
For this recipe, the vodka is essential to the tender texture and adds no flavor to the final dough. DO NOT SUBSTITUTE WATER for the vodka. You absolutely must use vodka in this recipe for the dough to turn out. This recipe makes a double batch of the pie dough - however, the excess dough can be stored in the refrigerator for up to 2 days or stored in the freezer until you need to make another pie. Simply allow the dough to thaw completely before using out of the freezer.
Begin making the dough by processing 1 1/2 cups of the flour, with sugar and salt in a food processor until combined. Next, add the butter and shortening (you may have to add both in sections - not all at once - depending on the size of your food processor). Process until everything is incorporated and the mixture is forming thick clumps.
Scrape the dough down the sides of the processing bowl and back on top of the blades. Add the other 1 cup of flour to the dough and pules until everything is evenly incorporated (roughly 5 to 7 pulses). Transfer this mixture to a medium bowl and add the vodka and ice water (straining out the ice first!) Stir and press the dough with a rubber spatula until the dough begins to stick together. (The easy way to tell you are done stirring is when the dough looks like traditional dough - up until this point, the dough has been very mealy and separated - once it joins, it is ready.)
Divide the dough into two even pieces. Place each piece of dough on a section of wax or parchment paper and work the dough into a 4 inch disk. Wrap each piece tightly in plastic wrap and refrigerate for 1 hour.
Before rolling the dough out - let it rest on the counter for 10 minutes to soften. After this time, roll the dough into a larger circle - just slightly larger than the circumference of the pie plate you are using. Drape the dough over the plate and work it in - making sure there are no pockets or air bubbles. Form the top of the crust with your fingers or with a fork - whatever your preference may be - and turn your attention to making the actual pie.
What You'll Need:
1 Cup Heavy Cream
1 Cup Whole Milk
3 Large Eggs, Plus 2 Large Egg Yolks
1 Teaspoon Vanilla Extract
1 Can (15 Ounces) Pumpkin Puree
1 Cup Candied Yams (Drained)
3/4 Cup Sugar
1/4 Cup Maple Syrup
2 Teaspoons Ground Ginger
1 Teaspoon Salt
1/2 Teaspoon Ground Cinnamon
1/4 Teaspoon Ground Nutmeg
Begin by adjusting your oven rack to the lowest position. Place a rimmed baking sheet on the bottom rack and preheat the oven to 400 degrees. Next, using two layers of aluminum foil, cover your pie completely. Add pie weights to the center of the aluminum foil (this keeps the dough from rising during the early cooking stages) and cook on the heated baking sheet (in the now 400 degree oven) for 15 minutes.
After 15 minutes, remove the aluminum foil and the pie weights and return the pie to the oven for another 10 to 15 minutes, or until the crust is crisp and golden brown. Transfer the pie crust to a wire rack until the filling is ready. (Be sure to keep the filing and the pie crust cooking times close together - the pie works best when both the crust and the filing are till warm when added together.)
While the pie crust is cooking you can turn your attention to making the filling. In a large bowl, whisk the cream, milk, vanilla, eggs and egg yolks together. Set aside. Next, bring the pumpkin puree, yams, sugar, maple syrup, ginger, salt, cinnamon and nutmeg to a simmer in a large saucepan. Over medium heat, stir the mixture constantly (making sure to mash the yams while stirring) until the mixture becomes thick and slightly shiny. This should take about 15 to 20 minutes (which is great - because that's how long the pie crust takes!)
Off of the heat, whisk in the cream mixture and stir until everything is combined. Using a large strainer, pour the mixture into a medium bowl. Use a spoon or ladle to push all of the liquid through the strainer. This helps keep the strings from the yams and other larger impurities from making their way into the pie. Whisk the newly strained mixture and then pour it into the still warm pie crust.
Return the pie to the oven, on the same baking sheet as before and cook for 10 minutes. After 10 minutes, reduce the oven temperature to 300 degrees and cook for another 20 to 35 minutes. (These first 10 minutes of high heat prevent the cream mixture from curdling inside the pie filling.) After 20 to 35 minutes, the outer edges of the pie should be set and the center should still have a little 'play'. If the pie still seems a little 'jiggly' return it to the oven for another 5 minutes. Once the sides are set and the center registers 175 degrees on an instant read thermometer - transfer the pie to a wire cooling rack and allow to cool at air temperature for 2 to 3 hours before serving. Serve with whipped topping (optional...or not, depending on how seriously you take your Cool Whip!)
But that's not all we have for you this evening- since we have so many recipes to share, we will be posting two per day. The second dish tonight is a not so traditional take on a traditional Thanksgiving dish - mashed sweet potatoes.
The Recipe: Mashed Sweet Potatoes
Original Recipe Found In: The Complete America's Test Kitchen TV Show Cookbook 2nd Edition: Every Recipe from the Hit TV Show With Product Ratings and a Look Behind the Scenes
What You'll Need:
4 Tablespoons (1/2 Stick) Unsalted Butter, Cut In 4 Pieces
2 Tablespoons Heavy Cream
1 Teaspoon Sugar
1/2 Teaspoons Salt
2 Pounds Sweet Potatoes (2 to 3 medium) Peeled, quartered lengthwise and cut crosswise into 1/4 inch tick slices
Begin by melting the butter in a large saucepan over low heat. Stir in the cream, sugar and salt. Next add the sweet potatoes and cook, covered, stirring occasionally for 30 to 45 minutes, or until the potatoes fall apart when poked with a fork.

Once soft, remove the pan from heat and mash the sweet potatoes with a masher or transfer them to a food processor and pulse until fully mashed. Serve immediately with a dash of salt and pepper to taste. (I think this may be the easiest side dish recipe we've ever shared!)
The Results:
The mashed sweet potatoes may be my favorite sweet potato recipe. This recipe allows the natural flavors of the sweet potatoes to run this dish - sweet, creamy yet just a little bit 'nutty'. The potatoes themselves are light and fluffy - and with a dash of butter on top are simply the greatest turkey day side dish you can make. The best part is that the recipe is so undeniably simple! 35 minutes of cook time and ta-da!
Wednesday, November 14, 2012
Thanksgiving Recipes: Green Bean Casserole
The Recipe: Green Bean Casserole with Crispy Shallots
Original Recipe Found In: Food Network magazine, November 2011
What You’ll Need:
¼ Cup Olive Oil
6 Medium Shallots (Sliced into rings)
1 ½ Pounds Thin, Fresh String Beans (Trimmed)
1 Pound Button Mushrooms (Sliced)
6 Large Garlic Cloves (Minced)
1 Tablespoon Chopped Fresh Thyme
3 Cups Low Fat Milk (1%)
3 Tablespoons All Purpose Flour
½ Cup (Plus 2 Tablespoons) Freshly Grated Parmesan Cheese
½ Cup Finely Chopped Parsley
¼ Teaspoon Ground Nutmeg
Begin by preheating your oven to 350 degrees.
Heat the olive oil in a small skillet over medium high heat until the oil is shimmering but not quite smoking. Add ¼ cup of the shallots (roughly ¼ of the shallots) and cook, stirring constantly until they are golden brown and crispy. This should take about 2 minutes. Transfer the shallots (via slotted spoon) to a paper towel lined plate. Repeat this process (1/4 cup at a time) until all of the shallots have become golden brown, crispy and are drained of excess oil. Make sure you reserve the excess oil in the skillet – you’ll need it later on.
This step allows you to create the great crispy “onion ring” crunch that green bean casserole is famous for. Instead of deep fat fried, sodium enriched glorified chips – these crispy shallots are much better for you!
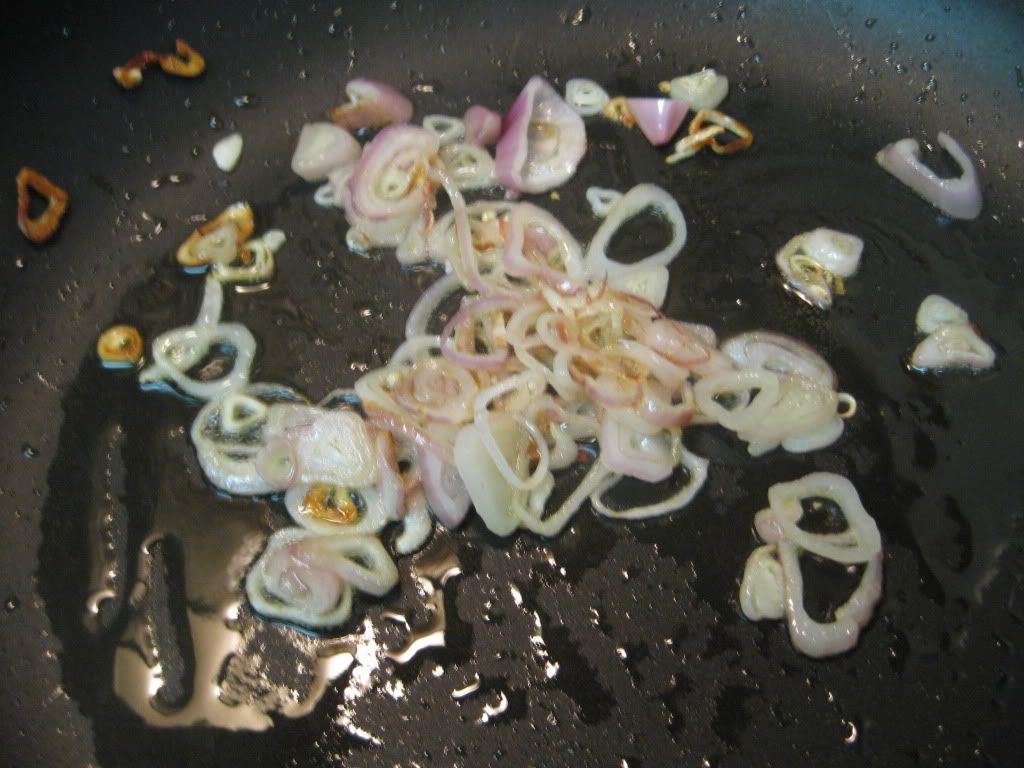 |
| Getting the shallots all nice and crispy |
Next, add your green beans to a steamer basket and place that basket over a large pot of boiling water (do not submerge the beans). Cover the basket and steam until the beans have become a brighter green and are still slightly crisp. This should take about 3 to 5 minutes.
If you do not have a steamer basket, you can use a wire strainer and a pot lid – improvising in the kitchen is always necessary unless you’re equipped like the pros are!
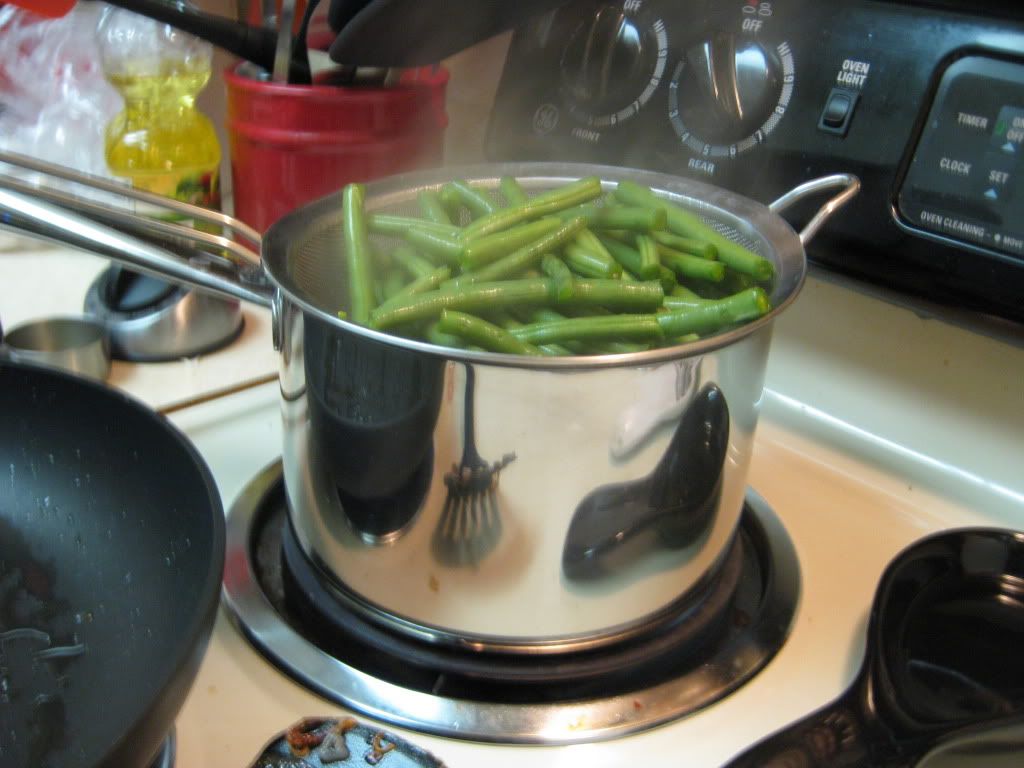 |
| Look at those perfectly cut beans - all those years of cutting beans from my parents garden have FINALLY paid off! |
Remember that reserved shallot oil from earlier? It’s time to use it now – add 1 tablespoon of this oil to a large (high sided) non-stick skillet. Over medium high heat, bring the oil to a light shimmer. Next, add the mushrooms and cook (stirring occasionally) until all of the liquid has been absorbed into the mushrooms and they begin to brown. This takes about 10 to 15 minutes. Finally, add the garlic and thyme and cook until they are fragrant – roughly 30 seconds to one minute. Transfer the mushroom mixture to a bowl and set aside.
 |
| Nothing smells better than frying up some mushrooms! |
In a small bowl, combine the flour and milk. Whisk the mixture until all of the flour has been blended with the milk (I.E. no clumps). Add this mixture to the deep sided skillet you used previously. Stir the mixture constantly on high heat until the milk begins to simmer. At that point, reduce the heat to medium low and allow the mixture to simmer until it thickens. Be sure to stir occasionally. This process should take about 10 to 15 minutes.
This stage allows you to recreate the classic ‘cream’ flavor that traditional green bean casserole contains. The original version of this dish obtains that flavor from cream of mushroom soup – while that is an easy alternative, you are adding a lot of extra fat and sodium (especially sodium) to the dish. By adding an extra (10 minute) step, you greatly enhance the health aspect of this dish!
Next, add the green beans, mushrooms, ½ cup of parmesan cheese, parsley, nutmeg, ¾ teaspoon of salt and ½ teaspoon of pepper to the skillet. Stir the mixture until everything is well combined.
Coat a large (2 quart is ideal) baking dish with cooking spray. Spoon the green bean mixture into the dish and sprinkle the top with the crispy shallots and the remaining parmesan cheese. Place the baking dish into the oven and bake until the cheese is golden brown, roughly 20 minutes. Serve and enjoy!
The Results:
In every sense, in flavor and in looks, this is a Green Bean Casserole. Except it looks nothing like your typical Green Bean Casserole. The beans aren't drenched in soup and the top of the dish isn't completely coated in fried onions. Instead, the beans are lightly coated in the thickened milk/flour mixture along with the mushrooms and the top is sprinkled with lightly cooked shallots. The beans could have used a little bit more time steaming to get a better cooked taste, but the flavor was there and that is what I was aiming for. This is a great spin on an old Thanksgiving staple!
Tuesday, November 13, 2012
Thanksgiving Recipes: Corn Bread Edition
The Recipe: Famous Dave's Copycat Cornbread Muffins
Original Recipe Found In: Various Sources
What You'll Need:
1 3/4 Cup Cornmeal
1 1/2 Cup All-Purpose Flour
2 Teaspoons Baking Powder
3/4 Teaspoon Salt
1/4 Teaspoon Baking Soda
2 Eggs
2/4 Cup Granulated Sugar
1/4 Cup Shortening
1/2 Teaspoon Vanilla Extract
3/4 Cup Whole Milk
1/4 Cup Buttermilk
1/3 Cup Vegetable Oil
4 Tablespoons Honey
To start, preheat the oven to 400 degrees. If your cornmeal isn't finely ground, almost to a flour-like consistency, grind it in a food processor for five minutes. This will help the dry ingredients keep the same consistency when mixing. Pour the cornmeal, flour, baking powder, salt, and baking soda into a large mixing bowl and mix until all the ingredients are incorporated.
In another mixing bowl, combine the eggs, sugar, shortening, and vanilla. Using an electric mixer, cream these ingredients together until they are well combined. Next, pour the wet ingredients into the large bowl with the dry ingredients. Stir together until smooth.
Line two 12-cup muffin tins with paper muffin cups. We used silicon muffin cups and they pop out the muffins much more easier than paper muffins cups. Fill each muffin cup until it's 3/4 full with batter. Place the muffin tins in the oven and bake for 18-20 minutes or until a toothpick inserted comes out clean. Serve with butter and honey and enjoy!
The End Result:
I have been to Famous Dave's Restaurant several times and I always love to have their muffins. Now, I won't need to go to their restaurant, because these muffins are way better. The muffins have a little bit of moistness still left in them, even after baking in the oven for 20 minutes. The sweetness isn't too much, but there is enough there to make it incredibly delicious. Pairing the muffins with butter and honey is one of the ways we enjoys cornbread muffins, but you can decide what to pair with them. We love these muffins so much, that I made them twice in a month. Even if you aren't a cornbread muffin fan, we would definitely recommend that you try these, you won't regret it.
****
The Recipe: Crispy Cornbread
This is an Out of the Culinary Recipe
What You'll Need:
3/4 Cup Corn Meal (Yellow)
1 Cup All Purpose Flour
2 Teaspoons Baking Powder
2 Tablespoons Light Brown Sugar
2 Tablespoons Honey
2 Eggs
3/4 Cup Milk*
3 Tablespoons Butter
* Maggie and I are actually slightly lactose intolerant (milk doesn't really 'sit' right with us). So, we don't keep standard milk in our home. Instead we use almond milk (vanilla flavored) - the downside is that almond milk (when flavored) doesn't lend itself to baking. In its place, we used water. If you're using a leaner type of milk (skim, low fat) the difference between milk and water in a recipe is negligible. The only thing your recipe will miss is the fat in the milk (making the bread drier). You can replicate this fat by adding about 1 tablespoon of vegetable oil to the mixture (if you're using water).
Preheat your oven to 400 degrees.
To begin, combine the dry ingredients (corn meal, flour, brown sugar and baking powder) in a large bowl and whisk until everything is well combined. Next, add the eggs, honey, butter (melted) water (or milk) and whisk until everything is well blended and no lumps remain.
Lightly grease an 8 X 8 baking dish with cooking spray and pour the mixture into the baking pan. Once the dough has been evenly distributed into the baking dish, pop the pan into the oven and allow it to cook for about 25 minutes or until the bread is golden brown and passes the toothpick test. (Stick a toothpick into the center of the bread, if it comes out clean, it's done).
The Results:
I prefer my cornbread to act as a vessel for butter and honey. Sure, the cornbread is great, but slathering it in butter and honey makes it extraordinary. This cornbread recipe created a nice, porous bread that absorbed the melted butter and honey without making a sticky mess or crumbling all over the plate. This is a drier cornbread - but as I said it was sort of designed that way intentionally. If you like to pair your cornbread with chili or simply like to serve it with honey, jelly or other toppings, this recipe works great and can easily be made with things you likely have in your pantry.
Friday, November 9, 2012
Scheduling Announcements
Hello everyone! We wanted to take a moment to announce a slight change to our schedule for the coming weeks. Starting today through November 26th, we're not going to be cooking any new recipes.
You see, it's going to be hard to cook anything when all of your cookware is packed away.
That's right! We're moving!! After living in an apartment for 3 years and cooking out of what is essentially a glorified closet, Maggie and I have purchased a home and will be moving during the week of Thanksgiving.
This does mean that we'll have to shut down the blog for a brief period of time as we switch over to our new home. Don't worry - we're not going silent during this timespan! With the culinary "4th of July" (Thanksgiving) coming up, we're going to be sharing our best turkey day dishes. Over the past two years we've cooked up a variety of side dishes and other fall themed treats and we're going to use these two weeks of downtime to share them once again.
As always, stay tuned to our Twitter feed or Facebook page to keep up to date on our new posts. We'll be back to cooking brand new dishes on the week of 11/26.
We'll likely start the week out with a "tour" of our new cooking digs and give everyone an idea of the change we're making in cooking space (hint: it's huge). Stay tuned next week for some revisits of old holiday favorites. Until then,
~Cheers
Thursday, November 8, 2012
Hearty Autumn Flavors into One Dish
Good evening everyone! As it starts to feel more like fall-winter outside (where it's mild weather, but the temperature starts to cool way down,) I love to create dishes that take a little bit more effort to create. The hearth created by these kinds of dishes fills my belly and soul, that's why I continue to say that Fall/Winter cooking is the best. Tonight's dish is no exception: a hearty dish that takes quite a bit of effort to create with the end result being incredibly comforting.
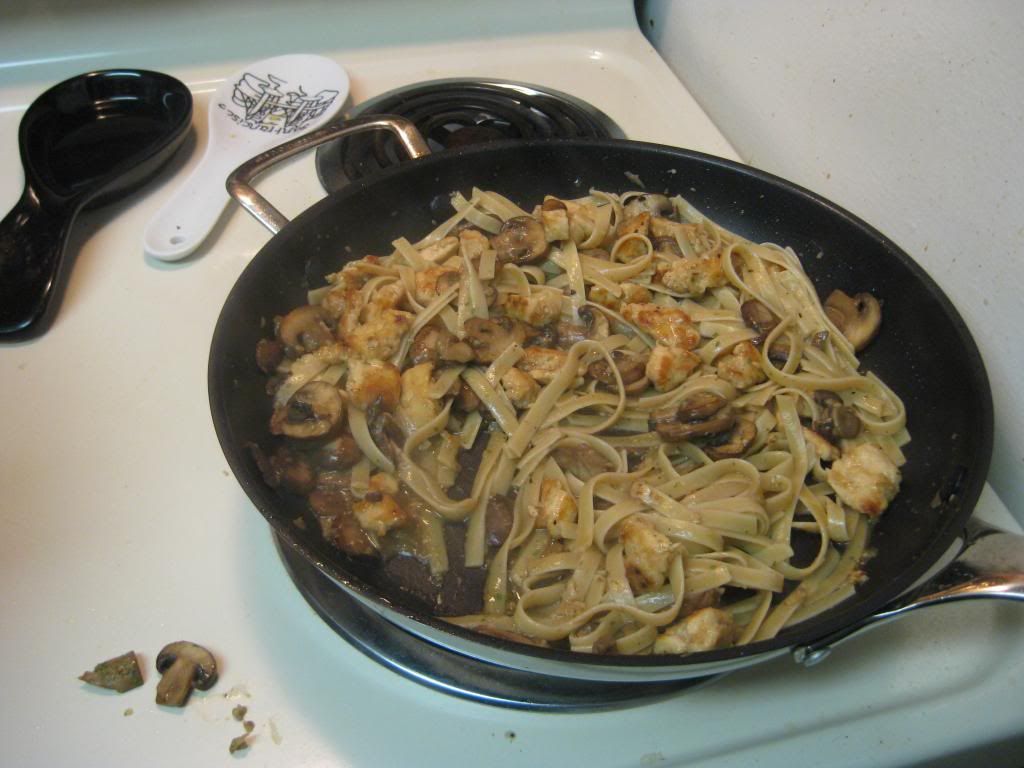
The Recipe: Chicken and Mushrooms in Garlic White Wine Sauce
Original Recipe Found In: Cooking Light, November 2012
What You'll Need:
4 Ounces uncooked wide Egg Noodles*
1 Pound skinless, boneless Chicken Breast halves
2 Tablespoons All-Purpose Flour, divided
1/2 Teaspoon Salt
1/4 Teaspoon freshly ground Black Pepper
2 Tablespoons Olive Oil, divided
1 Tablespoon minced fresh Garlic
1 (8 ounce) package presliced Mushrooms
1/2 Cup dry White Wine
1/2 Cup fat-free, lower-sodium Chicken Broth
1 Teaspoon chopped fresh Tarragon
1/4 Cup Parmesan Cheese, shredded
*Note: I am using remaining fettuccini noodles that we had left in our pantry.
To start, bring a large pot of water to a boil and cook the noodles according to the package directions, omitting any salt or oil when cooking. When the noodles are done cooking, drain in a colander and keep warm. Meanwhile, cut the chicken breasts into one inch pieces and place in a shallow dish. In a small bowl, combine one tablespoon of flour, 1/4 teaspoon salt, and 1/8 teaspoon of pepper. Sprinkle the chicken with the flour combination and toss to coat.
Next, heat a large, nonstick skillet over medium-high heat. Add one tablespoon of oil to the pan and swirl to coat. Add the coated chicken and cook until all the sides are brown, about four to six minutes, depending on how strong your stovetop is. We have found that our stovetop take a little bit longer to cook, so we have to make alterations to our recipes when cooking anything on a stovetop.
After the chicken is cooked, remove from the skillet and keep warm in a pan. Add the remaining tablespoon of oil to the pan. Add the garlic and mushrooms and cook until all the liquid evaporates, about three minutes. After the mushrooms are cooked, add the wine and cook for one minute. Add the remaining one tablespoon of flour and stir constantly for one minute. Finally, add the broth, the remaining 1/4 teaspoon of salt, and remaining 1/8 teaspoon of pepper, and continue to stir the sauce frequently until it has thickened slightly.
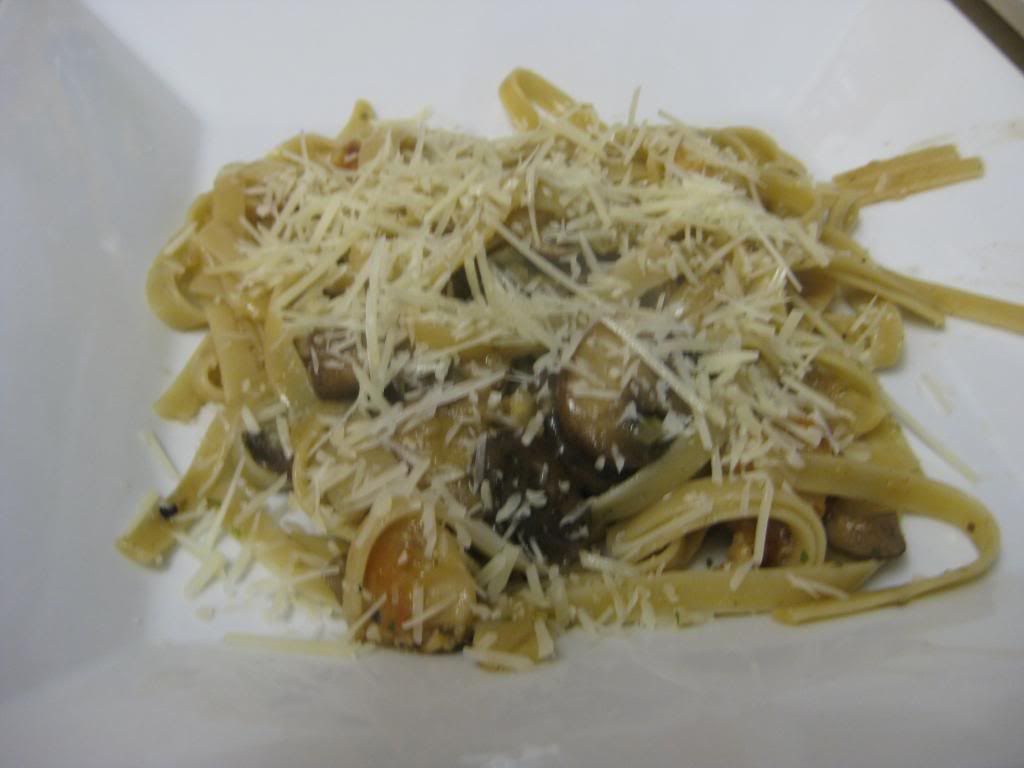
After the sauce is cooked, add the chicken back to the pan, cover with a lid and cook for two minutes. Once this is finished, uncover the skillet and continue to cook the chicken until done, about one minute. Stir in the noodles and tarragon and make sure it is heated throughout. Top with a sprinkle of Parmesan cheese, serve, and enjoy!
The End Result:
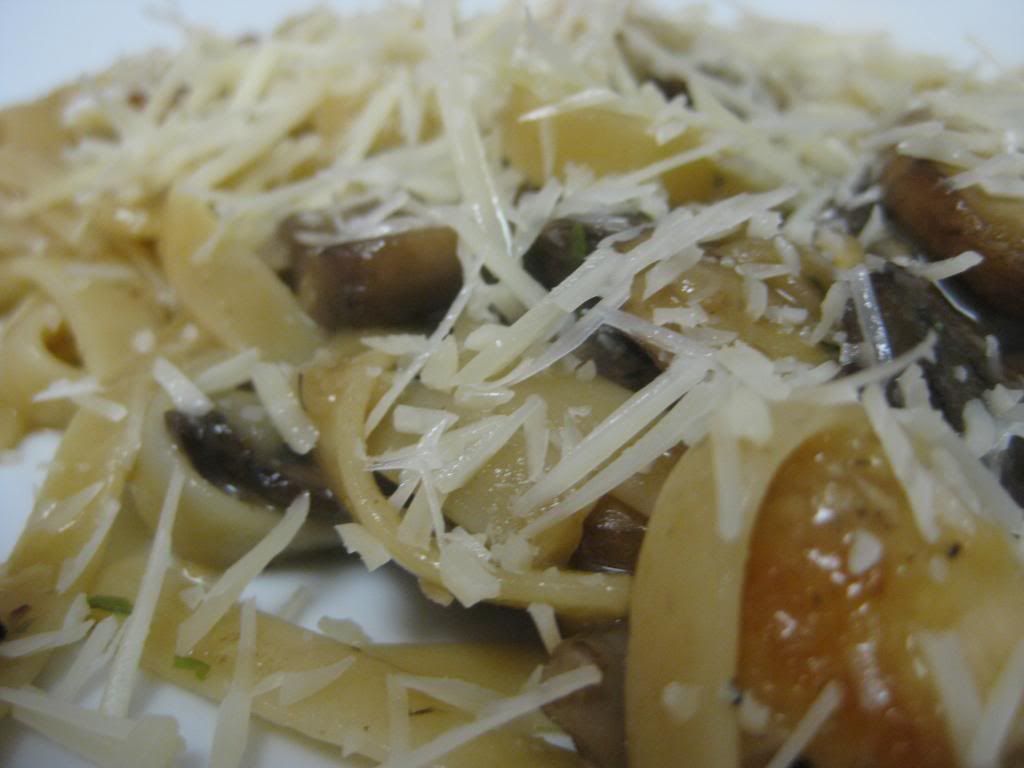
This recipe was the perfect accumulation of all the savory flavors you could meld into one dish. The chicken, mushrooms, and pasta were coated in this great sauce that had hints of garlic, wine, and chicken broth. Although we used dried tarragon, using fresh would have really amped up the flavor of the entire dish. Adding the Parmesan cheese at the end rounded out a really great dish that gives that exemplifies the term hearth.
Stop by tomorrow as we share our Thanksgiving schedule for the blog. Until then,
~Cheers!
Tuesday, November 6, 2012
Getting Creative With A Classic
Good evening everyone! November is one of our favorite culinary times of year. Stews, soups, pot pies and other warm, filling dishes are all in season and just begging to be cooked up. This week, as I was scanning our usual sources of inspiration I stumbled across a dish that got my creative juices flowing.
In this month's Food Network Magazine was a recipe for Slow Cooker Sauerbraten - what intrigued me was the idea they had one recipe later. They used the leftovers from this dish and created a casserole (resembling a pot pie) with a creamed corn topping. While the original recipe was a bit more demanding (long "need" list at the grocery) than I wanted to take on, I decided that I would take the ideas from these recipes and apply them to my own creation.
Lets get cooking!
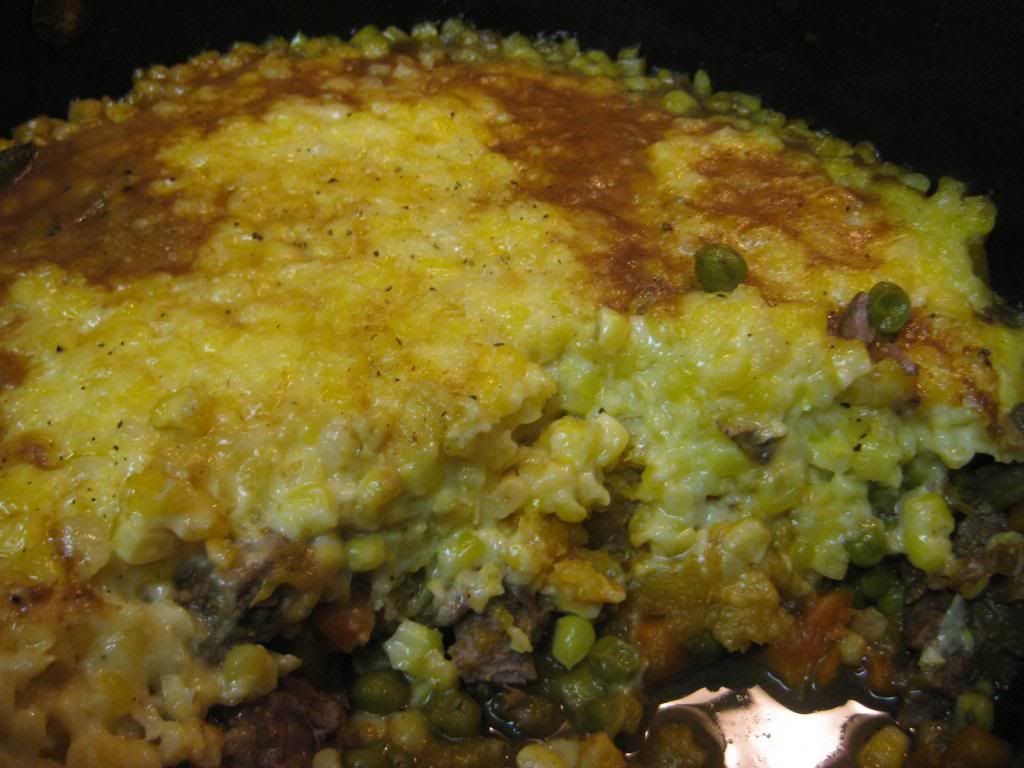
The Recipe: Creamed Corn Pot Pies
This is an Out of the Culinary Original Recipe
What You'll Need:
(Serves 4)
12 - 18 Ounces Stewing Beef or Beef Tips
2 Tablespoons Extra Virgin Olive Oil
2 Tablespoons Tomato Paste
1 Cup Red Wine
1/2 Cup Red Wine Vinegar
1 Cup Low Sodium Beef Broth
1 Small Bag Frozen Vegetable Medley (Carrots, corn, peas - etc.)
8 - 10 Ounces Cubed Butternut Squash*
* Most grocery stores have already cut and cubed butternut squash in their frozen sections or in a refrigerator cabinet next to the produce.
To begin, preheat your oven to 300 degrees or find a 4 quart slow cooker.
Add the olive oil to a Dutch oven over medium high heat and warm the oil until it begins to shimmer slightly. Once shimmering, add the beef (seasoned with salt and pepper) to the Dutch oven and cook for 3 to 5 minutes, or until the outsides of the beef are browned.
(You'll want to brown the beef here as the searing creates a barrier that keeps the beef's natural juices in during the cooking process.)
Next, add the tomato past, red wine, red wine vinegar and beef broth to the pot and give the mixture a good stir. Bring the mixture to a light simmer before adding the frozen veggies and the cubed butternut squash. Stir the mixture again before placing the lid on your Dutch oven and moving the pot into the oven for 3 to 5 hours. (If you're using a slow cooker, transfer the contents of the dutch oven to the slow cooker and allow the mixture to cook on low for 5 to 8 hours).
While you're beef and veggies are cooking - you can turn your attention to the creamed corn. Now, you certainly can you canned corn for this recipe - but in my experience I've found canned creamed corn to be lacking flavor and full of sodium. Instead of using a subpar ingredient, I found a recipe from Alton Brown that should give us a whole lot better result.
The Recipe: "Better Than Granny's" Creamed Corn
Original Recipe From: Alton Brown
What You'll Need:
1 Small Onion (Diced)
1 Tablespoon Butter
8 Ears of corn (Kernels removed - alternatively, you can use frozen corn)
1 Tablespoon Sugar
2 Tablespoons Yellow Cornmeal
1 Cup Heavy Cream
Melt the butter to a medium saucepan over medium heat, add the onion and a pinch of salt and cook the onions until they "sweat" and become translucent. This takes about 3 minutes.
Next, add the corn to the saucepan (including any of the "juices" from the corn - if you cut it off the cob) and allow it to simmer for 2 to 4 minutes. Sprinkle the sugar in and stir well. Add the cornmeal and whisk well to make sure it is evenly incorporated. Finally, add the heavy cream and stir constantly for 2 to 3 minutes until the mixture thickens.
Season with salt and pepper to taste.
Store your creamed corn in the refrigerator until you're ready to finish preparing your dish.
After your stew has had all afternoon to...well...stew, remove it from the oven and give the mixture a good stir. Increase the oven heat to 400 degrees.
Carefully spread your creamed corn from earlier across the top of the stew. (You're essentially creating a lid with the corn). Once all of the corn has been spread across the top of the stew, place the Dutch oven back into the oven (no lid this time) for 30 to 40 minutes, or until the creamed corn has browned slightly. Serve and enjoy!
The Results:
First and foremost - hats off to Mr. Alton Brown as his creamed corn recipe is simply extraordinary. If you take nothing away from the main recipe, at the very least you have to try this creamed corn dish for yourself. It's the perfect blend of sweet corn with a creamy base - in a word - outstanding.
This delicious corn recipe coincided with my country stew recipe beautifully. Allow the corn to bake for 30 minutes really helped create a traditional pot pie "lid" giving the dish a nice, slightly crunchy crust. The sweet / rich harmony of the creamed corn topping blended beautifully with the hearty stew flavors creating a brand new blending that I've never tasted in a pot pie before.
This recipe is perfectly suited for these cool fall days. It's warm, filling and full of flavor. Give this one a try and you're sure to love it too!
That's all we have for you this evening. Maggie will take to the kitchen Thursday night with a brand new dish of her own. Stop in then to see what she has cooking. Until then,
~Cheers
Thursday, November 1, 2012
Experimenting with the Classics
Good evening everyone! Here on the blog, we like to try different variations of the same recipe, most notably the breaded chicken dish or the white fish variant. While we have tried the various different meats, we haven't dabbled a whole lot into pasta. We have tried this dish before, but we haven't tried "the classic" version of this...until tonight.
The Recipe: Classic Spaghetti Carbonara
Original Recipe Found On: www.foodnetwork.com
What You'll Need:
1/2 Pound Bacon, chopped
1 Tablespoon Garlic, minced
1 Pound dry Spaghetti
4 large Eggs
1 Cup grated Parmesan cheese
1 Teaspoon dried Parsley leaves
To start, bring a large pot of water to boil. Once the water is boiling, gently slide the dry spaghetti noodles in the boiling water and cook to package directions indicate al dente. Once cooked, pour the spaghetti into a colander, shake to remove excess water, and set aside.
Next, heat a large nonstick skillet over medium heat. Add the chopped bacon and cook the bacon until crispy, about six minutes. I prefer my bacon to be slightly undercooked, not extra crispy, so it'll be cooked less than six minutes. Remove the bacon and place on paper towel lined plates. Pour three tablespoons of the bacon grease into a small container. Remove the rest of the grease from the skillet and reintroduce the bacon grease.
Add the minced garlic to the skillet and season with black pepper. Saute the garlic and pepper until fragrant, about 30 seconds. Add the bacon and pasta to the skillet. Stir this mixture for one minute until everything is mixed through. In a small bowl, beat the eggs until they are well mixed and season with salt. Remove the pan from the heat and add the eggs to the pan. Whisk the eggs, bacon, and pasta until the eggs thicken, but not scramble. Add the cheese and reseason with salt and pepper. Pour into serving bowl, sprinkle with the parsley flakes, serve, and enjoy!
The End Result:
The classic version of carbonara is exactly that: tried, true, and classic. The fact of using eggs and cheese really adds a creaminess to the dish that can't be topped with any sauce either handmade or in a jar. Also, it is such an easy process to create the sauce that it's a delight when you're in the kitchen. Bacon makes any recipe delicious and tonight is no exception. Normally, bacon doesn't go into pasta dishes, but this tops the cake of any bacon/pasta combinations out there. Overall, a great base recipe that can have all sorts of variations - it's all up to the imagination to experiment with other ingredients to create a great dish.
That's all we have for you this week. Join us next week as we journey into another batch of recipes. Until then,
~Cheers!
The Recipe: Classic Spaghetti Carbonara
Original Recipe Found On: www.foodnetwork.com
What You'll Need:
1/2 Pound Bacon, chopped
1 Tablespoon Garlic, minced
1 Pound dry Spaghetti
4 large Eggs
1 Cup grated Parmesan cheese
1 Teaspoon dried Parsley leaves
To start, bring a large pot of water to boil. Once the water is boiling, gently slide the dry spaghetti noodles in the boiling water and cook to package directions indicate al dente. Once cooked, pour the spaghetti into a colander, shake to remove excess water, and set aside.
Next, heat a large nonstick skillet over medium heat. Add the chopped bacon and cook the bacon until crispy, about six minutes. I prefer my bacon to be slightly undercooked, not extra crispy, so it'll be cooked less than six minutes. Remove the bacon and place on paper towel lined plates. Pour three tablespoons of the bacon grease into a small container. Remove the rest of the grease from the skillet and reintroduce the bacon grease.
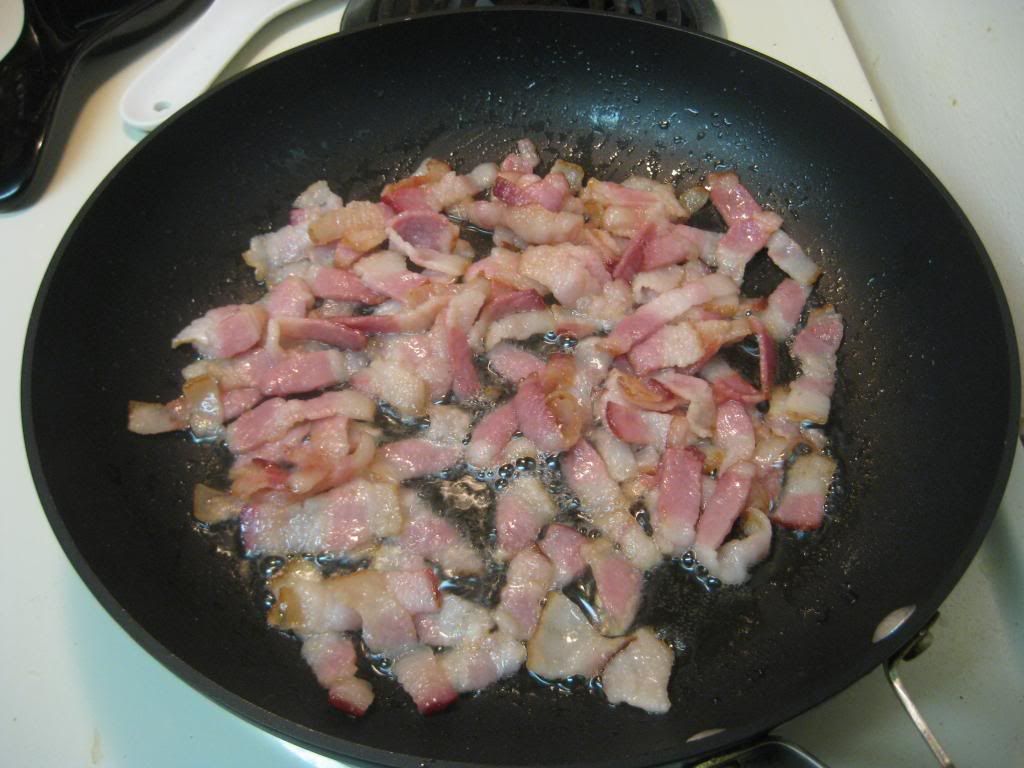 |
| Nothing is quite like bacon cooking in a skillet... |
Add the minced garlic to the skillet and season with black pepper. Saute the garlic and pepper until fragrant, about 30 seconds. Add the bacon and pasta to the skillet. Stir this mixture for one minute until everything is mixed through. In a small bowl, beat the eggs until they are well mixed and season with salt. Remove the pan from the heat and add the eggs to the pan. Whisk the eggs, bacon, and pasta until the eggs thicken, but not scramble. Add the cheese and reseason with salt and pepper. Pour into serving bowl, sprinkle with the parsley flakes, serve, and enjoy!
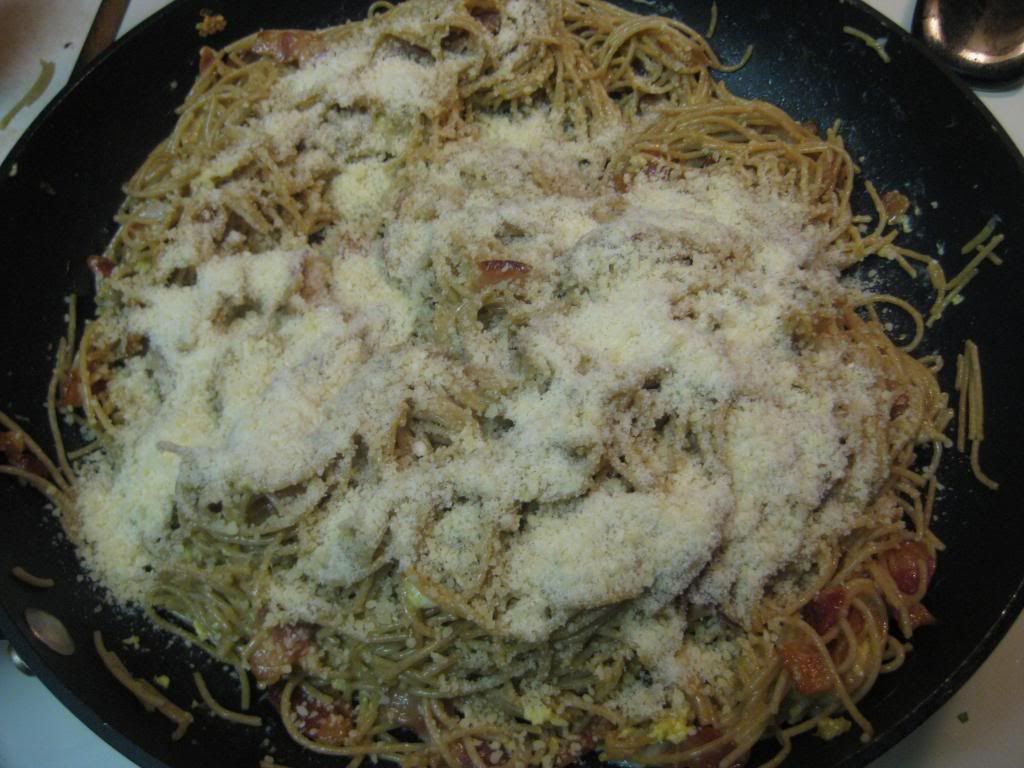 |
| Cheeeeese |
The End Result:
The classic version of carbonara is exactly that: tried, true, and classic. The fact of using eggs and cheese really adds a creaminess to the dish that can't be topped with any sauce either handmade or in a jar. Also, it is such an easy process to create the sauce that it's a delight when you're in the kitchen. Bacon makes any recipe delicious and tonight is no exception. Normally, bacon doesn't go into pasta dishes, but this tops the cake of any bacon/pasta combinations out there. Overall, a great base recipe that can have all sorts of variations - it's all up to the imagination to experiment with other ingredients to create a great dish.
That's all we have for you this week. Join us next week as we journey into another batch of recipes. Until then,
~Cheers!
Subscribe to:
Comments (Atom)


