Tuesday, January 31, 2012

A Freshness Makeover for Pasta

Good evening everyone!  As we were preparing for this week's dishes, we were trying to use up some of the ingredients from our pantry.  I was immediately reminded of one of our favorite Food Network shows: Chopped.  For those who haven't seen this show, four chefs are given a basket of four mystery ingredients to create an appetizer.  The lesser quality dish from one of the chefs will get eliminated - or as the show implies, chopped.  This process continues through an entree and dessert round, until only one chef remains.  This chef will receive a monetary prize and a Chopped title.  Oh, and the kicker, each round is only 30 minutes long and the chefs need to cook in that time frame.


Although I won't be rushed to create a fantastic dish, I did have a list of secret ingredients and will use them for tonight's recipe.  The main ingredient is not a frequently used ingredient here on the blog, but it's definitely unique and I have a great feeling about it.

The Recipe:  Orzo with Parmesan and Basil
Original Recipe Found On:  www.allrecipes.com

What You'll Need:

2 Tablespoons Butter
1 Cup Uncooked Orzo
1 (14.5 ounce) Can Chicken Broth
1/2 Cup Parmesan Cheese
1/4 Cup Fresh Basil (Chopped)

Orzo is a type of pasta that is slightly larger than the size of a grain of rice.  In fact, orzo is commonly mistaken as being a form of rice due to its similar shape, size, color and even similar texture.Even its Italian name 'risoni' means "big rice". Orzo used to be made from barely, but more modern interpretations of the pasta are now made from wheat or some form of wheat byproduct.


Orzo is typically used in dishes with a heavy sauce, and it pairs well with a ragu and works great in a casserole. It's a fairly hearty pasta despite being fairly diminutive in size. You'll frequently see orzo as a filler in many Italian dishes that are predominatly 'sauce heavy'. The beauty of orzo is that it works quite well with lighter influences such as lemon and herbs as well. Some more modern dishes have even begun to feature the petite pasta as the star of the dish.


While its origins are from Italy, orzo has made its way into Middle Eastern cooking as well as Greek and Turkish cuisine. But the most important thing about orzo's history is to remember that it's a pasta, not a rice, so be sure to look next to the spagetti in your grocery store, rather than amongst the rice!


To begin preparing the orzo, melt the butter in a large non stick skillet over medium-high heat. Warm the butter until it turns a light golden brown.  Stir in the orzo and sauté until the pasta is slightly browned, this takes around 5 minutes.

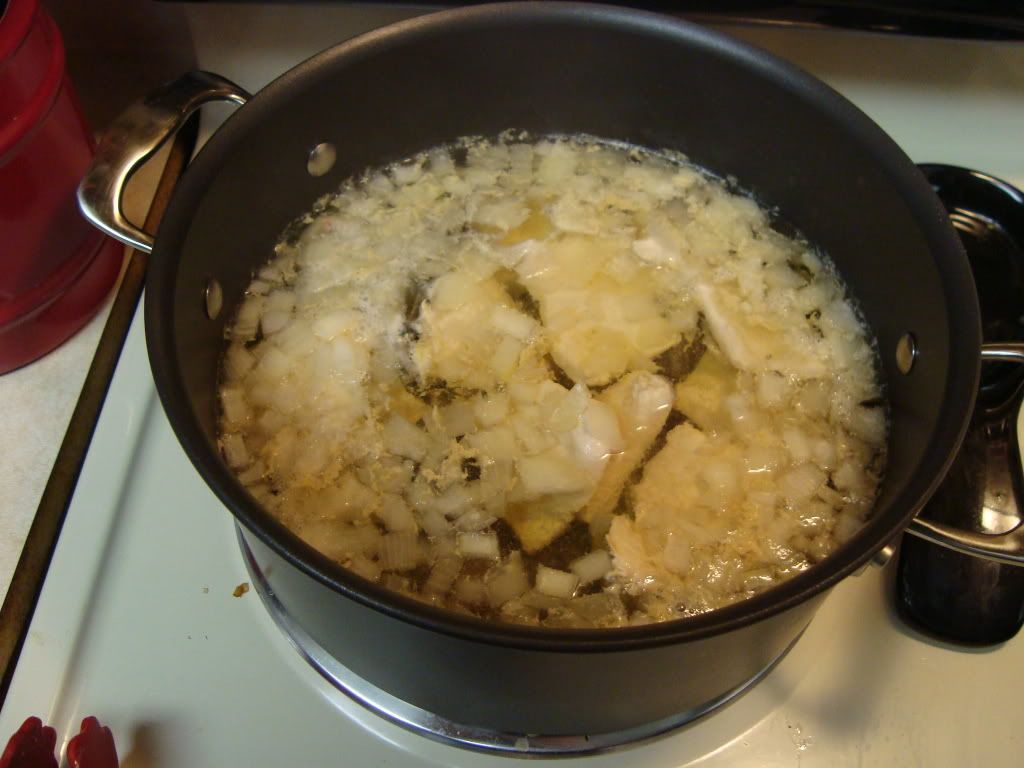
The obligatory 'boiling pasta' picture

Next, stir in the chicken broth and bring the mixture to a boil.  Cover the skillet with a glass top and reduce the heat to medium or medium low. Allow the mixture to simmer until the orzo is tender and the liquid is absorbed, about 15-20 minutes.  Give the orzo a quick stir as you add the parmesan cheese. You may have to add the cheese in segements to allow it all to melt evenly. Finally, stir the basil into the skillet.  Season with salt and pepper, serve, and enjoy!

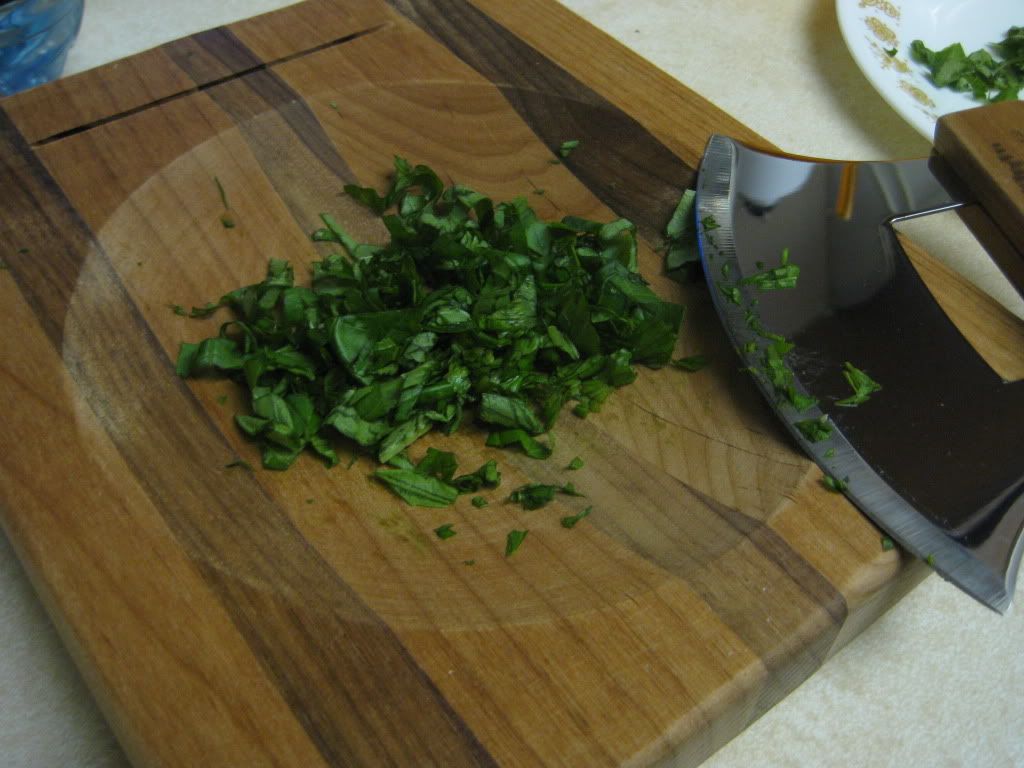
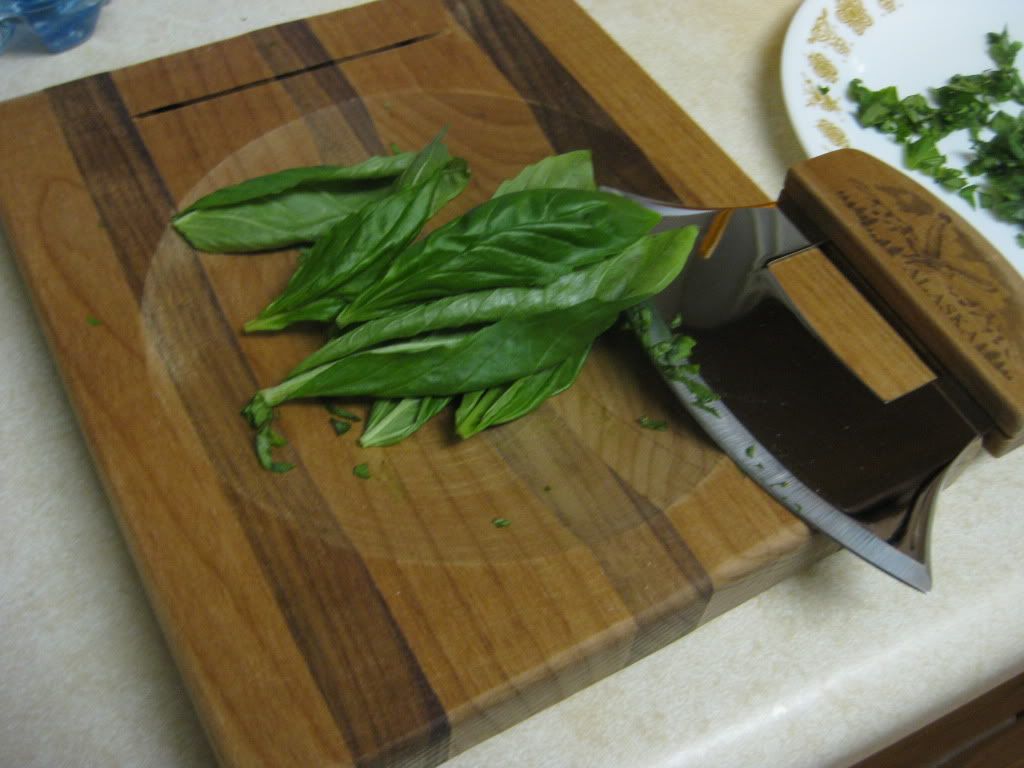
Basil, pre chopped, in our handy curved cutting board
And post chopped


The End Result:


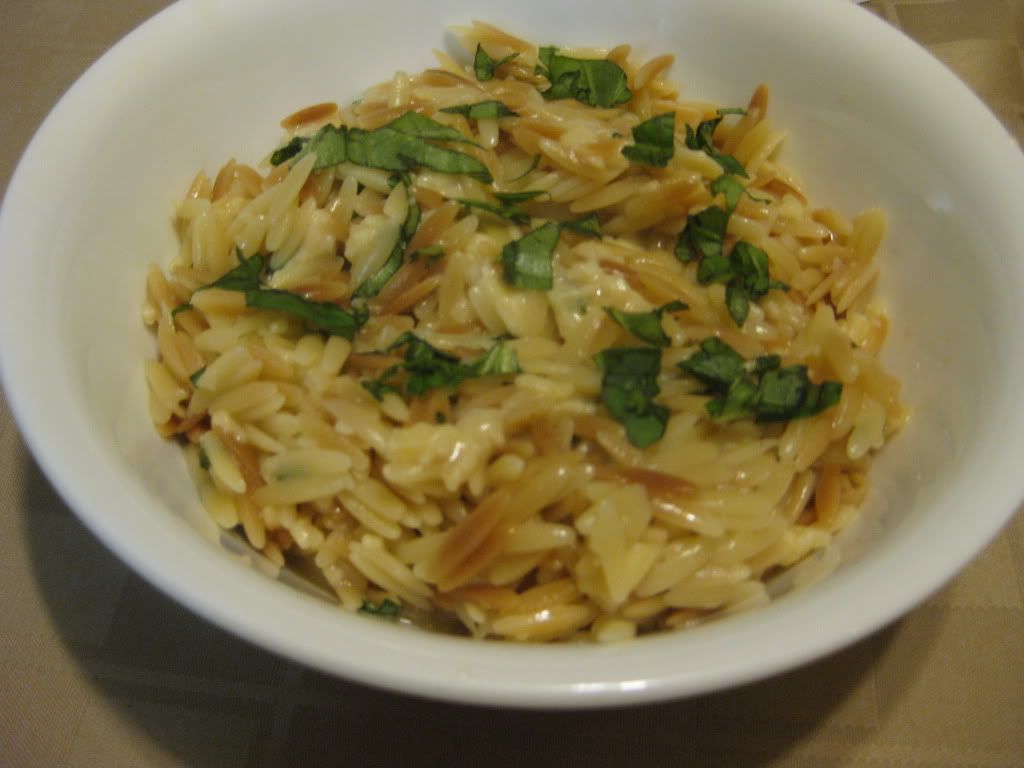
Even though this is a fairly quick recipe, it packs quite a delicious punch.  The cheese we purchased was finely grated, which made it really easy to melt and to cover over the orzo.  The fresh basil added a nice herby flavor to the entire dish and made it really fresh.  Even adding chicken or some sort of meat and/or herb and cheese would step the dish up to another level.  As we were eating, it reminded me of the my own creation: "Italian Spaghetti".  This includes spaghetti covered in olive oil, shredded parmesan, and dried basil.  This dish was way better because you won't be covered in olive oil after eating it.  Also, the flavor quotient is taken to the next level with the fresh ingredients.  Overall, a quick and easy dish to whip up in the middle of the week and to use again and again.


Join us tomorrow as Tyler tries to recreate one of our favorite eating establishment dishes.  Until then,

~Cheers!

Monday, January 30, 2012

Around The Culinary World

Hello again everyone! What a difference a week makes. Here in the greater Iowa / Midwestern US, we’ve switched from 1-6 inches of snow (and freezing rain) last week to 50 degree temperatures this week. Currently in the greater Des Moines metro, we have absolutely no snow on the ground and the forecast calls for rain (!) and 50 degree temps all week. Beautiful!


There’s no better way to start a beautiful week than with a trip around the culinary world looking at all of the food news, stories and reports for the coming week.

Before we start, no – we’re not giving any more page time to that horrible human Paula Deen whose crappy cooking gave her diabetes, which she hid from her fans for three years (so she could keep peddling her crappy cooking). When she finally revealed that the horrible way she prepares food has given her a completely preventable disease, she did so alongside an announcement that she was ‘partnering’ with a diabetic drug company. This woman had her publicist quit over her handling of this situation (I wonder why..) and her own kids feel like she’s making a cash grab. Oh, and she is still out eating cheeseburgers and carrying on like it’s all great. Paula Deen is everything that is wrong with the culinary world’s image. Chefs like this give the real ones a bad name; the professional & amateur ones who are trying to show that cooking can be a HEALTHY option have to fight the fat chef, diabetic chef, unhealthy chef notions that this “chef” has put into people’s heads. No, we will no longer discuss this woman’s activities or actions on our blog. Chefs like Anthony Bourdain and others in the food world have absolutely (and deservedly) skewered Deen recently– Bourdain's comments are especially true. (End of rant)


On to the actual news for the week: If you ever needed more motivation to find out where your food comes from, here you go. US exports of pork are coming under fire from China and the European Union due to the usage of the drug ractopamine. The drug is injected into pigs (and other animals) right up until they’re slaughtered. It’s meant to keep the animals lean (more meat per pound) and increase their growth. It does this by mimicking stress hormones in the animal, increasing their heart rate and relaxing their blood vessels. 13 years ago, upon its introduction to the food industry, the FDA deemed the drug to be safe for use and consumption. It has been tested multiple times over the past 13 years and each time the FDA ruled that consuming small levels of ractopamine posed little to no health risk for the end consumer. It should be noted that the drug has only ever been tested on animals, and that it was never rated for human consumption.

The catch is the drug doesn’t seem to be overly safe for the animals (surprise, surprise). In fact, ractopamine has sickened or killed over 218,000 pigs since its introduction. It’s common to see pigs or other livestock unable to walk or even stand after they’ve been introduced to the drug. In 2002, the FDA forced the manufacturer to disclose a warning on the drug after they saw a surge in ‘lame pigs’ during that year.

Ractopamine is banned in many other countries due to the possible effects the drug could have on humans consuming a product containing the drug. According to the manufacturer, 85% of the ractopamine content should have been lost from the animal within 24 hours of being treated, with the remaining content being lost over the next few days. However, countries like China and organizations such as the European Union have sent back entire US pork shipments because they found traces of the drug in the meat. The Department of Agriculture states that they have found levels of ractopamine during inspection of pork or beef products in the US, but they were below the levels of concern, so the products were allowed through production.

This whole story acts like a giant advertisement for the organic food industry. Food production standards in the US have been under fire for quite some time, and until the lobbyists and corporate money are removed from the law making process, this issue will continue. I’d hesitate to eat any animal that has been treated with a drug as harsh as ractopamine. The secondary effects on humans have to be a concern, and in some countries, they clearly are. This just goes to show, it’s worth spending the extra time to know where your local grocery store obtains its meat – or even spending the extra $2 to $4 to get a certified organic meat product. That way you know the pork you’re eating is simply pork – not pork with a cocktail of chemicals and additives. You can read a lot more on this story HERE.


Moving on to a more humorous story involving pork products, The Guardian recently shared the findings of a new medical study on nosebleeds. The result? The next time you have a nosebleed, you may want so shove a little cured pork up there to take care of it. You read that right, according to new medical research, “Cured salt pork crafted as a nasal tampon within the nasal vaults successfully stopped nasal hemorrhage promptly” The research was done in order to find a solution for a girl suffering from a form of nasal hemorrhaging that can actually be life threatening – so it’s a very important study. That being said, I just typed the phrase “nasal tampon” and we’re being told to shove a little pork up our nose to stop bleeding. Despite the significant medical findings…it’s still pretty humorous. (Note, this applies to cured pork – not bacon, there is a difference. Don’t go shoving bacon up your nose during your next nosebleed. You may not enjoy the results). Check out the full story HERE.

Scientifically referred to as "Nose tampon"


One of the greatest pleasures for any food lover is a fresh loaf of bread. Fresh, crispy and delicious, fresh bread is a great culinary treat that anyone can enjoy. (Not to mention, it’s fairly easy to make on your own). However, what do you do with the bread after a few days have passed and the bread is not so fresh any longer? Food52 has a list of 5 uses for leftover bread that will help you clear out the last of the old bread in some pretty inventive (and tasty) ways. Check out their ideas HERE.


You may be familiar with the website Zagat, they compare restaurants and bars and compose a score for the eatery based on customer feedback, user input and reviews. In fact, you may have seen some of your local restaurants boasting “#1 Zagat rated sandwich shop” or something similar on their doors or front windows. When your job is to review restaurants, you begin to see some trends – some of which are cause for concern. We previously shared their “Most annoying” list of restaurant trends in a past edition of Around The Culinary World – and now they’re back with part 2. Check out the trends that are beginning to annoy diners everywhere. Does your favorite eatery commit any of these no-no’s? Check out the list HERE.


One of our favorite restaurants is Smashburger. The fresh, juicy burgers, amazing fries and atmosphere make it one of the best places to get a burger in the Des Moines metro. Recently, Reuters previewed Smashburger, taking a deeper look into how the company works and what it has done to separate itself from the fast food burger crowd. It’s an interesting look into a younger, progressive ‘fast food’ chain that is everything but your traditional fast food chain. Check out the full profile HERE.
That’s all the news that’s fit to blog about this week. (With a free Paula Deen rant too!) We’ve got another full week of healthy and delicious cooking lined up for you – Maggie will take to the kitchen on Tuesday with a dish that has her feeling like she’s on a Food Network show. I’ll follow her on Wednesday night with my attempt to recreate the delicious seasoned chicken that Chipotle serves up in their burritos. I’ll even try to make their recipe a little bit healthier too. It’s sure to be a fun week of cooking, so be sure to stop in tomorrow night to see what Maggie’s got cooking. Until then,


~Cheers

Wednesday, January 25, 2012

Pan Grilled...er, Smoked Pork

Good evening everyone! As many of our readers know, I frequently like to experiment with different flavor combinations. Whether these flavors work or not, it's all about experimentation and seeing if the text translates to taste. The flavors I am trying tonight will be completely new for the blog. I am expecting it to work, especially with the meat I am using with it. But will experimentation lead to a new flavor or failure??

The Recipe: Pan-Grilled Ginger-Honey Pork Tenderloin
Original Recipe Found In: Cooking Light, January/February 2012

What You'll Need:
1 Tablespoon grated peeled Ginger
3 Tablespoons Honey
1Tablespoon fresh Lemon Juice
1 Tablespoon lower-sodium Soy Sauce
1 (1 pound) Pork Tenderloin, trimmed

The beauty of this recipe is that it only has five ingredients. Sometimes it doesn't translate that well because because of its simplicity. Other times that's what defines the dish. I've never hear of a ginger/honey/pork combination before and I'm really hoping it turns out well.


To start, combine the ginger, honey, lemon juice, and soy sauce in a bowl, whisking together until smooth. Coat a grill pan with cooking spray and heat over medium high heat. Sprinkle the pork with salt and pepper.


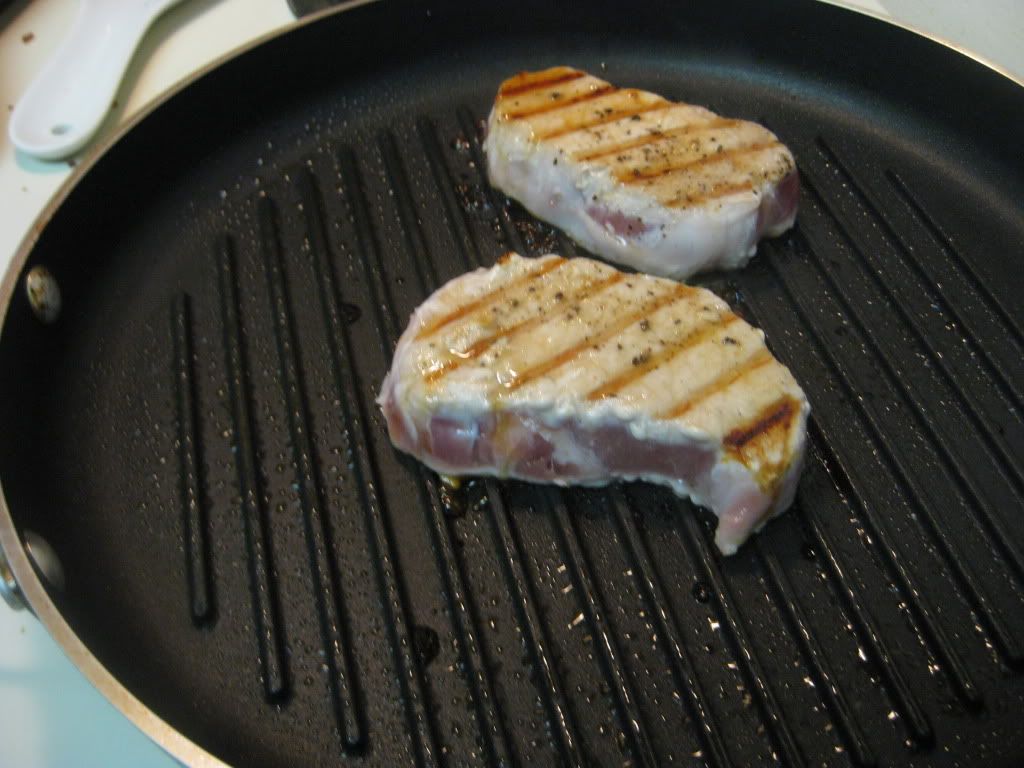
After one flip on the grill pan...


Add the pork to the grill pan and cook for 15 minutes or until a meat thermometer reads 145 degrees. Since this is my first go-around with pork, I'll stick with the 'done meat rules' at 145 degrees. Frequently baste the pork with the sauce while cooking to be sure the sauce with stick with the pork. This will give it a nice, dark, carmelized color, due to the sugar in the honey. After cooking, let the pork rest for five minutes to reserve all those juices and flavor. Serve and enjoy!!


 After the second flip...


The End Result:


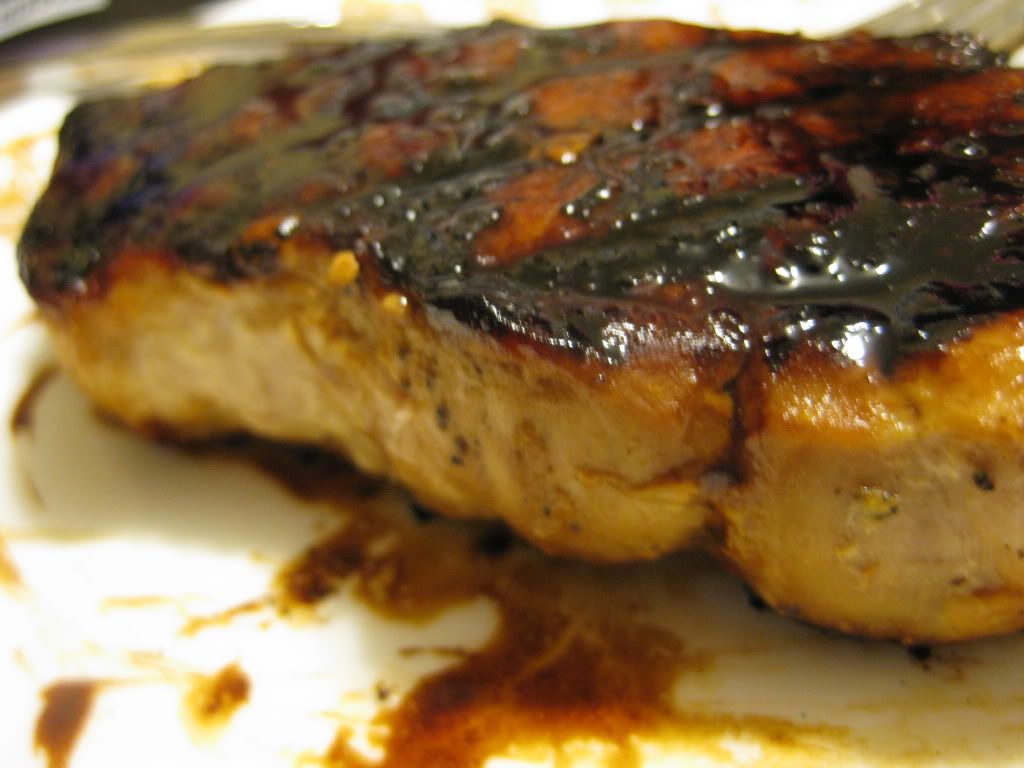
I honestly had no idea what I would end up putting in the end results prior to cooking this dish, I assumed the flavors would be good but unfortunately, the unique flavor that I wanted out of the dish was cooked out.  I didn't flip the pork as much as I should have and I ended up with a smoky mess.  I kept basting the pork but didn't turn it enough. This meant the honey caramelized and then went right on to burning.  If I had kept my eye on the pork, it probably would have retained some of the flavor. Underneath the crust there were still some good morsels of the glaze. What wasn't burnt was actually quite tasty. A good premise with unique flavors, but fell flat on its face, due to the lack of supervision by me. Tonight was another lessoned learned. This glaze goes from golden to crunchy in a very short amount of time. 


That's all we have for you this week.  Join us next week as we start off the week with a fresh batch of news from Around the Culinary World.  Until then,


~Cheers!

Tuesday, January 24, 2012

Light & Crispy

Good evening everyone! Before we begin cooking tonight, I’d like to take a moment to share with you the process that brought me to tonight’s recipe. I was browsing the 2011 Annual Edition of Jamie Oliver’s magazine (“Jamie” $15.99, full of all of the recipes from 2011’s issues) when I came across a recipe for breaded cod and sweet potato fries. A quick peruse of the ingredients and process led me to believe this would be a solid recipe… but some part of me knew it wasn’t going to be quite good enough. Why? Well, back in August of 2010, I made THIS breaded cod recipe, which has set the benchmark for all other breaded cod dishes to measure up to. While this doesn’t mean I will not try another variant of breaded cod, it does mean that any dish I contemplate taking on has lofty expectations to live up to.


The beauty of Jamie Oliver’s recipes is that they are very easy, usually great tasting and are always health conscious. The downfall is that sometimes, they’re a little too simplistic in flavoring. Jamie loves to have the natural flavors of a dish shine through, which was the concept behind his breaded cod recipe. I prefer to give the cod a little nudge (it’s a fish that can really shine with a helping hand in my experience, on its own it’s simply ‘OK’). The only downside to my preferred breaded cod recipe? It’s an America’s Test Kitchen recipe, which, if anyone watches the show or has tried ATK’s recipes you know that healthy is usually the fourth or fifth priority on their list.

So, I decided to meet in the middle. Using Jamie’s inspiration to keep everything healthy, I decided to see if I could adapt the original breaded cod recipe – the one that set the bar so very high back in 2010 and try to trim some calories without compromising the overall flavor.


The Recipe: Light & Crispy Oven Fried Cod
An adaptation of 8/26/10 recipe: Super Crispy Oven Fried Cod
(Changes notated with an *, see corresponding note below for explanation)

What You’ll Need:

4 Slices 100% Whole Wheat Sandwich Bread*
1 Tablespoon Vegetable Oil**
2 Teaspoons Dried Parsley
1 Small Shallot (Minced)
¼ Cup All Purpose Flour – Plus 5 Additional Tablespoons
2 Large Eggs
3 Tablespoons Light Mayonnaise***
½ Teaspoon Paprika
¼ Teaspoon Cayenne Pepper
2 Cod or other whitefish fillets

* Originally 4 slices of high quality white sandwich bread.
** Originally 2 tablespoons of butter. The butter was in place to help brown the breadcrumbs in the early stages. Vegetable oil will do this task as well, but only will require half of the amount and will lower the calories at the same time.
*** Originally “regular” mayonnaise.


The Recipe: Oven Baked Sweet Potato Fries
Original Recipe Found In: Jamie Magazine Annual Edition (2011)

What You’ll Need:

2 Medium Sweet Potatoes (Scrubbed clean, cut lengthwise into 8 wedges)
½ Teaspoon Smoked Paprika
1 Tablespoon of Olive Oil


TO MAKE THE SWEET POTATO WEDGES:

Preheat your oven to 400 degrees. If you want to make this recipe alongside the cod you can choose to cook these wedges in a toaster or convection oven or simply put them in your 425 degree oven about 15 minutes ahead of the cod.

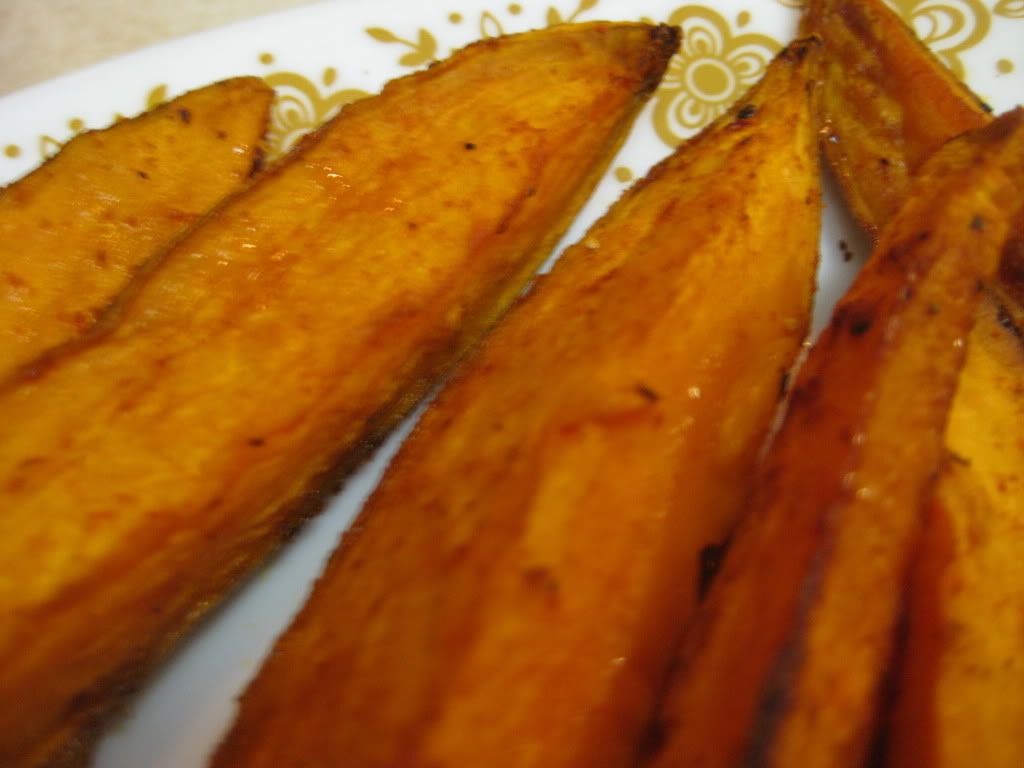
Toss the wedges in a roasting pan with the olive oil, paprika and a pinch of salt and pepper. Place the roasting pan (or transfer the wedges to a baking sheet – whatever works best for your oven) in the oven and cook for 30 to 40 minutes or until the wedges are golden and have softened. If you’re cooking the wedges in the same oven as the cod, you’ll have to reduce the cooking time to about 25 to 35 minutes to adjust for the slightly higher temperature.


TO MAKE THE BREADED COD:

To begin, preheat your oven to 350 degrees.

Tear your bread into larger sections and then place those into a food processor along with the vegetable oil and a pinch of salt and pepper. Pulse the mixture for about 8 to 10 seconds until everything is coarsely ground. (Only pulse for about 1-2 seconds per time, so ideally you’re looking for about 8 ‘pulses’ you don’t want to over grind the bread).

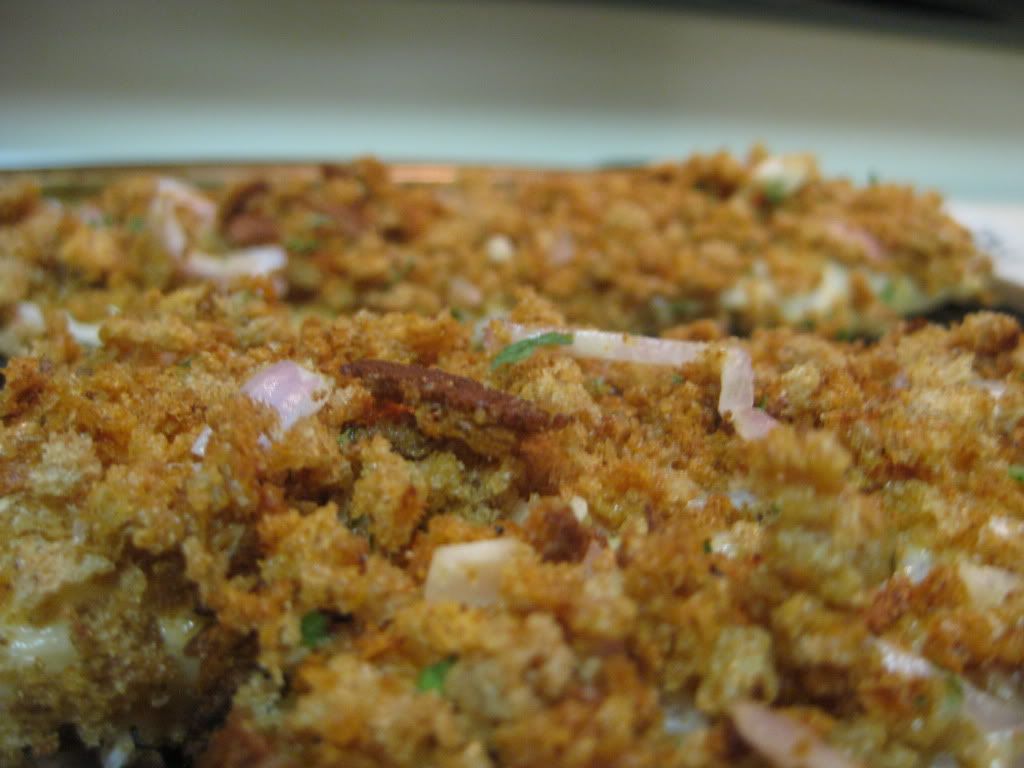
Transfer this bread mixture to a rimmed baking sheet and bake for 15 minutes, or until the bread crumbs have become a deep golden brown and are slightly crispy. Be sure to stir the mixture every 5 minutes to avoid over cooking any portion of the breadcrumbs. Once the crumbs have turned golden brown, transfer them to a large plate and add the shallot and parsley to the mixture, then set aside.

After removing the breading, increase your oven temperature to 425 degrees.

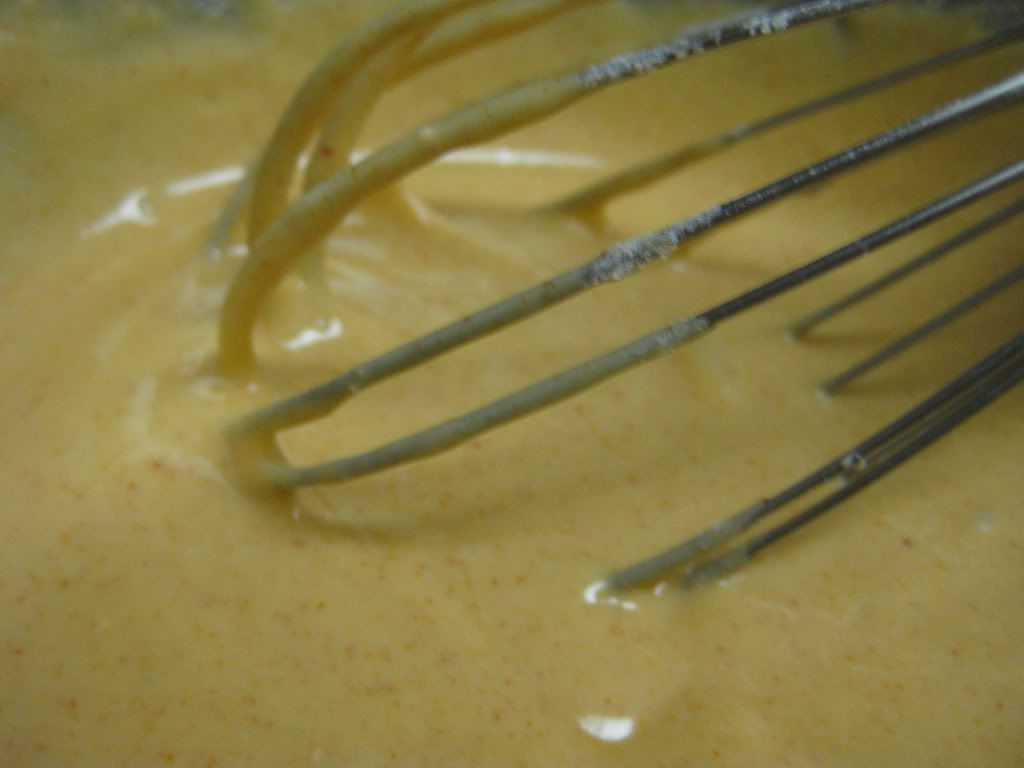
Add the ¼ cup of flour on a second plate and place it next to your breadcrumb covered plate. Finally, in a large bowl, whisk the eggs, mayonnaise, paprika, cayenne and a pinch of black pepper. Stir until blended. Next, add the extra five tablespoons of flour and stir this into the mixture. Your mixture will become very thick here – rather than a typical ‘wash’ that the eggs serve as during normal breading, this mixture almost becomes a batter. It will be messy – so be prepared to have a wet towel handy to clean up.


Place a wire baking rack on top of a rimmed baking sheet and give it a quick hit of cooking spray. Carefully dry off your fillets to make sure that any moisture is off of the fillets. I’ve said it once and I’ll say it again – you HAVE to make sure the moisture is almost completely gone before you try any breading recipe. Moisture is the undercover agent that will sabotage the recipe’s mission if left ignored. Lightly season the fillet with a pinch of salt and black pepper.

Arrange your plates in bowls in the (surely famous by now) assembly line style. Start with the plate of flour, place your egg/batter mixture next and end with the plate of breadcrumbs. Begin by dredging your fillets in the flour mixture, making sure to shake off any excess. Next, either dip the fillets into the egg/batter of spread the batter across the fillets with a knife or spoon. Normally, you’d allow the egg wash excess to drip off – but in this case, that mixture won’t be dripping so just make sure to cover all the sides with an equal amount of batter. Finally, roll the fillet into the breading, making sure all of the sides are evenly covered with breadcrumbs.


Place the breaded fillets on the wire baking rack and then into the oven. Allow the fillets to cook for 18 to 25 minutes, or until an instant read thermometer gives a reading of 140 degrees at the thickest part of the fillet. Serve and enjoy!


The Results:


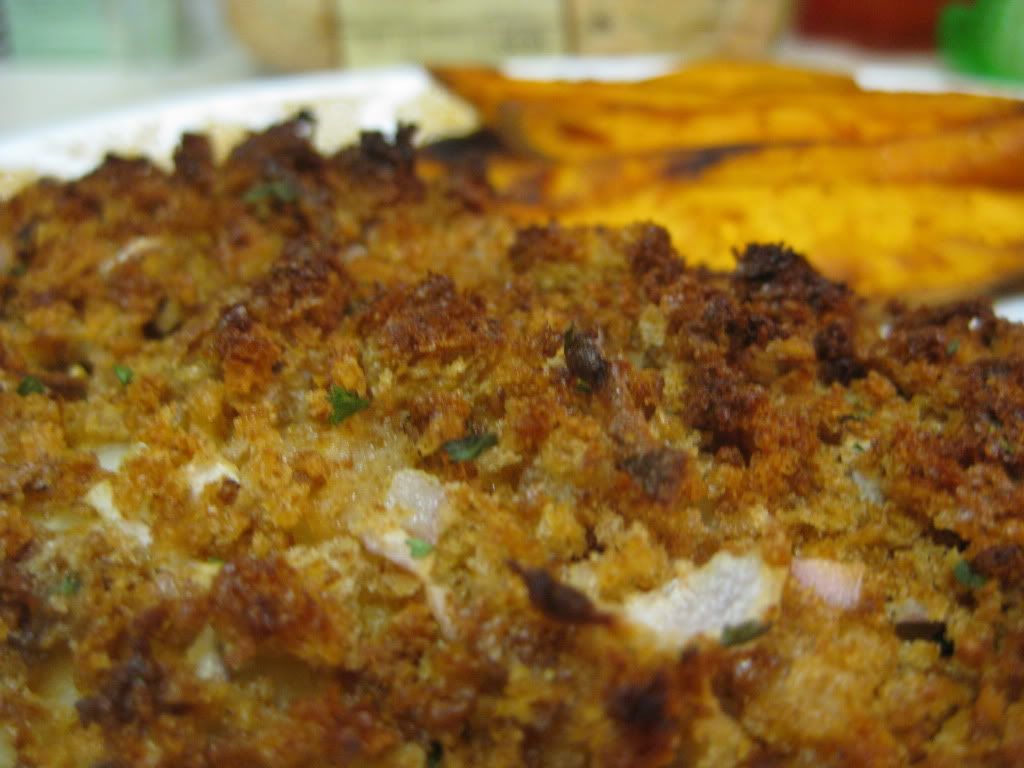
This recipe still stands as the pinnacle of breaded cod. The amazing flavor of the batter combines with the beautifully crunchy crust. The shallot & parsley adds an amazing dimension to these flavors – as we said in the opening, this is the benchmark that all other breaded cod recipes have to live up to. Much like the original, this dish continues to be the best cod recipe we’ve made to date. The small tweaks I made to the recipe had very little impact on overall flavor. Losing the butter didn’t seem to impact the final taste at all and switching the breading to whole wheat only changed the flavor profile slightly. All in all, I think we found a good way to blend Jamie’s healthy eating principles with ATK’s great flavor.

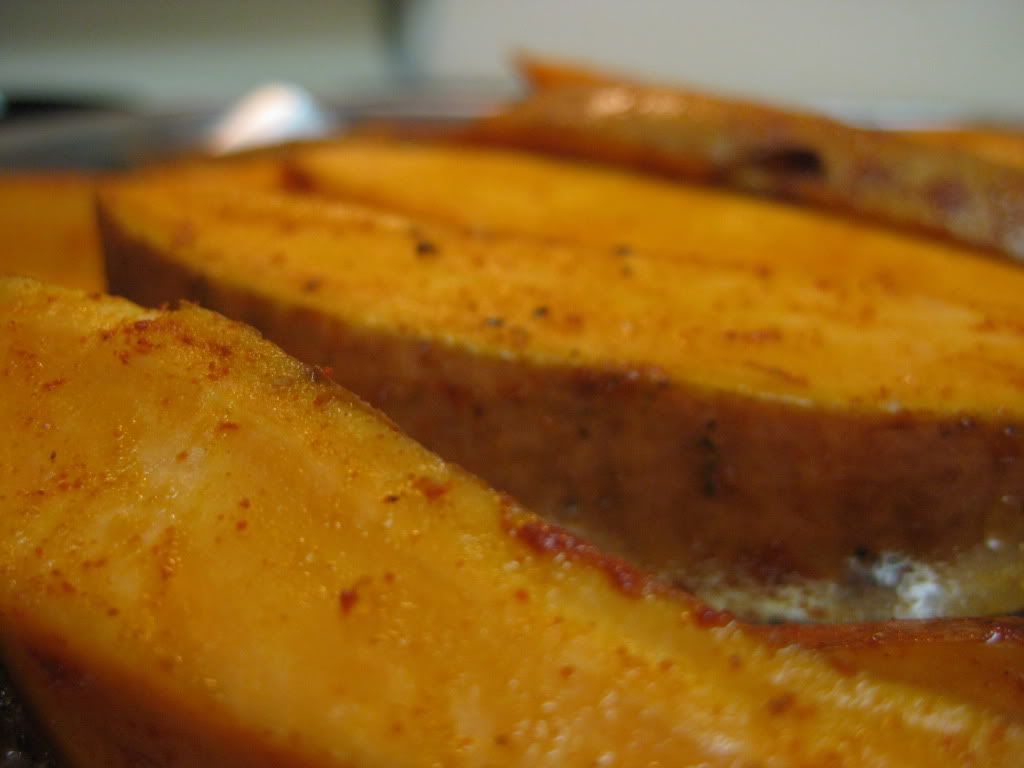
Oh and the sweet potato wedges? They’re oven roasted sweet potatoes. You cannot go wrong with oven roasted sweet potatoes. Make them, enjoy them. End of story.

That’s all we have for you this evening. Maggie is taking to the kitchen tomorrow night to try her had a new flavor blending. It’s one that has stood the test of time, but has never been tested in our kitchen. Tune in tomorrow night to see what she has cooking. Until then,

~Cheers

Monday, January 23, 2012

Around The Culinary World

Hello again everyone! Welcome back to another week of recipes, news stories and adventure here at Out Of The Culinary. Those of us who reside in the Midwest were reminded just how fun winter can be with last night’s ¼ to ½ inch of freezing rain and 1 to 2 inch snowfall. Some regions had that piled on top of an already beefy 5-8 inch snowfall. Winter is back folks. You don’t have to love it – but you can’t hide from it. Speaking of things you cannot hide from – the culinary news! We’ve got a full serving of culinary stories and tips this week, so let’s dive right in!


Often times, the food industry moves in trends. Whether it’s a particular food group (cupcakes are the current media darling) or a certain diet fad (for some reason, people are convinced gluten free products are a diet aide..) the culinary world can get caught up with a certain fad and run with it. In some instances, these products have true staying power and become a viable industry. In others, the product fades away relatively quickly.

The latest food group that is powering through the grocery store is Greek yogurt. The product accounted for $1 billion of the $4.1 billion annual yogurt sales last year (in its first major year on grocery shelves). Major yogurt makers were caught off guard by high demand, leaving smaller companies like Chobani alone to reap the rewards. Now, manufacturers are building new plants, upping production and planning on capitalizing on the latest trend.

Can Greek yogurt keep up its steam, or is demand already starting to taper in different regions. What makes Greek yogurt so special that it experienced this sudden shot to stardom? All of these questions and more are answered in this interesting article from the Huffington Post. Check it out HERE.


There are certain foods out there that are incredibly polarizing. They fall only in the ‘love them or hate them’ regions of the culinary world. Everyone has products or particular foods they don’t like (green beans for me) but these products transcend even the normal like / dislike and move into a whole new level of hatred (or perhaps love). Check out this ‘Top 10’ list of polarizing foods HERE. How many do you detest or love? I (somewhat surprisingly) came to the realization that there were quite a few foods that fell into this category for me (looking at you coconut). Do you see any surprises on this list? Or do you detest all 10?


It’s been proven that there is a correlation between plate size and the amount of food we eat. Given a larger plate, it’s our natural tendency to fill that plate a little more full than we would if the plate was a smaller size. (Not speaking on pure volume here, rather in terms of percentage). However, new studies may have found that the color of your plate could impact how much (or little) you eat as well. Scientific American has a very intriguing article in which they tested that very premise. So, should you run out and buy a whole new color palette of dishware? Check out the results HERE.


The humble potato chip has become anything but simplistic over the years. Faced with an ever competitive market, chip makers have been forced to think of new and innovative ways to keep their products ahead of the competition. The easiest way to differentiate your product from your competitor seems to be creating a unique (sometimes questionable) flavor. Kitchen Daily put together a slideshow of 10 crazy chip flavors currently available on store shelves. The article also links to a few other stories (and slideshows) featuring amazing (sometimes appalling) chip flavors. Check out the article (and the other links within) HERE.


One of our favorite places to dine out is Chipotle Mexican Grill. This fast food joint provides quick and delicious Mexican food that is made with fresh ingredients, right in front of your eyes (think Subway or Jimmy John's but with burritos). The true calling card of Chipotle is the amazing flavor that is packed into their chicken and beef. If you've ever wondered how to make this amazing burrito yourself, you're in luck. Kitchen Daily received a 'how to' from Chipotle themselves and have shared the recipe HERE. I'm going to put this recipe to the test next week and we'll share the results. In the meantime, you can read the article and maybe even give it a try yourself.


That’s all we have for you this evening. As always, we’ve got another full week of cooking lined up. I’ll take to the kitchen on Tuesday to revisit an old recipe that is actually one of our favorite dishes to date on the blog – but this time I’ll aim to make it healthier. Maggie will take to the kitchen on Wednesday night with a recipe that blends two flavors we’ve never tried before. It’s sure to be an interesting week – so stop back in Tuesday night to see what I’ve got cooking. Also, if you haven’t voted in our cookbook survey yet, please take a moment to answer a few questions in the post below this one. We appreciate your feedback! Until next time,

~Cheers

Thursday, January 19, 2012

Penny For Your Thoughts

Hello everyone! As you may or may not know, last year we produced a cookbook of the best recipes of 2011 from our blog. We were very proud of the finished product, but the sales figures were not all that exciting (Read: poor)

We're currently kicking around the idea of producing a new cookbook, but we would like some feedback from our community first. If you would be so kind as to take a few seconds to answer the survey below, we'd greatly appreciate it! Thank you!


Create your free online surveys with SurveyMonkey, the world's leading questionnaire tool.

Wednesday, January 18, 2012

Cooking Chicken with Hopefully Different Results

Good evening everyone!  Here in the Des Moines metro, we had another really chilly day - granted the temperature got up to the mid 30's, with that wind, it felt more like the single digits.  All I can say is: BRRRR!!  I don't like the cold weather just as much as the next person, but I have a difficult time warming up, so these temperatures are not very nice to my body.  Enough of weather, let's talk food!


It's been a while since I have cooked a chicken dish - mainly because every time I do a chicken dish, something seems to go wrong.  Whether it be smoking up the oven or not cooking it properly on the stove top, I can't quite get it down.  When I came across this recipe, it sounded something that would be relatively easy and not end up with a mess on my hands.  Will this recipe finally break my streak of failed chicken recipes?

The Recipe:  Creamy Chicken and Mushrooms (any thoughts on a more creative title are much appreciated!)
Original Recipe Found In:  Cooking Light, January/February 2012

What You'll Need:

4 Cups fat-free, lower-sodium Chicken Broth
2 Cups Water
1/3 Cup chopped Onion
3 Thyme Sprigs
1 Celery Stalk
4 boneless skinless Chicken Breasts halves
1 Tablespoon Olive Oil
1/2 Cup thinly sliced Shallots
2 Teaspoons minced Garlic
8 Ounces sliced Cremini Mushrooms
1/2 Cup Dry White Wine
2 Teaspoons All-Purpose Flour
1/2 Cup Creme Fraiche

For those of you who aren't aware, creme fraiche is a cream that is very similar to sour cream, but is less sour.  It also is very thick and has a higher fat content.  Mostly, it's used with fruits as a nice additive.  But I am using it tonight with its other use:  finishing sauce.  It won't be added until the very end and will, hopefully, give a smooth consistency to the finished product.


Creme Fraiche - pronounced like it's spelled


Begin by combining the chicken broth, water, onion, thyme sprigs, and celery stalk in a saucepan.  Add the chicken breasts and bring to a simmer for 15 minutes or until the chicken is done.  For some reason, our Dutch oven was rather persnickety tonight and took a while to get to 'simmer'.  Alas, once it finally did warm up, it was rather a quick boil, so I decreased the time to cook to 10 minutes.  Remove the chicken form the saucepan and let cool, shredding the chicken when the chicken is warm to the touch but not hot enough that you can't handle it.  Strain the cooking liquid through a sieve or a mesh strainer over a bowl, reserving one cup of the cooking liquid.


Simmering away...


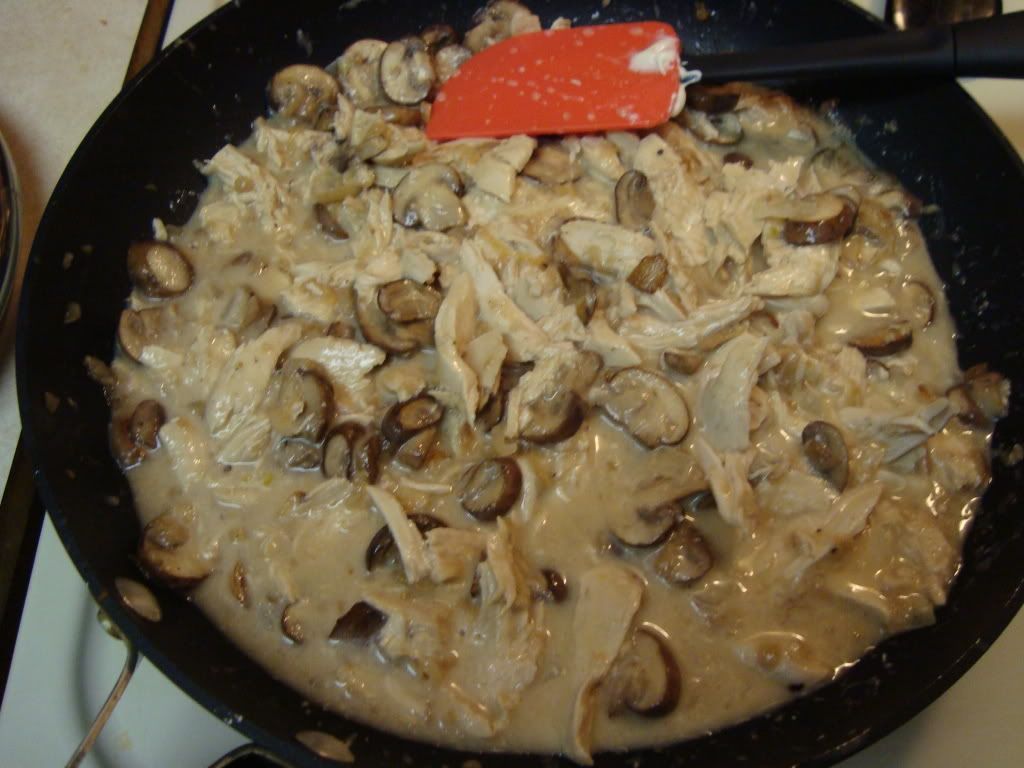
Meanwhile, heat a skillet over medium-high heat.  Add the olive oil, shallots, and garlic.  Saute for one minute, stirring frequently.  These next few steps are going to go really quick, so don't focus on other things, because this part will go rather quickly.  Add the mushrooms, salt, pepper and sauté for three minutes.  Add the white wine and cook until the liquid evaporates.  Stir in the all-purpose flour and cook for one minute.  Stir in the reserved cooking liquid and bring to a boil, cooking for one minute.  Remove from heat.  Stir in the chicken and the creme fraiche, serve, and enjoy!

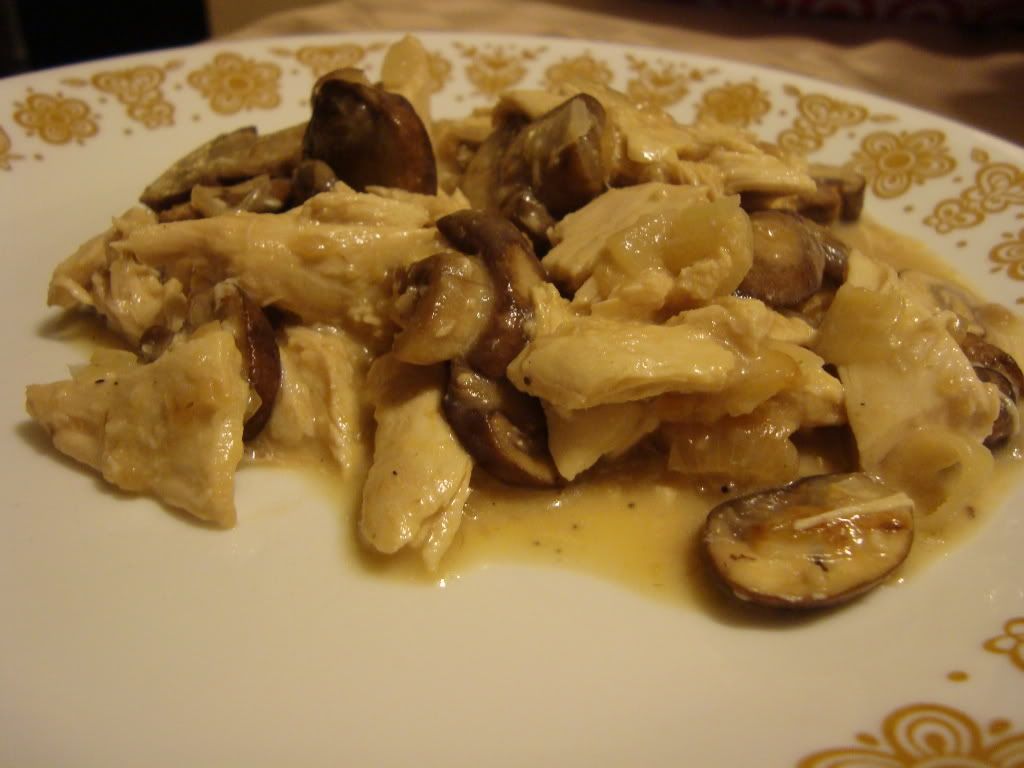
The End Result:


The creme fraiche really gives the whole dish an incredible creamy texture and doesn't add any strong flavors to it.  Even though it is relatively unknown in most household kitchens, creme fraiche is a great additive without adding extra flavor or calories.  I will admit that I have a bias towards sautéing mushrooms in garlic and/or shallots, because it really boosts the flavor of the mushrooms and makes it so much more delicious.  The entire dish had a little more liquid than what I would have preferred, but if you put it on toasted bread, like the original recipe called for, it would enhance it even more.   Overall, the flavor was incredibly consistent and was really flavorful.  You could dress it up with more spices and it would still be delicious.  The curse of the bad chicken recipes has been broken!


That's all we have for you this week.  Join us on Monday as we take yet another trip Around the Culinary World.  Until then,


~Cheers!

Tuesday, January 17, 2012

Light on calories, heavy on flavor

Good evening everyone! If you live in the greater Des Moines metro – welcome to winter! 2 inches of fluffy white snow and 30 MPH winds were not a very welcome sight today. It was a nasty slap of a reminder that winter can (and will) appear at any time. What’s the best way to fight away the cold winter winds? By spending time in a warm kitchen cooking up a delicious dinner of course! We’ve got a just such a dish lined up for you tonight, check it out:


The Recipe: Penne With Turkey Ragu
Original Recipe Found In: Food Network Magazine, January/February 2012 Issue

What You’ll Need:

8 Ounces Ground Turkey
12 Ounces Penne
2 Leeks (White & green parts only) Finely Chopped
2 Cloves Garlic (Minced)
1 28 Ounce Can Crushed Tomatoes
¼ Fresh Basil (Chopped)
2 Tablespoons Half and Half
3 Tablespoons Freshly Grated Parmesan Cheese
1 Tablespoon Extra Virgin Olive Oil


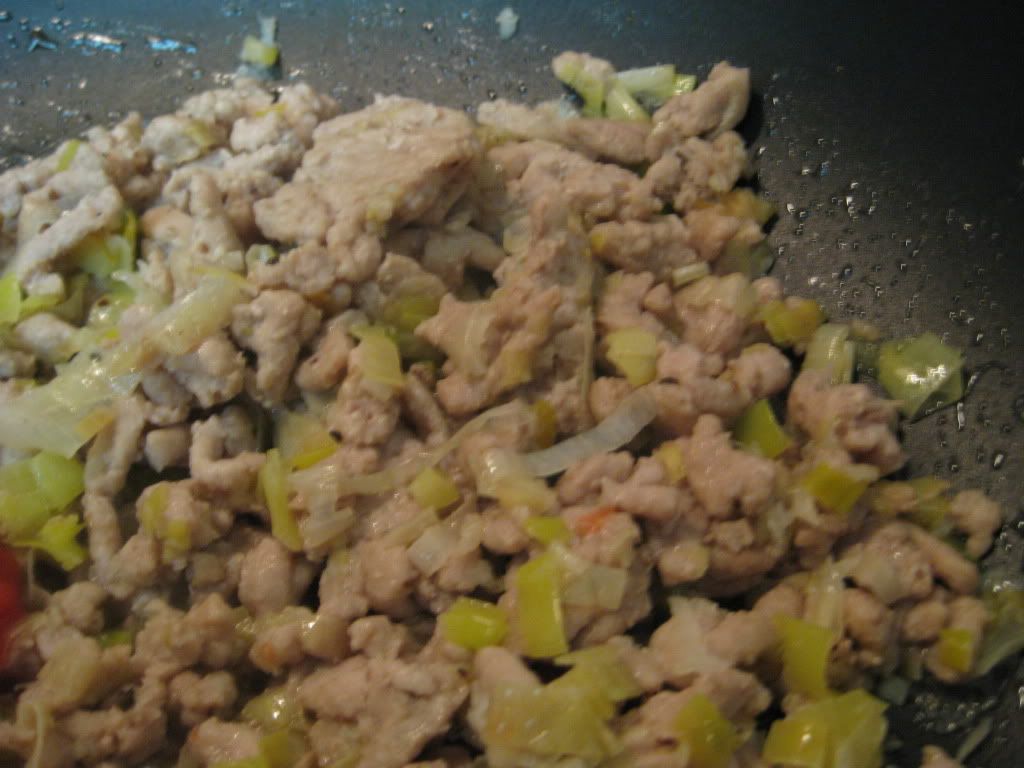
Begin by bringing a large pot of lightly salted water to a boil. Meanwhile, add the olive oil to a 12 inch non stick skillet over medium high heat. Once the oil begins to shimmer, add the leeks and cook until they become slightly translucent and softened – about two minutes.


Next, add the garlic and cook until it becomes fragrant – this takes around 30 seconds. Finally, add the turkey to the pan and cook, stirring occasionally, until the turkey browns, this takes roughly 5 minutes.


Note: the original instructions called for the leeks, garlic and turkey to all be cooked at once in the skillet. However, I’ve found that this method isn’t the best for cooking leeks/onions with some form of meat. You’re usually left with some undercooked onions and the garlic never gets a chance to fully ‘burst’ into the pan. Simply by adding a few minutes to your cooking time and cooking each ingredient one at a time, you can greatly add to the flavor and quality of the final dish.

Once the turkey has browned, add the tomatoes, a cup and a half of water (note, we opted omit the water and make a thicker sauce. The amount of water needed will vary greatly based on the type of crushed tomatoes you use) and a pinch of salt and pepper to the skillet. Increase the heat to high and bring the mixture to a boil, making sure to stir occasionally, allow the mixture to cook for 5 minutes before reducing the heat to medium. Add ½ of the basil, and allow the mixture to simmer for about 10 minutes until it thickens. If you find your sauce is becoming a little too thick, you can add another ½ cup of water to the pan to thin it out slightly. This is all to your preference. If you’re a fan of a thicker sauce, cut the water down even farther.

Next, add the pasta to the boiling water and cook as instructed by the package directions. Once the pasta is tender, reserve about ½ cup of the cooking water and then drain the pasta. Once drained, turn your attention back to the sauce – add the half and half, remaining basil and 2 tablespoons of the parmesan cheese. Stir until everything is incorporated.

Add the pasta into the sauce and toss to coat everything evenly (you may find it easier to transfer the both the sauce and pasta to a large bowl and toss there, the skillet could be getting a little crowded by now). Sprinkle the remaining parmesan cheese and a little additional basil over the pasta and serve! (Use the reserved ½ cup of cooking water if the mixture is too thick)

The Results:


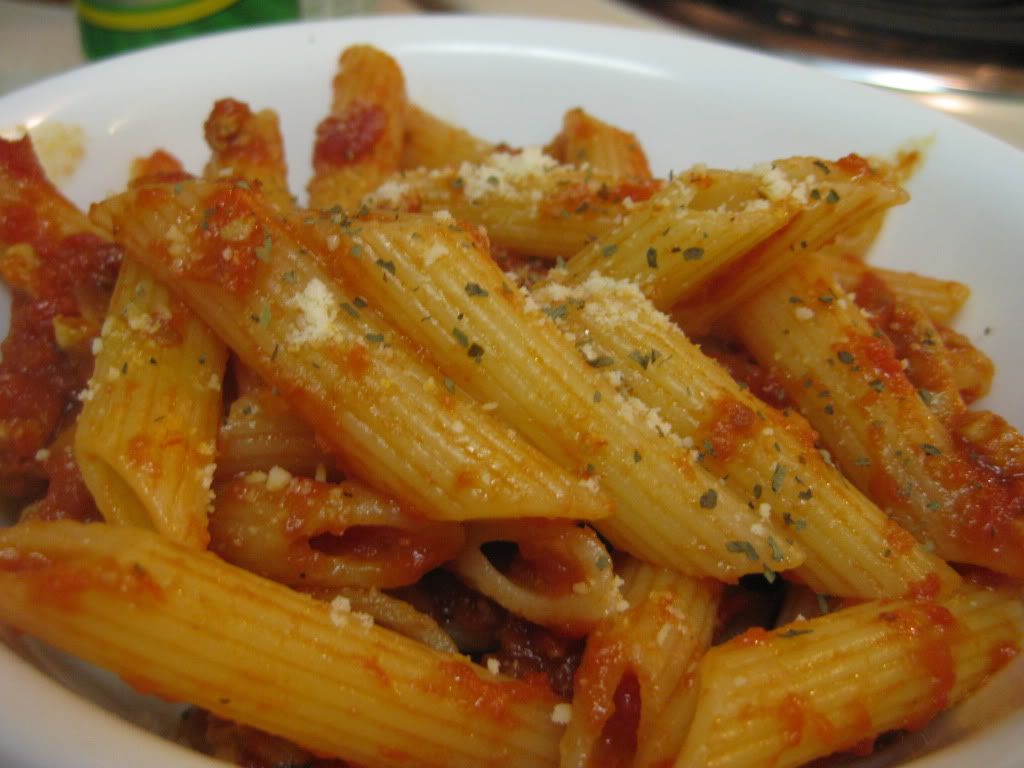
There’s a reason this dish was under Food Network’s “Healthy Eating” section – this dish is so light and fresh it’s hard to believe that you’ve made a ragu sauce. The typical ragu sauce is overly beefy and very heavy. This ragu, while still holding a nice amount of turkey in every bite, was very light and complimented well with the penne. The flavors are great, and I’ve finally found a traditional ‘meat sauce’ (aka ragu) that isn’t overbearing. If you love Italian flavors but still want to eat a little bit healthier, you cannot go wrong with this delish dish!

That’s all we have for you this evening. Maggie takes to the kitchen tomorrow night with a brand new recipe. Until then,

~Cheers

Monday, January 16, 2012

Around The Culinary World

Hello again everyone! It’s another Monday, but a majority of the US had it off – so for some of you, it’s Sunday part two! Alas, even though I work in the banking world, I work for one of the few places that believes it achieves a competitive advantage in staying open on Federal holidays. Of course, we’re unusually slow, because…well, everyone thinks we’re closed. Maggie works in the medical world, so they don’t observe the non major holidays. So, the long and short of it was, it was still a Monday for your favorite amateur chefs. Extended weekend or not – Monday means we’re taking a trip Around The Culinary World! Let’s dive in to the news of the week:


The biggest news of the week involves another food contamination scare that ended up being slightly overblown. On Wednesday, the FDA announced it was suspending the import of foreign orange juice until they could confirm that the product was free of a particular fungicide that is banned in the United States.

Traces of carbendazim were detected in orange juice imported from Brazil. Carbendazim is a fungicide that has only recently been blacklisted by the FDA. It was used in the US as recently as 2008. However, there have been studies linking the fungicide to cancer and other health defects. Other countries, Brazil among them, do not have this ban in place yet, so they are still allowed to use the product in orange growing, but they cannot import any oranges that have come in contact with this particular fungicide to the US.

The initial announcement was enough to cause a spike in orange prices, jumping the price of orange juice futures (yes, that really is an investment option…) to an all time high price of $2.07 per pound. However, shortly after announcing the ban, the FDA stressed that the presence of Carbendazim is not an immediate health risk and that this ban was simply being over cautious, rather than reflecting a potential major health epidemic. By Thursday, OJ futures were trading at a normal level and some foreign imports were being allowed into the US once again. You can read more about the initial reaction HERE and the follow up from the FDA HERE.


Even though this development ended up being a lot of overreaction by both the market and consumers - we always try to stay on the ball in regards to major product recalls, food contamination and other packaging, producing goofs – keeping you up to date on the producers that cut corners, the companies that don’t handle their product recalls properly and, even though this is rare, we try to highlight the companies that do the right thing the first time and recall / report food related problems or contaminations before they become a major outbreak.

Luckily this week, we only have kudos to hand out involving the latest contamination scare. The FDA was extremely proactive in stopping a potential problem before it became a widespread issue. Even more so, Coca-Cola deserves credit for being on the ball regarding the orange juice supply. On Thursday, the company announced that they were the ones who tipped the FDA off in regards to carbendazim in imported orange juice.

While the company was doing routine tests on their (and their competitor’s) products, they noticed levels of the fungicide and alerted the FDA to the issue. The company has not said which product they found the fungicide traces in (for obvious ‘don’t want to hurt the bottom line’ reasons). Even so, with a world of food producers who desperately try to hide production issues and contamination problems, kudos to Coca-Cola for sounding the alarm on a potential issue before it became a problem.


With the NFL playoffs fully upon us, the humble potato chip is getting a lot of crunch time action. (Pun slightly unintentional…) One of the most popular party chips is the tortilla chip, mainly for its amazing compatibility with the world of dips and dipping goods. Choosing the proper tortilla chip, however, is a lot harder than it needs to be. The big boys like Tostitos have the funds to buy advertising and store space, so they obviously are the best selling product on the tortilla chip market. But, does best selling mean best product? The folks from KitchenDaily put tortilla chips to the test to find out once and for all, which tortilla is really king of the bowl. Check out their results HERE.


In food news that should shock no one, Paula Deen announced this week that she has type 2 diabetes.

Those familiar with Deen’s cooking style are likely more surprised this hasn’t happened sooner. There is a reason Deen’s recipes don’t appear on our blog – she’s exactly the opposite of what our blog strives to achieve. Deen prides herself on heavy (sometimes called southern style) cooking, featuring a lot of butter and not-so-great for you ingredients.

Even with a different cooking style and culinary vision from us, we wouldn’t come out and mock someone whose health has become a concern. In a normal situation, we would wish Ms. Deen a speedy recovery and move on – but there’s more to this story than meets the eye.

The latest story involving this announcement is that Deen knew about her condition as far back as April of 2010 but attempted to keep it hidden because she didn’t want to damage her reputation as a celebrity chef.

I’m not sure what’s worse, the fact that she is prioritizing pushing her butter filled, heavy eating recipes to her fans even though she is now exhibit A on what eating like that will do to you or the fact that she was more concerned about her status as a celebrity chef than anything else.

I understand that being a food celebrity is her career, but I think she may have done more damage to that career by responding the way she did instead of being proactive and aggressive. I don’t work in PR, but doesn’t this seem like a good time to give new life to your career and push a good cause? You now have a platform to preach on healthy eating – you can say “I’m the best example of what poor eating can do to you” diabetes is preventable if you eat better… etc. In addition, you can revamp your cooking style and make healthy versions of your old recipes. Here’s hoping Ms. Deen takes this bad news and uses her (very important to her) celebrity to push a good agenda. Her reaction to this matter is going to dictate how the food world responds. Initial reports are that she is using this diagnosis to launch and endorsement of a diabetes drug. If true, this report tells me that Ms. Deen is always looking to find the next financial windfall – no matter the situation. Read the full story HERE.


Now, as opposite of Paula Deen as we can get – let’s talk about healthy food options. Lentils have been featured on our blog a few times now, and we’ve been pleasantly surprised at just how delicious these little legumes have been. They’re packed full of flavor, and work very well as either a star of the dish or a great compliment. Even better, they’re packed with protein and are actually quite filling. Meaning your vegetarian meals won’t leave you hungry 30 minutes later. Add in the low cost and the lentil makes an argument for unsung bean of the year. OrganicAuthority.com has a great feature on the lentil this week that highlights three very diverse recipes to use the legume in. Check out the story, and the recipes HERE.


There you have it folks, an overblown recall, a company on the ball, the best tortilla chips for your money, a celebrity chef whose priorities are (allegedly) all out of whack and the little legume that could. Not too bad for a slow week of culinary news, right? We’ve got another full week of cooking lined up – I’ll be taking to the kitchen on Tuesday with a healthy dish that features an interesting ingredient. Maggie follows me on Wednesday with another healthy dish of her own. It’s sure to be a fun week of cooking, so stop back in on Tuesday night to see what I’ve got on the menu. Until then,

~Cheers

Wednesday, January 11, 2012

Guilt Free Mexican

Good evening everyone! As Tyler has been alluding to Monday and Tuesday, I have been on the hunt for a particular recipe. Now, it's no secret that I have a strong favoritism towards Mexican food and trying all things within that realm. With that being said, I've always wanted to try an enchilada recipe because they are, in my opinion, one of the best Mexican foods around. Unfortunately, the only enchilada recipes I find are 1) extremely high in the calorie department and 2) feed a small army. It's been incredibly difficult to find a small portioned dish with fewer calories without giving up on flavor. Alas, after much searching, I finally found an enchilada recipe that serves only 4 (leftovers are always welcome) and that ranks in under a typical Mexican restaurant menu item. Will it be everything that I anticipated??


The Recipe: Enchilada Casserole
Original Recipe Found In: Cooking Light Magazine, January/February 2012

What You'll Need:

1 Pound Ground Sirloin
1 Cup Chopped Onion
1 Tablespoon Butter
1 Tablespoon Minced Garlic
1 1/2 Tablespoons All-Purpose Flour
1 Cup fat-free, lower sodium Beef Broth
1 Tablespoon 40%-less -sodium Taco Seasoning Mix
1 (8 ounce) can no-salt-added tomato sauce
4 (8 inch) whole-wheat flour Tortillas
1/3 Cup shredded Monterey Jack Cheese with jalapeño peppers

The reason why I chose this version of the classic enchilada recipe is that it had many substitutions where many added.  First off, the beef broth, taco seasoning, and tomato sauce are all low or no sodium products.  Salt, granted adds flavor to food, but also adds a lot of calories.  By reducing what we can on the sodium front, we can reducing calories.  Also, the tortillas are whole-wheat, instead of flour or corn.  This not only adds grains to the recipe, but helps the overall healthfulness of the dish.  Keeping these things in mind won't add too much guilt in eating something so good.


To start, preheat the oven to 400 degrees. Next, heat a large nonstick skillet over medium high heat.  Brown the beef until completely cooked.  Drain any excess fat.  Add the beef to the pan and add the onions as well, cook for six minutes, stirring to crumble. 


Next, melt the butter in a medium saucepan over medium high heat. Add the garlic and sauté for about one minute, until it becomes fragrant. Sprinkle the flour into the saucepan and cook for 30 seconds. Add the broth, taco seasoning, and tomato sauce to the pan. Bring this mixture to a boil and cook for two minutes making sure to keep stirring occasionally. Remove the pan from heat and add 1 1/2 cups of the tomato mixture to the beef mixture while reserving the rest of the tomato mixture.


Let the layering begin!


Finally, place 1 tortilla in a 9 inch pie plate. Top with 1 cup of the beef mixture. Repeat the layering until all of the tortillas have been used, making sure to end with a tortilla on top. Top this tortilla with cheese. Place the pie plate into the oven and bake 10 minutes or until the cheese melts and turns a nice golden brown. Cool slightly, cut into 4 wedges, serve, and enjoy!!


The End Result:


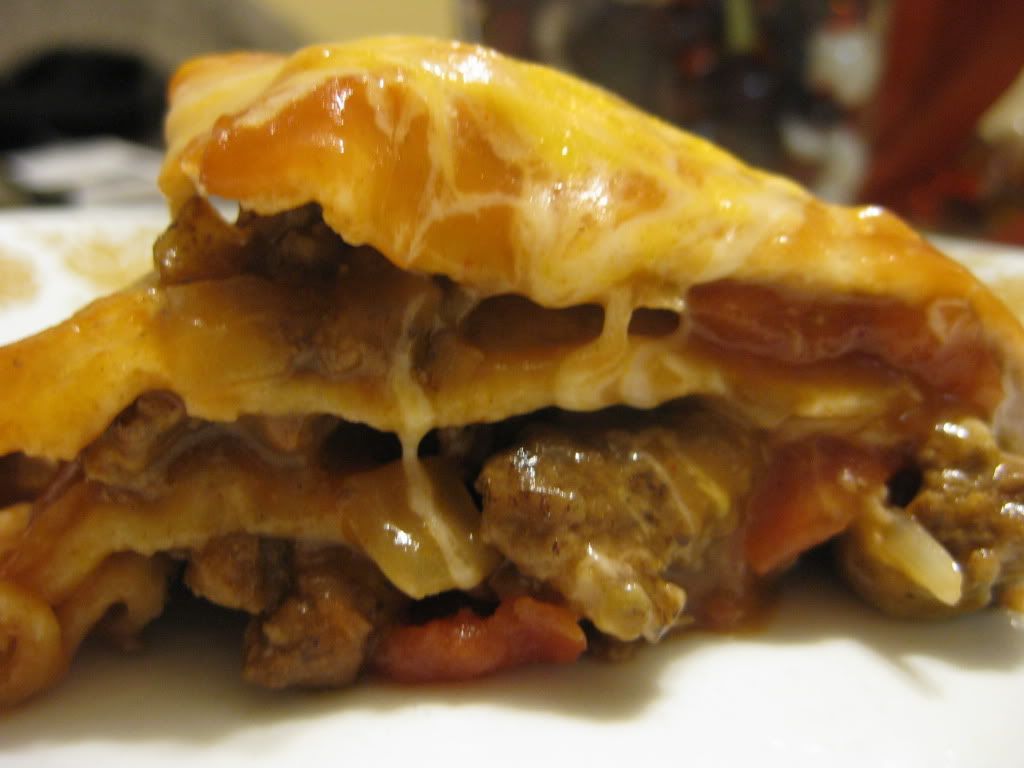
Although the filling is a standard tomato meat sauce, the creativity behind stacking it in between wheat tortillas is genius. I'm used to my enchiladas in individually wrapped tortillas, but the fact that everything is combined is really great. The flavors really harmonize well, as they should. We did substitute tomato chunks instead of tomato sauce. I thought this made the enchiladas heartier, which was a great substitution.  It didn't have an overtly Mexican flavor, i.e. a strong kick of spice or pepper, but the taco seasoning did add a nice hearth to it.  Honestly, it could have probably used more taco seasoning to really amp up the flavor, but maybe when we try another variation of this recipe, it could be done. I did find another recipe for healthy enchiladas and I’m eager to stack that recipe against this variation and see who comes out ahead. But, that’s for another week.


That's all we have for you this week. Join us next week as another edition of Around the Culinary World and a full week of cooking. Have a great weekend everyone, until Monday,


~Cheers!

Tuesday, January 10, 2012

Simple Premise - Amazing Flavor

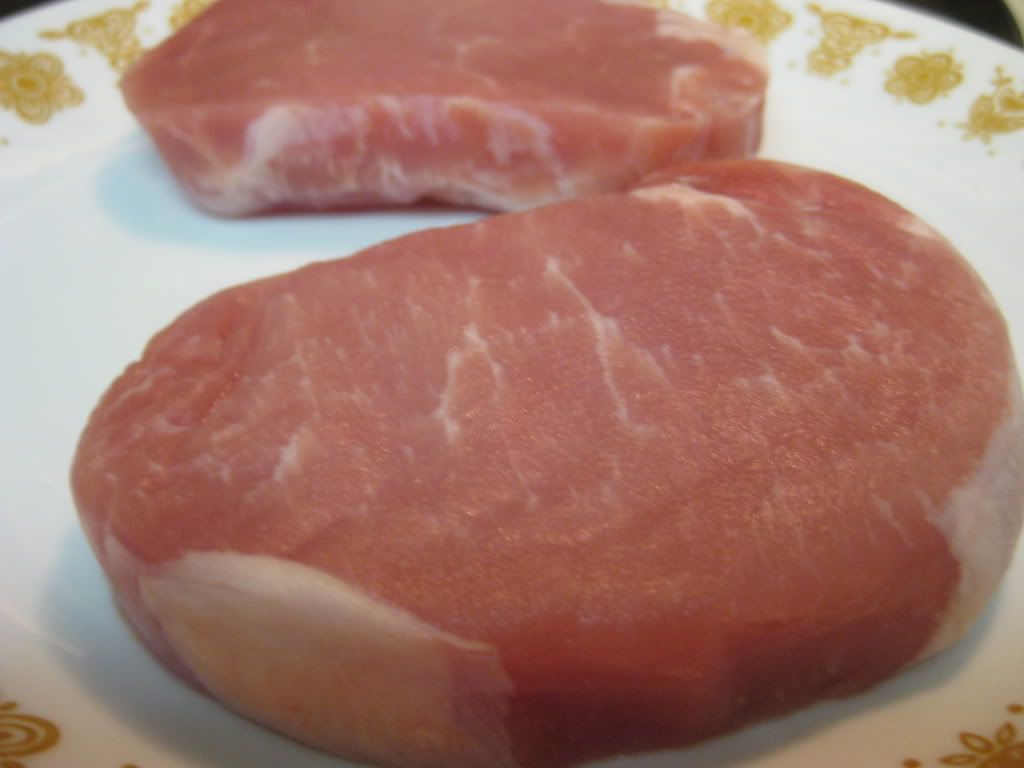
Good evening everyone! Last week we finally dove into the delicious world of Omaha steaks. This week, we're continuing to sample the world of high end meats - but we're moving away from the steak and into a whole new category: pork. Ever since we're reintroduced pork to our menu, we've had great luck with some very tasty recipes. Now that we're upgrading the pork to these high quality cuts of pork loin (pictured below) I'm anxious to see what sort of results we can achieve. Let's get cooking!


The Recipe: Roasted Pork With Lentils
Original Recipe Found In: Food Network Magazine - January/February 2012 Issue

What You'll Need:

3/4 Cup Dried Griend Lentils
3/4 Pound Cubed, Peeled Butternut Squash
2 Bay Leaves
2 Tablespoons Dijon Mustard
6 Sprigs of Thyme (Leaves only)
1 Large Pork Tenderloin (1 1/4 Pounds)
2 Tablespoons Breadcrumbs (Panko preferred)
2 Slices Bacon (Chopped)
4 Shallots (Thinly sliced)
1 Stalk Celery (Diced)
1/2 Cup Dry Red Wine
1/2 Cup Finely Chopped Fresh Parsley

Begin by preheating your oven to 450 degrees. In a medium sauce pan, add the lentils, butternut squash, bay leaves and 2 1/2 cups of water. Place the sauce pan over medium high heat and bring the water to a boil. Once boiling, cover the pan and cook for 25 minutes until the squash is tender and the lentils have plumped up in size. (Be sure to drain any excess water and fish out the bay leaves before serving)

This combination of two great, earthy flavors will really add to the base of the dish. There's a lot of deep flavor in lentils, as we've found out before, and butternut squash is well known for its deep earthy flavors. Add that to the dijon, pork and bacon and you're building quite a flavor profile.

Speaking of the the pork, begin preparing the pork by combining the mustard and thyme in a small bowl. Brush the mixture over the pork and place the meat on a large baking sheet. Cover the pork with the bread crumbs and place the baking sheet in the oven for 20 to 25 minutes or until the center of the tenderloin registers 145 degrees.


While you're pork is cooking, combine the shallots, bacon and celery in a medium skillet and cook, stirring occasionally, over medium heat until the bacon is crispy and the shallots have turned golden brown. This should take about 5 to 8 minutes. Finally, add the wine and cook until it is completely incorporated and evaporated - this should take an additional 5 minutes. Stir in the parsley and set this mixture aside.

Remove the pork from the oven and let rest on a plate (loosely tented with foil) for 5 minutes before slicing and placing upon the lentil / squash mixture. Spoon the bacon shallot mixture over the pork and serve.

The Results:


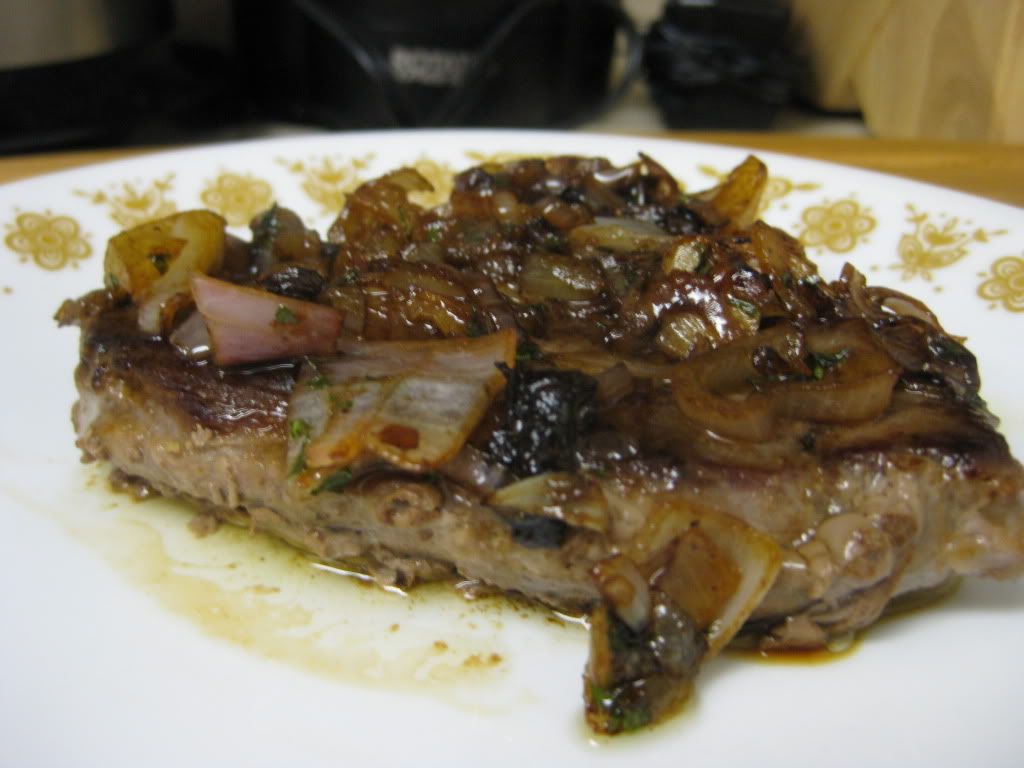
This dish is both cheap (lentils, squash and pork are all very affordable ingredients) and amazingly simple. The resulting flavor, however, was anything but simple. Deep earthy undertones greatly complimented the zesty pork and the bacon / shallot topping added another layer of depth to the entire flavor profile. This dish is certainly a great way to start of a week. The best part is, it's low fat and low calorie, coming in at about 450 calories. Healthy, easy and tastes great? You can't beat that!

That's all we have for you this evening. Maggie takes to the kitchen tomorrow night to cook up a dish she's been searching for a long while. Tune in tomorrow night to see what she has cooking. Until then,

~Cheers
Monday, January 9, 2012

Around The Culinary World

Hello again everyone! It’s the first ‘real’ Monday of 2012. I know, I don’t like it either. The whole ‘three day weekend’ trend was not only very easy to get used to, but it was also very, very enjoyable. Alas, all good things must come to an end. Except, of course, Around The Culinary World, which keeps trucking every single Monday. Today’s edition features tips for buying and using some of winter’s best produce, an article on the evolving world of sparkling water, the ‘Dark Side’ of burgers and so much more. Let’s dive right into the culinary news for this week!


Apparently, while no one was looking sparkling water evolved into a high end business. There are now sparkling water experts, who can tell you which bottle of sparkling water will go best with your filet, what ‘flavor profile’ a certain region of sparkling water posses (yes, there are regions and flavor profiles. I’m as astounded as you are). While I’m no stranger to sparkling water, I’m a little surprised that the beverage has moved into the ‘fine dining’ category. The sparkling water I enjoy comes from Target in a plastic bottle…and it tastes like raspberry (or tangerine/lime if I’m feeling bold). It costs $.69 and is tasty, but it does not evoke thoughts of fine dining. Granted, sparkling water has been around in Europe for a long while (it’s very commonly served with meals in place of our usual plain glass of water) so it really was only a matter of time before the beverage made the jump to the big time here in the United States. This article titled “6 Ways To Survive The Sparkling Water Trend” is a nice guide if you think you’re going to find yourself amongst the high brow and will have to choose between New Zealand’s or France’s bubbly beverage to pair with your fish. If you don’t think you’ll find yourself in that particular position, this article turns into a rather humorous read. Sparkling water…fine dining? Amazing. (And yes, I'm aware there are many elements to fine dining and that sparkling beverages are common. Before we receive a 'matter of fact email' please not that this story was written slightly 'tounge in cheek').


While winter typically means inflated produce prices and some smaller selections at your grocery store – there are a few fruits and veggies that come into their peak during this time. One such fruit is oranges. This fruit typically associated with warm climates and summertime actually hits its peak during the colder months of December and January. With oranges hitting their prime, now is a good opportunity to refresh (or perhaps be introduced to) the large variety of oranges out there for you to buy. There is more to this citrusy world than just tangerines. Check out the guide HERE.


Another food that hits its stride in the colder winter months is a gourd that is typically associated with fall; the butternut squash. This earthy, delicious squash may be somewhat cumbersome to peel – but it can really shine as the star of a dish or work as a great side kick to boost up a recipe’s flavor. (Side note: I’ll be cooking with butternut squash this week in my recipe). Food52 has put together a collection of butternut squash recipes to get your winter cooking juices flowing. Check out the collection of tasty gourd recipes HERE.


As you may or may not know, in his never ending quest to boost his wallet, George Lucas is rereleasing the Star Wars films to theaters, this time in 3D.
(Seriously, enough with the 3D, it adds little, inflates the prices and frankly is just a buzz word anymore. Make it work or toss it out movie studious….just my 2 cents)
Anyway, the Belgian fast food chain Quick is taking this rerelease as an opportunity to launch some Star Wars Episode 1 themed burgers. They’re offering three varieties, the ‘Dark Burger’ the ‘Jedi Burger’ and the ‘Dark Vador’ burger (no clue why Vader is spelled with an “o”). The ‘Dark Burger’ is a simple double cheeseburger with some (menacing?) seeds on the bun. The ‘Jedi Burger’ is a standard double cheeseburger topped with some sort of strange white chunks. (Cheese? Marshmallows?) The ‘star’ (ha!) of the show is the ‘Vador’ burger. This thing…well, you’ll have to see it to believe it. Check out the article HERE. I’ll wait…. Okay, did you see it? O..M..G. Would you eat that? I don’t think I could!

Not pictured: The horror that is the "Vador"


With the change into the New Year, most people set resolutions or goals for them to improve, change or otherwise make their lives a bit better. One of the more common goals is to be more financially responsible, save more, spend less – etc. What better way to save money than to trim your grocery budget with savvy shopping? Even if your New Year’s resolutions don’t fall into this category, it’s never a bad thing to save a few dollars here and there. Reader’s Digest composed a list of 9 money saving grocery tips that’s worth a read. Check out the article HERE.


Some of my favorite types of articles to read for the blog involve “NEVER” headlines. Mainly because I’m a fan of hyperbole, and I believe you should NEVER define things in absolutes. (Pauses for laughter…nothing? Fine…) Reader’s Digest has a list of 15 foods you should NEVER buy again, and to my surprise there are some interesting and useful suggestions on this list. Should you NEVER buy them again? Well, that’s for you to decide, but take a look at their suggested list HERE and decide for yourself.


Whew, what a start to 2012 for culinary news! We’ve got a full week of cooking lined up for you – I’m taking to the kitchen on Tuesday with a great dish that I’m eager to try (featuring another Omaha Steaks product and the previously mentioned butternut squash) Maggie will follow with her recipe on Wednesday. It’s one she’s been searching for quite some time. Be sure to stop in tomorrow night to see what I’ve got cooking. Until then,

~Cheers
Thursday, January 5, 2012

Fact: Everything Is Better With Pan Sauce

Good evening everyone! After a long holiday break, it is nice to be back to some semblance of routine. Don’t get me wrong, long holiday vacations and light work weeks are certainly welcome – but having a little bit of order restored to our daily lives isn’t always a bad thing either. Even more important is a return to a healthier eating routine. Needless to say we weren’t eating at all healthy during the holidays (of course we tried, but in the end, holiday goodies won out – like they always do).


One of the gifts we received for Christmas was a bundle of Omaha steaks and other assorted Omaha Steaks brand frozen meats. I’ve never tried Omaha Steaks before, but I’ve heard nothing but good things from those that have. You can’t give me a freezer full of steaks and NOT expect me to cook some up right away – so naturally, my first recipe of 2012 is going to feature the simple, unparalleled quality and simplicity that is steak.

The trick to tonight’s recipe was actually finding a recipe that wasn’t really a recipe. What I mean is this: Omaha Steaks are high quality pieces of beef that posses great flavor on their own. You don’t really need to do anything to ‘fancy them up’. My challenge was finding a recipe that would still allow me to cook – while not burying the natural flavor of the beef. The solution? A pan sauce of course!


The Recipe: Shallot & Butter Pan Sauce
Original Recipe Found In: The Complete America’s Test Kitchen Cookbook

What You’ll Need:

2 Steaks Of Your Choice (We're using top sirloin tonight)
2 Medium Shallots, Minced (About 1/2 cup)
4 Tablespoons Unsalted Butter, cut into 4 equal sections
1 Teaspoon Lemon Juice
1 Teaspoon Minced Parsley Leaves

This recipes takes place after you've already cooked your steaks in the skillet. While you don't have to cook your steaks in the skillet to make this pan sauce, a good portion of the flavor in this sauce is derived from the flavoring the steaks leave behind after cooking. If you're not sure how to pan sear a steak, it's surprisingly easy. Just make sure you have an instant read thermometer to ensure you're reaching the correct 'cooked' level.

To cook your steaks - add 1 teaspoon of vegetable oil to a large non stick skillet and bring to a shimmer over medium heat. While the oil is heating up, season both sides of your steaks with salt and pepper.

Place the steaks in the skillet and cook over medium high heat until they become nicely seared. To guarantee a proper sear, you have to leave the steaks undisturbed during this process. Sometimes it's hard to simply let something cook without 'checking' on it - but in this instance, if you want a beautiful crust on the top of your steaks, you'll have to let them cook. After 4 minutes, flip the steaks over and allow to cook until they reach the desired doneness.

The best way to check how 'done' your steaks are is to use an instant read thermometer. The center of the steak should register: 120 degrees - Rare, 125 degrees - Medium Rare, 130 degrees - Medium. (Cooking time should be 4,5 or 6 minutes respectively). Anything lower than 120 is not fully cooked and is not safe to eat so 120 is the very low point you're shooting for.


Once the steaks have reached their desired temperature, transfer them to a plate and loosely cover with aluminum foil. Allow to rest for 5 minutes while you prepare the pan sauce.

In the same skillet you prepared the steaks in (don't clean it out!) add the shallots and cook them over low heat until they being to soften. This takes about 1 minute. Next, turn the heat to medium low and stir in the butter. Use a wooden spoon or rubber spatula to work up any browned bits still stuck to the bottom of the pan. There is great flavor in these caramelized particles - you don't want to leave them behind! When the butter is just melted, stir in the lemon juice and sprinkle in the parsley. Serve immediately over the steaks and enjoy!


The Results:


First and foremost - I got my first crack at using our new Princess House skillet that Maggie mentioned yesterday. Highly recommended! It's sturdy, has a great nonstick surface that heats up evenly and quickly and best of all it makes a great searing pan for steaks! The steaks themselves were delicious - you can really taste the quality of the beef. They would be fine on their own, but since this is a cooking blog - we needed to cook SOMETHING for them. Luckily, the shallot / butter sauce was amazing in its own right. Rich, full of flavor and incredibly complimentary to the steaks. With only 3 minutes of prep time, this simple sauce is a great way to spice up your steak dinner.

That's all we have for you this week. 2012's first 'Around The Culinary World' will return on Monday, followed by another full week of cooking. Until then,

~Cheers

Wednesday, January 4, 2012

A Classic Breakfast Dish...Only for Supper!

Happy New Year everyone!!  I hope everyone had a joyous and safe holiday season.  It's kind of crazy that in a matter of a short weeks that all the hullaballoo of the holidays get an abrupt cut off.  Nevertheless, now it's on to focusing on trying to lose the holiday weight and eat a bit healthier.  Granted it's hard to get into that particular routine, but it's definitely worth a shot.  And even though this recipe might not have an entirely vegan base, it's at least a step in the right direction.

The Recipe:  Farmhouse Baked Eggs with Cheddar and Potatoes
Original Recipe Found In:  Food Network Calendar 2011 (yup, you saw right, calendar.  As I was browsing our old calendar, I happen to come across this recipe.  I saved this one, among others, and pitched the calendar.  So last year's features became this year's to try recipes.)

What You'll Need:
3 Tablespoons Unsalted Butter
1 1/2 Pounds Red-Skinned Potatoes, diced
1/4 Cup Chopped flat-leaf Parsley
2 Large Cloves Garlic, minced
8 Large Eggs
1 Cup shredded extra-sharp White Cheddar Cheese

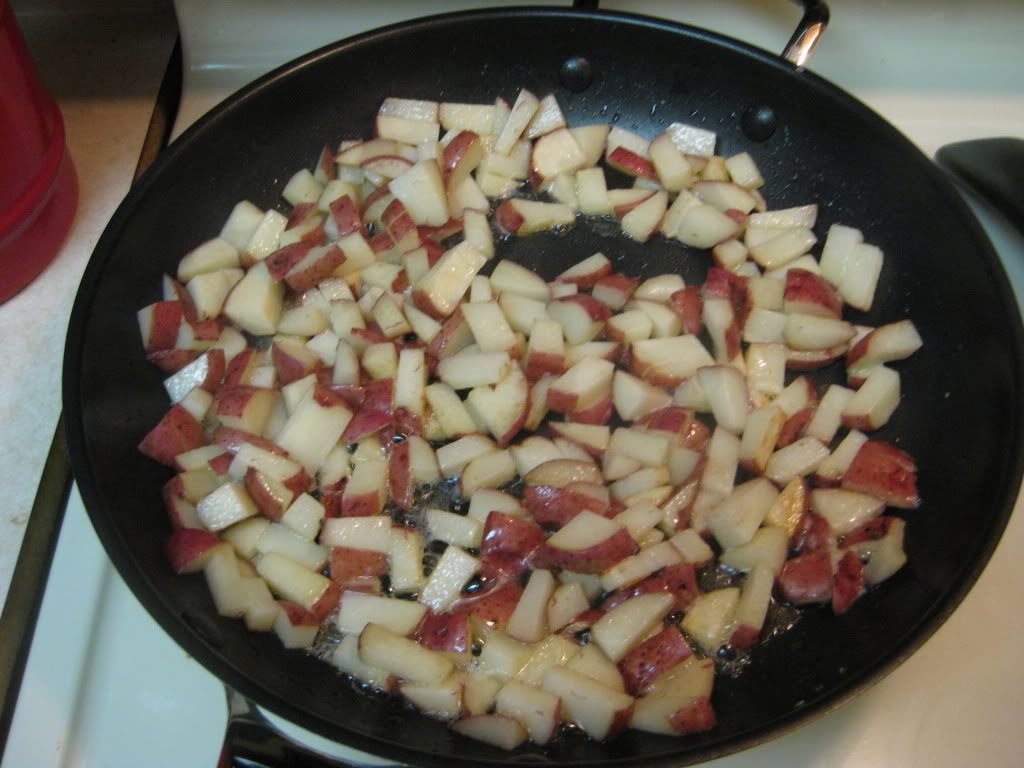
To start, preheat the oven to 400 degrees.  Next, melt the butter in a large cast iron skillet or an ovenproof skillet over medium heat.  Add potatoes and cook, stirring occasionally until tender and brown, about 15 minutes.  Stir in parsley and garlic.  Season with salt and pepper to taste and remove from heat.


We are using one of our Christmas presents for tonight's dish.  We had received a Princess House 12 inch nonstick, oven safe skillet as one of our gifts.  We have been searching tirelessly to find an oven safe skillet and alas, we had finally received one.  It's a large, heavy, sturdy pan and will hopefully become one of our favorites.


Potatoes sizzling away in our new skillet.


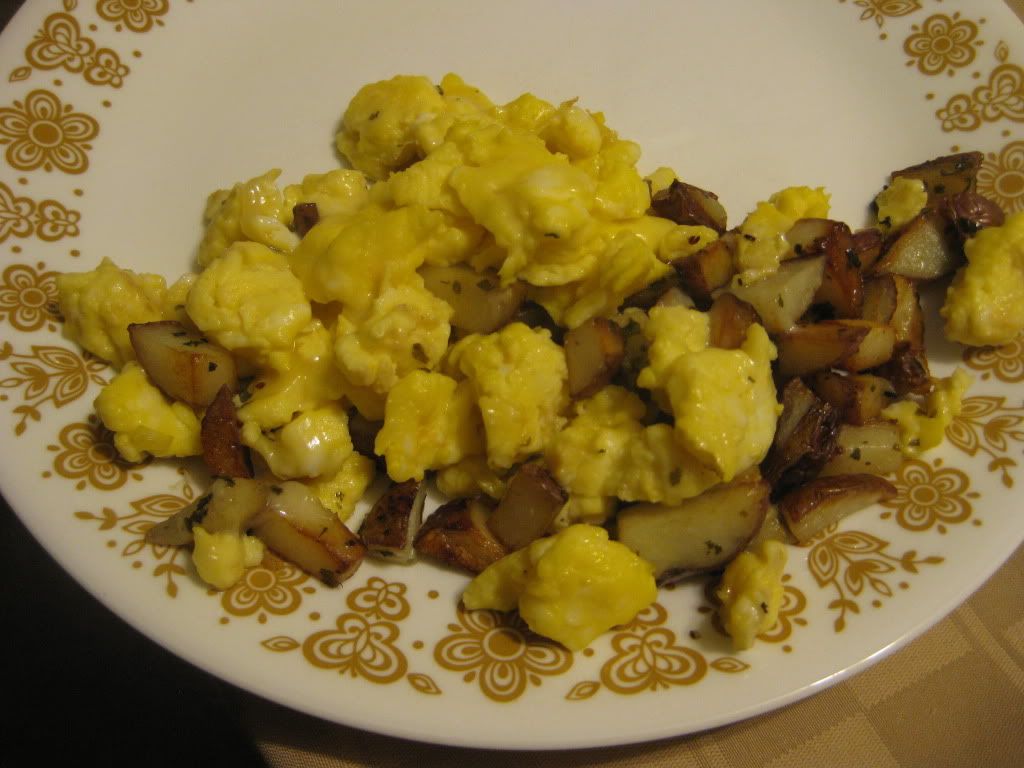
Make 4 shallow depressions in the potatoes and beat two eggs into each.  Transfer to oven and bake until egg white are cooked and yolks are still runny, about 10 minutes.  Another note:  since neither of us like  over easy eggs, we decided to scramble the eggs for the potatoes, hopefully with similar results.  Sprinkle cheese over eggs and continue to bake until the cheese melts, about one minute.  Serve immediately and enjoy!


Ready to pop in the oven


The End Result:


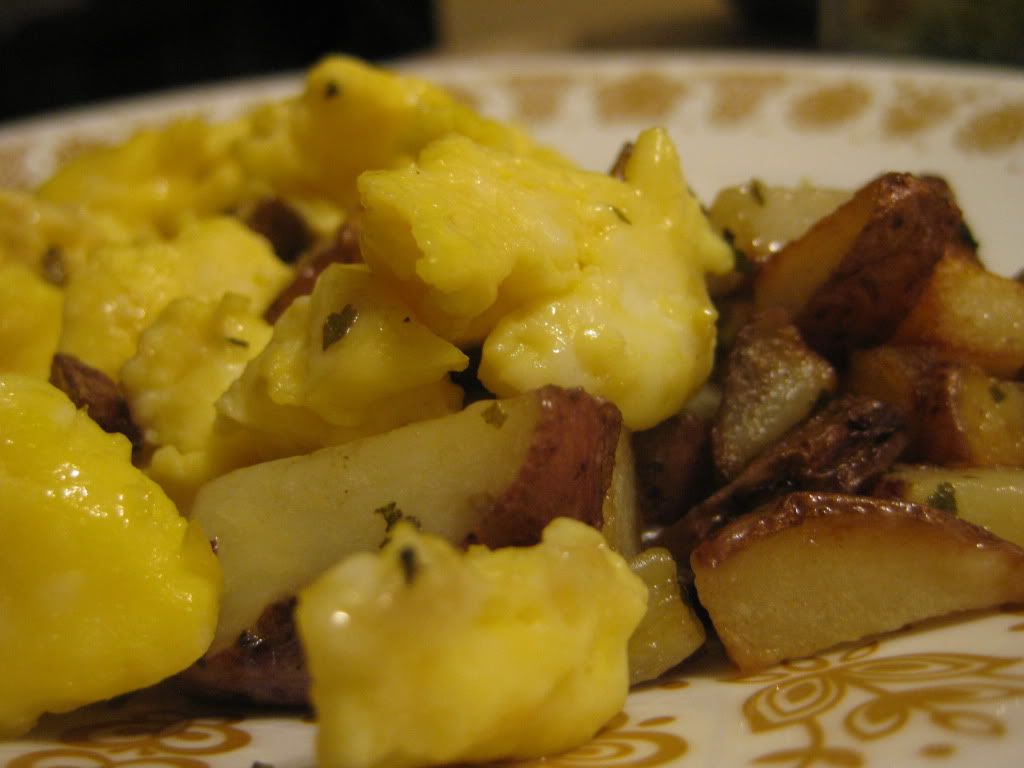
Even though this would make a great brunch dish, it's a great hearty dinner dish as well.  The potatoes were cooked to perfection and the eggs, in all their scrambled glory, were the cherry on top.  The white cheddar make an incredible addition and add a real depth to the entire dish.  Although it could have really used a meat to round out the entire recipe, I know that this could be used as a vegetarian dish.  Heck, if all things vegetarian tasted this great, I would convert right now!


That's all we have for you this evening.  Join us tomorrow night when Tyler brings us a new recipe with a new flavor quotient.  Until then,


~Cheers!