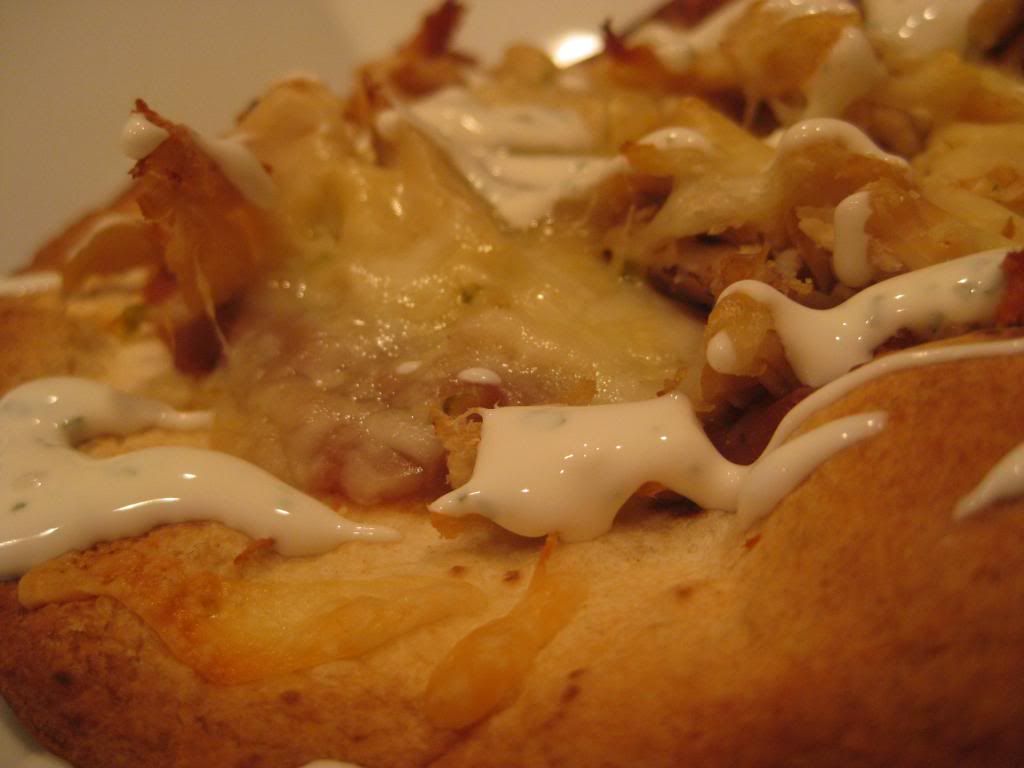
There's a program on the Cooking Channel called "The Best Thing I Ever Ate". The premise is simple, chefs and other culinary world personalities sit down and talk about their favorite meal or dish. Where they had it, what was in it - and why it's their all time favorite.
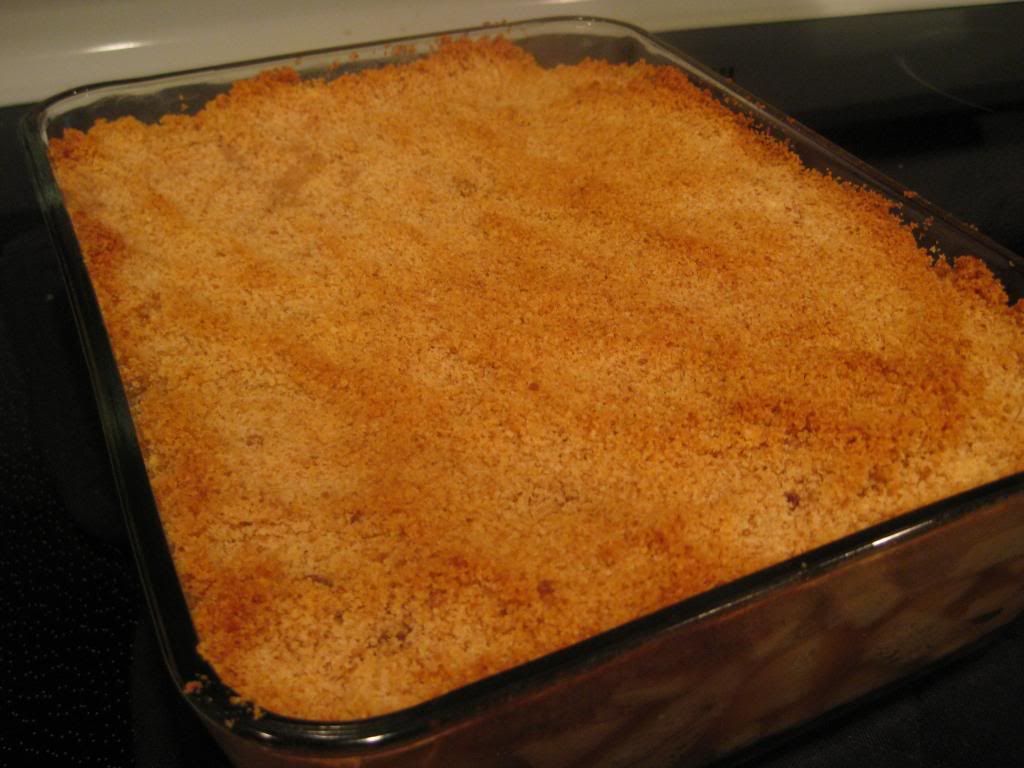
This afternoon's 'quick hit' blog post borrows from that concept. One of my favorite dishes of all time is a speciality of my mom's - escalloped corn. It's been a holiday / family gathering staple for as long as I can remember and it's absolutely one of my favorite things to eat. If I could find a way to eat it for three meals per day, I likely would. It's the perfect blending of creamy, corn flavor with a crisp flavorful outer crust. All in all, it's one of my favorite all time dishes.
After 'borrowing' the recipe from my mom, I set out to recreate this tasty fall treat myself. (I should note, nothing about this recipe is seasonal - I simply refer to it as a 'fall treat' because it always seems to make appearances around the holidays).
The Recipe: Mom's Escalloped Corn
What You'll Need:
2 Cans Creamed Corn
2 Eggs (Beaten)*
1/2 Cup Milk or Half and Half
1/2 Cup Club Crackers (ground fine) plus an additional 1/4 cup ground for topping.
* Does anyone else see the phrasing "Eggs, beaten" in a recipe and imagine a detective interrogation scene? "Okay eggs, start talking or will start busting heads" - then you proceed to 'beat them up'....
Yeah, me either...
Preheat your oven to 350 degrees.
Combine all of the ingredients in a large bowl. Spray a large glass baking dish with non stick spray and then add the contents of the bowl to the baking dish. Spread into an even layer, then top with another 1/4 cup of ground club crackers.
Place the dish into the oven and allow to bake for 45 minutes, or until the edges have turned golden brown and the dish is 'set' (there should be little to no movement if you lightly jostle the dish - that's how you can tell it's cooked through).
Serve with a pinch of salt and pepper and a small bit of butter. Enjoy!
Sunday, September 29, 2013
Thursday, September 26, 2013
Stew Season!
Good evening everyone! Anyone who does a lot of cooking at home has likely found they eventually reach a point with a given dish that they no longer need a recipe. Perhaps you’ve tried so many variants of roasted chicken that you can simply recreate your favorite from memory, or maybe you’re so well versed in the world of burritos that you simply create your own on the fly – whatever the dish, experience has given you a foundation in which to become creative and confident in your culinary ability.
For me, that dish is the wide world of soups and stews. I’ve tried so many variants of classic soups and stews that I no longer turn to a cookbook to create my own warming fall treat. Instead, I stand in the kitchen and just begin to collect what calls to me.
For those that don’t cook for themselves too often or that are just jumping in to cooking, this can seem like a daunting task. However, as true with most things in life (outside of skydiving) – practice makes perfect. As you experiment and learn, you’ll certainly have some duds or things that don’t quite go your way – but the knowledge you’ll pick up will be more valuable in the long run than any recipe could ever be.
Don’t get me wrong, there is nothing wrong with using and following a recipe – we do it quite often on the blog. My point is, be sure to use these recipes and guides as a learning tool to build the skills you’ll need to eventually branch out and create your own dishes. Cooking becomes even more fun when you’re not only making the dish, but responsible for its contents as well.
As the cool fall winds are moving in, I found myself craving a hearty beef stew. So, I set out to the kitchen to cook up what my mind was craving – the result was one of the best stews we’ve made on the blog to date. Check it out;
The Recipe: Hearty Country Beef Stew
This is an Out of the Culinary original recipe
What You’ll Need:
1 Pound Beef Stew Meat (Cubed)
¾ - 1 Pound Baby Red Potatoes (Cubed)*
1 Cup Frozen Green Beans
1 Cup Frozen Peas & Carrots
1 Can (10-12 Ounces) Low Sodium Beef Broth
1 Can (14.5 Ounces) Diced Tomatoes, Drained**
1 Teaspoon Worcestershire Sauce
1 Bay Leaf
1 Tablespoon Flour
* I prefer my stews to have thick, hearty potato pieces. I typically quarter my baby red potatoes and leave them at that. You are free to dice the potatoes as fine as you’d prefer as the cooking times will largely stay the same.
** For the longest time, I couldn’t understand why beef stew recipes insisted on including tomatoes. “I want a rich, beefy flavor” I thought to myself. “Why in the world would I add an acidic product to cut that flavor?” As such, I largely ignored the tomato portion of most stew recipes, thinking it was unnecessary. I finally relented and added tomatoes to a stew a couple of years ago and found what I had been missing all of this time. The tomatoes don’t detract at all from the beef’s flavor – in fact, they add to it. Just another example of using experience to learn from your past mistakes. (This is a long way of saying, don’t skip the tomatoes!)
Begin by placing a large dutch oven over medium high heat and adding the stew meat. Cook the meat until it is browned on all sides and you can no longer see any pink coloration, 5 to 10 minutes.
You may be asking yourself, “Why brown the meat when we’re just going to let everything simmer in the pot anyway?” Excellent question! The answer can be found in the science of browning meat. When we brown meat, we create an outer crust by searing the meat on intense heat. This crust does two things, it transforms the outer flavor of the beef and creates a sort of barrier that locks in much of the moisture. By browning the beef beforehand, you’re enhancing the flavor and insuring that your beef will be soft and juicy when the stew is finished. If you left the beef raw and simply let it cook within the stew, you’d boil it, making it tougher and more likely to be dried out and bland.
Once you beef is browned, add the frozen vegetables and the Worcestershire sauce. Cook, stirring often, until the vegetables have softened and the sauce ahs worked its way into the beef. Next, stir in the canned tomatoes, allowing the mixture to simmer for 3 to 5 minutes before moving on to the next step.
Add the potatoes and beef broth to the pot. If the broth does not cover the all of the ingredients, fill the broth can with water an add as much or as little water to the pot until the liquid just barely covers the top of all the ingredients. Because we’re making a stew, we want the liquid level to be a bit lower than if we were making a soup.
Give the pot a stir to make sure all of the ingredients are incorporated. Add the bay leaf and cover the pot. Bring it to a simmer and allow the stew to cook for 30 to 45 minutes, stirring occasionally. If the simmer is too vigorous (you want a gentle bubble, not an aggressive boil) reduce the heat.
After the first 30 to 45 minutes, remove the lid from the pot, stir the stew and return it to a soft simmer. Let the stew cook for an additional 30 to 45 minutes. (By removing the lid, we’re letting some of the excess moisture escape. Since I like my stews to be nice and thick, we need to get excess moisture out of the pot. If you like a ‘runnier’ stew, simply leave the lid on for this step).
Before serving, fish out the bay leaf and stir in the tablespoon of flour. This will thicken the broth and tighten the overall stew. Serve warm and enjoy!
The Results:
Few things top a nice, filling stew on a cool fall day. Loaded with a variety of vegetables, flavorful beef and a flavorful broth (thanks, in part to the tomatoes), this stew is beautiful in its simplicity. Full of flavor, light on calories (250 per cup) and super easy to make – this ‘off the cuff’ creation easily climbs to the top of our all time favorite stew list. Use it as a guide or as simple inspiration to create your own fall stew!
That’s all we have for you this week. Look out on Sunday for another special post, followed by a series of new recipes next week. Until then,
~Cheers
Tuesday, September 24, 2013
Delightful Vegetarian Fritters
Good evening everyone! By pure coincidence, Tyler and I both did vegetarian dishes this week. I think choosing to have a meatless meal once (or twice or more) a week is not that bad of an idea. It's all a matter of choosing what ingredients that suit your tastes and make a recipe that sounds delicious. With that, tonight I've chosen a recipe that not only sounds tasty, but one ingredient in particular has become one of my new fall favorites.
The Recipe: Spaghetti Squash Fritters with Sriracha Mayonnaise
Original Recipe Found In: Cooking Light, October 2013
What You'll Need:
1 (2 Pound) Spaghetti Squash*
1 (8 Ounce) package Baby Spinach
1/2 Cup Panko
2 Tablespoons grated fresh Parmesan Cheese
1 Tablespoon minced Garlic
1/2 Teaspoon Black Pepper
1/4 Teaspoon Baking Powder
2 large Egg whites
1 Tablespoon Olive Oil, divided
5 Teaspoons Canola Mayonnaise
2 Teaspoons 2% Reduced-Fat Milk
1 Teaspoon Sriracha (or other hot chile sauce)
1 Teaspoon Cider Vinegar
*This is not our first waltz with spaghetti squash, in fact, the first time we used it was almost two years ago. If you care for a flashback, here's our first journaling on spaghetti squash.
To start, cut the squash in half lengthwise. All varieties of squash tend to be a little difficult to handle when cutting, so I advise caution when doing so. Once cut, scoop out the seeds and any remaining innards of the squash and discard. Place the squash halves, cut sides up, on a microwave safe plate. Cover with a damp paper towel. Put in the microwave and cook on high for twenty minutes or until tender. Take the squash out of the microwave and let stand for 10 minutes. Once cooled, scrape the inside of the squash with a fork to remove the spaghetti-like strands until it measures four cups.
Next, heat a large non-stick skillet over medium-high heat. Add the spinach to the pan and cook for two minutes, or until the spinach wilts. Place both the squash and the spinach on a clean dish towel and squeeze until both ingredients are barely moist. Place the spinach and squash on a butting board and coarsely chop until well mixed. Place these ingredients in a large bowl. Next, add the panko, Parmesan cheese, garlic, black pepper, and baking powder to the large bowl and toss well to combine.
In a medium bowl, add the egg whites. Beat the eggs with a mixer at high speed until soft peaks begin to form, about five to seven minutes. Once the eggs are done, gently fold the eggs whites into the squash mixture until all the ingredients well combined.
Using a 1/4 cup dry measuring cup, fill with the squash mixture. Place the cup upside down in your hand and gently pat the mixture until it forms a 3/4 inch thick patty. Repeat the process with the remaining squash mixture, forming ten patties total. Next, heat a large nonstick skillet over medium heat. Add 1 1/2 teaspoons of oil and swirl to coat. Once the skillet is heated, add five patties to the pan and cook for three to five minutes on each side, or until browned. Transfer the patties to dish and cover to keep warm. Add the remaining oil to the skillet and cook the remaining patties.
In a small bowl, add the mayonnaise, milk, Sriracha, and cider vinegar and mix well to combine. Serve with the fritters and enjoy!
The End Result:
If you've never had spaghetti squash, this is great introduction to this tasty and under appreciated vegetable. Granted the squash doesn't have much of a flavor, but pairing it with spinach and cooking it in olive oil makes it taste superb. If you are concerned about the patties being cooked through with the limited time given, don't be. They will be completely warmed through and taste even better. The olive oil actually gives a nice flavor crunch to the outside of the fritters that vegetable oil or even canola oil could stand up to. The real kicker is the sauce. If you don't like really spicy condiments, I would use the sauce sparingly, but when added, it really adds more depth to the fritters that I don't think another sauce could handle. Overall, a great dish that's worth a shot to try in your kitchen tonight!
Thanks for swinging by tonight. Stop in on Thursday for a brand new recipe. Until then,
~Cheers!
The Recipe: Spaghetti Squash Fritters with Sriracha Mayonnaise
Original Recipe Found In: Cooking Light, October 2013
What You'll Need:
1 (2 Pound) Spaghetti Squash*
1 (8 Ounce) package Baby Spinach
1/2 Cup Panko
2 Tablespoons grated fresh Parmesan Cheese
1 Tablespoon minced Garlic
1/2 Teaspoon Black Pepper
1/4 Teaspoon Baking Powder
2 large Egg whites
1 Tablespoon Olive Oil, divided
5 Teaspoons Canola Mayonnaise
2 Teaspoons 2% Reduced-Fat Milk
1 Teaspoon Sriracha (or other hot chile sauce)
1 Teaspoon Cider Vinegar
*This is not our first waltz with spaghetti squash, in fact, the first time we used it was almost two years ago. If you care for a flashback, here's our first journaling on spaghetti squash.
To start, cut the squash in half lengthwise. All varieties of squash tend to be a little difficult to handle when cutting, so I advise caution when doing so. Once cut, scoop out the seeds and any remaining innards of the squash and discard. Place the squash halves, cut sides up, on a microwave safe plate. Cover with a damp paper towel. Put in the microwave and cook on high for twenty minutes or until tender. Take the squash out of the microwave and let stand for 10 minutes. Once cooled, scrape the inside of the squash with a fork to remove the spaghetti-like strands until it measures four cups.
Next, heat a large non-stick skillet over medium-high heat. Add the spinach to the pan and cook for two minutes, or until the spinach wilts. Place both the squash and the spinach on a clean dish towel and squeeze until both ingredients are barely moist. Place the spinach and squash on a butting board and coarsely chop until well mixed. Place these ingredients in a large bowl. Next, add the panko, Parmesan cheese, garlic, black pepper, and baking powder to the large bowl and toss well to combine.
In a medium bowl, add the egg whites. Beat the eggs with a mixer at high speed until soft peaks begin to form, about five to seven minutes. Once the eggs are done, gently fold the eggs whites into the squash mixture until all the ingredients well combined.
Using a 1/4 cup dry measuring cup, fill with the squash mixture. Place the cup upside down in your hand and gently pat the mixture until it forms a 3/4 inch thick patty. Repeat the process with the remaining squash mixture, forming ten patties total. Next, heat a large nonstick skillet over medium heat. Add 1 1/2 teaspoons of oil and swirl to coat. Once the skillet is heated, add five patties to the pan and cook for three to five minutes on each side, or until browned. Transfer the patties to dish and cover to keep warm. Add the remaining oil to the skillet and cook the remaining patties.
In a small bowl, add the mayonnaise, milk, Sriracha, and cider vinegar and mix well to combine. Serve with the fritters and enjoy!
The End Result:
If you've never had spaghetti squash, this is great introduction to this tasty and under appreciated vegetable. Granted the squash doesn't have much of a flavor, but pairing it with spinach and cooking it in olive oil makes it taste superb. If you are concerned about the patties being cooked through with the limited time given, don't be. They will be completely warmed through and taste even better. The olive oil actually gives a nice flavor crunch to the outside of the fritters that vegetable oil or even canola oil could stand up to. The real kicker is the sauce. If you don't like really spicy condiments, I would use the sauce sparingly, but when added, it really adds more depth to the fritters that I don't think another sauce could handle. Overall, a great dish that's worth a shot to try in your kitchen tonight!
Thanks for swinging by tonight. Stop in on Thursday for a brand new recipe. Until then,
~Cheers!
Monday, September 23, 2013
Meatless Monday: Lentil Edition
Good evening everyone! Every so often, we like to partake in the 'meatless Monday' movement. For those who are not familiar, it's the simple concept of removing one meat based dish from the menu each week. There are benefits to going vegetarian one day a week, including lower grocery bills (vegetables are considerably cheaper than meat) and better nutritional value per calorie.
This week, we're returning to an old favorite - lentils. Lentils get a bad wrap in the vegetable world. I'm not sure if it's because they need a better PR firm, a new agent who can get their name out there or if they just ticked off some king pin in the vegetable promotion industry and have been blacklisted - but whatever the reason - lentils are looked at like a third world citizen when it comes to the culinary world.
Rather, lentils are looked at unfavorably in the at-home culinary world. Those that cook with the little legumes know that they pack great nutritional value and are actually quite tasty. The challenge is getting others to give them a try.
We've cooked with lentils before (HERE) and enjoyed the great, earthy flavor (think, dark beans) that they provided. The key is cooking lentils like rice, but considering their flavor profile to be that of a kidney or black bean - understand those two concepts and a whole new world of culinary fun is open to you. A world that includes recipes like this:
The Recipe: Lentils with Fried Eggs
Original Recipe Found In: Food Network Magazine, October 2013
What You'll Need:
(Serves 4)
3 Tablespoons Unsalted Butter
4 Large Shallots (Finely chopped)
3 Stalks Celery (Finely chopped)
3 Sprigs Thyme
1/4 Cup Red Wine Vinegar
1 1/2 Teaspoons Sugar
14 Ounces Canned, Diced, Fire Roasted Tomatoes
15 Ounces Lentils
2 Teaspoons Dijon Mustard
2 Tablespoons Parsley
4 Large Eggs
Pita Bread (For serving)
I'd first like to note that the original recipe calls for canned lentils, which are a bit different than dried. We have dried on hand, so it was important for us to follow the instructions on the bag to prepare the lentils PRIOR to using them in the recipe. Canned lentils are already softened and "damp" (for lack of a better word) so they can jump right into the recipe as instructed. If you're using dried, take the extra steps ahead of time to prepare them for the recipe.
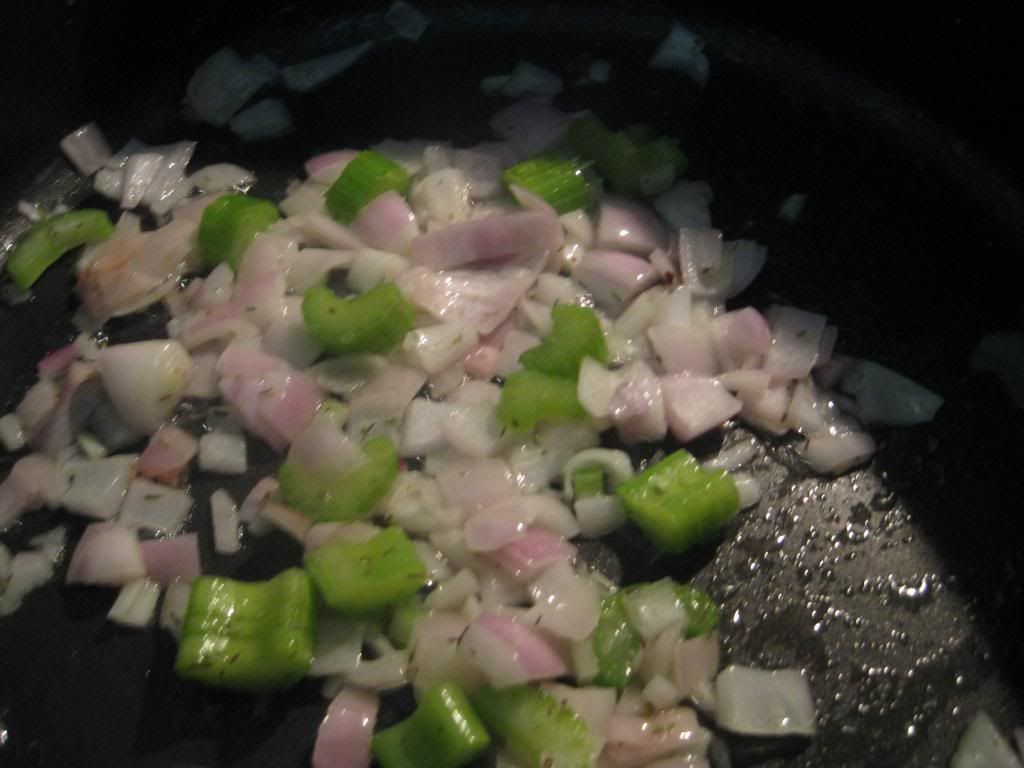
To begin, heat 1 tablespoon of the butter in a large dutch oven or high sided skillet (medium high heat). Add the shallots, celery, thyme and a pinch of salt and cook until the shallots begin to brown, roughly 5 minutes. Make sure to stir the mixture occasionally to promote even cooking.
Next, stir in the sugar along with the red wine vinegar and 1/4 cup of water. Allow the mixture to simmer until the water is nearly evaporated - 5 to 10 minutes.
Add the tomatoes (drained of the liquid from the can) and increase the heat to high. Bring the mixture to a simmer and allow it to cook for 3 minutes before stirring in the lentils along with a cup of water. Return the mixture to a simmer, then reduce the heat to medium and cook until the lentils are soft and cooked through. (Remember, if you used dried lentils, they will already be soft - because you cooked them ahead of time - so they will only need to be heated through here).
Once soft, stir in the mustard and allow the mixture to cook for another 5 minutes. Season lightly with salt and pepper and remove from heat. Keep the pot covered to keep warm while you prepare the eggs.
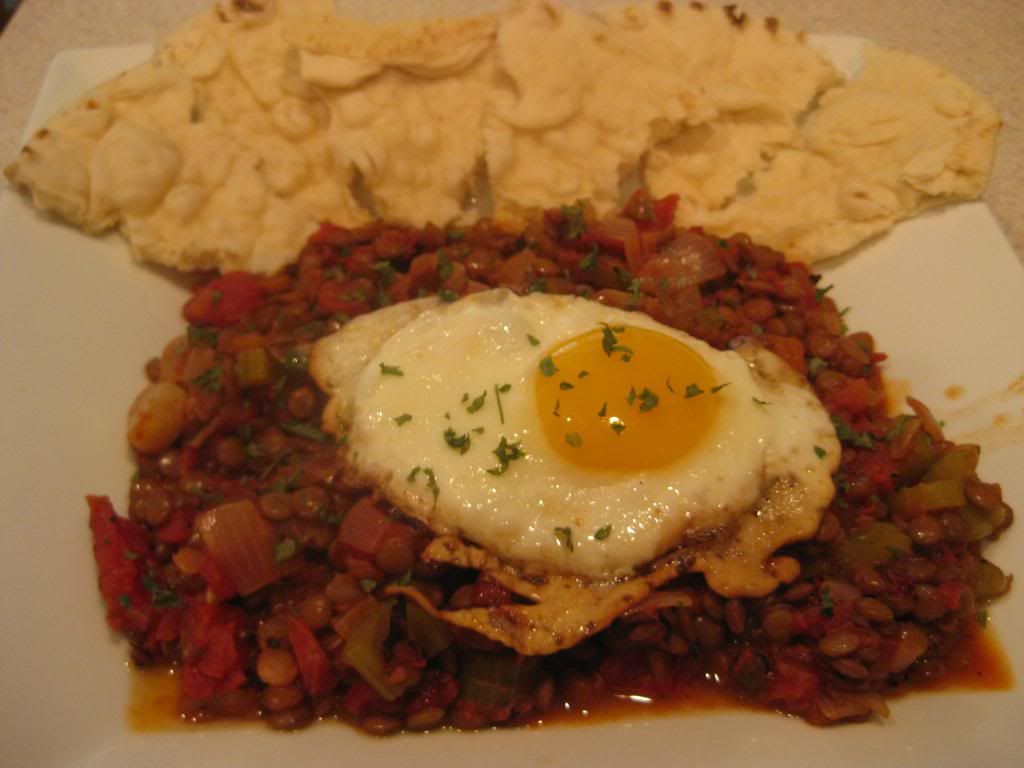
Melt the remaining butter in a large non stick skillet over medium heat. Break each egg into a small bowl, then slide it into the skillet. Cook until the whites set, 3 to 5 minutes. Serve the fried egg on top of the lentils and with a few pieces of pita bread. Sprinkle with the parsley and enjoy!
The Results:
Lentils are versatile, we learned that much when we first used them almost two years ago. Tonight, they proved that again. The combination of the lentils' earthy flavor with the base (tomatoes, mustard, shallots) made for a rich, almost "Italian meets American country" flavor.
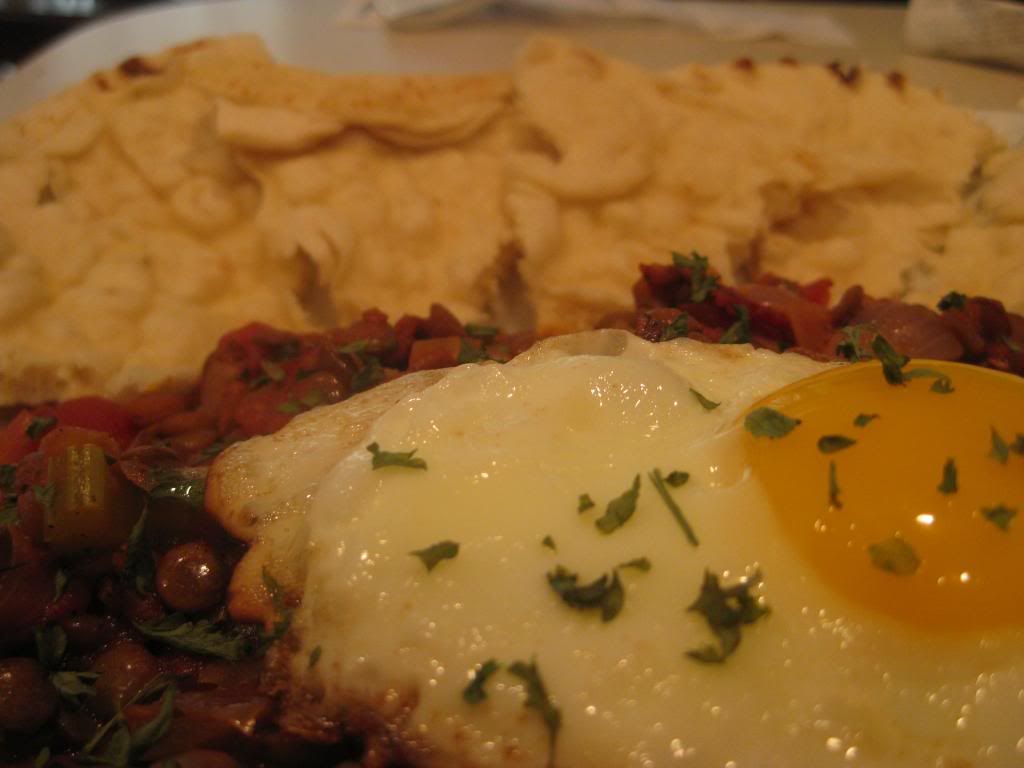
It's the egg and pita that truly complete this dish, however. The egg almost acts like the meat of the dish, adding a bright contrasting flavor that all blends beautifully with the pita bread, which serves as the perfect ambassador of both ingredients.
THe flavors of this dish are rich and refreshing - they're somewhat difficult to put a firm label on, but they can certainly be called "delicious". If you're in the mood for something new and adventurous on the menu, be sure to give this vegetarian dish a try.
Did I mention it's only 300 calories? (Bonus!)
That's all we have for you this evening. Maggie will take to the kitchen tomorrow night with a brand new recipe to share. We'll follow that up with another recipe on Thursday and yet ANOTHER post on Sunday. It's another big week, so be sure to stop back in and see what we have cooking! Until then,
~Cheers
This week, we're returning to an old favorite - lentils. Lentils get a bad wrap in the vegetable world. I'm not sure if it's because they need a better PR firm, a new agent who can get their name out there or if they just ticked off some king pin in the vegetable promotion industry and have been blacklisted - but whatever the reason - lentils are looked at like a third world citizen when it comes to the culinary world.
Rather, lentils are looked at unfavorably in the at-home culinary world. Those that cook with the little legumes know that they pack great nutritional value and are actually quite tasty. The challenge is getting others to give them a try.
We've cooked with lentils before (HERE) and enjoyed the great, earthy flavor (think, dark beans) that they provided. The key is cooking lentils like rice, but considering their flavor profile to be that of a kidney or black bean - understand those two concepts and a whole new world of culinary fun is open to you. A world that includes recipes like this:
The Recipe: Lentils with Fried Eggs
Original Recipe Found In: Food Network Magazine, October 2013
What You'll Need:
(Serves 4)
3 Tablespoons Unsalted Butter
4 Large Shallots (Finely chopped)
3 Stalks Celery (Finely chopped)
3 Sprigs Thyme
1/4 Cup Red Wine Vinegar
1 1/2 Teaspoons Sugar
14 Ounces Canned, Diced, Fire Roasted Tomatoes
15 Ounces Lentils
2 Teaspoons Dijon Mustard
2 Tablespoons Parsley
4 Large Eggs
Pita Bread (For serving)
I'd first like to note that the original recipe calls for canned lentils, which are a bit different than dried. We have dried on hand, so it was important for us to follow the instructions on the bag to prepare the lentils PRIOR to using them in the recipe. Canned lentils are already softened and "damp" (for lack of a better word) so they can jump right into the recipe as instructed. If you're using dried, take the extra steps ahead of time to prepare them for the recipe.
To begin, heat 1 tablespoon of the butter in a large dutch oven or high sided skillet (medium high heat). Add the shallots, celery, thyme and a pinch of salt and cook until the shallots begin to brown, roughly 5 minutes. Make sure to stir the mixture occasionally to promote even cooking.
Next, stir in the sugar along with the red wine vinegar and 1/4 cup of water. Allow the mixture to simmer until the water is nearly evaporated - 5 to 10 minutes.
Add the tomatoes (drained of the liquid from the can) and increase the heat to high. Bring the mixture to a simmer and allow it to cook for 3 minutes before stirring in the lentils along with a cup of water. Return the mixture to a simmer, then reduce the heat to medium and cook until the lentils are soft and cooked through. (Remember, if you used dried lentils, they will already be soft - because you cooked them ahead of time - so they will only need to be heated through here).
Once soft, stir in the mustard and allow the mixture to cook for another 5 minutes. Season lightly with salt and pepper and remove from heat. Keep the pot covered to keep warm while you prepare the eggs.
Melt the remaining butter in a large non stick skillet over medium heat. Break each egg into a small bowl, then slide it into the skillet. Cook until the whites set, 3 to 5 minutes. Serve the fried egg on top of the lentils and with a few pieces of pita bread. Sprinkle with the parsley and enjoy!
The Results:
Lentils are versatile, we learned that much when we first used them almost two years ago. Tonight, they proved that again. The combination of the lentils' earthy flavor with the base (tomatoes, mustard, shallots) made for a rich, almost "Italian meets American country" flavor.
It's the egg and pita that truly complete this dish, however. The egg almost acts like the meat of the dish, adding a bright contrasting flavor that all blends beautifully with the pita bread, which serves as the perfect ambassador of both ingredients.
THe flavors of this dish are rich and refreshing - they're somewhat difficult to put a firm label on, but they can certainly be called "delicious". If you're in the mood for something new and adventurous on the menu, be sure to give this vegetarian dish a try.
Did I mention it's only 300 calories? (Bonus!)
That's all we have for you this evening. Maggie will take to the kitchen tomorrow night with a brand new recipe to share. We'll follow that up with another recipe on Thursday and yet ANOTHER post on Sunday. It's another big week, so be sure to stop back in and see what we have cooking! Until then,
~Cheers
Sunday, September 22, 2013
Better Brown Betty
Hello again everyone! Today officially marks the first day of fall, and that means that certain fruits and veggies are hitting their peak. One fall baking staple in particular, the apple, is at its prime this time of year. We recently made a trip to a local orchard (full post on that coming soon) and had our pick of some absolutely loaded honey crisp apple trees.
We came home with nearly 3 dozen apples and set out to use some of them to make up some great baked treats. Our first recipe was an adaptation on the classic apple brown betty.
The Recipe: Apple Brown Betty
Original Recipe From: The Complete America's Cookbook
What You'll Need:
For the bread crumbs:
4 Slices High Quality Sandwich Bread (Torn into quarters)
3 Tablespoons Unsalted Butter
2 Tablespoons Packed Light Brown Sugar
For the filling:
1/4 Cup Packed Light Brown Sugar
1/4 Teaspoon Ground Ginger
1/4 Teaspoon Ground Cinnamon
3 Tablespoons Unsalted Butter
1 1/2 Pounds Granny Smith Apples (Peeled, cored, cubed)
1 1/2 Pounds Golden Delicious Apples (Peeled, cored, cubed)
1 1/4 Cups Apple Cider
To make the bread crumbs, combine the bread pieces, butter and brown sugar in a food processor and pulse until the mixture becomes coarse (5 to 10 pulses). Transfer the mixture to a 12 inch skillet and toast the bread crumbs over medium heat until they become golden brown, this takes between 10 to 15 minutes. Transfer the crumbs to a paper towel lined plate and set aside for later.
To make the filling, combine the brown sugar and other spices in a small bowl. Melt 1 1/2 tablespoons of butter in a 12 inch skillet over high heat. Stir in the granny smith apples and 1/2 of the sugar mixture. Distribute the apples evenly across the skillet and allow them to simmer for 5 to 10 minutes, stirring occasionally. Once the apples have become tender and golden brown, transfer them to a small bowl and set aside.
Add the remaining 1 1/2 tablespoons of butter to the skillet and repeat the previous process using the golden delicious apples and the remaining sugar mixture. After the apples have become golden brown, add the apple cider to the skillet and stir with a wooden spoon to work up any browned on bits. Allow the mixture to simmer until the cider thickens slightly - this takes an additional 5 to 7 minutes.
Here's where we went 'rogue' from the original recipe. The original instructions tell you to return the other apples to the skillet with the golden delicious apples and to top with the bread crumbs. Sounds nice in theory - but unless you're using a supremely high sided skillet, it's a disaster waiting to happen.
We opted to avoid a stovetop apple catastrophe and instead broke out a deep sided baking dish. Set the oven to 350 degrees and combine the apples in the baking dish, topped with the breadcrumb mixture. Place the baking dish in the oven, and allow the mixture to bake for 30 to 45 minutes, or until the breadcrumb topping turns a deep golden brown.
Remove the dish from the oven and allow it to rest for 15 minutes before serving with ice cream or cool whip. Enjoy!
The result:
It's apples, plus brown sugar and a breading - baked and topped with something sweet. We don't have to tell you now this turned out, we all know it's delicious!
We came home with nearly 3 dozen apples and set out to use some of them to make up some great baked treats. Our first recipe was an adaptation on the classic apple brown betty.
The Recipe: Apple Brown Betty
Original Recipe From: The Complete America's Cookbook
What You'll Need:
For the bread crumbs:
4 Slices High Quality Sandwich Bread (Torn into quarters)
3 Tablespoons Unsalted Butter
2 Tablespoons Packed Light Brown Sugar
For the filling:
1/4 Cup Packed Light Brown Sugar
1/4 Teaspoon Ground Ginger
1/4 Teaspoon Ground Cinnamon
3 Tablespoons Unsalted Butter
1 1/2 Pounds Granny Smith Apples (Peeled, cored, cubed)
1 1/2 Pounds Golden Delicious Apples (Peeled, cored, cubed)
1 1/4 Cups Apple Cider
To make the bread crumbs, combine the bread pieces, butter and brown sugar in a food processor and pulse until the mixture becomes coarse (5 to 10 pulses). Transfer the mixture to a 12 inch skillet and toast the bread crumbs over medium heat until they become golden brown, this takes between 10 to 15 minutes. Transfer the crumbs to a paper towel lined plate and set aside for later.
To make the filling, combine the brown sugar and other spices in a small bowl. Melt 1 1/2 tablespoons of butter in a 12 inch skillet over high heat. Stir in the granny smith apples and 1/2 of the sugar mixture. Distribute the apples evenly across the skillet and allow them to simmer for 5 to 10 minutes, stirring occasionally. Once the apples have become tender and golden brown, transfer them to a small bowl and set aside.
Add the remaining 1 1/2 tablespoons of butter to the skillet and repeat the previous process using the golden delicious apples and the remaining sugar mixture. After the apples have become golden brown, add the apple cider to the skillet and stir with a wooden spoon to work up any browned on bits. Allow the mixture to simmer until the cider thickens slightly - this takes an additional 5 to 7 minutes.
Here's where we went 'rogue' from the original recipe. The original instructions tell you to return the other apples to the skillet with the golden delicious apples and to top with the bread crumbs. Sounds nice in theory - but unless you're using a supremely high sided skillet, it's a disaster waiting to happen.
We opted to avoid a stovetop apple catastrophe and instead broke out a deep sided baking dish. Set the oven to 350 degrees and combine the apples in the baking dish, topped with the breadcrumb mixture. Place the baking dish in the oven, and allow the mixture to bake for 30 to 45 minutes, or until the breadcrumb topping turns a deep golden brown.
Remove the dish from the oven and allow it to rest for 15 minutes before serving with ice cream or cool whip. Enjoy!
The result:
It's apples, plus brown sugar and a breading - baked and topped with something sweet. We don't have to tell you now this turned out, we all know it's delicious!
Friday, September 20, 2013
Local Review: Tacopocalypse
One of the great things about living in the Des Moines metro area is how youthful and vibrant the city has become over the past 5 to 10 years. The city has developed by growing and innovating, expanding and embracing its second ranked (nationally) farmer’s market, while focusing on and bettering its plentiful bike trails, adding new shopping options, and highlighting its beautiful downtown and riverfront area. All of this progress has occurred alongside a boom of local culinary exploration and innovation. Des Moines and the surrounding metro has become a hotbed for young, entrepreneurial chefs to debut their creations.
These factors are why Des Moines typically ranks in the top 10 for cities to live in – especially for young professionals. It’s one of the biggest reasons Maggie and I enjoy making the short jaunt downtown or around the metro – there’s just so much to see when it comes to Des Moines.
Obviously, our favorite part of the city is its culinary offerings. We’ve tried a handful of the small restaurants, street vendors and other food purveyors and have found each to be a delightful experience. Up until this point, we had been content to share the restaurants with friends and our own personal social media platforms – but we hadn’t been giving the local eateries any “ink” on the blog.
That’s about to change.
Starting now and continuing for as long as we see fit, we’ll be featuring a local restaurant or eatery that deserves some extra attention. We’ll cover the prices, the décor and (most importantly) the food. We think it’s a great way to share the awesome culinary world of our community with our readers. Not from Des Moines or even the state of Iowa? No biggie, hopefully you can take these menu items and maybe find some inspiration to create something unique at home or even use these places as motivation to go out and find your own local establishments making up their own fresh and fun food.
Our first entry is actually the most recent restaurant we visited, the awesomely named: Tacopocalypse
![]() |
| Image courtesy of Tacopocalypse's Twitter Account |
621 Des Moines St.
Des Moines, IA 50309
We’d had been hearing great things about Tacopocalypse for some time, but had yet to make the journey to Des Moines’ East Village to actually try the much discussed joint for ourselves. Saturday we decided to correct this atrocious wrong and set out for some Mexican inspired culinary adventures.
Tacopocalypse is a joint that would fit right in on Food Network’s “Diner’s, Drive-Ins and Dives” (Say what you want about Guy Fieri – we like him, most don’t - but the show does give some great attention to smaller joints doing cool things). Tacpocalypse current storefront is the true definition of a “hole in the wall” and I mean that in every positive and praising way possible.
The modest front is accentuated only by a lone banner, bearing the name of the restaurant. The modesty continues inside as well, as the space is decorated only by bare brick and old wooden floors. The chairs and tables are basic wood, painted in neutral grays and blacks. They blend perfectly with the ‘warehouse / casual dive bar’ vibe. The space is relatively small, with roughly a dozen tables (that’s a ballpark, I forgot to actually count) spread across the room. It makes for a cozy, more causal dining experience and despite the fact that each table was filled while we were there, the place never felt crowded.
The ‘back of the house’ features the counter, which sits ahead of the small kitchen. (It’s always cool when you can see your dish being whipped up right behind the counter). A large chalkboard menu hangs over the counter and is easily the best decoration in the joint – simply because it features the delicious menu items cooking up a few feet ahead of you.
Prices are extremely fair, ranging from $2 per taco to $8 per burrito. Maggie ordered the “Burrito of the day” which featured brisket, fresh rosemary, fried rice and spinach and was topped with house queso and a fried egg. (Obviously the burrito of the day is a rotating menu option that will vary depending on the…well…day…you’re there. So, don’t look for this one on the menu EVERY time you stop in).
I ordered the “I can’t believe it’s not breakfast burrito” which contained chorizo, eggs and fried potatoes, all covered with a white gravy and house ground sausage.
![]() |
| The 'burrito of the day' in all of its glory |
First, let me definitively say – yes, the burrito is EXACTLY as big as it looks in the picture. I’d call it huge, but I feel that’d be selling it short. It’s a massive amount of food, so you are certainly getting your money’s worth for the modest $8 price.
Maggie was blown away by the burrito of the day – she particularly liked how the fresh rosemary accentuated the dish – adding a little freshness and lift without overpowering the final flavor (which is REALLY easy to do with rosemary). The house made queso was a huge bonus as well, Maggie referred to it as easily the best queso she’s had (and this is a girl who enjoys her Mexican cheese – she’s darn near an expert).
The “I can’t believe it’s not breakfast burrito” was equally worthy of praise. My favorite part was actually the tortilla. It’s so easy for a great burrito to be ruined by a thick, heavy or chewy tortilla. Tacopocalypse tortillas are light, flaky and don’t weigh down the dish. (In fact they –gasp- add to it!)
The chorizo within my burrito is worthy of its own blog post, but no one wants to read 800 words on a spicy sausage, so I’ll try to keep it short. It’s tough to find a good chorizo, even harder to order one on a menu. Chorizo can range from “burn off your face hot” to “ground beef with chili powder added” bland. There’s a range at play that can give chorizo a bad name – run into one of its too spicy or too bland counterparts and you’ll think bad things of the sausage for years to come.
Tacopocalypse's chorizo should be the ambassador to those unfamiliar with the Mexican staple. It was the perfectly blend of spicy (but not overly hot) sausage. It was full of flavor, accentuated the eggs and potatoes nicely and added just enough heat to let you know this wasn’t your everyday meat filling. I’m a big fan.
We left stuffed to the gills and gurgling with delight. There’s much more to the menu, and we will certainly be back to try all of it. The staff was great, while the atmosphere was simple and perfect for the laid back crowd that was continuously flowing in.
If you’re in the Des Moines metro and looking for a great burrito – the ‘best of list’ has to start with Tacopocalpyse. Check this place out!
Thursday, September 19, 2013
Banana Bread On Steroids
Good evening everyone! Tonight's recipe is going to be a smidge different than what Tyler mentioned last night. Due to a technical difficulty (an ingredient going bad,) I'll be presenting an incredibly delicious dessert. As we've mentioned before, we try to focus our blog with healthy recipes that are easily duplicatable. Every now and then, it's fun to create dishes that you can indulge yourself in. Tonight's recipe is one of those kinds of recipes, especially if you love the combination of peanut butter and chocolate.
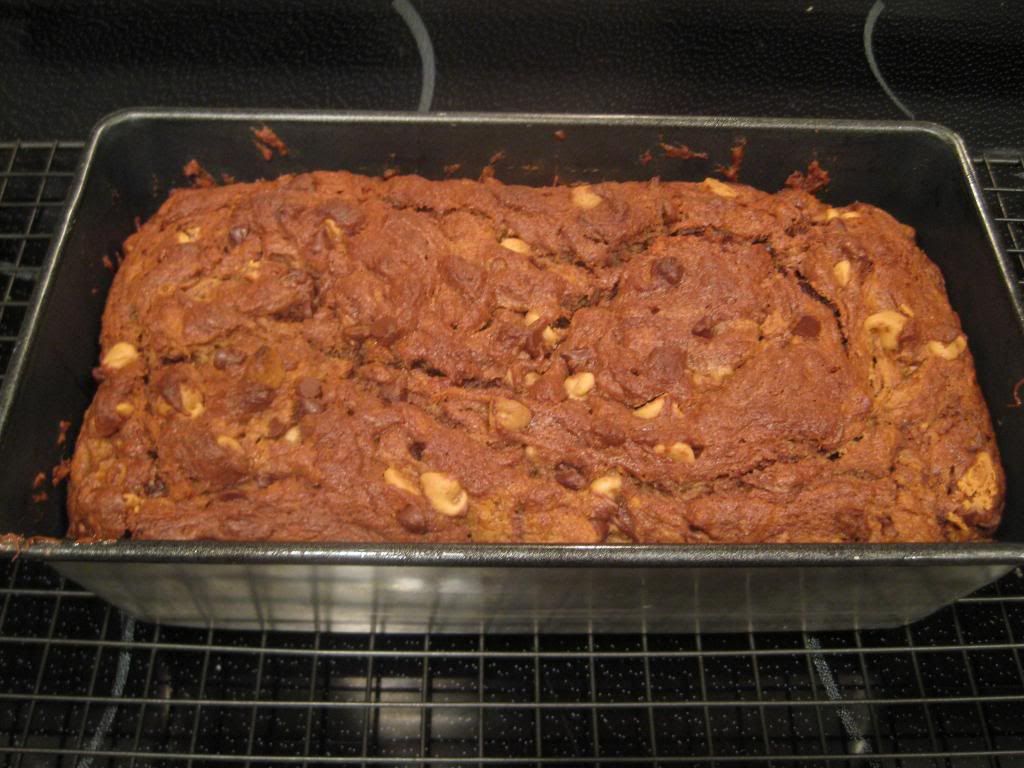
The Recipe: Nutella Swirled Peanut Butter Banana Bread
Original Recipe Sourced From: www.pinterest.com
What You'll Need:
3 very ripe Bananas, mashed
1/2 Cup creamy Peanut Butter
1/4 Cup Canola Oil
1 Egg
1/3 Cup White Sugar
1/4 Cup Brown Sugar
1.5 Cups white Whole Wheat Flour
1/2 Teaspoons Baking Soda
1.5 Teaspoons Baking Powder
1/2 Teaspoon Salt
3/4 Cup Reese's Mini Cups (if you can't find those, Reese's peanut butter chips will do in a pinch)
1/3 Cup Semi-Sweet Chocolate Chips
3 Heaping Tablespoons Nutella
To start, preheat an oven to 350. Prepare an 8x4 inch loaf pan with nonstick cooking spray and set aside.
In a medium bowl, add the flour, baking soda, baking powder, and salt together. Slowly whisk these ingredients together. Next, in a stand mixer, add the bananas, peanut butter, oil, egg, white and brown sugars. Turn the mixer on to the lowest speed and mix these ingredients together until everything is well combined.
Next, slowly pour the dry ingredients into the wet ingredients and mix until everything is just combined - the batter will be very thick but resist the temptation is over mix. Add the Reese's mini cups and the chocolate chips. With a spatula, fold the cups and chips into the batter until just combined.
After the batter is well mixed, spread into the prepared loaf pan. Drop the three tablespoons of Nutella on top of the batter in a row. Poke a knife into the batter and swirl the Nutella into the batter. Next, place the pan in the oven and bake for 50 minutes or until a toothpick inserted into the center comes clean. Every oven is different, so adjust the cooking time if necessary.
Transfer the bread from the oven to a cooking rack. Let the bread cool in the pan for thirty minutes. Cut up slices of the bread, serve, and enjoy!
The End Result:
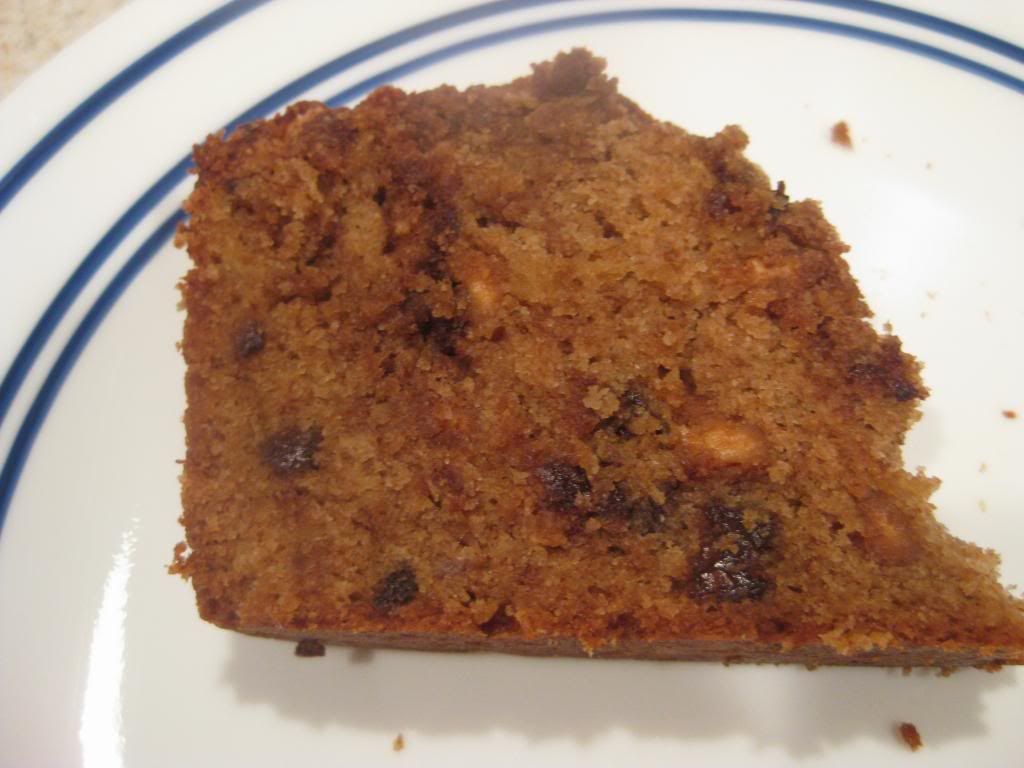
Oh my goodness! If you are a fan of banana bread, or any type of chocolate/peanut butter flavorings, this is the treat for you! It mixes all the different flavors from the bananas, the chocolate chips, and peanut butter into one flavorful combination. The banana flavor is almost a little overwhelming, but the other ingredients help to balance it out. I was a little disappointed that the Nutella didn't get a bigger flavor spotlight, considering there was three tablespoons of it. But overall, it's a hearty, delicious recipe, if you want to enjoy a boost to the generic banana bread.
Thanks for joining us this evening. Check back next week as we continue to showcase recipes and share some of our local eateries. Until then,
~Cheers!
The Recipe: Nutella Swirled Peanut Butter Banana Bread
Original Recipe Sourced From: www.pinterest.com
What You'll Need:
3 very ripe Bananas, mashed
1/2 Cup creamy Peanut Butter
1/4 Cup Canola Oil
1 Egg
1/3 Cup White Sugar
1/4 Cup Brown Sugar
1.5 Cups white Whole Wheat Flour
1/2 Teaspoons Baking Soda
1.5 Teaspoons Baking Powder
1/2 Teaspoon Salt
3/4 Cup Reese's Mini Cups (if you can't find those, Reese's peanut butter chips will do in a pinch)
1/3 Cup Semi-Sweet Chocolate Chips
3 Heaping Tablespoons Nutella
To start, preheat an oven to 350. Prepare an 8x4 inch loaf pan with nonstick cooking spray and set aside.
In a medium bowl, add the flour, baking soda, baking powder, and salt together. Slowly whisk these ingredients together. Next, in a stand mixer, add the bananas, peanut butter, oil, egg, white and brown sugars. Turn the mixer on to the lowest speed and mix these ingredients together until everything is well combined.
Next, slowly pour the dry ingredients into the wet ingredients and mix until everything is just combined - the batter will be very thick but resist the temptation is over mix. Add the Reese's mini cups and the chocolate chips. With a spatula, fold the cups and chips into the batter until just combined.
After the batter is well mixed, spread into the prepared loaf pan. Drop the three tablespoons of Nutella on top of the batter in a row. Poke a knife into the batter and swirl the Nutella into the batter. Next, place the pan in the oven and bake for 50 minutes or until a toothpick inserted into the center comes clean. Every oven is different, so adjust the cooking time if necessary.
Transfer the bread from the oven to a cooking rack. Let the bread cool in the pan for thirty minutes. Cut up slices of the bread, serve, and enjoy!
The End Result:
Oh my goodness! If you are a fan of banana bread, or any type of chocolate/peanut butter flavorings, this is the treat for you! It mixes all the different flavors from the bananas, the chocolate chips, and peanut butter into one flavorful combination. The banana flavor is almost a little overwhelming, but the other ingredients help to balance it out. I was a little disappointed that the Nutella didn't get a bigger flavor spotlight, considering there was three tablespoons of it. But overall, it's a hearty, delicious recipe, if you want to enjoy a boost to the generic banana bread.
Thanks for joining us this evening. Check back next week as we continue to showcase recipes and share some of our local eateries. Until then,
~Cheers!
Wednesday, September 18, 2013
Potatoes, meet Sloppy Joes
Good evening everyone! We’re back after our annual week long hiatus (sorry for not making any proclamation regarding this on the blog, but we’ve found it’s not the best idea to announce “Hey, we’re not going to be home for a week” to the whole world).
After our break we’re feeling rejuvenated and ready to get back to healthy cooking and blogging. We’ve got a bunch of brand new recipes on the docket, but even better we have a new variety of posts we’ll be rolling out over the coming weeks.
We’re making a greater effort to be more engaged with our community, the greater Des Moines metro, than we have been in the past. That means we’ll be featuring reviews of local eateries (Des Moines is LOADED with great independent restaurants and food lovers) and more posts about products, processes and tip and tricks (alongside our usual recipe regime).
We’re revamping our ‘staff’ as well. (Okay, not really. The staff is still just myself and my wife, Maggie – but we’re changing roles within the blog. I’m going to be doing a majority of the writing, while Maggie has taken full control of our social media presence. We plan to be MUCH more interactive with our readers and community from here on out. Maggie will still be writing her own weekly recipe posts, but reviews, special posts and other unique entries will return to my domain).
Enough with the housekeeping – let’s get to cooking!
***
Crisp cool winds are now in the air, and many of the local trees are starting to pick up touches of color. We have damp, cool mornings with moderate afternoons and chilly evenings; that can mean only one thing: fall is upon us.
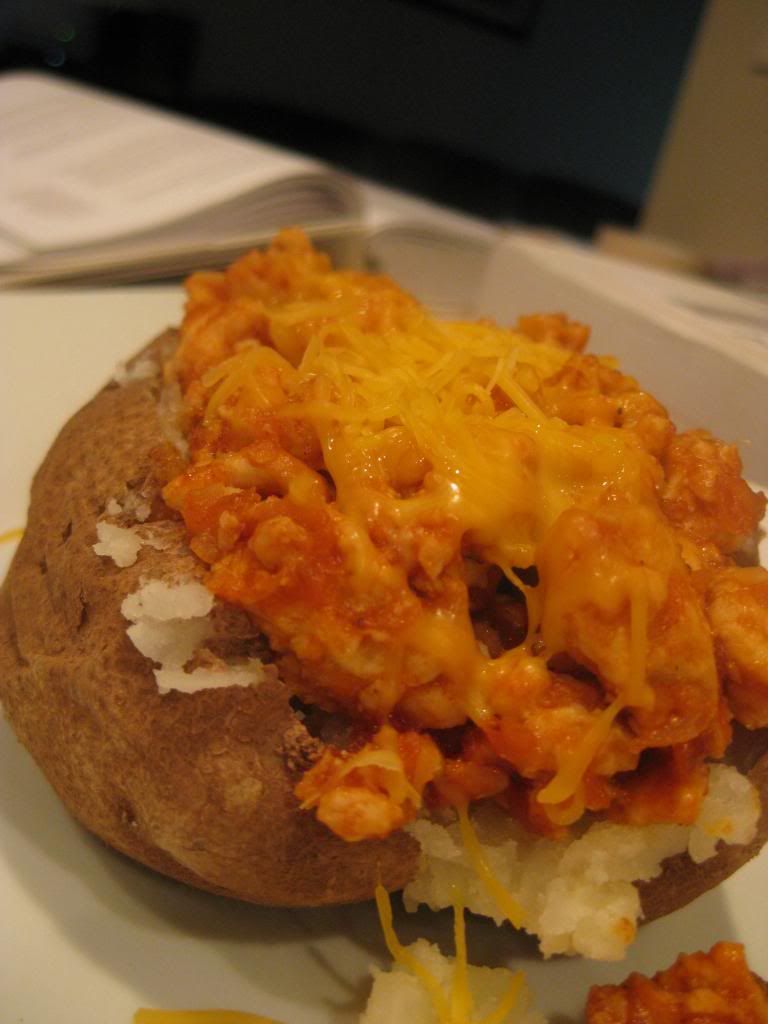
Long time readers will know this already, but fall is our favorite culinary season. Gourds, apples and other fun ingredients hit their prime and the menu can shift to soups, stews or other creative warming creations. Tonight’s recipe is one such creative creation. It blends a classic fall staple – the potato, with another fall sandwich favorite – the sloppy joe. We cut the calories by swapping beef for turkey, but the dish is still full of rich flavor. Want to try it for yourself? Then let’s get cooking!
The Recipe: Sloppy Joe Baked Potatoes
Original Recipe Found In: Food Network Magazine, October 2013 Issue
What You’ll Need:
(Serves 4)
4 Russet Potatoes (Scrubbed clean)
4 Tablespoons Unsalted Butter
1 Small Onion (Diced)
1 Carrot (Diced)
1 Stalk Celery (diced)
1 Pound Lean Ground Turkey
½ Cup Ketchup
½ Cup Sweet Chili Sauce
1 Tablespoon Chile Powder
¼ Teaspoon Garlic Powder
½ Cup Shredded Cheddar Cheese (Low fat)
Begin by piercing your potatoes in a few places (3 to 5 “prods” per spud, try to evenly distribute the pokes across the potato) and place them on a microwave safe plate. Heat until the potatoes are tender, making sure to turn them once during cooking. This takes about 3-5 minutes per potato. Heating all 4 will take 15 minutes, cooking two will take about 8 minutes.
While your potatoes are ‘baking’, melt 1 tablespoon of butter in a large (12 inch) non stick skillet over medium high heat. Add the onion, carrot and celery (or ready made mirepoix mix if you can find it – it’s the same thing) and cook until the vegetables are tender and the onion is translucent. This takes between 5 to 7 minutes.
Next, add the turkey and a pinch of salt and pepper to the skillet with the veggies. Using a wooden spoon or silicon spatula, break up the turkey into smaller pieces. Cook, stirring occasionally, until the turkey is evenly browned and no longer pink. Stir in the ketchup and chili sauce, along with ½ cup of water and the chili powder and garlic powder. Stir well to evenly incorporate all of the ingredients, then allow the mixture to simmer until everything is cooked through – an additional 5 minutes.
To prepare the dish, split your potatoes in the center with a knife. Fluff the insides of the potato with a fork, and place a tablespoon of butter in the center of each potato. Top with a heaping spoonful of the sloppy joe mixture. Top with the shredded cheese, serve and enjoy!
The Results:
This recipe falls under one of my favorite categories. It looks like a guilty pleasure comfort food. It tastes like a guilty pleasure comfort food. When in reality, it doesn’t have to be a guilty pleasure at all. The rich sloppy joe flavor is fantastic, and the substitution of turkey for the beef does little to change the flavor of a traditional sloppy joe. Draped over a perfectly fluffy potato, these flavors all blend beautifully for a savory and filling dish. The best part is that the recipe clocks in at only 450 calories per potato. See? No guilt at all!
That’s all we have for you this evening. Maggie will take to the kitchen on Thursday with a brand new recipe featuring a unique use for one of fall’s best products (think: gourds). We’ll follow that with a special apple based recipe on Saturday.
Next week we’ll have posts on a can’t miss taco joint in Des Moines, a review of some great cuisine at a nearby ballpark and another tasty treat recipe featuring bananas. This is all in addition to our usual recipes for the week! I told you we were ramping things up!
Until tomorrow,
~Cheers
Thursday, September 5, 2013
Light, Yet Incredibly Flavorful
Good evening everyone! Here on the blog, we love to experiment with different ingredients and concepts when cooking with those ingredients. It always surprises me when those recipes turn out and taste incredible. That's exactly what I'm doing tonight and trust me, you'll want to experiment with it too.
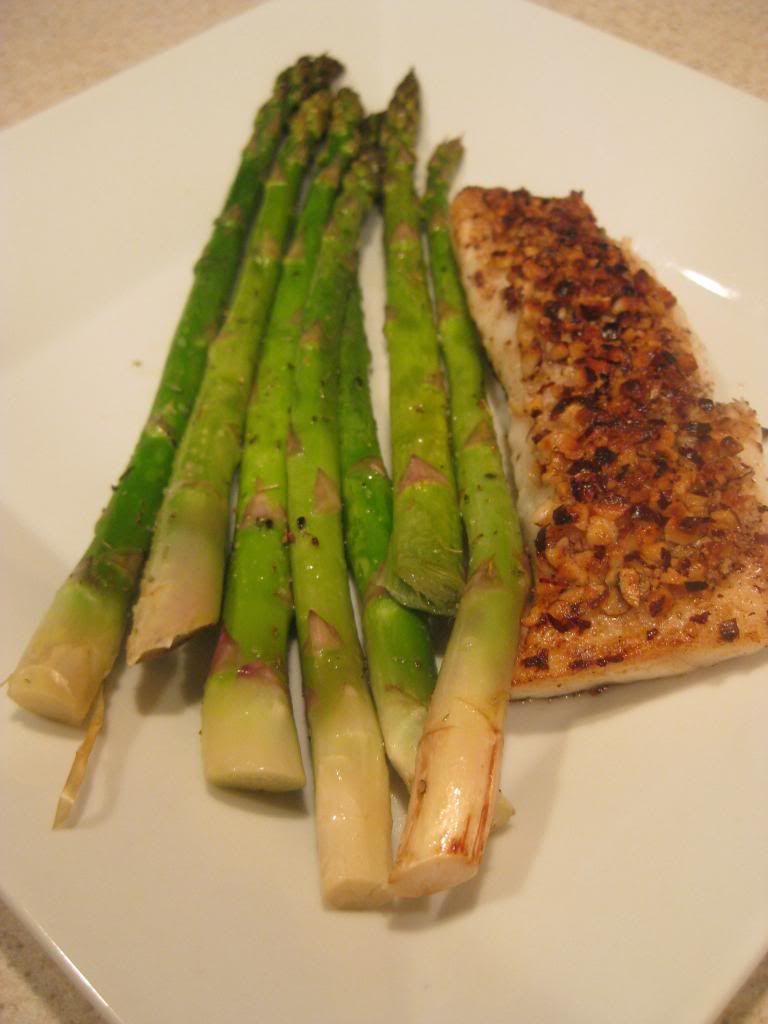
The Recipe: Hazelnut-Crusted Halibut with Roasted Asparagus
Original Recipe Found From: www.myrecipes.com
What You'll Need:
1 Tablespoon Butter
2 Teaspoons Extra-Virgin Olive Oil, divided
4 (6 Ounce) Halibut fillets, skinned
1 Egg White, lightly beaten
1/2 Teaspoon Salt, divided
1/2 Teaspoon Pepper, divided
1/2 Cup finely chopped Hazelnuts
2 Garlic cloves, thinly sliced
1 Pound Asparagus, trimmed
1 Teaspoon chopped fresh Thyme
To start, preheat an oven to 400 degrees. Also, heat a nonstick skillet over medium-high heat with the butter and one teaspoon oil. While both of these begin to heat up, prepare the fish. Brush the tops of the fish fillets with the beaten egg white and sprinkle evenly with a 1/4 teaspoon salt and 1/4 teaspoon pepper. Sprinkle the tops of the fish with the chopped hazelnuts and press gently, yet firmly to adhere the nuts to the fish.
Once the skillet is heated, place half the fish, with the nuts side down, in the skillet. Cook the fish for three to five minutes or until the nuts are browned. Carefully, turn the fish over and continue to cook. Cook for another three to five minutes, or until desired degree of doneness. To prevent any burning, slide the skillet off the burner, gently pick up the fish to place on a clean plate, and cover to keep warm.
By now, the oven should be preheated and you can begin to prepare the asparagus: combine the remaining olive oil, garlic, and asparagus on a baking sheet, coated with an even layer of cooking spray. Toss all these ingredients until well combined. Sprinkle the remaining salt, pepper, and thyme on top of the asparagus. Place the baking sheet in the preheated oven and cook for eight to ten minutes, or until crisp tender. Serve the asparagus with the fish and enjoy!
The End Result:
The fish was cooked perfectly, flakiness and all. If you want a little boost of flavor, gently spritz with lemon juice, but not enough to completely soak. But the real star of this dish was the chopped hazelnuts. I don't cook (or eat, except when it comes to Nutella,) with hazelnuts to warrant using them. But the hazelnuts on top of this fish? Phenomenal! They still have a bit of nuttiness, but when they are warmed, they taste great. The asparagus was quite delicious also. Roasting in olive oil, garlic, and thyme made them super flavorful and a great alternative to any "standard" vegetable. Such a great combination, paring the fish and asparagus together, and for only 356 calories, it's a worthy dish to cook in your kitchen tonight!
Thanks for joining us tonight. Tyler will swing by tomorrow for a very unique spin on a taco. Until then,
~Cheers!
The Recipe: Hazelnut-Crusted Halibut with Roasted Asparagus
Original Recipe Found From: www.myrecipes.com
What You'll Need:
1 Tablespoon Butter
2 Teaspoons Extra-Virgin Olive Oil, divided
4 (6 Ounce) Halibut fillets, skinned
1 Egg White, lightly beaten
1/2 Teaspoon Salt, divided
1/2 Teaspoon Pepper, divided
1/2 Cup finely chopped Hazelnuts
2 Garlic cloves, thinly sliced
1 Pound Asparagus, trimmed
1 Teaspoon chopped fresh Thyme
To start, preheat an oven to 400 degrees. Also, heat a nonstick skillet over medium-high heat with the butter and one teaspoon oil. While both of these begin to heat up, prepare the fish. Brush the tops of the fish fillets with the beaten egg white and sprinkle evenly with a 1/4 teaspoon salt and 1/4 teaspoon pepper. Sprinkle the tops of the fish with the chopped hazelnuts and press gently, yet firmly to adhere the nuts to the fish.
Once the skillet is heated, place half the fish, with the nuts side down, in the skillet. Cook the fish for three to five minutes or until the nuts are browned. Carefully, turn the fish over and continue to cook. Cook for another three to five minutes, or until desired degree of doneness. To prevent any burning, slide the skillet off the burner, gently pick up the fish to place on a clean plate, and cover to keep warm.
By now, the oven should be preheated and you can begin to prepare the asparagus: combine the remaining olive oil, garlic, and asparagus on a baking sheet, coated with an even layer of cooking spray. Toss all these ingredients until well combined. Sprinkle the remaining salt, pepper, and thyme on top of the asparagus. Place the baking sheet in the preheated oven and cook for eight to ten minutes, or until crisp tender. Serve the asparagus with the fish and enjoy!
The End Result:
The fish was cooked perfectly, flakiness and all. If you want a little boost of flavor, gently spritz with lemon juice, but not enough to completely soak. But the real star of this dish was the chopped hazelnuts. I don't cook (or eat, except when it comes to Nutella,) with hazelnuts to warrant using them. But the hazelnuts on top of this fish? Phenomenal! They still have a bit of nuttiness, but when they are warmed, they taste great. The asparagus was quite delicious also. Roasting in olive oil, garlic, and thyme made them super flavorful and a great alternative to any "standard" vegetable. Such a great combination, paring the fish and asparagus together, and for only 356 calories, it's a worthy dish to cook in your kitchen tonight!
Thanks for joining us tonight. Tyler will swing by tomorrow for a very unique spin on a taco. Until then,
~Cheers!
Thursday, August 29, 2013
Anyone Care for Dessert?
Good evening everyone to an extra night of cooking here on Out of the Culinary! As we focus on low calorie recipes, sometimes it's nice to splurge on a dessert everyone now and then. Unfortunately, the majority of these recipes are ridiculously high in the calorie count and it wouldn't even be worth the splurge. Tonight, I'm creating a delicious dessert, that just happens to be nutritious too!
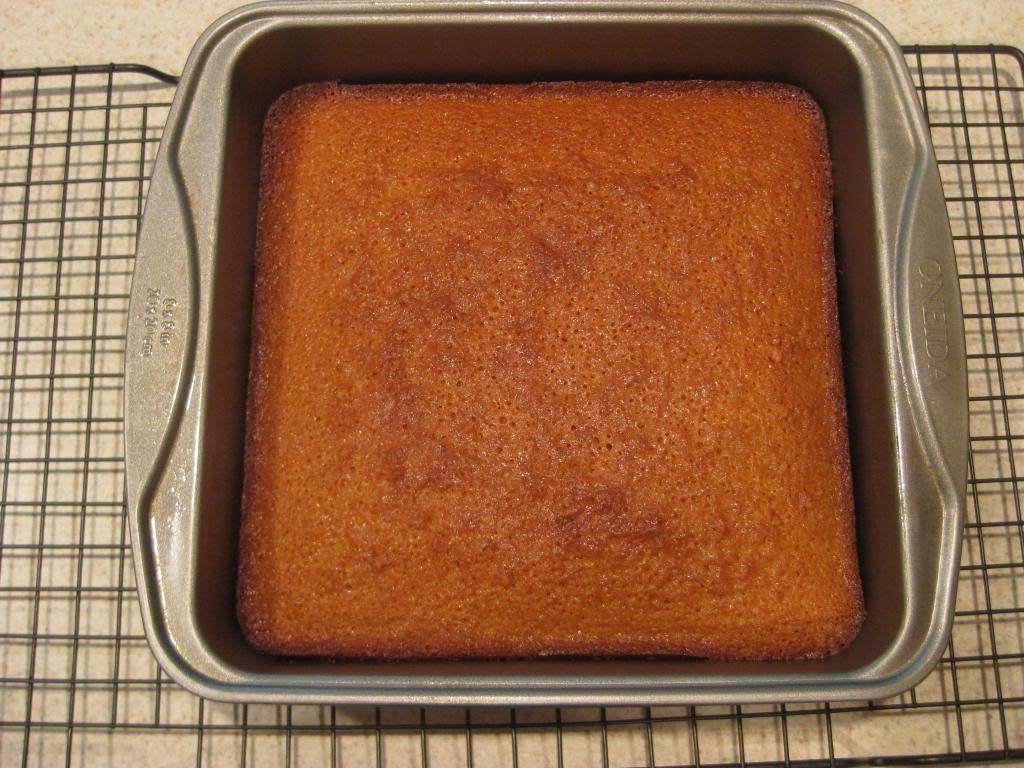
The Recipe: Butterscotch Blondes
Original Recipe Found In: Cooking Light, September 2013 Issue
What You'll Need:
4.5 Ounces Whole-Wheat Pastry Flour (about one cup)*
1/2 Teaspoon Baking Powder
1/2 Teaspoon Salt
1/4 Cup Butterscotch Morsels
2 Tablespoons Half-and-Half
3/4 Cup Brown Sugar
3 Tablespoons Canola Oil
3 Tablespoons Butter, melted
1 Teaspoon Vanilla Extract
2 Large Eggs
1/3 Cup Semisweet Chocolate Chips
*Note: While we knew that whole-wheat pastry flour is a specialized ingredient, we knew not to look in the regular grocery store. We found the flour in a supermarket and I'm sure you can find it too in a grocery store that has a large baking section.
To start, preheat an oven to 350 degrees. Next, weight or lightly spoon the flour into a dry measuring cup and level in a knife. In a medium mixing bowl, add the flour, baking powder, and salt. Stir with a whisk, making sure all the ingredients are well combined.
In a medium microwave-safe bowl, mix the butterscotch morsels and the half-and-half. Pop into the microwave and microwave on high for 45 seconds, stirring every 15 seconds until this mixture is smooth. Into a mixing bowl, add the brown sugar, canola oil, butter, vanilla, and eggs. Using a mixer, beat these ingredients for two minutes, or until all the ingredient are well combined. Add the flour mixture and the butterscotch mixture to the mixing bowl and stir until just combined. Finally, stir in the chocolate chips.
In an 8-inch square metal baking pan, coat with cooking spray. Pour the batter into the baking pan. By this time, the oven should be preheated. Place the baking pan in the oven and bake for 40 minutes at 350 degrees, or until a wooden pick inserted comes out with moist crumbs clinging. Place the pan on a wire rack to cool. Cut into 16 squares, serve, and enjoy!
The End Result:
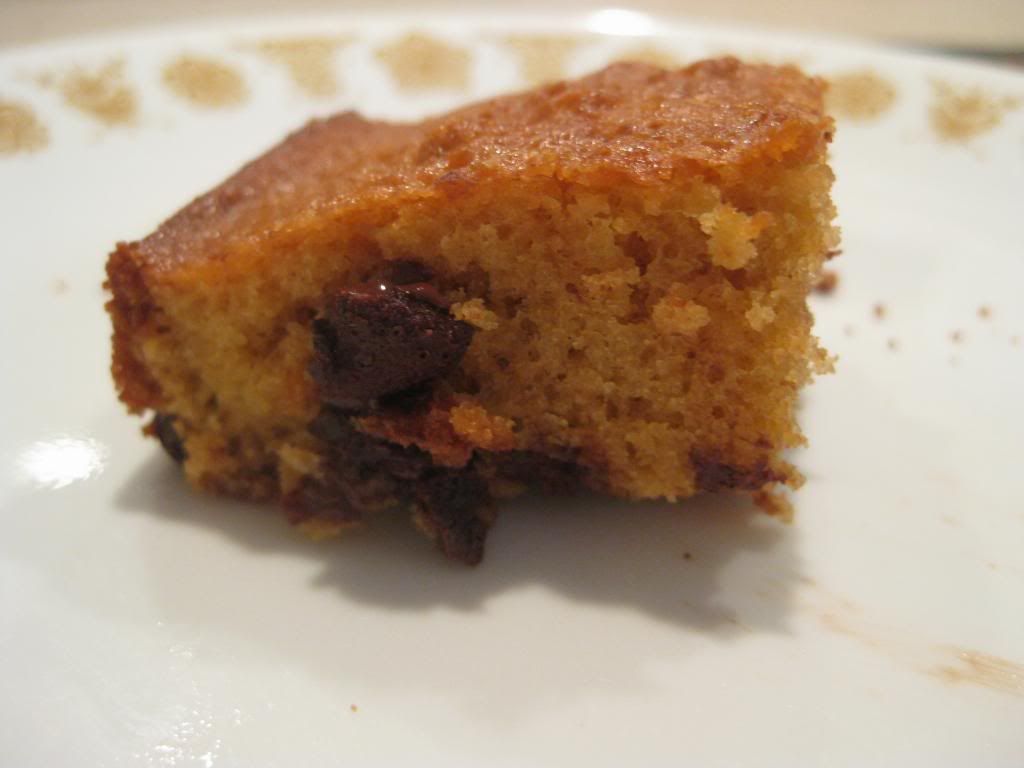
These little squares are packed with moist, yet crumbly goodness. The whole-wheat flour definitely is a different flavor direction your mouth will not be ready for. It a complete flavor difference than just regular all-purpose flour. Bits of butterscotch flavor are infused into the bars. While it's not a smack in the face flavor, it's enough to notice and it makes it more flavorful. The chocolate chips become somewhat melty and an ooey-gooey consistency happens. With each square being 154 calories, it's okay to have more than one and you won't feel guilty!
Thanks for joining us this week. If you are in the states, celebrate the last blast of summer of Labor Day, and we'll rejoin next week with brand new recipes to share with you all. Until then,
~Cheers!
The Recipe: Butterscotch Blondes
Original Recipe Found In: Cooking Light, September 2013 Issue
What You'll Need:
4.5 Ounces Whole-Wheat Pastry Flour (about one cup)*
1/2 Teaspoon Baking Powder
1/2 Teaspoon Salt
1/4 Cup Butterscotch Morsels
2 Tablespoons Half-and-Half
3/4 Cup Brown Sugar
3 Tablespoons Canola Oil
3 Tablespoons Butter, melted
1 Teaspoon Vanilla Extract
2 Large Eggs
1/3 Cup Semisweet Chocolate Chips
*Note: While we knew that whole-wheat pastry flour is a specialized ingredient, we knew not to look in the regular grocery store. We found the flour in a supermarket and I'm sure you can find it too in a grocery store that has a large baking section.
To start, preheat an oven to 350 degrees. Next, weight or lightly spoon the flour into a dry measuring cup and level in a knife. In a medium mixing bowl, add the flour, baking powder, and salt. Stir with a whisk, making sure all the ingredients are well combined.
In a medium microwave-safe bowl, mix the butterscotch morsels and the half-and-half. Pop into the microwave and microwave on high for 45 seconds, stirring every 15 seconds until this mixture is smooth. Into a mixing bowl, add the brown sugar, canola oil, butter, vanilla, and eggs. Using a mixer, beat these ingredients for two minutes, or until all the ingredient are well combined. Add the flour mixture and the butterscotch mixture to the mixing bowl and stir until just combined. Finally, stir in the chocolate chips.
In an 8-inch square metal baking pan, coat with cooking spray. Pour the batter into the baking pan. By this time, the oven should be preheated. Place the baking pan in the oven and bake for 40 minutes at 350 degrees, or until a wooden pick inserted comes out with moist crumbs clinging. Place the pan on a wire rack to cool. Cut into 16 squares, serve, and enjoy!
The End Result:
These little squares are packed with moist, yet crumbly goodness. The whole-wheat flour definitely is a different flavor direction your mouth will not be ready for. It a complete flavor difference than just regular all-purpose flour. Bits of butterscotch flavor are infused into the bars. While it's not a smack in the face flavor, it's enough to notice and it makes it more flavorful. The chocolate chips become somewhat melty and an ooey-gooey consistency happens. With each square being 154 calories, it's okay to have more than one and you won't feel guilty!
Thanks for joining us this week. If you are in the states, celebrate the last blast of summer of Labor Day, and we'll rejoin next week with brand new recipes to share with you all. Until then,
~Cheers!
Wednesday, August 28, 2013
Taking Take Out Home
Good evening everyone! When you order take out from any restaurant, the only complaint is that the food you are receiving is too high in calories. While it's a quick and convenient way to have any meal, there are way too many calories that one should consume in a day, (but it's definitely nice to indulge every once in a while.) Tonight, I'm bringing the take out home. By cooking it yourself, you save the calories and still get to indulge.
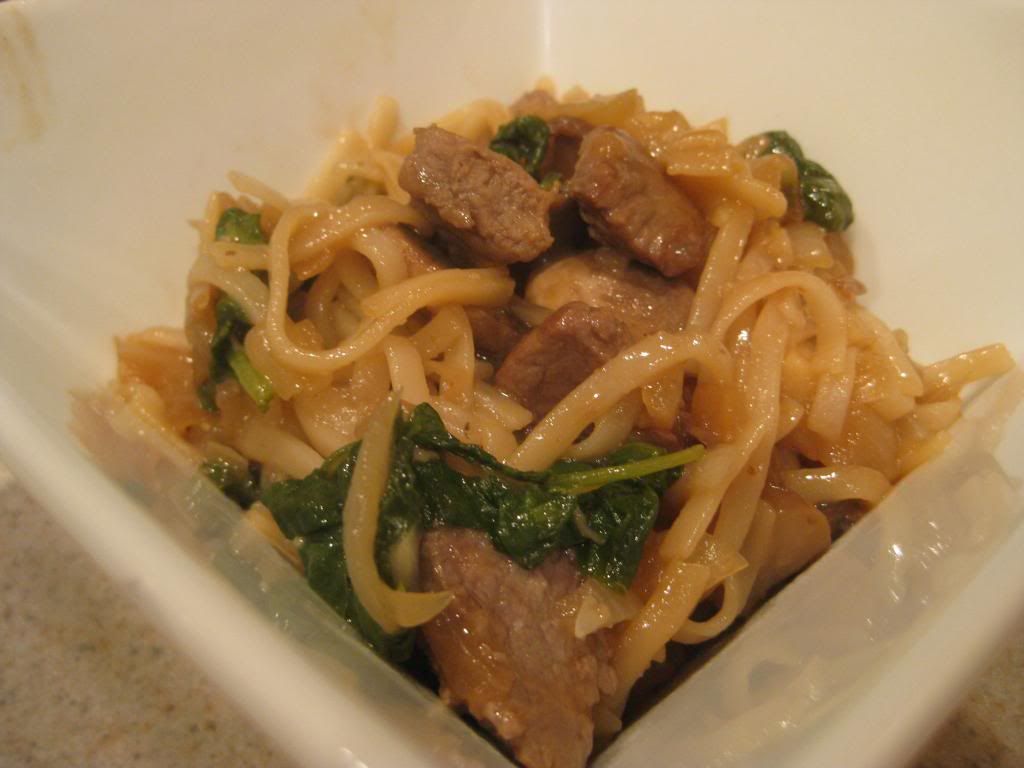
The Recipe: Stir-Fried Rice Noodles with Beef and Spinach
Original Recipe Found In: Cooking Light September 2013 iPad Issue
What You'll Need:
6 Ounces uncooked wide Rice Noodles (or rice-flour noodles)
1 Tablespoon Canola Oil
1 Cup thinly sliced Green Onions
2/3 Pound top Sirloin Steak, cut into thin, one inch strips
2 Cups sliced Shiitake Mushroom caps
2 Garlic cloves, finely minced
1 (6 ounce) bag washed Baby Spinach
2 Tablespoons Rice Vinegar
1 Tablespoon fresh Lime Juice
3 Tablespoons lower-sodium Soy Sauce
2 Teaspoons grated peeled fresh Ginger
2 Teaspoons Sriracha (or hot chili sauce)
1 Tablespoon dark Sesame Oil
1/4 Teaspoon Salt
2 Teaspoons Sesame Seeds, toasted
To start, bring a large stockpot of water to boil. Once at a boil, add the rice noodles. Cook the noodles according to package directions (usually between eight to ten minutes.) Once cooked, drain the noodles in a colander and rinse with cold water. Set the noodles aside.
In a small mixing bowl, combine the rice vinegar, lime juice, soy sauce, ginger, and Sriracha. Whisk these ingredients together until well combined. Set the bowl aside.
Next, heat a large nonstick skillet over high heat. If you have a wok available to use, you can use this instead of a large skillet. Add the canola oil and swirl to coat. Once heated, add the onions and steak and stir fry for one minute or until the steak begins to turn a light brown and the onions begin to soften. Next, add the mushrooms and garlic. Stir fry these ingredients until the mushrooms begin to soften, about three minutes. Add the spinach and continue to stir fry, until the spinach begins to wilt, about two minutes.
Once all the ingredients in the skillet are well-combined and cooked through, add the vinegar mixture to the steak mixture. Stir everything together until the sauce begins to thicken. Add the noodles, sesame oil, and salt. Stir until the noodles are heated and coated, about one to two minutes. Sprinkle in the sesame seeds, serve, and enjoy!
The End Result:
When we create a recipe that is very similar to take out food, it's impossible to brag. All the ingredients were incredible tasty together - I swear beef and mushrooms were meant to be together! The beef was so thinly sliced that it cooks almost instantly and soaks in any flavor from other ingredients. The mushrooms almost give a meaty quality that isn't given by the beef. The spinach is almost tasteless, but does add that pop of green and adds some definite vitamin power. The rice noodles are slowly becoming by new favorite. Not only are they low in calories, but they make an excellent substitution for any pasta. At slightly over 400 calories a serving, it's hard to enjoy this take out substitute at home!
Thanks for joining us this evening. Check back tomorrow as I present a bonus dessert recipe that you'll want to whip up this week. Until then,
~Cheers!
The Recipe: Stir-Fried Rice Noodles with Beef and Spinach
Original Recipe Found In: Cooking Light September 2013 iPad Issue
What You'll Need:
6 Ounces uncooked wide Rice Noodles (or rice-flour noodles)
1 Tablespoon Canola Oil
1 Cup thinly sliced Green Onions
2/3 Pound top Sirloin Steak, cut into thin, one inch strips
2 Cups sliced Shiitake Mushroom caps
2 Garlic cloves, finely minced
1 (6 ounce) bag washed Baby Spinach
2 Tablespoons Rice Vinegar
1 Tablespoon fresh Lime Juice
3 Tablespoons lower-sodium Soy Sauce
2 Teaspoons grated peeled fresh Ginger
2 Teaspoons Sriracha (or hot chili sauce)
1 Tablespoon dark Sesame Oil
1/4 Teaspoon Salt
2 Teaspoons Sesame Seeds, toasted
To start, bring a large stockpot of water to boil. Once at a boil, add the rice noodles. Cook the noodles according to package directions (usually between eight to ten minutes.) Once cooked, drain the noodles in a colander and rinse with cold water. Set the noodles aside.
In a small mixing bowl, combine the rice vinegar, lime juice, soy sauce, ginger, and Sriracha. Whisk these ingredients together until well combined. Set the bowl aside.
Next, heat a large nonstick skillet over high heat. If you have a wok available to use, you can use this instead of a large skillet. Add the canola oil and swirl to coat. Once heated, add the onions and steak and stir fry for one minute or until the steak begins to turn a light brown and the onions begin to soften. Next, add the mushrooms and garlic. Stir fry these ingredients until the mushrooms begin to soften, about three minutes. Add the spinach and continue to stir fry, until the spinach begins to wilt, about two minutes.
Once all the ingredients in the skillet are well-combined and cooked through, add the vinegar mixture to the steak mixture. Stir everything together until the sauce begins to thicken. Add the noodles, sesame oil, and salt. Stir until the noodles are heated and coated, about one to two minutes. Sprinkle in the sesame seeds, serve, and enjoy!
The End Result:
When we create a recipe that is very similar to take out food, it's impossible to brag. All the ingredients were incredible tasty together - I swear beef and mushrooms were meant to be together! The beef was so thinly sliced that it cooks almost instantly and soaks in any flavor from other ingredients. The mushrooms almost give a meaty quality that isn't given by the beef. The spinach is almost tasteless, but does add that pop of green and adds some definite vitamin power. The rice noodles are slowly becoming by new favorite. Not only are they low in calories, but they make an excellent substitution for any pasta. At slightly over 400 calories a serving, it's hard to enjoy this take out substitute at home!
Thanks for joining us this evening. Check back tomorrow as I present a bonus dessert recipe that you'll want to whip up this week. Until then,
~Cheers!
Tuesday, August 27, 2013
Saving Coleslaw...With Bacon!
Good evening everyone! Coleslaw is a quintessential summer dish that falls under the 'love it or hate it' classification. You hardly find someone who can "take or leave" the cabbage based side dish - rather people either love it to pieces or detest it. Full disclosure, I find myself on the 'hate it' side of the equation.
If we've discovered one thing this summer, it has been that bacon really does make every dish better. So, when I discovered a recipe that paired two things I love (bacon and corn) with the traditional coleslaw side dish, I knew I had to give it a try. Would bacon be enough to make coleslaw a personal favorite? Let's find out!
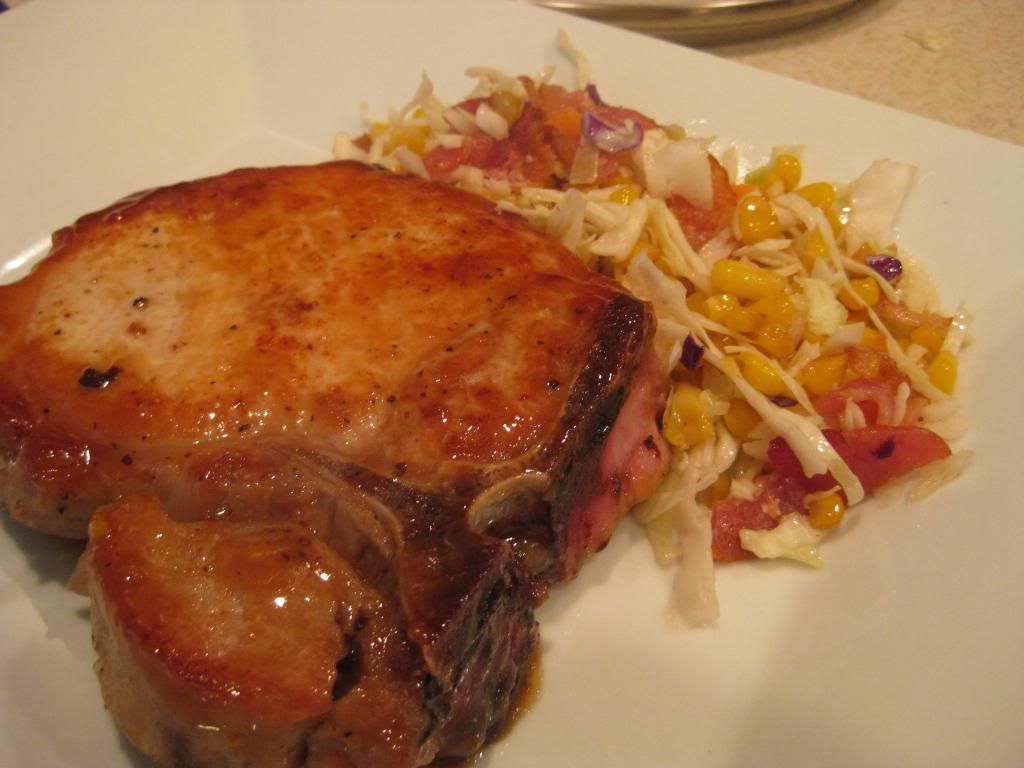
The Recipe: Pork Chops With Corn-Bacon Slaw
Original Recipe Found In: Food Network Magazine, September 2013
What You'll Need:
(Serves 4)
4 Center Cut Bone In Chops (2 pounds total)
4 Slices Bacon
2 Ears of corn (Kernels removed)
4 Cups Shredded Coleslaw Mix
* The pork chop recipe is wide open for your preference here. You can choose from any pork chop concoction we've cooked up over the years (search "pork chops" in the upper left hand portion of the page) or you can use your own recipe. For this dish, I'm making up the maple glaze sauce from THIS recipe, but you're free to do as you wish. (I'd recommend the maple glaze recipe linked above or our BBQ sauce recipe, found HERE)
To prepare the slaw, begin by cooking the bacon slices in a large skillet until the pieces are crispy and cooked through. Transfer the bacon to a paper towel lined plate to dry off the excess grease, then chop the bacon into 1/2 to 1/4 inch pieces. Set aside.
Depending on pork chop recipe you're following, you may need to cook the chops in a skillet. If that's the case, go ahead and add the chops into the skillet now. Using the bacon grease in the skillet really boosts the flavor of the chop, while providing a great oil crisp and brown the outer edge of the chop. Once cooked, transfer the chops to a 200 degree oven or a plate tented with foil to keep warm.
In the same skillet, add the corn and cook in the bacon grease until the kernels turn a light golden brown color (3 to 5 minutes). Stir the cooked corn into a large bowl with the coleslaw mix and the bacon pieces. Serve the slaw with the pork chops and enjoy!
The Results:
There's not much to this recipe, but that doesn't mean it doesn't deliver. Bacon, once again, saves the day. The blending of bacon and corn, which Maggie discovered in her side dish from earlier this month, is a beautiful harmony of flavor that really brings out the best aspects of the coleslaw mix. What can be an underwhelming side dish is picked up by two simple ingredients. The cabbage within the coleslaw acts as a companion to the bacon, brightening the final flavor - simply put, coleslaw can move off my blacklist...so long as it has bacon and corn alongside it.
That's all we have for you this evening, but we've got a full week of cooking ahead. Maggie will be taking to the kitchen on Wednesday night with a uniquely Asian inspired dish, followed by a special post on Thursday featuring a simple and delicious dessert treat. Stop in tomorrow to see what's on the menu. Until then,
~Cheers
If we've discovered one thing this summer, it has been that bacon really does make every dish better. So, when I discovered a recipe that paired two things I love (bacon and corn) with the traditional coleslaw side dish, I knew I had to give it a try. Would bacon be enough to make coleslaw a personal favorite? Let's find out!
The Recipe: Pork Chops With Corn-Bacon Slaw
Original Recipe Found In: Food Network Magazine, September 2013
What You'll Need:
(Serves 4)
4 Center Cut Bone In Chops (2 pounds total)
4 Slices Bacon
2 Ears of corn (Kernels removed)
4 Cups Shredded Coleslaw Mix
* The pork chop recipe is wide open for your preference here. You can choose from any pork chop concoction we've cooked up over the years (search "pork chops" in the upper left hand portion of the page) or you can use your own recipe. For this dish, I'm making up the maple glaze sauce from THIS recipe, but you're free to do as you wish. (I'd recommend the maple glaze recipe linked above or our BBQ sauce recipe, found HERE)
To prepare the slaw, begin by cooking the bacon slices in a large skillet until the pieces are crispy and cooked through. Transfer the bacon to a paper towel lined plate to dry off the excess grease, then chop the bacon into 1/2 to 1/4 inch pieces. Set aside.
Depending on pork chop recipe you're following, you may need to cook the chops in a skillet. If that's the case, go ahead and add the chops into the skillet now. Using the bacon grease in the skillet really boosts the flavor of the chop, while providing a great oil crisp and brown the outer edge of the chop. Once cooked, transfer the chops to a 200 degree oven or a plate tented with foil to keep warm.
In the same skillet, add the corn and cook in the bacon grease until the kernels turn a light golden brown color (3 to 5 minutes). Stir the cooked corn into a large bowl with the coleslaw mix and the bacon pieces. Serve the slaw with the pork chops and enjoy!
The Results:
There's not much to this recipe, but that doesn't mean it doesn't deliver. Bacon, once again, saves the day. The blending of bacon and corn, which Maggie discovered in her side dish from earlier this month, is a beautiful harmony of flavor that really brings out the best aspects of the coleslaw mix. What can be an underwhelming side dish is picked up by two simple ingredients. The cabbage within the coleslaw acts as a companion to the bacon, brightening the final flavor - simply put, coleslaw can move off my blacklist...so long as it has bacon and corn alongside it.
That's all we have for you this evening, but we've got a full week of cooking ahead. Maggie will be taking to the kitchen on Wednesday night with a uniquely Asian inspired dish, followed by a special post on Thursday featuring a simple and delicious dessert treat. Stop in tomorrow to see what's on the menu. Until then,
~Cheers
Wednesday, August 21, 2013
Bourbon, Bacon & Burgers...Brilliant!
Good evening everyone! First and foremost, my apologies for not posting my regularly scheduled recipe last week – we ran into a little ingredient difficulty (Read: shortage) and that forced me to postpone my dish into this week.
If you watch the Food Network with any sort of regularity, you’ve likely encountered the show “Diners, Drive-Ins and Dives”. If you’re unfamiliar with the show and its boisterous host, Guy Fieri, the premise is simple. Guy travels across the country stopping at various diners, drive-ins and dive bars, looking for the best menus, great food items and unique culinary ideas. We enjoy the show simply because you get to see such a large cross section of American cuisine. There are those that find Guy’s passionate and catch phrase heavy presentation to be too much of a shtick, but if you’re going to let things like that bother you – your issues are probably more with yourself than with any host of any show.
Last month’s Food Network Magazine featured a burger from the show. The burger was discovered during Guy’s visit to St. Paul Minnesota at a place called Casper’s & Runyon’s Nook. This recipe blends some of my favorite things – burgers, bacon and bourbon - and is appropriately called “The Triple B Burger” You can’t have a trifecta like that and NOT expect me to try it! Let’s get cooking!
The Recipe: The Triple B Burger
Original Recipe From: Casper’s & Runyon’s Nook (St. Paul, Minnesota)
What You’ll Need:
(Serves 6)
For the bourbon sauce:
¼ Cup Cornstarch
¼ Cup Confectioners’ Sugar
¼ Teaspoon Cayenne Pepper
¼ Teaspoon Salt
¼ Teaspoon Black Pepper
¾ Cup Bourbon
2 Tablespoons Soy Sauce
2 Tablespoons Worcestershire Sauce
2 Tablespoons Maple Syrup
1/3 Cup Sesame Oil
2 ½ Tablespoons Balsamic Vinegar
1 Teaspoon Dijon Mustard
1 Teaspoon Minced Garlic
1 Teaspoon Minced Onion
1 ½ Teaspoons Tabasco Sauce
½ Cup Packed Brown Sugar
½ Cup Granulated Sugar
For the burgers:
2 Pounds 85/15 Ground Beef*
12 Slices Thick Cut Smoked Bacon, Cooked Until Crispy
6 Slices Mild Cheddar Cheese
6 Fresh Bakery Buns, Buttered and Toasted
* Many burger recipes call for 80/20 beef, simply because they want all of that fat to stay within the burger for a juicy finish. More fat means a greater chance that the beef will retain that moisture. I’ve found that 80/20 beef tends to cause more grill flare ups (essentially – grease fires) than it’s worth. By dropping the ratio to 85/15, I’ve reduced the flare ups and still manage to preserve a great deal of the burgers natural juices. For burgers 90/10 is typically too lean, but 85/15 seems to be the sweet spot (when using a grill at least).
In a medium bowl, combine the confectioners’ sugar, cayenne pepper, salt and black pepper. Set this mixture of dry ingredients aside. Meanwhile, in a medium saucepan or skillet (12 inches) combine the bourbon, 1 cup water, soy sauce, Worcestershire sauce, maple syrup, sesame oil, vinegar, mustard, garlic, onion, Tabasco, brown sugar and granulated sugar over medium low heat. Bring this mixture to a light simmer before slowly incorporating the dry ingredients with a whisk. When the mixture is well combined (no clumps or dry ingredients should remain) all the mixture to simmer for one more minute before removing it from the heat. Set this mixture aside.
Preheat your grill to medium heat and bring it up to temperature. Lightly season your burger patties with salt and pepper, then place them on the grill to cook for 4 to 5 minuets per side (medium doneness is achieved at this time, add time to increase doneness). 1 minute before the burgers are done, add a cheese slice on top of each burger and close the lid of the grill to allow the cheese to melt completely. Remove the burgers from the grill, add them to your toasted buns topped with the crispy bacon and a generous helping of the bourbon sauce. Serve and enjoy!
The Results:
Burgers with bacon and cheese are as guaranteed as death and taxes. It’s pretty tough to screw that premise up – so the real question is – how was the bourbon sauce? In short, delectable. The sauce was a beautiful blend of sweet yet smoky flavors with the undertones of the bourbon shining through with each bite. The harsh ‘bite’ that most people find unappealing in bourbons was gone, replaced by a sweet (but not too sweet) base from the sugars and maple syrup. Drizzled all over this burger, this sauce was simply perfection.
That’s all we have for you this week, we’re back next week with a few brand new recipes, including a dessert recipe that you’re sure to love. Until then,
~Cheers
Tuesday, August 20, 2013
It's Mag-potle
Good evening everyone! As I was compiling my dishes (yes, there is more than one this week,) it hit me that both of these recipes have a restaurant equivalent. By no means did I intend on doing this, it was a happy surprise, so I'll roll with it. I am a big fan of Chipotle, but I'm often discouraged that their dishes are quite high in caloric count (and that's without any chips and salsa or a drink.) While Chipotle is known for their burritos, tonight's recipe can be comparable to their burrito bowls (same ingredients for the burrito go in the bowl, without the large flour tortilla to wrap it in.) Tonight, we're cutting the calories even more. With more flavorful and better for you ingredients, this recipe can be made in a snap, without relying on Tex-Mex pitstop.
The Recipe: Tex-Mex Rice Bowl
Original Recipe Found In: Cooking Light, September 2013 iPad Issue
What You'll Need:
1 (8.8 Ounce) pouch precooked Brown Rice
8 Ounces ground Sirloin*
1/4 Cup Water
1 1/2 Tablespoons 40%-less-sodium Taco Seasoning
1/2 Cup frozen Whole-Kernel Corn
1 (15 Ounce) can organic Black Beans, rinsed and drained
1 Cup fresh Pico de Gallo
1 Jalapeno Pepper, minced
4 Teaspoons chopped fresh Cilantro
*We found that it's quite impossible to find sirloin that is comes pre-ground. As Tyler has mentioned previously, that's one task that can be easily solved. If the sirloin comes in steaks, cut them into one-inch pieces. Place the sirloin pieces in a food processor and pulse six to eight times. This will yield a similar result to ground beef.
To start, cook the brown rice in a microwave or according to package directions. While the rice is cooking, heat a large nonstick skillet over medium high heat. Once at temperature, add the ground sirloin. Cook the beef for three minutes or until browned, stirring to evenly cook. Once the beef is cooked, stir in the water and taco seasoning and bring to a simmer. Next, stir in the corn and beans and cook for one minute or until heated through. Stir in the rice and stir until all the ingredients are well-combined and heated through. Divide into four bowls, top with pico de gallo and jalapeño, serve, and enjoy!
The End Result:
This recipe tastes so similar to Chipotle, I bet you can't taste the difference! Letting all the natural and flavorful ingredients shine through is the winning key for this dish. Tyler and I both agreed that adding sour cream or cheese would have given this dish more quality of flavor, but it shined all on its own. The healthfulness of this recipe is definitely the winning ingredient. This "burrito bowl" is just over 300 calories. In comparison, a burrito bowl, with the same exact ingredients, is almost 500 calories. This recipe is a true winner for a fast, fresh, healthy dish!
Thanks for joining us tonight! Check back tomorrow as Tyler presents a brand new burger recipe and I'll return later this week for a tasty and healthy dessert. Until then,
~Cheers!
The Recipe: Tex-Mex Rice Bowl
Original Recipe Found In: Cooking Light, September 2013 iPad Issue
What You'll Need:
1 (8.8 Ounce) pouch precooked Brown Rice
8 Ounces ground Sirloin*
1/4 Cup Water
1 1/2 Tablespoons 40%-less-sodium Taco Seasoning
1/2 Cup frozen Whole-Kernel Corn
1 (15 Ounce) can organic Black Beans, rinsed and drained
1 Cup fresh Pico de Gallo
1 Jalapeno Pepper, minced
4 Teaspoons chopped fresh Cilantro
*We found that it's quite impossible to find sirloin that is comes pre-ground. As Tyler has mentioned previously, that's one task that can be easily solved. If the sirloin comes in steaks, cut them into one-inch pieces. Place the sirloin pieces in a food processor and pulse six to eight times. This will yield a similar result to ground beef.
To start, cook the brown rice in a microwave or according to package directions. While the rice is cooking, heat a large nonstick skillet over medium high heat. Once at temperature, add the ground sirloin. Cook the beef for three minutes or until browned, stirring to evenly cook. Once the beef is cooked, stir in the water and taco seasoning and bring to a simmer. Next, stir in the corn and beans and cook for one minute or until heated through. Stir in the rice and stir until all the ingredients are well-combined and heated through. Divide into four bowls, top with pico de gallo and jalapeño, serve, and enjoy!
The End Result:
This recipe tastes so similar to Chipotle, I bet you can't taste the difference! Letting all the natural and flavorful ingredients shine through is the winning key for this dish. Tyler and I both agreed that adding sour cream or cheese would have given this dish more quality of flavor, but it shined all on its own. The healthfulness of this recipe is definitely the winning ingredient. This "burrito bowl" is just over 300 calories. In comparison, a burrito bowl, with the same exact ingredients, is almost 500 calories. This recipe is a true winner for a fast, fresh, healthy dish!
Thanks for joining us tonight! Check back tomorrow as Tyler presents a brand new burger recipe and I'll return later this week for a tasty and healthy dessert. Until then,
~Cheers!
Tuesday, August 13, 2013
Sign Us Up for Fast and Healthy Mexican!
Good evening everyone! As followers of the blog know, I have been on an avid quest to claim gold with the perfect Mexican dish. The qualifiers for this dish would be a recipe that's low calorie, minimal time, and, of course, taste delicious. Whether or not I felt like I have met this goal previously, tonight's dish has definitely claimed that title and I'm excited to share with you all!
The Recipe: 20 Minute Chicken Enchiladas
Original Recipe Found In: Cooking Light, August 2013
(Serves 6)
What You'll Need:
1 Cup prechopped Onion
1 Cup unsalted Chicken Stock
1 Tablespoon All-Purpose Flour
1 1/2 Tablespoons Chili Powder
2 Teaspoons ground Cumin
3/4 Teaspoon Garlic Powder
1/2 Teaspoon Crushed Red Pepper
1/4 Teaspoon Salt
1 (15 ounce) can unsalted Tomato Sauce
3 Cups shredded, boneless, skinless Rotisserie Chicken Breast
1 (15 ounce) can unsalted Black Beans, rinsed and drained
12 (6 inch) Corn Tortillas
3 Ounces preshredded 4-Cheese Mexican Cheese (shredded Pepper Jack Cheese would also do in a pinch)
To start, preheat an oven to 350 degrees. Next, in a large saucepan, combine the onion, chicken stock, flour, chili powder, cumin, garlic powder, crushed red pepper, salt, and tomato sauce; stir to combine. Bring this mixture to a boil over high heat and cook for two minutes, or until the sauce has thickened. Carefully, spoon out 1 1/2 cups of the sauce mixture and set aside. The sauce might be splashing on the sides of the pan, so I urge extreme caution while putting your hand in the pan to retrieve the sauce. To the remaining sauce in the pan, add the chicken and beans and cook for two minutes or until the chicken is throughly heated. Take the pan off the heat and set aside.
Next, on a clean plate, stack the tortillas and wrap the stack in damp paper towels. Place the plate in a microwave and cook for 25 seconds on high. Once the tortillas are warmed, you can begin to assemble the enchiladas. Prepare a 9x13 inch glass baking dish by spraying it with cooking spray. Spoon about 1/3 cup of the chicken mixture in the center of each tortilla and roll them up. Place the rolled up tortillas seam side down in the baking dish. Once all the tortillas are filled, top with the reserved sauce and sprinkle with cheese.
Place the baking dish in the oven and cook at 350 degrees for 15 to 20 minutes, or until the cheese is slightly browned and the sauce is bubbly. If you wish, serve with a dollop of sour cream and a sprig or two of cilantro, and enjoy!
The End Result:
Out of all the Mexican dishes I created here on the blog, this was, by far, the best one I've made. All the flavors melded together so well and it helps that the sauce was "homemade", not from a can. Adding shredded chicken and black beans made the filling so, well, filling. The cheese adds a bit of melty goodness that is undeniably Mexican. Not only was the flavor incredible, but the caloric value really made this dish pop. At 374 calories for two (TWO?!) enchiladas, this dish has won every round in my journey of Mexican recipe gold.
Thanks for joining us this evening. Check back tomorrow when Tyler hits us with a brand new dish. Until then,
~Cheers!
The Recipe: 20 Minute Chicken Enchiladas
Original Recipe Found In: Cooking Light, August 2013
(Serves 6)
What You'll Need:
1 Cup prechopped Onion
1 Cup unsalted Chicken Stock
1 Tablespoon All-Purpose Flour
1 1/2 Tablespoons Chili Powder
2 Teaspoons ground Cumin
3/4 Teaspoon Garlic Powder
1/2 Teaspoon Crushed Red Pepper
1/4 Teaspoon Salt
1 (15 ounce) can unsalted Tomato Sauce
3 Cups shredded, boneless, skinless Rotisserie Chicken Breast
1 (15 ounce) can unsalted Black Beans, rinsed and drained
12 (6 inch) Corn Tortillas
3 Ounces preshredded 4-Cheese Mexican Cheese (shredded Pepper Jack Cheese would also do in a pinch)
To start, preheat an oven to 350 degrees. Next, in a large saucepan, combine the onion, chicken stock, flour, chili powder, cumin, garlic powder, crushed red pepper, salt, and tomato sauce; stir to combine. Bring this mixture to a boil over high heat and cook for two minutes, or until the sauce has thickened. Carefully, spoon out 1 1/2 cups of the sauce mixture and set aside. The sauce might be splashing on the sides of the pan, so I urge extreme caution while putting your hand in the pan to retrieve the sauce. To the remaining sauce in the pan, add the chicken and beans and cook for two minutes or until the chicken is throughly heated. Take the pan off the heat and set aside.
Next, on a clean plate, stack the tortillas and wrap the stack in damp paper towels. Place the plate in a microwave and cook for 25 seconds on high. Once the tortillas are warmed, you can begin to assemble the enchiladas. Prepare a 9x13 inch glass baking dish by spraying it with cooking spray. Spoon about 1/3 cup of the chicken mixture in the center of each tortilla and roll them up. Place the rolled up tortillas seam side down in the baking dish. Once all the tortillas are filled, top with the reserved sauce and sprinkle with cheese.
Place the baking dish in the oven and cook at 350 degrees for 15 to 20 minutes, or until the cheese is slightly browned and the sauce is bubbly. If you wish, serve with a dollop of sour cream and a sprig or two of cilantro, and enjoy!
The End Result:
Out of all the Mexican dishes I created here on the blog, this was, by far, the best one I've made. All the flavors melded together so well and it helps that the sauce was "homemade", not from a can. Adding shredded chicken and black beans made the filling so, well, filling. The cheese adds a bit of melty goodness that is undeniably Mexican. Not only was the flavor incredible, but the caloric value really made this dish pop. At 374 calories for two (TWO?!) enchiladas, this dish has won every round in my journey of Mexican recipe gold.
Thanks for joining us this evening. Check back tomorrow when Tyler hits us with a brand new dish. Until then,
~Cheers!
Thursday, August 8, 2013
Tex-Mex Pizza...Like You've Never Seen Before
Good evening everyone! As a notorious fiend of Mexican and Tex-Mex, my love for cooking and eating these recipes are often overshadowed by how long most of these recipes take. The cooking time takes longer than I usually have patience for and I usually stuff the food in my mouth when the food is done. But tonight, I'm whipping up a dish that satisfies that Tex-Mex craving, without taking too long to make.
The Recipe: Individual Tex-Mex Chicken Pizzas
Original Recipe Found In: America's Test Kitchen Simple Weeknight Favorites
What You'll Need:
(Serves 4)
1/2 Cup Sour Cream
1/3 Cup chopped fresh Cilantro
2 Tablespoons Lime Juice
1 (15 Ounce) can Refried Beans
1 Teaspoon Chili Powder
4 (8-inch) Flour Tortillas
8 Teaspoons Vegetable Oil
2 Cups shredded Rotisserie Chicken
4 Ounces shredded Pepper Jack Cheese
To start, preheat an oven to 475 degrees. While the oven preheats, whisk the sour cream, one tablespoon of lime juice, and 1/4 cup of cilantro in a small bowl. Mix all these ingredients until well combined. Place this bowl in the refrigerator until the pizzas are ready to serve. In another bowl, mix the refried beans, chili powder, and the remaining one tablespoon lime juice. Set this bowl aside.
Next, place four tortillas on a clean plate. Brush one side of the tortillas with one teaspoon of vegetable oil. Place the tortillas, oil side down, on two rimmed baking sheets. Brush the other side of the tortillas with another teaspoon of oil. Place the baking sheets in the oven and cook until the tortillas are golden brown on both sides, two and a 1/2 minutes on each side, five minutes total.
Once the tortillas are cooked, take them out of the oven and place on oven pads. Spread a 1/4 cup of the bean mixture on each tortilla and spread until there is a 1/2 inch border around the tortilla. Then top with a 1/2 cup chicken and a 1/4 cup cheese. Place the baking sheets back in the oven and cook until all the ingredients are heated through and the cheese is melted, six to eight minutes. Slice the pizzas into quarters and liberally drizzle the sour cream mixture on top. Serve and enjoy!
The End Result:
All the ingredients work so well together in these individual "pizzas". Starting from the ground up: The tortillas become a cracker-thin crust and are crunchy, yet satisfying when bit into. The refried beans serve as a good base, keeping all the ingredients stuck to the tortillas and they have a hint of heat, due to the chili powder. The cheese definitely kicks the heat up, but not enough to melt any faces. The sour cream mixture is the perfect element to cool this pizza down, if it does get a bit too hot. With simple ingredients and differing flavor components, this recipe is ready to devour anytime of the week!
Thanks for joining us tonight. We will return next week with new recipes to share. Until then,
~Cheers!
The Recipe: Individual Tex-Mex Chicken Pizzas
Original Recipe Found In: America's Test Kitchen Simple Weeknight Favorites
What You'll Need:
(Serves 4)
1/2 Cup Sour Cream
1/3 Cup chopped fresh Cilantro
2 Tablespoons Lime Juice
1 (15 Ounce) can Refried Beans
1 Teaspoon Chili Powder
4 (8-inch) Flour Tortillas
8 Teaspoons Vegetable Oil
2 Cups shredded Rotisserie Chicken
4 Ounces shredded Pepper Jack Cheese
To start, preheat an oven to 475 degrees. While the oven preheats, whisk the sour cream, one tablespoon of lime juice, and 1/4 cup of cilantro in a small bowl. Mix all these ingredients until well combined. Place this bowl in the refrigerator until the pizzas are ready to serve. In another bowl, mix the refried beans, chili powder, and the remaining one tablespoon lime juice. Set this bowl aside.
Next, place four tortillas on a clean plate. Brush one side of the tortillas with one teaspoon of vegetable oil. Place the tortillas, oil side down, on two rimmed baking sheets. Brush the other side of the tortillas with another teaspoon of oil. Place the baking sheets in the oven and cook until the tortillas are golden brown on both sides, two and a 1/2 minutes on each side, five minutes total.
Once the tortillas are cooked, take them out of the oven and place on oven pads. Spread a 1/4 cup of the bean mixture on each tortilla and spread until there is a 1/2 inch border around the tortilla. Then top with a 1/2 cup chicken and a 1/4 cup cheese. Place the baking sheets back in the oven and cook until all the ingredients are heated through and the cheese is melted, six to eight minutes. Slice the pizzas into quarters and liberally drizzle the sour cream mixture on top. Serve and enjoy!
The End Result:
All the ingredients work so well together in these individual "pizzas". Starting from the ground up: The tortillas become a cracker-thin crust and are crunchy, yet satisfying when bit into. The refried beans serve as a good base, keeping all the ingredients stuck to the tortillas and they have a hint of heat, due to the chili powder. The cheese definitely kicks the heat up, but not enough to melt any faces. The sour cream mixture is the perfect element to cool this pizza down, if it does get a bit too hot. With simple ingredients and differing flavor components, this recipe is ready to devour anytime of the week!
Thanks for joining us tonight. We will return next week with new recipes to share. Until then,
~Cheers!
Wednesday, August 7, 2013
Product Review: Dorot Frozen Garlic & Herbs
It’s probably the most common thing we hear from people when we talk to them about the blog, “Oh, I’d love to cook like that, but we just don’t do it often enough to justify the money for fresh ingredients” or, “I hate buying fresh herbs, I use half of them for one recipe then they go bad!”
It’s a fair point. Unless you cook for yourself 3+ times a week, many fresh ingredients such as garlic, basil, thyme, parsley – etc. will be bad before you can use them again. It’s wasted money and enough to frustrate many amateur chefs into simply not buying fresh ingredients or just avoiding cooking from scratch all together.
For years, we haven’t really had a reply to these statements. We could merely shake our head and say something to the effect of “Yeah, I can see that” or “Sure, if you don’t cook that much, it’s hard to justify the money”. That was before we discovered a new product on the shelves of our local Trader Joes. This product looks to fill the need of the at home chef who wants to cook from scratch, but doesn’t do it often enough (or in large enough quantity) to justify spending money on garlic and herbs that will go bad long before they can use them again.
Enter, Dorot frozen garlic and herb cubes.
We’ve tried our fair share of packaged herb products before – from pastes to different verities of dried, they each have their limitations. Dried herbs are great, but they don’t pack the flavor that fresh herbs do. Herbs worked into a paste are nice, but only if they’re going to be used IN a recipe (they don’t work well as a topping) and their shelf life is only moderately longer than their fresh counterpart.
That’s where Dorot’s products attempt to fill the void. They make fresh ingredients into tiny cubes, and then freeze them. The concept is brilliant – fresh herbs, but preserved for nearly an infinite amount of time so that any chef, no matter how frequently they cook, can use fresh ingredients in any dish.
The proof is in the pudding, as they say (note: don’t use these products for pudding, that’d be gross) so do Dorot’s clever little cubes solve the kitchen conundrum? We put them to the test, here’s what we found out:
The Selection:
Dorot offers a wide range of the most commonly used herbs and spices including; garlic, ginger, red chiles, basil, cilantro, dill and parsley. They also make a line of pesto and pasta bases, but we have not tried those products, so we’ll keep our focus on the garlic and herbs.
That selection covers the basics, although it would be nice to see Dorot expand into some of the lesser used spices, such as tarragon and sage. Since recipes only occasionally call for these herbs, it would be great to have a frozen option for them as well. Still, all things considered this product line should cover a majority of the at home chef’s needs.
The Flavor:
We’ve tested herbs in paste form before and weren’t thrilled by the flavor they delivered. After all, there’s little point in using a product as a substitute for fresh ingredients if it doesn’t pack any more flavor than their dried counterparts.
Our tests focused on the basil and garlic forms of Dorot’s line, and we were very pleased with both results. The garlic is on the milder side, but it still imparts great flavor into any dish with the same ratio as fresh garlic cloves (1 cube = 1 clove). We found that a recipe calling for 2 cloves crushed garlic could easily be covered by 2 cubs of the frozen alternative.
We found the basil to be considerably stronger than expected. They list 1 cube being equivalent to 1 teaspoon of fresh chopped basil, but we found the ratio closer to 1 cube = 2.5 teaspoons fresh chopped basil. That’s not necessarily a bad thing (you’ll get more value for your money, after all) but it does mean the first time using the product is a bit experimental.
Ease of Use:
Herb pastes have always been limited by the rather small area of use. They work well if you’re stirring the herb INTO the recipe, but if it’s meant to top the dish, they simply don’t cut it. Unfortunately, Dorot frozen line suffers from the same limitations. The cubes are packed with water and / or soybean or sunflower oil to help in freezing them. That means that as they ‘melt’ they take on more liquid form than dry form. If you’re topping a dish with a particular herb, you’re still going to want to turn to fresh or dried.
When it comes to every other aspect of cooking, however, Dorot’s products worked great. The cubes melt extremely quickly when added to a hot pot or skillet and once melted, they behave much like their fresh counterparts. Recipes that call you to cook the garlic until fragrant, for example, can still be followed to the letter. Simply add the cube, allow it to melt (20 to 30 seconds in our experience) and then let it simmer until it becomes fragrant.
We put these cubes through their paces in a multitude of recipes (Including marinades, pestos, sauces and rubs) and never once found the cube to be a hassle or hurdle to normal cooking. Simply pop the cube out of the easy to access tray and drop it right into the recipe. Easy as that!
Value:
Pricing may vary depending on your store of choice, but these cubes sell for between $2.99 and $3.99 at our local Trader Joes. Considering you get 24 cubes per package, that’s not too bad of value, especially since they last such a long time.
Final Verdict:
These cubes deliver on flavor, although we found the garlic to be a bit mild and the basil to be a bit strong – each was close enough to their fresh counterpart to keep the recipe tasting like it should. They’re easy to use and versatile, despite not being able to top a recipe, they will work in nearly any other cooking situation (even recipes that call for garlic to be rubbed across a steak – simply use the cube to rub – works like a charm!). With 24 cubes in most packages, this product will last you for months and you never have to worry about it going bad before your next dish – making these fresh herb alternatives a winner in our book.
Please not that we received no financial compensation from Dorot to talk about their product, nor are they involved with this post in any way. We simply found a product we liked that we felt many other at home chefs should know about and wanted to share our thoughts. The above post is our honest opinion of the product and nothing more.
That’s all we have for you this evening, we close out our great big week of blogging tomorrow night with a brand new recipe from Maggie. Until then,
~Cheers
Subscribe to:
Posts (Atom)