Thursday, May 19, 2011

Crunchy Garlic Chicken Take 2!

Good evening everyone! Tonight I'm flashing back to my first failure on the blog. My first foray into Jamie Oliver's 'Crunchy Garlic Chicken' turned out to be my first letdown in my early cooking days. The blog was in its first month and I had only made about three recipes so far. I spotted the dish in the Food Revolution cookbook and instantly thought I had a hit on my hands. The problems with the dish started immediately. I didn't have a food processor, so I tried to use an emersion blender to mix the breaded. That failed. I didn't have lemon zester - so I opted to use a paring knife to work of the skin. That resulted in large chucks of lemon, rather than a zesty peel - which overpowered the dish. I used a regular aluminum skillet with only a little oil (hey - I was young and naive!) which caused the breading (which was falling off due to the large size from the aforementioned lack of food processor) to burn and stick. It was, by all accounts, a disaster. The taste was still there - but everything else let me down.

Now, almost a full year later, I am more experienced, and better equipped. I decided that now was the time to face my first blogging failure. I was going to take on the crunchy garlic chicken and this time I would kick it's (hopefully delicious) rear end!


The Recipe: Crunchy Garlic Chicken
Original Recipe Found In: Jamie's Food Revolution

What You'll Need:
(Serves 2)

2 Boneless, Skinless Chicken Breast Fillets
1 Clove Of Garlic
1 Lemon
10-12 Unsalted Saltines*
2 Tablespoons Butter (Unsalted)
4 Sprigs Fresh Parsley (1/4 to 1/2 Teaspoon Dried)
2 Tablespoons All Purpose Flour
1 Large Egg

*The original recipe calls for 6 unsalted saltines, but I've found that with the butter, 6 simply isn't enough. The crackers become 'sticky' and group together - 10 to 12 makes the mixture much more usable.

Preheat your oven to 475 degrees.

Begin by placing your crackers, garlic, lemon zest, butter and parsley into the bowl of a large food processor. Pulse for about 15 to 20 seconds or until the mixture is a very fine powder. As I learned during my first crack at this dish, this is the most important aspect of this recipe. You have to have a very fine powder for the breading to work at all. I found that 30 seconds to a minute of full pulsing (with a few second breaks) was the best way to get a fine cracker mixture, like the one pictured below.

Lemon zest, much better than the first time

Breading mixture - finely ground 


Pour the bread crumb mixture into a large bowl. Next, add your flour to a large plate or bowl and crack the egg into a second bowl. Much like every breading recipe we've ever tried, it's time to set up an assembly line. Place the flour plate first, followed by the egg and finally the bowl with the breading mixture.


Using a paring knife, score the underside of the chicken breasts lightly. Place a small square of plastic wrap over the breast and use a meat tenderizer to flatten out the chicken. You're looking for 1/4 to 1/4 inch of thickness here. The scoring should help the chicken flatten out a little easier - reducing the stress on both your arm and your countertop!


Now you're ready to begin breading the chicken. First, dip the breast into the flour, making sure that it's completely covered. Shake off any excess flour. Dip the chicken into the egg mixture, allowing the excess to drip off. Finally, press the chicken into the bowl of breading, making sure every portion of the chicken is covered.

Finally, place the chicken breasts on a wire rack over a baking sheet.* Place the chicken in the oven and cook for 15 minutes or until the center of the breast measures 165 degrees. Slice the breasts into strips, or serve whole with a side of lemon and enjoy!


*Previously, I had pan fried the chicken. But, over the past year I've found that breading and oil frying tends to...well...not always work. I have had a lot of success using the wire baking rack over a baking sheet, however, so tonight I opted to 'wing' it and use my previous experience to help me with the recipe.


The Results:


It's amazing what a little more cooking experience, the right equipment and more confidence can do for you. Tonight's revisit turned into a huge success. The chicken was perfectly breaded, crispy, crunchy and full of flavor. The lemon didn't dominate the dish - instead it simply complimented the overall flavor. I certainly prefer the baking method to the oil frying method - both for the reduced fat content and for the ease of an all around browned finished product. The oven cooks the breast evenly and crisply, certainly the recommended way to go! (Although I still stand by my 'it should be named lemon chicken assertion - the lemon flavor is certainly the dominant one of the dish)


That's all we have for you this week. We're back on Monday with another Around The Culinary World. Be sure to stop in then to see what's new in the world of food and cooking. Until then, enjoy your weekends everyone!

~Cheers

Tuesday, May 17, 2011

1 Year Ago Today...

Good evening everyone and HAPPY ANNIVERSARY!  If you are a loyal reader of the blog, you will know that today is our one year anniversary of starting our blog.  It has been, most certainly, an incredible trip.  When we started last May, we wanted to change the way we were eating and learn how to cook.  My, how things change in 12 short months.  We have developed into complete, die-hard foodies and pretty good chefs.  Our families, friends, and coworkers are well versed in our blog and often ask what we are making that evening/week.  We have refined our tastes and only look for the "good stuff" in grocery stores and in restaurants.  I've felt that we've grown up a lot, culinary wise, and I'm sure Tyler would say the same.  I get excited about every week when we try something completely different...and pleased that the recipe turns out well.  But mostly, we couldn't have done it without the help our family, friends, and readers - this blog wouldn't be successful without your support and love.  Thank you, thank you, thank you a million times over!


Speaking of growing up as cooks, tonight's recipe was something I would have never tried a year ago.  Granted, I've tried salmon way before I was a budding chef, but I wouldn't even attempt to cook salmon.  As we have developed our tastes into the fish department, salmon is that one ingredient we keep on going back to.  After tonight's recipe, I think it's safe to say that anyone can make this dish.

The Recipe:  Slow-Baked Salmon with Lemon and Thyme
Original Recipe Found In:  Bon Appetite magazine, May 2011

What You'll Need:
1 1/2 Tablespoons Extra Virgin Olive Oil, divided
2 6-8 Ounce Boneless Salmon Fillets, skin on
1 Tablespoon Chopped Fresh Thyme (or 1 teaspoon dried thyme)
Zest of 1 Lemon
4 Lemon Wedges

To start off, preheat an oven to 275 degrees.  While the oven is preheating, line a baking sheet with aluminum foil and brush 1/2 tablespoon of oil over it.  Now, you might be asking why the oven is at such a low temperature.  Giving the salmon a low heat loosens the fat surrounding the fillet and makes the meat really moist and tender.  After all, the best kind of salmon is the kind that breaks apart when you cut into it with a fork - no knife needed.


Next, place the salmon fillets skin side down on the oiled baking sheet.  In a small bowl, mix the remaining oil, thyme, and lemon zest.  Spread the mixture over the salmon, making sure the mixture is dispensed equally and coated evenly.  After that, season with salt and pepper.  Let the salmon stand for ten minutes before popping in the oven.  This allows the flavors the seep into the fillets.  That's what's great about this kind of fish - salmon really soaks up the flavor of whatever is around it.  This makes it a universal dish that you can put any flavor with it and it will taste great.


Mixture mixed


Place the salmon in the oven and bake it until just clear in the center of the fillets, about 15 to 18 minutes.  Serve with lemon wedges and enjoy!


Ready to cook!


The End Result:


The slow and low method worked perfectly.  The salmon was incredibly moist and just broke apart when I dug my fork into it.  The lemon and thyme flavors really enhanced an already great fish.  Letting the flavors seep into the fish before putting it in the oven made it really flavorful.  If I had not done that, the lemon/thyme mixture would have not stayed on the fish nor made it taste great.  Salmon is a great choice for any night of the week - paired with the right flavor options, it could become a super part of your dinner plate.  Not only is salmon a super food (high protein, high omega 3's, and vitamin D,) but this dish is a superb low calorie option.  At only 308 calories, for those wanting to eat healthy and have their food taste great, this recipe is for you!


Thank you Maggie. Yes, as Maggie mentioned in the open, today marks the 1 year anniversary of our little cooking blog. I started Out Of The Culinary on a whim last May. Maggie and I were trying to cook and eat healthier and had been doing a decent job. I wanted something to keep us honest and keep us committed. It's all too easy to start something and then sluff off - until you're back to where you started.

So, Out Of The Culinary was born. Not only as a method to share our recipes and cooking adventures but as a way to keep Maggie and myself on track. 230 posts, 170 plus recipes and countless adventures later, we've become quite capable chefs.

I started off with the most cooking experience between the two of us. This sounds impressive, until you realize that my beginning cooking experience was the ability to make 'box mix' pancakes. Maggie, to her credit, freely admitted that she could boil water...and that was all. Armed with my copy of Jamie Oliver's Food Revolution, I learned to cook the way I learn anything new - diving right into and learning on the fly. Through Jamie's quirky terms and free flowing recipe style, I learned how grill, sear, season and cook like a pro. It was thanks to that one cookbook (and it's easy to follow recipes) that this blog succeeded and grew like it did.


As a feature for our one year anniversary, I wanted to create a 'top 25 recipes' list featuring the best of the best recipes (so far). As I started, however, I found the task to be more taxing than I first imagined. Our cooking style has shifted so much in one year, that it is almost unfair to compare today's dish with the recipes from a year ago. You can't really compare the ground beef wellington with our crunchy cod fillets - they're both great, but for different reasons. So, I decided against making a 'best of list' - instead, you can check out our favorites from the blog's first year in our cookbook.

If you're in the mood for a funny read - go back to the beginning of the blog and randomly skip through the weeks. You can almost see the evolution, both in writing style and it recipes tackled. We started small - keeping the post focused on the recipes and keeping the recipes focused on a few ingredients. This grew into more research heavy posts, more detailed recipes, more ingredients. We eventually have settled into a blending of the two. We try to write informative, detailed posts breaking down a recipe beyond what you can find in the cookbook. We're cooking it first so you don't have to. We learn the hard way when a cookbook is uninformative. We search for substitutes and alternatives for many recipes - we even will take a recipe down to its framework and start from square one. Our job is to not only share good recipes with you, but to break them down and make them approachable for any level of cooking experience.

As an aside, this has been the biggest challenge for Maggie. She tends to write 'by the book' keeping her posts reading a lot like a recipe. I have spent many nights editing and patching one of her posts together to the point where it is more 'my words' and less her words. She's gotten a lot better at this, (another way we've grown in the past year) by the way, and most of her posts go unedited!

Unlike my wife, I tend to get verbose and wax poetic (much as I am now) I get involved in a recipe from start to finish and try to craft a story of the dish. Beginning, middle and end. Sometimes it makes for great, interesting reads others (I'm sure) it feels a little long winded. But those differences are what make Out Of The Culinary what it is. Two different voices, two different chefs, two different approaches to cooking.

In the end, I've discovered a new hobby and learned that I had a talent for something I could never have imagined doing even two years ago. I got to share the experience with the love of my life and it has become a passion that we can both share forever.

In the back of my head, when I started this blog, I imagined it as 'snapshot' of our lives together. I planned to treat it as a look into one year of our lives cooking. That's right, the plan was for this to last one year. That's why tonight, I'm announcing that this is the end of....

Only kidding. We've got something good going here and so long as Maggie and I are enjoying what we're doing - we're going to keep it going. (Heaven knows it's not for monetary gain as we don't make a dime off of the site thanks to a Google mix-up...) Last month was our highest total page views since our blog launched. We had over 1,300 unique visitors in April alone - an astounding increase in readers. Our readership is growing, our experience is becoming more vast and, well, this whole thing is just too much fun to give up.

I'm back Thursday night with a revisit to a recipe that has bothered me since the day I tried (and mostly failed) at duplicating it. Now, I'm back for vengeance. Be sure to stop in Thursday night to see what I've got cooking. Until then, thank you for reading - and here's to another year!

~Cheers

Sunday, May 15, 2011

Around The Culinary World

Good evening everyone! Welcome to a new week of blogging and recipe sharing here at Out Of The Culinary. This week, Maggie and I are pumped to share two new recipes with you. Maggie has a dish that she has never worked with before lined up. I'm returning to one of my first recipe - not only that, it's one of my first recipes that didn't go so well. Those will come later in the week, of course, as we always start the week off with news from around the culinary world - this week is packed with good stories. Let's dive right in:


It's almost summer - painstakingly close to summer. The days are hinting at 80's and 90's - the trees are fully 'popped' with leaves, the flowers are full; summer is so close you can taste it. (Unless you live the the great midwestern states like we do - it's been 50 and rainy for a week - not so much like summer then!) With summer, of course, comes grilling. We've covered gas grills (both cooking techniques and how to purchase) on previous blogs. Tonight's story feature the other form of grilling - charcoal. Now, we've not about to start up the great debate between gas and charcoal grilling, we here at Out Of The Culinary believe there is room in the world for grills of all kinds - gas, charcoal, electric - so long as you have delicious cooked meats - all grills are welcome. Public service announcement aside, HERE'S a story on everything you need to know about charcoal. Even if you're a seasoned grilling veteran, I'll bet there are a few facts here you didn't know!


What is one of the best things to grill in the summer? Burgers! Eatingwell.com has a useful story regarding the 16 tips for the perfect burger. Maggie and I have been doing most of the things on this list since we've started cooking and we can assure you that they're worth it. (If you're looking for the best burger recipe - look no further than our Sunset Burger recipe from last summer - YUM)


My guilty pleasure when it comes to the world of food is a good bourbon or whiskey. I'm a sucker for the small distilleries (such as Iowa's own Templeton Rye, and Cedar Ridge bourbon) as well as the big boys such as Knob Creek, Maker's Mark, Johnny Walker and even Jack Daniel's. If you're a connoisseur of the finer spirits or if you just like to change things up from the usual weekend brew - check out What's New In Booze: 5 New Spirits To Tempt Your Taste Buds. 


We've had a lot of fun at the expense of KFC's food monstrosity - the Double Down. It really is an assault on the culinary world. Heck, it's an assault on your waistline and your arteries! Most of the food critics out there agree with us - and now, we've got a whole country on our side against the Double Down. KFC launched the Godzilla of sandwiches in New Zealand this week - and you'll never guess how they have classified the dish. Check it out HERE


Speaking of fast food places that really aren't nice to your waistline - McDonald's is in the news again this week. In the past, we've pounced on them for everything from the monstrosity burgers they've demoed in other countries to their horribly constructed oatmeal. So, it's only fair that we give them full credit when they actually succeed in the healthy meal 'realm'. Check our this SlashFood feature on the newest health options at your local McDonald's 


When you were a kid, did you take apart Oreo cookies and stack them together, making a super cookie to rule all other cookies? No? ...Yeah...Me either... Anyway, if you were a tyrannical little tot, or found of making super version of regular food - Nabisco has aided your cause. Introducing the 'triple-double Oreo' There's nothing really to say this picture says it all: 


There you have it folks, all the news that's fit to blog about for this week. (It was a full week of news!) We're planning a full week of recipes (so long as Google Blogger cooperates - apologies, again, for last week's delayed post. It was typed and ready to go - but we just couldn't put it online!) Maggie will be cooking on Tuesday, and I'll be rounding off the week on Thursday. Be sure to stop in Tuesday night to see what Maggie has cooking. Until then,

~Cheers

Friday, May 13, 2011

50% Less Size, 100% Of The Flavor

Tonight's blog was originally scheduled to post on Thursday. However, a Google Blogger error prevented us from posting the recipe until Friday evening. Sorry for the delay!

Good evening everyone! On tonight's menu, we're trying something that I've always wanted to make - chicken pot pies. Now, the modern day chicken pot pie has become demonized and a little 'overused'. The frozen food industry has turned what used to be a healthy hodgepodge of chicken and veggies into a sodium filled, preservative laced bowl of 'yuck'.

By returning to its roots, however, you can turn this humble dish into a healthy eating option. Remember, healthy eating is only about low calories - as Jamie Oliver likes to point out, you can completely change your lifestyle simply by eating with fresh foods and cooking things yourself. That beings said, tonight's dish is also light on calories (win - win situation right there) due to the unique way we're preparing it. Without further ado, let's get cooking!

The Recipe: Individual Chicken Pot Pies
Original Recipe Found In: Cooking for Two: 2010

What You'll Need:
(Makes 2 individual pot pies)

1 Savory Pie Dough Recipe*
2 Tablespoons Unsalted Butter
2 Carrots (Peeled, sliced 1/4 inch thick) **
1 Small Onion (Minced)
1 Small Celery Rib (Sliced 1/4 inch thick)
2 Garlic Cloves (Minced)
1 Teaspoon Fresh Minced Thyme (1/4 teaspoon dried)
1/4 Teaspoon Soy Sauce
3 Tablespoons Unbleached, All Purpose Flour
1 3/4 Cups Low Sodium Chicken Broth
1/3 Cup Heavy Cream
(1) 8 Ounce Boneless, Skinless Chicken Breast (Trimmed of fat)
1/4 Cup Frozen Peas
2 Teaspoons Fresh Minced Parsly (1/2 teaspoon dried)
1/4 Teaspoon Fresh Lemon Juice


*You can choose to make your own crust, which is preferred, or if you so wish, you can opt to go the easy route and buy a store brand. While the chefs at America's Test Kitchen really don't like the second option, they do recommend the Pillsbury brand of refrigerated pie crust. They note that the flavor is not as great as making the dough yourself, but in a pinch, the pre-made version would be a suitable substitute. Tonight, I'm choosing to use a the pre-made crust. Admittedly, I wanted to make the homemade version (I prefer things from scratch) but I had a slight time crunch and this would help cut another 30 minutes of the preparation time.

** If you're in a pinch for time, you can substitute the fresh veggies for the frozen vegetable medley alternative. We've found many store brands and name brands that contain carrots, corn, beans and peas and this method is a lot faster than chopping and peeling all of the veggies yourself. You sacrifice a little of the fresh flavor, but speed up in cooking time in return. We've found that 1 cup of frozen veggies substitutes nicely for the carrots, celery and peas in this dish.

Begin by adjusting your oven rack to the middle position and preheating your oven to 450 degrees.

Next, roll out your pie dough onto the counter top. Using a 12 ounce ramekin as a guide, trim a circle about a 1/2 inch wider than the ramekin into the pie dough. Cut 3 ovals into the center of the pie dough (as pictured) to act as vents. Fold the excess edge up around the ramekin, then pinch the newly created lip between your index finger and thumb to create a ruffled edge. Repeat this process again to create a second lid. Place the dough on a greased baking sheet and cook for 7 minutes if you're using ready made dough - if you're using the dough recipe, cook for about 10 to 12, or whenever the dough no longer looks raw. (Set the lids aside when done)


While the dough bakes, add the butter to a medium skillet over medium heat. Add your onion, carrots and celery with a pinch of salt and cook until softened and lightly browned, roughly 8 to 10 minutes. Alternatively, if you are using frozen veggies, add them to the onion and butter mixture but reduce the cooking time to about 5 minutes.


Once browned, stir in the garlic, thyme and soy sauce and cook until fragrant, roughly 30 seconds. Next, stir in the flour and mix until well combined.

Begin whisking in your broth and cream. Use a wooden spoon to work up any browned bits on the bottom of the skillet. Nestle in the chicken breast and bring the mixture to a simmer. Cover the skillet and cook until the chicken breast reaches 165 degrees. This should take about 15 to 20 minutes. Once at 165 degrees, transfer the chicken to a plate and allow it to cool before shredding it with a fork.


Meanwhile, return the skillet to heat and allow the mixture to simmer until the sauce thickens and reduces slightly, roughly an additional 5 to 7 minutes. Off of the heat, return the shredded chicken to the skillet. Also add the parsley, lemon juice and peas (if you are not using the frozen vegetable mixture - which already likely has peas in it). Season with salt and pepper to taste.


Next, split the mixture evenly between two ramekins and cover each with the dough lids from the first step. Place the pot pies on a baking sheet and cook in the oven (450 degrees) until the crusts are a deep golden brown and the filling is bubbling. About 10 to 15 minutes. Allow the pies to cool for 10 minutes before serving and enjoy!

The Results:


Savory and amazing. We've dabbled with this basic premise before, (heavy whipping cream, chicken broth and veggies) so I knew going in that we were going to end up with a fantastic, creamy and full of flavor mixture. Thankfully, I was right. Rich, creamy and bursting with flavor this pot pies' filling was everything that the modern frozen pot pie is not. In addition, the crispy flaky crust provided a nice extra touch to this dish. Each pot pie was sized about right, just big enough to leave you feeling full, but no so big that you gorge yourself and eat too much. (Yes, too much of a healthy dish is still a bad thing - everything in moderation - remember?)

A relatively easy dish that can quickly be customized (due to the individual nature of preparation) with a great flavor? That's a recipe for 'try this one at home' right there. It will be well worth the effort.

That's all we have for you this week. Thank you for stopping by and reading our cooking expeditions for another week, our site's traffic is higher than it has ever been. It's great to see! We're back on Monday with another 'Around The Culinary World' until then,

~Cheers

Tuesday, May 10, 2011

It's a Flavor Kick to the Mouth

Good evening everyone!  As many readers know, I love combining different flavors and taste combinations to create a truly unique dish.  When a flavor combination works, I love to go back and retry it with a different twist to it or maybe as a new variation of the dish.  Tonight is no exception.  Last December (wow, five months ago - crazy!) I tried a recipe that we saw at the Des Moines Food and Wine Expo Chimichurri - Hard to Spell, Easy to Enjoy and searched for quite a bit for the perfect recipe.  Chimichurri is one of those recipes that once you have the list of ingredients, it's easy to find numerous recipes that are all pretty much the same.  Tonight, I'll be taking on a variation of this recipe, but make it a more Americanized version.  Would it live up to its previous contender?

The Recipe:  Burger Argentina with Chimichurri Sauce
Original Recipe Found In:  America's Test Kitchen, 30 Minute Suppers

What You'll Need:
1/2 Cup Chopped Fresh Parsley
1/4 Cup Extra Virgin Olive Oil
1 Large Shallot, minced
2 Tablespoons Red Wine Vinegar
2 Garlic Cloves, minced
1/8 Teaspoon Red Pepper Flakes
1 1/2 Pounds 85% Lean Ground Beef
5 Teaspoons Vegetable Oil
1 Red Onion, peeled and cut into 1/4 inch rings
4 Hamburger Buns

Begin by making the Chimichurri sauce, combining the parsley, olive oil, shallot, vinegar, garlic, and pepper flakes.  Season with salt and pepper.  If you have never tried Chimichurri sauce, you are in for a real treat.  Granted these ingredients sound rather weird all together, when you combine everything, it makes for a heavenly aroma and a flavorful sauce.

Premixed Chimichurri Sauce

Next, gentle mix the ground beef with a 1/2 teaspoon of salt, 1/2 teaspoon of pepper, and three tablespoons of the Chimichurri sauce in a large bowl until well combined.  Form the mixture into four 3/4 inch thick patties and make a slight indentation in the top of each with your knuckles.  Making an indentation in the beef patties helps them from not swelling during the cooking process.  Don't press too hard though - a shallow center with thick edges will not make for a good burger by unevenly cooking it.

Burgers, pre-burgerized

Then, heat three teaspoons of oil in a large nonstick skillet over medium high heat until the oil is warmed through and is shimmering, not yet smoking.  Cook the onion rings until soft and golden, about six minutes.  Transfer the onion rings to a plate and tent with foil to keep warm.


After that, wipe the skillet down with paper towels (a tip: pressing the paper towels hard in the skillet might burn through the paper towel and cause an unnecessary burn.  The paper towel should soak up that excess oil without pressing too hard.)  Return the skillet to the stovetop and heat remaining two teaspoons of oil in the skillet until the oil is just smoking.  Add the meat patties until they are well browned and cooked to desired doneness, six minutes for medium rare, eight for well done.  Arrange the burgers on the hamburger buns, top with the cooked onion rings, drizzle with sauce, and enjoy!

The End Result:


This recipe was completely different than the Chimichurri steak.  While the steak marinated in Chimichurri sauce, the burger was topped with the sauce and a little bit sauce was mixed in with the meat.  Therefore, the burger had a more intense flavor.  But all the different ingredients worked so well together that it was a good kick.  The leaner meat probably also had to do with the greater flavor quotient.  The one thing that didn't work was the size of the patties.  I made them too chunky and therefore, ended up burning one side of them and cook the remaining time in the microwave.  Live and learn as a cook, right?  Hopefully, next week will be a little bit better than these last two.  But, as a chef, I'm always learning about being better and picking up new techniques.

Thanks Maggie! That's all we have for you this evening.  I'm reaching back into our new cookbook for a recipe that I'm excited to try. It's new, it should be tasty, and it's coming up on Thursday. Until then,

~Cheers!

Sunday, May 8, 2011

Around The Culinary World

Good evening everyone! Welcome back to another edition of Around The Culinary World, where, I'm pleased to say, we actually have news to share this week. While the past few weeks have been bare and boring, this last week was teeming with news and interesting articles. Let's dive right in to all the news that's fit to blog about:


If you're like us, your pantry is full of all sorts of dried goods and other spices, sauces and pastas you can fit into the cabinet. After a while, these things can tend to pile up to the point where you don't exactly remember what is in there anymore. If that's the case, maybe it's time to do a little pantry spring cleaning. Eatingwell.com has a few helpful tips on spring cleaning your pantry along with a list of the top 5 'staples' that you should be keeping on hand at all times. Check out the story HERE.


Ever since that 'wonderful' (read: awful) movie 'The Bucket List' came out, people have been making '10 things to do before you die' lists like they're going out of style. I'm not a fan of the whole 'before you die' list phenomenon. Why not call them '10 things that you might like' or '10 things you didn't expect' or '10 things that you should do because they're really cool'. The threat of death doesn't really add to the appeal for me. That being said, here's 10 things to do with macaroni before you die.


Going out to eat is always a fun excursion. You get to try new menu items, share the ambiance of a restaurant with a loved one(s) - but did you know you may be doing the whole restaurant experience the wrong way? In (yet another) 10 things list, Adam Roberts looks at the 10 things you're doing wrong when you go to a restaurant. Thankfully, you don't have to try any of these before you die! Check out the full list HERE.


We've got a lot of top 10 lists this week - here's another one. The 10 best ways to eat cheap (and it doesn't involve ramen noodles or mac and cheese three nights a week). There are some interesting tips here, a few 'obvious' notes, but most of the list has some valuable info for those looking to save a few bucks a week in groceries. Check out the full list HERE.


Are you a bad tipper? You might want to start finding a little extra 'generosity' after every meal. Some of the short changed staff are starting to get angry - and a few are turning to unusual mediums to express their anger. One particular delivery guy has started a blog just to gripe about how horrible some people tip. Read a few of the stories and you'll be shocked at how cheap (and rude) some people can be. Check it out HERE.


There you have it folks. All the news that's fit to blog about for the week. As usual, we have a full week lined up for you this week. Maggie will be cooking Tuesday night - can she make a successful comeback after last week's 'failure' recipe? I'll close up the week on Thursday night with an ambitious dish - something I've always wanted to try but have never actually tried (yes, after almost a year of blogging, there are still recipes out there that we have yet to try!) Stop back in Tuesday night to see what Maggie has cooking. Until then, 

~Cheers

Thursday, May 5, 2011

My Battle With Mushrooms

Good evening everyone! In the past, I've made no secret of the war I waged versus peas. When Maggie and I started this cooking journey, almost one year ago, the humble little pea was public enemy number one when it came to vegetables and my taste buds. Slowly, I began to work the pea into my recipes, and to my shock, I found that (when used properly) they are not horrendously awful - and (sometimes) can actually be quite delicious.

This lesson, I hope, will apply to my other not-so-favorite food group, mushrooms. I don't despise the mushroom, like I once despised the pea, but I'm no big fan either. My issue with mushrooms lies in the texture and (lack of) flavor. I don't see what they add to a recipe, therefore, I think they're sort of useless. However, I'm nothing if not optimistic - so I'm willing to give mushrooms another go. If they pan out, maybe I'll grudgingly accept them (much like the pea) if not - it's banishment from my recipes forever! Or, at least until I work up enough curiousity to use them again...

Bring it on... 


The Recipe: Steak Tips With Mushroom Onion Gravy
Original Recipe Found In: Cooking for Two: 2010 (Via the folks at America's Test Kitchen)

What You'll Need:
(Serves 2)

12 Ounces Sirloin Steak Tips (Lean) Cut Into 1 1/2 Inch Cubes
2 Teaspoons Soy Sauce
4 Teaspoons Vegetable Oil
8 Ounces White Mushrooms (Trimmed and sliced thin)
1 Small Onion (Halved and sliced thin)
1/8 Ounce Dried Porcini Mushrooms (Roughly 2 tablespoons)
1 Garlic Clove (Minced)
1/4 Teaspoon Minced Thyme Leaves (Fresh) or 1 Pinch (Dried)
1 Tablespoon Unbleached All Purpose Flour
1 Cup Beef Broth
1 Tablespoon Minced Fresh Parsley (Small pinch dried)
Egg Noodles or White Rice (Quantity based on preference)


To begin, mix the soy sauce with a pinch of black pepper in a medium bowl. Add the steak tips and cover the bowl. Place in the refrigerator for 30 minutes, or up to 1 hour.

This process acts a lot like a brine. Soy sauce is fairly sodium intensive, so the salt gets to work pulverizing the molecules of the meat, breaking down the tough protein enzymes into softer, gentler enzymes. These new enzymes are much more inclined to hold on to the natural moisture of the meat, meaning your end result will be fantastically juicy.

Next, add 2 teaspoons of vegetable oil to a medium skillet. Bring the oil to a shimmer over high heat. Add your steak tips and cook all sides until nicely browned. This should take about 6 to 10 minutes. Monitor your steak closely, this is a leaner cut of steak, so drying it our is easier to do (even after the soy sauce 'bath') you don't want overly dry and tough steak. I frequently check the smallest pieces to see how they're cooking up. Simply slice them with a knife to get a good indicator of how much longer you'll have to cook everything. You will be adding the beef back into the mixture for a final cooking - so they don't have to be 100% done at first. (In fact, it's better if they're not). Once the beef is browned, transfer it to a plate and cover loosely with foil. Set aside.


Add the remaining 2 teaspoons of vegetable oil to the skillet and bring to a shimmer. Add the white mushrooms, onion, porcini mushrooms and a pinch of salt to the skillet. Cover and allow the mixture to cook for 3 minutes, or until the mushrooms have softened considerably.

Next, stir the mixture, making sure to work up any browned bits left in the skillet. Return the cover to the skillet and continue cooking until the mushrooms are lightly browned and a light 'fond' (browning layer) is built up on the bottom of the skillet. This takes about 5 to 7 minutes.

Stir in the garlic and thyme and cook until fragrant - roughly 30 seconds. Next, stir in the flour until combined. Finally, add the beef broth to the skillet and stir, making sure to get up all of the browned bits on the bottom of the pan. (Remember, that's all flavor - you don't want to leave any of that behind!)

Return the beef to the skillet and bring the mixture to a simmer. Once the beef registers 130 degrees on an instant read thermometer, you are good to go. The beef is typically up to temperature in about 5 minutes, but that will vary based on how long it took you to prepare the mushrooms (the longer the beef sits, the cooler it gets - obviously.)


Serve on top of egg noodles or white rice and enjoy!


The Results:


Alright mushrooms, you win this round. Once again, the folks at America's Test Kitchen deliver a recipe that is packed with simple, natural flavor. The great beef flavor really stands out in this dish. The sauce, slightly thicker than I thought it would be, has a great subtle onion hint to it - and the mushrooms actually add a subtle 'earthy' flavor that compliments the beef quite nicely.

All in all, this is a straightforward recipe that could easily be modified with new veggies and combinations (served over mashed potatoes is one option - adding carrots or peas would be a nice addition as well). This is a great dish to make for a person cooking for one - or if you are serving a whole family, simply double the ingredient amounts and enjoy the satisfied 'yums' of the entire family. Certainly worth a shot at home.


That's all we have for you this week! Thanks as always for reading our adventures in the culinary (or out of it as it were...) We're back on Monday with another 'Around The Culinary World' - be sure to stop in then and see all the news that's fit to blog about in the culinary world. Until then,

~Cheers

Wednesday, May 4, 2011

Recipe Flashback: Beef Wellington

Hello everyone! Today we're sharing a 'recipe flashback' from one of last year's hit recipes - beef wellington. I remember when I first set out to make this dish, I thought it would be the most difficult cooking challenge I would ever take on. At the time, it was the most complicated thing I had ever attempted to cook, but little did I know that it was far from a difficult recipe. This is one of my favorite recipes from Jamie Oliver's cookbooks. It's relatively easy to make, full of great flavor and really an impressive dish to put on the table at the end of the night. So, here's a little bonus reading, our June 2010 recipe (original blog post titled 'Eye Of The (Culinary) Tiger'

****

The Recipe: Ground Beef Wellington
Original Recipe Found In: Jamie Oliver's Food Revolution 

What You'll Need:

1 X Medium Onion
1 X Carrot
1 X Potato
2 X Cloves Of Garlic
4 X Sprigs Fresh Rosemary
1 Handful Of Frozen Peas
1 X Large Egg
2 X Sheets Puff Pastry
1 Lb. Ground Beef

The Recipe: Honey Roasted Carrots
Original Recipe Found In: Jamie Magazine, June/July 2010 Issue

What You'll Need:

1 Lb Large Carrots or 1 Bag Baby Carrots
3 Tbs. Butter
2 Tbs. Honey
1.5 Oz. Water

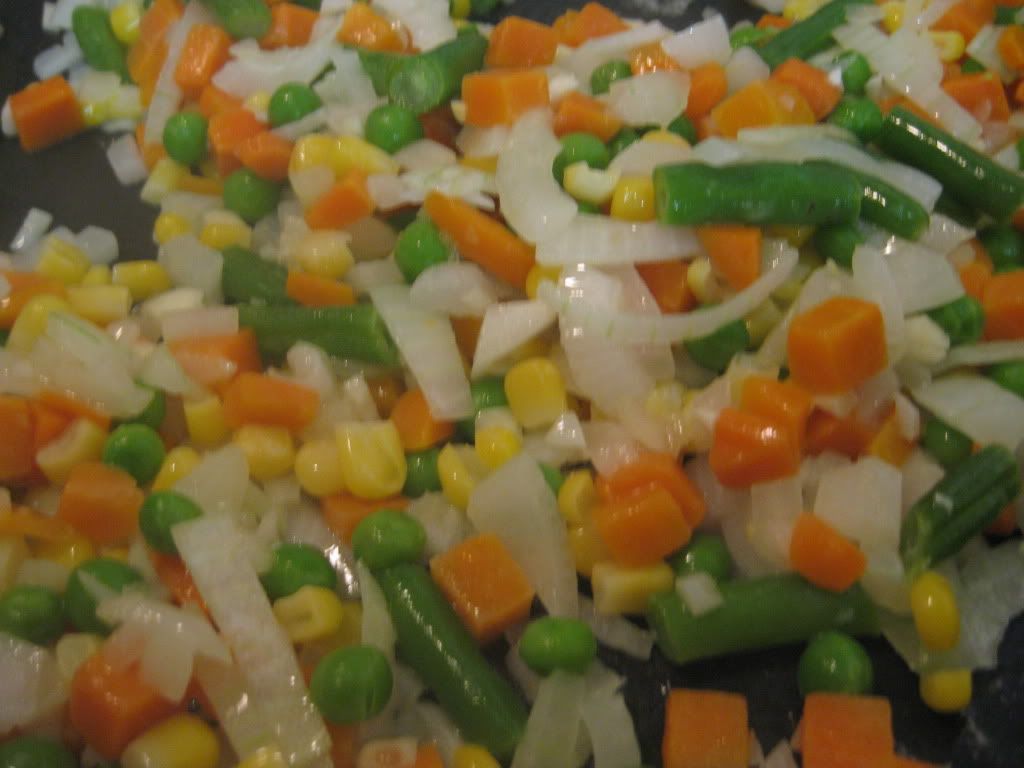
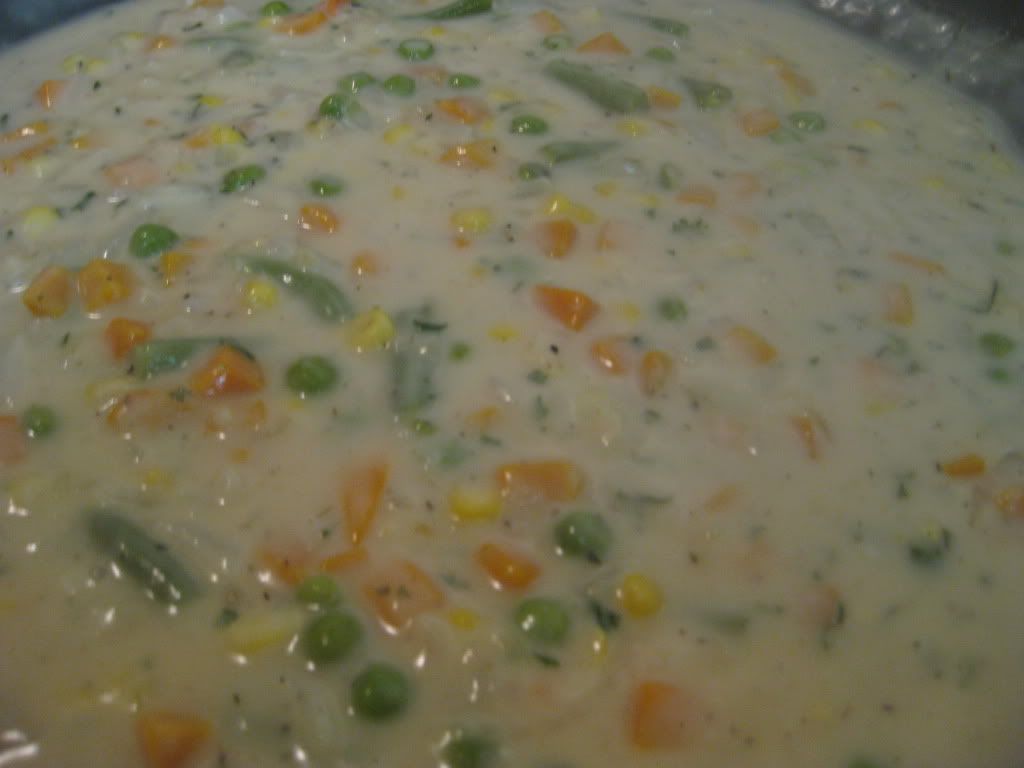
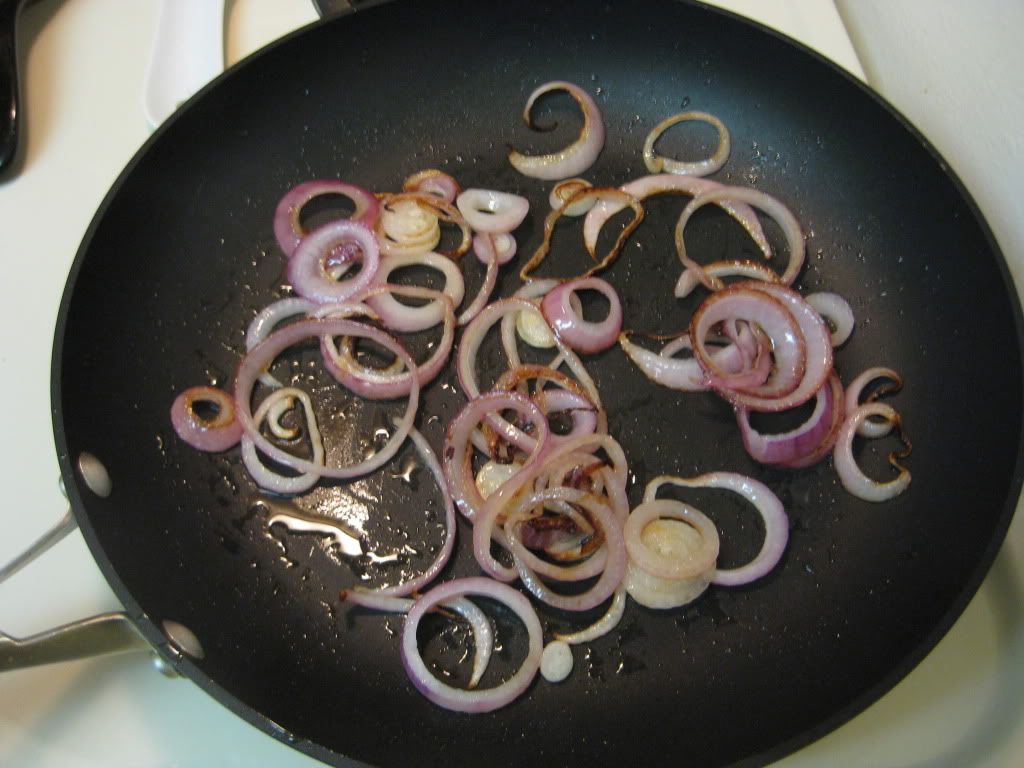
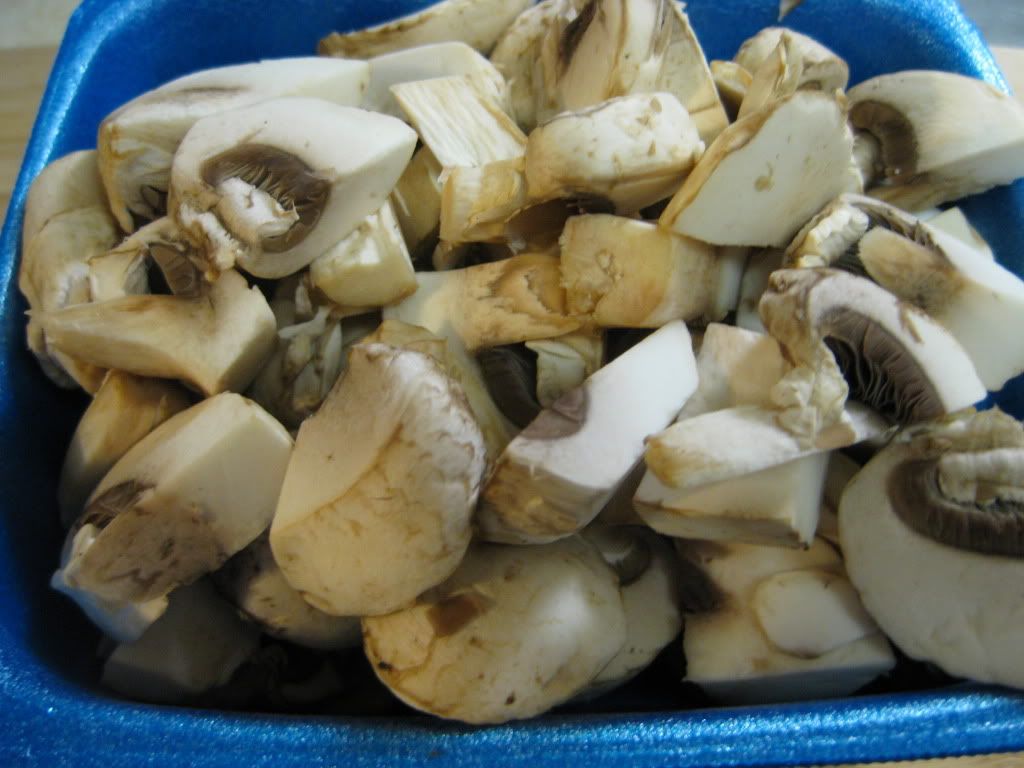
Begin by preheating your oven to 350 degrees. Peel and chop the carrots, onion and potatoes. Make sure to chop everything into as small of pieces as possible. This will help you out a lot later on. Next, place your veggies in a large frying pan and add two 'lugs' of olive oil. Add your rosemary now as well. Cook the veggies for about 8 to 10 minutes, then add a handful of frozen peas.

I tossed in an extra carrot at the last moment 

Fryin' the veggies

I mentioned yesterday that I've never liked peas. I don't like the flavor, I don't like the texture and frankly, I'm not fond of the color either. They are, in my opinion, an all around terrible vegetable (and I'm convinced they may be poisonous) While looking over the ingredients for the beef wellington, I noticed 'frozen peas' and immediately thought "omit". Then I started thinking. Since Maggie and I have started this new way of cooking, things have changed. We can no longer eat any kind of fast food - our bodies just 'reject' things that are too poor in quality or overly greasy. We now can taste the preservatives in other foods as well. Things that have been prepackaged and frozen have a very different (read: gross) flavor in comparison to something we've made fresh. Lastly, our taste buds' preferences have changed. Foods (mainly veggies) that I never used to care for, I'm finding myself enjoying. The best example of this was last week - with my fruit salad recipe. I included fresh grapes, something that I never really enjoyed growing up. However, after returning to them last week I've found that I now LOVE grapes. They were absolutely fantastic and - honestly, I wish I had some right now...

My (long and drawn out) point is this - if my taste preferences are changing, maybe I SHOULD put peas in this recipe. Maybe, just maybe, I'll find I actually like the little green beasts. So, after much deliberation, peas have been included in my beef wellington recipe.

You better not be deadly...

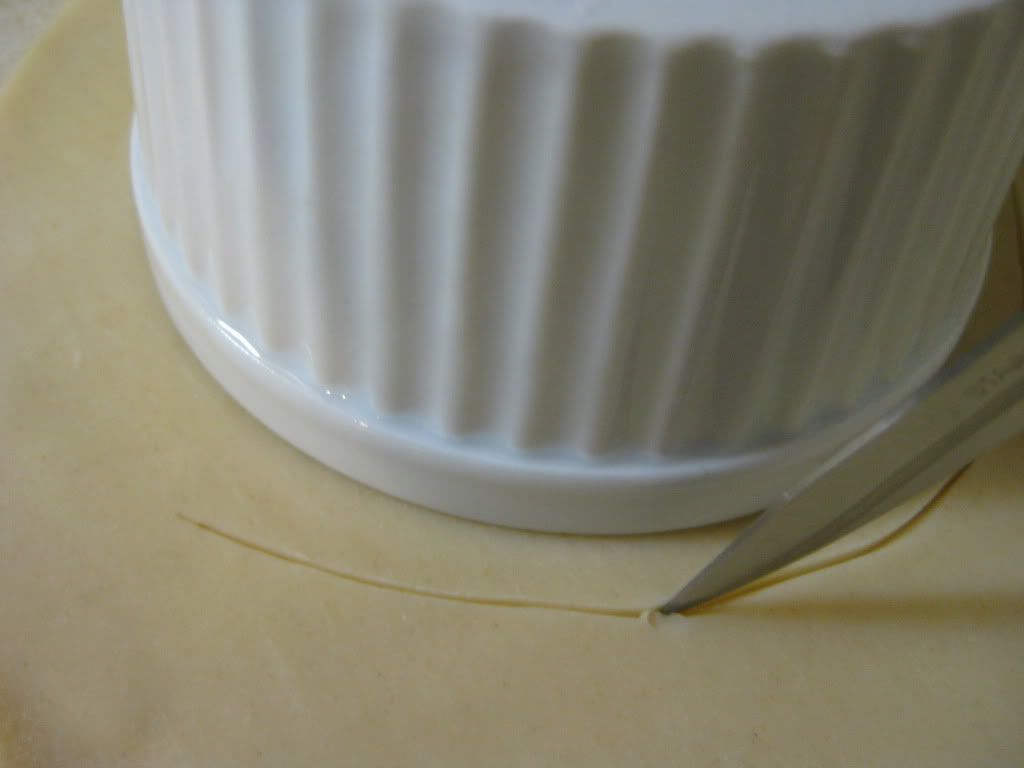
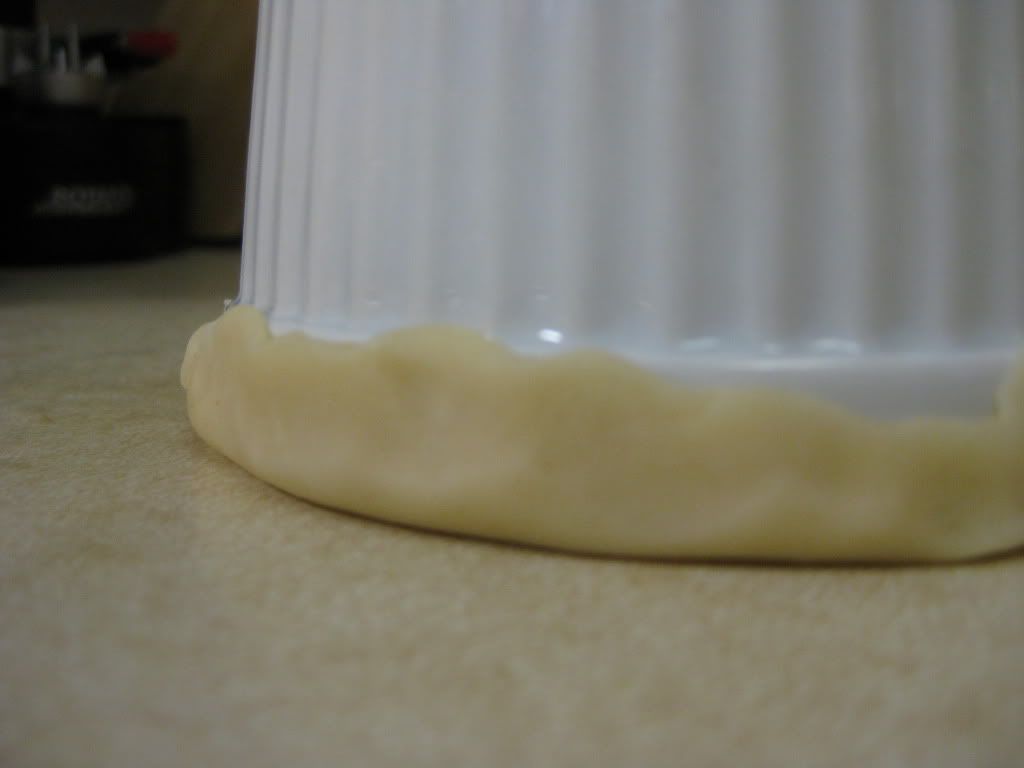
Once all of your veggies are starting to brown up - pour them into a large bowl and set aside to cool. While that is cooling, you can begin to prepare your dough. Take the two sheets of puff pastry and lay them on top of each other. Lightly dust the countertop and the rolling pin with flour and squish the sheets down into a 12 X16 rectangle. (I didn't really measure here - I just rolled until it the pastry became thin and said 'eh, close enough!')

A pinch of flour on the countertop 

And on the rolling pin make your life a lot easier 

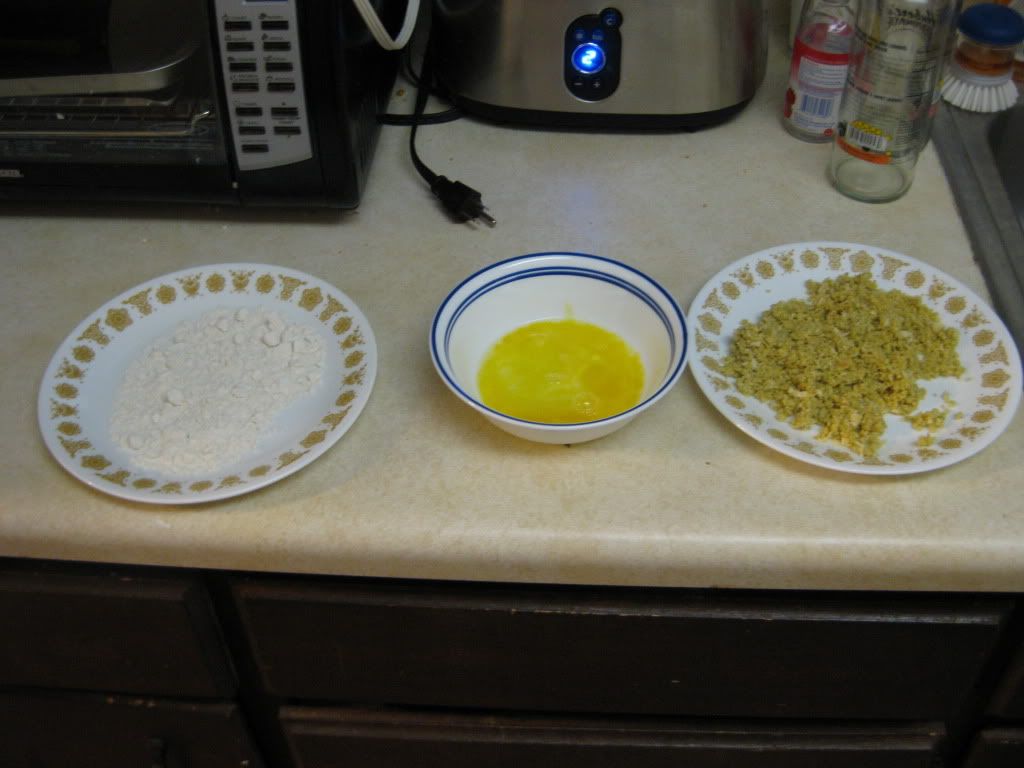
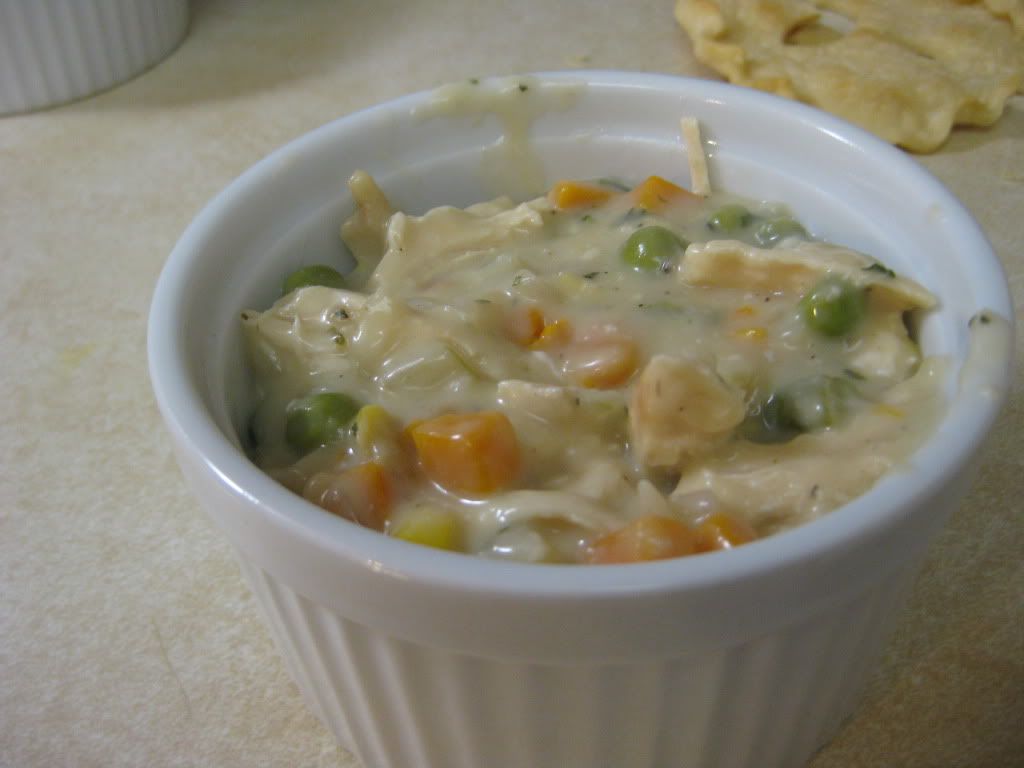
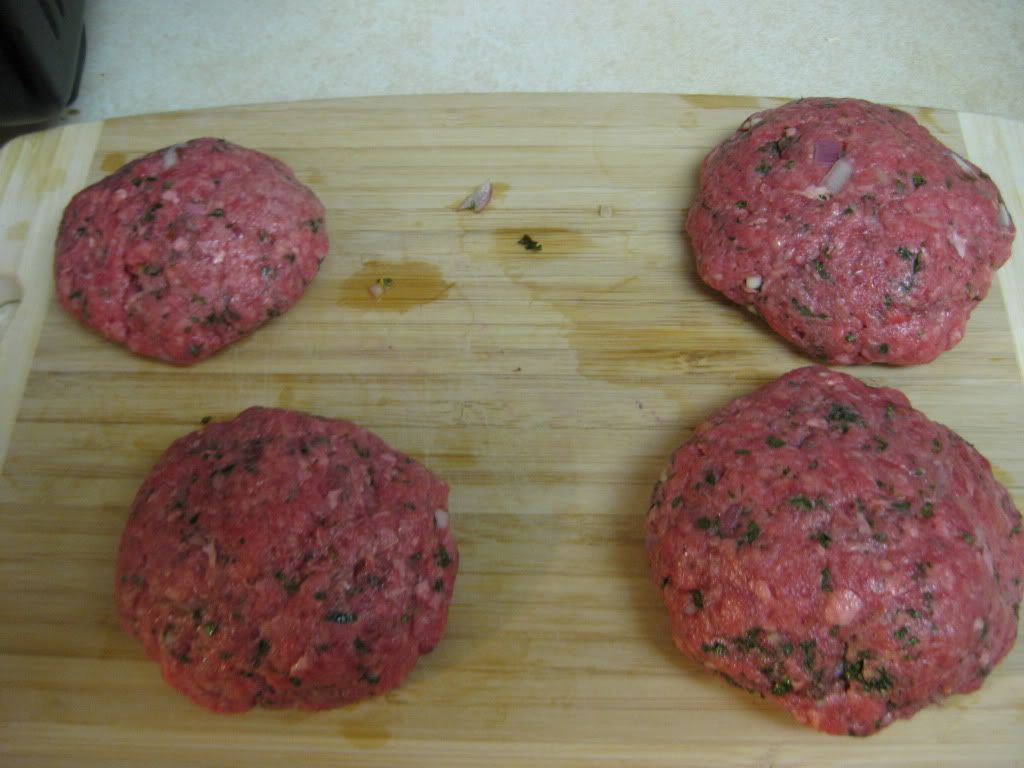
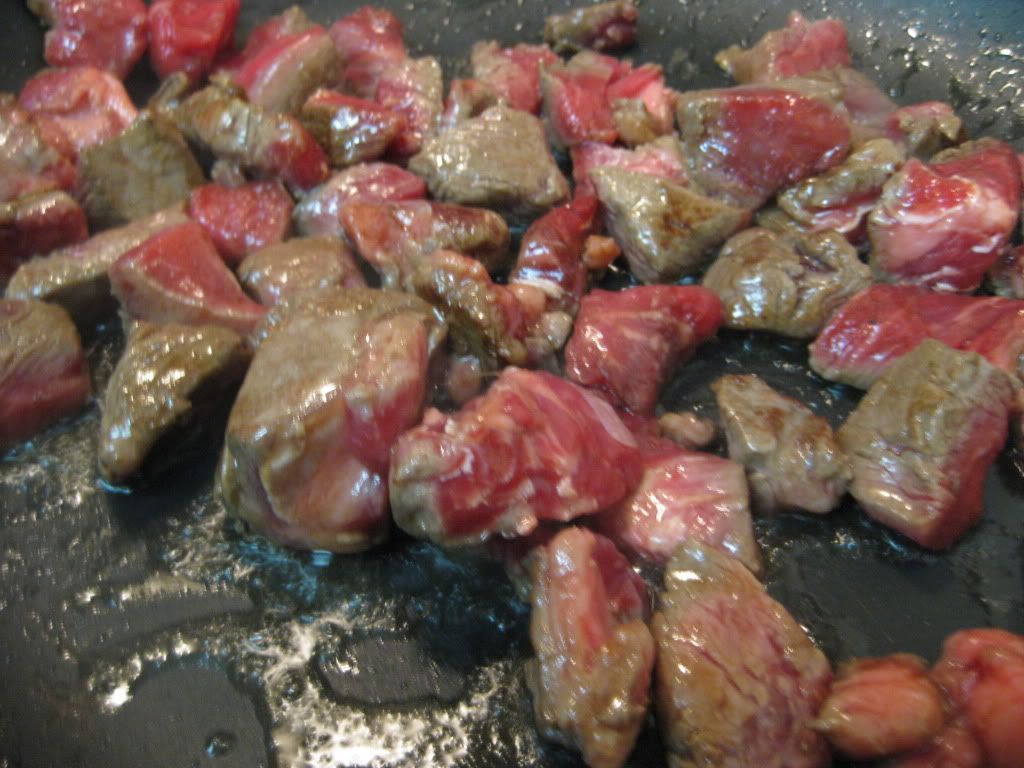
Next, crack your egg into a bowl and mix well with a fork. By now, your veggies should have cooled to the point where you can handle them safely without burning your hands. Add your ground beef into the bowl with the veggies. Pour in 1/2 of the egg as well. Now, using your hands, mix everything up really well in the large bowl. This is very similar to the cracking burger recipe. Get in there and get messy (and you WILL get very, very messy) the better mixed up everything is, the better your end result will be.

Mixing in all up 

(Here is where chopping your veggies into smaller pieces will help you. To help me this evening, Maggie chopped the potatoes, carrot and onion before I got off of work. However, we found out that they weren't chopped small enough when I started mixing everything by hand. The potatoes were large enough that they were interfering with everything mixing together. This adds extra time and effort into mixing everything together. Learn from our experience and avoid the hassle by chopping everything up into tiny bits)

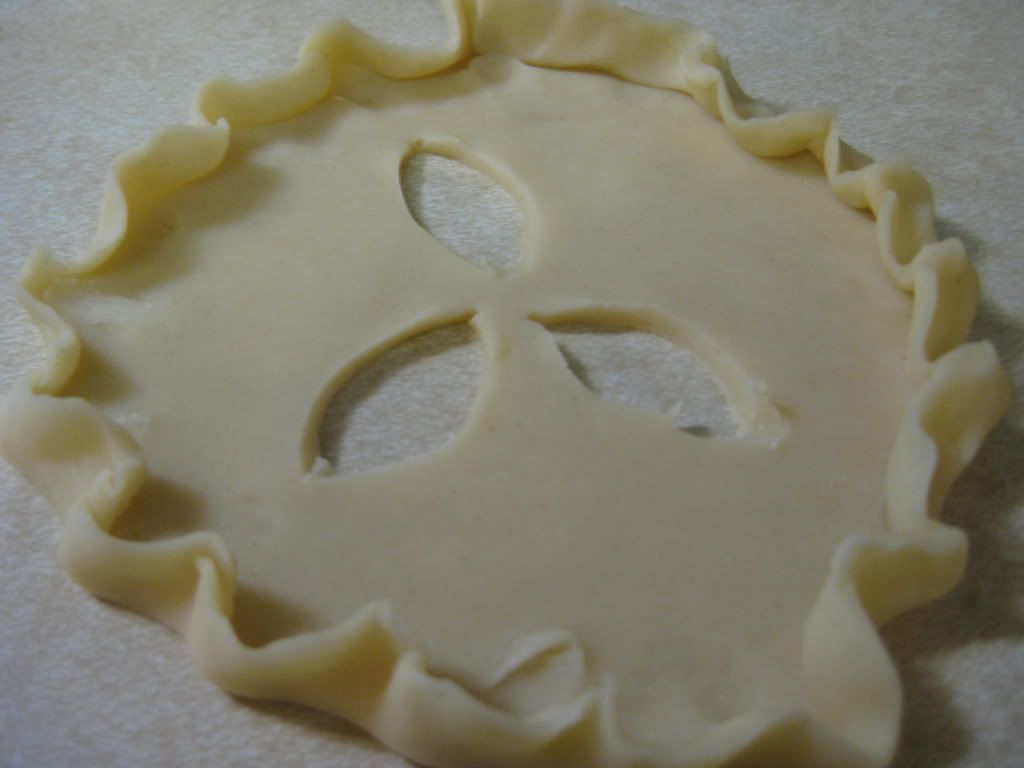
When everything is mixed, turn your attention to the (now flattened) puff pastry. With the longer edge facing you, spread out the mixture (as pictured below) along the dough. Once everything is dispersed, begin to roll everything up like a large taco shell. This part is a little tricky - just work slowly and make sure everything stays together and you will be alright. Crimp the ends of the pastry once your finished rolling and rejoice - you've just made a wellington.


One wellington

Take the remaining portion of your beaten egg and brush it across the top and sides of the wellington. This will help the outer crust become nice and golden brown while cooking. We don't have a pastry brush, so I improvised and used the next best thing. A paper towel. Turns out, the end of a paper towel saturated in egg works very well as a brush! Once the entire wellington is covered - stick the little guy in the oven and set the timer for 40 minutes.

When in a pinch, a paper towel works just like a pastry brush

Once that timer goes off, you can begin making your honey roasted carrots. Roasted is a bit of a misnomer here - they are actually cooked on a stovetop. Must have been one of those "sounds better this way" naming scenarios.

Add your water, carrots, honey and butter into a large pot and bring everything to a boil. Allow the butter to fully melt and mix everything together really well after this and then reduce the heat and cover the pot with a lid. Allow to cook for 15 minutes, shaking the pot occasionally to prevent the carrots from sticking. (Alternatively, you can use a large spoon to stir, but be quick. The entire concept here is the small amount of water will 'flash steam' the carrots. Every time you take off the lid, you lose valuable steam and heat.) Once the timer goes off, your carrots and done and so is your wellington.

Adding the touch of honey 

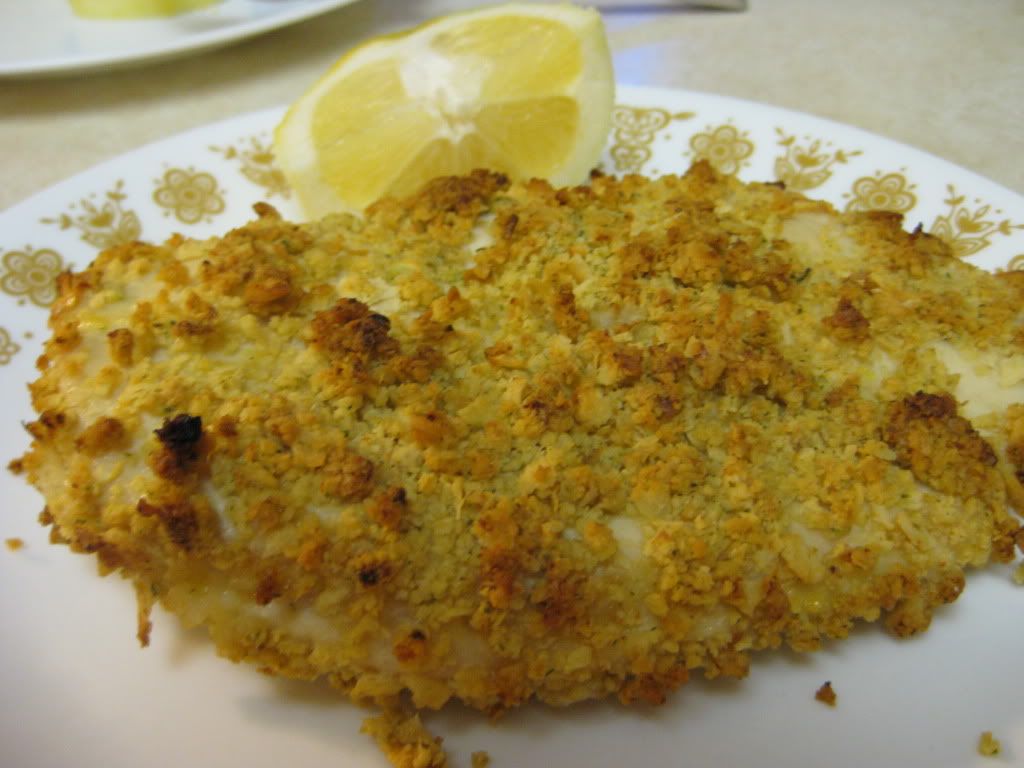
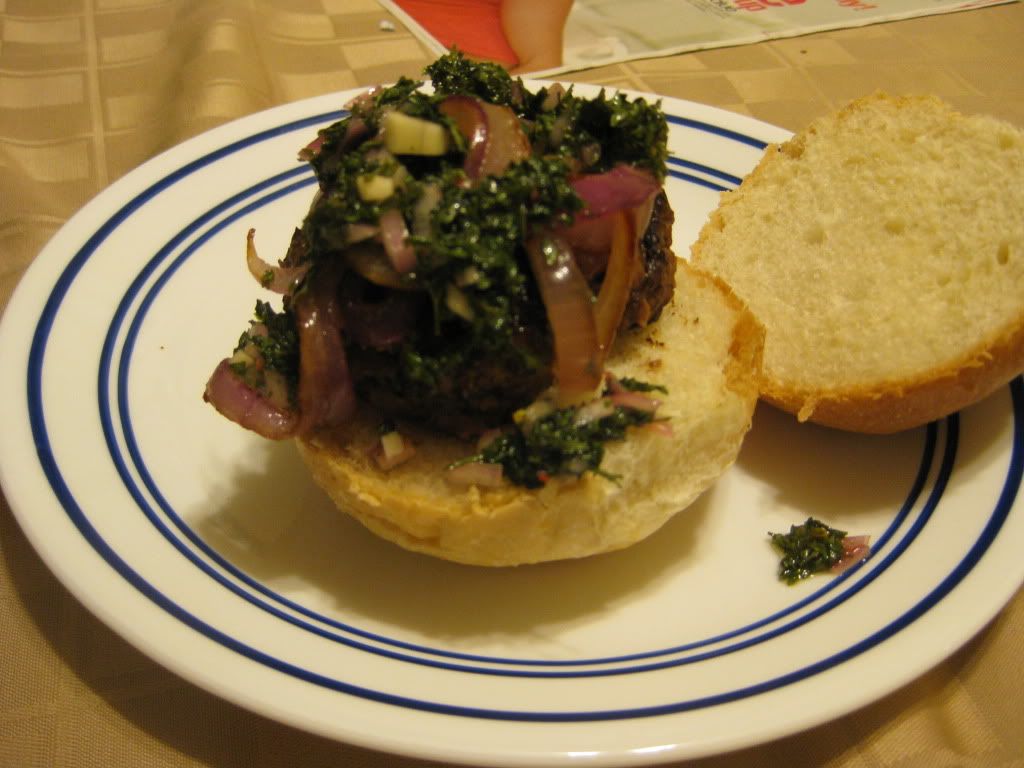
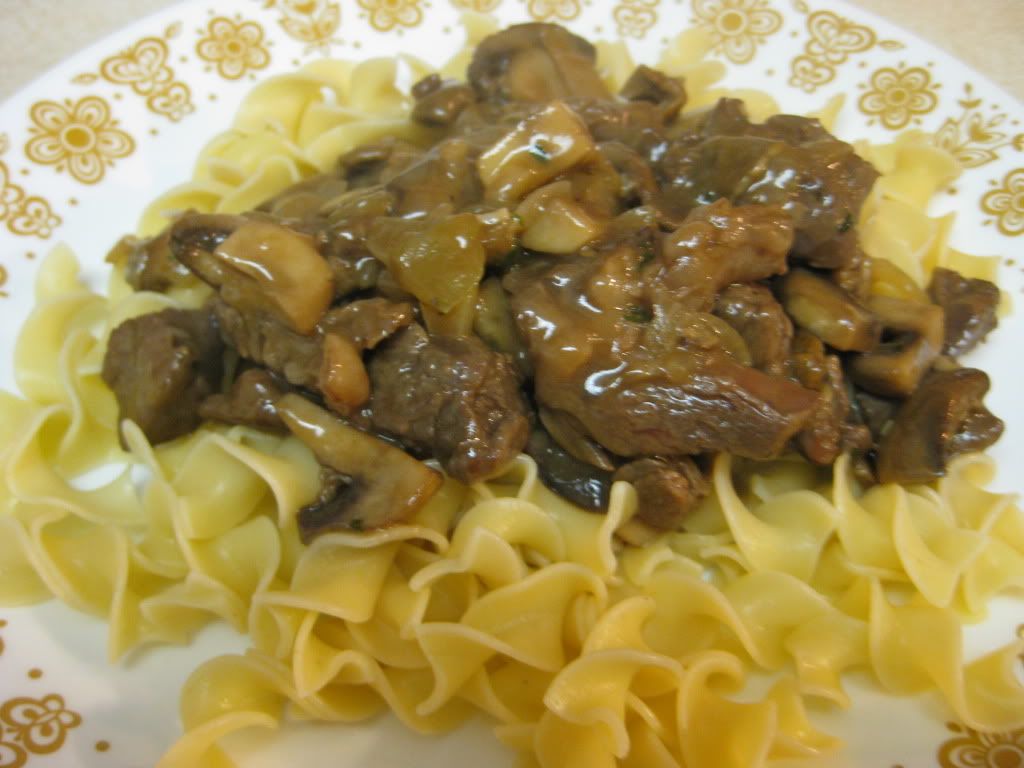
Slice your wellington like a loaf of bread (don't worry about the contents falling out, everything sticks together very well after baking) and serve with a big spoonful of your honey carrots and enjoy!
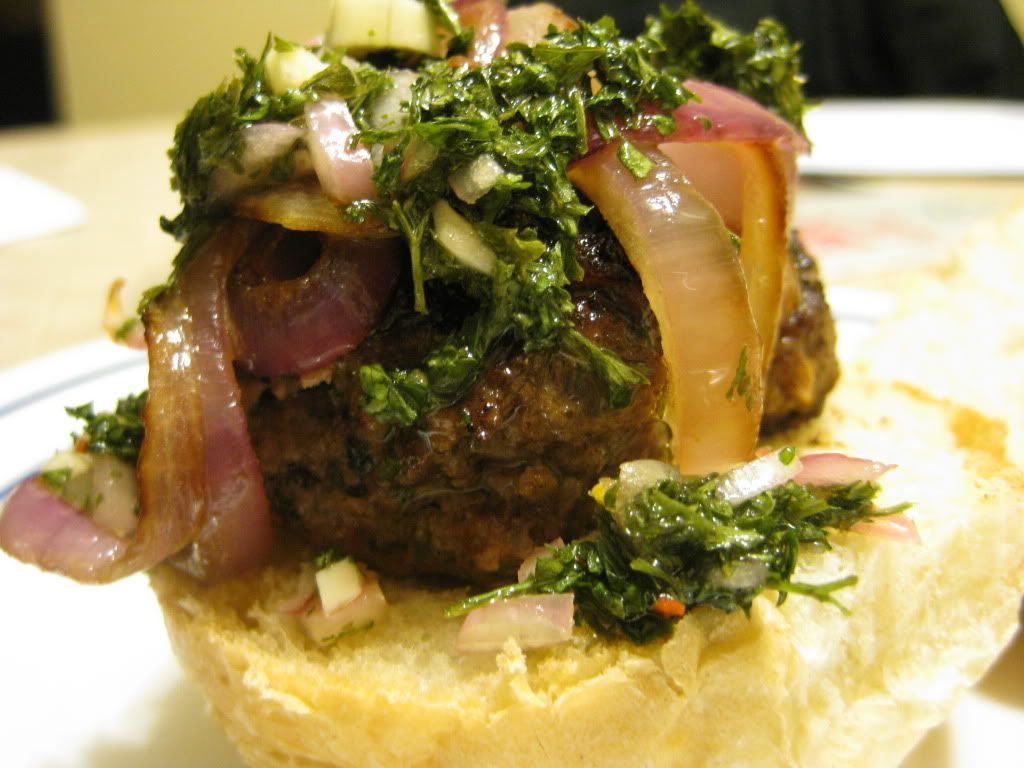
The Results:


Oh

My

Goodness!

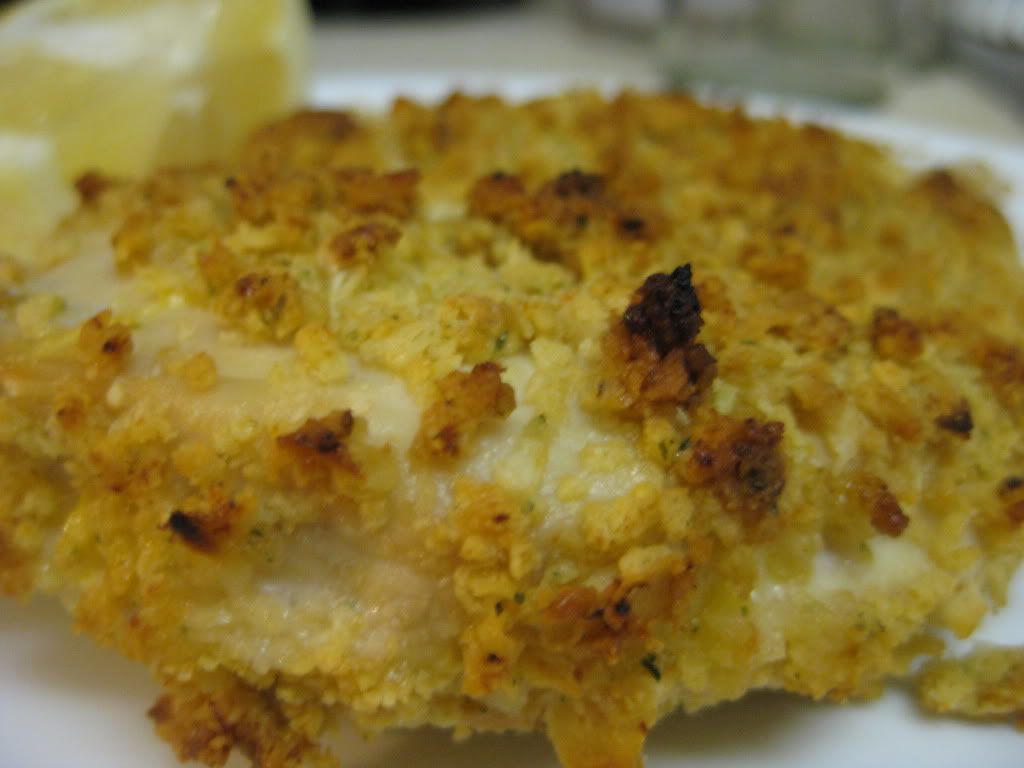
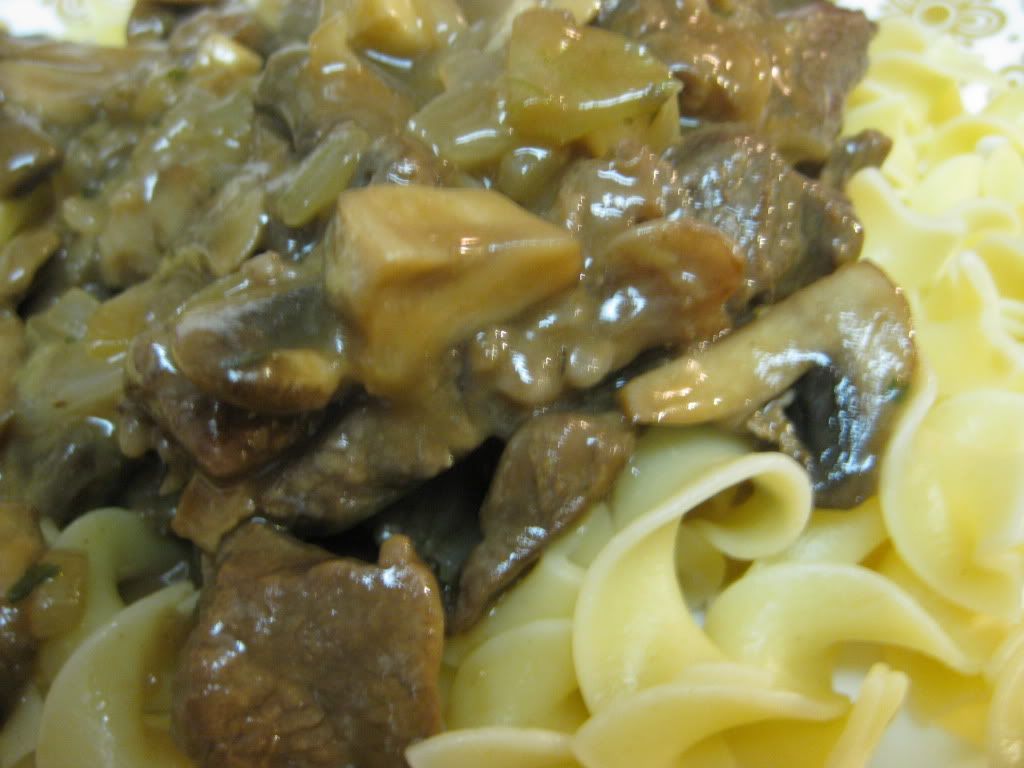
Tonight's recipe was, in a word, FANTASTIC. The beef wellington was full of flavor. The meat was incredibly juicy and flavorful and the vegetables all added their own unique flavors to create this perfect symphony of flavor. I was hoping for good thing from this recipe, but I wasn't expecting this. Next to the french baked potatoes from an earlier blog, this may be my favorite dish so far. Fantastic. I highly recommend you try making it for yourself. Heck, buy the ingredients and I'll come over and make it for you. It's THAT GOOD.

The honey 'roasted' carrots were a nice surprise as well. They ended up being nice, soft, cooked carrots with a light hint of honey. A delicious side dish that would compliment any main dish very well. These are also worth a look.

When it was all said in done, I'd say I conquered this recipe with relative ease. There were some tricky parts. However, nothing was too unbelievably difficult or overly taxing. In the end, I think I was letting all of the pictures and descriptions get to me. Taking it one step at a time, this recipe wasn't nearly as hard as I had originally thought.

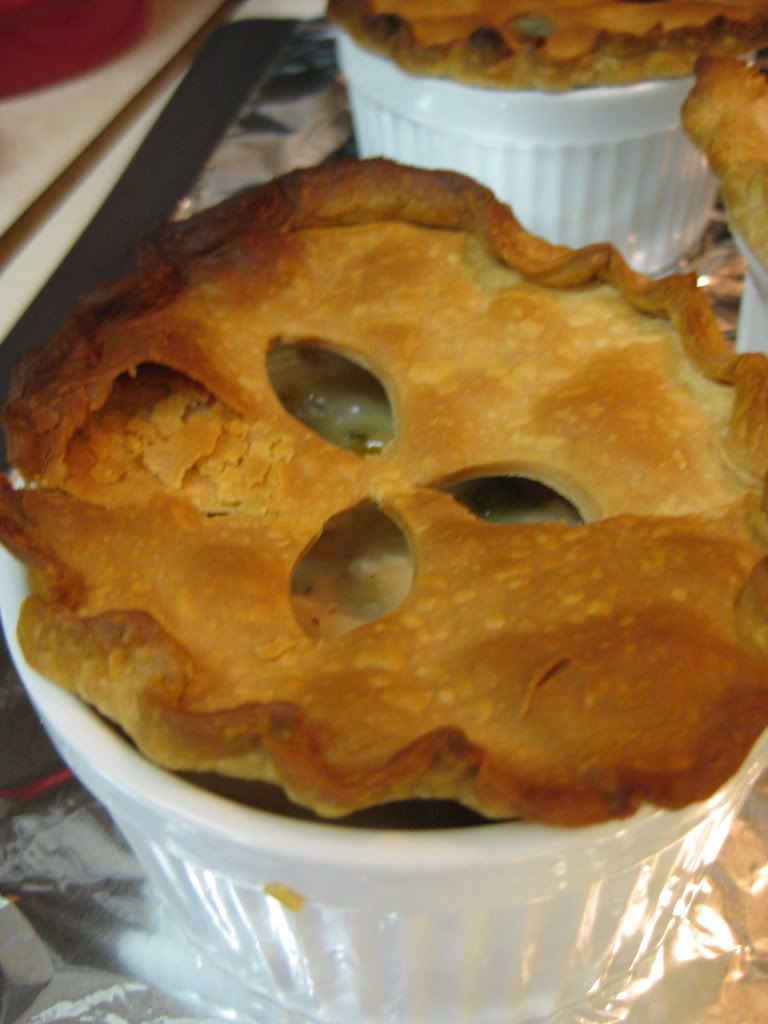
One last note. You may have noticed in that first picture of the wellington - mine sprung a leak during cooking. I rolled the dough a little too thin in one spot and the juices from the hamburger oozed right out during cooking. Outside of that one small incident - this recipe came off relatively accident free. As of this moment, I'm still sitting here. (Meaning the peas haven't killed me yet). I can't really say if I've come around to them yet. I never really had a chance to taste their individual flavor. However, after a brief return to my diet - peas have proven to be not as horrible as I remember. Maybe (maybe) they will make another return to a recipe. That all depends on me surviving the night....


****

Of course, I survived the night and found that peas are not as bad as I thought. In fact, I have no qualms about throwing them into any recipe I try now. (I've grown a lot as a cook in a year!) This ended up as one of our greatest recipes in the early days of the blog. Since then, we've tried countless recipes (around 200 if you decided to count) and had a lot of great dishes that surpass this dishes final flavor. But it's the original successes that you always remember. This is a great recipe to try for home chefs still building confidence, for a family that wants something new without having to buy lots of expensive ingredients, or for the experienced chef looking to have a little fun in the kitchen. Any way you slice it, this is a great recipe to try. 


That's all we have for you this evening. I'm back in the kitchen tomorrow night with a brand new recipe, one that features an ingredient I'm not overly fond of - but who knows, maybe like peas, I'll grow to like it. You don't know until you try cooking with it a few different ways right? Stop in tomorrow night to see what I'm talking about. Until then, 

~Cheers

Tuesday, May 3, 2011

Great Premise, Flawed Execution

Good evening everyone!  As always, we try to branch into new and interesting flavor combinations on the blog.  This recipe caught me by surprise.  It’s a pasta dish, but it’s virtually sauceless.  Granted, it has some liquids to keep the main ingredients together, but it does not completely revolve around some sort of sauce.  It’s more focused on the unique ingredient combination and making that the primary focal point of this dish.  But would it actually work?

The Recipe:  Penne with Arugula, Chorizo, and Romano
Original Recipe Found In:  America’s Test Kitchen 30 Minute Suppers

What You’ll Need:
1 Tablespoon Extra Virgin Olive Oil
8 Ounces Chorizo, sliced into thin disks
3 Shallots, chopped fine
5 Garlic Cloves, minced
1/2 Cup Dry White Wine
1 Cup Low-Sodium Chicken Broth
1 Tablespoon Salt
1 Pound Penne
1 Cup Grated Romano Cheese
5 Ounces Baby Arugula

Begin by bringing a large pot of water to a boil.  When at a boil, add the salt and pasta and cook to al dente, or package directions.  Drain the pasta and return it to the original pot.

In a large, nonstick skillet, add the olive oil and heat over medium heat until the oil is shimmering.  Add the chorizo and cook until a golden brown color forms on both sides, about three minutes per side.  Something to take note of is when the chorizo is cooking, all that will be left behind is rendered fat.  This will be an important part of the dish, since the next part relies on the fat left behind.  Be sure the chorizo is cooked nice and thoroughly before moving on to the next step. 


Cooking up some chorizo

For this recipe, I am using authentic chorizo, not the soy chorizo I used a couple of months ago (Tastes Kinda Like a Chili Dog).  Not only have we found a store locally that sells it (thank you World Market!) but now, we don't have to search all over the metro to find it...again.  For this recipe, one could use soy chorizo and make it a completely vegetarian meal.  Alterations would have to be made to "brown"-ing it and scooping up the little pieces might be a pain.  Thankfully, we were able to find authentic chorizo again and joyfully using it in recipes once more.

Move the cooked chorizo onto a paper towel lined plate.  Add the chopped shallots to the empty skillet and cook until softened and a light brown color appears, about five minutes.  When the shallots are cooking, the browned bits from the chorizo should be scraped up, infusing the shallots with more flavor.  

Add the garlic and cook until fragrant, less than a minute.  Then add the wine and reduce by half for almost a minute.  After that, add the chicken broth and cook until the sauce thickens, about three to five minutes.

In the pasta pot, add the sauce, chorizo, cheese, and arugula.  Toss the combination until the arugula is slightly wilted.  Serve and enjoy!

The End Result:


As much as I had high hopes for this recipes - it didn't pan out. While the flavors did work quite well together, there were other issues that kept this dish from being a success.   The subtle spiciness of the chorizo, the peppery flavor of the arugula, and the depth of the cheese made the dish stand out.  The pasta absorbed the salt and added a nice flavor to it.  Unfortunately, an error in the kitchen made the entire dish not that great.  I cooked the chorizo and the penned longer than anticipated and made the dish really chewy, and the chorizo rock hard.  All in all, a superb dish would have been awesome, but getting over zealous in cooking time made it worse.

Thanks Maggie. Not every dish is going to pan out, unfortunately, it's usually Maggie that learns these lessons the hard way. Learn from it and grow as a cook - that's what we always say. That's all we have for you this evening.  Tune back on Thursday for my brand new recipe.  Until then,

~Cheers!

Sunday, May 1, 2011

Out Of The Culinary Restaurant Awards!!

Good evening everyone. We're normally going to feature the news from around the culinary world on Sunday/Monday nights. The key there is, of course, normally. Over the past few weeks, the culinary world has been...a bit...well, boring to be honest. The news has been rather inconsequential or bland, with most of the sites we visit simply featuring recipes or quirky little tales. We try to make the best of weeks like that and feature what we can. This week has been particularly horrid - so we're trying something completely different.


Even though Maggie and I are big supporters of cooking at home and making food fresh, we still do enjoy eating out on occasion. One of the things you quickly learn after you start cooking fresh, however, is that the food you used to eat may not appeal to you anymore. We've found that mass produced fast food simply tastes 'off' and certain restaurant's menu items actually taste like preservatives and sodium. It's amazing how quickly your pallet can adjust to natural flavors and fresh food.

We've been asked multiple times by our friends, followers and family - where do you guys eat out? The implication of these questions obviously being, "If your pallets are so picky now, how can you find good fast food or restaurant food?" So, tonight we thought we'd share our favorite places to eat, when not cooking for ourselves. Just for fun, we're dubbing it the 'Out Of The Culinary Restaurant Awards' where the winners come home with...well, nothing really - but we will say nice things about them, so they've got that going for them. (These are regional - by the way, we're not world travelers!) Without further ado, let's jump into the 'awards'


Best Pizza 


Winner: Black Market Pizza
Located: Ames Iowa
Website: www.blackmarketpizza.com/

Black Market Pizza, tucked away in Ames Iowa is, hands down, the best pizza Maggie and I have ever had. Not only is their menu diverse and full of interesting new pizza options that you don't see anywhere else (such as the Rueben Pizza, Chicken Alfredo Pizza, Maui Waui Pizza - and many, many more) but they don't sacrifice quality for quirkiness. Their Bacon Double Cheeseburger pizza, packed with onions, pickles, and a custom 'cheeseburger sauce' in place of the standard tomato sauce, is simply the best thing you can ever feed your pizza hungry tummy. Great flavors, new pizzas - it doesn't get any better than Black Market Pizza

Close Second: 


Great Plains Sauce & Dough Company - The wheat pizza crust combined with honey to dip it in (it sounds weird - don't knock it to you try it) makes Great Plains' pizza a fantastic runner up to Black Market - and, as a bonus - it's also in Ames!


Best Barbecue 


Winner: Hickory Park
Location: Ames, Iowa
Website: www.hickoryparkames.com/


Continuing on ourAmes theme, we arrive at the quintessential BBQ joint - Hickory Park. Simply put, it doesn't get any better than Hickory Park. Great sauces, smoked turkey, pork and beef that simply bursts with flavor. The prices are low, the atmosphere is great (get there early if you're stopping in on a weekend, the joint may be big - but it's big for a reason - this is a VERY popular weekend stop) If you're hankering for BBQ, Hickory Park is the clear winner. Be sure to try one of the smoked sandwiches (pork, turkey or beef) they are, in our opinion, the best thing on the menu.


Runner Up: Jethro's BBQ - located in the Drake University neighborhood, this BBQ joint was a favorite stop of mine while I was in college. Great menu options, great atmosphere (and close to campus if you're attending Drake like I was...) It's not Hickory Park, but if you don't feel like making the trek to Ames, it's a great second option.


Best Sandwiches (Deli style) 


Winner: Jason's Deli
Location: West Des Moines, Iowa
Website: www.jasonsdeli.com/

If you're looking for great deli style food - you can't beat Jason's Deli in West Des Moines. With a wide array of options and a wallet friendly price point, Jason's Deli is the destination for you. Our favorite item, the Santa Fe Chicken Sandwich, is a unique blending of chicken, guacamole and russian dressing that blows your taste buds away.


Runner(s) Up: Pickerman's Deli and Palmer's Deli (Both in West Des Moines) - This was a tight race, all three places are very similar and are great alternatives to each other. In the end, Palmer's menu is slightly smaller than Jason's Deli and Pickerman's has some customer unfriendly hours - making Jason's Deli the slight winner.


Best Burger (Fast Food or Other) 


Winner: SmashBurger
Location: West Des Moines, Iowa
Website: www.smashburger.com/

If you haven't tried SmashBurger yet, you owe it to yourself to track one down and dive into what is simply the best fast food burger to cross your lips. They cook the burgers by smashing them onto a searing hot grill, quickly cooking the beef to perfection. The result is a delicious, juicy burger that is topped with an amazing 'smash sauce' and placed on a fresh bun. Order the classic and get a side of (garlic and rosemary infused) smash fries and enjoy the heaven your mouth will encounter.


Best Seafood 


Winner: BoneFish Grill
Location: West Des Moines, Iowa
Website: www.bonefishgrill.com/


Surprisingly the greater Des Moines area is full of great sea food options. (Being so close to the ocean after all - it makes sense right?!) But Bonefish Grill tops them all. While it is NOT a budget friendly option (this is a 'nice occasion' destination only) the menu is chocked full of amazing fresh fish delights. Our favorite option is the Tilapia with lemon butter sauce. Melt in your mouth delicious fish - cooked on a wood smoke grill makes Bonefish the best in Des Moines.


Best Pasta 


Winner: Z'Mariks
Location: West Des Moines, Iowa
Website: zmariks.com/

Maggie's personal favorite, Z'Mariks Noodle Cafe is an interesting little diversion from the standard restaurant fare you find in most cities. A menu based entirely around pasta and noodles, Z'Mariks has a diverse and delicious lineup sure to please any craving. Our personal favorite dish is the Udon - stir fried noodles, veggies and a spicy chili garlic sauce. Delicious!


Best Ice Cream 


Winner: Scoopy Doo's
Location: Forest City, Iowa
Website: www.facebook.com/pages/Scoopy-Doos-Ice-Cream-and-More/137000642976775

Sometimes, you can't beat small town parlors. Forest City based Scoopy Doo's has a great lineup of unique ice cream flavors, delicious homemade waffle cones and a friendly staff that make a trip to the local ice cream parlor a fun event. Affordable prices, a wide menu and great main street location make Scoopy Doo's a winner in our book.


There you have it folks, the first ever "Out Of The Culinary Restaurant Awards" - our favorite places to eat in the greater Iowa area. Here's hoping you give some of these great eateries a try if you're in the area.

Of course, it's not the beginning of the week without a few culinary stories - so here are the highlights:


Around The Culinary World (Speed Edition) 

The Government wants food companies to limit their marketing towards kids. STORY

What does the 'Proof' of an alcoholic beverage actually mean? STORY

20 Kitchen habits you should be using / learn to use STORY

How to watch out for genetically modified foods STORY


There you have it folks. All the news that's fit to blog about, plus a bonus feature on our favorite eateries. Hopefully you found it as entertaining to read as it was to type. It was a close contest in some of our categories - we had a good debate picking our favorites. We're got another full week of recipes planned - Maggie is cooking Tuesday, and I'll close us out on Thursday. We'll see you Tuesday night with a new dish - until then,

~Cheers