Tuesday, October 25, 2011

Not Your Average Spaghetti

Good evening everyone!  Today was probably the last day we will see 70 degree temperatures until probably May, so hopefully everyone got a chance to go out and enjoy it!  The weather will finally start to feel like fall starting tomorrow, which means the fall themed recipes will taste better.  I don't know what it is about 40-50 degrees and the slight chill to the air, but it definitely conjures up images and feelings of warm, hearty meals.  With that being said, tonight is no exception, except with one slight major alteration.  This recipe is a variation of every non-sauce spaghetti dish known to man, except that the pasta is replaced with a gourd.  Spaghetti Squash has pretty much every similarity to its pasta brother, but there is no gluten and very little to carbs.  It's a great alternative to pasta, without feeling like you have a run a mile afterward.  

The Recipe:  Roasted Spaghetti Squash with Herbs
Original Recipe Found In:  www.marthastewart.com

What You'll Need:
1 Spaghetti Squash (about four pounds, halved lengthwise and seeds removed)
1 Tablespoon Extra Virgin Olive Oil
1 Tablespoon Packed Light Brown Sugar (we're using dark for our version)
1/2 Cup grated Parmesan Cheese
1/2 Cup chopped fresh flat-leaf Parsley
1/2 cup chopped fresh Cilantro
1/4 Cup blanched Hazelnuts, toasted and coarsely chopped.

For those of you who don't know how to prepare a spaghetti squash, let me take the load off your back and describe it to you in pictures:


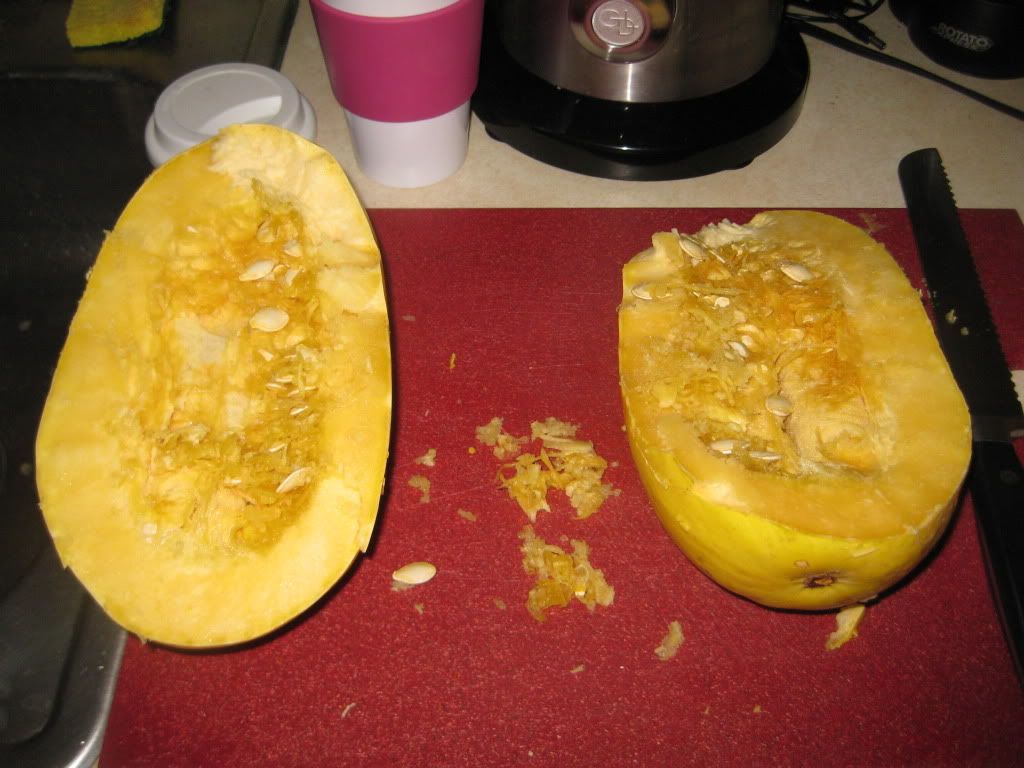
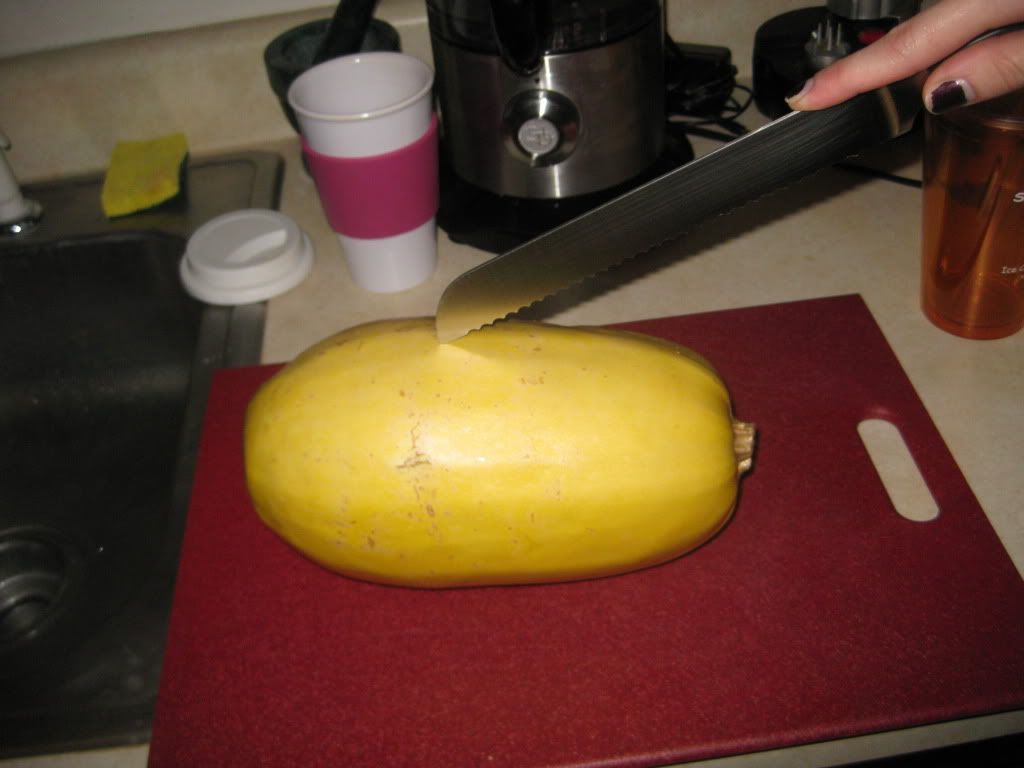
Cut the squash lengthwise - it's very tough to cut, so BE CAREFUL!!
There will be seeds, lots and lots and seeds, so they will need to scraped out
Freshly carved squash!
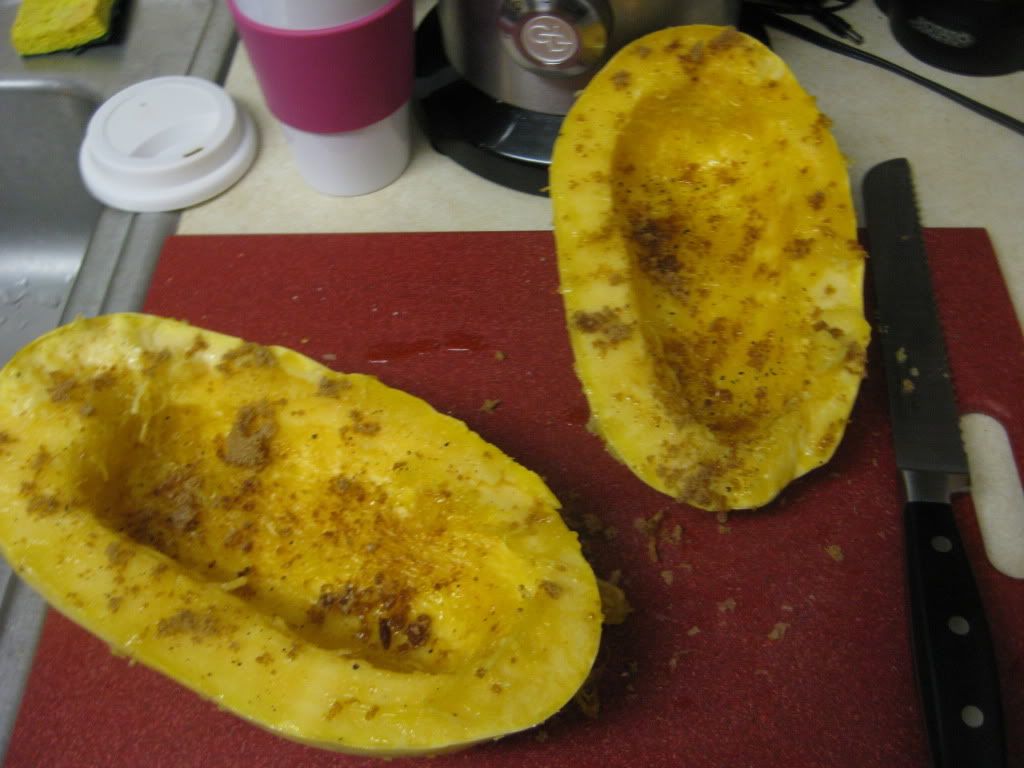
Season the squash with either salt or pepper or whatever your recipe calls for (in this case, brown sugar and olive oil.)
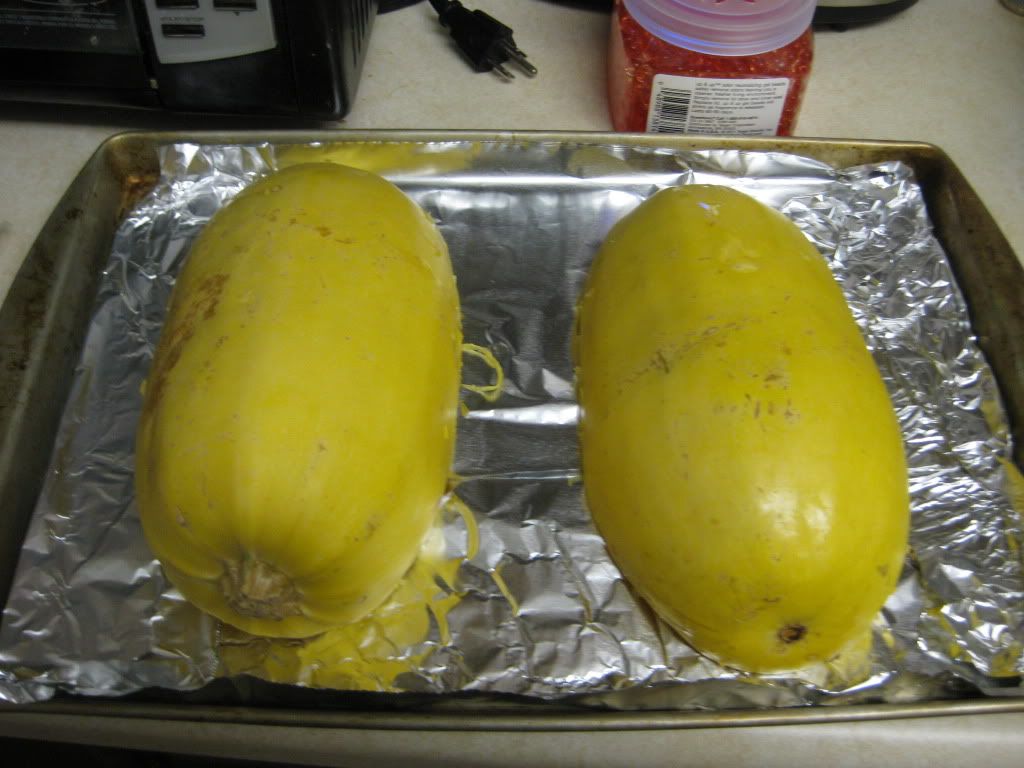
Place cut side down and pop it in the oven for 45-60 minutes for a great roasted flavor.


While preparing the squash, preheat the oven to 400 degrees.  Brush the cut sides of the squash with oil and sprinkle with sugar, salt, and pepper.  Place squash, cut side down on a rimmed baking sheet.  Roast until tender, about 45 minutes.  Let the squash cool slightly on the sheet on a wire rack, about ten minutes.


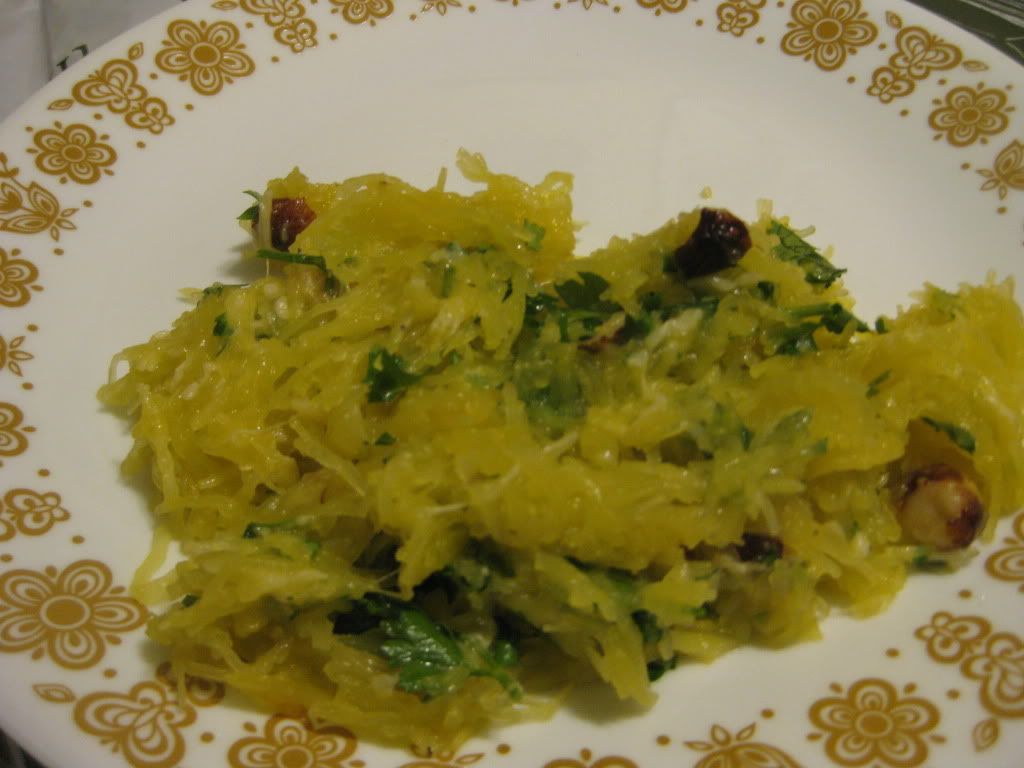
Scrape the squash with a fork to remove the flesh in long strands.  Place in a large bowl.  Add the oil, Parmesan, parsley, cilantro, hazelnuts, salt and pepper.  Toss, serve, and enjoy!

The End Result:


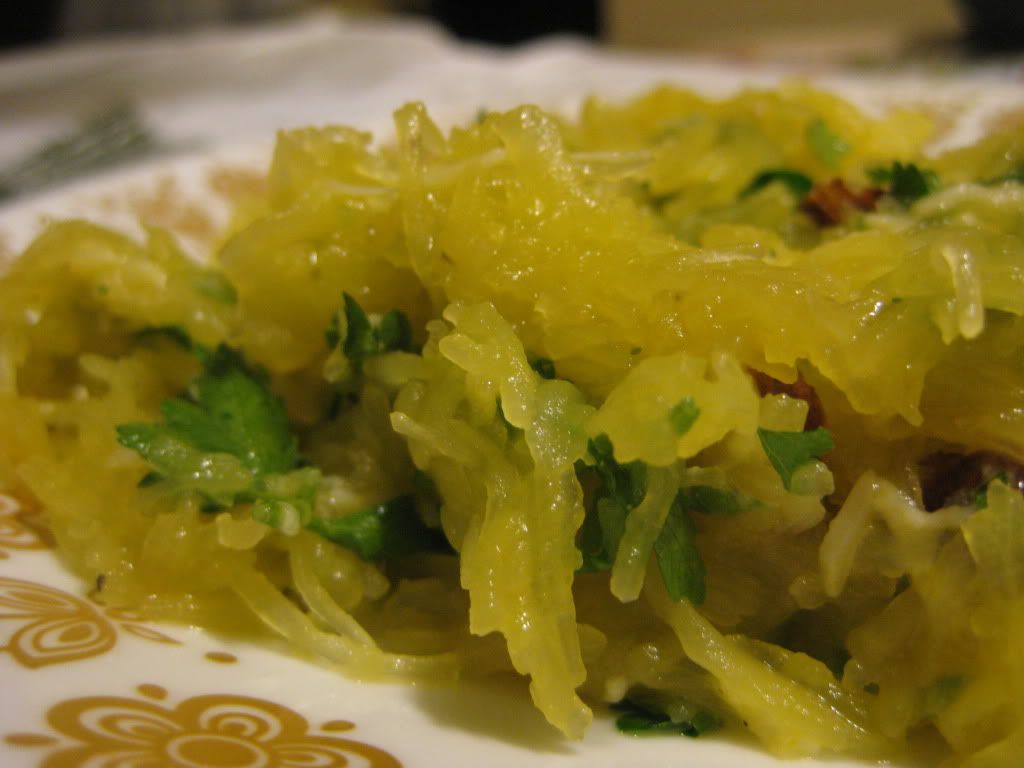
After roasting the squash, it was incredibly easy to scoop out all the innards.  I was actually really surprised how easy it came out and it made that part of the recipe a snap.  As for the flavor?  Hands down, one of the best fall flavors I've tasted in a while.  It was rich and hardy and yet, surprisingly sweet.  With this flavor, added with the parmesan, cilantro, and parsley, it was quite fantastic.  Although, I think this recipe highlights the roasted squash and not so much on the cheese.  The cilantro was, at times, a little overbearing.  The hazelnuts did add a little crunch to the mix and that made it worth while.  I think this is a great fall dish, for those of you who are looking for a little vegetarian twist to your new fall traditions.


Join us tomorrow as Tyler continues the vegetarian theme, with a dish that you don't commonly associate with vegetarians.  Until then,

~Cheers!

Monday, October 24, 2011

Around The Culinary World

Good evening everyone! It’s hard to believe that we are entering the last full week of October! We were graced with 70 degree weather in the greater Midwest this weekend, a nice change of pace from the usual fall temperatures. Nevertheless, we know that November is just right around the corner and these fall days will eventually be moving to a more permanent cool. Lucky for us (and by extension – as a reader of the blog – you) fall is the best time of year to be a chef (amateur or pro). We’ve got an exciting week of recipes lined up – with a theme! More on that later, we first have to cover all the news of the culinary world for this week. Let’s dive in!


This first story falls under the category of “Weekly feature that I wish wasn’t a weekly feature”. Food product recalls – they are an all too common occurrence and it seems we hardly have a week between massive recall stories. This week, the product is bagged salad sold by Taylor Farms Retail Inc. The product, under the brand names Fresh Selections, HEB, Marketside and Taylor Farms was tested by the Washington state Agriculture Department and showed signs of possible salmonella contamination. The company has voluntarily recalled 3,265 cases of their product. The cases were distributed to Arizona, California, Colorado, Florida, Kentucky, Missouri, New Mexico, New York, North Carolina, Oregon, South Carolina, Texas, Virginia, Washington and Puerto Rico. To date, no illnesses have been reported. (SOURCE)

It looks like Taylor Farms Inc. was out ahead of this one at the very least. Judging by the reports we’ve read on this recall, most of the product was just scheduled to hit shelves or was just being stocked onto shelves when the recall was decided; this likely means that very few bags of the actual product made it into consumer’s hands. The other refreshing aspect of this story is that the checks in place, in this case the Washington agricultural department’s inspection, actually caught the issue early in the process. While it’s never good when a product is recalled, it’s nice to see some that are caught in time.


Part of the reason there are so many outbreaks and recalls in the food industry is due to the scale of the industry itself. Right now, there is simply too much product and too many variables within the food production system for companies to be able to maintain a constant and reliable level of control. Currently, for every 1,000 cows sent through the processing system and into the food supply, only one is being tested for diseases and contaminations.

The high costs and large amount of time required for testing is the main issue behind the low cattle testing numbers. (Currently it costs about $50 and takes 12 hours to test 1 cow). Add in all of the variables of meat packing and production and you have a higher-than-you’d-like percentage of some form of contamination. (One in four people in this country will fall ill annually from some form of food related contamination)

Luckily, a group of engineering graduate students from Yale may have found an answer. Their device, called the ‘alpha-screen’ recently won NASA’s Tech Brief Engineering prize (beating out 900 other entries from 50 countries).

The device, which is roughly the size of a quarter, looks to fix all of the issues that food production is currently facing. It lowers the cost – from $50 per cow to about $1. It also vastly reduces the time required to test from 12 hours to about 30 minutes. While the device is not quite ready for mass production, early indicators appear that this may be the solution the food industry is looking for when it comes to system wide testing of their product. To read more about the ‘alpha-screen’ and how it works, check out the full story HERE.


What is the most commonly stolen food in grocery stores? Alcohol? Grapes (when people just ‘sample’ a few)? Are you stunned that people even steal food from grocery stores? Don’t be – it’s a lot more common than you’d like to think. As for the most commonly stolen product – it’s cheese. Roughly 4% of the cheese inventory of major grocery stores goes missing annually, the largest figure of any of the products sold in a typical grocery store. What’s the motivation behind stealing cheese? It’s not to make a casserole or top a taco at home – apparently there is a ‘black-market’ of sorts when it comes to cheese and other grocery store products. (The seedy underworld of super markets if you will) Read the full story HERE for more information.


Grand theft cheddar


If you’re like my wife, you love the monthly food magazines. While I like to take ideas and inspiration from cookbooks and a select few (tested and trusted) websites, Maggie likes to gleam her inspiration from the likes of Bon Appetit, Food Network, Taste of Home and others. November is sort of the ‘season’ for food magazines as they see a spike in sales of their issues that feature Thanksgiving and other holiday dishes. So, if you’re in the market for a turkey based read this holiday season, which magazines are worth your hard earned cash? Check out this list of 10 cooking periodicals (complete with content highlights) to judge which one is worth the dough. (Pun slightly intended)



It’s probably no surprise to you when I say Americans consume too much sodium. A recent CDC study found that 88.2 percent of Americans who should be reducing their sodium intake to about 2,300 mg per day (based on a healthy amount of sodium for individuals ranging from 2 to 50 years of age) are actually consumer more than that amount. Of individuals 51 and older, who should be consuming about 1,500 mg of sodium a day; over 98 percent are consuming too much sodium. Clearly, we have a sodium problem in this country. Over consumption of sodium can lead to heart disease, kidney problems and a whole multitude of other health issues. This over consumption of sodium is putting a heavy burden on the health and insurance industry. In fact, the study estimates that if Americans were to reduce their sodium intake to the recommended levels, the health industry would save almost $4 billion annually in health care costs. That’s no small figure.

So, how do you lower your sodium level? Do you stop putting a few extra shakes from the salt shaker on your fries? Well, while that IS a start, it’s actually not where most of your sodium comes from (in fact, on average, very little sodium comes from your salt shaker). The major culprit? Food itself (production and packaging showers and shoves their food full of sodium). Read more about the study HERE.

Maggie and I can speak to this firsthand. After we decided that packaged food was simply too loaded with sodium and other preservatives for our liking, we decided to start cooking on our own. It wasn’t very long after that before we noticed the ‘other’ ingredients in processed food. Cooking healthy and with fresh ingredients causes your taste buds to quickly adjust to this fresh, more healthy style of eating. The first time you consume something processed or packaged, the overwhelming flavor you find is actually sodium or other chemicals, rather than the flavor you’re used to tasting. The fact of the matter is, you’re simply so used to your foods being pumped up with these products and chemicals that your body has just adjusted to their flavors. It’s scary to stop and think about isn’t it!? (All the more reason to start cooking a majority of your meals for yourself!)


That’s all the news that’s fit to blog about this week. As I touched on in the open, we’ve got a theme week coming up. This week’s theme? Vegetarian! As we’ve touched on in the past, eating meatless once or twice a week is not only a great way to reduce your grocery bill, but also acts as a great way to maintain a healthy lifestyle. Maggie will get our vegetarian week started on Tuesday night and I’ll close out our theme week on Wednesday. Tune in Tuesday night to see what Maggie has cooking. Until then,

~Cheers

Wednesday, October 19, 2011

Sweetness: Thy Name Is Potato

Good evening everyone! The humble sweet potato is a staple of fall – but it never receives the full billing it deserves. While it’s likely to make its way on to your table during Thanksgiving and maybe even during the Christmas holiday; it’s usually as an after thought or as a complimentary dish. There is certainly nothing wrong with using the sweet potato in a casserole or even in a pie, but it undersells the potential of the fall root. We have featured the sweet potato in a soup, but most of our sweet potato recipes have fallen under the ‘side dish’ category as well. Tonight, that changes.


The Recipe: Black-Bean Smothered Sweet Potatoes
Original Recipe From: Eatingwell.com

What You’ll Need:
Serves 2


2 Medium Sweet Potatoes
1 Can 15 Oz. Black Beans (Rinsed)
1 Medium Tomato (Diced)
2 Teaspoons Extra Virgin Olive Oil
½ Teaspoon Ground Cumin
½ Teaspoon Ground Coriander
¼ Teaspoon Salt
2 Tablespoons Reduce Fat Sour Cream
2 Tablespoons Freshly Chopped Cilantro


The beauty of this recipe is that it can be broken down in two forms. Quick or super-quick. The super quick variant involves the use of a microwave to zap the potatoes into tender, warm, delicious morsels in about 10 minutes. While I usually discourage the use of a microwave in traditional cooking (too many cons, not enough ‘pros’ in my opinion) tonight is the exception. Potatoes are one of the few dishes that can be cooked in a microwave with little lost value. Since it makes more economical sense to cook the sweet potato in a microwave rather than heat an oven for an hour, the final decision was easy.

Begin by poking several holes into the top and sides of the sweet potato (a fork is the easiest way to do this). Place the potatoes in the microwave and heat on high for about 12 to 15 minutes or until the potatoes are tender. Alternatively, you can place the potatoes in a 425 degree oven and let them slow roast for about 45 to 1 hour. If you’re not going to be using the oven for another dish, however, this doesn’t make as much sense. While this is still a relatively quick option – it’s not as practical as using the microwave.

Next, combine the beans, oil, tomato, coriander, cumin and salt and place them in a microwave safe bowl. Heat this mixture on high for about 2 to 3 minutes. Alternatively, you can place the mixture in a small saucepan and heat it over medium high heat for about 10 minutes. If you want to add a little extra complexity to this mixture, sprinkle in a touch of cinnamon (no more than about ¼ teaspoon, however).

I actually prefer the stovetop method in this instance. Microwave cooking can result in overcooked (and undercooked) beans, uneven heating and it will dry out the mixture a little more than stovetop cooking will. In addition, heating cumin and coriander in your microwave is a way to guarantee that you will be smelling spicy cumin and coriander for a few weeks. Since it takes 12 minutes to heat the potato, and 10 minutes to heat the mixture, it just makes more sense to utilize the stovetop.

On the surface, you may be thinking that this combination sounds very odd. You have to think in terms of food science to see how this recipe works. I don’t have to tell you that sweet potatoes are naturally sweet – the bean mixture is a variation of a Spanish dish – and it packs quite a spicy punch. When combined, you neutralize the extremes of each flavor profile and create a happy medium loaded with great flavor. In fact, this mixture is very similar to the more common sweet potato & cinnamon pairing. Cinnamon is a warm spice, much like coriander and cumin. The flavor profile in this dish works with the same concept, but it just takes a few more liberties.

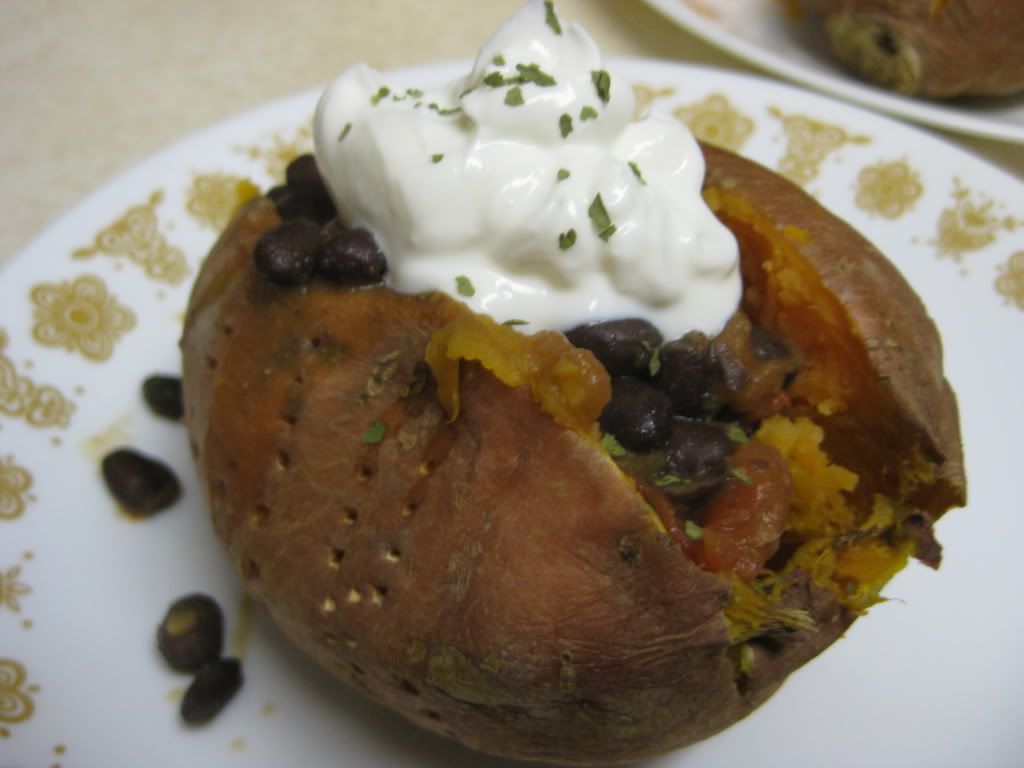
Allow the sweet potatoes to cool slightly (to the point that you’re able to handle them safely) and slice them down the center. Fill the gap with the bean mixture and top with a tablespoon of sour cream (optional). Serve and enjoy!


The Results:

Only one photo tonight, surprisingly - microwaving a potato doesn't lend itself  to great photos! 


A very fall inspired flavor! The sweet potato was tender and warm and greatly complimented the (slightly spicy) bean mixture. The dish was filled with great textures and every bite was packed with great flavor. You could use unflavored yogurt if you wanted to have a little more neutral topping (in place of the sour cream). In addition, you could add some onions to the mix to spice things up a little more. The nice part about this dish is it is highly customizable. Change, tweak and alter the ingredients to create the flavor profile you want. All in all, a great dish that highlights an overlooked fall treat.

That's all we have for you this week. Enjoy a cool fall weeked everyone! We're back on Monday with another trip Around The Culinary World - tune in Monday night to see what's new in the world of food. Until then,
 
~Cheers

Tuesday, October 18, 2011

Souper Chili!

Good evening everyone! As the temperatures dip slowly into a more 'fall-y' feeling, our favorite flavors get to be front and center. These flavors include soup - for one, I can't get enough of it! Nothing says autumn more than curling up with a warm bowl of soup and a blanket around my body. Granted, that perfect scene is used when I'm sick, but there's just something about the leaves falling and the sweaters are being worn. It's just a wonderful feeling! Tonight, I'm taking a old favorite of many families and taking an alternate route. Though this recipe is popular, this is my first attempt at trying a chili variation.


The Recipe: White Chili
Original Recipe Found In: www.eatingwell.com


What You'll Need:

1 Tablespoon Canola Oil
1 1/2 Cups chopped Onion
2 4-ounce cans chopped Green Chiles
1 Teaspoon Dried Oregano
1 Teaspoon Ground Cumin
1/8-1/4 Teaspoon Cayenne Pepper
3 15 Ounce cans Great Northern Beans, rinsed
4 Cups Reduced-Sodium Chicken Broth
4 cups diced cooked Skinless Turkey (or chicken)
2 Tablespoons Cider Vinegar

Tyler's Note: Traditional tomato based chili has developed and evolved greatly from its southeastern roots over time, but there is no denying that there is something inherently southern about classic style chili. Almost as sacred as barbeque, the southern chili recipe is hotly contested, fiercly competed over and almost always a well guarded secret. White chili, however, finds itself with a whole new set of inspirations.

White chili is a product of the desert southwest. White chili is based around chicken broth, turkey, tortilla (either shells or bread) some forms even feature lime juice or a side of guacamole. On a whole, white chili is lighter and a little more zesty than its more traditional coutnterpart. Unlike the almost barbeque like traditional chili (thicker sauce, heavier flavors) white chili falls more in the line of a soup - with the flavors focusing on more light and even citrus-y themes. While the two dishes are far from regionally exclusive - they both cross over to other regions of the US and are worldwide dishes - you can see in the 'roots' of each dish that they are fairly indicitive of their region.

Those who are fans of traditioanl chili (such as myself) may find themselves surprised by the fact that they enjoy this variant of chili. In reality, it's chili in name only. The basis framework of the dish is as far from chili as possible. Now that we've covered the origins of the dish (and how it's different) let's let Maggie show us how to make it:

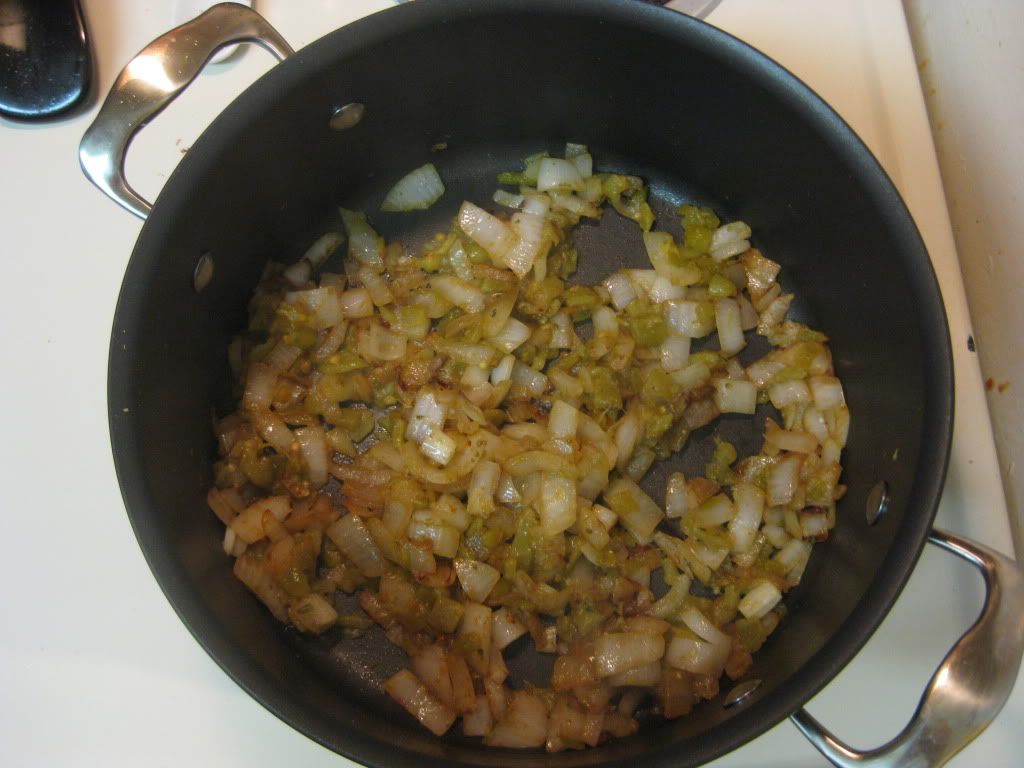
Begin by heating the oil in a large pot or a Dutch oven over medium high heat. Add the onions, stir occasionally and cook until softened, about five minutes. The onions should begin to appear translucent by this point in time. Next, stir in the chiles, oregano, cumin, and cayenne. Cook, stirring occasionally for five minutes. This first slow cook allows the chiles and onions to really absorb the cumin, cayenne, oregano mixture and greatly enhances the flavor. Slow down and allow these ingredients to simmer. You'll be glad you did.


Fragrant flavors getting their flavor on


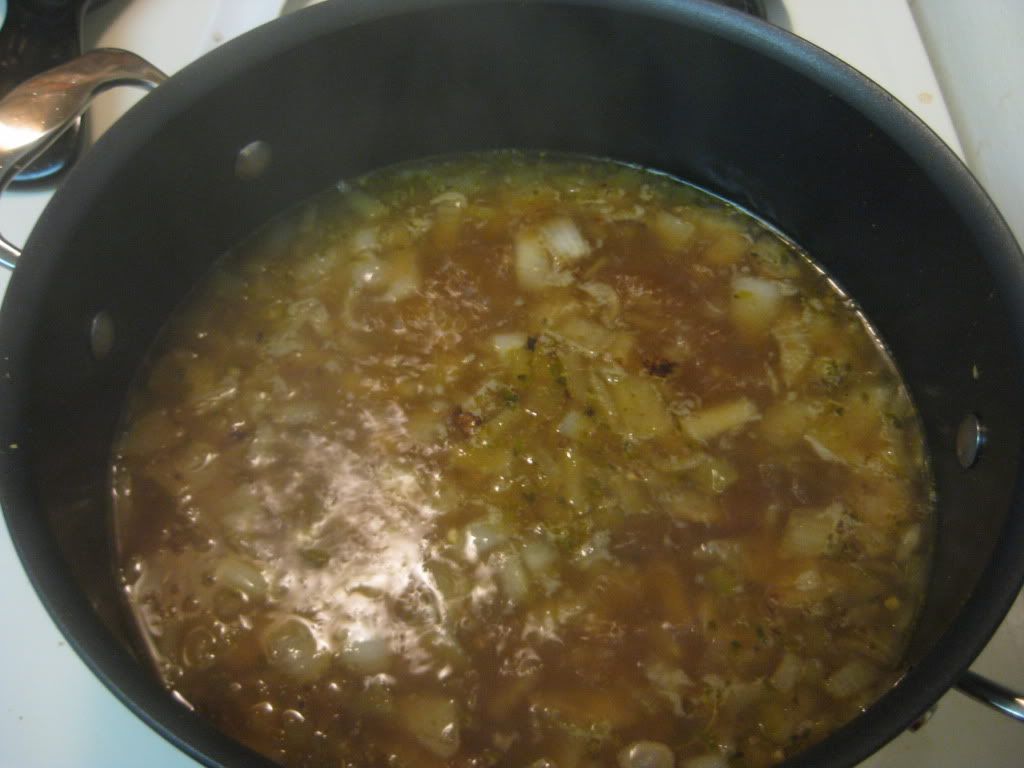
Stir in the beans and broth and bring to a simmer. Cook for 20 minutes, giving a good stir every now and then. Add the turkey (or chicken) and vinegar and cook for five minutes more. Apple cider vinegar, while still packing a bite, is a bit sweeter than traditional vinegar. In this dish, it's sweet flavors will neutralize a little of the heat packed in by the cayenne. Finally, serve in soup bowls, and enjoy!!


All the ingredients simmering away


The End Result:


If you love southwestern/Mexican flavors, the soup is for you!  As Tyler previously explained the dish's roots, you can clearly smell it as you are mixing the chiles and spices together.  As for the taste?  It smells and tastes like a Tex-Mex fiesta in your mouth!  Like I said before, if you aren't a fan, this recipe won't be for you.  But if you are and/or you're feeling adventurous with your soups, then this soup is for you.  An overall classic flavor that isn't too spicy and you're left with a feeling of all the warm notes all the way down to your belly.


That's it for this evening.  Check back in tomorrow as Tyler tries something completely different with one of his favorite foods.  Until then,


~Cheers!

Monday, October 17, 2011

Around The Culinary World

Good evening everyone! Welcome back to a brand new week of culinary adventure here at Out Of The Culinary! It’s official folks, after a faux ‘return of summer’ to the greater United States, we are now in the fall season. This morning we awoke to a cool 42 degrees and light rain in the great Des Moines metro – the forecast for the week looks very similar to today. The summer has ended and fall is upon us which means fall cooking and fall themed dishes! (Cue up ‘It’s the most wonderful time of the year’)


This week, I’ll be fully embracing that fall theme with a very unique dish. It utilizes one of my favorite fall classics but gives it a good twist to create something I’ve never seen before. Maggie’s dish this week is also all about the cooler weather. That will come later in the week – but first, we have to cover all the news that’s fit to blog about in the culinary world. Let’s dive in!


October 24th will mark the first Food Day. Food day, for those who are not familiar, aims to bring Americans from all walks of life together to discuss healthy eating and responsible and sustainable food production. The movement is backed by an advisory board of physicians, politicians, authors and other advocates. You can read more about Food Day (including how you can get involved) HERE.


Ahead of Food Day, the Center for Science in the Public Interest has released a ‘Terrible Ten’ list. This list is composed of the 10 worst food products currently in the American food scene. The group aims to facilitate discussion about healthy eating and sustainable (responsible) farming by highlighting the foods and producers who are doing much more harm than good in the food world. See the group’s “Terrible Ten” list HERE.


It should no longer come as a surprise – but food companies are not honestly marketing their products. The culprit this week is cereal. While we’ve talked about the false advertising in children’s cereal in the past, today we’re focusing on ‘Natural’ cereals. The Cornucopia Institute recently released a report that states ‘natural’ cereals are vastly overstated in how natural they really are. Read about the biggest violators and see the full report HERE.


Sustainable farming – yes, we’ve talked about this topic a LOT over the past few months. It’s important, it’s better for the environment and it may be one of the many ways the human race will have to adapt to feed its ever growing populous. We’ve covered the how’s and why’s of sustainable farming before, so I won’t bore everyone with another soapbox rant on the topic – I will suggest you search sustainable farming and production if you are unfamiliar with the topic, however. This week, our sustainable farming focus turns to Target. The big box retailer announced last week that they aim to sell only 100% sustainable farmed fish by 2015. This is a huge announcement in the sustainable farming movement and Target should be applauded for making such a move. All it takes is one or two big companies to start a movement. Target is one of the biggest companies so far to get this ball rolling. Read more about this announcement HERE.


Groceries are expensive; there is simply no way around that. If you decide that you want to eat healthy and buy organic you’ll likely see your grocery bill rise as a result. So, how can you eat healthy and still be able to afford all of your other expenses? Eatingwell.com has a six tip article that claims it can save you up to $2,997 a year. While your results may vary (obviously) it’s worth looking at to pick up a few tips. Check out the story HERE.


That's all we have for you this week. We've got another full week lined up for you when it comes to recipes, this week we're foucsed on fall cooking. Maggie will take to the kitchen on Tuesday night and I'll finish out our week on Wednesday. Be sure to stop in Tuesday night to see what Maggie has cooking. Until then,

~Cheers
Wednesday, October 12, 2011

State Fair Food Finds Its Way Home

Good evening everyone! As Tyler mentioned yesterday, I often take risks on different, out of the norm recipes. Whether it's blending completely different flavors or adding a new twist to an old favorite, trying something innovative has always stirred my imagination. Unfortunately, this wasn't a recipe I came up with, but it's something out in left field. I have heard of this type of dish before - this recipe is sometimes billed under "Great State Fair Food", but I have never consumed it. Anyway, enough of me talking, let's get cooking!!


The Recipe: Chili-Corn Chip Pie
Original Recipe Found In: Cooking Light, October 2011

What You'll Need:

1 Pound Ground Sirloin (ground beef will work too)
1 1/4 Cups Chopped Onion
6 Garlic Cloves, minced
1/2 Teaspoon Ground Cumin
1/2 Teaspoon Ground Red Pepper
1/8 Teaspoon Salt
1 Tablespoon Tomato Paste
1 Cup Beef Broth
1/3 Cup Water
1 10 Ounce Can diced Tomatoes and Green Chilis, undrained
4 Ounces Corn Chips (Fritos work quite well for this recipe)
1/3 Cup Shredded Sharp Cheddar Cheese
1/4 Cup Fat-Free Sour Cream

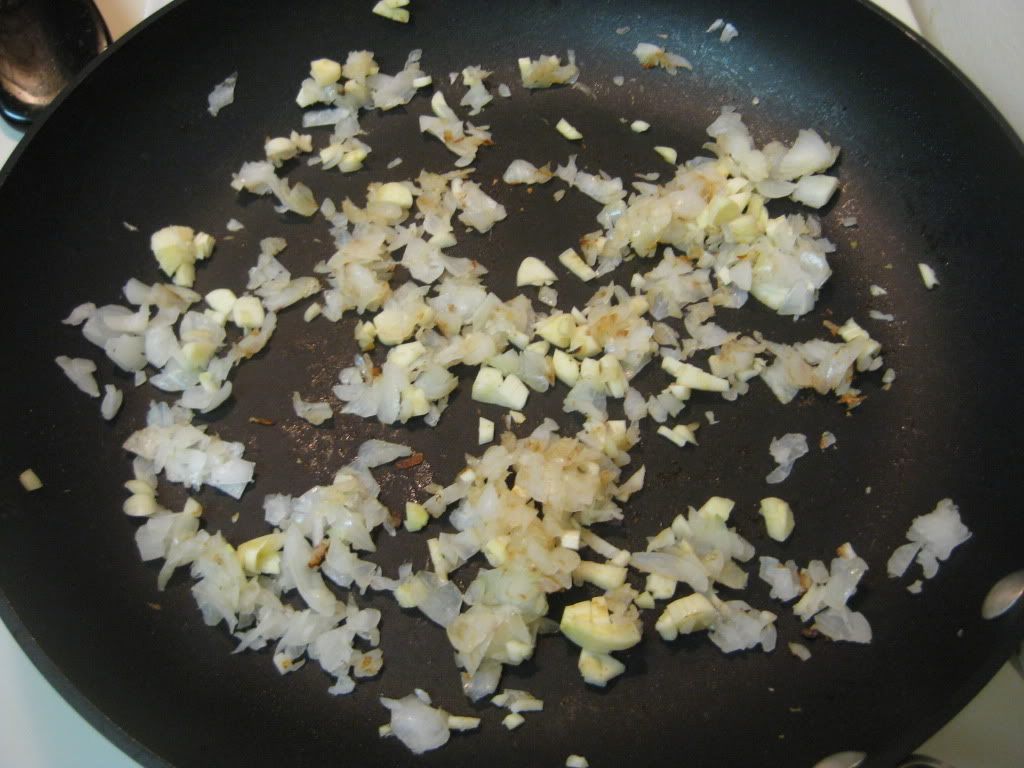
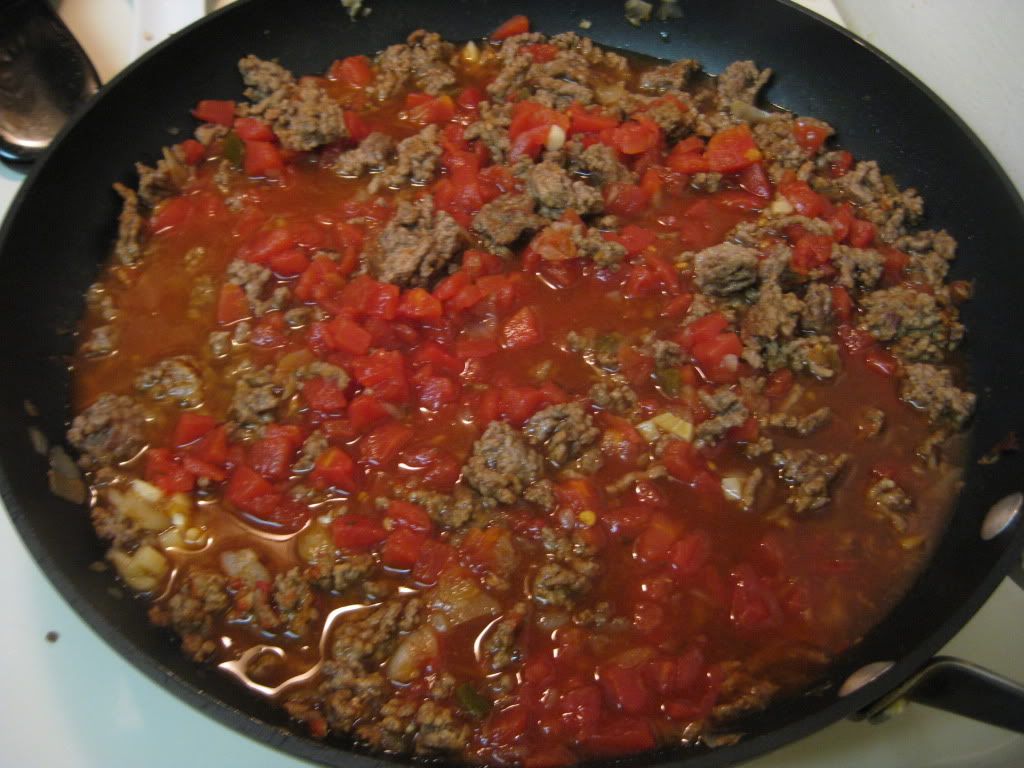
To start, heat a large skillet over medium-high heat and coat the pan with cooking spray.  Add the beef to the pan and sauté for five minutes, stirring to crumble.  Drain the beef and wipe out the pan with paper towels.  Add the chopped onion to the pan and sauté for four minutes, stirring occasionally.  Stir in the beef, cumin, pepper, and salt.


Stir in the tomato paste, cook for a minute, stirring occasionally.  Add the beef broth, water, and tomatoes and bring to a boil.  Reduce the heat to medium and simmer for 15 minutes, stirring occasionally until slightly thick.  Remove from the heat.


Looking at this recipe it could be quite baffling at how many layers are needed to add.  It seems like a never ending list of flavors and steps.  But the recipe revolves around these layers.  Adding depth to each ingredient, i.e. adding the cumin and pepper to the beef, which was added after the onion and the garlic, really enhances the flavor of the beef and gives it an extra oomph!  Trust me, the layering technique in this dish will really amp up the flavor.


Layer 1:  Onions and Garlic


Layer 2:  Adding the beef, tomato paste, and spices
Layer 3:  Adding tomatoes/chilis, beef broth, and water


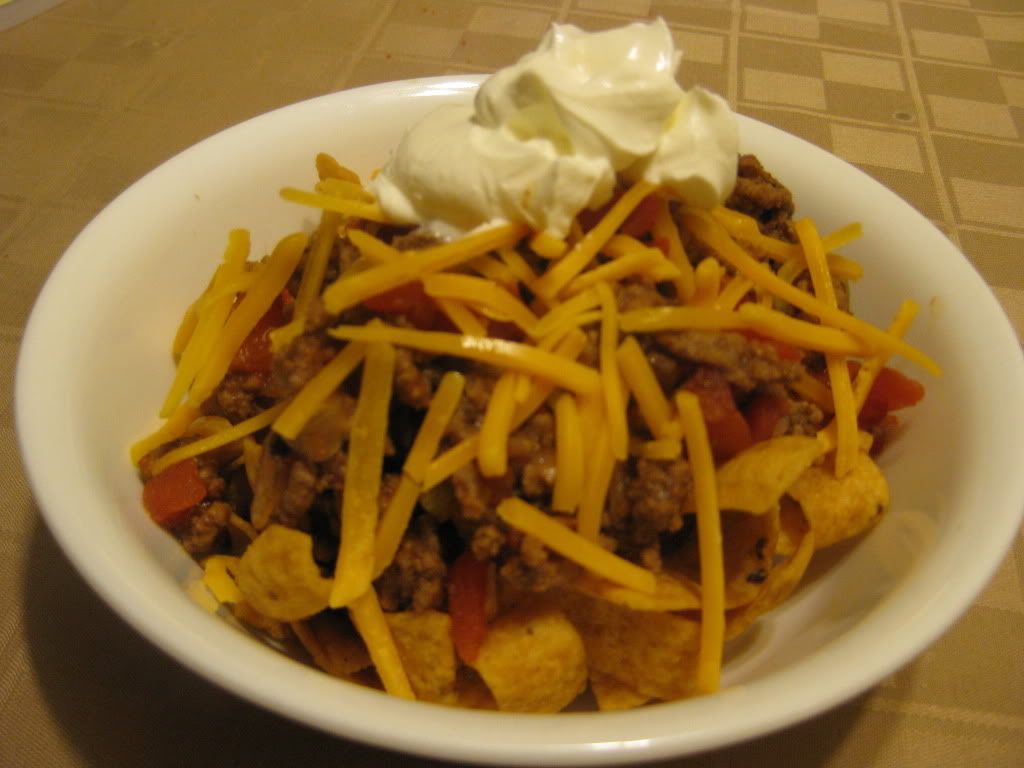
Finally, place 1 ounce of chips in each serving bowl and top each serving with 2/3 cup of the beef mixture, 2 tablespoons cheese, and 1 tablespoon of sour cream.  Eyeballing it each ingredient will probably be the best bet - depending on how hungry you feel.  Serve and enjoy!

The End Result:


Oh...my...goodness!!  The layering flavor absolutely worked for this dish.  Letting all those flavors meld and simmer together in the end really boosted the all of the ingredients' flavors.  It may be a little runny, but the chips will soak that all liquid up.  Adding the crunch of the chips and the cheese and sour cream was just the tip of the iceberg.  If awesome flavors and pleasing a crowd is your goal, this recipe should be in your back pocket!


That's all we have for you this week.  Thanks for sharing your week with us.  We'll be back next Monday with another edition of Around the Culinary World.  Until then,

~Cheers!

Tuesday, October 11, 2011

Brisket Beyond Belief

Good evening everyone! One of my favorite things to do on a day off is get ambitious. I like tackling large recipes and side dishes when I have a solid afternoon to spend in the kitchen. Another favorite of mine is cooking brisket - especially when the calendar flips to fall and I can start using the cooler weather as inspiration. Last fall, I made a delicious cran-apple brisket that had me craving something similar this year. After searching through cookbooks, magazines and websites, I couldn't come up with a fall inspired brisket recipe that I wanted to try - so I opted for the next best thing - I made one myself! My own version of a cranberry brisket was not too hard to draw up - and with the addition of a mashed sweet potato recipe I found in our Cook's Country cookbook - I knew I had a meal on my hands!


The Recipe: Cranberry Brisket
Original Recipe By: Out Of The Culinary

What You'll Need

2-4 Pound Brisket
1/4 Cup Blackening (Or Cajun) Seasoning
1/2 Cup Dark Brown Sugar
1 Can Cranberry Sauce (Whole Berry)
1/2 Cup Dark Rum (Or Brandy)

Ideally, you would use brisket for this recipe. However, rather inexplicably, our local Hy-Vee had absolutely no brisket in stock this week. As such we had to find an alternative on the fly - and we chose a thick 2.5 pound bottom round roast. To compensate for lost quality, we opted to buy the premium Angus beef roast over the standard beef.

Begin by combining the blackening seasoning and dark brown sugar in a small bowl. Blackening season is a mix of paprika, garlic powder, onion flakes, cayenne pepper, black pepper, thyme or oregano. Some mixtures include salt - some do not. There are slight variations of the mixture depending on brand, but all that really matters is that it has some form of 'warm' base. The naming of the powder seems to be regional. We couldn't find any blackening powder at any of our local stores - but Cajun seasoning was everywhere.


Carefully dry off the brisket with a paper towel - make sure there is no surface moisture on any side of the meat. Next, rub the seasoning on to all sides of the meat, making sure everything is well covered and the rub is worked into all the crevices.


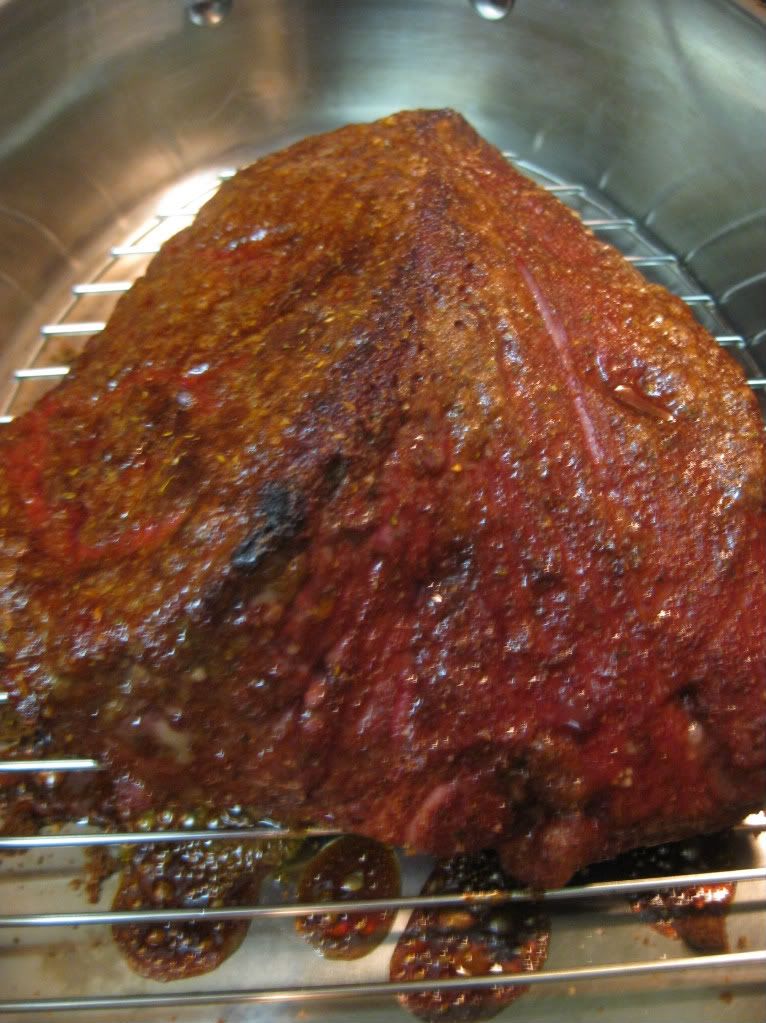
Preheat your oven to 475 degrees and prepare a large roasting pan for the brisket. Place the seasoned brisket in the pan and place that pan in the oven for 20 minutes without a cover. This 20 minute high heat cook does two things. First, it will caramelize the dark brown sugar. 20 minutes of high heat cooking will create a great crust on the outer layer of the brisket. To avoid having a 'too sweet' finish, we incorporate the blackening seasoning to balance out the brown sugar. Secondly, this crust creates a barrier on the outer edges of the meat that traps in the juices while the brisket cooks later on.

While the brisket is cooking, you can begin preparing the sauce. Add the can of cranberry sauce to a small saucepan and begin heating over medium high heat. As the sauce begins to melt, slowly add the rum (or brandy) to the saucepan and stir slowly until incorporated. All the mixture to simmer on medium low heat, stirring occasionally.

This photo struck me as funny... not sure why


Once the 20 minutes have passed, you can remove the brisket from the oven and add the cranberry sauce to the roasting pan. Pour the mixture all over the brisket, and cover the roasting pan. You can use aluminum foil in addition to your roasting pan's lid if you feel the seal will not be sufficient.

Beautifully caramelized after 20 minutes


Reduce the oven's heat to 300 degrees and return the roasting pan to the oven. As we've discussed in past brisket recipes, the best way to cook  roast is low and slow. This breaks down the fatty tissues in the meat, creating an incredibly soft and succulent finished product without the loss of much juice. Allow the brisket to cook at 300 degrees for 3 hours.

After the 3 hours have passed, carefully remove the brisket from the roasting tray and allow to rest on a cutting board for about 20 minutes. You can transfer the juices from the roasting pan to a sauce pan and heat those contents over medium low heat to create a sauce if you wish. Slice the roast into 1/2 inch thick slices and serve with the leftover sauce. Enjoy!


Since I had a whole day to cook, I thought I'd try my hand at a side dish as well!

The Recipe: Mashed Sweet Potatoes
Orignal Recipe Found In: Cook's Country

What You'll Need:

2 Large (or 3 Medium) Sweet Potatoes (Peeled and diced into roughly 1/4 inch slices)
4 Tablespoons Unsalted Butter
3 Tablespoons Heavy Cream
1 Teaspoon Sugar


Combine 2 tablespoons of the heavy cream, 1/2 teaspoon of salt, 1/2 teaspoon pepper, butter sugar and sweet potatoes in a large pan. Cook this mixture in a covered pan over low heat until the potatoes are tender and fall apart when prodded with a fork. This should take about 35 to 40 minutes.

Off of the heat, add the remaining tablespoon of heavy cream. Mash the potatoes with a potato masher and serve!


The Results:


First, let's start with the brisket. Delicious and savory! My own recipe turned out to be a successful venture. The blackening seasoning and dark brown sugar mixture worked perfectly - the outer crust was crispy, caramelized and delicious. The cajun seasoning balanced out the sweetness of the cranberry sauce and brown sugar. When it comes to cooking - I don't know if you can top slow roasted beef.

The sweet potatoes were delicious as well. Soft, slightly creamy and full of flavor. Lightly whipped and fluffy - these sweet potatoes were one of the top side dishes to grace the blog to date! They are such an easy side dish to add to any meal - simply pop them in the pot and let the heat do all the work! It doesn't get any easier than that!

That's all we have for you this evening. Maggie takes to the kitchen tomorrow night with a dish that she's very eager to try. This recipe is something totally outside her 'usual' recipe zone! Stop back tomorrow night to see what she has cooking. Until then,

~Cheers
Monday, October 10, 2011

Around The Culinary World

Hello again everyone! Welcome back to a new week of blogging and recipes here at Out of the Culinary! It was a long and beautiful weekend across much of the Midwest – if you would have told Maggie and me that we would be able to go to a park in October and be wearing SHORTS we would never have believed you. Yet – there we were, 85 degrees and sunny in October. It was a true delight!


Now – on to matters concerning food! It’s funny how the culinary news cycle falls into themes. We read multiple news sites and confer from many different sources for our news each week – but the sites all seem to fall into a trend, or theme, even though they are separate entities. Last week, the theme was food safety – this week, it’s all about food taxation and restrictions. Confused? We’ll try to clear things up below:


If you’re a fan of buttering your bread – and you live in Denmark, you likely noticed a little more pain to the pocketbook at the start of this month. As of October 1st, the average price of a half pound of butter saw a 35% increase due to new taxation. The tax – accurately labeled the ‘fat tax’ was levied by the Denmark government as a form of healthy eating incentive. The tax targets fats found in animal products – most commonly butter and cream. In addition, any food product that contains over 2.3% of saturated fat is seeing a $3 hike per kilo due to the tax. The Denmark government is hoping to reduce cardiovascular disease and other heart related problems by discouraging the purchase of these fat based products. Does it work? Well, in 2004 Denmark became the first government to ban trans-fats in foods. Since that time, Denmark has seen a 30% reduction in cardiovascular disease. You can read the full story HERE.

These issues are always heavily contested. Farmers and conservatives tend to cry foul – they claim that the taxes unfairly burden farm production and lower profitability, making it harder for local production to stay sustainable. Conservatives cry ‘big government’ intervention and declare that these decisions need to be made by the consumer and not the government. Without turning this into a political debate – you can’t argue with the results. Typically foods that are high in saturated fats are cheaper because of the ease of mass producing these items and the low cost of production. Lower income individuals typically choose these items over healthy alternatives simply due to the increased buying power of their dollar when they buy low quality foods. While banning or over taxing ‘junk’ foods may not be the best alternative – some foods such as cheese (which are full of saturated fats but contain a lot of beneficial elements as well) are taxed heavily and are unfair victims to these regulations. From a national health standpoint, the results show that the policy is effective. The Denmark government has set their focus on protecting the health of their country, and as of late, this policy seems to be working.


The French government announced last week that ketchup would no longer be allowed in local schools. The move, much like Denmark’s ‘fat tax’ is aimed solely for health purposes. French Fries will be the only food exempt from the ban – and they are only served once per week. (So, it’s not a true ban of sorts, simply a restriction).

Jamie Oliver, a personal favorite of the blog, has championed this idea for a few years now. Healthy eating starts when you’re young and studies have proven that cooking and serving healthy meals to school children greatly impacts the overall health of a country (or even region) as they grow older. It establishes healthy eating habits and curbs early health problems that many overweight American children are experiencing. This aggressive move would never fly in this country – but the sodium rich ketchup ban is a move that should be applauded by the ‘eat healthy’ supporters as a step in the right direction. It will be interesting to follow this story and see how the parents react / if the health benefits begin to appear. Read more about the ‘ban’ HERE.


Schools and governments feel the need to make these aggressive moves because (sadly) some parents fail to give their children the proper direction when it comes to eating choices. A recent study found that fast food marketing has a great impact on children. A study tested showing commercials for French fries or apple slices in between cartoon shows. After the shows concluded, the children were given a choice between apple slices or French fries. The children who saw the fry ads chose the French fries 71% of the time. 54% of the children chose apple slices if they saw the apple slice commercial. While that isn’t too surprising (we know that marketing, especially to children is very effective) the true ‘ah-ha’ moment of the study came when the children’s parents became involved. The percentage of children who chose French fries after seeing the fry ad dropped to 55% when their parent’s encouraged the kids to make a healthy decision. The percentage of children who chose apples after seeing the apple ad increased to 67% when encouraged by their parents to make a healthy choice. This study enforces the concept that regulation and marketing can only impact children’s decisions to a point. The greatest influence a child can have on healthy eating choices comes from active participation and encouragement from home. You can read more on this study HERE.


It’s common knowledge that organically grown products provide a greater health benefit than their non-organic counterparts. While the exact percentages of these benefits are still hotly contested, both sides agree that there are some added benefits to eating organic when compared to the alternative. Now, new studies are showing that organic produce has another added benefit that was, at first, not noticed.

It turns out that produce grown organically actually produces a higher yield than the non-organic counterparts. When compared to an equally sized non-organic plot, the average yield of organic produce was close to 30% higher when conditions were poor. In equal conditions, organic and non-organic yields were nearly equal. This debunks the largest organic myth – organic farming would not keep up with world demand. Organic farming cannot be shoehorned into conventional farming practices; however, as smaller organic plots had better yields than the more ‘standard size’ organic farm plots. This would force a change in field layouts and farming practices – not a difficult transition, but change is always a hard thing to get past those who are used to doing things a certain way.

In addition, organic farming is much more sustainable than non-organic. Organic farms use 45% less unsustainable energy than a non-organic farm and produce about 40% less greenhouse gas emissions when compared to a conventional farm.

Organic detractors argue that organic farming is more expensive for farmers thereby reducing profit margins and making it harder for farmers to make a profit. That fact is false as well. Organic farms save a considerable amount of money on fertilizer and other chemicals. While they do have a higher manual labor cost, the savings on other chemicals more than offset this increased labor cost. In fact, organic farms have been found to be twice as profitable as a conventional farm. You may be wondering, if it’s cheaper for farmers to grow organic, why is organic food so much more expensive than non-organic? Simple supply and demand! There are a lot more non-organic farms (thereby more non-organic produce) than organic farms. The demand for organic is higher than non-organic thereby driving up the price. As more farms shift to organic, the price of their produce will become more competitive. You can read more about these organic farming discoveries HERE.


Finally, a not-so-healthy related story: A few weeks ago, we shared fall bourbons and whiskeys that are great to enjoy on a cool day. Today, we’ve got a list of cocktails for you to utilize these great bourbons. Check out the fall inspired list HERE.


That’s all the news to fit blog about this week! We’ve got a full week of cooking lined up for you as well. I’m taking to the kitchen for an epic recipe tomorrow night (when I have the day off, I tend to get ambitious…) and Maggie will take to the kitchen for a very unique recipe on Wednesday night. After both of our recipes left us wanting more last week, we decided to come out firing and be aggressive this week. It’s sure to be interesting! Stop in tomorrow night to see what I’ve got cooking. Until then,

~Cheers

Wednesday, October 5, 2011

Panko & Pork Paired Up

Good evening everyone! It’s an unseasonably warm here in the Des Moines metro, not that we’re complaining, but it’s odd to see the temp hit 86 degrees in October. Knowing the weather patterns of the Midwest, we’ll have 3 inches of snow by this time next week. (I’m kidding…sort of). We’re in a pattern of our own around the blog. Maggie started us off by taking a trip back to one of her old favorites – pasta. I’m continuing this pattern by returning to one of my favorites – breading.

Breading tonight brought to you by Panko 


If you’re a long time reader of the blog, you’ll likely remember that there was a point of time early in the blog’s first days, that breading was something we couldn’t quite figure out. A few of the recipes even turned out…well…badly. After trying multiple techniques, we finally found a sweet spot and now breading has become one of my favorite kitchen tools. Tonight, I’m taking my favorite cooking process to a new ingredient – pork. I’ve never tried breading pork before, but I’m hoping the tried and true techniques I’ve used for chicken and fish will impart the same great flavor on the other white meat.


The Recipe: Crispy Breaded Pork Chops with Parsley Caper Sauce
Original Recipe Found In: Cook’s Country Magazine

What You’ll Need:
Serves 4

1 Cup Chopped Fresh Parsley
½ Cup Drained Capers
3 Tablespoons Lemon Juice
1 ½ Cups Olive Oil
½ Cup All Purpose Flour
2 Large Eggs
2 Cups Panko Bread Crumbs
8 Boneless Pork Chops (3 to 4 ounces)


Since this recipe serves four, you may want to adjust the quantities you are working with for ingredients. If you’re cutting the recipe in half – you won’t need to preheat an oven to keep the finished chops warm. If you’re making more than four chops, however, you will want to begin by preheating your oven to 200 degrees.

Next, place the parsley, capers and lemon juice in a small blender / food processor. Mince the ingredients with 2 or 3 – 1 second pulses to break down the parsley and begin to mix the lemon juice and capers. Next, slowly add the oil to the processor (while the processor is running if your machine is capable of doing so) and blend for 5 to 10 seconds or until the mixture is fully combined and smooth. Transfer this mixture to a serving bowl and season lightly with salt and pepper.

Next, arrange three shallow dishes in a row (assembly line style – much like our previous breading recipes). In the first dish, add the flour. In the second add the eggs and beat them lightly. Finally, in the third dish, add the bread crumbs.


Pat the pork chops dry with a paper towel – much like fish; if you have any moisture on left on a pork chop the breading will fall off in the pan. Take the extra few minutes to prevent problems when the food hits the pan. Season the newly dried chops lightly with salt and pepper.

Working one at a time, dip a chop into the flour mixture and allow an excess to fall off. Next, carefully dip the chop into the egg mixture (don’t over saturate the chops – they don’t have to be soaked) allow excess egg mixture to drip off. Finally, press the chops into the bread crumbs making sure they are completely covered and evenly breaded. Repeat this process until all of the pork chops have been breaded.

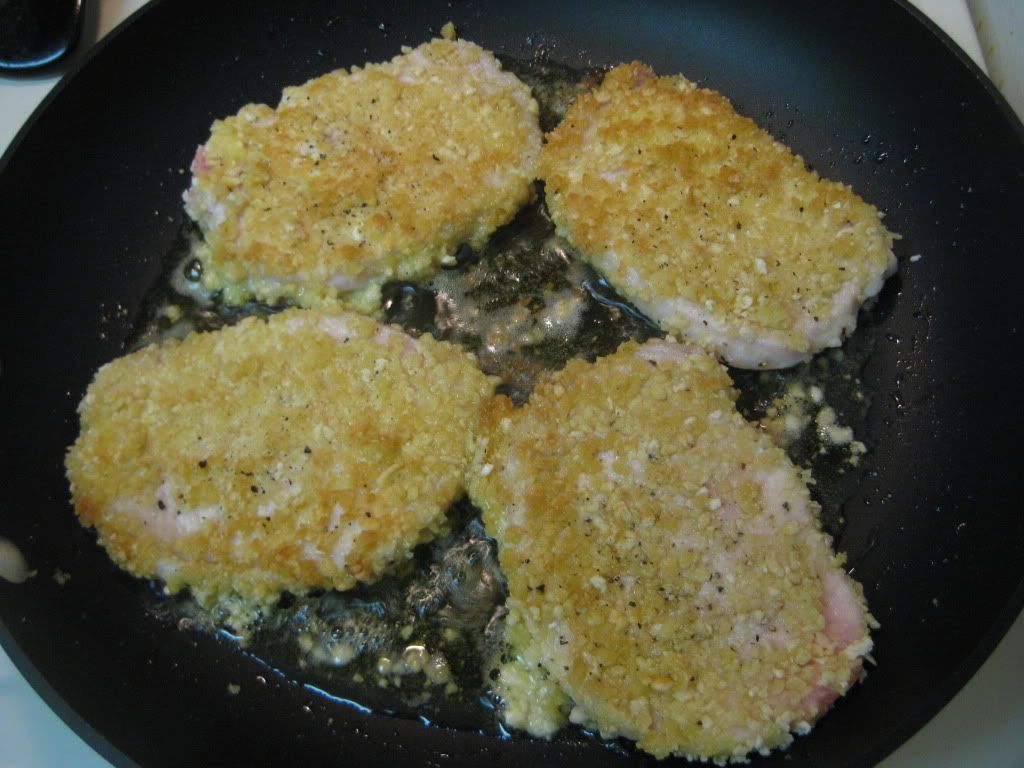
In a medium skillet (preferably one with high sides and a lid) add ½ cup of the oil and heat until shimmering and just before the smoke point has been reached. Add half of the chops to the skillet and cook until crispy and golden brown (roughly 3 to 5 minutes per side) transfer the completed chops to a baking sheet and store them in your 200 degree oven to keep warm. I point out that a high side skillet and lid are nice additions because once the oil reaches the shimmering heat and you add the chops, you’re likely going to see a lot of splatter. Since second degree oil burns are not fun for anyone, I’d suggest sticking a lid on the skillet while you cook the chops. Repeat the process on the remaining chops. Serve with the sauce and enjoy!


The Results:


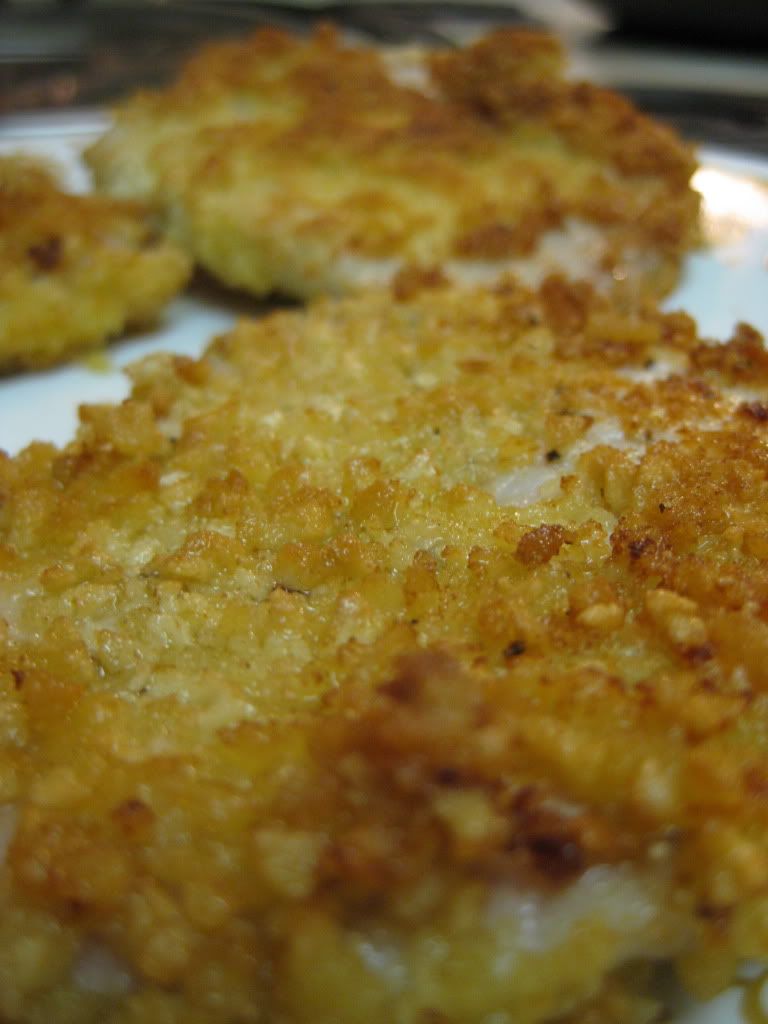
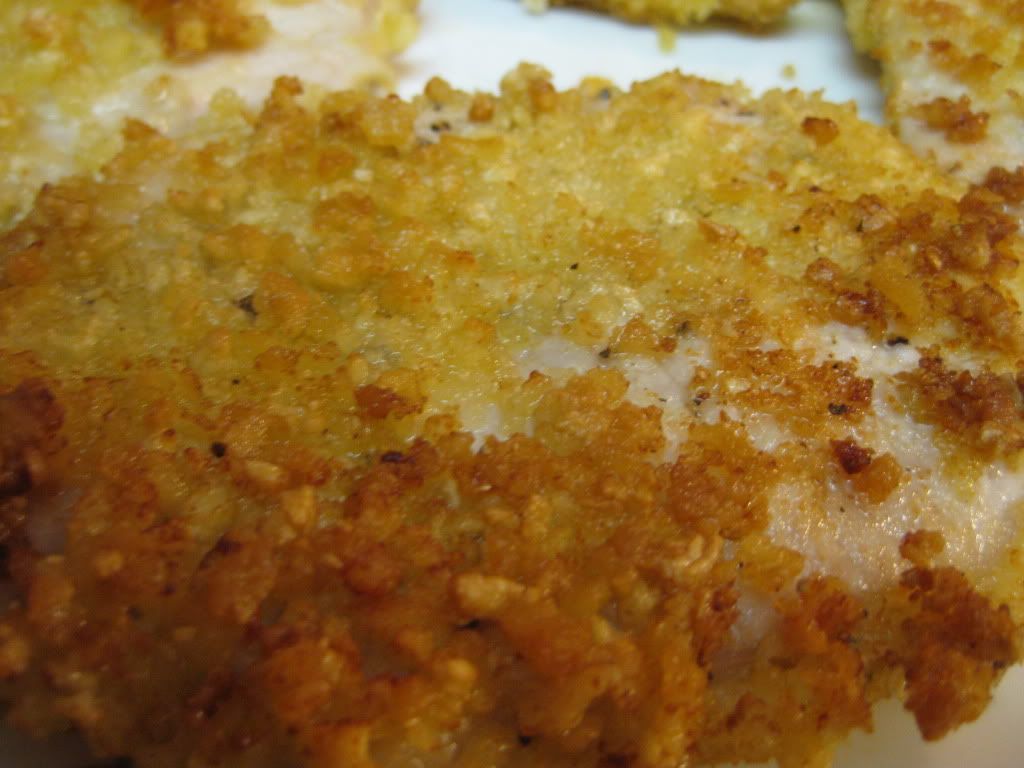
Oh breading, how great of a kitchen technique you are! Adding a basic breading – flour, egg, bread crumbs imparts such a great flavor to a simple dish. The crispy breading adds a great crunch and texture to the chops. The caper parsley sauce - well, I wasn't a fan. The capers added almost too much of a tang to the dish and didn't really 'gel' with the pork chops. Overall I found the dish underwhelming but not without promise. Since the breading is the strength of the dish - I feel that maybe some shallots or even parsley worked into the breading would greatly enhance the flavor. As it stands, this is not a bad dish - but it certainly can be improved. It's disappointing to see an American Test Kitchen dish that essentially 'phones it in' and ends up being simply 'okay'.

That’s all we have for you this week. Thanks for stopping by and sharing in our cooking explorations for another week. We’ve got some interesting dishes lined up for the coming week – and as always Monday will get us started with another trip Around the Culinary World. Enjoy the rest of the week everyone! Until next time,

~Cheers

Tuesday, October 4, 2011

Terrific Tortellini

Good evening everyone! It seems more and more that I find recipes that are quite short and succinct - perhaps it's because of the nice weather we've been having and I want to enjoy it while it lasts! But short recipes can amount to large flavor and that's what tonight's recipe is all about. Granted it deals with pasta (my favorite food) and that takes a bit to prepare, it adds a whole new perspective that I don't usually see in pasta dishes. We going to turn the pasta game around tonight, with hopefully successful results!


The Recipe: Totellini Primevera
Original Recipe Found In: www.eatingwell.com

What You'll Need:

1 14 Ounce Can Vegetable Broth (or reduced-sodium chicken broth)
2 Tablespoons All Purpose Flour
1 Tablespoon Extra-Virgin Olive Oil
3 Cloves Garlic, sliced
1 Cup shredded Fontina Cheese (or 3/4 cup shredded Parmesan cheese)
1 Tablespoon chopped fresh Tarragon, Dill or Chives (or 1 teaspoon dried tarragon)
1/8 Teaspoon Salt
4 Cups chopped Vegetables, such as broccoli, carrots and snap peas (or 16-ounce bag frozen mixed vegetables)
1 16 Ounce Package Frozen Cheese Tortellini

Begin by bringing a large pot of water to a boil.  Meanwhile, whisk the broth and flour in a small bowl.  Heat the oil in a large skillet over medium high heat.  Once the oil is shimmering, add the garlic and stir, until the garlic is just beginning to brown, one to two minutes.  This is a very quick process and I cannot stress enough to not do something else whilst the garlic is cooking.  They will turn brown rather quickly and black garlic is not a pleasant sight.  Add the broth mixture to the pan.  Continue to bring to a boil and cook stirring occasionally, until the sauce is thick enough to coat the back of a spoon, about three minutes.  Remove from the heat and stir in cheese, tarragon, and salt.

Sauce thickening up!


For those of you that don't know, tortellini are pasta rings filled with either meat or cheese.  Originated in Italy, these tasty little morsels are traditionally served in some variation of broth.  These days, most people serve them with either marinara or alfredo sauce and some sort of cheese.  With tortellini coming in refrigerated or frozen packages, it's super easy to pop them in some boiling water for a couple of minutes and enjoy.


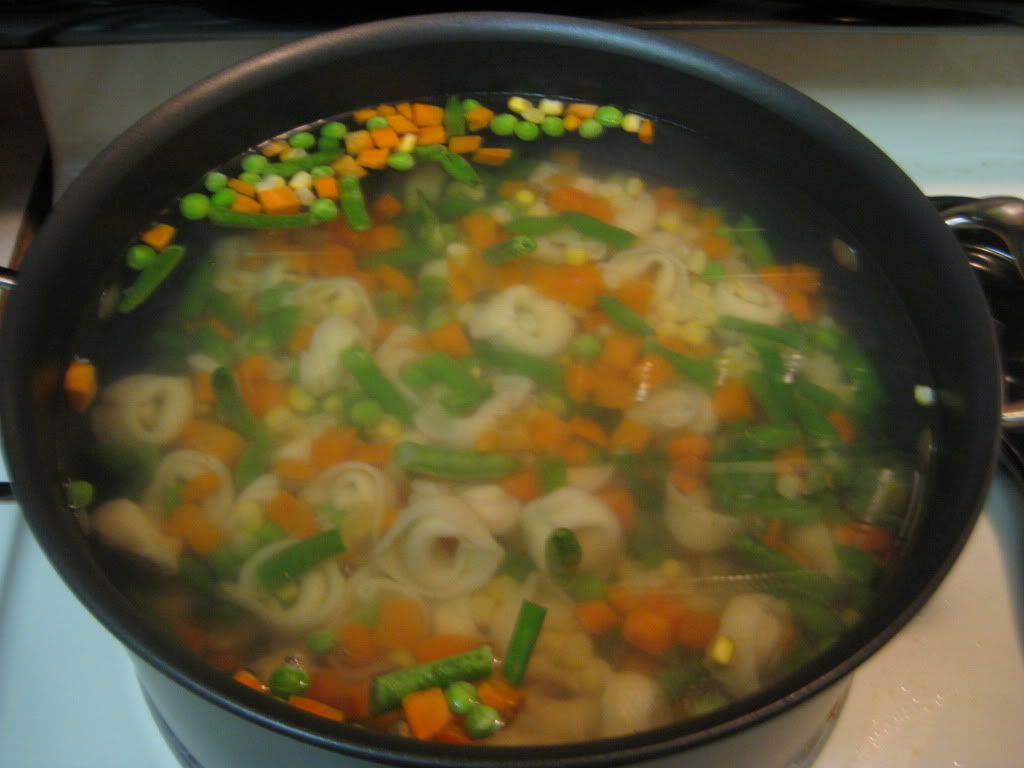
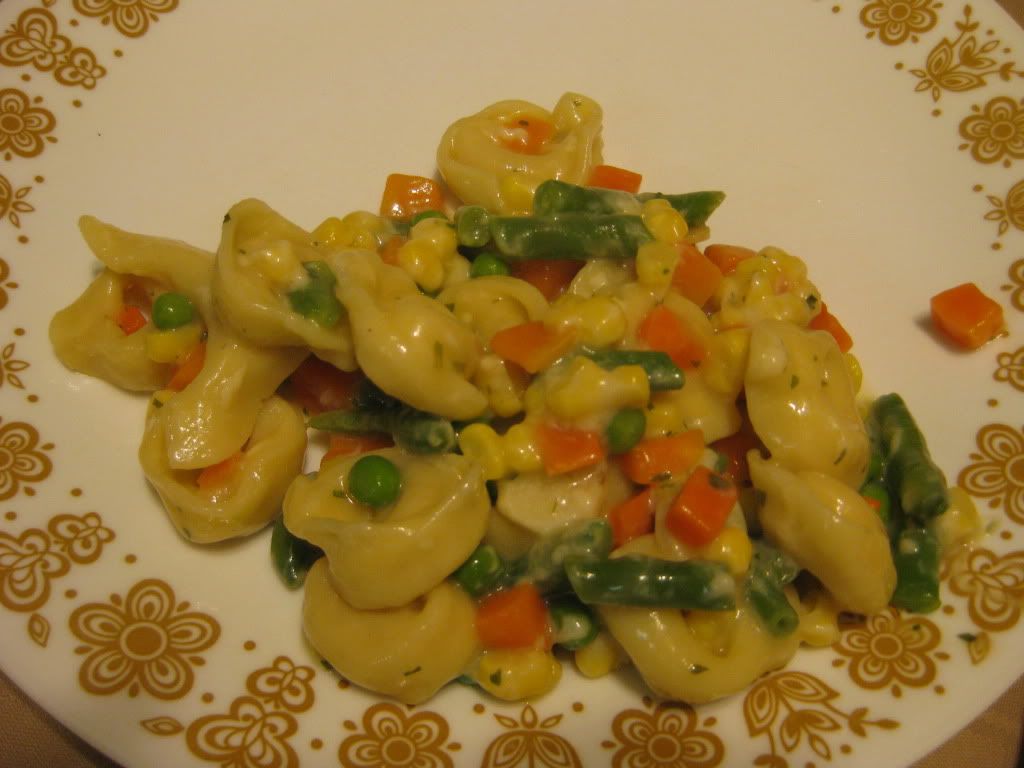
Once the water has started to boil, add the vegetables and tortellini.  Return the water to a simmer and cook until the vegetables and tortellini are tender, about three to five minutes.  Drain the veggies and pasta.  Add to the pan with the sauce, stir to coat, serve, and enjoy!

Cooking the veggies and pasta


The End Result:


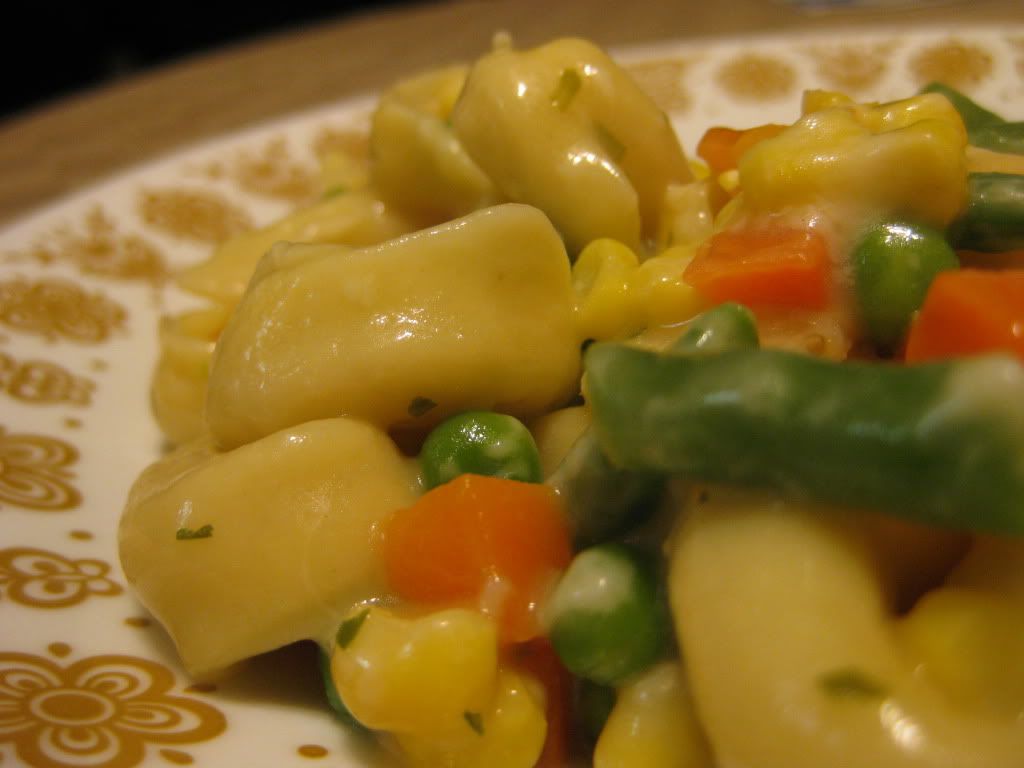
The tortellini tasted really fresh with the vegetables.  The sauce, consisting only of vegetable broth, garlic, tarragon, and cheese didn't weigh the pasta down.  Instead it enhanced it and added a whole new depth to the dish.  Granted, I'm a little biased towards all pasta dishes and think they are all superb (kinda like having a favorite child,) but this dish kinda had a country stew feel to it and tasted great!


Join us tomorrow night as Tyler attempts a recipe that mixes old technique with new ingredients.  Until then,

~Cheers!

Monday, October 3, 2011

Around The Culinary World

Good evening everyone! Welcome back to another week of culinary news and adventure here at Out Of The Culinary. Predictably, after last week’s news explosion, this week provided little in the way of story variation. (The news world seems to fall into this pattern – busy week, slow week, rinse, lather, repeat). As expected most of the focus this week was on the listeria outbreak caused by some bad cantaloupes. This week we’ve got news about another product recall, more information on the listeria outbreak and a Girl Scout cookie story sprinkled in to top it all off. Let’s dive into the culinary news for this week!


Last week, we touched on the listeria outbreak that spread across a large portion of the country. This week, we’re still learning some interesting things about this particular outbreak. Some of the more dramatic stories coming from the latest outbreak are tales of those infected. Charles Palmer, a 71 year old ex-marine used to eat melons for lunch every day. A perfect picture of health, Charles and his family were shocked when he began suffering intense headaches a dry-heaves. Charles and many others in similar situations are either still hospitalized or worse all due to this outbreak. Read more about the victims behind the latest food contamination HERE.


Shortly after the news of the Cantaloupe outbreak was dying down in the news cycle, another product recall took to the headlines. True Leaf Farms in California recalled 90 cartons of their chopped romaine lettuce for fear of listeria contamination. The FDA notified the company that one of their bags tested positive for listeria during random sampling (Not to sound cynical, but it’s nice to see the FDA catching something before it becomes a pandemic). You can read more about this recall HERE.


If you cannot rely on food producers to keep products safe or free from disease, what are our options? Avoid produce all together? Boil EVERYTHING? Sure, those are options – but let’s face it – they’re not desirable outcomes (no produce is bad for your health and you can’t boil melons…) When germs like listeria thrive in cold environments it only complicates matters further. The Associated Press posted an article last week giving out some tips for keeping your produce safe. A few, such as eating produce within a few days of purchase and keeping food cold are common sense, but others such as tips for washing melons are good pieces of advice. Check out the full story and all of the accompanying safety tips HERE.


Cantaloupes and romaine lettuce are the most recent victims of food contamination. If you’re like me, you’ve got to be wondering – “How can this keep happening?” is it simply negligence on the part of the food producers? Or is it a lack of oversight by the FDA that allows some of these products to slip right through their safety net? Well, the answer (as with most things) lies somewhere in the middle and is kept in the details. While some company’s poor production standards have caused illnesses in the past and FDA regulators have been slow to respond to other outbreaks - the most recent outbreak has nothing to do with either issue. This is something I hadn’t thought of before, but now that I read this perspective on the issue – I think there is a lot of truth here. Find out the largest cause of these outbreaks by reading THIS article.


Finally, in news that doesn’t revolve around product recalls (hooray!) the Girl Scouts are promising to change the way they make their cookies in the future. Currently, the cookies are made with palm oil. Many rainforests in South America have been clear cut in order for developers to plant palm oil plantations. Since palm oil demand is very high, it makes great economical sense that these plantations have become a booming business. From an environmental standpoint, well…it’s not as brilliant of a move. Read all about how the Girl Scouts plan to do their part in lowering the palm oil demand HERE.


That’s all the news that’s fit to blog about this week. It was a little outbreak heavy, but when something of this scale takes over the culinary world, you’re likely to see all sorts of news & fallout as a result. We’ve got another front loaded week for you as far as recipes are concerned. Maggie takes to the kitchen tomorrow night to create a new variation on one of her favorite dishes and I will take to the kitchen on Wednesday with a breading dish that I’ve never tried before. It should be fun, and it’s sure to be delicious so join us on Tuesday for a new recipe! Until then,


~Cheers
Wednesday, September 28, 2011

Homemade & Savory

Good evening everyone! Now that it's officially fall - I can delve into my favorite fall/winter dishes. Mainly, soups & stews. I am a fan of homemade soups simply because of their simplicity in premise but complexity in flavor. A few simple ingredients can become an amazing dish that warms you to the core. It's cooking at its best! If you're a long time reader of the blog, you'll remember last fall I experimented (multiple times) with my favorite soup - potato soup. I tried multiple variations and finally created a homemade, original recipe that ended up winning the day.

This fall, I've set my sights on another soup - chicken noodle - to create a 'perfect' version. Much like last year's foray into potato soups, I decided to try a few recipes from established sources before I set out to create my own version. Tonight's first recipe comes form the folks at America's Test Kitchen that is sure to get us off on the right foot. I can promise you over the next few months, there will be a few chicken noodle soup recipes from this blog - I can also promise you that they will all be different. It's sure to be fun (who doesn't like discovering and creating perfect recipes?) so let's get started!


The Recipe: Classic Chicken Noodle Soup
Original Recipe Found In:  The Complete America's Test Kitchen Cookbook

What You'll Need:

For The Stock:

1 Tablespoon Vegetable Oil
4 Pounds Chicken Pieces (Or one whole chicken) Breast / Thigh meat preferred
1 Medium White Onion (Minced)
2 Quarts Boiling Water
2 Teaspoons Table Salt
2 Bay Leaves

For The Soup:

2 Tablespoons Chicken Fat (Reserved from the stock)
1 Medium White Onion (Minced)
1 Large Carrot (Chopped 1/2 in. pieces)
1 Celery Rib (Chopped 1/2 in. pieces)
1/2 Teaspoon Dried Thyme
2 Cups Egg Noodles
1/4 Cup Fresh Minced Parsley

* As usual when a recipe calls for carrots and celery, we like to substitute with things we have on hand - such as frozen vegetable medley (composed of carrots, peas and corn).

For the stock:

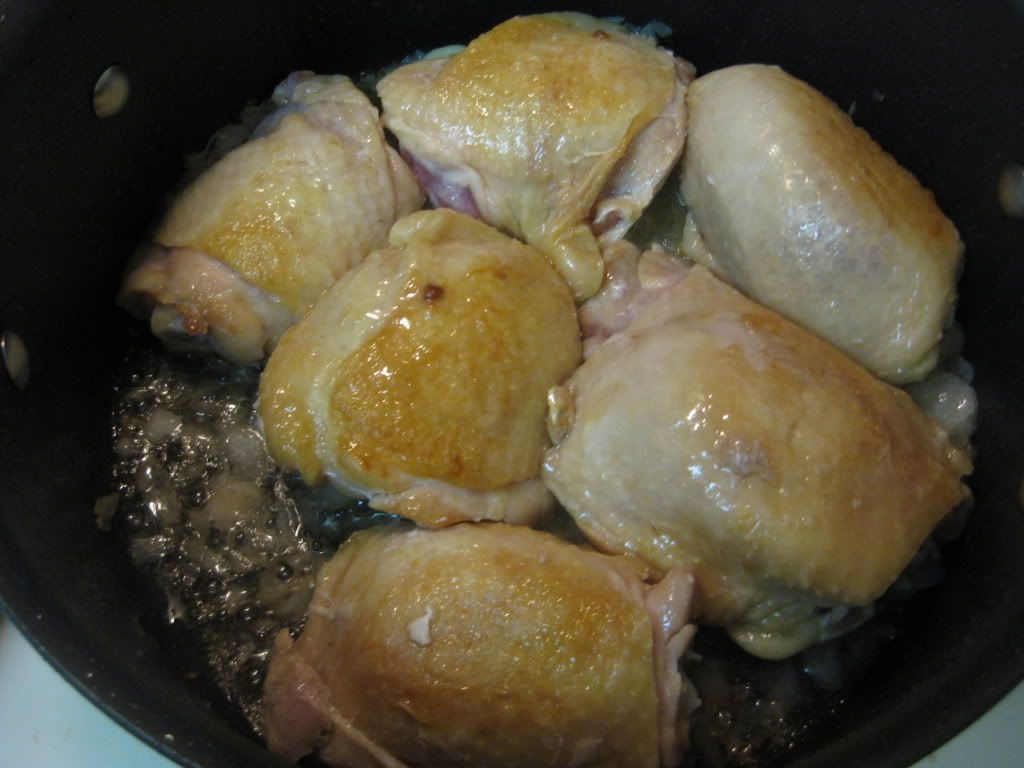
Begin by heating the oil in a large dutch oven over medium heat. Add half of the chicken pieces to the dutch oven and cook until lightly browned on each side (about 5 minutes per side). Transfer the pieces to a large bowl and set aside. Continue cooking the remaining pieces until all chicken pieces are browned. Leaving the fat and grease in the pan, add the onion and cook until softened, about 3 to 5 minutes. Return the chicken pieces to the pot and reduce the heat to medium low. Cover the pot and allow the chicken to cook completely, until the pieces begin to release their juices. This should take about 20 minutes.


Next, add the boiling water to the dutch oven as well as the salt and bay leaves. Increase the heat to high and allow to simmer until all of the flavors have blended - about 20 minutes. This process is essentially creating the stock for the soup. You're infusing the natural chicken flavors into the water base, creating a flavorful chicken stock that no grocery store can match.
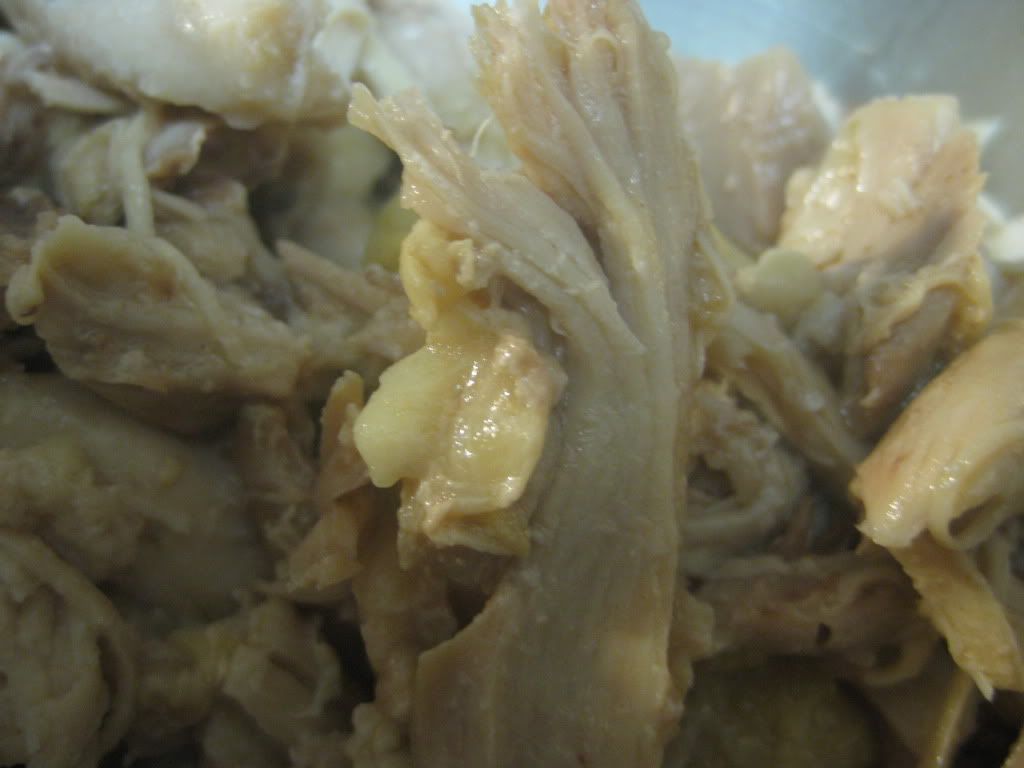
Remove the chicken pieces from the pot and set aside to cool. Once cooled, discard the skin and shred the meat from the bones of the chicken pieces. Discard the bones and reserve the chicken meat in a bowl. Set aside. Carefully remove the dutch oven from heat and filter the stock through a large mesh strainer into another container. This allows any 'chicken debris' and the bay leaves to be caught while keeping the great flavor of the stock in place.

Allow the liquid to settle for 5 minutes. This will cause the fat and grease to rise to the top so it can easy be skimmed off with a spoon or paper towel. Be sure to reserve of the grease for use in making the soup. You can store the shredded chicken pieces and stock for 2 to 3 days if you want to make the base ahead of time.


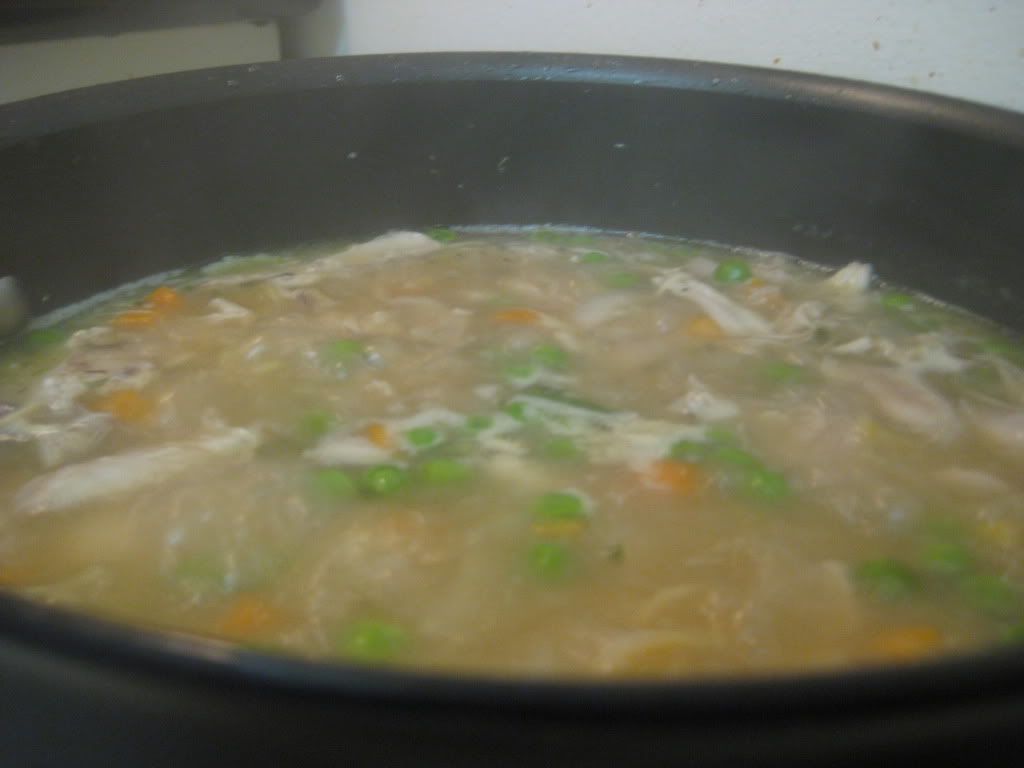
To make the soup, begin by heating the reserved chicken fat in a large pot over medium high heat. Add the onion, carrot and celery and cook until softened (about 5 minutes). Next, add the dried thyme and your chicken stock and allow the mixture to simmer until the vegetables have softened.


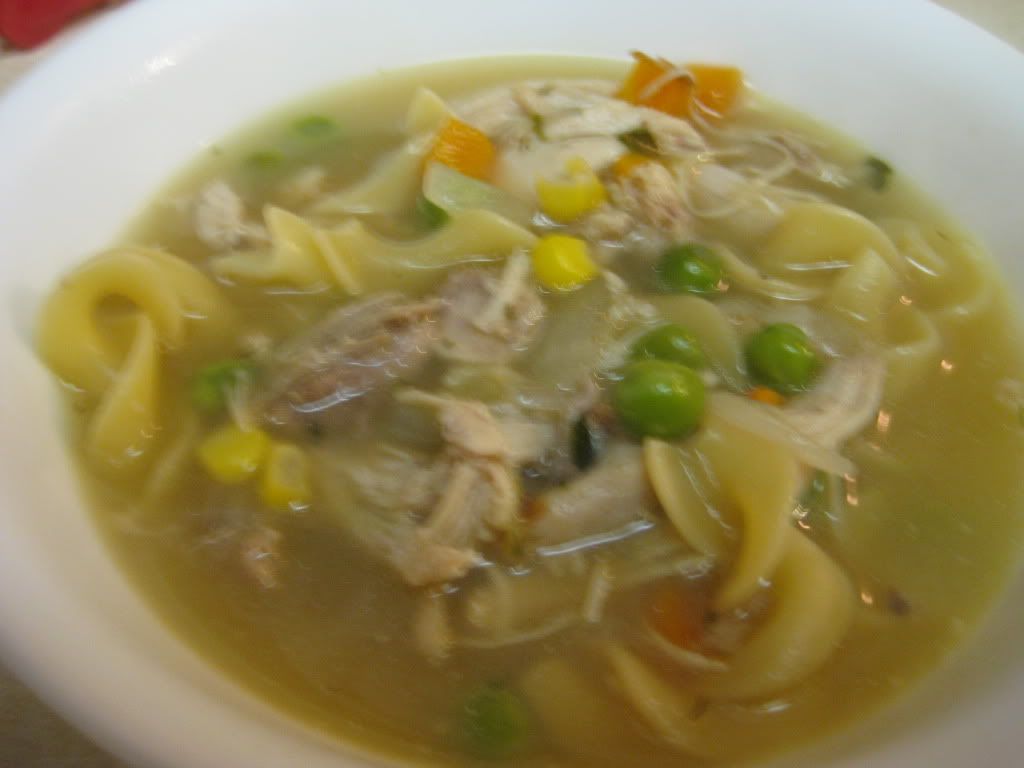
Finally, add the noodles and shredded chicken and cook until the noodles become tender, roughly 5 to 8 minutes. Stir in the parsley, season lightly with salt and pepper - serve and enjoy!


The Results:


Not a bad start for the quest for a perfect chicken noodle soup recipe. It's amazing what a homemade base can do for a soup. Rather than just using chicken stock and achieving an 'okay' result, spending the extra 20 minutes on making it from scratch really shows up in this dish. The base of the soup is so full of flavor, you'll never be able to make (or eat) a condensed soup again. This was a very simple, flavorful dish that is worth an attempt at home!

That's all we have for you this week. We're back on Monday with another trip Around The Culinary World. Until then,

~Cheers