Tuesday, May 31, 2011

Top Of The World Tilapia

Good evening everyone and welcome back from a (hopefully) long weekend.  As I proved to our loyal readers (and myself) a couple of weeks ago, I can officially cook fish (One Year Ago Today...)  Now, fish is still a very tricky "meat" to cook.  Granted, it can have a simple premise, but if you get something off between buying it or cooking it wrong, it might mess up the dish completely.  Tonight, I wanted to try this fish recipe, yet I was somewhat unsure if the steps in the recipe would lead to a great result.  Would this fish dish turn out like it wanted it to?

The Recipe:  Tilapia Milanese
Original Recipe Found In:  Food Network Magazine, March 2011

What You'll Need:
(Adjusted to serve 2)
2 6 Ounce Tilapia Fillets
1 1/2 Cups Milk
1 Cup All-Purpose Flour
3 Large Eggs
3 Slices White Sandwich Bread, torn into pieces
1/3 Cup Fresh Parsley Leaves
Finely Grated Zest of 1/2 Lemon, plus lemon wedges to serve
2 Tablespoons Extra Virgin Olive Oil
2 Tablespoons Unsalted Butter

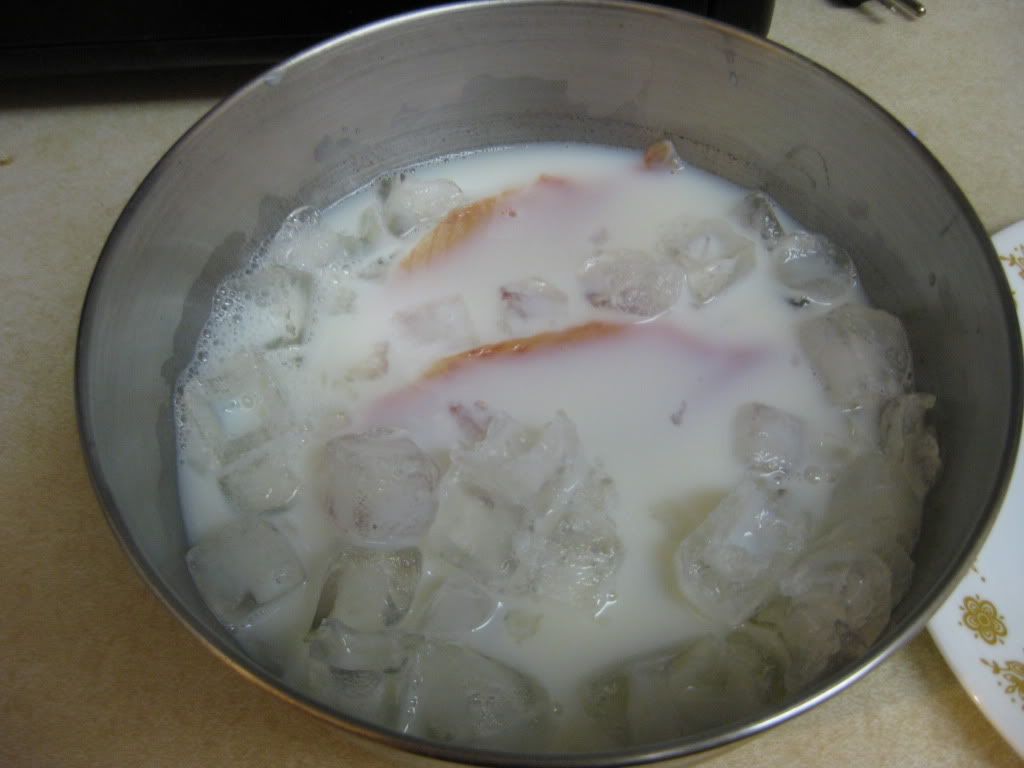
To begin the dish, preheat the oven to 425 degrees.  In a large bowl, pour the milk and add two cups of ice.  Nestle the fillets in combination and let it soak for 15 minutes.  This milk bath helps the fish if was thawed out for 24 hours (like our fillets were.)  Although, there will be a slight film of ice over the fish, you can brush that off once the 15 minutes are up.  


The tilapia getting a good bath before getting cooked


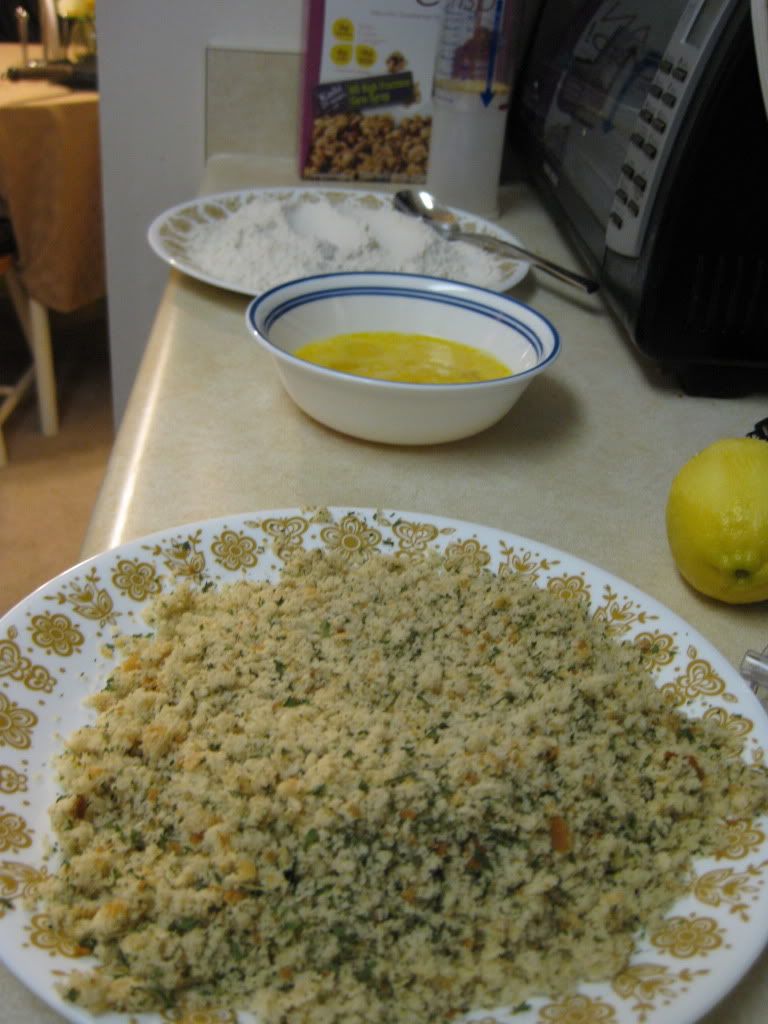
Meanwhile, mix the flour and 1/2 teaspoon salt and 1/2 teaspoon pepper on a large plate and set aside.  Crack the eggs in a bowl and lightly beat, until well blended, and set aside.  In a food processor, pulse the bread, parsley, lemon zest, and 1/2 teaspoon salt until crumbs start to form, place on another large plate and set aside.  When complete, the order to coat the fish should be: flour combination, eggs, and bread crumbs.


Fish preparation assembly line


By the time all of the coatings should be done, the fish will need to come out of its milk bath.  One at a time, remove the fish from its bath and dredge in the flour, gently shake any excess flour.  Next, dip the fish in the beaten eggs, until well coated.  Finally, coat with the breadcrumbs, until both sides are nice and covered, and set the fillets aside.


Next, in a large skillet, heat the butter and olive oil in a medium skillet over medium high heat until the butter is melted and the oil is slightly popping.  Add the fish to the skillet and cook until golden brown, three minutes on each side.  While the fillets are cooking, line a baking sheet with foil.  After the fish is cooking on both sides, transfer to the baking sheet.  Pop it in the oven and cooked through, eight minutes.  Transfer to plates, serve with lemon wedges, and enjoy!

The End Result:


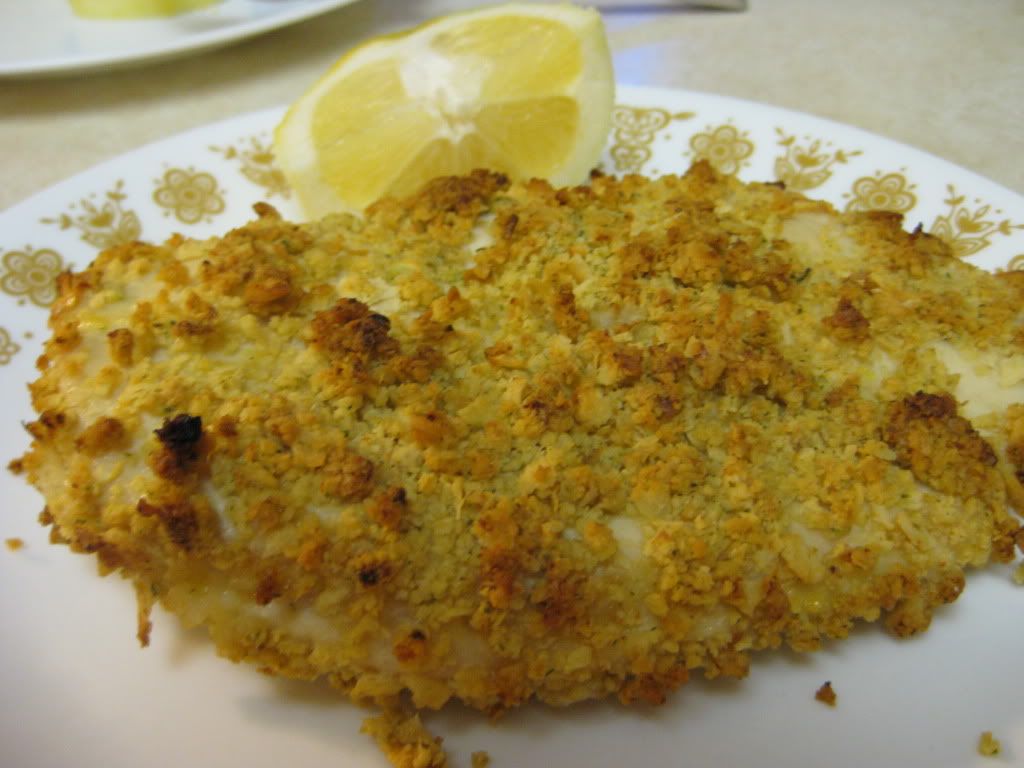
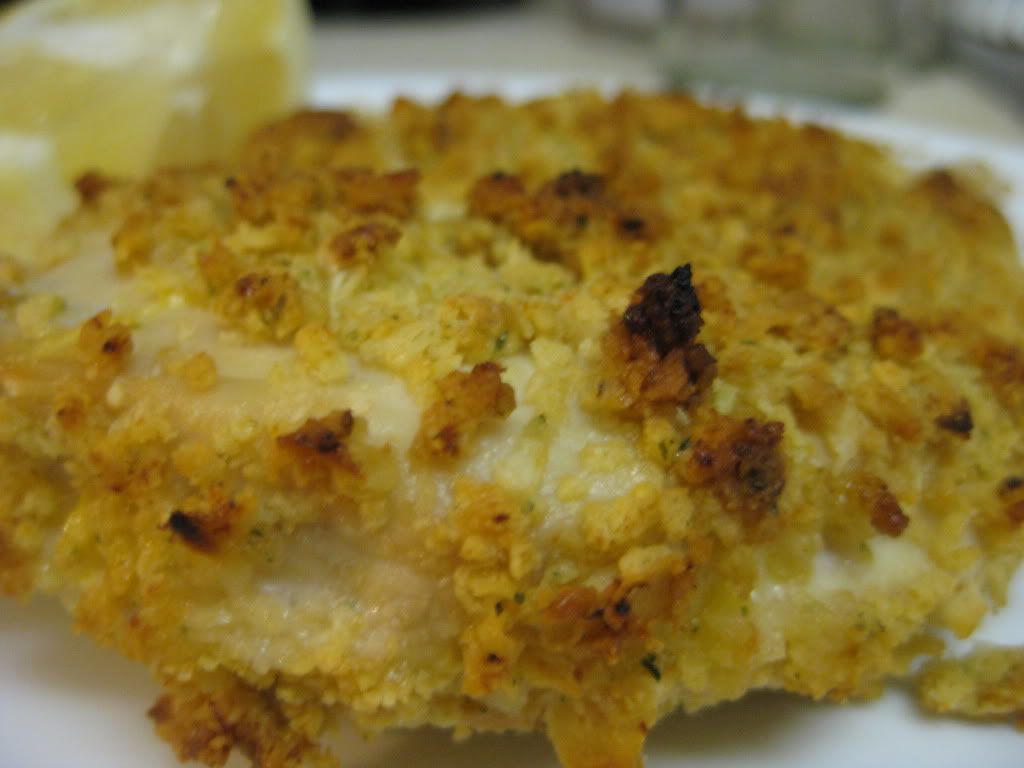
An incredibly flavored dish!  The tilapia cooked so perfectly, I had to use two serving tongs just to get off of the baking sheet, not wanting the fish to fall apart.  Cooking in the skillet before cooking in the oven, gave it a nice golden color and really enhanced the flavor of the fish.  I felt that the lemon wasn't even needed to top the fish.  But if you like a little extra zing in the tilapia, you can squeeze just a little bit on the fillet and it was taste amazing.  If you're afraid of extreme fishy flavor, you won't find it in this recipe.  Tyler mentioned this evening that this is at least our sixth(?) variation of breaded fish and (in my opinion) this is definitely one of the best!


That's all we have for you this evening.  Check back on Thursday when Tyler tries something completely new - hint: it's a dish we haven't tried EVER on the blog before.  Until then,

~Cheers!

Thursday, May 26, 2011

Two Unique Tastes Combined into One

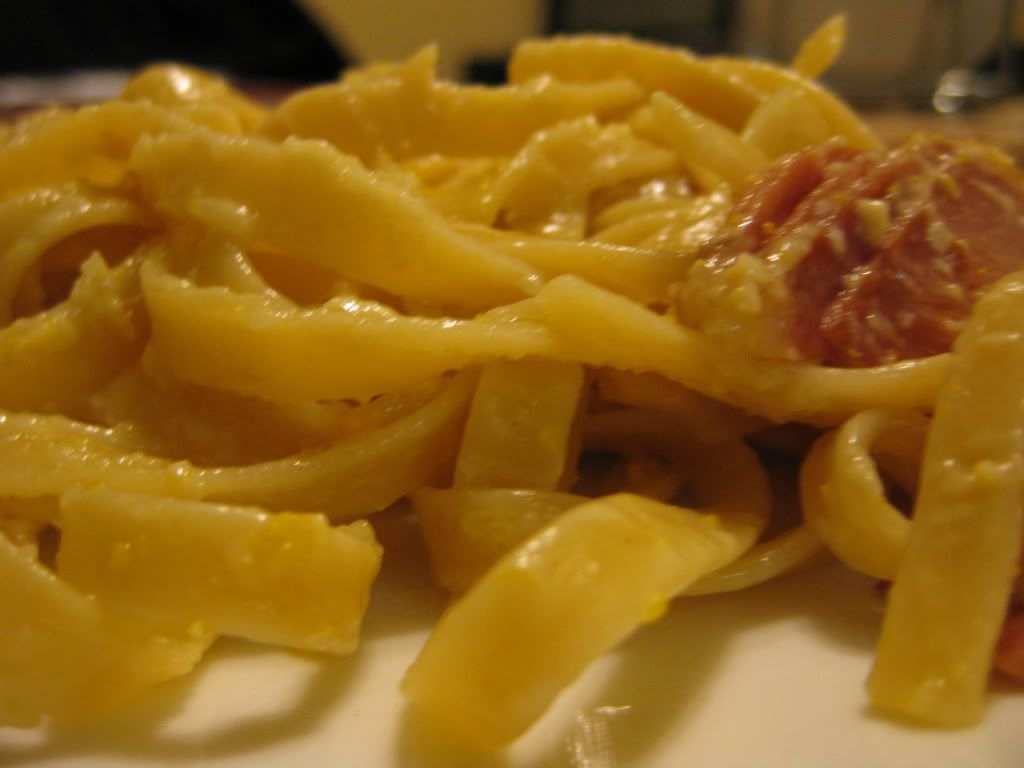
Good evening everyone!  Unique flavor combinations are the mainstay in most of my recipes.  Cooking gives you a chance to experiment and try different arrangements.  That is one of my rights as a cook that I like to exercise…a lot!  This recipe is no different.  When reading the title of the recipe, I was kind of taken aback by the two main ingredients.  Would the saltiness of the prosciutto cut out the citrusy flavor of the orange, or vice versa?  Would these two relatively obscure tastes work together or could it be the strangest pasta dishes I’ve ever created?

The Recipe:  Tagliatelle with Prosciutto and Orange
Original Recipe Found In:  Bon Appetite Magazine, May 2011
What You’ll Need:
12 Ounces Egg Tagliatelle or Fettuccine (preferably fresh)
2 Tablespoons (1/4 Stick) Unsalted Butter
2 Ounces Thinly Sliced Prosciutto, torn into one inch pieces
Zest and Juice of One Orange
1/2 Cup Heavy Whipping Cream
1/4 Cup Finely Grated Parmesan

Begin by bringing a large pot of water to a boil and season with salt.  If you had fresh pasta, you would cook it for two minutes.  Since we’re using shelf fettuccine, we’re cooking it according to package directions.  Regardless of your pasta preference, reserve 1/4 cup of pasta water and drain the remaining water.

Prosciutto  
And orange juice? 

After the pasta is drained, melt the butter in a large nonstick skillet over medium high heat.  Add the torn prosciutto and sauté until browned, three minutes.  Now, I learned from my chorizo recipe (5-2-11) that you cannot cook pork products longer than what the recipe says…following the recipe, ingenious idea, right?  So, keep your eye on the prosciutto, because it is very thin meat and will cook rather quickly if you’re not paying attention.  Or else, you might have very crispy, and hopefully not charred, prosciutto.


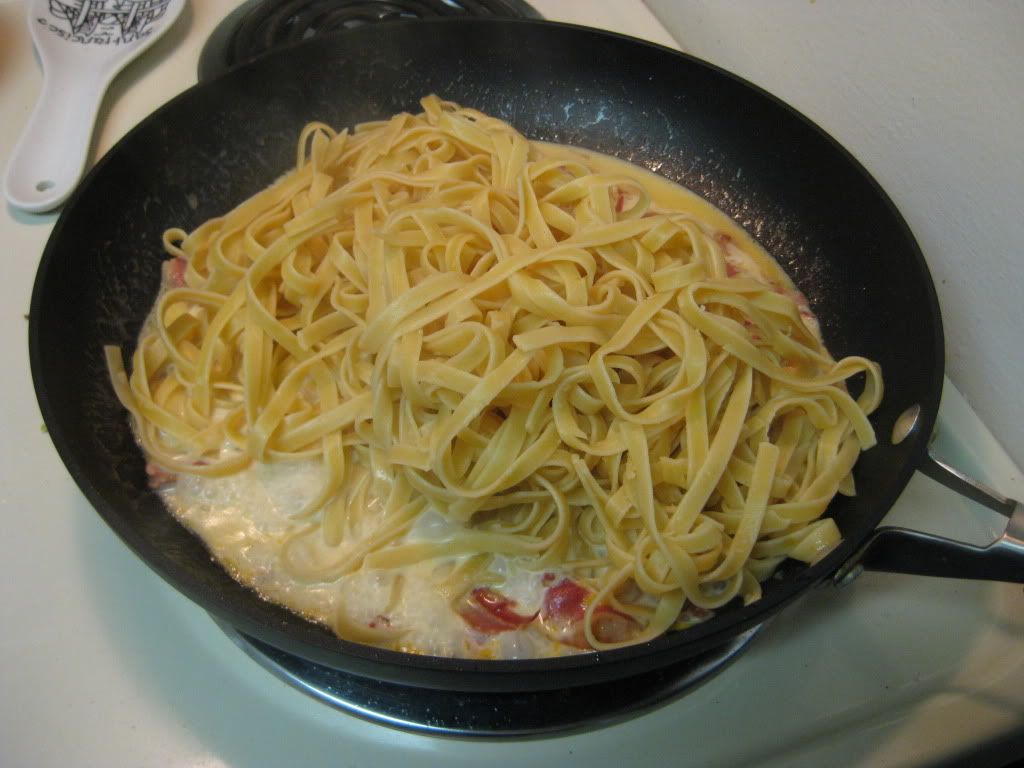
In the same skillet, add the reserved pasta water, fresh orange juice, half of the zest, and cream.  Bring this mixture to a boil.  Add the drained pasta and cook, stirring until the sauce coats the pasta and is warmed through, about one minute.  Season the pasta combination with salt and pepper.  Stir the cheese and enjoy!

The End Result:


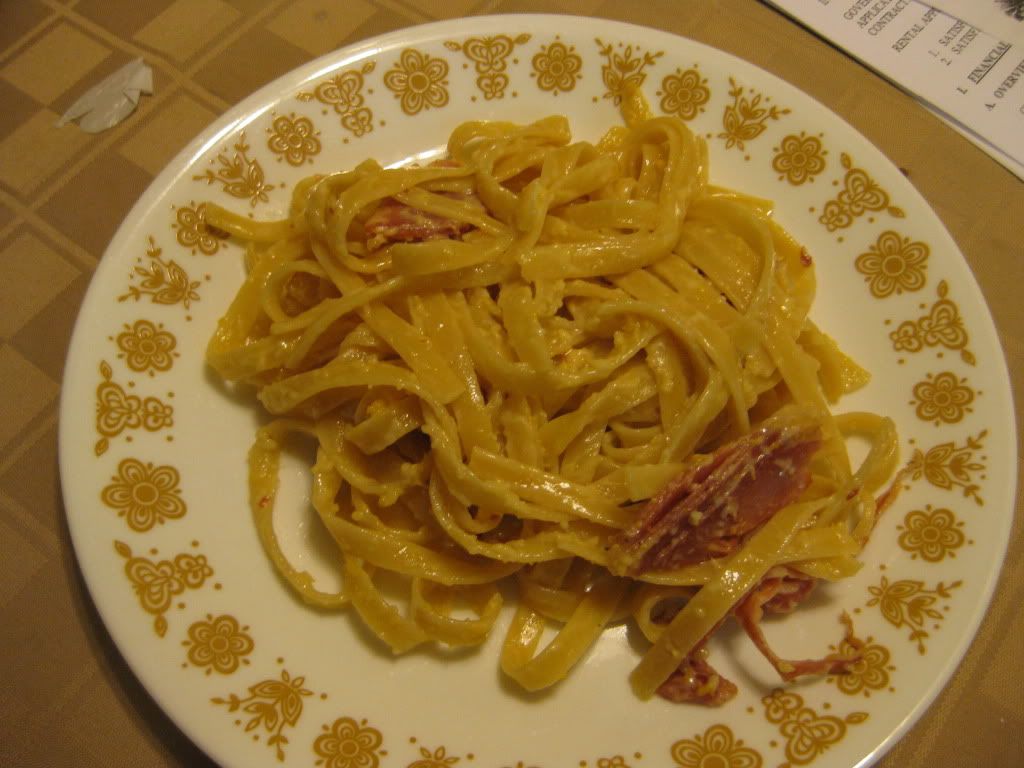
When I was first read this recipe, I thought that the orange flavor would be too potent and overpower the dish.  But actually, the orange was an undertone to the whole dish.  The same could be said for the prosciutto.  It could have been incredibly salty and yet, cooking the prosciutto first calmed some of that saltiness down.  I am really pleased with the end flavor of this dish - not too citrusy, not too salty, right in between.  Although the two flavors seem so strange together, it had a great flavor to it, wasn't too tricky to make, and wasn't bogged down with a heavy sauce.


Thanks Maggie. I'll admit, I was wrong on this one. I didn't think this dish would work at all - but it did. It's hard to describe why, but it was just a perfect fit. Who would have thought, oranges and prosciutto? Maggie gets the credit for a great 'risk' and better reward tonight.

That's all we have for you this week. We're back on Tuesday with a new set of recipes (no Around The Culinary World this week). Be sure to stop in then to see what we're cooking. Until then,

~Cheers

Tuesday, May 24, 2011

Breaded, Baked and Brilliant

Good evening everyone! Tonight, I'm returning to one of my favorite dishes - breaded fish. Now, we've covered multiple types of fish on the blog (cod, salmon, halibut, swordfish, tilapia) and quite a few breadings (bread crumbs, cracker crumbs, whole wheat flour, panko bread crumbs, corn meal) as well. However, the nice part about breaded fish is that the dish is there are so many options you can continue to return to the recipe and almost always come up with something new. Tonight, we're going 'new' in every phase of the standard breaded fish recipe. We're trying a new fish - Alaskan Perch. We're trying another variant of breading and (as if these changes were not enough) we're trying a 100% new form of tartar sauce, featuring capers.

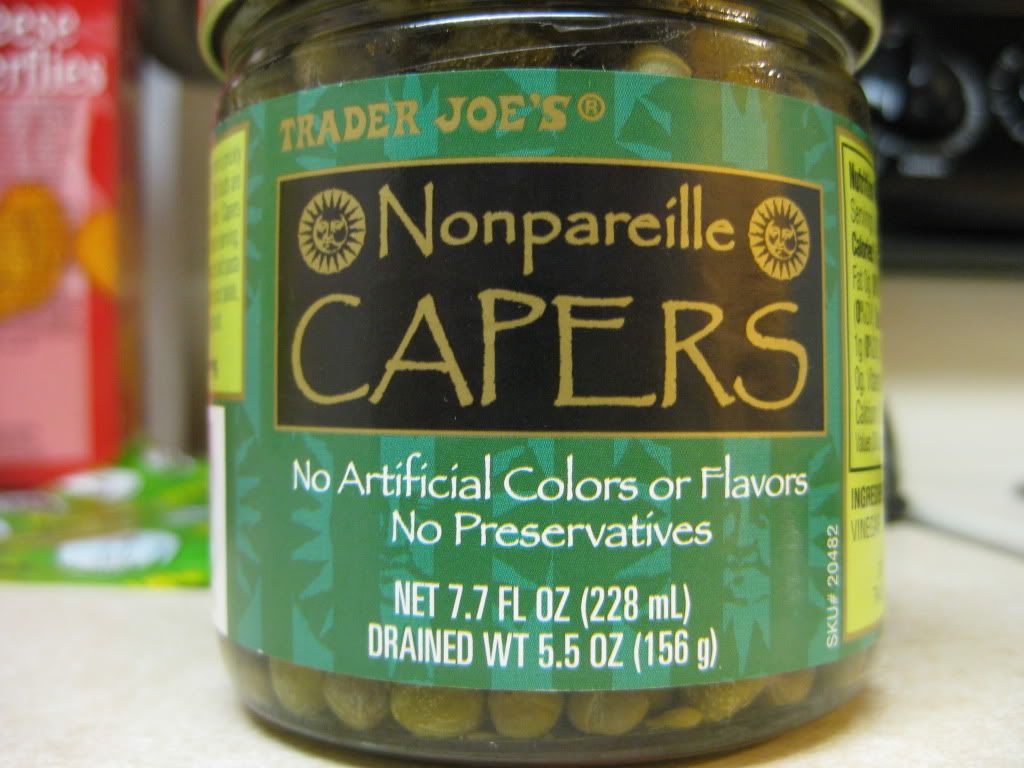
Capers, if you're unfamiliar, are the bud of the caper bush. For culinary purposes, caper buds are picked, and pickled in a vinegar/salt solution and used as a garnish or additive for recipes. Capers are typically found in Mediterranean dishes (as the bush grows naturally in that region). While pickled, the caper bud develops a mustard like flavor that release a nice tang to any dish you add it to. This, of course, is according to the cookbooks we own - neither Maggie nor myself have tried capers in our lifetimes. First time for everything!

If you don't want to use Alaskan perch (which we chose simply for the reason of 'we've never used this before') you can substitute any thick, white fish fillet. Halibut is the ideal substitute but cod serves just as solid as a stand-in.

Armed with our new indgredients, let's head to the kitchen!

The Recipe: Breaded Perch Fillets (Originally called oven baked halibut)
Original Recipe Found In: Cooking For Two

What You'll Need:

1 1/2 Slices High Quality White Sandwich Bread (Torn into pieces)
1/4 Cup Unbleached All-Purpose Flour
1 Large Egg White
2 Teaspoons Dijon Mustard
1/4 Teaspoon Dried Parsley (1 Teaspoon Fresh)
Pinch Cayenne Pepper
Pinch Salt
Pinch Pepper
2 Skinless Fish Fillets (Cod, Halibut or Perch preferred)

For the tartar sauce:

1/3 Cup Light Mayonnaise
1 Tablespoon Minced Sweet pickle relish (plus 1 teaspoon juice)
1 Teaspoon Drained, Rinsed & Minced
1/2 Teaspoon Minced Shallot
1/4 Teaspoon Worcestershire Sauce
1 Teaspoon Fresh Lemon Juice


Begin by mixing the mayonnaise, pickles, pickle juice, capers, lemon juice, shallot and worcestershire sauce together in a medium bowl. Stir until well combined and place the bowl in the refrigerator for later.

Adjust your oven rack to the center position and preheat the oven to 400 degrees.

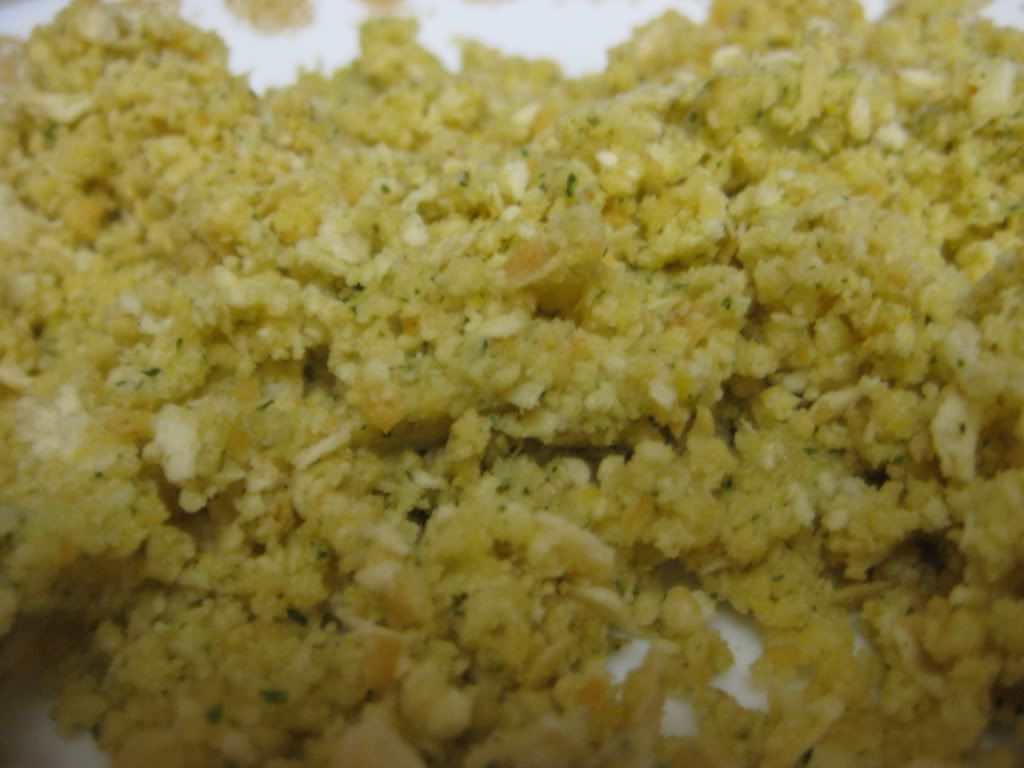
In a medium food processor, pulse the bread pieces until they become coarse crumbs. Next, add the bread crumbs to a rimmed baking sheet and bake for 8 to 10 minutes, or until golden brown. Stir the crumbs occasionally to prevent burning. Transfer the finished crumbs to a shallow baking dish and set aside.

Next, combine 2 tablespoons of the already mixed tartar sauce with 2 tablespoons of flour, the egg white, mustard, parsley and cayenne. Mix until blended and set aside. This mixture will be very thick, almost paste like.


In a separate dish, combine the remaining 2 tablespoons of flour with a pinch of salt and pepper.
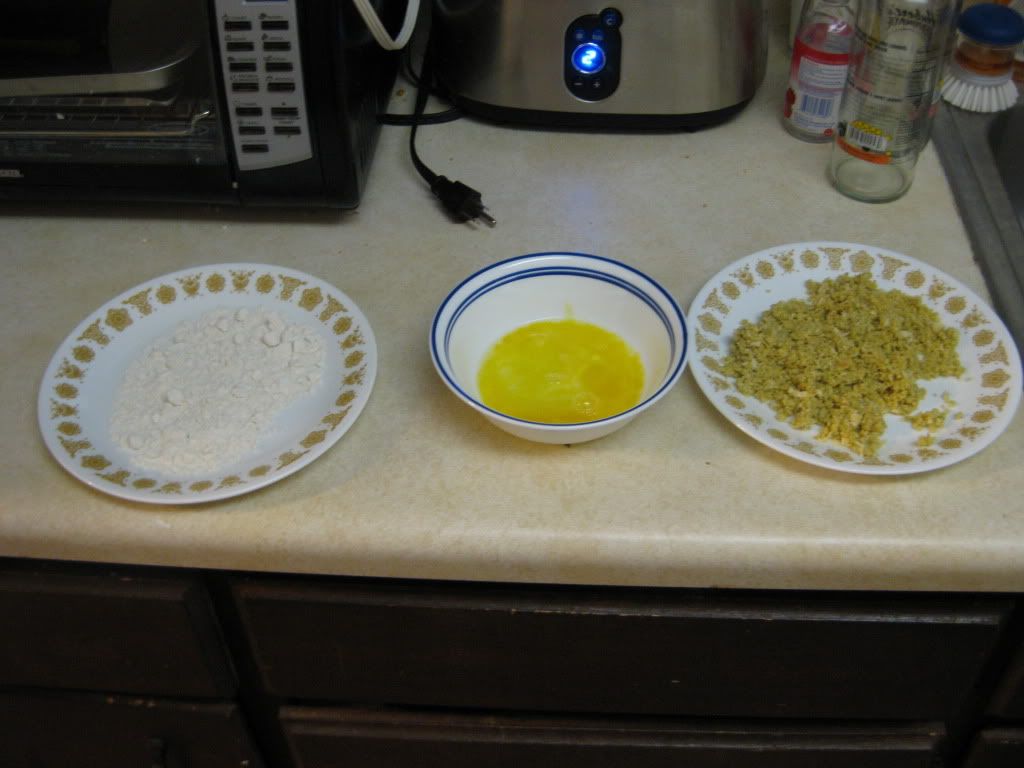
Line up the dishes in an assembly line style. Starting with the seasoned flour, then the egg white mixture and finally the bread crumbs.

Increase the oven temperature to 450 degrees and place a wire rack on the rimmed baking sheet you used earlier.

If you are using a frozen fish fillet, be sure that there is no moisture on the fillet before you start the breading process. Water will ruin the breading's ability to cling to the fish and you will not be happy with the end result.

Begin breading the fillets by first dipping them into seasoned flour, then carefully dipping them into the egg mixture. Rub the excess egg to off. Finally, press the fillets into the bread crumb mixture until equally covered. Repeat for as many fillets as necessary.

Place the finished fillets on the wire baking rack and give each fillet a light spray with vegetable oil (this helps brown the crumbs - and reduce sticking, I opted to skip this step myself). Bake the fillets at 450 degrees until they reach 135 degrees on an instant read thermometer. This should take about 6 to 10 minutes. Serve the fillets with the remaining tartar sauce and enjoy!


The Results:


The fish was a pleasant surprise. Perch isn't too different from cod or halibut, so the flavor didn't vary as wildly as I thought it might. Perch does pack a little more 'fishy' taste when compared to cod, which to some is a plus, others find that as a negative. I prefer the cleaner tasting cod myself. The breading had a fantastic crunch with a slight onion/pepper flavor (not too much, just enough to barely notice). While it wasn't as good as our favorite fish dish of all time, the oven baked cod, it certainly makes its own path and is a enjoyable dish in its own right.

The tartar sauce hasn't won me over. I've tried about 4 varieties from the folks at America's Test Kitchen and it just seems like they want to do too much with the simple side. Light mayo with pickle relish. That. Is. All. You. Need. Basic and straightforward. You cannot beat simple. This tartar sauce wasn't bad, just a little too much for the simplicity of the dish it was accompanying. Worth a try for those feeling adventurous.

That's all we have for you this evening. Maggie will be taking to the kitchen Thursday night with a dish that I'm not 100% sure about. She thinks that it could turn out amazing, I'm a little more skeptical - but then again, that's what makes us work so well together - we balance out! Tune in Thursday to see who has it right. Until then,

~Cheers

Sunday, May 22, 2011

Around The Culinary World

Good evening everyone! Welcome back to a new week of cooking and blogging here at Out Of The Culinary. This week, we're going to get started with a topic that is all over the grocery store shelves nowadays; gluten (or, the lack thereof). The current 'buzz phrase' in the cooking world is 'gluten free'. For some reason, people have it in their heads that gluten free = healthier and therefore they must opt for the gluten free version of every product. Now, for the 1% of the population (not an arbitrary number, that is actually the percentage) of the population that is affected by gluten - these products are a lifesaver. But, does the general public see any benefit from gluten free products? Or is this just another buzz word that is taking customers by storm - so marketers are running with it?

I found a fascinating article in the May 23, 2011 issue of Time Magazine. The article, titled 'Bad-Mouthing Gluten. What's behind the craze for gluten-free food?' was written by Katy Steinmetz. If Time would publish their entire article online, I would simply link the article and move on. They don't do this. However, I feel the points made in this article are very interesting and worth a read, so I'm going to quote the full article below. Again, I want to stress what follows are not my words, they are the work of Katy Steinmetz and Time Magazine. All credit goes to them for the follow paragraphs:

Illustration by Sam Kerr 


For the estimated 1% of the population with celiac disease, gluten is a kryptonite that can trigger digestive distress and cause long-term health problems. (It's also problematic for a slice with less severe gluten sensitivity, though there are no solid numbers on its prevalence.) But for the vast majority of us, gluten is a harmless protein found in grains like wheat, rye, and barley that is best known for giving bread its fluffiness. 
Nonetheless, "gluten free" has become a major selling point, as if it were synonym for "low carb". Gulten-free Betty Crocker cake mix and gluten-free beer now line grocery-store shelves. There are gluten-free menus, gluten-free Communion wafers and gluten-free lifestyle tips from the likes of Gwyneth  Paltrow. Americans spent a record $2.6 billion last year to banish gluten from their lives , about the same amount they spent on cat food. 
But it is the trend followers rather than the celiac sufferers who are doing the bulk of the buying. A recent survey by marketing research firm Packaged Facts showed that only 8% to 12% of people who purchased gluten-free products did so because of gluten intolerance. Most simply thought these products were healthier or of higher quality or could help them manage their weight.
"It's becoming extremely fashionable to the point that it's almost alarming" says Dr. Stefano Guandalini, founder of the Celiac Disease Center at the University Of Chicago. He and other gluten gurus say most people on gluten-free diets don't actually need to be: they've either jumped on the bandwagon or mis-diagnosed themselves as gluten-sensitive, a conidion that can't be tested for and is treated only by changes in diet. 
Food manufacturers are rushing to get a slice of the market, but the Food and Drug Administration has yet to set a standard for gluten-free labeling. that's hardly dire for people avoiding gluten for non-medical reasons, but for those with celiac disease, a tiny amount can cause severe autoimmune reaction. And without regulation, the risk of that happening increases. "Vendors or restaurants will feel it's just a fad, it's another crazy diet and it doesn't matter what we feed to these people," says Tiara Rogers, 34, who has a close friend with celiac disease. 
Rogers recently gathered with other activists in Washington to pressure the FDA (and to garner attention by building a 11-foot, 64 layer gluten-free cake). One event fresh on their minds was a mis-labeling case in North Carolina, where a con man slapped "gluten free" on regular bread, making dozens sick. He as given an 11 year prison sentence last month.
Many health experts stress that gluten is not a dietary evil. "Think of all the population on the globe that have existed on wheat or other products that have gluten in them," says Barry Popkin, a nutrition professor at the University of North Carolina. As for supposed weight-loss benefits, a gluten-free pretzel is not going to take off pounds any faster than a regular pretzel. In fact, if you avoid only gluten, rather than the carb-packed foods it's typically in, you will likely be getting more calories, with fewer nutrients, says Guandalini, because many substitutes end up being high in surrogate carbs and low in fiber. That's why celiac patients who go on prescribed gluten-free diets often see their body mass index increase, not decrease. 
Of course, people are free to eat what they wish, but "a gluten-gree diet is not necessarily a healthy diet," says Dr. Peter Green of Columbia University's Celiac Disease Center. "It's something people seem to take on without being aware of the effects."  
 
I thought that article was brilliantly done. For me, it did two things; first, it showed what exactly the problem with gluten was (I didn't know there was an issue with it for some people) and secondly, it showed why removing gluten from your diet is not a sure fire way to lose weight. In fact, (shockingly) you could gain weight.

So, there you have it folks. Gluten free is (for roughly 99% of the population) a fad diet with no actual grounding. Feel free to eat all the gluten you want. It's those carbs you should be cutting out!

Other 'quick hit' stories for this week:


10 Ways To Sweeten Food Without Sugar 

This Man Just Ate His 25,000th Big Mac 

China Has An Issue With EXPLODING WATERMELONS


That's all we have for you this evening. Another full week of recipes are lined up - I'll take to the kitchen on Tuesday and Maggie will close us on for the week with a very unique dish on Thursday. Be sure to stop back in Tuesday night to see what we've got cooking. Until then,

~Cheers


Thursday, May 19, 2011

Crunchy Garlic Chicken Take 2!

Good evening everyone! Tonight I'm flashing back to my first failure on the blog. My first foray into Jamie Oliver's 'Crunchy Garlic Chicken' turned out to be my first letdown in my early cooking days. The blog was in its first month and I had only made about three recipes so far. I spotted the dish in the Food Revolution cookbook and instantly thought I had a hit on my hands. The problems with the dish started immediately. I didn't have a food processor, so I tried to use an emersion blender to mix the breaded. That failed. I didn't have lemon zester - so I opted to use a paring knife to work of the skin. That resulted in large chucks of lemon, rather than a zesty peel - which overpowered the dish. I used a regular aluminum skillet with only a little oil (hey - I was young and naive!) which caused the breading (which was falling off due to the large size from the aforementioned lack of food processor) to burn and stick. It was, by all accounts, a disaster. The taste was still there - but everything else let me down.

Now, almost a full year later, I am more experienced, and better equipped. I decided that now was the time to face my first blogging failure. I was going to take on the crunchy garlic chicken and this time I would kick it's (hopefully delicious) rear end!


The Recipe: Crunchy Garlic Chicken
Original Recipe Found In: Jamie's Food Revolution

What You'll Need:
(Serves 2)

2 Boneless, Skinless Chicken Breast Fillets
1 Clove Of Garlic
1 Lemon
10-12 Unsalted Saltines*
2 Tablespoons Butter (Unsalted)
4 Sprigs Fresh Parsley (1/4 to 1/2 Teaspoon Dried)
2 Tablespoons All Purpose Flour
1 Large Egg

*The original recipe calls for 6 unsalted saltines, but I've found that with the butter, 6 simply isn't enough. The crackers become 'sticky' and group together - 10 to 12 makes the mixture much more usable.

Preheat your oven to 475 degrees.

Begin by placing your crackers, garlic, lemon zest, butter and parsley into the bowl of a large food processor. Pulse for about 15 to 20 seconds or until the mixture is a very fine powder. As I learned during my first crack at this dish, this is the most important aspect of this recipe. You have to have a very fine powder for the breading to work at all. I found that 30 seconds to a minute of full pulsing (with a few second breaks) was the best way to get a fine cracker mixture, like the one pictured below.

Lemon zest, much better than the first time

Breading mixture - finely ground 


Pour the bread crumb mixture into a large bowl. Next, add your flour to a large plate or bowl and crack the egg into a second bowl. Much like every breading recipe we've ever tried, it's time to set up an assembly line. Place the flour plate first, followed by the egg and finally the bowl with the breading mixture.


Using a paring knife, score the underside of the chicken breasts lightly. Place a small square of plastic wrap over the breast and use a meat tenderizer to flatten out the chicken. You're looking for 1/4 to 1/4 inch of thickness here. The scoring should help the chicken flatten out a little easier - reducing the stress on both your arm and your countertop!


Now you're ready to begin breading the chicken. First, dip the breast into the flour, making sure that it's completely covered. Shake off any excess flour. Dip the chicken into the egg mixture, allowing the excess to drip off. Finally, press the chicken into the bowl of breading, making sure every portion of the chicken is covered.

Finally, place the chicken breasts on a wire rack over a baking sheet.* Place the chicken in the oven and cook for 15 minutes or until the center of the breast measures 165 degrees. Slice the breasts into strips, or serve whole with a side of lemon and enjoy!


*Previously, I had pan fried the chicken. But, over the past year I've found that breading and oil frying tends to...well...not always work. I have had a lot of success using the wire baking rack over a baking sheet, however, so tonight I opted to 'wing' it and use my previous experience to help me with the recipe.


The Results:


It's amazing what a little more cooking experience, the right equipment and more confidence can do for you. Tonight's revisit turned into a huge success. The chicken was perfectly breaded, crispy, crunchy and full of flavor. The lemon didn't dominate the dish - instead it simply complimented the overall flavor. I certainly prefer the baking method to the oil frying method - both for the reduced fat content and for the ease of an all around browned finished product. The oven cooks the breast evenly and crisply, certainly the recommended way to go! (Although I still stand by my 'it should be named lemon chicken assertion - the lemon flavor is certainly the dominant one of the dish)


That's all we have for you this week. We're back on Monday with another Around The Culinary World. Be sure to stop in then to see what's new in the world of food and cooking. Until then, enjoy your weekends everyone!

~Cheers

Tuesday, May 17, 2011

1 Year Ago Today...

Good evening everyone and HAPPY ANNIVERSARY!  If you are a loyal reader of the blog, you will know that today is our one year anniversary of starting our blog.  It has been, most certainly, an incredible trip.  When we started last May, we wanted to change the way we were eating and learn how to cook.  My, how things change in 12 short months.  We have developed into complete, die-hard foodies and pretty good chefs.  Our families, friends, and coworkers are well versed in our blog and often ask what we are making that evening/week.  We have refined our tastes and only look for the "good stuff" in grocery stores and in restaurants.  I've felt that we've grown up a lot, culinary wise, and I'm sure Tyler would say the same.  I get excited about every week when we try something completely different...and pleased that the recipe turns out well.  But mostly, we couldn't have done it without the help our family, friends, and readers - this blog wouldn't be successful without your support and love.  Thank you, thank you, thank you a million times over!


Speaking of growing up as cooks, tonight's recipe was something I would have never tried a year ago.  Granted, I've tried salmon way before I was a budding chef, but I wouldn't even attempt to cook salmon.  As we have developed our tastes into the fish department, salmon is that one ingredient we keep on going back to.  After tonight's recipe, I think it's safe to say that anyone can make this dish.

The Recipe:  Slow-Baked Salmon with Lemon and Thyme
Original Recipe Found In:  Bon Appetite magazine, May 2011

What You'll Need:
1 1/2 Tablespoons Extra Virgin Olive Oil, divided
2 6-8 Ounce Boneless Salmon Fillets, skin on
1 Tablespoon Chopped Fresh Thyme (or 1 teaspoon dried thyme)
Zest of 1 Lemon
4 Lemon Wedges

To start off, preheat an oven to 275 degrees.  While the oven is preheating, line a baking sheet with aluminum foil and brush 1/2 tablespoon of oil over it.  Now, you might be asking why the oven is at such a low temperature.  Giving the salmon a low heat loosens the fat surrounding the fillet and makes the meat really moist and tender.  After all, the best kind of salmon is the kind that breaks apart when you cut into it with a fork - no knife needed.


Next, place the salmon fillets skin side down on the oiled baking sheet.  In a small bowl, mix the remaining oil, thyme, and lemon zest.  Spread the mixture over the salmon, making sure the mixture is dispensed equally and coated evenly.  After that, season with salt and pepper.  Let the salmon stand for ten minutes before popping in the oven.  This allows the flavors the seep into the fillets.  That's what's great about this kind of fish - salmon really soaks up the flavor of whatever is around it.  This makes it a universal dish that you can put any flavor with it and it will taste great.


Mixture mixed


Place the salmon in the oven and bake it until just clear in the center of the fillets, about 15 to 18 minutes.  Serve with lemon wedges and enjoy!


Ready to cook!


The End Result:


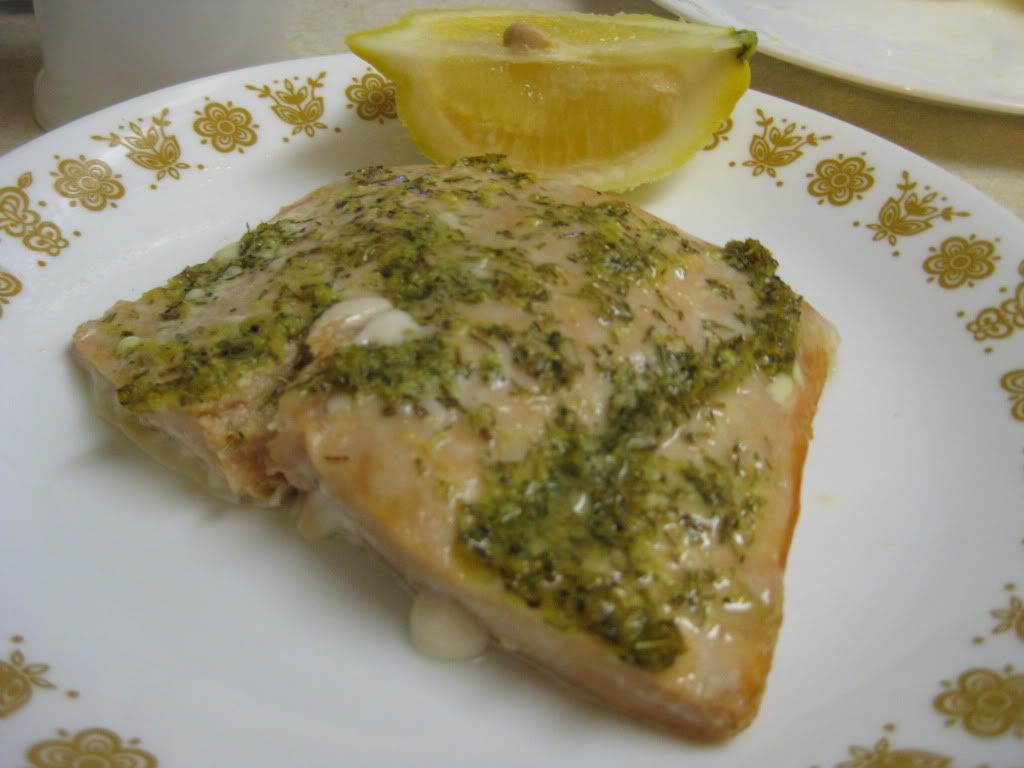
The slow and low method worked perfectly.  The salmon was incredibly moist and just broke apart when I dug my fork into it.  The lemon and thyme flavors really enhanced an already great fish.  Letting the flavors seep into the fish before putting it in the oven made it really flavorful.  If I had not done that, the lemon/thyme mixture would have not stayed on the fish nor made it taste great.  Salmon is a great choice for any night of the week - paired with the right flavor options, it could become a super part of your dinner plate.  Not only is salmon a super food (high protein, high omega 3's, and vitamin D,) but this dish is a superb low calorie option.  At only 308 calories, for those wanting to eat healthy and have their food taste great, this recipe is for you!


Thank you Maggie. Yes, as Maggie mentioned in the open, today marks the 1 year anniversary of our little cooking blog. I started Out Of The Culinary on a whim last May. Maggie and I were trying to cook and eat healthier and had been doing a decent job. I wanted something to keep us honest and keep us committed. It's all too easy to start something and then sluff off - until you're back to where you started.

So, Out Of The Culinary was born. Not only as a method to share our recipes and cooking adventures but as a way to keep Maggie and myself on track. 230 posts, 170 plus recipes and countless adventures later, we've become quite capable chefs.

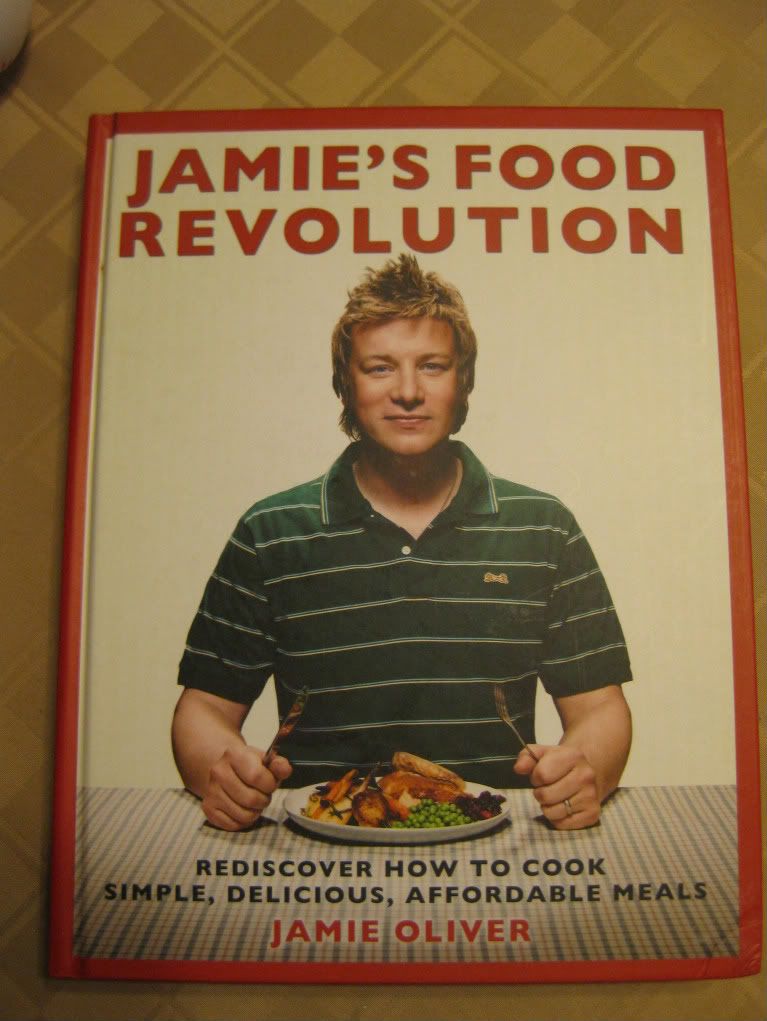
I started off with the most cooking experience between the two of us. This sounds impressive, until you realize that my beginning cooking experience was the ability to make 'box mix' pancakes. Maggie, to her credit, freely admitted that she could boil water...and that was all. Armed with my copy of Jamie Oliver's Food Revolution, I learned to cook the way I learn anything new - diving right into and learning on the fly. Through Jamie's quirky terms and free flowing recipe style, I learned how grill, sear, season and cook like a pro. It was thanks to that one cookbook (and it's easy to follow recipes) that this blog succeeded and grew like it did.


As a feature for our one year anniversary, I wanted to create a 'top 25 recipes' list featuring the best of the best recipes (so far). As I started, however, I found the task to be more taxing than I first imagined. Our cooking style has shifted so much in one year, that it is almost unfair to compare today's dish with the recipes from a year ago. You can't really compare the ground beef wellington with our crunchy cod fillets - they're both great, but for different reasons. So, I decided against making a 'best of list' - instead, you can check out our favorites from the blog's first year in our cookbook.

If you're in the mood for a funny read - go back to the beginning of the blog and randomly skip through the weeks. You can almost see the evolution, both in writing style and it recipes tackled. We started small - keeping the post focused on the recipes and keeping the recipes focused on a few ingredients. This grew into more research heavy posts, more detailed recipes, more ingredients. We eventually have settled into a blending of the two. We try to write informative, detailed posts breaking down a recipe beyond what you can find in the cookbook. We're cooking it first so you don't have to. We learn the hard way when a cookbook is uninformative. We search for substitutes and alternatives for many recipes - we even will take a recipe down to its framework and start from square one. Our job is to not only share good recipes with you, but to break them down and make them approachable for any level of cooking experience.

As an aside, this has been the biggest challenge for Maggie. She tends to write 'by the book' keeping her posts reading a lot like a recipe. I have spent many nights editing and patching one of her posts together to the point where it is more 'my words' and less her words. She's gotten a lot better at this, (another way we've grown in the past year) by the way, and most of her posts go unedited!

Unlike my wife, I tend to get verbose and wax poetic (much as I am now) I get involved in a recipe from start to finish and try to craft a story of the dish. Beginning, middle and end. Sometimes it makes for great, interesting reads others (I'm sure) it feels a little long winded. But those differences are what make Out Of The Culinary what it is. Two different voices, two different chefs, two different approaches to cooking.

In the end, I've discovered a new hobby and learned that I had a talent for something I could never have imagined doing even two years ago. I got to share the experience with the love of my life and it has become a passion that we can both share forever.

In the back of my head, when I started this blog, I imagined it as 'snapshot' of our lives together. I planned to treat it as a look into one year of our lives cooking. That's right, the plan was for this to last one year. That's why tonight, I'm announcing that this is the end of....

Only kidding. We've got something good going here and so long as Maggie and I are enjoying what we're doing - we're going to keep it going. (Heaven knows it's not for monetary gain as we don't make a dime off of the site thanks to a Google mix-up...) Last month was our highest total page views since our blog launched. We had over 1,300 unique visitors in April alone - an astounding increase in readers. Our readership is growing, our experience is becoming more vast and, well, this whole thing is just too much fun to give up.

I'm back Thursday night with a revisit to a recipe that has bothered me since the day I tried (and mostly failed) at duplicating it. Now, I'm back for vengeance. Be sure to stop in Thursday night to see what I've got cooking. Until then, thank you for reading - and here's to another year!

~Cheers

Sunday, May 15, 2011

Around The Culinary World

Good evening everyone! Welcome to a new week of blogging and recipe sharing here at Out Of The Culinary. This week, Maggie and I are pumped to share two new recipes with you. Maggie has a dish that she has never worked with before lined up. I'm returning to one of my first recipe - not only that, it's one of my first recipes that didn't go so well. Those will come later in the week, of course, as we always start the week off with news from around the culinary world - this week is packed with good stories. Let's dive right in:


It's almost summer - painstakingly close to summer. The days are hinting at 80's and 90's - the trees are fully 'popped' with leaves, the flowers are full; summer is so close you can taste it. (Unless you live the the great midwestern states like we do - it's been 50 and rainy for a week - not so much like summer then!) With summer, of course, comes grilling. We've covered gas grills (both cooking techniques and how to purchase) on previous blogs. Tonight's story feature the other form of grilling - charcoal. Now, we've not about to start up the great debate between gas and charcoal grilling, we here at Out Of The Culinary believe there is room in the world for grills of all kinds - gas, charcoal, electric - so long as you have delicious cooked meats - all grills are welcome. Public service announcement aside, HERE'S a story on everything you need to know about charcoal. Even if you're a seasoned grilling veteran, I'll bet there are a few facts here you didn't know!


What is one of the best things to grill in the summer? Burgers! Eatingwell.com has a useful story regarding the 16 tips for the perfect burger. Maggie and I have been doing most of the things on this list since we've started cooking and we can assure you that they're worth it. (If you're looking for the best burger recipe - look no further than our Sunset Burger recipe from last summer - YUM)


My guilty pleasure when it comes to the world of food is a good bourbon or whiskey. I'm a sucker for the small distilleries (such as Iowa's own Templeton Rye, and Cedar Ridge bourbon) as well as the big boys such as Knob Creek, Maker's Mark, Johnny Walker and even Jack Daniel's. If you're a connoisseur of the finer spirits or if you just like to change things up from the usual weekend brew - check out What's New In Booze: 5 New Spirits To Tempt Your Taste Buds. 


We've had a lot of fun at the expense of KFC's food monstrosity - the Double Down. It really is an assault on the culinary world. Heck, it's an assault on your waistline and your arteries! Most of the food critics out there agree with us - and now, we've got a whole country on our side against the Double Down. KFC launched the Godzilla of sandwiches in New Zealand this week - and you'll never guess how they have classified the dish. Check it out HERE


Speaking of fast food places that really aren't nice to your waistline - McDonald's is in the news again this week. In the past, we've pounced on them for everything from the monstrosity burgers they've demoed in other countries to their horribly constructed oatmeal. So, it's only fair that we give them full credit when they actually succeed in the healthy meal 'realm'. Check our this SlashFood feature on the newest health options at your local McDonald's 


When you were a kid, did you take apart Oreo cookies and stack them together, making a super cookie to rule all other cookies? No? ...Yeah...Me either... Anyway, if you were a tyrannical little tot, or found of making super version of regular food - Nabisco has aided your cause. Introducing the 'triple-double Oreo' There's nothing really to say this picture says it all: 


There you have it folks, all the news that's fit to blog about for this week. (It was a full week of news!) We're planning a full week of recipes (so long as Google Blogger cooperates - apologies, again, for last week's delayed post. It was typed and ready to go - but we just couldn't put it online!) Maggie will be cooking on Tuesday, and I'll be rounding off the week on Thursday. Be sure to stop in Tuesday night to see what Maggie has cooking. Until then,

~Cheers

Friday, May 13, 2011

50% Less Size, 100% Of The Flavor

Tonight's blog was originally scheduled to post on Thursday. However, a Google Blogger error prevented us from posting the recipe until Friday evening. Sorry for the delay!

Good evening everyone! On tonight's menu, we're trying something that I've always wanted to make - chicken pot pies. Now, the modern day chicken pot pie has become demonized and a little 'overused'. The frozen food industry has turned what used to be a healthy hodgepodge of chicken and veggies into a sodium filled, preservative laced bowl of 'yuck'.

By returning to its roots, however, you can turn this humble dish into a healthy eating option. Remember, healthy eating is only about low calories - as Jamie Oliver likes to point out, you can completely change your lifestyle simply by eating with fresh foods and cooking things yourself. That beings said, tonight's dish is also light on calories (win - win situation right there) due to the unique way we're preparing it. Without further ado, let's get cooking!

The Recipe: Individual Chicken Pot Pies
Original Recipe Found In: Cooking for Two: 2010

What You'll Need:
(Makes 2 individual pot pies)

1 Savory Pie Dough Recipe*
2 Tablespoons Unsalted Butter
2 Carrots (Peeled, sliced 1/4 inch thick) **
1 Small Onion (Minced)
1 Small Celery Rib (Sliced 1/4 inch thick)
2 Garlic Cloves (Minced)
1 Teaspoon Fresh Minced Thyme (1/4 teaspoon dried)
1/4 Teaspoon Soy Sauce
3 Tablespoons Unbleached, All Purpose Flour
1 3/4 Cups Low Sodium Chicken Broth
1/3 Cup Heavy Cream
(1) 8 Ounce Boneless, Skinless Chicken Breast (Trimmed of fat)
1/4 Cup Frozen Peas
2 Teaspoons Fresh Minced Parsly (1/2 teaspoon dried)
1/4 Teaspoon Fresh Lemon Juice


*You can choose to make your own crust, which is preferred, or if you so wish, you can opt to go the easy route and buy a store brand. While the chefs at America's Test Kitchen really don't like the second option, they do recommend the Pillsbury brand of refrigerated pie crust. They note that the flavor is not as great as making the dough yourself, but in a pinch, the pre-made version would be a suitable substitute. Tonight, I'm choosing to use a the pre-made crust. Admittedly, I wanted to make the homemade version (I prefer things from scratch) but I had a slight time crunch and this would help cut another 30 minutes of the preparation time.

** If you're in a pinch for time, you can substitute the fresh veggies for the frozen vegetable medley alternative. We've found many store brands and name brands that contain carrots, corn, beans and peas and this method is a lot faster than chopping and peeling all of the veggies yourself. You sacrifice a little of the fresh flavor, but speed up in cooking time in return. We've found that 1 cup of frozen veggies substitutes nicely for the carrots, celery and peas in this dish.

Begin by adjusting your oven rack to the middle position and preheating your oven to 450 degrees.

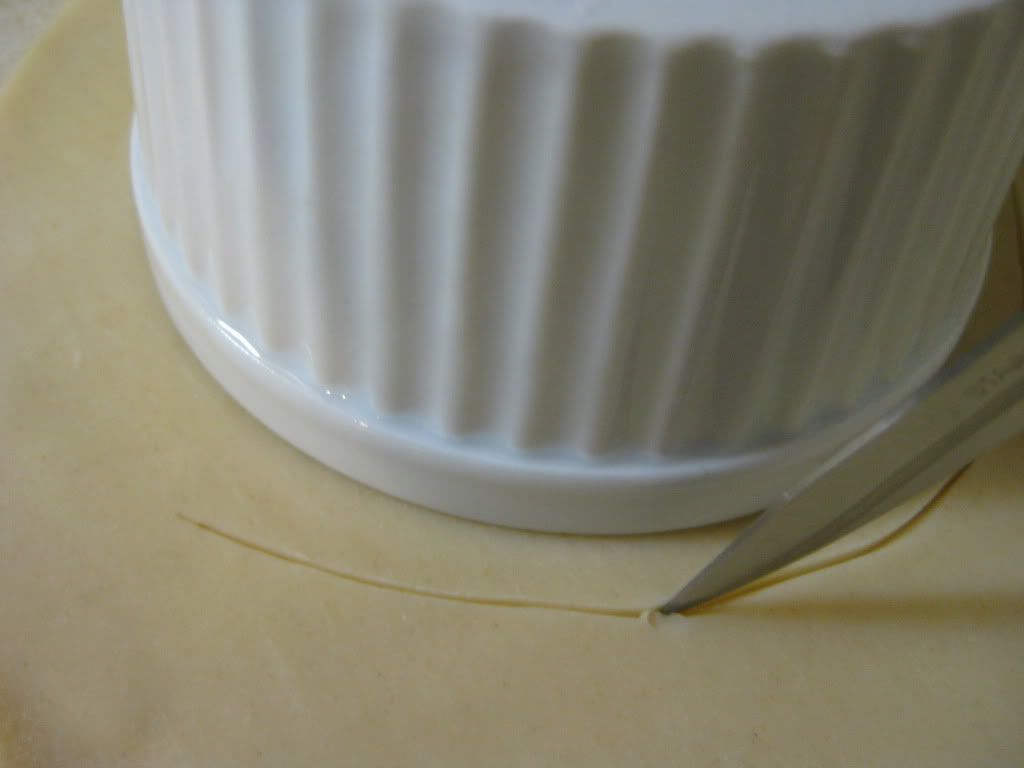
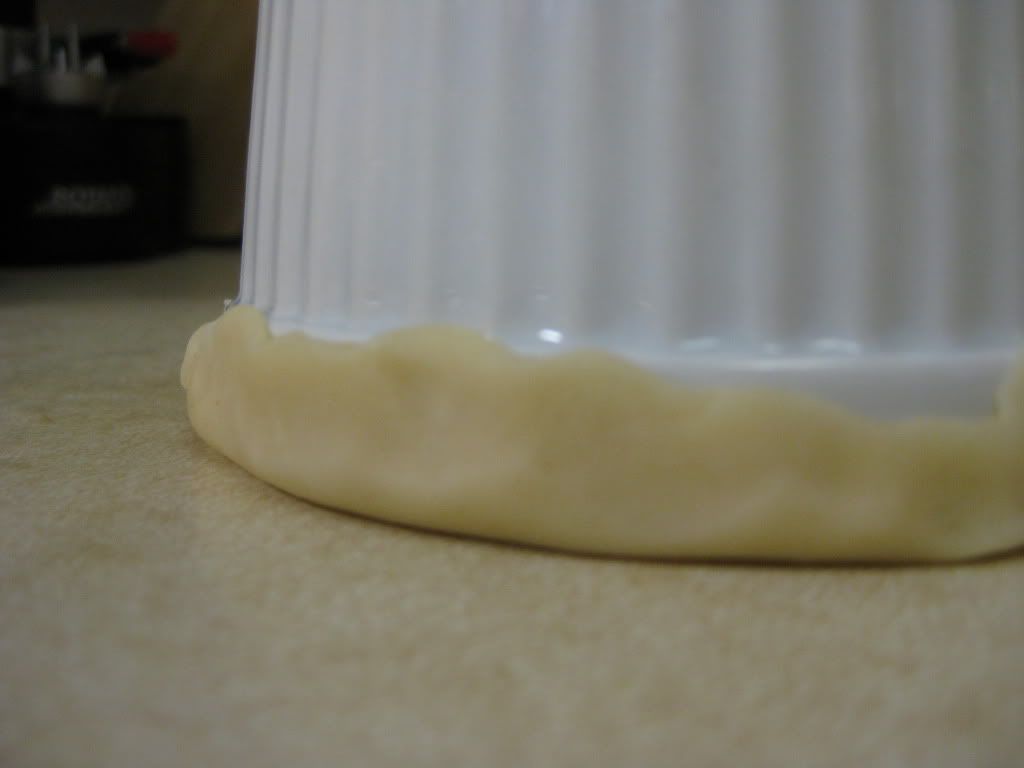
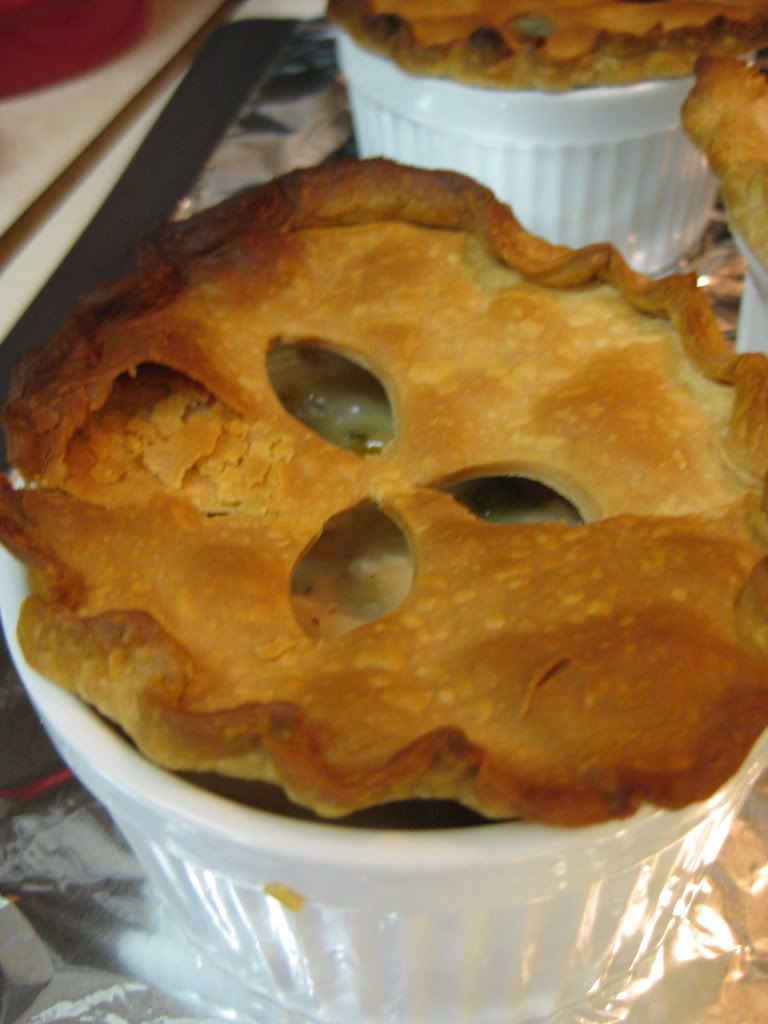
Next, roll out your pie dough onto the counter top. Using a 12 ounce ramekin as a guide, trim a circle about a 1/2 inch wider than the ramekin into the pie dough. Cut 3 ovals into the center of the pie dough (as pictured) to act as vents. Fold the excess edge up around the ramekin, then pinch the newly created lip between your index finger and thumb to create a ruffled edge. Repeat this process again to create a second lid. Place the dough on a greased baking sheet and cook for 7 minutes if you're using ready made dough - if you're using the dough recipe, cook for about 10 to 12, or whenever the dough no longer looks raw. (Set the lids aside when done)


While the dough bakes, add the butter to a medium skillet over medium heat. Add your onion, carrots and celery with a pinch of salt and cook until softened and lightly browned, roughly 8 to 10 minutes. Alternatively, if you are using frozen veggies, add them to the onion and butter mixture but reduce the cooking time to about 5 minutes.


Once browned, stir in the garlic, thyme and soy sauce and cook until fragrant, roughly 30 seconds. Next, stir in the flour and mix until well combined.

Begin whisking in your broth and cream. Use a wooden spoon to work up any browned bits on the bottom of the skillet. Nestle in the chicken breast and bring the mixture to a simmer. Cover the skillet and cook until the chicken breast reaches 165 degrees. This should take about 15 to 20 minutes. Once at 165 degrees, transfer the chicken to a plate and allow it to cool before shredding it with a fork.


Meanwhile, return the skillet to heat and allow the mixture to simmer until the sauce thickens and reduces slightly, roughly an additional 5 to 7 minutes. Off of the heat, return the shredded chicken to the skillet. Also add the parsley, lemon juice and peas (if you are not using the frozen vegetable mixture - which already likely has peas in it). Season with salt and pepper to taste.


Next, split the mixture evenly between two ramekins and cover each with the dough lids from the first step. Place the pot pies on a baking sheet and cook in the oven (450 degrees) until the crusts are a deep golden brown and the filling is bubbling. About 10 to 15 minutes. Allow the pies to cool for 10 minutes before serving and enjoy!

The Results:


Savory and amazing. We've dabbled with this basic premise before, (heavy whipping cream, chicken broth and veggies) so I knew going in that we were going to end up with a fantastic, creamy and full of flavor mixture. Thankfully, I was right. Rich, creamy and bursting with flavor this pot pies' filling was everything that the modern frozen pot pie is not. In addition, the crispy flaky crust provided a nice extra touch to this dish. Each pot pie was sized about right, just big enough to leave you feeling full, but no so big that you gorge yourself and eat too much. (Yes, too much of a healthy dish is still a bad thing - everything in moderation - remember?)

A relatively easy dish that can quickly be customized (due to the individual nature of preparation) with a great flavor? That's a recipe for 'try this one at home' right there. It will be well worth the effort.

That's all we have for you this week. Thank you for stopping by and reading our cooking expeditions for another week, our site's traffic is higher than it has ever been. It's great to see! We're back on Monday with another 'Around The Culinary World' until then,

~Cheers
Tuesday, May 10, 2011

It's a Flavor Kick to the Mouth

Good evening everyone!  As many readers know, I love combining different flavors and taste combinations to create a truly unique dish.  When a flavor combination works, I love to go back and retry it with a different twist to it or maybe as a new variation of the dish.  Tonight is no exception.  Last December (wow, five months ago - crazy!) I tried a recipe that we saw at the Des Moines Food and Wine Expo Chimichurri - Hard to Spell, Easy to Enjoy and searched for quite a bit for the perfect recipe.  Chimichurri is one of those recipes that once you have the list of ingredients, it's easy to find numerous recipes that are all pretty much the same.  Tonight, I'll be taking on a variation of this recipe, but make it a more Americanized version.  Would it live up to its previous contender?

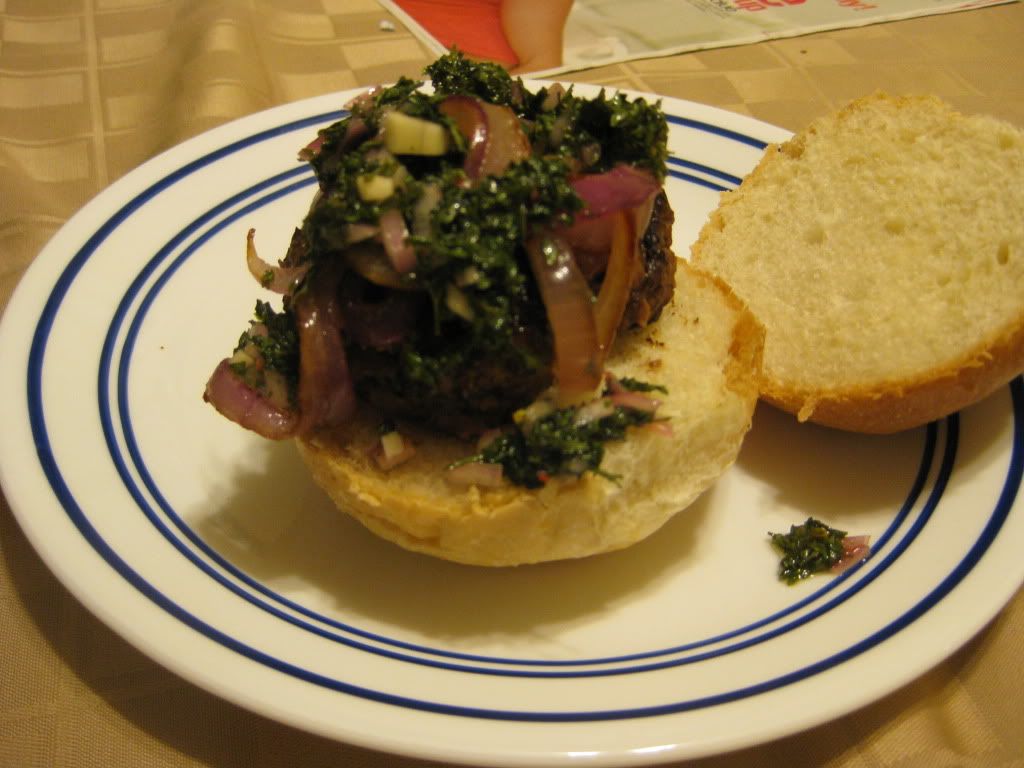
The Recipe:  Burger Argentina with Chimichurri Sauce
Original Recipe Found In:  America's Test Kitchen, 30 Minute Suppers

What You'll Need:
1/2 Cup Chopped Fresh Parsley
1/4 Cup Extra Virgin Olive Oil
1 Large Shallot, minced
2 Tablespoons Red Wine Vinegar
2 Garlic Cloves, minced
1/8 Teaspoon Red Pepper Flakes
1 1/2 Pounds 85% Lean Ground Beef
5 Teaspoons Vegetable Oil
1 Red Onion, peeled and cut into 1/4 inch rings
4 Hamburger Buns

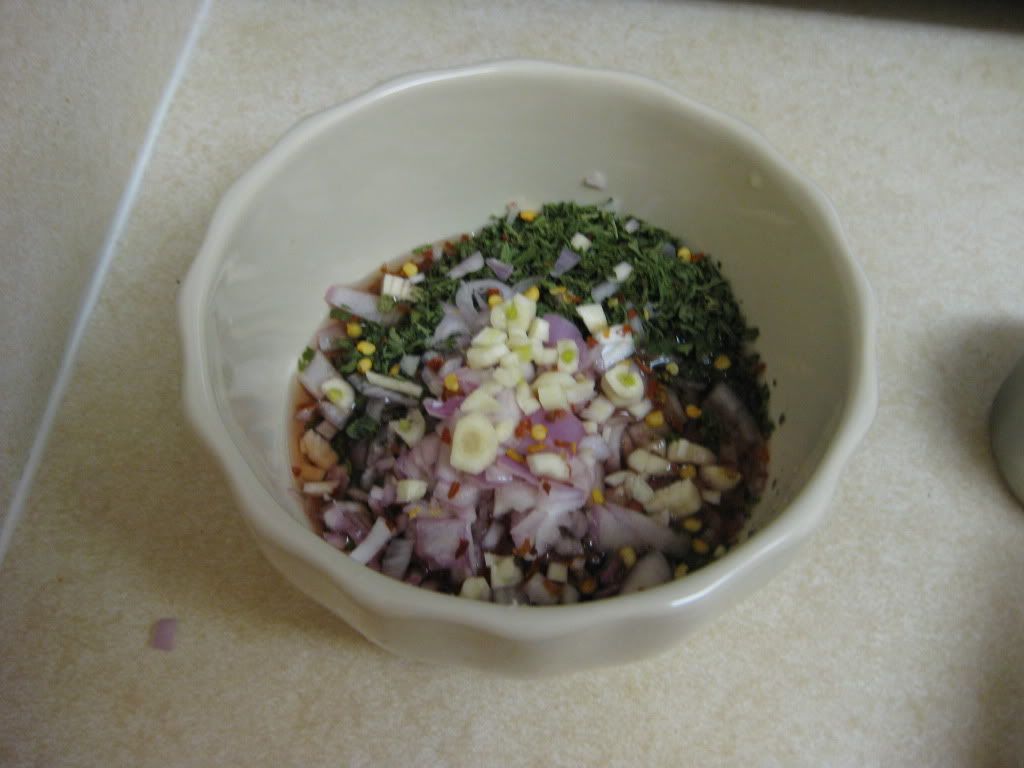
Begin by making the Chimichurri sauce, combining the parsley, olive oil, shallot, vinegar, garlic, and pepper flakes.  Season with salt and pepper.  If you have never tried Chimichurri sauce, you are in for a real treat.  Granted these ingredients sound rather weird all together, when you combine everything, it makes for a heavenly aroma and a flavorful sauce.

Premixed Chimichurri Sauce

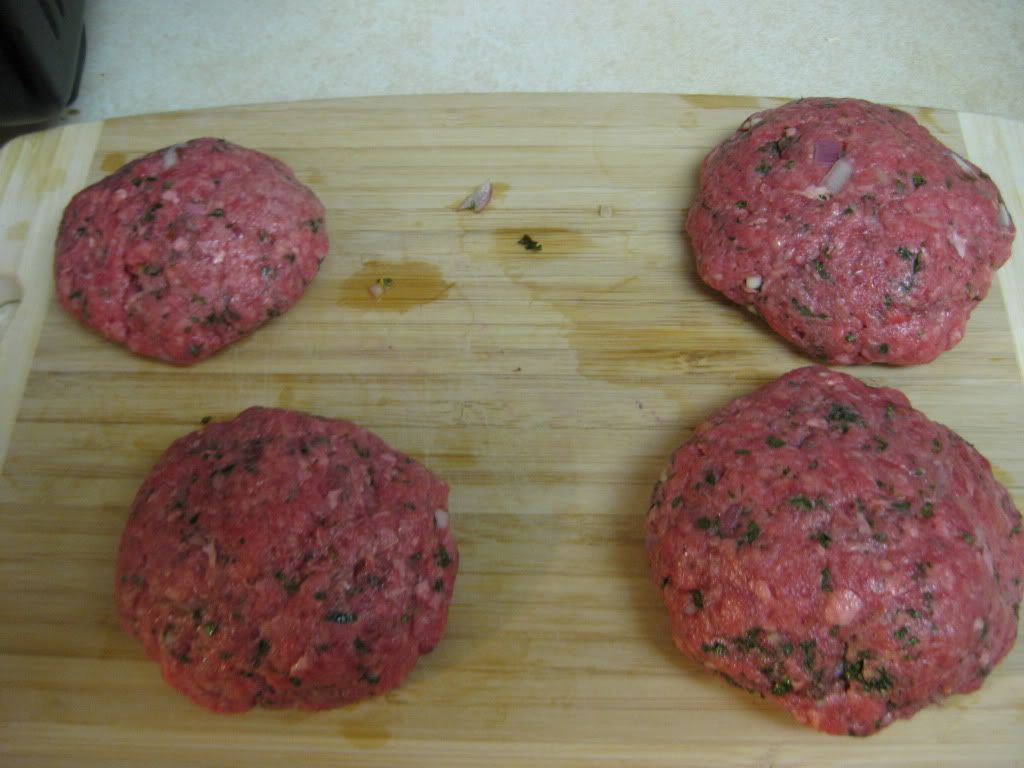
Next, gentle mix the ground beef with a 1/2 teaspoon of salt, 1/2 teaspoon of pepper, and three tablespoons of the Chimichurri sauce in a large bowl until well combined.  Form the mixture into four 3/4 inch thick patties and make a slight indentation in the top of each with your knuckles.  Making an indentation in the beef patties helps them from not swelling during the cooking process.  Don't press too hard though - a shallow center with thick edges will not make for a good burger by unevenly cooking it.

Burgers, pre-burgerized

Then, heat three teaspoons of oil in a large nonstick skillet over medium high heat until the oil is warmed through and is shimmering, not yet smoking.  Cook the onion rings until soft and golden, about six minutes.  Transfer the onion rings to a plate and tent with foil to keep warm.


After that, wipe the skillet down with paper towels (a tip: pressing the paper towels hard in the skillet might burn through the paper towel and cause an unnecessary burn.  The paper towel should soak up that excess oil without pressing too hard.)  Return the skillet to the stovetop and heat remaining two teaspoons of oil in the skillet until the oil is just smoking.  Add the meat patties until they are well browned and cooked to desired doneness, six minutes for medium rare, eight for well done.  Arrange the burgers on the hamburger buns, top with the cooked onion rings, drizzle with sauce, and enjoy!

The End Result:


This recipe was completely different than the Chimichurri steak.  While the steak marinated in Chimichurri sauce, the burger was topped with the sauce and a little bit sauce was mixed in with the meat.  Therefore, the burger had a more intense flavor.  But all the different ingredients worked so well together that it was a good kick.  The leaner meat probably also had to do with the greater flavor quotient.  The one thing that didn't work was the size of the patties.  I made them too chunky and therefore, ended up burning one side of them and cook the remaining time in the microwave.  Live and learn as a cook, right?  Hopefully, next week will be a little bit better than these last two.  But, as a chef, I'm always learning about being better and picking up new techniques.

Thanks Maggie! That's all we have for you this evening.  I'm reaching back into our new cookbook for a recipe that I'm excited to try. It's new, it should be tasty, and it's coming up on Thursday. Until then,

~Cheers!

Sunday, May 8, 2011

Around The Culinary World

Good evening everyone! Welcome back to another edition of Around The Culinary World, where, I'm pleased to say, we actually have news to share this week. While the past few weeks have been bare and boring, this last week was teeming with news and interesting articles. Let's dive right in to all the news that's fit to blog about:


If you're like us, your pantry is full of all sorts of dried goods and other spices, sauces and pastas you can fit into the cabinet. After a while, these things can tend to pile up to the point where you don't exactly remember what is in there anymore. If that's the case, maybe it's time to do a little pantry spring cleaning. Eatingwell.com has a few helpful tips on spring cleaning your pantry along with a list of the top 5 'staples' that you should be keeping on hand at all times. Check out the story HERE.


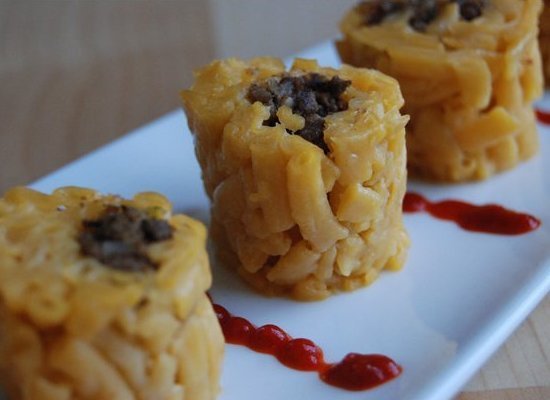
Ever since that 'wonderful' (read: awful) movie 'The Bucket List' came out, people have been making '10 things to do before you die' lists like they're going out of style. I'm not a fan of the whole 'before you die' list phenomenon. Why not call them '10 things that you might like' or '10 things you didn't expect' or '10 things that you should do because they're really cool'. The threat of death doesn't really add to the appeal for me. That being said, here's 10 things to do with macaroni before you die.


Going out to eat is always a fun excursion. You get to try new menu items, share the ambiance of a restaurant with a loved one(s) - but did you know you may be doing the whole restaurant experience the wrong way? In (yet another) 10 things list, Adam Roberts looks at the 10 things you're doing wrong when you go to a restaurant. Thankfully, you don't have to try any of these before you die! Check out the full list HERE.


We've got a lot of top 10 lists this week - here's another one. The 10 best ways to eat cheap (and it doesn't involve ramen noodles or mac and cheese three nights a week). There are some interesting tips here, a few 'obvious' notes, but most of the list has some valuable info for those looking to save a few bucks a week in groceries. Check out the full list HERE.


Are you a bad tipper? You might want to start finding a little extra 'generosity' after every meal. Some of the short changed staff are starting to get angry - and a few are turning to unusual mediums to express their anger. One particular delivery guy has started a blog just to gripe about how horrible some people tip. Read a few of the stories and you'll be shocked at how cheap (and rude) some people can be. Check it out HERE.


There you have it folks. All the news that's fit to blog about for the week. As usual, we have a full week lined up for you this week. Maggie will be cooking Tuesday night - can she make a successful comeback after last week's 'failure' recipe? I'll close up the week on Thursday night with an ambitious dish - something I've always wanted to try but have never actually tried (yes, after almost a year of blogging, there are still recipes out there that we have yet to try!) Stop back in Tuesday night to see what Maggie has cooking. Until then, 

~Cheers

Thursday, May 5, 2011

My Battle With Mushrooms

Good evening everyone! In the past, I've made no secret of the war I waged versus peas. When Maggie and I started this cooking journey, almost one year ago, the humble little pea was public enemy number one when it came to vegetables and my taste buds. Slowly, I began to work the pea into my recipes, and to my shock, I found that (when used properly) they are not horrendously awful - and (sometimes) can actually be quite delicious.

This lesson, I hope, will apply to my other not-so-favorite food group, mushrooms. I don't despise the mushroom, like I once despised the pea, but I'm no big fan either. My issue with mushrooms lies in the texture and (lack of) flavor. I don't see what they add to a recipe, therefore, I think they're sort of useless. However, I'm nothing if not optimistic - so I'm willing to give mushrooms another go. If they pan out, maybe I'll grudgingly accept them (much like the pea) if not - it's banishment from my recipes forever! Or, at least until I work up enough curiousity to use them again...

Bring it on... 


The Recipe: Steak Tips With Mushroom Onion Gravy
Original Recipe Found In: Cooking for Two: 2010 (Via the folks at America's Test Kitchen)

What You'll Need:
(Serves 2)

12 Ounces Sirloin Steak Tips (Lean) Cut Into 1 1/2 Inch Cubes
2 Teaspoons Soy Sauce
4 Teaspoons Vegetable Oil
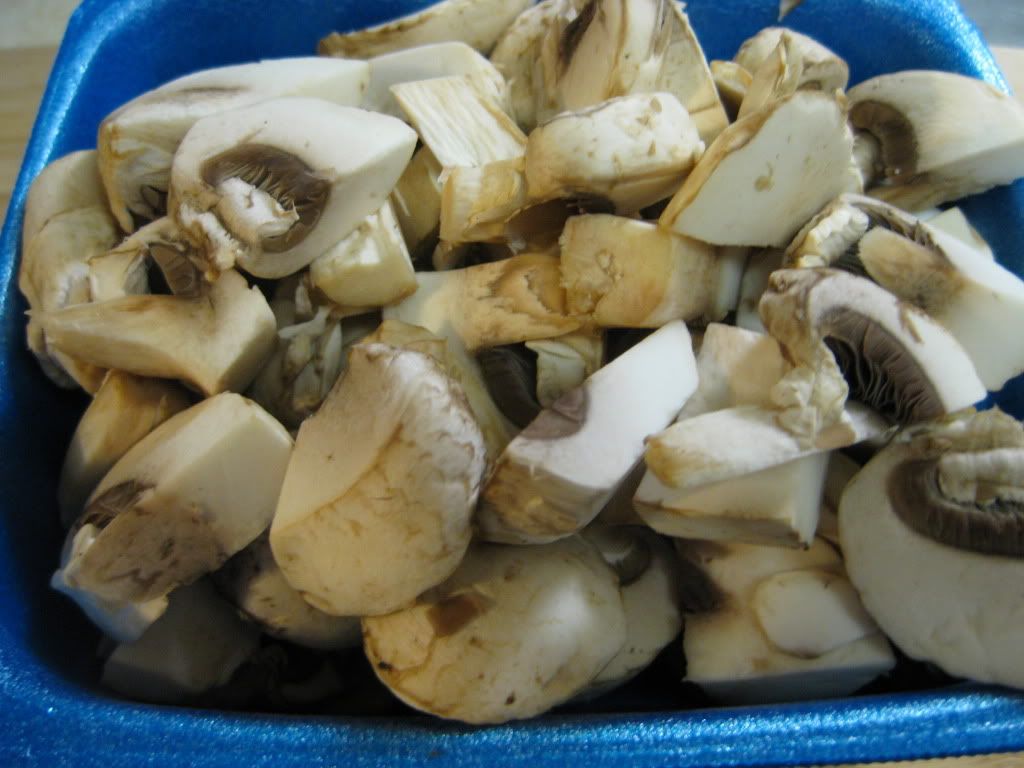
8 Ounces White Mushrooms (Trimmed and sliced thin)
1 Small Onion (Halved and sliced thin)
1/8 Ounce Dried Porcini Mushrooms (Roughly 2 tablespoons)
1 Garlic Clove (Minced)
1/4 Teaspoon Minced Thyme Leaves (Fresh) or 1 Pinch (Dried)
1 Tablespoon Unbleached All Purpose Flour
1 Cup Beef Broth
1 Tablespoon Minced Fresh Parsley (Small pinch dried)
Egg Noodles or White Rice (Quantity based on preference)


To begin, mix the soy sauce with a pinch of black pepper in a medium bowl. Add the steak tips and cover the bowl. Place in the refrigerator for 30 minutes, or up to 1 hour.

This process acts a lot like a brine. Soy sauce is fairly sodium intensive, so the salt gets to work pulverizing the molecules of the meat, breaking down the tough protein enzymes into softer, gentler enzymes. These new enzymes are much more inclined to hold on to the natural moisture of the meat, meaning your end result will be fantastically juicy.

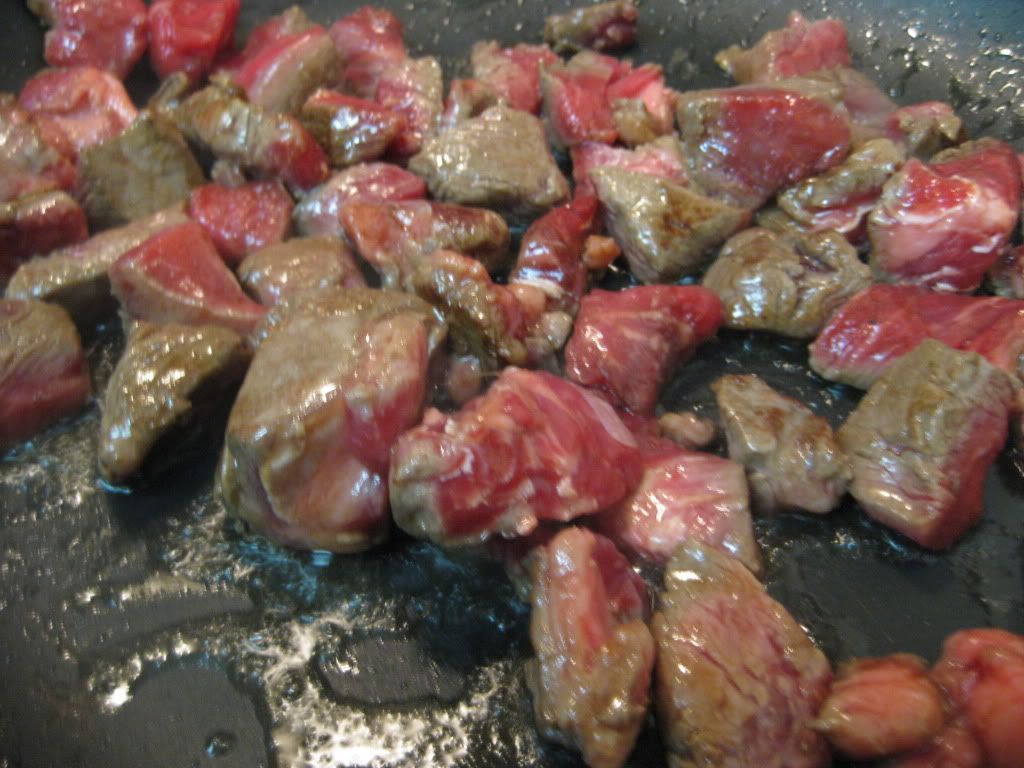
Next, add 2 teaspoons of vegetable oil to a medium skillet. Bring the oil to a shimmer over high heat. Add your steak tips and cook all sides until nicely browned. This should take about 6 to 10 minutes. Monitor your steak closely, this is a leaner cut of steak, so drying it our is easier to do (even after the soy sauce 'bath') you don't want overly dry and tough steak. I frequently check the smallest pieces to see how they're cooking up. Simply slice them with a knife to get a good indicator of how much longer you'll have to cook everything. You will be adding the beef back into the mixture for a final cooking - so they don't have to be 100% done at first. (In fact, it's better if they're not). Once the beef is browned, transfer it to a plate and cover loosely with foil. Set aside.


Add the remaining 2 teaspoons of vegetable oil to the skillet and bring to a shimmer. Add the white mushrooms, onion, porcini mushrooms and a pinch of salt to the skillet. Cover and allow the mixture to cook for 3 minutes, or until the mushrooms have softened considerably.

Next, stir the mixture, making sure to work up any browned bits left in the skillet. Return the cover to the skillet and continue cooking until the mushrooms are lightly browned and a light 'fond' (browning layer) is built up on the bottom of the skillet. This takes about 5 to 7 minutes.

Stir in the garlic and thyme and cook until fragrant - roughly 30 seconds. Next, stir in the flour until combined. Finally, add the beef broth to the skillet and stir, making sure to get up all of the browned bits on the bottom of the pan. (Remember, that's all flavor - you don't want to leave any of that behind!)

Return the beef to the skillet and bring the mixture to a simmer. Once the beef registers 130 degrees on an instant read thermometer, you are good to go. The beef is typically up to temperature in about 5 minutes, but that will vary based on how long it took you to prepare the mushrooms (the longer the beef sits, the cooler it gets - obviously.)


Serve on top of egg noodles or white rice and enjoy!


The Results:


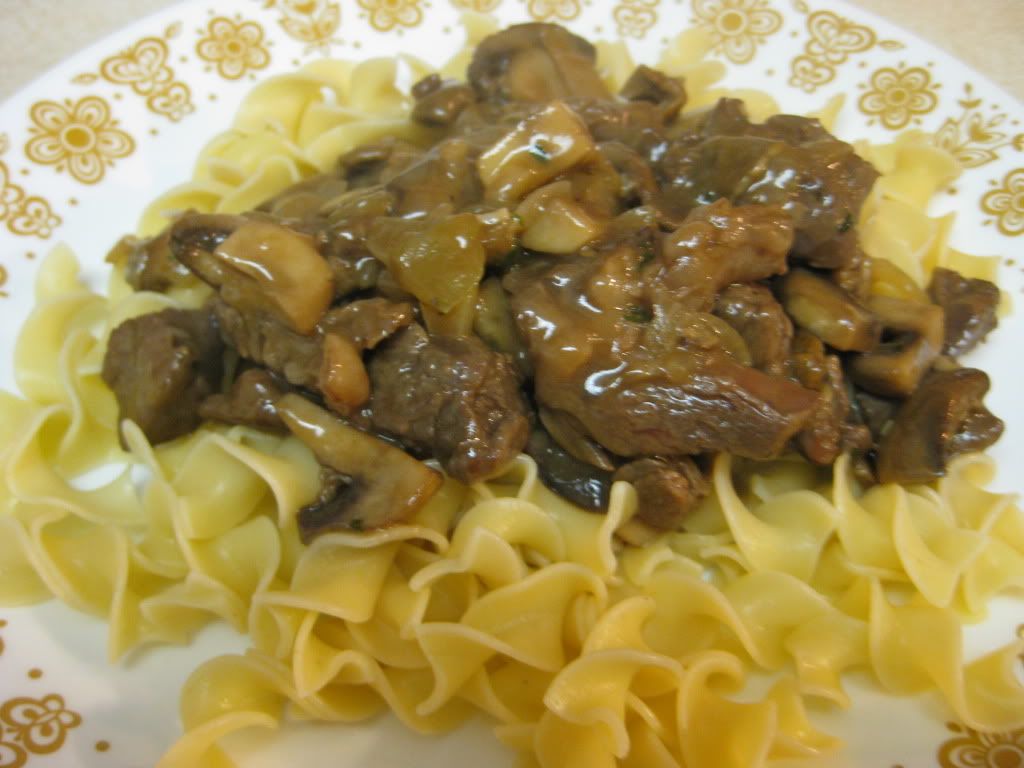
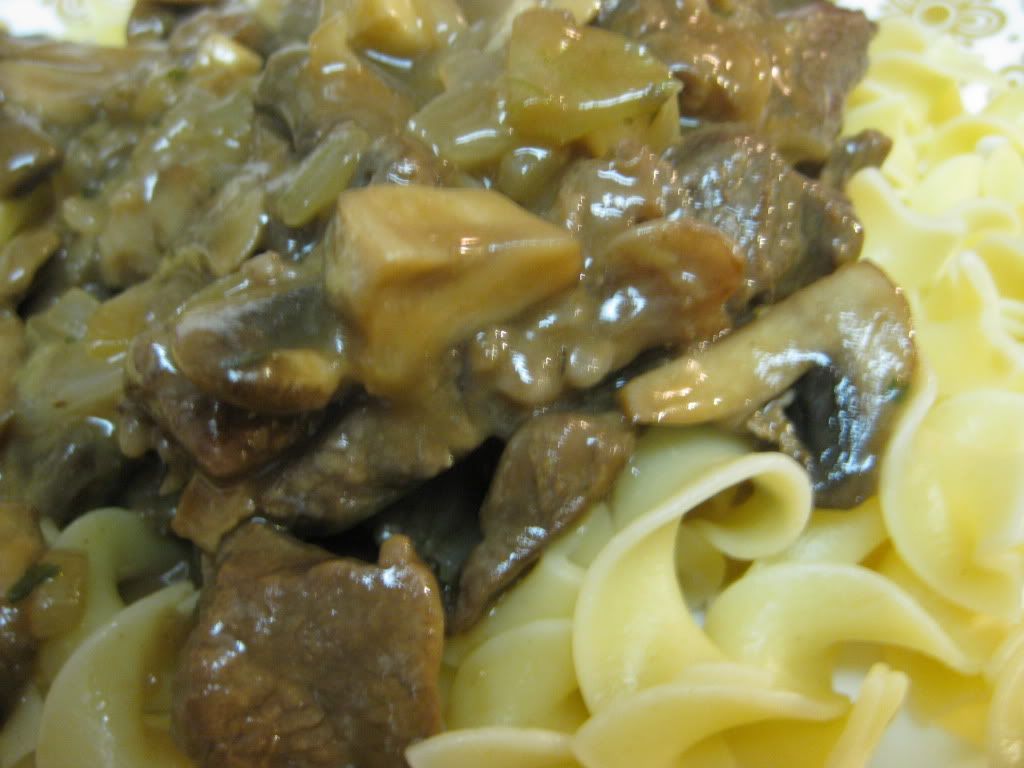
Alright mushrooms, you win this round. Once again, the folks at America's Test Kitchen deliver a recipe that is packed with simple, natural flavor. The great beef flavor really stands out in this dish. The sauce, slightly thicker than I thought it would be, has a great subtle onion hint to it - and the mushrooms actually add a subtle 'earthy' flavor that compliments the beef quite nicely.

All in all, this is a straightforward recipe that could easily be modified with new veggies and combinations (served over mashed potatoes is one option - adding carrots or peas would be a nice addition as well). This is a great dish to make for a person cooking for one - or if you are serving a whole family, simply double the ingredient amounts and enjoy the satisfied 'yums' of the entire family. Certainly worth a shot at home.


That's all we have for you this week! Thanks as always for reading our adventures in the culinary (or out of it as it were...) We're back on Monday with another 'Around The Culinary World' - be sure to stop in then and see all the news that's fit to blog about in the culinary world. Until then,

~Cheers