Thursday, March 31, 2011

Seriously Good Comfort Food

Good evening everyone!  As we round out another week and take a turn into April, spring is most definitely on the mind.  Not only looking for fresh ingredients, but something that blends two unique flavors.  Leeks, one of my favorite vegetables, is not only fresh but can be used in a lot of different ways.  When I saw this recipe, it blew my mind.  Not only the flavor combination, but how it's used is an ingenious way of doing it.  Blending two strong flavors, like bacon and leek, cooked with an bland equalizer, risotto, made for a creamy, delicious meal.

The Recipe:  Bacon and Leek Risotto
Original Recipe Found In:  Bon Appetit, April 2011

What You'll Need:
5 Cups Low-Sodium Chicken Broth
1 Tablespoon Olive Oil
6 Slices Thick Cut Bacon (cut into 1/2 inch pieces)
2 Cups Thinly Sliced Leeks (white and pale green parts only, rinsed; about 2 large leeks)
1 1/2 Cups Arborio Rice
3/4 Cup Dry White Wine
3 Tablespoons Finely Chopped Fresh Italian Parsley
1 Tablespoon Butter
2 Tablespoons Finely Grated Parmesan Cheese

Bring broth to simmer in a medium saucepan; cover to keep warm.  Heat olive oil in a heavy large saucepan over medium heat.  Add bacon and cook until crisp.  If you want to keep the calorie count lower (yes, this is a low calorie dish,) you can used turkey bacon.  I am a huge advocate of turkey bacon - tastes like the real thing, without all that grease you get from normal bacon.  Transfer bacon, using a slotted spoon, to paper towels to drain.


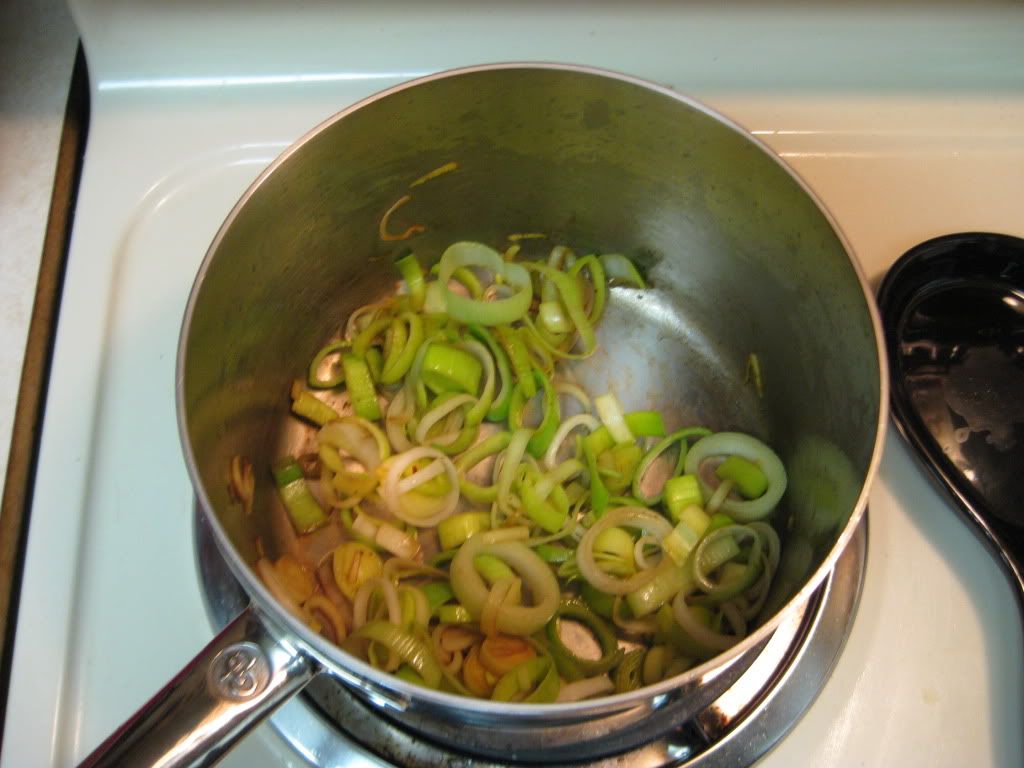
Add leeks to drippings in pan; cook until soft but not brown, stirring often, about 4 to 5 minutes.  Keep 2 tablespoons worth for garnish.  Add rice to the pan, stir for 1 to 2 minutes.  Add wine, stir until absorbed, about 2 minutes.


Lots and lots of leeks


Add 1/2 cup warm broth to saucepan, stir until broth is absorbed.  Repeat adding broth and stirring until rice is tender but still firm to bit and sauce is creamy, stirring almost consistently, about 23 minutes (yes, you read right...23 minutes!)  It could take up to 30 minutes, but remember to be patient with the rice; it will make for a beautiful result.  


Risotto pre-stirring for 23 minutes


Add bacon, chopped parsley, butter, and 2 tablespoons of cheese.  Season with salt and pepper and enjoy!

The End Result:


A smooth and creamy sauce combined with the onion-y flavor of the leeks and a strong texture of the bacon made for a wonderful and yet simple dish.  Granted the stirring consistently (and constant babysitting of the risotto) for over 20 minutes did get rather...boring.  But, like I said, if you stay with the risotto and continually watch over it, it will turn out a wonderful evening meal.  And at under 400 calories a serving, it's a must for those watching their waistline, yet want a great tasting dish.

That's all we have for you this week!  Stay tuned Monday for Around the Culinary World.  Until then,

~Cheers!

Tuesday, March 29, 2011

Have Your Pan Sauce - And Eat It Too!

Good evening everyone! One of my favorite culinary treats has to be a good pan sauce. Ever since Maggie & I started cooking and blogging almost a year ago (hard to believe) the pan sauce has been my biggest surprise. It's amazing how the browning and other pan 'remenants' can be combined with a little wine, cream or mustard and turned into something extraordinary. Pan sauce always manages to take on the flavors of the dish (since it's composed of the remnants of the main dish - this is pretty logical!) The best part, 99% of pan sauces are simple and fast to whip up. The downside? A lot of pan sauces are composed of fatty creams or other 'not too great for you' ingredients. The traditional pan sauce is a delicious, albeit unhealthy option.

The obvious problem the rears its ugly head. If you're trying to eat healthy and maintain a good diet - how can you make a pan sauce that doesn't sabotage those efforts? For the longest while I thought the answer was simple "you can't" It seemed to me like the traditional pan sauce was a thing of the past. No longer a part of our dinner staples. That was, until this past weekend, when I stumbled across a pan sauce that was not only authentic pan sauce (no substitutions or cheats) and wasn't loaded in fat. Here's how you can have your pan sauce, and eat it too!


The Recipe: Sauteed Chicken Breasts With Creamy Chive Pan Sauce
Original Recipe Found On: Eatingwell.com

What You'll Need:

2 Chicken Breasts (1/2 thickness or thinner preferred)
1/2 Teaspoon Of Kosher Salt
1/4 All Purpose Flour (Plus 1 Tablespoon - divided)
3 Teaspoons Extra Virgin Olive Oil (divided)
2 Large Shallots (Finely Chopped)
1/2 Cup Dry White Wine
14 Ounces Low Sodium Chicken Broth
1 Tablespoon Dijon Mustard
1/3 Cup Low Fat Sour Cream
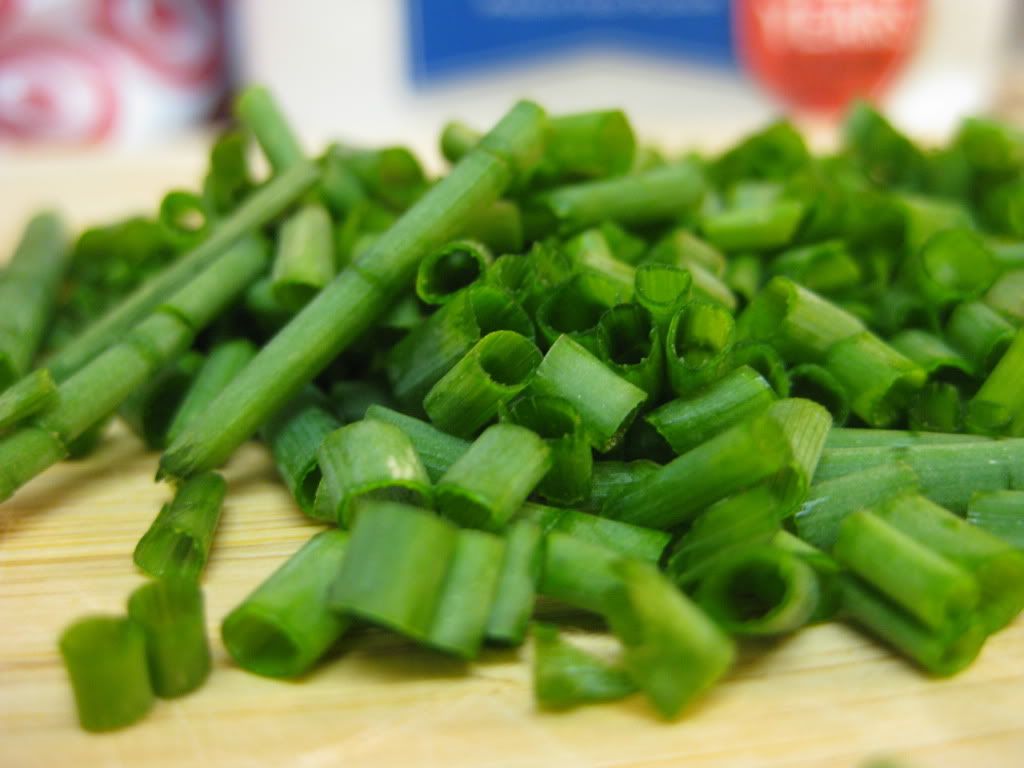
1/2 Cup Fresh Chives (Chopped)

Begin by seasoning your chicken breasts with a light rubbing of salt on both sides of each breast. Next, pour your all purpose flour on a small plate and dredge the chicken breasts through the flour until both are evenly coated. Allow any excess flour to fall off. Discard the remaining flour.


Heat 2 teaspoons of the olive oil in a large non stick skillet (medium heat) until just shimmering. Once hot, place the chicken breasts in the skillet and cook, rotating the chicken every 3 minutes, until both sides are a deep golden brown. I found that this method took about 3 rotations per breast (9 minutes all together) to reach a nice, golden brown finish. Once golden, place the chicken breasts on a plate, cover and set aside until later.


Using the same skillet (don't wipe it out!) add the remaining teaspoon of olive oil and the shallots. Cook the shallot until they are golden brown, roughly 3 to 5 minutes. Next, add the tablespoon of flour to the mixture and stir until well combined. Finally, add the chicken broth and white wine to the skillet. Use a rubber spatula to work up any cooked on browned bits on the bottom of the skillet. These little pockets of flavor really add to the sauce.

Bring the broth mixture to a low boil before adding your chicken breasts back into the skillet. The original recipe calls for the chicken to be cooked like this for 6 minutes - however, I found it took considerably longer to get the chicken up to the right temperature. My version of the recipe had the chicken nestled in the broth for about 10 to 15 minutes before the breasts finally reached the magical 165 degree mark.

This tends to happen to us whenever we get a recipe that calls for flattened or thin chicken breasts. It doesn't matter that the chicken is thin, it still takes considerably longer than the recipe calls for to bring the chicken up to the right (safe) temperature. Maybe we have a weak stove top (temperature wise) maybe the recipes are a little too short sided with their cooking times. All I know is 99 times out of 100 we've had to cook a chicken breast for well longer than the original recipe called for.

Once the chicken reaches the 'golden' temperature, stir in your sour cream, dijon mustard and chives. Mix until smooth. Serve the chicken with the pan sauce and a side of mashed potatoes or green beans (both if you're ambitious!) Enjoy!


The Results:


You simply cannot beat a good pan sauce. Natural flavors of the chicken, plus a nice creamy boost from the sour cream, dijon, wine combination. Fantastic dish! The best part? This bad boy clocks in at a measly 240 calories! A thick, creamy pan sauce that's full of flavor and low on calories? That's a winning combination right there. This simple dish is a great 'try this one' at home recipe.


That's all we have for you tonight. Maggie is taking to the kitchen on Thursday with a new and interesting dish. Until then,

~Cheers

Monday, March 28, 2011

Around The Culinary World

Good evening everyone! Welcome to another Monday and another edition of Around The Culinary World. As usual, we've carefully combed through the series of tubes that is the world wide web and have come out with the most interesting culinary stories of the week. They may not be the most scientifically important, heck some of them may not even be 'need to know' information. They all are (in our opinion anyway) entertaining, however, and worth a read if you're looking to fill your Monday evening internet browsing time. So, without further ado - here are this week's 'best of the best' stories:


If you're like me, you're not really a fan of deviled eggs. I don't know what it is about this culinary concoction - but I"m just not a fan of it no matter how it's done. Luckily, Maggie hates the little eggs as well, meaning we don't really ever have to encounter the food unless we're at a family gathering or pot-luck of some kind. After seeing this article, I'm thinking we may have to change our perspective on deviled eggs. Maybe ALL deviled eggs are bad...maybe some of them would even be quite tasty. Check out the creative minds behind these creative (and world's best?) deviled eggs HERE.


The FDA and food companies have fought for the longest time over accuracy on labels and advertisements. Companies want to make great claims that their product can do everything from helping you lose weight to boosting your energy to growing your hair. The FDA wants companies to...well...be honest about what their product can REALLY do.  Even with all the regulation, fact checking and other checks and balances out there, marketers and companies still find ways to depict their products in a 'less than accurate light'. One such product may be natural herbal tea. While on the surface, you wouldn't think that herbal tea would have a lot of room to lie - after all the ingredients are essentially labeling in the name, it turns out that the phrase 'natural' may all be in perspective. Check out THIS interesting story about one reporter's inquiry into the 'natural flavors' of herbal tea, and see the surprising response she received.


Last week, we linked you to a story from the Daily Meal listing the 50 greatest inventions in the history of food. It was an interesting story highlighting the greatest culinary achievements in food, cooking and preservation known to man. This week, the Daily Meal has a follow up of sorts to that story. 10 Food and Drink Inventions We Don't Need. It's a great 'counterpoint' to last week's story and well worth a browse for those people who love kitchen gadgets. Do you have anything that makes this list? Maggie and I are guilty of three items. Check out the story HERE.


Do you like wine but hate how much a good bottle costs? I know Maggie and I become frustrated from time to time regarding the high prices on some of the best wine bottles. It seems like if you want something that doesn't taste like spiked grape juice, you have to spend a decent amount of cash. Well, maybe that's not so true anymore. In a feature accurately labeled as 'The Cheap Drunk' a collection of great wines has been made - the best part? All of the wines are under $10 in price. Check out the budget friendly (and tasty) wines HERE.


Finally this week, we have a unique product to highlight. This bottle:


Was found at World Market in West Des Moines. It has such an interesting concept that Maggie and I couldn't resist picking one up and giving it a try. The premise is simple, it's carbonated, flavored water that doesn't actually become carbonated until you pop a little ball into the neck of the bottle. Once the ball hits the water, it reacts adding carbonation to the bottle. Check it out:


(Yes, sadly, the video is sideways, my camera isn't smart enough to auto rotate and it won't allow the editing programs we have to make the changes either.) That's all we have for you for this week's Around The Culinary World. We're cooking two nights this week, I've got Tuesday and Maggie will be taking Thursday. That schedule may be changing (again) soon. My work schedule went through a very unfortunate change and is currently...well... that's a whole separate issue I won't get into on the blog. Anyway, stop back in Tuesday night to see what I've got cooking. Until then,

~Cheers

Thursday, March 24, 2011

"Tastes Kinda Like a Chili Dog"

Good evening everyone!  The work week has finally descended on Thursday and my turn to take over the kitchen.  As I was perusing the various recipes I have dog eared in magazines and I came across this little number.  We first tabbled into chorizo last summer and it was pretty darn tasty in a soup.  Finding the "exotic food" was a breeze.  Fast forward to this week and something must have changed in the chorizo stocking options.  We went to four different stores within the Des Moines metro all but one had chorizo...and technically it wasn't really authentic.  


Hindsight, we should have just stopped at an Hispanic store to grab some, but trying to locate chorizo should have been easier than we thought.  We ended up locating a soy chorizo at Trader Joe's.  By the looks of it, I didn't know if it was going to be chopped in slices.  But would the whole "no meat" factor prove to be fatal to our recipe?


The Recipe:  Melted Cheese and Chorizo with Grilled Bread
Original Recipe Found In:  Bon Appetit, March 2011

What You'll Need:
2 1/2 Tablespoons Grapeseed Oil, or other Neutral Oil
2 Cups Chopped White Onions
1 Cup (packed) Thinly Sliced Leeks (about two small; white and pale green parts only)
1/2 Cup Dry White Wine
8 Ounces Smoked Spanish Chorizo (cut into 1/16 inch rounds)
3 Cups Coarsely Grated Petit Basque Cheese or Gruyere Cheese
Grilled Sourdough Bread Slices

Begin by heating 1 1/2 tablespoons of oil in a large skillet over a medium high heat.  Add onions; saute until deep golden brown, stirring often and adjusting heat as needing to prevent burning, 25-30 minutes.  Sprinkle with salt and pepper.  


Meanwhile, heat remaining 1 tablespoon oil in medium skillet over medium heat.  Add leaks; saute for 3-4 minutes.  Add 3/4 cup water; cover and cook until leeks are tender, stirring often and adding more water by tablespoonsful to moisten as needed, 10 to 15 minutes.  Add wine; cook uncovered until leeks are very soft, about five minutes longer.  Sprinkle with salt and pepper.  Combine onions and leeks in a small bowl.


Preheat oven to 450 degrees.  Pour onion-leek mixture in a large gratin dish.  Top mixture with chorizo slices and then cheese.  Bake until cheese melts and bubbles, about 15 minutes, serve with grilled bread, and enjoy!

The End Result:


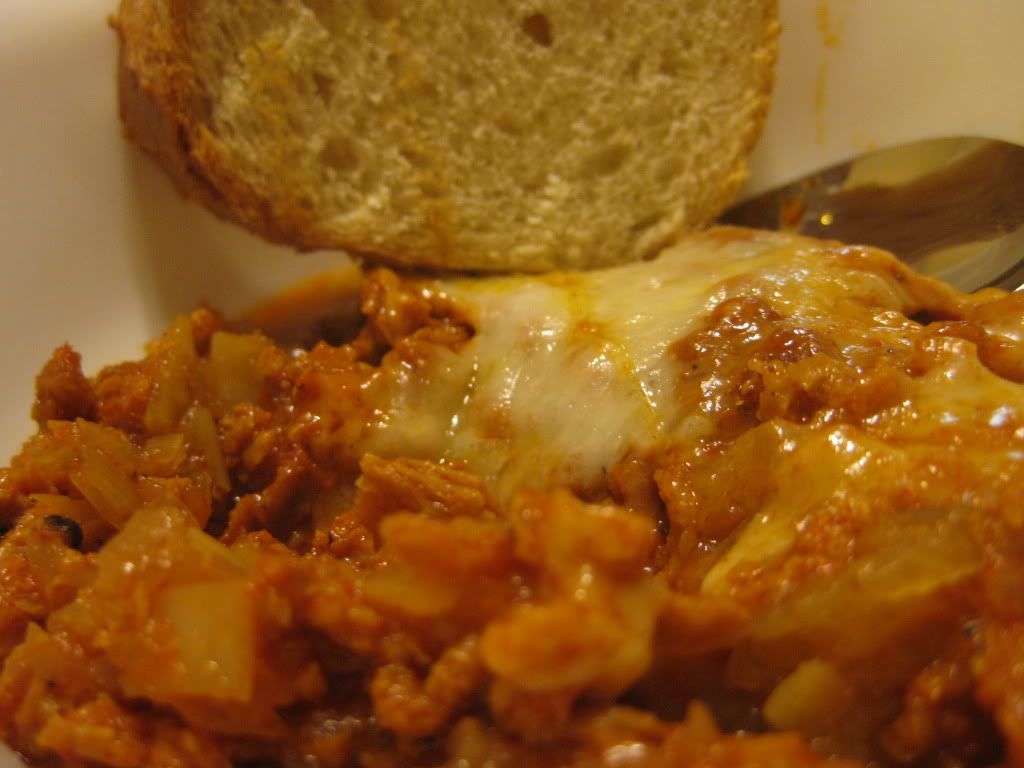
I will admit, I was VERY nervous about this dish.  Not that it wouldn't turn out good, but if it would work.  Typically, chorizo is shaped like sausage, but the fact that it came out kinda looking like sloppy joes deterred me a little.  Also, having soy chorizo would run the risk of it not taking like regular chorizo. But, to my surprise, the flavors went really well together and it didn't taste too bad.  The chorizo was very, very spicy and we both only had a small bowl full.  If it wasn't for the bread, our mouths would still be on fire. In the end, the final flavor was very similar to a chili dog - it's funny how the cheese and chorizo blended to make a all around flavor similar to an american classic. If you can handle the heat - it's a good dish. 


That's all we have for you this week. Thanks for stopping by and following along at home. We're back on Monday with another 'Around The Culinary World' Until then,

~Cheers

Wednesday, March 23, 2011

Guilty Pleasures - Made Healthy

Good evening everyone! We certainly had the first 'active' weather night of the spring last evening didn't we? If you live anywhere near the greater Des Moines metro area, you saw everything from torrential downpours to hail, damaging winds and even a few tornadoes. Spring is here - that's for sure! We managed to avoid the nastiest part of the storm and only got an inch of rain or so. Maggie and I even managed to get a mile walk in before the storm hit!

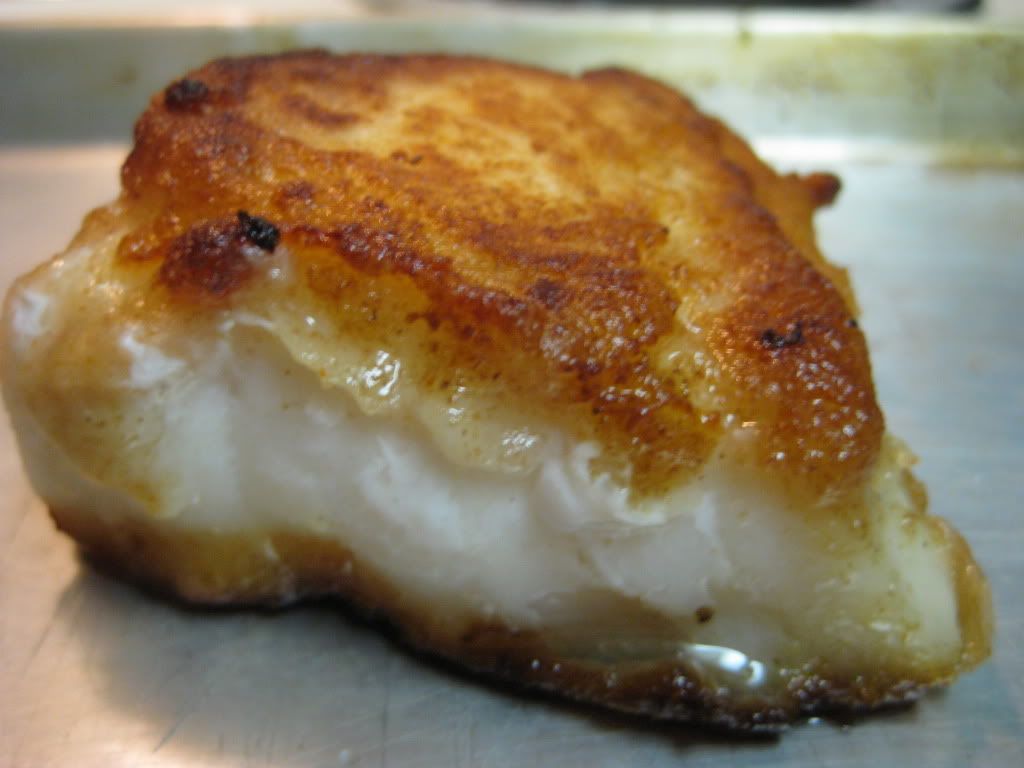
Tonight, we return to the kitchen with a brand new recipe which happens to be based on one of my favorite 'guilty pleasure' foods of all time. Battered, deep fried fish has to be one of my favorite dishes. Thick, rich dough covering a nice cod, halibut, walleye, talapia or whatever white fish you can think of fillet, dunked in bubbling hot cooking oil until it's golden brown and tender. While the flavor is astounding - healthy doesn't really describe this dish. So, the obvious challenge was to create a beer battered fried fish without sacrificing the healthy qualities we're striving to achieve in every dish.

Can you create that fried fish flavor without the fried fish calories? It turns out, you can come really really close. Here's how: 


The Recipe: Beer Battered Tilapia
Original Recipe Found On: Eatingwell.com


What You'll Need:

2-4 X Tilapia Fillets
3 Tablespoons Whole Wheat Flour
2 Tablespoons All Purpose Flour
1/4 Teaspoon Ground Cumin
1/4 Teaspoon Salt
1/8 Teaspoon Cayenne Pepper
1/2 Cup Beer*
4 Teaspoons Canola Oil (Divided Into 2 Teaspoon Sections)

-The batter creates enough to bread 4 fillets (If you're only cooking two fillets you will only need 2 teaspoons of canola oil)

*You're looking for a lager or pilsner for the beer in this section. The idea is to add moisture and flavor to the dish without weighing down the batter or overpowering the dish with an alcohol flavor. Skip the Guinness and other stouts and opt for something like Heineken - it's a light lager that will pack a lot of flavor without over burdening the batter. (Plus, you can drink the extra while you cook! Win-win!)

This dish originally calls for tilapia, which is ideal because it is a thin, flat cut of fish that tastes great with a breading. I had originally planned to use talapia in our version of the dish, only to find that my inventory of tilapia was not as full as I had originally thought. I opened our freezer last night to find we only had one tilapia fillet left. Needless to say, cooking one talapia fillet for two people really isn't much of an option. So, I had to improvise. Luckily, we had two cod fillets left in the freezer. Since cod and talapia are both white fish fillets, they can be substituted without much worry about flavors clashing. The only downside is that cod is much thicker and oddly shaped than talapia, which makes breaded the fillet (and cooking the breading evenly) much more of a challenge. Since I didn't pay close enough attention to our inventory - it's a challenge I'll have to take on. However, I'd strongly recommend using thin cut talapia fillets for this recipe, as it will greatly lower the cooking challenge.


Begin by combining the whole wheat flour, all purpose flour, cumin, cayenne, salt and beer in a medium bowl. Whisk together until all the lumps have been removed to create the batter. Be aware, the batter is going to react strangely at first, as all of the carbonation in the beer bubble up and reacts violently to the mixture. Just keep whisking and within 20 seconds or so, the batter will start to take shape.


The first method in creating a healthy batter that isn't full of high fat dough (or deep fried) is substituting some of the all purpose flour for whole wheat flour. The whole wheat flour changes the batter's flavor profile slightly, adding a more 'grain/wheat' flavor to the dough - similar to the flavor that is achieved by deep frying regular batter. This simple substitution allows for the flavor to stay - but a bad cooking method (deep frying) to be removed.

Next, cover your talapia pieces in the batter. Now, although the original recipe doesn't really specify how to create a great, even batter - they simply assume that telling someone to 'dip the fillet in batter' will result in a evenly coated delight that cooks with ease. Not so fast. I've been down this breading road many times before (especially with fish) and I'll be the first to tell you that you need to make certain steps first or else you'll be cursing out the frying pan and eating poorly breaded fish fillets for dinner.

First, make sure the talapia fillets are completely dry. Use a paper towel (or two) and soak up all the moisture you can before you even think about breading the fillets. Moisture creates a barrier between the fillet and the breading, meaning that once the heat comes into the equation, the breading wont seal to the fillet - rather it simply lets go and falls into the pan.

Secondly, don't just 'dip' the fillets in the batter. Take a few extra moments and carefully dredge the fillet through the batter (both sides) making sure to work the batter in the cracks and crevices on the fillet. Once properly dredged through the batter, allow the fillet to drip off excess batter and (ideally) put the breaded fillet directly into a prepared skillet.

Speaking of a prepared skillet - you can prepare your own skillet by adding 2 teaspoons of canola oil to a large, non stick skillet and bringing it to a shimmering point on medium high heat.

Some breading recipes will tell you to bring the canola oil to a light smoke. I tend to shy away from this due to the nature of canola oil. Canola oil has a very high smoke point, which is why it's ideal for browning / frying fish. It can become very hot without smoking the fish out of the pan. Ideally to create a nice browned fillet, you would want your oil slightly smoking (as that indicates it is at its highest heat). I've found (through trial and error) than bringing canola oil to a smoke point just makes the cooking a little too fast for my liking. The oil is too hot and it forces you to cook at a faster pace than necessary in order to prevent the fillet from burning. Instead, I've found that bringing the canola oil to a shimmering point and simply adding a minute or two to the cook time has resulted in a more evenly cooked, less stressful fillet 99% of the time.

Once your oil is shimmering, add the fillets to the skillet (two at a time) and cook 4 minutes per side or until the breading is crispy and golden. If you're cooking more than two fillets, transfer the finished fillets to a plate loosely tented with aluminum foil and set aside. Add another 2 teaspoons of canola oil to the skillet, heat until shimmering and repeat the process. If you're only cooking two fillets - congratulations! You're done! Serve with tartar sauce (or 'naked' as it has a great flavor on its own) and enjoy!


The Results:


Sometimes the healthy version of a classically 'unhealthy' recipe is hard to create. The flavors don't quite match up or the dish just fails to compare to the fat laden original dish. Thankfully, tonight's dish earns a 'very close' rating when compared to the original dish. While you're never going to be able to recreate a breading that tastes 100% like deep fried batter without...well...deep frying, this batter comes very close to the original. It has a great 'beer batter' flavor without all the calories. Clocking in at 230 calories per fillet - this healthy dish is a great addition to any family's evening menu!

That's all we have for you this evening. Maggie takes to the kitchen with a very unique dish tomorrow night. Be sure to stop back in tomorrow evening to see what she has cooking. Until then,

~Cheers
Tuesday, March 22, 2011

Recipe Flashback: The Sunset Burger

Good evening everyone! As we stated on Monday, we're shifting our blogging schedule for the summer months. As such, we will be revisiting a few of our classics during this time (one, they're fast for us to make since we've made them before and two, we love them so much we want to try them again and again). However, it's pretty boring to simply revisit a recipe that works and repeat it all over again. So, in it's place we'll be doing 'flashbacks' featuring a favorite recipe from the past. 

I'm in the kitchen tomorrow night with a brand new recipe, and Maggie has a new dish planned for Thursday - so be sure to stop in tomorrow night to see what I've got cooking. Until then - feel free to revisit the 'Sunset Burger' recipe from June of last year! 

Recipe Flashback: Sunset Burger

There is a lakeside restaurant in Clear Lake Iowa by the name of PM Park. My family and I have been there on many occasions, and greatly enjoy their entire menu. There is one item, however, that stands out above the rest - the sunset burger.

The sunset burger is one of those rare finds in the restaurant world. It is the perfect burger. The combination of ingredients simply blend together to make one mouthwatering morsel. What's the best part about the sunset burger? It's easily replaceable.

This week, I found myself craving a sunset burger once again. However, living in the Des Moines metro - it's not exactly feasible to jump in the car for 2+ hours and travel up to Clear Lake - so the "do it yourself" option was really the only choice.

I then got to thinking - I have a fantastic recipe for a burger (the cracking burger) and a great recipe for a homemade Barbecue sauce - I could do one better than the standard sunset burger, I could make a BETTER sunset burger! And that, ladies and gentlemen is how we arrived at tonight's recipe.

The Recipe: A BETTER Sunset Burger
Original Recipe From: 3 Places; PM Park in Clear Lake Iowa, The Cracking Burger recipe from Jamie's Food Revolution: Rediscover How to Cook Simple, Delicious, Affordable Meals and Mom's Homemade BBQ Sauce

What You'll Need:

Cracking Burger: 

12 X Unsalted Saltines
1 Lb Ground Beef (85/15 or 90/10)
2 Tbsp. Dijon Mustard
1 Egg
Parsley

Sunset Burger: 

Choice of cheese (we went with swiss)
Bacon
Burger patty (if not using the cracking burger recipe)

Mom's Homemade BBQ Sauce* 

2 X Cups Store Brand Ketchup (go as cheap as you can here)
1 1/2 Cups Brown Sugar
1/2 Cup Chopped Onion OR 1 tsp. Minced Onion
1 1/2 Tsp. Liquid Smoke
1/2 Tsp. Garlic Powder OR Garlic Salt

* Full disclosure here. I used to think this BBQ sauce recipe was of my mom's own creation. I had this illusion in my mind that this recipe was the result of hours of dedication, taste testing and trial and error. I thought that this recipe came about due to hard work, blood-sweat-tears, the whole nine yards. Much to my surprise, when I asked for this recipe from my mom - she simply grabbed a cookbook and copied the recipe down. So - maybe calling it "Mom's Homemade BBQ Sauce" is a bit of a misnomer - However, I'm still going to call it that because it gives off that 'folksy' feeling. "BBQ Sauce That Mom Copied Out Of A Cookbook" just doesn't have that same ring to it.

Begin by mixing up your ingredients for the cracking burger. We've been over this process a few times in the past - so I'll give you the quick overview. (If you want more detail on how to make a cracking burger - check out our first encounter with it right HERE) Smash up your crackers into a fine powder, add the meat, mustard, parsley and egg and mix the whole lot up with your hands. Once mixed, break the meat up into four smaller balls and pat those down into burger shaped patties. Set aside until ready to grill.

4 Delicious little patties 

Place your bacon on a frying pan (use as much or as little bacon as you like - it's your burger after all.) Meanwhile, add the ketchup, brown sugar, onion flakes, garlic salt and liquid smoke into a medium sized sauce pan. Mix everything well and then bring it to a boil.

+
+
+
+
=
All of that makes a delicious BBQ sauce...who knew? 

Side note: Don't take a big whiff of the liquid smoke. It is strong...VERY strong and will cause you to nearly cough up a lung. If you don't believe me - simply ask Maggie. She learned this lesson the hard way. Her lung has been replaced, and she is recovering nicely.

While the bacon and BBQ sauce are cooking - throw your burgers onto the grill / into the grill pan / onto the George Foreman grill (whatever cooking method you prefer) to begin cooking. By the time your burgers are done - your bacon and BBQ should be done as well. All that is left is to top with slice of cheese of your choice (tonight we went with swiss) add the bacon and drizzle on some of the fantastic BBQ sauce and - ta da - you've just created the perfect burger.


The Results:


And, that's it folks. Tonight's recipe was very easy, very quick and (most importantly) VERY delicious. I can now say, without a doubt, that I have created the world's greatest burger. (OK - created is a stretch I took a great burger recipe, added a great BBQ sauce recipe and based the whole thing off of ANOTHER great burger recipe - I'll settle for 50% creation credit.) If you followed along at home, you too have created the world's greatest burger.

The flavors of this burger are simply outstanding. I've already ranted and raved about the amazing, juicy, tender, flavorful qualities of the cracking burger - and this recipe is simply a cracking burger combined with a sweet, tangy BBQ sauce and topped with bacon (which makes any dish better.) It's delicious and most importantly - it's simple. Go out and try you for yourself. You won't regret it.

~Cheers

Monday, March 21, 2011

Around The Culinary World

Good evening everyone! Spring has officially sprung in the central Iowa region. We experienced a weekend of 70 degree weather, sunny skies (a slight rainstorm - and a full blown thunderstorm in the early morning hours of Sunday) our trees are budding, the grass is getting greener - it's all starting to feel like spring!

With the shift into a new season, Maggie and I have been making a lifestyle shift - we've started a weeknight ritual of taking a 1 1/2 mile walk around the neighborhood. This extra bit of activity is really helping our health, making us feel more refreshed and cutting into blogging time. As such, we're making a few scheduling tweaks to the blog during the spring & summer months. We're going to be stepping back the recipes to two a week. We're still cooking 3 nights a week, however, we have such a large backlog of recipes that we want to try again that we decided we're going to be making one of those during each week. Rather than re-posting a recipe we've already shared, we'll just skip that night of the blog.

So, the long and short of it is as follows: Monday will still be home to Around The Culinary World, Tuesday - Thursday will see two new recipes between the three days with the odd day out being either a 'recipe revisit' (refreshing the dish we're trying that night) or another interesting post - (I.E. to be determined) We plan to continue this until the weather turns sour and doesn't allow us to walk in the evenings anymore.

Now that the logistics are out of the way - let's get into this week's news!


Slash Food has composed a list of America's fastest growing restaurants. There are a few things that I found pretty interesting about the list. #1, the top of the list is composed of restaurants that are a little 'unique' from the standard fare we usually see atop the best grossing restaurant lists. Original burritos, a new twist on subs, even a refresh on the standard burger and fry affair. The tastes of America are shifting to new and unique - and that's never a bad thing. #2, the top of the list (outside of number one) is healthier (not healthy per say - but healthier) than the usual fast food. You could do a lot worse than fresh chicken and rice in a burrito. Check out the full list HERE.


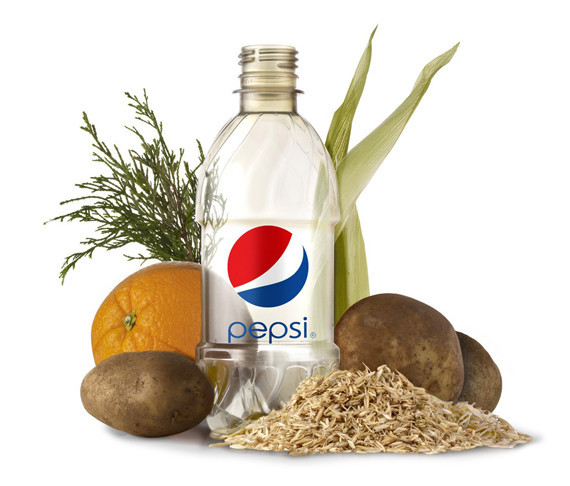
I'm always in favor of making things either self sustaining or at least environmentally friendly. I know there are some out there who find the green movement to be worthless or feel that the whole environmentally conscious mindset is a waste of time - and they're entitled to that opinion. I happen to believe that environmental awareness and care is a good thing. That's why stories like THIS, make me happy. Pepsi has created a 'green' pop bottle. Made entirely of plastics created with plants (such as pine bark and corn husks) the bottle works (and feels) just like a normal plastic bottle. The upside? Well, the bottle is recyclable just like a normal PET bottle, but it doesn't contain the harmful chemicals that PET does and it's completely sustainable. It is not biodegradable or compostable (yet) but the common thought is these achievements are coming soon. Nicely done Pepsi scientists!


Stories like the Daily Meals' "50 Most Important Inventions In Food & Drink" are always fun to read. I don't have a whole lot more to add to this story - I simply found it very interesting. There are a few things on the list that you take for granted, things that seem insignificant until you really step back and try to imagine cooking, food or wine without THAT item. It's an interesting story, well worth a read through if you've got a few moments to spare. Check it out HERE.


If criminals put as much thought into doing something good (and legitimate) as they did into ways to hide from the law, we'd all be so much better off. Check out what some enterprising criminals did with an ice cream truck. It's hard to believe people's minds can think that way - but I guess there are all kinds of people in the world - for better or worse! See the story HERE.


Sometimes, things are just funny. They don't add to the knowledge of the food public - they don't spark debate, they don't even advance mankind in any way, shape or form...they're just funny. This exchange at an office somewhere in the US falls into the last category (Disclaimer: we at Out Of The Culinary do not approve of food stealing - bring your own lunches people!)


Can we top a lean pocket ransom note? Nope, I don't think so. That's all we have for this week's edition of Around The Culinary World - We're cooking up some cracking burgers tomorrow night - so there wont' be a new blog post (after all, we've shared how many cracking burger recipes now? I don't think you need to see it again!) I'll start off the new recipes on Wednesday and Thursday will find Maggie in her usual 'close out the week' spot. Until then,

~Cheers
Thursday, March 17, 2011

Almost Too Good To Be True!

Happy St. Paddy's day - top of the evening, to ya (sorry, I couldn't resist.)  As part of our new mission to eat healthier and begin a new active lifestyle, I've been trying really hard to find recipes that use everyday products and use them in a new way to make them extraordinary.  With chicken, it's really not that tough.  Granted the possibilities are endless to make this kitchen staple into something wonderful.  Also, not to "dress it up" with heavy sauces, oodles of cheese, or a good deep fry in oil is a difficult task - people define that as "delicious" but I wanted to show that simple could be delicious, tonight, I wanted to take any preconceived notions of 'if it's simple, it's bland' and throw it out the window.  But would it work?

The Recipe:  Chicken in White Wine Sauce
Original Recipe Found In:  Taste of Home, Recipe Card Collection

What You'll Need
2 Tablespoons All-Purpose Flour
1/4 Teaspoon Salt
1/4 Teaspoon Paprika
1/4 Teaspoon Pepper
4 Boneless, Skinless Chicken Breast Halves
1 Teaspoon Olive Oil
1/2 Reduced Sodium Chicken Broth
1/2 Cup White Wine or Additional Chicken Broth
4 Teaspoons Grated Parmesan Cheese

Start by combining the flour, salt, paprika, and pepper in a large resealable plastic bag.  Add the chicken, one piece at a time, and shake to coat. This is a lot like shake-and-bake, the classic 'jazz up chicken' creation. However, unlike shake-and-bake, our breading is not loaded with sodium and other artificial flavors (i.e. junk) to ruin the natural flavors and nutrition of the chicken. This isn't a knock on shake-and-bake, more like a 'positive for doing it yourself'! 


Next, in a large ovenproof skillet (or Dutch oven) coated with cooking spray, brown the chicken in olive oil for two minutes on each side. Once browned, add the broth and wine; bring to a boil.  Remove from heat.


Cover and bake at 350 degrees for 20-25 minutes or until a meat thermometer reads 170 degrees.  Sprinkle with cheese and enjoy!

The End Result:


The chicken was incredibly juicy due to it's nice little bath of chicken broth and wine.  The flour/salt/pepper/paprika gave it a nice coating, but not too heavy or thick of a crust.  I topped mine with the parmesan cheese and it gave a whole different, but great, flavor to the dish.  Tyler had his sans cheese and said it was still good.  You could jazz the chicken up with some oregano or basil and it would be great too.  A wonderful little dish that was incredibly easy prep, cook, and at 145 calories a half breast, great for the waistline too.  Hope everyone is enjoying their St. Patrick's Day!!

Tonight's dish was the definition of simple. There is a reason that Maggie's description is only a few sentences long - it's that easy of a recipe! On top of that, it had an amazing flavor that was simply (almost) too good to be true. A dish this simple with this much flavor? Believe it - it was great. Well done Maggie!


That's all we have for you this week. We're back again on Monday with another Around The Culinary World. This week is shaping up to be a busy one, we've already compiled a few stories and there are a few more culinary tales I've bookmarked in today's news cycle. Stop back on Monday to check up on the culinary news - until then, enjoy what should be a beautiful weekend!


~Cheers

Tuesday, March 15, 2011

En Garde!

Good evening everyone! Today was another beautiful day in central Iowa. The weather isn't quite 'warm' but it is substantially warmer than it has been for the past few months - so it's nice to get out and enjoy it. Over the past two days, Maggie and I have gone for long (1 mile plus) walks in the evening to take in the beautiful weather and springtime changes. Our trees have buds on them, meaning leaves are only a few weeks away. It's the season of new beginnings - and we're loving it!

Speaking of new beginnings, we're trying something 100% new on tonight's blog. Swordfish. I mentioned last week that our local Hy-Vee had just started stocking more exotic cuts of fish. Flounder, swordfish and many others. Swordfish is one of the few 'large scale' (mass produced/fished) products that I have yet to try. With our (re)focus on healthier eating, fish is playing a big part on the menu. New fish = new ways to explore a healthy menu. A few searches for recipes online and I had the foundation for tonight's dinner. I didn't want to bread the swordfish (yet) because I want to gain an idea for what the fish tastes like. At the same time, I didn't want to eat the fish without any flavoring help - as (outside of halibut) most fish could use a little flavor help.

For those wondering, "isn't swordfish endangered due to overfishing?" the short answer is - not anymore. Certain regions of swordfish populations, such as the North American swordfish, were over fished to the point of near extinction in the late 1980's and early 1990's. However, a focus on rebuilding the population has brought their numbers back. Most commercially sold swordfish actually comes from the pacific islands regions. The population there has always been strong - making swordfish a sustainable food item when it is caught in these regions.

When you're shopping for a swordfish fillet, look for a rosy red or pinkish fillet. Avoid brown or overly 'dull' colored fillets, as those are older. Some fillets will differ in shade, based on their region, but that is not a true indicator of quality. The fillets should be approximately 1 inch to 3/4 of an inch thick, and feel very firm and 'steak like'.

Now that you know how to buy a swordfish fillet - here's how to cook up your own delicious dish!

The Recipe: Swordfish With Citrus Pesto
Original Recipe Found In: Foodnetwork.com


What You'll Need: 

2 Swordfish Fillets (3/4 to 1 inch thick)
Zest From 1/2 Lemon
Juice From 1/2 Lemon
Zest From 1/2 Orange
Juice From 1/2 Orange
1/4 Cup Pine Nuts
1 Clove Garlic
1/2 Cup Parmesan Cheese
1/4 Teaspoon Salt
1 1/2 Cups Fresh Basil
1/4 Cup Extra Virgin Olive Oil

(Serves 2)

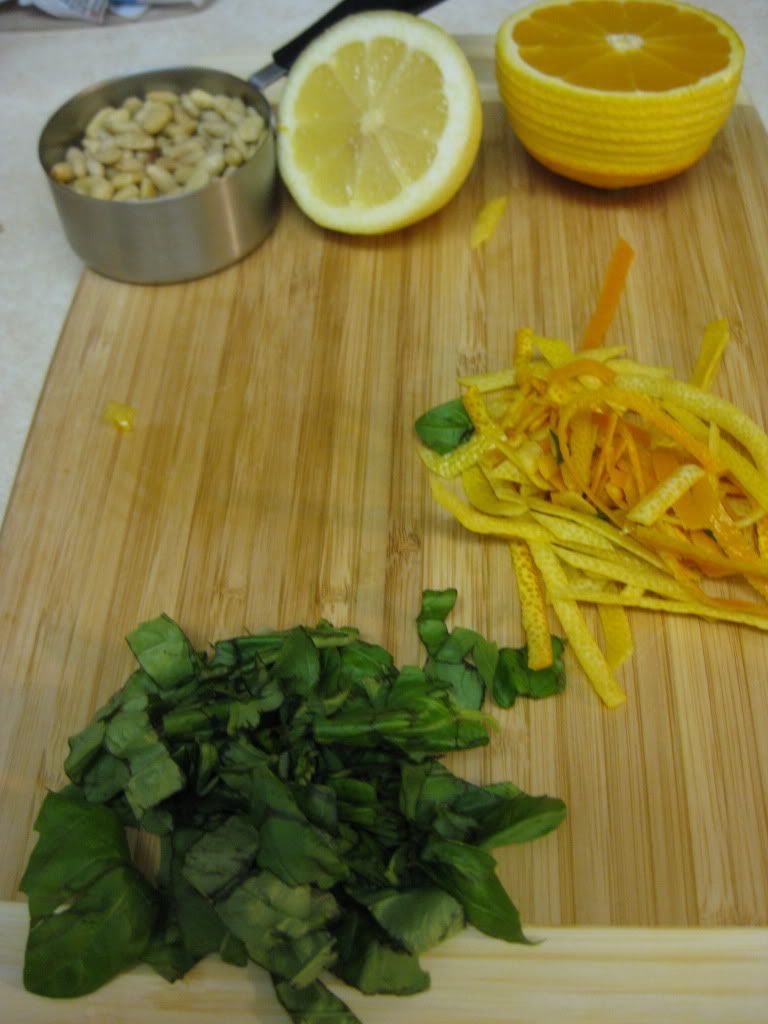
snapshot of a healthy dinner


In a small food processor, combine your pine nuts, garlic, orange zest, orange juice, lemon zest, lemon juice, basil, salt and a pinch of black pepper until everything is well blended. With the processor still running (carefully) add your olive oil to the mixture and blend until you achieve a smooth and creamy mixture.

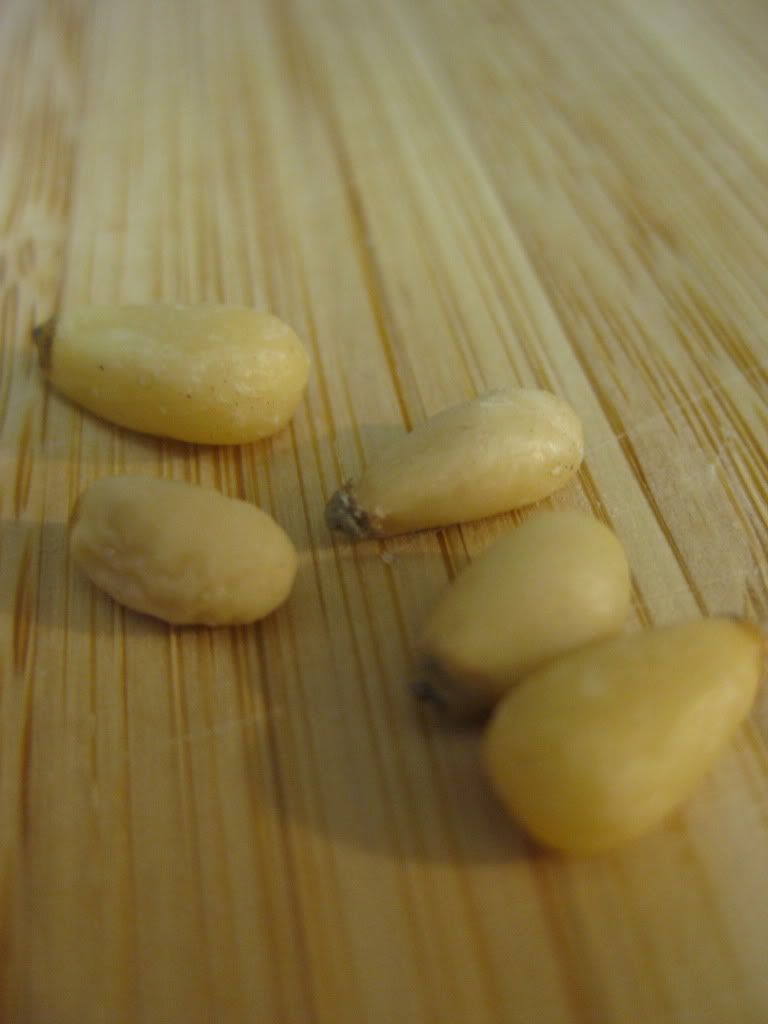
This recipe is full of firsts for us, we've never tried pine nuts up until this point either. Pine nuts, for those who are not familiar are made from a particular part of a pine cone (not the ones found in North America, however, so don't get any ideas about eating the pine cones in your backyard!) They're small, really no larger than a sunflower seed, but they supposedly pack a lot of flavor and add a great texture to any dish. What they also are, and what none of the professional cooking blogs mention, is very expensive. A small 1 3/4 ounce bottle of pine nuts (roughly 1/4 cup) is $5.50. Obviously, with the import costs and production costs, this raises the price - but if you're not expecting to drop $5 on a small bottle of nuts, you may be a little surprised (we certainly were) - but you have to be adventurous every now and again, right?

pine nuts


Transfer the mixture (I.E. pesto) to a medium bowl and stir in the cheese. Set aside.

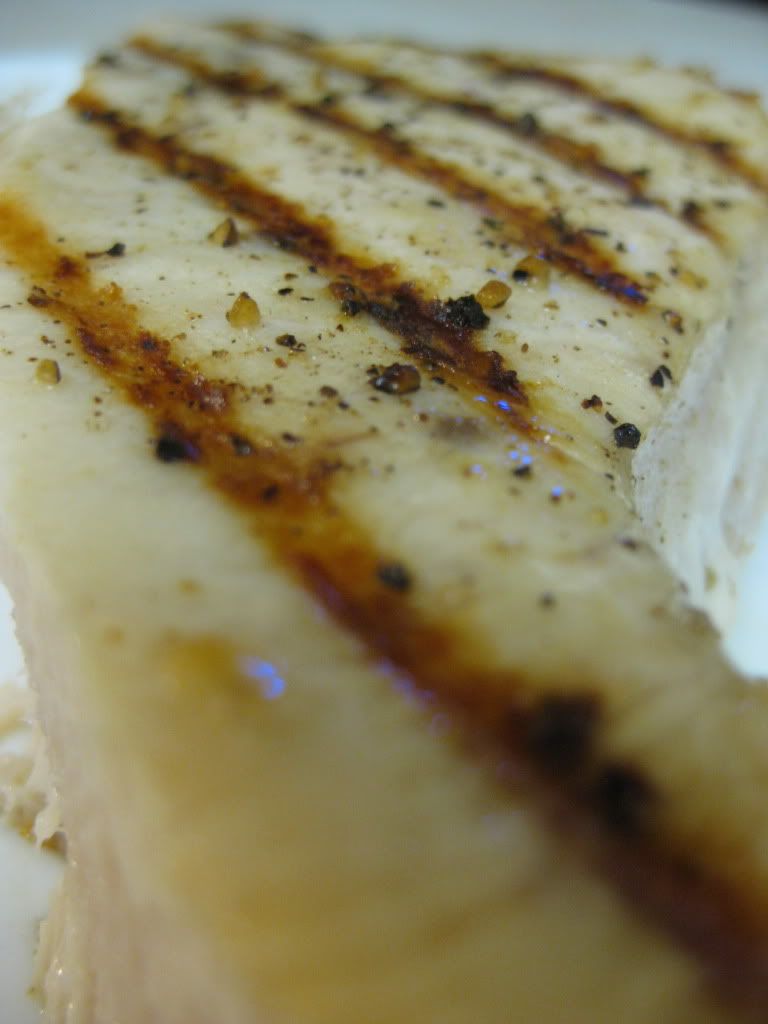
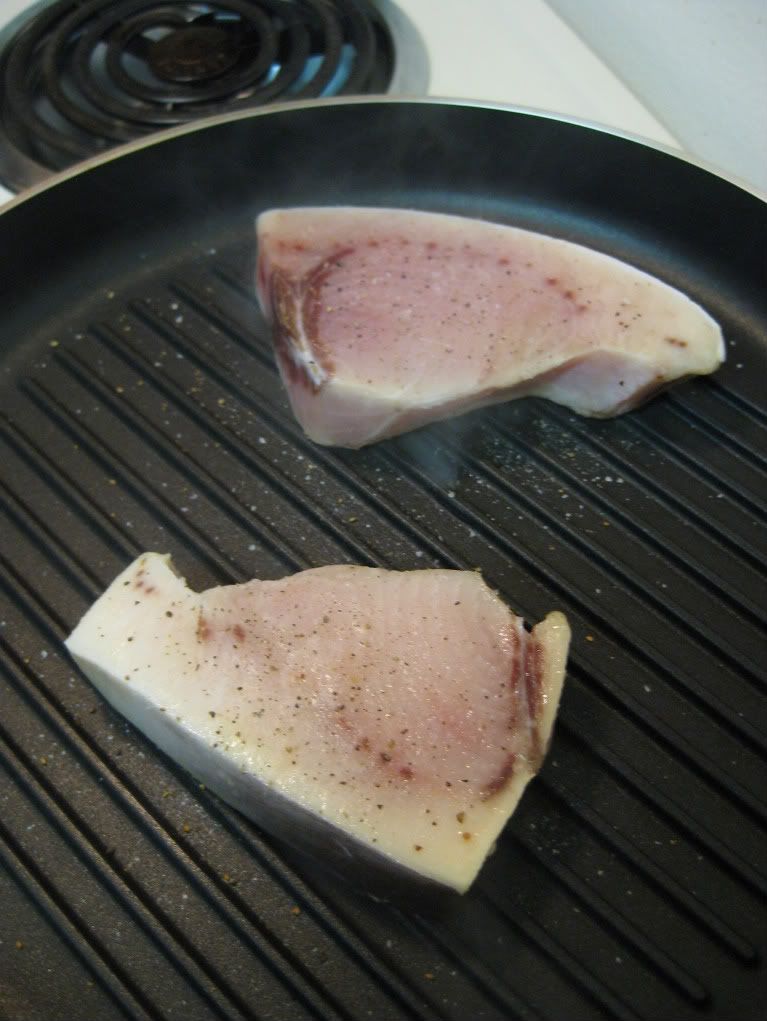
Place a grill pan on medium high heat (or use a gas / charcoal grill if you're able - we would if we could, but our apartment complex frowns on indoor gas grilling!) and lightly rub each side of the swordfish fillets with a little olive oil. Season with a pinch of salt and pepper as well. Once the grill pan is nice and hot (the hotter the better - patience while heating the pan will pay off with a great visual result in the end) place the fillets on the pan and cook, undisturbed for 3 to 5 minutes. Carefully flip the fillets and cook for an additional 3 to 5 minutes or until the fillet turns a nice shade of white and flakes easily with a fork. If your fillets still had a little skin on them, remove the skin (usually found on the sides of a swordfish fillet) and move to a serving tray or plate.


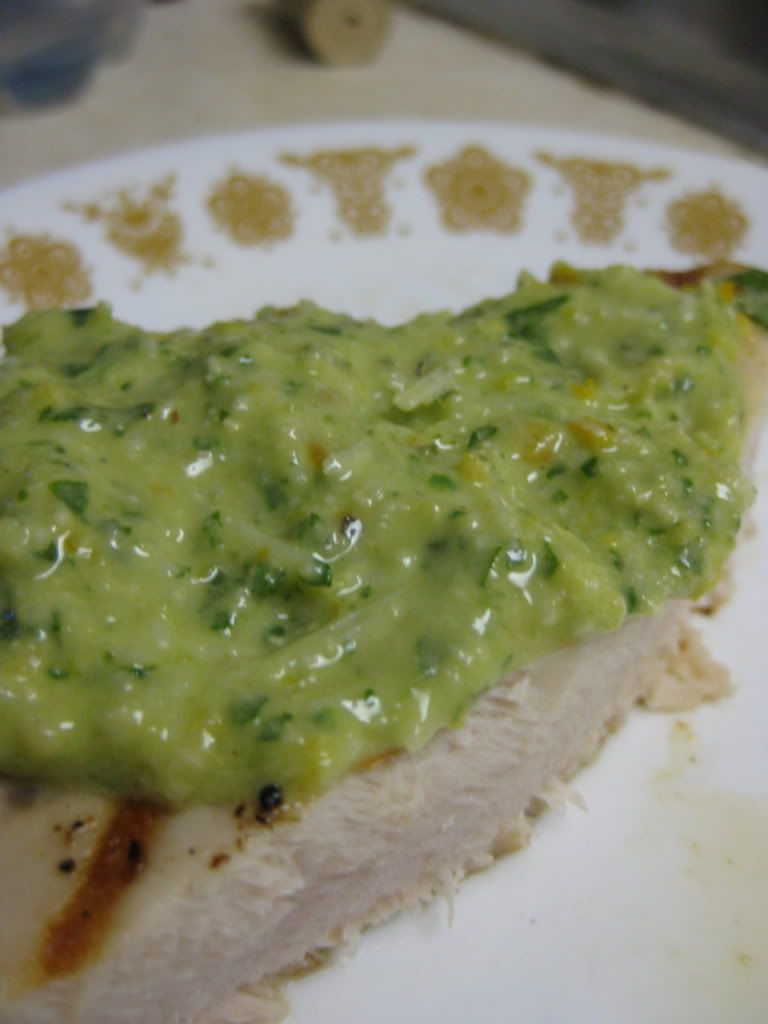
Serve with a topping of the citrus pesto and enjoy!


The Results:


Swordfish is a nice addition to our repertoire of fish options. Oddly enough, it gives off a smell similar to salmon (ode de


That's all we have for you this evening. As we mentioned Monday, we're taking Wednesday night off due to our work schedules and the time crunch we would be facing if we tried to cook, blog, and do everything else we have planned that night. That means we're back on Thursday, with a new recipe from Maggie. Until then,

~Cheers
Monday, March 14, 2011

Around The Culinary World

Good evening everyone! Welcome to a brand new week of blogging and recipes here at Out Of The Culinary. Hopefully everyone is recovering from the lost hour of sleep due to daylight savings time. Despite the loss of sleep - it's always nice to know that spring is almost here. It's hard to believe that March is already 1/2 way complete! Time seems to be flying by lately - as long as it's flying towards summer and AWAY from winter it's a good thing.

Note quite flower time yet...but we're getting closer! 


We're continuing an unfortunate trend for the Around The Culinary World feature - slow news weeks. This week we've got a collection of odd or slightly 'off kilter' stories - nothing ground breaking, earth shattering or overly informative - but entertaining none the less! Let's get started with the most 'newsworthy' story of last week:


According to new research, recycled cardboard may not be the best material to package food. In a few studies, researchers have found that food packaged in recycled cardboard has a higher level of mineral oils, a byproduct of the ink in recycled newspapers, within the food. Mineral oils have been linked to causing the inflammation of internal organs (NEVER a good thing) and cancer. It's an interesting develop in a relatively new industry and one that they will hopefully find a way to fix. Read more about this study via the BBC Health site - HERE.


Let's face it - no matter how you cut it, burgers simply are not great for you. Fast food burgers are loaded with fats and salts and usually come accompanied with large, sugary sodas and salted, deep fat fried fries. Even if you make the burgers at home, you're still taking in a lot of lower quality red beef (not great for your heart). That being said, a healthy lifestyle doesn't mean you can't indulge every once in a while. If you're looking to have a small 'cheat meal' and are craving a burger - here's a list of the the best fast food burgers in the US.


I'm sure this menu item won't make anyone's 'diet plan' or even be mentioned in the same sentence as the word 'healthy'. IHOP (International House of Pancakes for those who are bad with acronyms) has debuted a new menu item that is simply a head scratcher for me. I suppose this dish is a regional thing - but I'm just not seeing how this can taste good...at all. What do you think readers? Is THIS NEW MENU ITEM something you would ever try?


Finally this week (I told you it was a slow news week) - we've come across an interesting video showing you how to make your own maple syrup (at the very least, it will show you how OTHER PEOPLE make your maple syrup!) There's not much more to discuss in regards to the video - it's just an interesting watch. Check it out HERE.


There you have it folks - all the news that's fit to blog about, wrapped up in one nice little weekly summary. (Hopefully things turn around next week and we will actually have some stories to break down and discuss) We're planning on two recipes this week. I will be debuting a new fish dish (that rhymed!) on Tuesday and Maggie will be taking things over on Wednesday. A odd scheduling week due to work has created an odd scheduling week on the blog. It will be a shorter week - but no less fun to read or (on our end) eat! Be sure to stop back tomorrow night to see which sea creature I'm trying out next (it's one I've NEVER eaten before in my lifetime). Until then,

~Cheers

Thursday, March 10, 2011

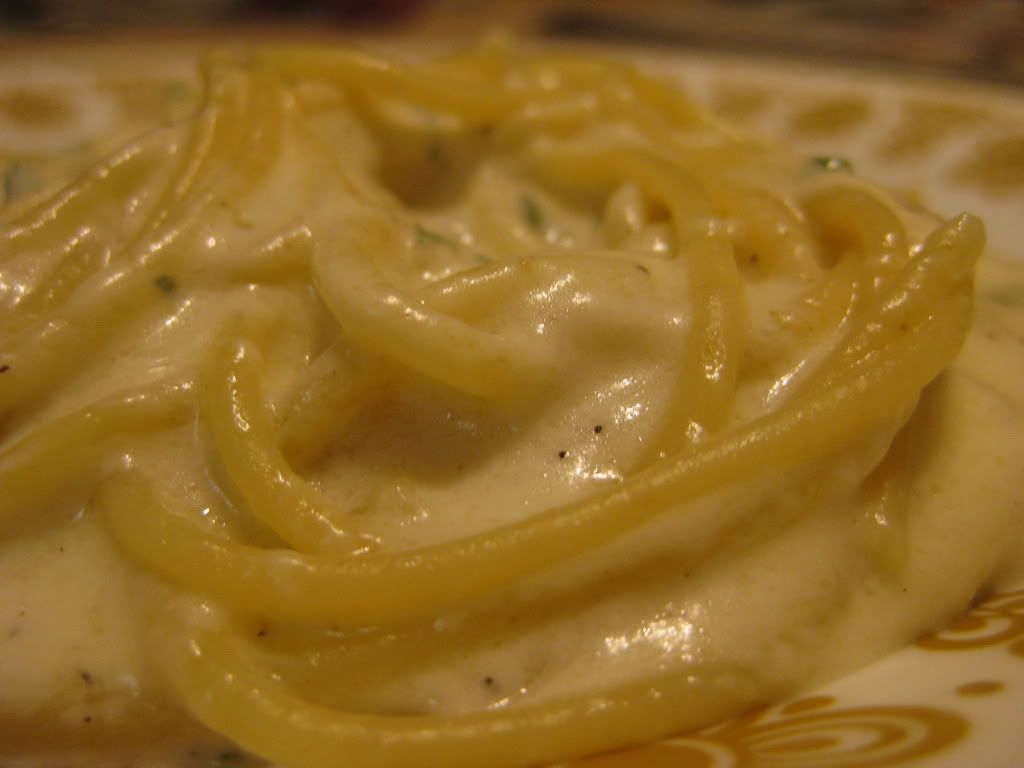
4 Cheese Spaghetti

Good evening everyone!  As Tyler alluded to yesterday, tonight's recipe includes two of my favorite food groups (well, not food groups, per se, but types of food that comes in these groups):  pasta and cheese.  Now, either of these alone are not really healthy, let alone put together.  But, if you watch your portion size of this recipe (and really, with any recipe this is true), it actually has a reasonable amount of calories that would satisfy anyone. (TYLER'S NOTE: Flavorful and still good for you? Cooking blasphemy you might say! Don't be so quick to judge though - this week's theme of tasty, healthier meals continues with Maggie's dish tonight...)

The Recipe:  Spaghetti with Four Cheeses
Original Recipe Found In:  Taste of Home, Recipe Card Collection

What You'll Need:

8 Ounces Uncooked Spaghetti
1/4 Cup Butter, Cubed
1 Tablespoon All-Purpose Flour
1/4 Teaspoon Salt
1/4 Teaspoon Pepper
1 1/2 Cups Half-and-Half Cream
1 Cup (4 Ounces) Shredded Mozzarella Cheese
4 Ounces Fontina Cheese, Shredded
1/2 Cup Shredded Provolone Cheese
1/4 Cup Shredded Parmesan Cheese
2 Tablespoons Minced Fresh Parsley

Begin by cooking spaghetti to package directions.  Another way to "healthify" this recipe, is to chose a better alternative to the regular boxed spaghetti.  We chose a multi-grain pasta, which is low fat, sodium free, and cholesterol free.  Granted, the flavor might be a smidge different, but once the cheese covers these noodles, you won't be able to tell the difference.


Nothing more boring than waiting for water to boil 


While the pasta cooks, melt the butter in a large saucepan.  Stir in the flour, salt, and pepper until smooth.  Gradually stir in the cream.  Bring it to a boil and cook and stir for two minutes or until thickened.  Remove from the heat and stir in the cheeses until melted.


Drain the spaghetti, toss with cheese sauce, garnish with parsley, and enjoy!


The End Result:


A quick and simple recipe that requires little to no effort.  The melding of all those cheeses make it incredibly flavorful and satisfying.  Although, we both felt that there was too much cheese in this dish. You could safely cut the cheese in half and reduce the cream as well and not lose any of the flavor. It was simply overbearing in some places - too much of a good thing. (Hey, look at it this way - less cheese means lower calories right?) Also, the cheese didn't quite stick to the noodles like it should have - which made prep a little more difficult than necessary.  The spaghetti did absorb some of the cheese flavor, but not the cheese itself.  However, at 462 calories, for 3/4 cup, this makes it appeasing to the waist line.  Overall, a good dish and something definitely out of the ordinary.


Thanks Maggie! A couple of announcements before we close up for the week. First of all, every recipe this week clocked in at under 500 calories. When your highest caloric meal of the week consists of whole grain pasta and fresh shredded cheese, you're not doing too bad.

Additionally, every recipe this week had under 20 minutes of preparation time. Some of them, like the salmon rosti from yesterday, were even faster (15 minutes) and all of them were a great deal of fun to cook. Eating healthy doesn't have to be a challenge or a chore. It can be quick and enjoyable - as Maggie and focus the blog on healthy eating and cooking - we hope to show just how easy a healthy cooking lifestyle can be.

On a related note, we're big fans of Jamie Oliver and his Food Revolution campaign. We've made that clear MANY times on the blog. Now, we have a new way to support the food revolution in your community. Jamie's website has a list of Food Revolution groups - simply search the page to see if a Food Revolution group has been started in your area. If not - sign up to create one. It's a great way to get a large group of people together to support a great cause.

If you're in the greater Des Moines area, we've got you covered. Yesterday, I set up the Des Moines Food Revolution community page (via Jamie's website) all you have to do is click THIS LINK (Or follow the link on the right hand side of the blog) and click 'Like'. The page will hopefully develop into a local community of people who are passionate for the cause. At the very least it can be a good foundation for discussion and sharing of ideas. Check it out and get involved!

That's all we have for you this week. As always, thank you to all of our fantastic readers who come to the blog and support our little hobby everyday of the week. We really appreciate all the kind words of support and encouragement we receive. It's nice to know that all of your hard works and efforts are appreciated - and we feel very appreciated by our fans. Thank you all.

We're back on Monday with another 'Around The Culinary World' until then,


~Cheers

Wednesday, March 9, 2011

Slammin' Salmon

Good evening everyone! Welcome back to another edition of your favorite amateur cooking blog. Tonight, we're continuing on the 'fish theme' set up by last night's (delicious) almond & lemon crusted cod fillets. Instead of a conventional fillet, however, tonight we're going in a totally different direction.

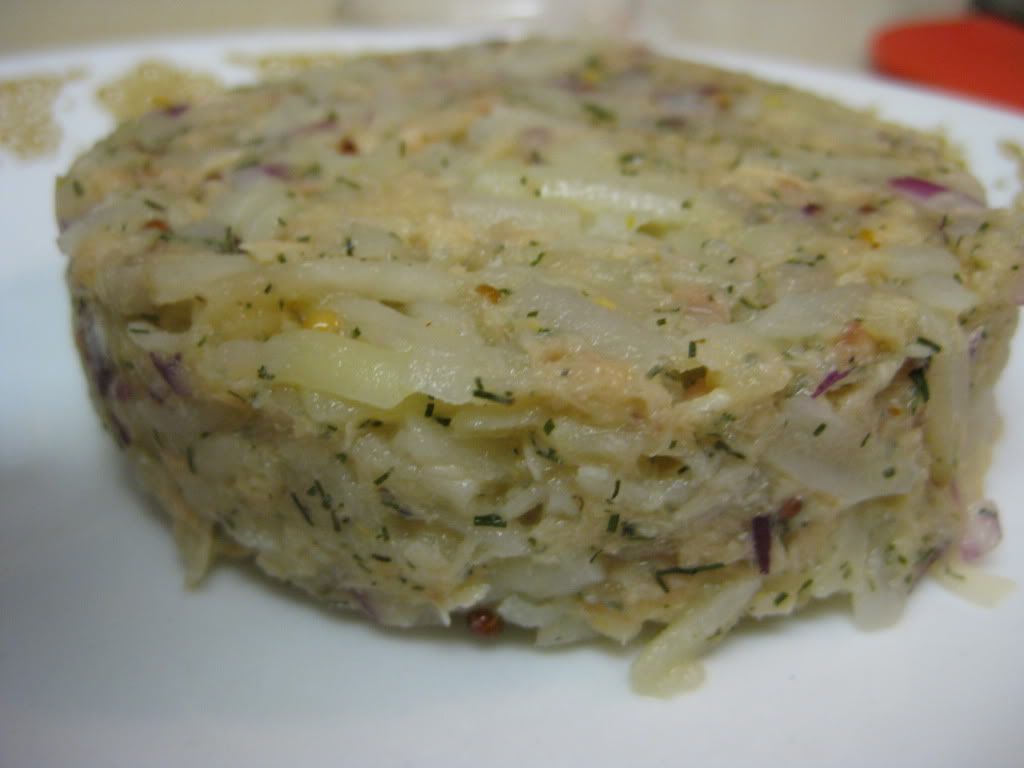
Tonight's recipe is of Swiss origin. The dish, called salmon rosti is a potato based dish that uses leftover salmon to create a 'salmon patty'. This recipe reminds me a lot of the salmon patties we cooked up last summer - with the only major differences being that we are not using mashed potatoes for the base and we're using canned salmon in place of freshly cooked and shredded salmon fillets.


Yes, canned salmon. Up until a few days ago, I didn't even realize this existed - now I'm plopping it into a recipe. According to the cooking professionals, as long as you find canned salmon that is boneless and skinless, you should be able to use the canned variety for any purpose you would normally use salmon fillets.

(As an aside - it looks and smells very much like canned tuna - in fact, if it wasn't for the 'salmon' label, you would think it was tuna!)

If all of my time cooking has taught me one thing, it would be this; reserve judgement until after you have tried the recipe once. I was skeptical about last night's lemon / dill / almond combination and was (once again) pleasantly surprised at the amazing flavor the final dish delivered. So, despite my hesitancy about combining frozen shredded potatoes and canned salmon and topping all of that with a dill / sour cream sauce - I decided to take this Swiss dish head on. After all, it doesn't become a culinary classic without having some merit...right?

The Recipe: Salmon Rosti
Original Recipe Found In: Eatingwell.com

What You'll Need:

*(The original recipe makes 8 patties - adjust as necessary)

2 X 6 Ounce Cans, Canned Salmon (Boneless, Skinless Preferred)
1/2 Cup Chopped Red Onion
2 Large Eggs
1 Egg White (Lightly Beaten)
1 Tablespoon Whole Grain Mustard
3 Teaspoons Dried Dill
1/2 Teaspoon Black Pepper
1/4 Teaspoon Salt
4 Cups Frozen, Shredded, Hash Brown Potatoes
2 Tablespoons Olive Oil
1/3 Cup Reduced Fat Sour Cream
1 Teaspoon Lemon Juice


Begin by preheating your oven to 200 degrees (This is necessary if you are making more than 4 patties - you can place the finished patties into the oven to stay warm while cooking the remaining patties. If you are only making 4 - feel free to omit the oven step)

In a large bowl, combine the salmon, eggs, egg white, mustard, salt, pepper, 2 teaspoons of the dried dill,  onion and the shredded potatoes. Mix well (it's a bit difficult if the shredded potatoes are large and thick, however, keep working at it and everything should blend together nicely).

Side note: This Tupperware egg separator is the greatest invention of all time... just saying


Heat 1 tablespoon of the olive oil in a large non-stick skillet over medium heat. Once the oil is shimmering, you are ready to start cooking your patties. To form the patties, use a 1 cup measuring cup (the metal/plastic variety *as pictured* work about the best for this) and fill it 2/3 of the way full with the salmon / potato mixture. Press the mixture down as much as possible. You are trying to work out any extra error or space. The patties will only truly hold together if they are compact - this step keeps you from creating salmon / potato omelets!


Once you've pressed up your patties, carefully place them in the skillet and cook (covered) 3 to 5 minutes or until nice and golden brown. I found that erring towards the longer time  (4 to 6 minutes)  yielded better results. Carefully turn the patties, and cook (once again, covered) for an additional 3 to 5 minutes. The second side seems to cook slightly faster, so be sure to keep an eye on the patties.


Once the first wave of patties are complete, place them on a oven safe plate or baking tray and into the 200 degree oven. Proceed on to making / cooking the remaining patties.

While you're finishing cooking the patties, you can make the sauce to serve atop said patties. In a small bowl, combine the remaining 1 teaspoon of dried dill with the sour cream and a teaspoon of lemon juice. Mix until combined.

Once all of your patties are complete, serve immediately with a side of the dill dip. This recipe compliments a nice side of green beans or scallions. If you don't want to make the dill dip - you can also serve this dish with dijon mustard, lemon juice or ketchup. I think all would be suitable substitutes - minus the ketchup, I'm not a big 'ketchup on my hash browns' fan. There are some out there that like it though, so if it's your cup of tea - have at it! (Although I'd recommend the dill dip - it completes the dish very nicely)


The Results:


I have to say, I am impressed with this recipe. Throw out any negative thoughts you have regarding salmon, because they don't apply to this dish. The flavors of tonight's recipe were like nothing I've ever tried before. I thought going into this dish that the final flavors would be reminiscent of breakfast - far from it. Instead the dish takes on its own, unique, not quite fish, not quite potato flavoring that ends up being very enjoyable. My preconceived notions about salmon in a can were thrown out the window (although I still wouldn't eat it by itself!). With a quick prep time and very little difficulty - this dish is certainly worth a try. (It's great on a budget too - canned salmon comes in at about $1 for a can and frozen hash browns (which come in 3 pound bags, and 3 pound bags ONLY it would seem) are a relatively cheap $2.50)
That's all we have for you this evening. Maggie closes out the week of cooking tomorrow night with two of her favorite things in the world. Her recipe tomorrow night is probably the third or fourth time we've tried this particular dish - but following the way of the blog - it's an entirely new way to prepare this meal. What does she have cooking? Well, stop back tomorrow night to find out! Until then,


~Cheers