Thursday, June 20, 2013

Mango Marinade Makes for a Marvelous Meal


Good evening everyone! We’re one day away from it “officially” being summer, but the weather in the greater Midwest has already taken a turn for the hot. While I’m not a big fan of hot weather, the warmer days do signal the return of some things I greatly enjoy – including tropical fruits that tend to make their best appearances in the summertime. One particular favorite of mine is the mango. We’ve used mango as an ingredient in previous recipes, and have even featured how to cut, slice and clean your very own mango. It’s somewhat surprising that I’ve never tried using this bright citrus in a marinade, since its flavors lend so well to grill season. Well, that trend ends tonight. Mangoes make it to the grill!

The Recipe: Mango Grill Chicken
Recipe (Heavily) Adapted From: Food Network Magazine, July 2012 Issue

What You’ll Need:
(Serves 4)

2 Mangoes, cleaned and diced (alternatively, buy a package of mango chunks from your grocer – it’s easier)
4 Bone in, skin-on chicken breasts
1 Cup Fresh Cilantro (stems, leaves  and all)
4 Tablespoons Chipotle Based Salsa

*The original version of this recipe appears in the July / August 2012 issue of Food Network Magazine as “Chipotle Mango Chicken with Chimichurri” and it differs greatly from the version I’m writing about tonight. I gave credit to the recipe for “inspiring” tonight’s dish, but if you want to try the original, understand it will be vastly different from what I’m sharing.

In a large food processor, add the mango, cilantro and chipotle based salsa (it doesn’t really matter what kind of salsa, just as long as it is tomato based and lists chipotle as it’s main pepper. You can increase or decrease the heat to your liking by choosing varying levels of salsa heat). Pulse the mixture until everything becomes a nice puree (there will be some chunks left behind, and that’s okay, but make sure the pieces are fairly small).

Pat your chicken breasts dry with a paper towel, then work about 1 tablespoon of the marinade under the skin of each chicken breasts. Next, scoop between three to four heaping tablespoons of the marinade into a plastic sealable baggy (repeat for each chicken breast you’re cooking). Place one breast into each bag, seal tightly, then jumble and jostle the chicken around until it is evenly coated in the marinade. Store the chicken in the baggies, in the refrigerator for at least 6 hours. It works best if you make this before you leave for work in the morning and let the little buggers marinate all day until you come home.

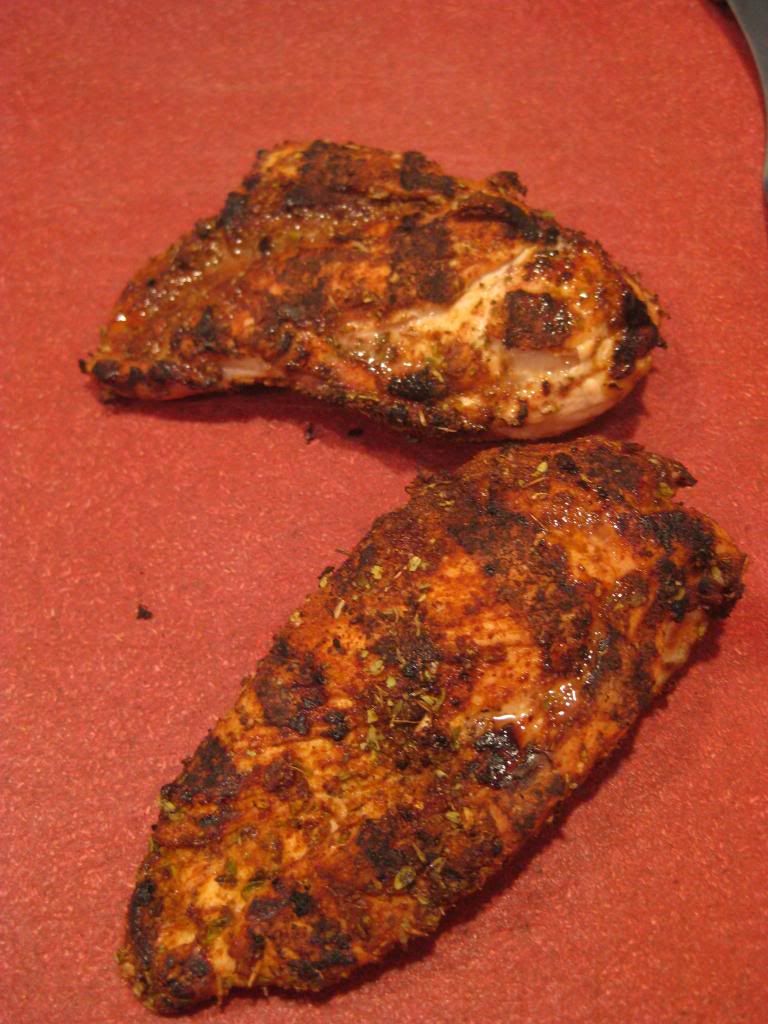
Next, preheat your grill to 350-400 degrees. Lightly oil the grates and place the chicken, skin side up, on the grates (directly over the heat) Cook for 5 minutes before turning the breasts (skin side now down) and allowing them to cook for an additional 5 to 7 minutes. Leaving the skin side down for so long is sacrilege to many ‘chicken skin aficionados’, but by doing this you’ll create a great crispy skin that crackles after you’ve pulled it off the grill. This skin almost becomes one with the marinade and produces a nice, lightly crispy exterior full of marinade flavor while allowing most of the fat to burn off on the direct heat.  

Check your chicken to make sure it registers 165 degrees at the thickest part of the breast. If not, turn it once more (skin side up) and allow it to cook for an additional 3 to 5 minutes, or until you reach the target temperature. Remove from the grill and serve immediately!


The Results
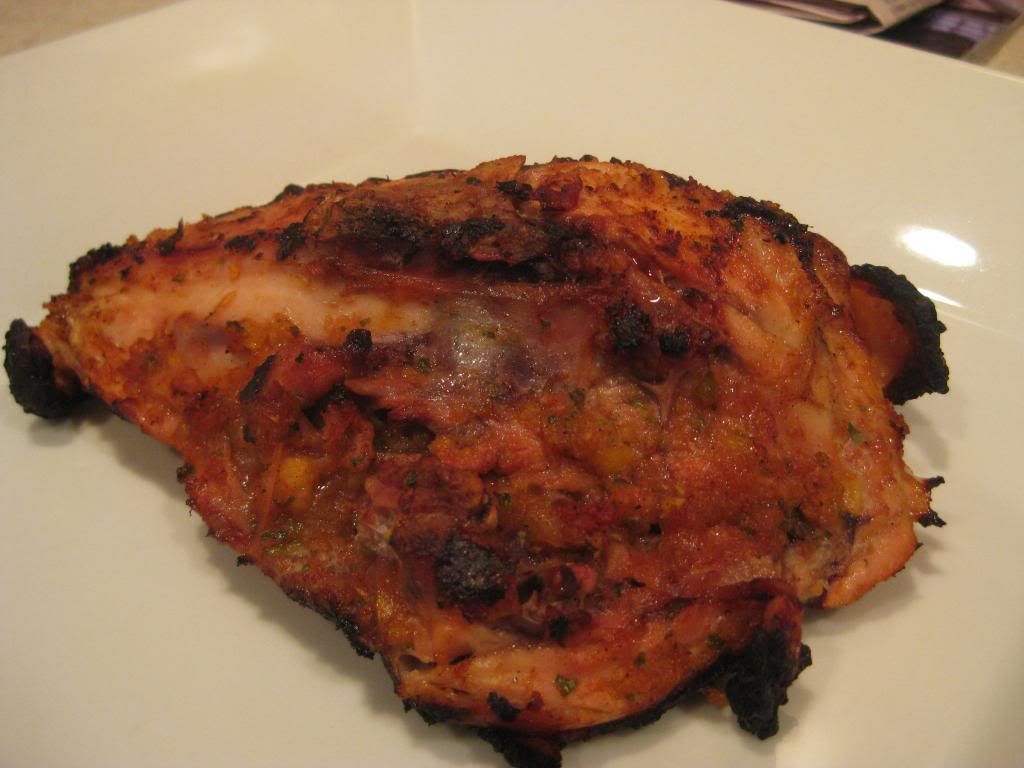


It’s a rare feat to create a BBQ style chicken, fresh off the grill, that doesn’t need BBQ sauce. This recipe manages to do just that. The chicken is moist and full of flavor, thanks to an all day session with the marinade – which is OUTSTANDING! The slight heat of the chipotle blends beautifully with the sweetness from the mango and everything is tied together wonderfully with the fresh undertones of cilantro. This dish is simple, looks great off the grill and is full of delicious flavor. That’s a win, win, win situation! Give this one a try at your next summer cookout – it’s sure to be a favorite.

That’s all we have for you this week. We’re back next week with two brand new recipes. Until then,

~Cheers

Tuesday, June 18, 2013

The Classic Tale of Pork and Fruit

Good evening everyone!  With grilling, the possibilities are endless.  It's great to know that cooking some variation of meat with a vegetable (or fruit,) will yield you with tasty end product that has a great smokey flavor to it that you wouldn't normally get with a dish cooked from an oven.  With that, tonight's dish has all those great qualities that you expect from a grilled dish, plus incorporating a new ingredient makes tonight's recipe all that more great.

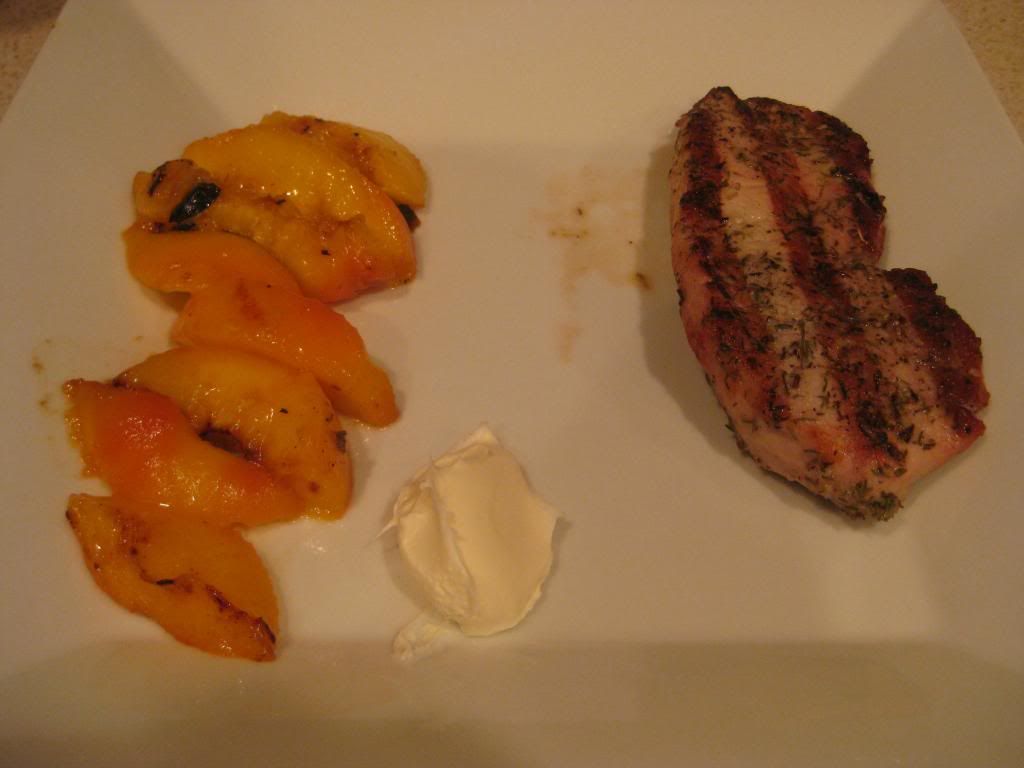
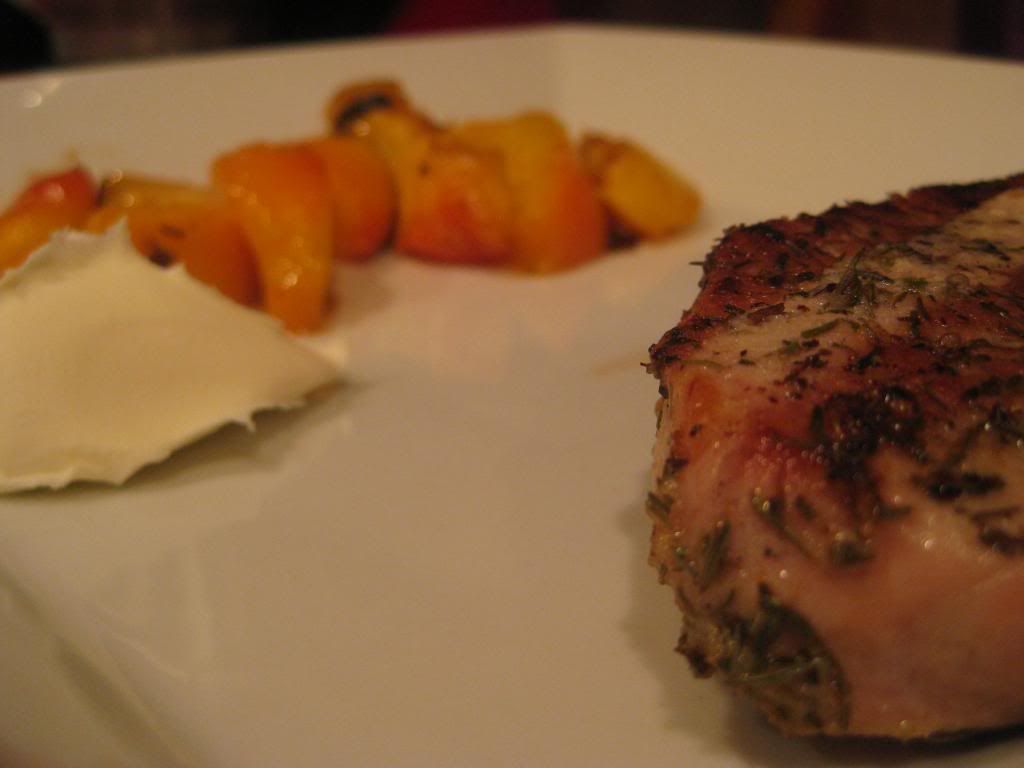
The Recipe:  Grilled Pork Chops with Nectarines
Original Recipe Found In:  Cooking Light, June 2013

What You'll Need:
1 Tablespoon chopped fresh Thyme
3 1/2 Tablespoons Extra-Virgin Olive Oil, divided
2 Teaspoons minced Garlic
4 (6 ounce) bone-in center-cut Pork Chops
1/4 Teaspoon Salt
1/4 Teaspoon Black Pepper
2 ripe Nectarines
1/2 Teaspoon Sugar
1/4 Teaspoon ground Cumin
1/8 Teaspoon ground Red Pepper
4 Teaspoons Mascarpone Cheese

To start, preheat a grill to medium-high heat.  Once the grill begins to warm up, you can prepare the pork chops.  In a small bowl, combine the thyme, one tablespoon olive oil, and garlic; mix these ingredients until well-combined.  Place the pork chops on a clean plate and rub the oil mixture evenly over the pork chops until they are completely covered in the oil mixture.  Once the pork chops are seasoned, sprinkle with salt and pepper.

Once the grill is heated, place the pork chops directly on the grill rack.  Grill the pork chops for three to five minutes on each side, depending on desired degree of doneness and thickness of the chop.  We like to cook our meat until it is well done, with a little hint of pink.  Alternatively, you can cook it until the pork is at a cooked temperature, which is 145 degrees.  Once cooked, transfer the pork chops to a clean plate, cover with aluminum foil, and let stand for 10 minutes.

While the pork stands, transfer the nectarines to a clean plate.  Cut these in half and discard the pits.  In a small bowl, combine the sugar, remaining 1/2 teaspoon of oil, cumin, and red pepper until well mixed.  Rub the sugar mixture evenly over the cut halves of the nectarines.  Immediately transfer over to a grill.  Grill the nectarines for two to three minutes on each side or until tender.  Transfer the nectarines back to a clean plate and let cool.  Once cooled, cut the nectarines in wedges and serve with mascarpone cheese.  Serve the nectarines with the pork chops and enjoy!

The End Result:


The pork tastes great rubbed in olive oil, garlic, and thyme.  It creates a delicious flavor that is only enhanced by the grill.  Letting the pork stand keeps all those juices in the meat and gives it a really juicy texture.  The nectarines were also enhanced by the grill.  You can barely taste the sugar mixture that was rubbed before the grill, but by using the grill, it made the nectarines super tender, almost melt-in-your-mouth quality.  The nectarines also offset the pure power of the garlic and thyme in the pork, so it's a must have when cooking this dish.  

Thanks for joining us tonight.  Check back later this week when Tyler presents a brand new dish.  Until then,

~Cheers!

Tuesday, June 11, 2013

Marvelous Mahi-Mahi

Good evening everyone! We've often discussed how much we enjoy cooking with the ubiquitous 'white fish'. This generic term applies to a wide swath of the fish 'genre', including cod, halibut, swordfish, perch and much more. It came as a bit of a surprise, given how much we enjoy using white fish fillets, that we had not combined our summertime cooking method of choice (grilling) with our fondness for fish. Well, tonight that (culinary) atrocity ends!


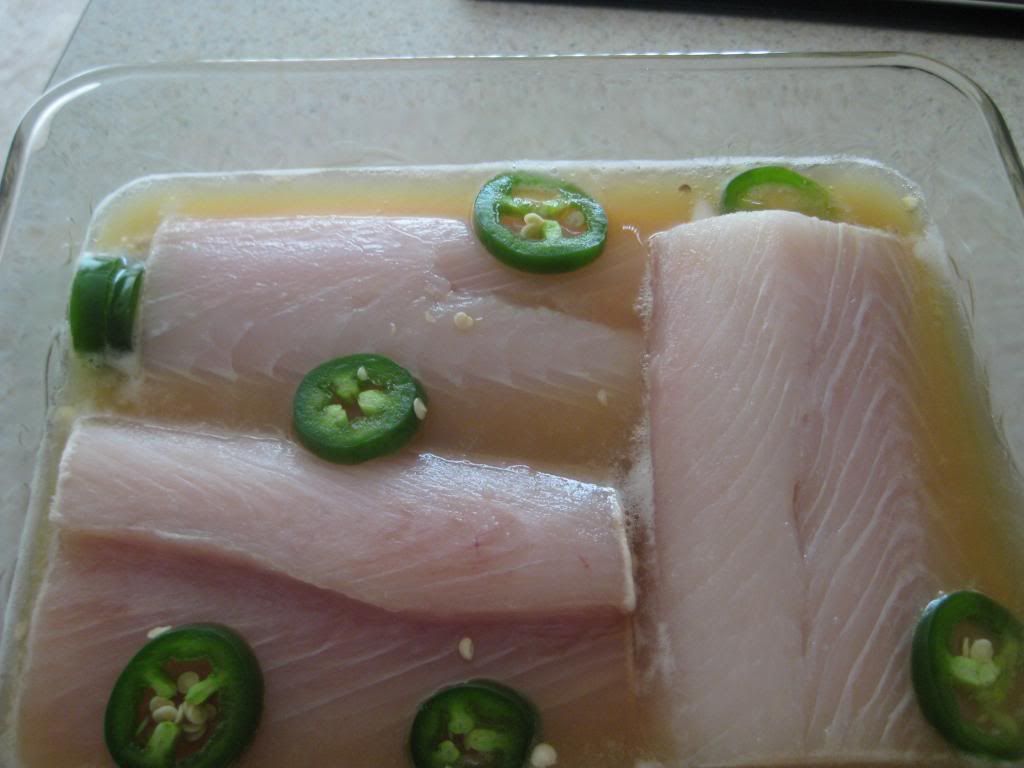
The Recipe: Beer Marinaded Mahi-Mahi
Original Recipe From: Time To Grill (Weber Grill e-book)

What You'll Need:
(Serves 2)

1 Cup Beer
1 Medium jalapeños (Sliced thin)
3 Tablespoons Lime Juice
2 Boneless, Skinless Mahi-Mahi fillets


In a glass baking dish (preferably one that has a lid), combine the beer (you can use any variety you like - we opted to use Summit's extra pale ale - because it's one of the beers we had in the fridge...plus, you get to drink the 'extra' while you're preparing the recipe. Life's too short to use crummy beer, even if it's for a marinade) jalapeños and lime juice. Add the fillets, making sure to cover them as well as you can in the marinade. Cover the baking dish and allow the fillets to rest at room temperature for 15 minutes, making sure to turn them halfway through.


It's important to stick to that 15 minute marinade time, as the acidic lime juice will actual begin "cooking" the fish after 15 minutes - obviously leading to a dryer than desired fillet.


Remove the fillets from the marinade (discard the marinade) and season them lightly with salt and pepper. On a clean, preheated (400-450 degrees) grill, add the fillets and cook for 8 minutes, flipping them halfway through. Make sure the fillets have are nice and flaky before removing them from the grill by lightly prodding them with a metal spatula or fork.

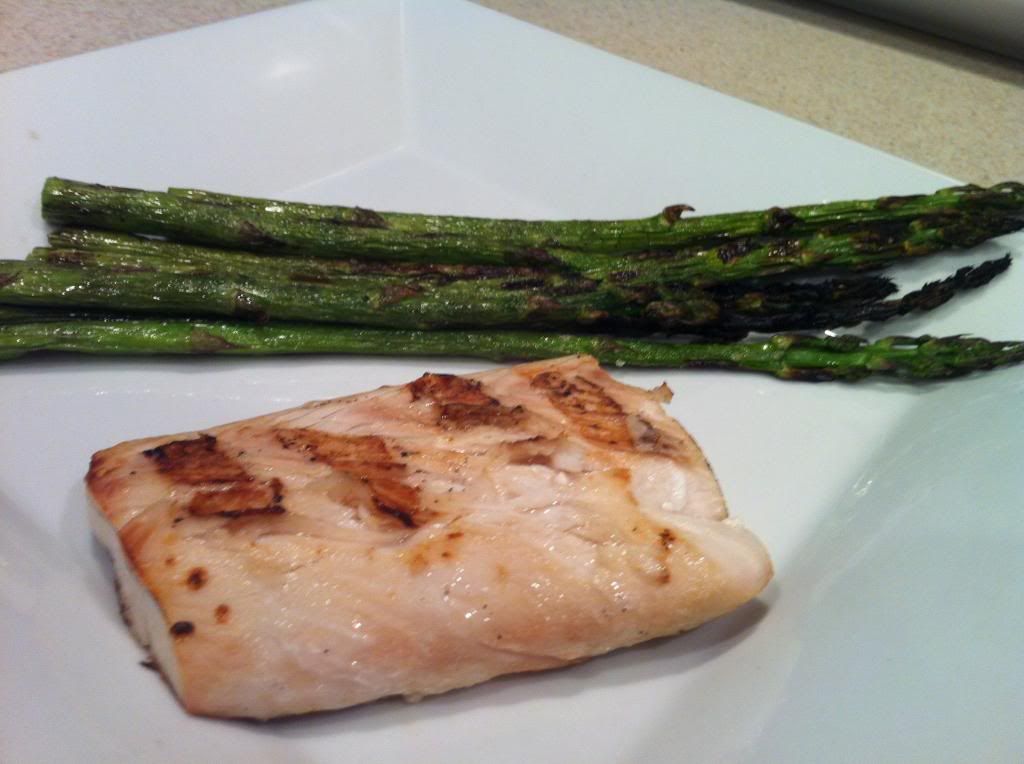
Transfer the fillets to your serving platter and enjoy! These fillets pair nicely with a green veggie (brean beans or asparagus are the best choices). Since we were already using the grill, we opted to toss some asparagus in olive oil, sprinkle it with salt and grill it alongside the fillets (8 to 10 minutes). But the side dish is up to your personal preference!


The Results:


Delicious! The mahi-mahi was incredibly tender and juicy thanks in part to the marinade. The fish picked up a very small hint of heat from the jalapeños (slight - not enough to deter even those who HATE heat in their food) but was otherwise unaffected (flavor wise) from the marinade. In this case, that's a good thing as mahi-mahi has great flavor on its own. Clocking in at just under 150 calories, this delicious dish is PERFECT for summertime. Give it a shot today!


That's all we have for you this evening. Stop in later this week as Maggie takes to the kitchen with a brand new recipe, featuring a brand new ingredient! Until then,

~Cheers

Saturday, June 8, 2013

On The Sweeter Side

Hello again everyone! One of the perks of summertime cooking is the ability to grill fruit. If you've never tried a pineapple slice or watermelon chunk on the grill, you really should give it a shot. The natural sugars of the fruit caramelize, greatly intensifying the fruit's natural sweetness.

 As I mentioned in last week's post, we had a big grill out over the Memorial Day weekend. One of the dishes we tried involved grilling up pineapple slices and combining them with frozen yogurt. Intrigued? You should be!

The Recipe: Caramelized Pineapple Fro-Yo

What You'll Need:

1 Pineapple (Cored, peeled, sliced into rounds)
1/4 Cup Brown Sugar
1 Tablespoon Cinnamon
Vanilla Frozen Yogurt

In a small bowl, combine the brown sugar and cinnamon. Next, dip each pineapple slice into the brown sugar / cinnamon mixture. Make sure each slice has an even coating of the mixture before transferring them to a plate. Allow the slices to rest for 5 to 10 minutes before adding them to the grill.

Cover 1/2 of the grill with aluminum foil, and bring the temperature to 350 degrees. Add the pineapple slices to the foil and allow them to cook for 5 minutes per side. This allows the brown sugar to caramelize, creating a thick, sticky glaze on the pineapple. After both sides of the pineapple have been coated in this lovely glaze, transfer the slices directly onto the grates for 1 minute per side. This creates the great char lines on the pineapple slice and adds a little more depth to the final flavors.

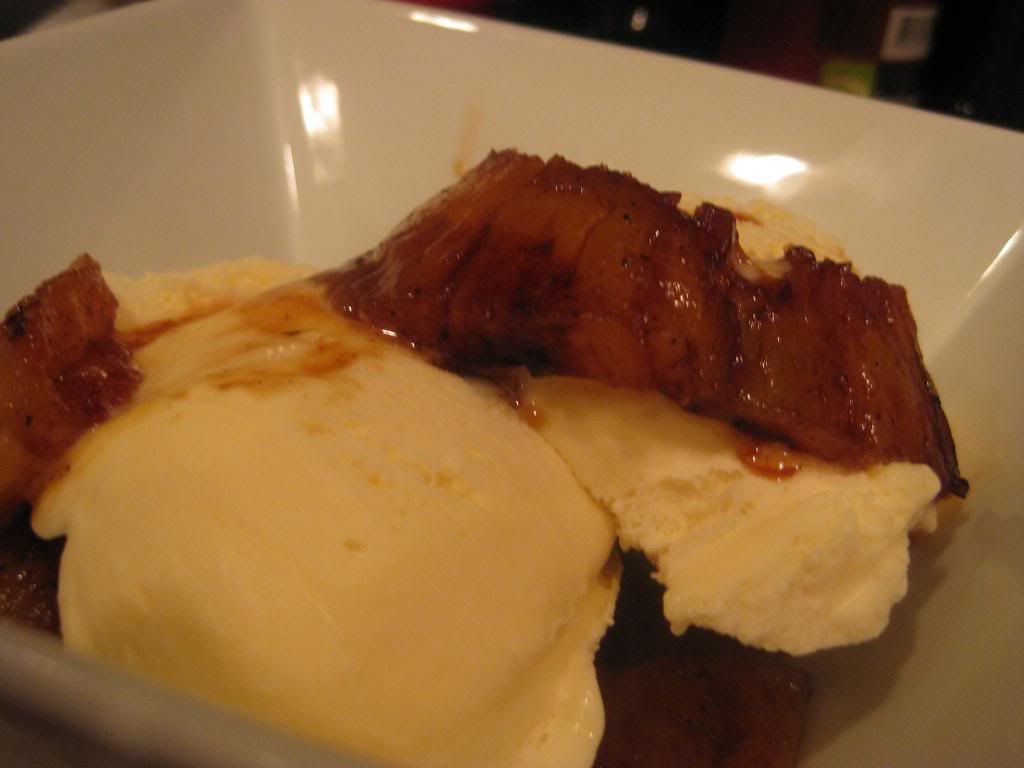
Once charred, remove the pineapple from the grill and dice it into smaller pieces. Scoop a few pieces of the pineapple into the bottom of a bowl, top with vanilla frozen yogurt and scoop a few slices of pineapple on top of the frozen yogurt. Serve and enjoy!


The Results:


This is one sweet little treat! Pineapple is already packed with natural sugars, so caramelized pineapple is predictably sweet. (That's a subtle way of warning you that a little of this dish is better than a lot - good things come in small serving sizes). But warm pineapple blended with cool vanilla frozen yogurt is one of summertime's most simple and decadent flavors. The next time you're firing up the grill, throw a few slices of pineapple on there and give this dessert a try for yourself.

Thursday, June 6, 2013

Go a Bit on the Wild Side

Good evening everyone!  As we've mentioned here on the blog before that using a grill can transform a simple dish to something extraordinary.  We've done the grill trick for quite a few recipes already (and I'm sure we'll have more up our sleeve in the next coming months.)  Tonight, I'll take a type of meat that is ranked in the "non-traditional American" sense, but give it the grill technique and it's something completely different.

The Recipe:  Lamb with Tzatziki Sauce
Original Recipe Found In:  Eat This, Not That No-Diet Diet

What You'll Need:
1 Cucumber; peeled, halved, and seeded
1 Cup plain Greek Yogurt
Juice of 1 Lemon (about three tablespoons)
2 Tablespoons Olive Oil
2 Cloves Garlic, finely minced
2 Teaspoons fresh Dill
4 loin or shoulder Lamb Chops (about four ounces each)

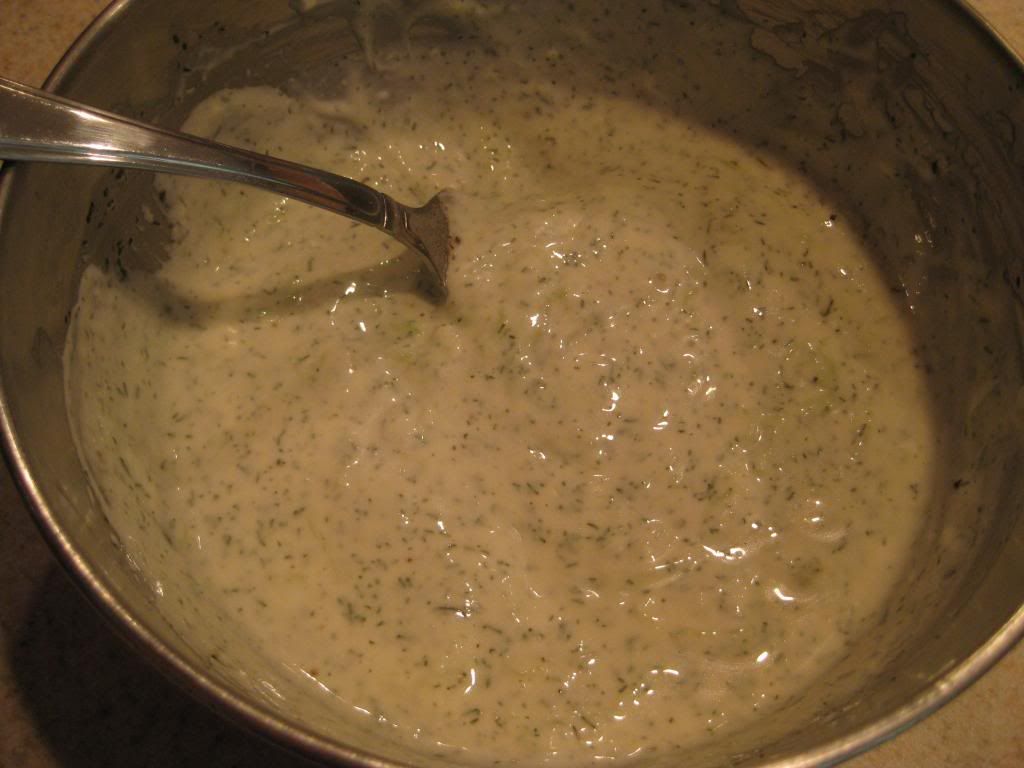
To start, preheat a grill to medium-high temperature.  Once the grill begins to warm, make the Tzatziki sauce:  using a cheese grater, grate the cucumber halves into small pieces.  Once the cucumber is grated, wring out the excess liquid from the cucumber.  This can be done by squeezing the cucumber to the inside of the bowl and pouring the excess liquid into a sink.  Keep wringing out the cucumber until it is barely moist.  Next, in a medium mixing bowl, combine the cucumber, yogurt, lemon juice, one tablespoon of olive oil, garlic, dill, and a pinch of salt and pepper.  Mix all these ingredients until well combined, then set aside.


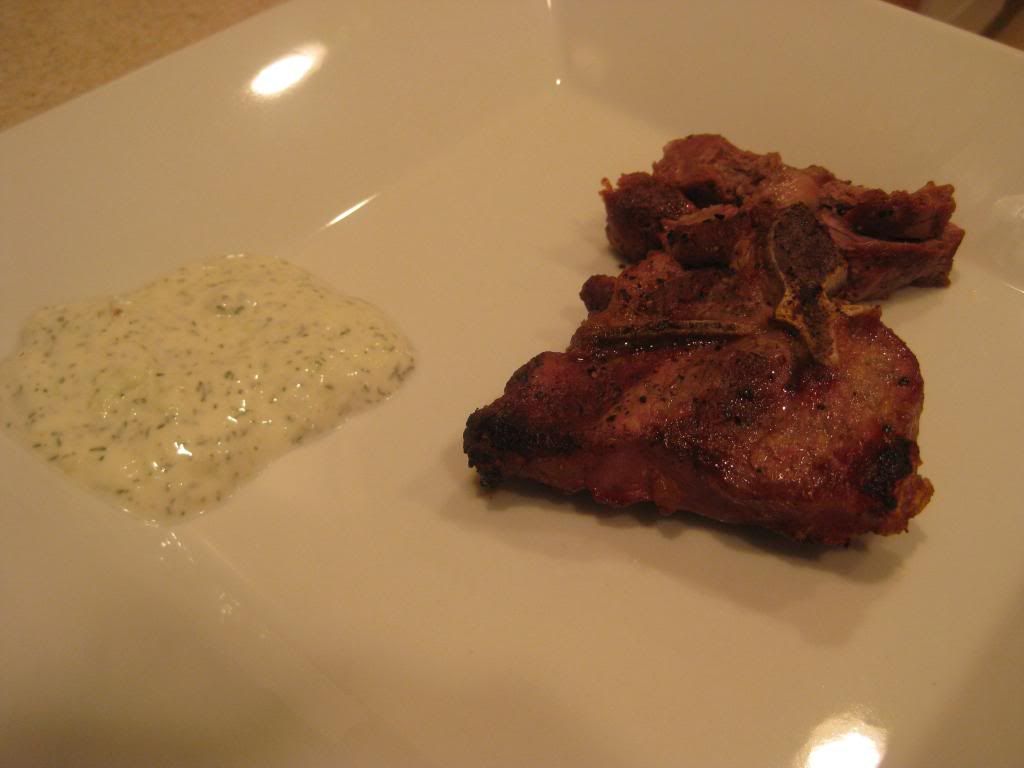
By the time the sauce is made, the grill will be ready to use.  On a clean plate, rub the remaining tablespoon of olive oil on the lamb chops and season with salt and pepper.  Once seasoned, lay the chops on the grill; cook them on five to six minutes on each side.  Using a meat thermometer, insert into the thickest part of the chop.  Once it reads 135 degrees, they are medium to well done.  Place the lamb chops on a serving plate, serve with the Tzatziki sauce, and enjoy!

The End Result:


Now, admittedly, not everyone is a fan of lamb.  I wasn't a fan until about ten years ago until I had my first gyro, and I had my reservations when someone told me that I was eating meat from a cute and fuzzy animal.  But I think grilling the lamb chops, like they were a piece of steak or a pork chop, would help those who are nervous about trying lamb.  The coat of olive oil, seasoned with salt and pepper, doesn't particularly enhance anything about the meat, but it gives an even playing field for the way its prepared.  The true winner of this dish is definitely the Tzatziki sauce.  There is something so incredibly fresh about this sauce and how well it pairs with lamb that cannot be missed.  You would think that one ingredient would stand out amongst the others, but everything works so well together that it's not hard to miss.  If you haven't tried lamb, I would recommend that this be the recipe to start enjoying this great grilled meat.

We didn't forget our dessert recipe!  It might have been a week, but we will showcase this fantastic dish.  Until then,

~Cheers!

Wednesday, June 5, 2013

Baked Beans Take Center Stage

Good evening everyone! Tonight we're taking a look at the unsung heroes of the grilling season - the side dishes. From veggies, to fruit to the classic beans, side dishes can really enhance the final meal. Traditional banked beans are sort of a ho-hum affair, but the recipe we're trying tonight puts a unique spin on the classic side. These aren't your father's baked beans.

The Recipe: Tuscan Stovetop Baked Beans
Original Recipe Found In: Food Network Magazine June 2013 Issue

What You'll Need
(Serves 8)

1/2 Pound Thick Cut Pancetta (Diced)
1 Medium Onion (Diced)
1 Stalk Celery (Diced)
1 Large Carrot (Diced)
1 Teaspoon Italian Seasoning
1/2 Teaspoon Red Pepper Flakes
4 Cloves Garlic (Minced)
3/4 Cup Dry White Wine
4 x 15 Ounce Cans Great Northern Beans (Drained, Rinsed)
15 Ounces Canned Crushed Tomatoes
2 Cups Low Sodium Chicken Broth
1 Tablespoon Fresh Lemon juice
1/2 Cup Shaved Parmesan Cheese


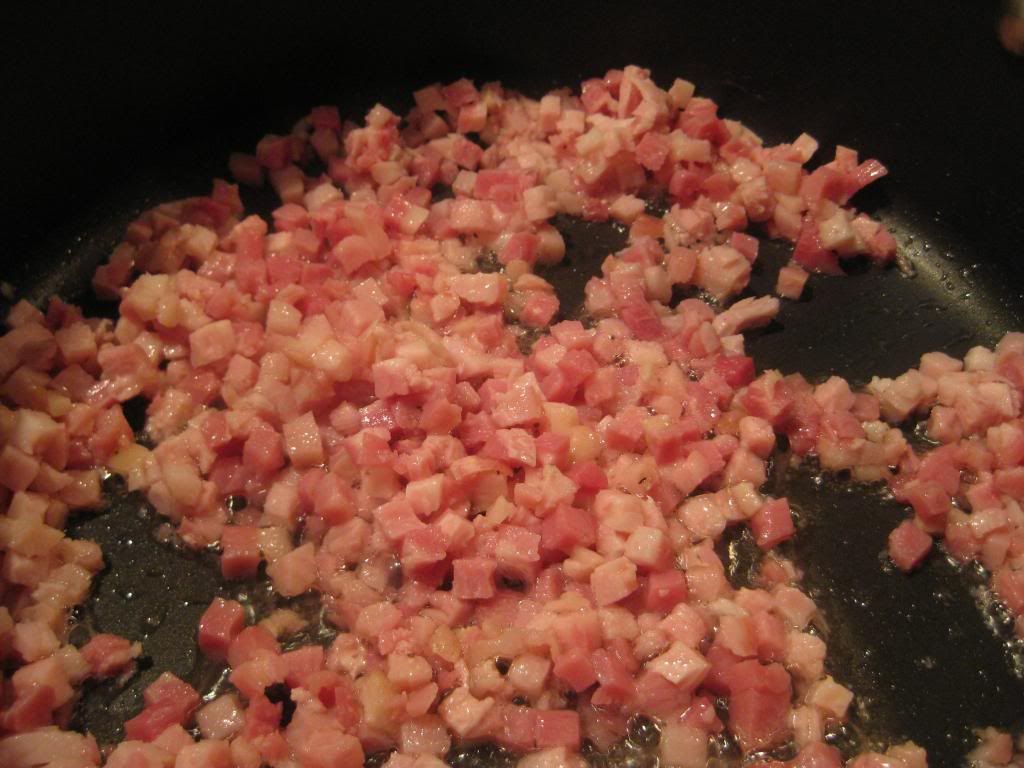
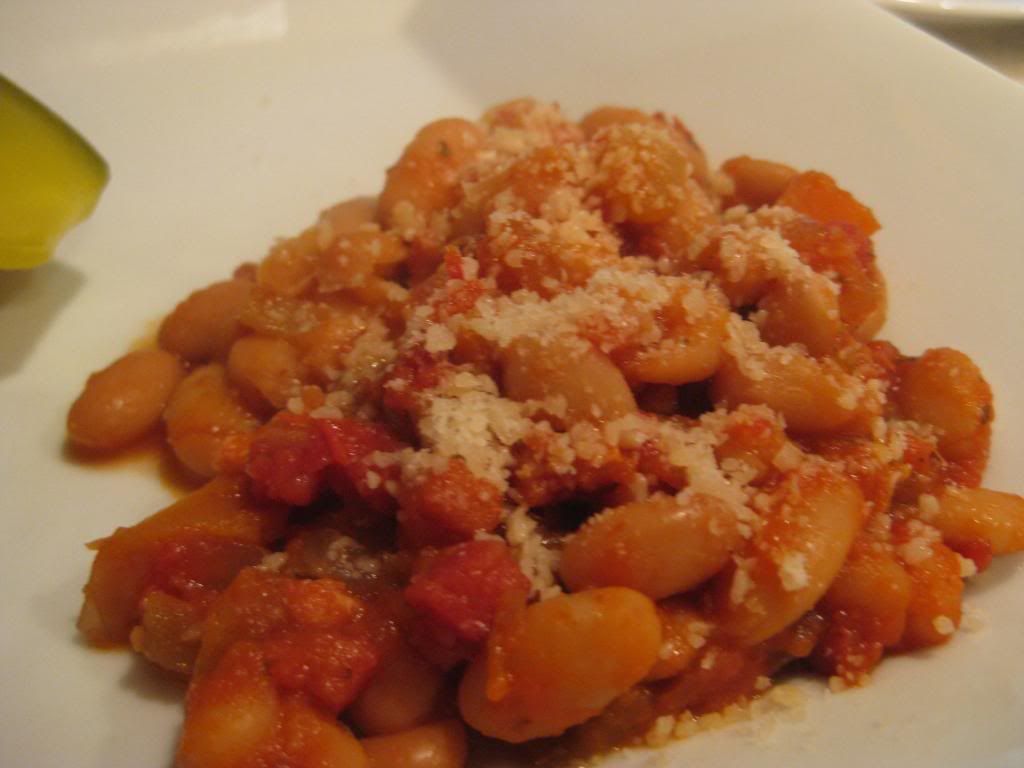
Begin by placing a large dutch oven over medium high heat and add the pancetta. Cook, stirring occasionally until the pancetta is crisp and lightly browned. Remove the pancetta with a slotted spoon and transfer the pieces to a plated lined with a paper towel. Leaving the grease in the dutch oven, add the carrot, onion and celery along with the italian seasoning and the red pepper flakes.


Cook, stirring occasionally until the vegetables have softened - this takes about 8 to 10 minutes. Next, add a dash of salt and pepper and the garlic and cook for 30 seconds to 1 minute. Add the white wine and deglaze the pan, working off any browned on bits from the bottom of the dutch oven. Allow the mixture to simmer until it reduces by half, then add the beans, tomatoes and chicken broth. Stir well and allow the mixture to simmer for 20 minutes. After 20 minutes, stir in the lemon juice and return the pancetta to the dutch oven.

Transfer the mixture to a serving dish and top with the parmesan cheese - serve and enjoy!

The Results:


Baked beans are a staple of summertime cookouts - but the traditional canned variety can be a bit bland and underwhelming. This recipe is essentially pork and beans, but kicked up to a whole new level of flavor. The pancetta adds a great, salty "bacon-like" flavor to the beans which are not as heavy as their canned cousins due to the chicken broth / white wine base. Paired with a good burger or pork chop - these beans will really shine.

That's all we have for you this evening, but be sure to stop back each night this week as we'll be featuring a brand new mini-recipe (plus Maggie has a full fledged recipe of her own). Until tomorrow,

~Cheers


Thursday, May 30, 2013

Not Your Average Burger

Good evening everyone!  During this grilling season, there's a whole variety of foods and types of meats to lay out on the grill and cook.  While this is a great way to enjoy any kind of food (not only not heating up the house on those super hot days,) repeating the same meats over and over again could get somewhat bland.  Tonight, I'm creating a very unique burger that your pallet won't soon forget.

The Recipe:  Sausage Burgers with Sriracha-Honey-Mustard Sauce
Original Recipe Found In:  Food & Wine Magazine, June 2013

What You'll Need:
(Serves 8)
1 1/2 Pounds Ground Pork
1 1/2 Pounds Sweet and Hot Italian Sausage, casings removed
1/4 Cup Honey
3 Tablespoons Sriracha sauce
1/4 Cup Dijon Mustard
1/4 Cup Whole-Grain Mustard
8 Whole Wheat Burger Buns, split and toasted

To start, mix the ground pork and the sausage meat in a large bowl until well combined.  If the sausage still remains in bits of pre-formed sausage, throw them in a food processor to get into smaller pieces.  From this meat mixture, shape into eight 4 inch patties, about 3/4 inch thick.  Set the patties aside on a clean plate.  

Next, heat a small saucepan over medium heat.  To the saucepan, add the honey, Sriracha, and both mustards.  Stir to combine well.  Cook this mixture until a boil.  You'll find that this sauce won't exactly "boil" - it will begin to bubble.  When this happens, you'll know when to turn down the heat to a simmer.  Heat this mixture until it becomes a slightly glossy sauce, about three minutes.  Reserve half the sauce in a bowl for serving.

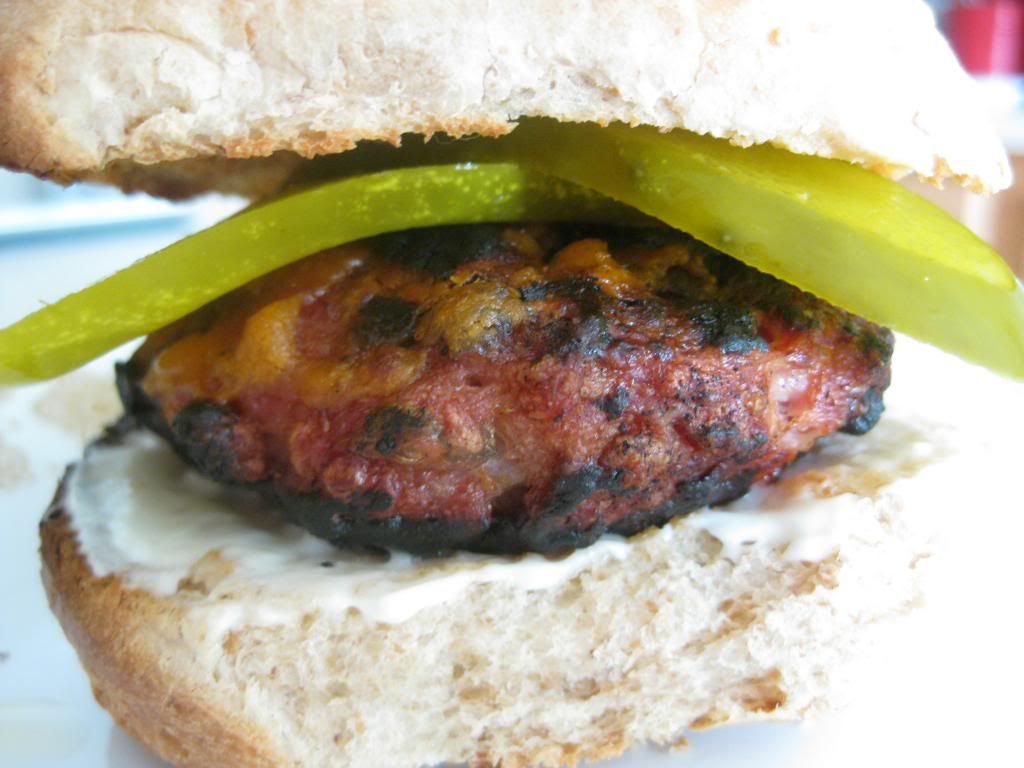
Being to preheat a grill and prepare for cooking.  Once the grill is heated, cook the burgers over medium high heat for five minutes on each side.  Grill until the burgers are lightly charred and barely cooked through.  Once each side is cooked and using a brush, glaze the burgers with the Sriracha-Honey-Mustard sauce and continue to grill.  Once the glazed side has cooked for three minutes, flip the burgers over and glaze the sauce on the new side.  Continue to cook for three minutes.

On a serving plate, spread the buns with light mayonnaise and top with the burgers.  Serve with the reserved sauce, coleslaw and/or pickles.  Top with the bun, serve, and enjoy!

The End Result:


If you're feeling bold and adventurous on your burgers, then this is the burger for you!  The meat is cooked perfectly and hits all the right flavor notes.  The combination of the ground pork and ground sausage melds together so well, that it's a surprise we haven't tried this combination yet.  The Sriracha-Honey-Mustard sauce packs quite a punch.  Granted there are greater parts of honey and mustard in the sauce, the Sriracha is quite potent, yet makes for a memorable sauce.  If you're not into a strong heat (or like me, can't handle it well,) I would layer up with pickles and mayo so you can still have the flavor of the sauce, but not a full mouth of it.  Overall, a wonderful burger alternative to the typical beef burger!

Check back tomorrow when Tyler returns for a dessert that make you want seconds.  Until then,

~Cheers!

Wednesday, May 29, 2013

Coffee & Steak Yields Great Smoky Flavor

Good evening everyone! I’ve got something different lined up for my portion of the blog this week. Like most of the country, we took advantage of the Memorial Day holiday and spent some quality time outdoors, including some time spent behind the grill. Rather than posting our entire Memorial Day spread in one big blog, I thought I’d break things down into two “mini-blogs”.

Today’s first mini-blog features a cooking technique that you may have seen on many Food Network or cooking channel shows (especially ‘Chopped’ or ‘Iron Chef’) – cooking your steak with ground coffee. At first glance, it seems a bit odd, coffee on steak? Why would you want to flavor your steak with coffee? Yet, time after time, chefs on these cooking competitions use the technique and are widely praised for their flavorful steak. Clearly there’s something there – I aimed to find out just what was so special about coffee covered steaks.

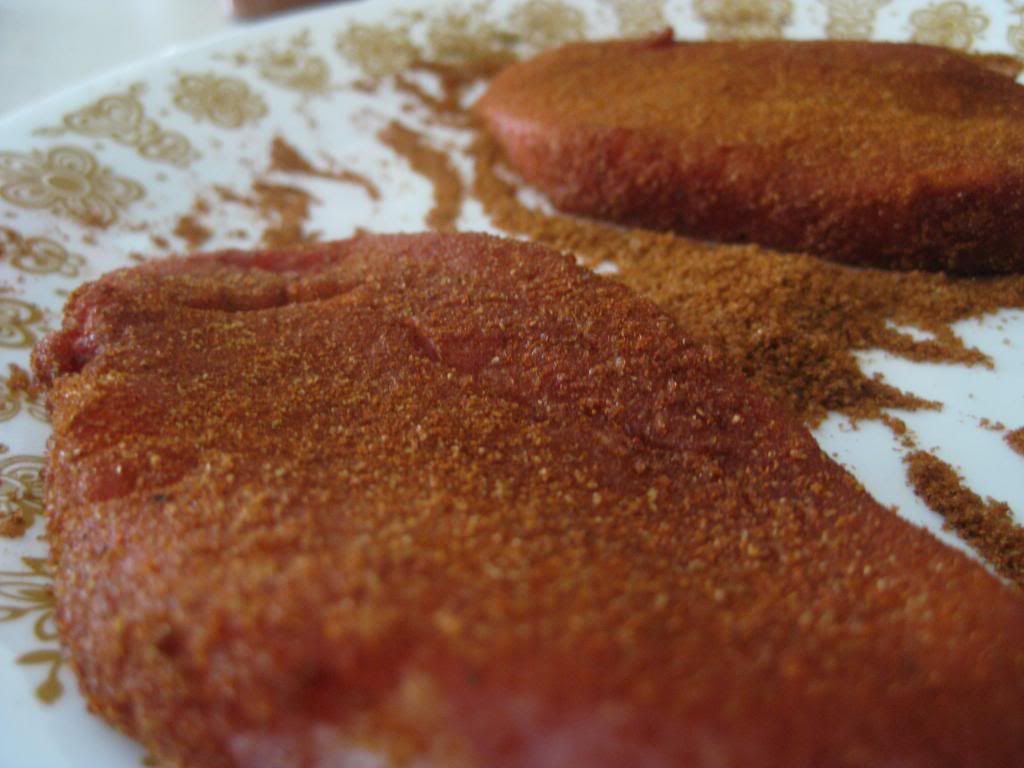
The process is fairly straightforward. Simply divide 1 teaspoon of ground coffee amongst your steaks (already seasoned lightly with salt and pepper) cover both side of the steak with ground coffee (remember, you’re not “breading” the steak with coffee – treat it like a seasoning) and place the steak on the grill. Cook the steak like you normally would and simply enjoy.

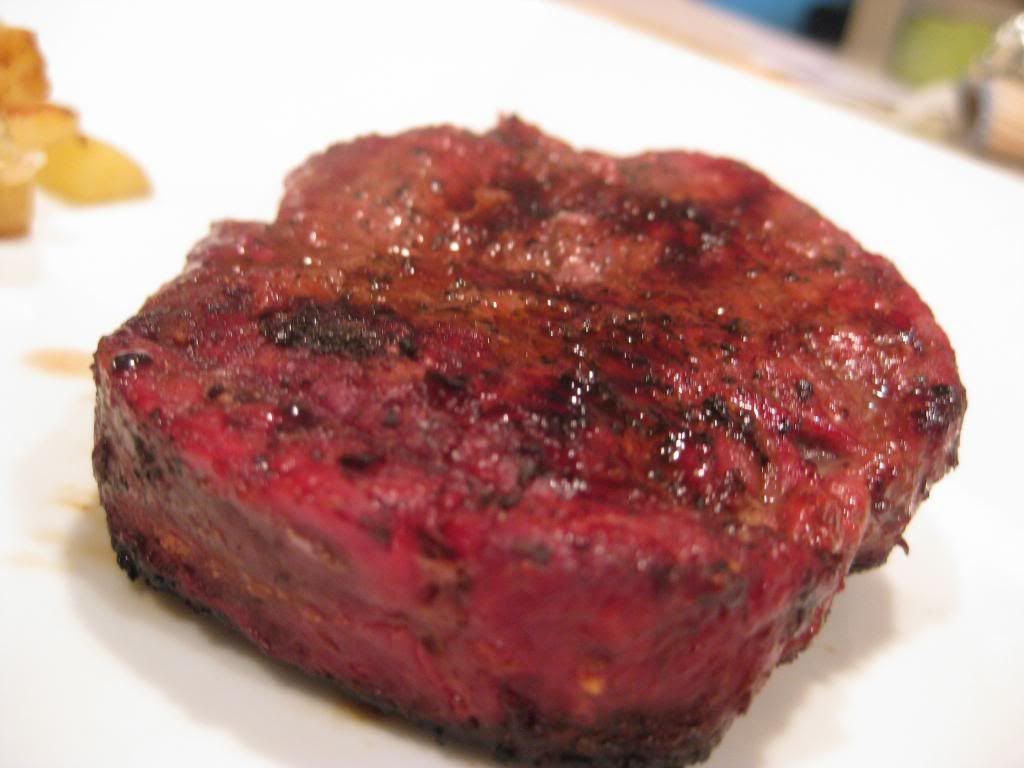
While I was cooking the steaks I noticed something interesting – the steaks were developing a deep red coloration around the edges, this is the tell-tale sign of smoked meat. (If you’ve ever cooked meat on a smoker or eaten at a good BBQ joint, you’ll recognize that bright red coloration as a sure fire sign of well done smoky flavor).


First cuts into the steak revealed the same situation, the first ¼ inch of the steak had a nice, deep red color (the ‘smoke’ had penetrated the steak – another good sign for BBQ). Color and presentation are all well and good, but did the coffee change the flavor?

Yes, it did. The coffee created a great, smoky flavor. The steaks tasted like they had been cooked over a smoker for hours, not simply grilled for 10 minutes. Surprisingly, there was absolutely no coffee flavor – just rich, smoky flavor that blended superbly with steak sauce or stood up nicely on its own (sans sauce).

It turns out the secret of coffee on steaks is that it creates a great smoked meat like end product. You don’t have to increase cooking time or even change the cooking method. Just a light rub of ground coffee and – ta-da – you’re eating smoked steaks.

If you’re feeling like tweaking your usual steak dinner, I’d recommend giving the ground coffee technique a try. It adds a great deal of flavor without changing any of the usual aspects of cooking a steak. Best of all, we now understand why everyone keeps using this technique on all of the cooking shows!

That’s all for min-blog number one. Maggie will step into the kitchen tomorrow night for her own full fledged recipe. I’ll follow her on Friday with mini-blog number two. Until then,

~Cheers

Thursday, May 23, 2013

A Side Dish Becomes the Main Attraction

Good evening everyone!  I've made mention several times here on the blog how much I love the Mexican cuisine, but at a very close second, I also love Chinese food.  And while I have the essentials of Mexican cooking down, I can't say the same for Chinese.  I have had several opportunities to prove myself and try varying degrees of Asian food here on the blog, but I have never tackled one of the most well-known Chinese foods...until today.

The Recipe:  Vegetable Fried Rice
An adapted recipe from www.foodnetwork.com

What You'll Need:
1/3 Cup Vegetable Oil
1 Onion, diced
3 cloves Garlic, finely chopped
1 Teaspoon ground Ginger
3 whole Scallions, white and green separated
3/4 Cup Sugar Snap Peas, ends trimmed off and cut into smaller pieces
3/4 Cup shredded Carrots
4 large Eggs, lightly beaten
4 Cups cold, cooked Jasmine Rice

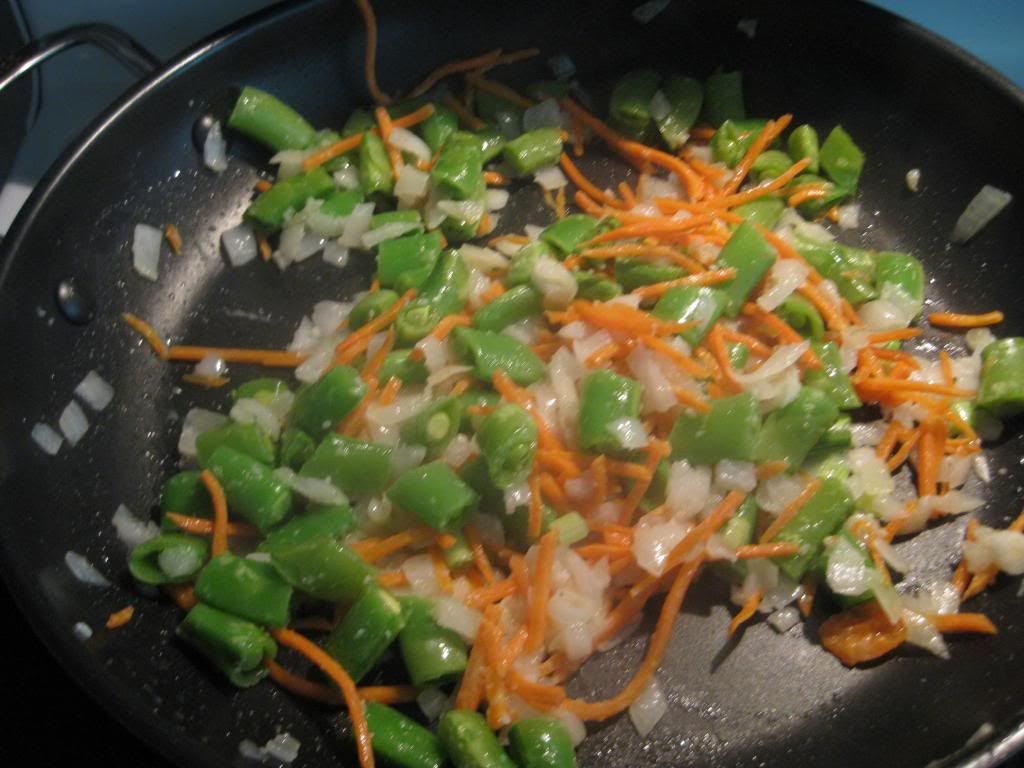
To start, heat a large nonstick skillet over medium-high heat.  For this portion of the recipe, it's important to keep a medium-high heat for the skillet.  You don't want to overheat the pan, or else your vegetables will become very crispy.  Once the pan is heated, add one tablespoon of the oil.  Add the onions to the pan and season with salt and pepper.  Cook the onions until they become slightly translucent and fragrant, about two to four minutes.  Add the garlic, ginger, and scallion whites.  Stir fry this mixture until everything becomes fragrant, about 30 seconds.  Next, add the sugar snap peas and shredded carrots.  Stir this combination until everything is well combined and all ingredients are heated through, about five minutes.  Once cooked, transfer into a large bowl and cover to keep warm.


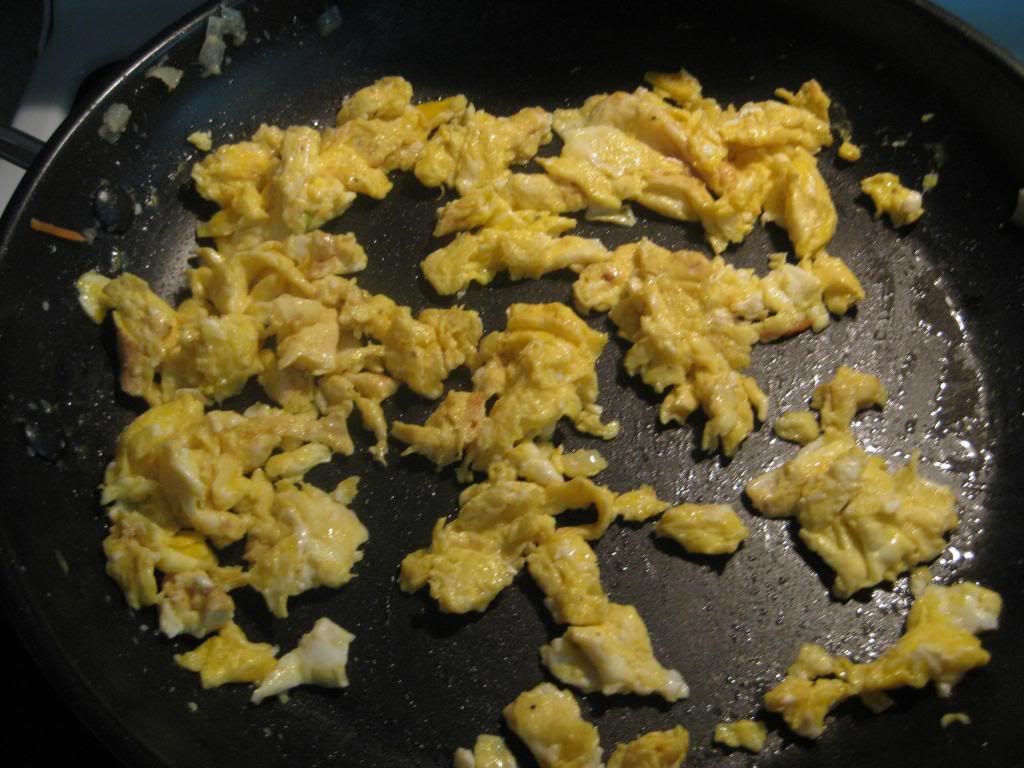
Return the skillet to the heat and add two more tablespoons of oil.  Once the pan has returned to medium-high heat, add the beaten eggs and season again with salt and pepper.  To cook the eggs, stir them constantly, and when the eggs are almost set, yet still moist, transfer the eggs into another bowl, cover to keep warm, and set aside.


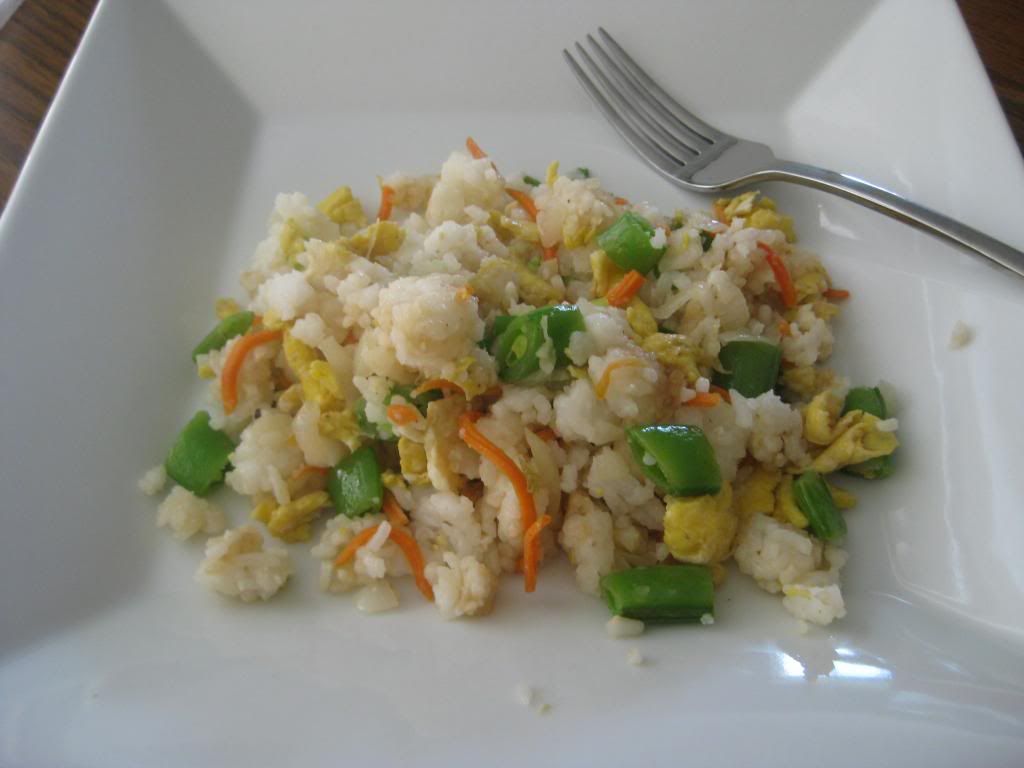
Again, return the skillet to the heat and heat the remaining oil.  Once the pan has returned to medium-high heat, add the cooked rice to the pan.  Using a spatula, break up any clumps that have formed.  Season with salt and pepper and stir fry the rice to coat with the oil.  Once the rice is covered, stop stirring the rice until it becomes slightly crispy, about two minutes.  Stir the rice again, removing any clumps that have been newly formed.  Add in the scallion greens, the stir-fried vegetables, and eggs.  Stir all the ingredients together until everything is well incorporated.  Heat this mixture until the ingredients are warmed, about two to three minutes.  If you want, add a splash of soy sauce for a little hint of flavor.  Serve and enjoy!


The End Result:


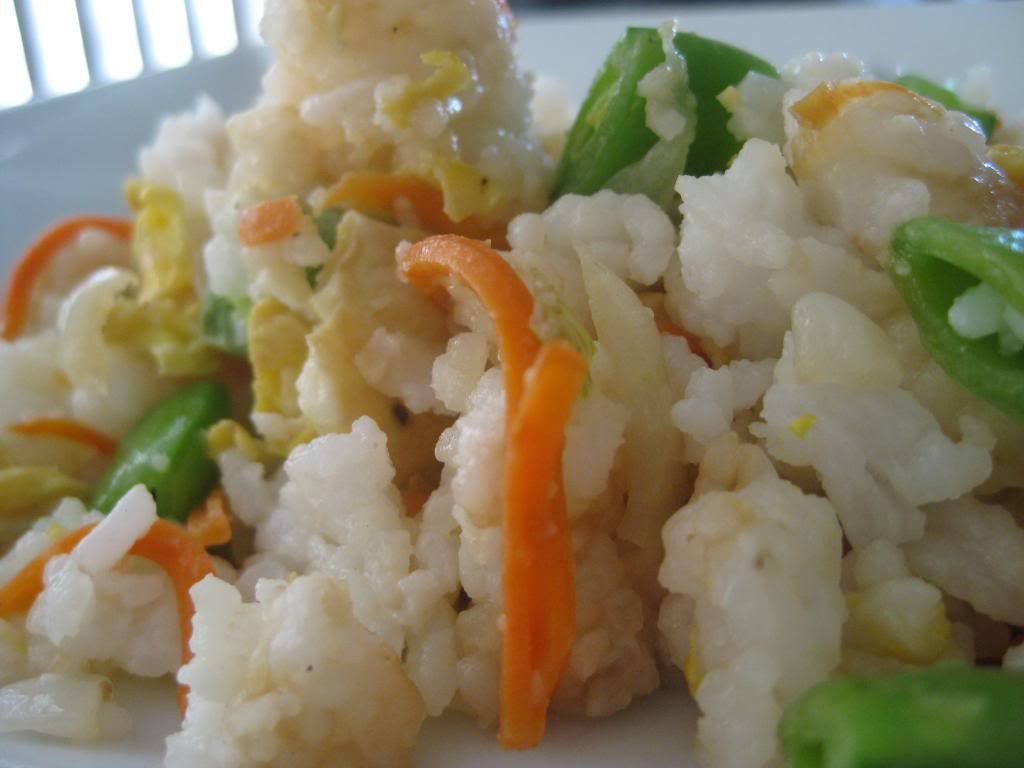
While this fried rice is in no means, like they serve in any Chinese restaurant, I'm proud of the fact that I actually got to create this dish.  The rice remained a bit sticky, probably from the remnants of cooking it the night before.  But once it became warm, it was a good base for all the other ingredients.  The onions, sugar snap peas, carrots, and scallions were cooked to perfection - not too raw and not too overdone.  Adding a bit of soy sauce right before serving gave the fried rice a bit of flavor and if you are wanting more flavor, you can add more soy sauce, or any Asian inspired seasoning to this dish - it won't certainly take any flavor away from it.  

That's all we have for you this evening, thanks for joining us for another week from around our culinary world!  Enjoy the holiday weekend and the unofficial start to summer.  Check back next week as we showcase our adventures in the kitchen.  Until then,

~Cheers!

Tuesday, May 21, 2013

Summer Classic


Good evening everyone! Well, you can’t say we didn’t warn you. When we bought our grill this spring, I wrote that we had a large backlog of grilling recipes that were just begging to be prepared. Every week for the past month, we’ve been firing up the grill for at least one of our recipes. This week? That trend continues.

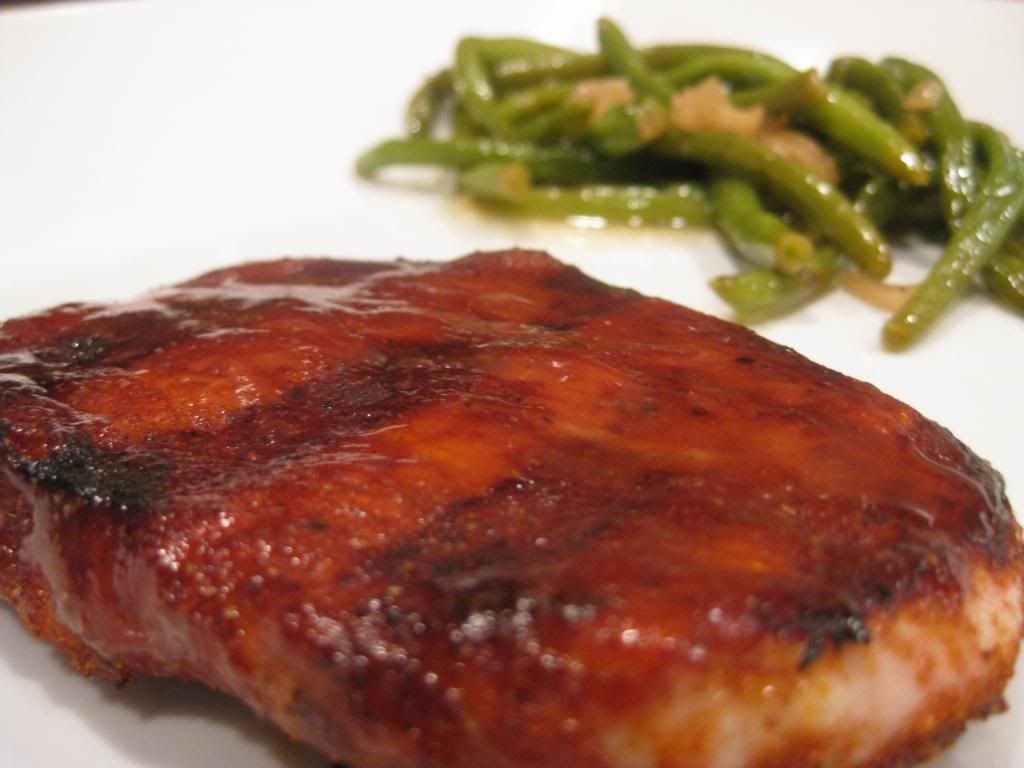
The Recipe: BBQ Pork Chops With Shallot Green Beans
Original Recipes Found In: The Best of America’s Test Kitchen

What You’ll Need:
(Serves 2)
2 X 4 ounce Boneless Pork Loin Chops
1 Tablespoon Paprika
1 Tablespoon Brown Sugar
2 Teaspoons Ground Coriander
1 Teaspoon Ground Cumin
1 Teaspoon Ground Black Pepper

For the BBQ Sauce:
½ Cup Ketchup
2 Tablespoons Light Molasses
2 Tablespoons Grated Onion (Or onion flakes)
2 Tablespoons Worcestershire Sauce
2 Tablespoons Dijon Mustard
1 Tablespoon Cider Vinegar
1 Tablespoon Brown Sugar
1 Teaspoon Liquid Smoke

For the Green Beans:
2 Cups Fresh Green Beans (Cooked)
4 Tablespoons Unsalted Butter
2 Tablespoons Vermouth

Obviously, everything in this recipe can be scaled to serve a larger crowd. Simply adjust to suit the number of people you’re feeding.

Begin by combining the dry ingredients (paprika, brown sugar, coriander, cumin and black pepper) in a small bowl. Toss until everything is evenly blended. Reserve 2 teaspoons of the spice rub in a small bowl, this will later be used in the BBQ. Transfer the remaining mixture to a shallow bowl or plate.

Next, pat your chops dry with a paper towel to remove any excess moisture. Using a chefs knife or paring knife, lightly score the surface of the pork chop twice (both sides). These scores prevent the chop from “curling” while the meat is on the grill. When the chops curl, you tend to have overcooked edges and undercooked centers (not a good thing!)

Coat both sides of your chops with the spice rub, making sure all cracks and crevices are filled. Allow the excess spice rub to fall off the chops. Set the chops aside.


In a medium bowl, combine all of the BBQ sauce ingredients, along with the 2 teaspoons of reserved spice rub, whisk well until evenly blended. Set this mixture aside (go ahead and give it a taste if you want – it’s good! Just save some for the recipe!)

If you’re making this dish with the green bean recipe, now is a perfect time to start on the green beans. In a small saucepan, melt 2 tablespoons of butter over medium high heat. Add the shallot and cook, stirring occasionally, until they turn a deep golden brown and become lightly crisped on the edges. This takes about 10 minutes.

Once browned, transfer the shallots to a skillet and stir in the vermouth. Bring the mixture to a light simmer before adding your (already cooked – they can be boiled, microwaved – whatever – just be sure they’re already cooked) green beans along with the remaining 2 tablespoons of butter. Give the beans a good toss to evenly coat them in the shallot sauce and then transfer them to a platter and serve.

Heat your grill to 500 degrees, clean the grates, and then reduce the temperature to 350-375 degrees. Place the chops directly oven the heat and cook for 3 to 5 minutes per side (adjusting cooking time based on the thickness of your chops – ours were about ¼ inch thick, so they cooked quickly). During the last minute of cooking on each side, brush a thin layer of the BBQ sauce on the chops (top side) so the sauce becomes a light glaze. It’s not part of the original recipe, but I’ve found this little touch really adds to the final dish.

Transfer your pork chops to a serving plate, serve with the BBQ sauce and green beans and enjoy!

The Results:


Elegantly simple recipes will always be appreciated on this blog and this recipe was, in fact, elegantly simple. A basic blend of spices complimented with a rich and savory BBQ sauce turn these delightfully grilled chops into a summertime flavor festival. BBQ + meat + grill almost always results in fantastic dishes (it’s about as close to “fool proof” cooking as you can get).

The green beans were a pleasant surprise as well. The butter shallot sauce added a nice bit of onion like depth to the fresh, bright flavors of the beans. Paired with the hearty BBQ flavors, the beans really balanced the plate. 

Oh – the best part? The whole dish clocks in at a little more than 200 calories!

That’s all we have for you this evening. Maggie will take to the kitchen on Wednesday night with a brand new recipe of her own. Until then,

~Cheers

Wednesday, May 15, 2013

Soup's On!

Good evening everyone! With Tyler, I wanted to express my gratitude to our readers and followers of the blog for celebrating our three year anniversary. It started as a fun hobby to create healthy meal options and its blossomed into something much greater. It's been a great journey on becoming better cooks and seeing how far we've developed is tremendous. Of course, without our readers, this hasn't been possible. So again, a multitude of thanks goes to those who read our cooking escapades every week! It drives us to create delicious dishes, like the one I'm cooking tonight

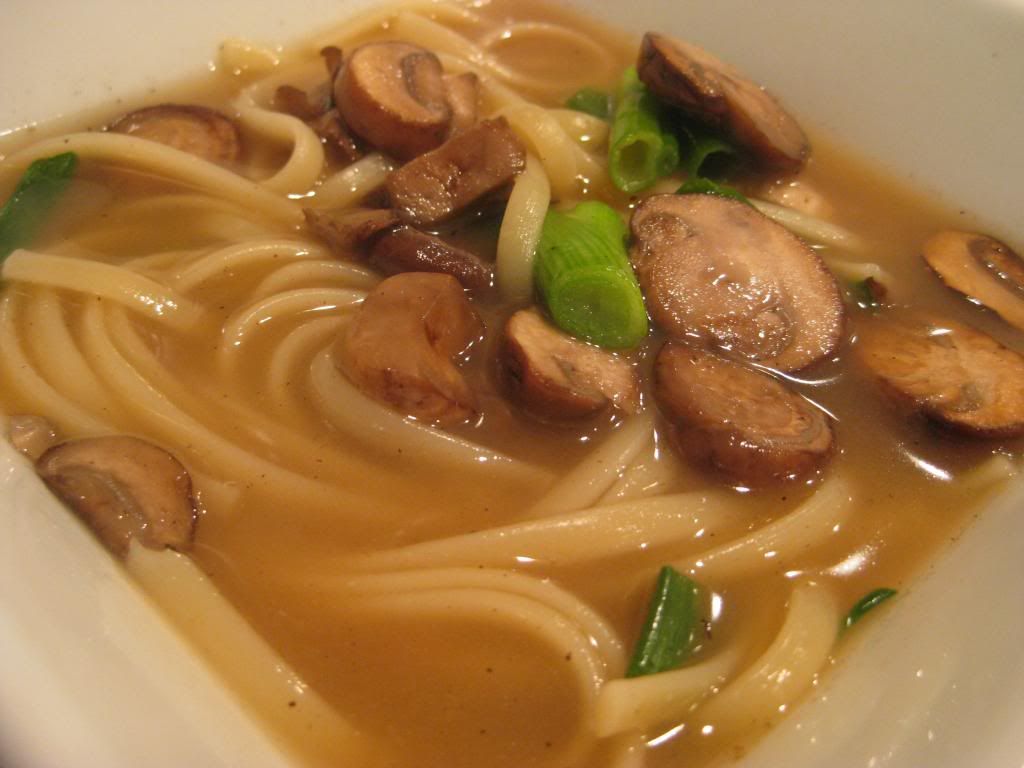
The Recipe: Chicken Noodle Bowl
Original Recipe Found In: Cooking Light, May 2013

What You'll Need:
4 Ounces uncooked Linguine
2 Teaspoons Canola Oil, divided
2 boneless, skinless Chicken thighs
1 Cup chopped Yellow Onion
1 Tablespoon powdered Ginger, divided
2 Tablespoons minced Garlic, divided
1/4 Teaspoon crushed Red Pepper
3 1/4 Cups unsalted Chicken Stock
1 3/4 Cups Water
2 Teaspoons dark Sesame Oil
1 1/4 Cup sliced Mushrooms
1 Tablespoon lower-sodium Soy Sauce
1 Teaspoon Sugar
3/4 Cup Sugar Snap Peas, cut diagonally into 1 inch pieces
6 Green Onions, cut diagonally into 1 inch pieces

To start, bring a large pot of water to a boil. Without adding salt or oil, cook the linguine according to package directions.  Once the pasta is al dente, drain in a colander, rinse the pasta in cold water, and set aside. 

While the pasta is being prepared, you can begin to cook the chicken. In a large saucepan, heat one teaspoon of canola oil over medium-high heat. Once the oil is heated and swirled in the pan, add the chicken. Cook the chicken for six to eight minutes on each side, or until it is cooked all the way through. Transfer the chicken to a clean plate and let stand for five minutes. After the chicken is cool to handle, shred into pieces. 

Next, return the same pan to the stovetop and heat the remaining canola oil. After the pan has returned to medium-high heat, add the onion, one teaspoon ginger, one tablespoon garlic, and crushed red pepper. Cook this mixture for four minutes, until the onions become slightly translucent. Add the chicken stock and water to the pan, scraping the bottom of the pan for any browned bits and bring the liquid to a boil. Once at a boil, cover the pan and cook for 15 minutes. After this is cooked, use a sieve and pour the liquid into a bowl, discarding any solids. Pour the liquid back to the pot and return to the stovetop, keeping warm.

In a large skillet, heat the sesame oil over medium-high heat and swirl to coat.  Add the mushrooms and cook for six minutes until they become softened.  After the mushrooms are cooked, add the remaining ginger and garlic.  Stir this mixture for one minute until everything is well incorporated.  When the mushroom mixture is done cooking, add them to the stock mixture, along with the chicken, soy sauce, and sugar and bring this mixture to a simmer.

Next, stir in the sugar snap peas and cook for four minutes.  Stir in the green onions and pasta; continue to cook the mixture for three minutes, until the pasta begins to absorb some of the stock liquid.  Ladle the soup into bowls, serve, and enjoy!

The End Result:


This soup is super refreshing, regardless of what the temperature gauge says it is outside.  I think a lot of that relies on the green onions and sugar snap peas - those two vegetables give the soup a crunch that's not in any other soups.  Most of this recipe is spent on building the depth of flavors to the broth.  In this case, it works beautifully.  Instead of a typical chicken stock, we added an onion flavor, but removed the chopped yellow onion, before the soup got overcrowded.  Also, adding the soy sauce and sugar gave the soup a uniquely different taste - and yes, sugar really did give the soup a boost, despite the soup having no sweet taste whatsoever.  If you're in the mood for a soup that is pleasing on the pallet and for something that is a little out of the norm, this dish is for you!

Thanks for joining us this week.  Check back next week when we whip up a brand new batch of recipes!  Until then,

~Cheers!

Tuesday, May 14, 2013

Recaito - Our New Best Friend


Good evening everyone! This week (Friday, to be specific) will mark our third anniversary of culinary adventure here at Out of the Culinary. This little hobby that started 3 years ago as a way to keep ourselves accountable for eating healthy and cooking our own meals has taken off into its own community and become so much more than we ever could have imagined. We average 100 page views per day, with some posts jumping beyond 200. In 3 years, we’ve had over 200,000 unique visitors to our blog – an absolutely astounding number when you consider this page’s humble origins.
 We won’t be doing any grand posts or special recipes to mark the occasion. Instead, we plan to simply continue making healthy meals and testing recipes (and occasionally fixing said recipes) so our readers at home can follow along in our culinary adventures. A big thank you to all of our readers, whether you’ve been here since day one or if you just found us last week. It means a great deal to Maggie and I that our hobby brings enjoyment to others beyond ourselves.
 When you’ve been cooking (and writing about cooking) for three years, you have to learn to take inspiration from everywhere. This week, my inspiration came from an episode of Travel Channel’s “Man vs. Food”. Now, a show that glorifies pig out spots and food competitions is probably not the first place you might think a healthy cooking blog would draw inspiration from, but that’s just what happened last week.
 In this episode, the host, Adam Richman, traveled to Puerto Rico to sample of some of their cuisine. One of his stops was at a food truck called “El Churry” which featured a sandwich called the “Mixto Frito”. The premise behind this dish was simple; it was a blend of steak, chicken, potato sticks, special sauce, lettuce and a big soft bun. Delicious? You bet. Healthy? No way.
 I wasn’t interested in the sandwich so much as the marinade. It was only mentioned in passing, but the show quickly spoke about a marinade called “Sofrito” that featured green peppers, onion, garlic and “other ingredients”. Other than a brief mention by Mr. Richman regarding how good the meat was having been flavored in this sofrito, no more attention was paid to the dish. That brief feature was enough to catch my attention, however, and I decided I needed to look into this marinade myself.
 I quickly learned two things upon researching sofrito – 1, sofrito is EVERYWHERE in Mexican cooking, in fact, it’s dubbed “Mexican ketchup” in reference to its common use in nearly any Mexican dish. 2, the recipe featured on Man vs Food was NOT sofrito, despite being called that in the show. See, traditional sofrito is tomato based, while this version was bright green (IE – no tomatoes).
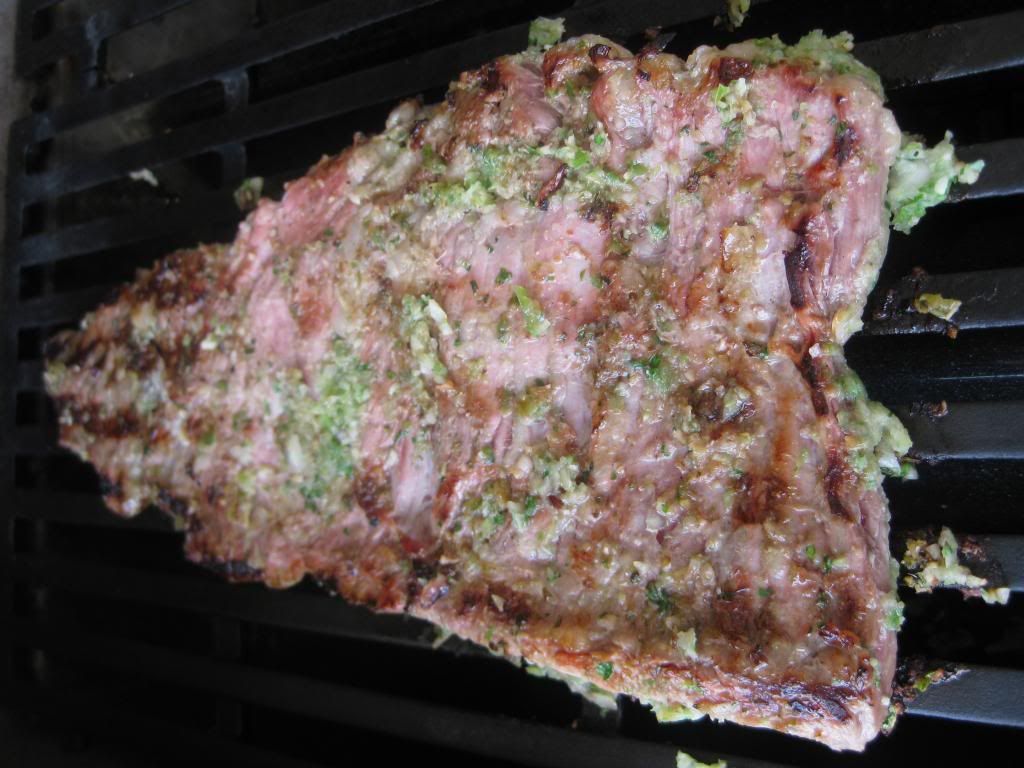
 FURTHER digging found the marinade was actually called “Recaito” (AKA, Puerto Rican sofrito) and IT is a common base in many Hispanic dishes (how have we never come across either of these bases / marinades before!?). Armed with my recipe for recaito, I set out to cook up my own recipe using the popular sauce. Here’s what I came up with:

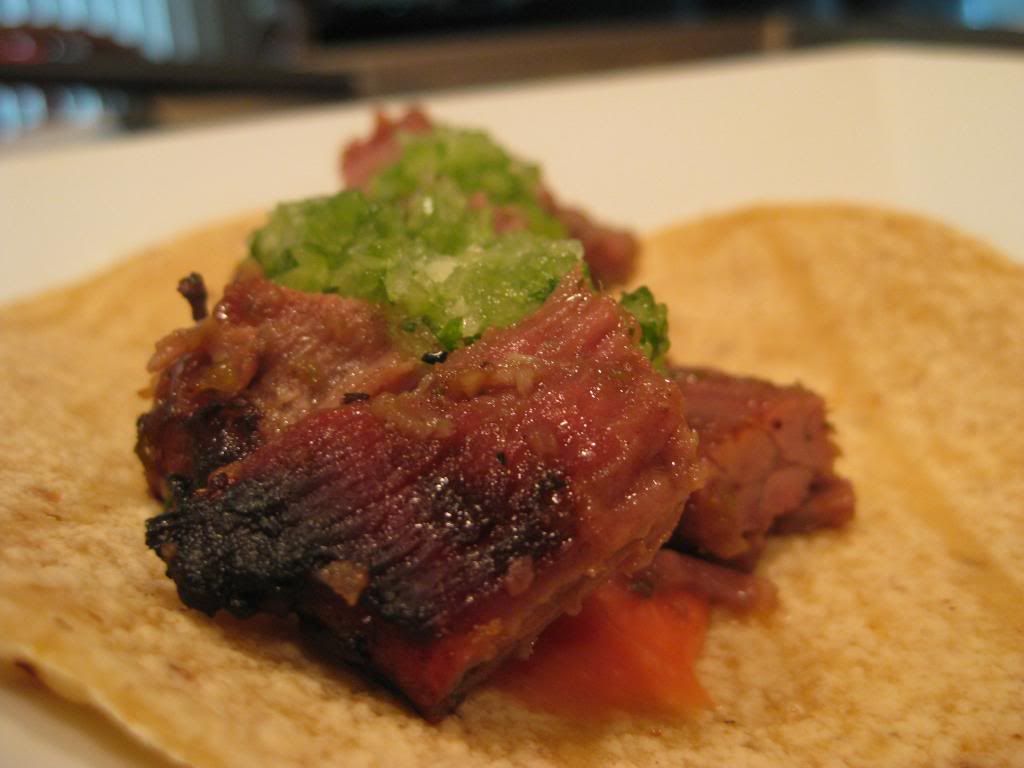
The Recipe: Recaito Tacos
This is an Out of the Culinary original recipe

What You’ll Need:
(Serves 4)
2-3 LBS Skirt Steak (Trimmed of excess fat)
2 Green Peppers (Diced)
1 Large Yellow Onion (Diced)
1 Head Garlic (Peeled, diced)
1 Bunch Fresh Cilantro (Stems removed)
Corn or Flour Tortilla Shells
For the fry sauce:
1 Cup Ketchup
½ Cup Mayo (Low fat)
2 Cloves Garlic (Minced)

Begin by preparing your recaito. Once all of your veggies have been roughly diced, simply toss everything into a food processor and pulse until the mixture is perfectly blended. Transfer this mixture to a glass jar or sealable container and refrigerate until you’re ready to use. Recaito should stay fresh for about a week, but you can freeze any leftovers in 1 cup increments to use in future recipes.
 At least 24 hours before you intend to serve the steak, remove it from the refrigerator and trim the excess fat. Lightly season both sides of the steak with salt and pepper. Cover both sides of the steak heavily in the recaito, making sure to fill any cracks and crevices in the meat. Next, wrap the steak tightly in plastic wrap and return it to the refrigerator. Allow the steak to marinate in the recaito for 24-48 hours prior to cooking.
 Preheat and clean your grill, then bring the temperature up to 350-400 degrees. Remove the steak from the plastic wrap, but leave as much of the recaito on as possible. Place the steak on the grill and allow it to cook for 5 to 7 minute per side, or until it reaches your preferred level of “doneness”. As described, the steak will be medium well. Reduce the cooking time to increase rareness to your preference.


 While your steak is grilling, you can begin preparing the fry sauce. This sauce was also featured on the sandwich in the Man vs Food episode and simply called “ketchup mayo”. I’ve always known it by its other name – fry sauce. In a medium bowl, combine the ketchup, mayo and minced garlic. Whisk together until perfectly blended. Store in the refrigerator until you’re ready to serve. So long as you keep it in a sealed container, the fry sauce should stay fresh for 3 to 4 weeks.
 Once your steak has reached the desired doneness, transfer it to a cutting board and allow it to rest for 3 to 5 minutes before slicing it up into ½ strips and then cubing the meat into ¼ to ½ inch pieces.
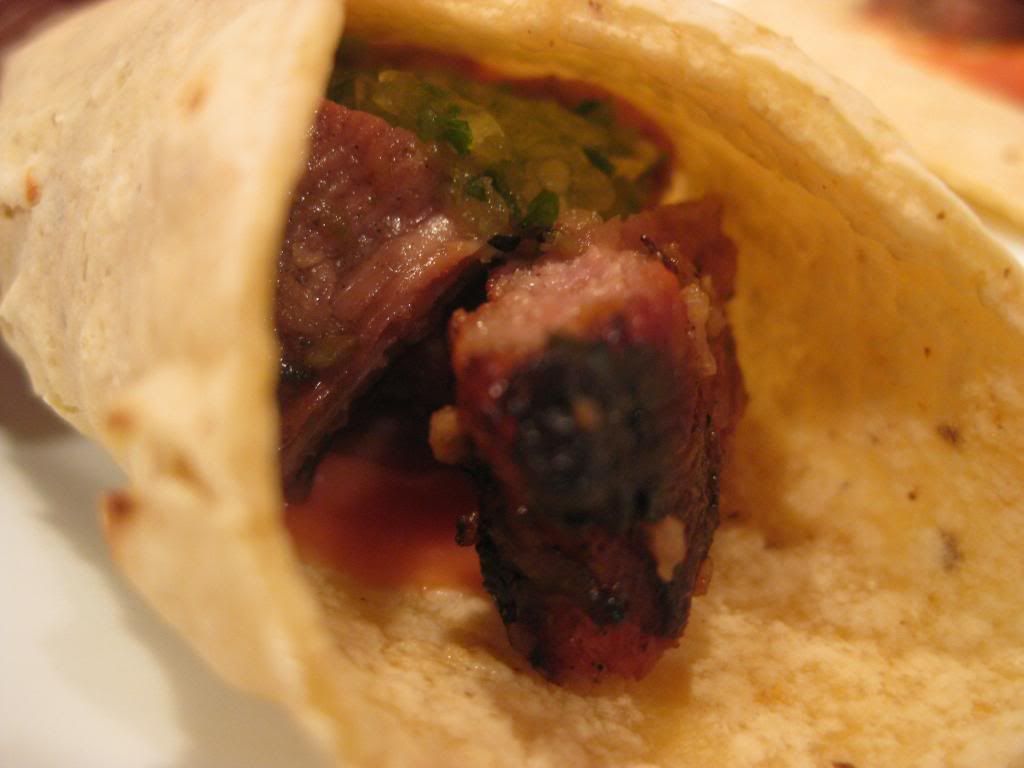
 Begin constructing your tacos by spreading a thin layer of the fry sauce down the center of the tortilla. Spoon a helping of the meat onto the sauce, topped with a tablespoon of the recaito. (You can also add fresh lettuce if you so choose). Serve and enjoy!

The Results:


In a word – WOW! The recaito marinade was absolutely phenomenal. The great pepper, onion and garlic flavors really penetrated the meat and made the dish just burst with flavor. The unsung hero of this dish was the fry sauce; it provided a nice zesty kick that really broke up the seasoned flavors of the meat. Topping the dish with fresh recaito is the ‘piece de résistance’ as it adds a nice bright, fresh flavor, but manages to tie all of the flavors together.
 I’m always pleased when a homemade recipe comes together for a nice, lean dish. It’s an extra bonus when our inspiration comes from something not quite as healthy (in this case, a food truck sandwich) and we manage to duplicate the flavors while cutting down on the calories. (This dish comes in at about 200 calories per serving).
That’s all we have for you this evening. Maggie will take to the kitchen on Wednesday with a brand new recipe of her own. Until then,

~Cheers

Wednesday, May 8, 2013

Creating Culinary Classics

Good evening everyone! Sometimes, you just have to get creative. This week, I was in the mood to cook up some form of roasted meat on the grill and turn it into pulled / barbecue sandwiches. I was looking for something that centered around brisket, but was open to pork or even chicken if necessary. The problem was, I couldn't find an exact recipe to match all of my needs. So, I adapted. Tonight's recipe is a hybrid of two partial recipes I've found and had been keeping in my 'back pocket' for future use. I combined a rub & BBQ marinade from Jamie Oliver that was intended to go on ribs (we're not huge rib fans) with a coleslaw and refried bean concoction that is meant for brisket (I'm using pork) to create my own version of slow roasted BBQ pork sandwiches. Just because the recipe you're searching for doesn't exist, that doesn't mean you can't MAKE it. Let's get cooking!

The Recipes: Pulled BBQ Pork Sandwiches
Original Recipe Inspired From: Daisy May's BBQ Ribs (Jamie's America) & Smoked Brisket Tortas (Bon Appetite, April 2013)

What You'll Need:
(Serves 8)

2.5 - 3 Pounds Pork Loin
8 Ciabatta Rolls

For The Iceberg Slaw 

1/4 Cup Fresh Lime Juice
1/4 Cup Sour Cream (light)
1/2 Head of Iceberg Lettuce (Shredded)
1/2 Small Red Onion (Diced)

For The Refried Beans 

15 Ounces Pinto Beans (Rinsed)
1 Tablespoon Vegetable Oil
1/2 Small Red Onion (Diced)


For The Rub (Scale according to size of roast) 

3 Tablespoons Yellow Mustard
3.5 Tablespoons Paprika
1 Tablespoon Chili Powder

For The Marinade 

1/4 Cup Light Brown Sugar
2.5 Tablespoon Honey
1 Small Pat Unsalted Butter (Melted)
1 Beef Bouillon Cube

Stick with me on this one folks. The ingredient list is long, but it's not a very complicated recipe - I promise!


Begin by preparing your iceberg slaw and refried beans. Both of these dishes can be prepared the night before if you're tight on time.

For the coleslaw, in a small bowl, combine the lemon juice and sour cream. Whisk until the mixture is evenly blended. Add in the lettuce, red onion and a pinch of salt. Toss the mixture until the lettuce is evenly coated in the sour cream mixture. If you're finding your slaw to have too much lettuce, add a dollop of sour cream. Conversely, too much sour cream - add another handful of lettuce. Once combined, cover with plastic wrap and store in the refrigerator until ready to serve.

To prepare the beans, add the vegetable oil to a small sauce pan over medium high heat. Once the oil is warm, add the onions and cook for 5 minutes or until the onions soften. Next, add 1/2 cup of water and the pinto beans. Using a small masher (or a spoon) mash the majority of the beans into a coarse pulp. Bring this mixture to a boil and then reduce the heat. Allow the mixture to simmer for 5 to 8 minutes, stirring occasionally, until the mixture thickens up. Set aside or store in the refrigerator if you're preparing this dish ahead of time.

About 1 hour prior to when you want to begin cooking, begin preparing your pork loin. First, spread the yellow mustard evenly across all side of the loin, creating a thin base layer - making sure to fill in all of the cavities. In a small bowl, combine the paprika, chili powder and a pinch of freshly ground kosher salt and black pepper. Toss until the spices are combined evenly, then carefully cover the roast in the spice mixture. Make sure to get even distribution across the loin, filling in all cracks and cavities.

Wrap the loin tightly in plastic wrap and store it in the refrigerator for one hour (at least) prior to cooking. This allows the rub to really penetrate the meat and will really boost the final flavor of the pork.

After an hour, preheat your grill to 400 degrees and begin making teh marinade. In a small bowl, combine the melted butter, brown sugar and honey with 1 1/2 tablespoons of water. Whisk well until everything is blended. Remove your loin from the plastic wrap and set it on a large piece of heavy duty aluminum foil. Carefully pour your marinade over the loin, making sure to cover all of the sides as best you can. Tightly wrap the loin the foil and place it on the grill.

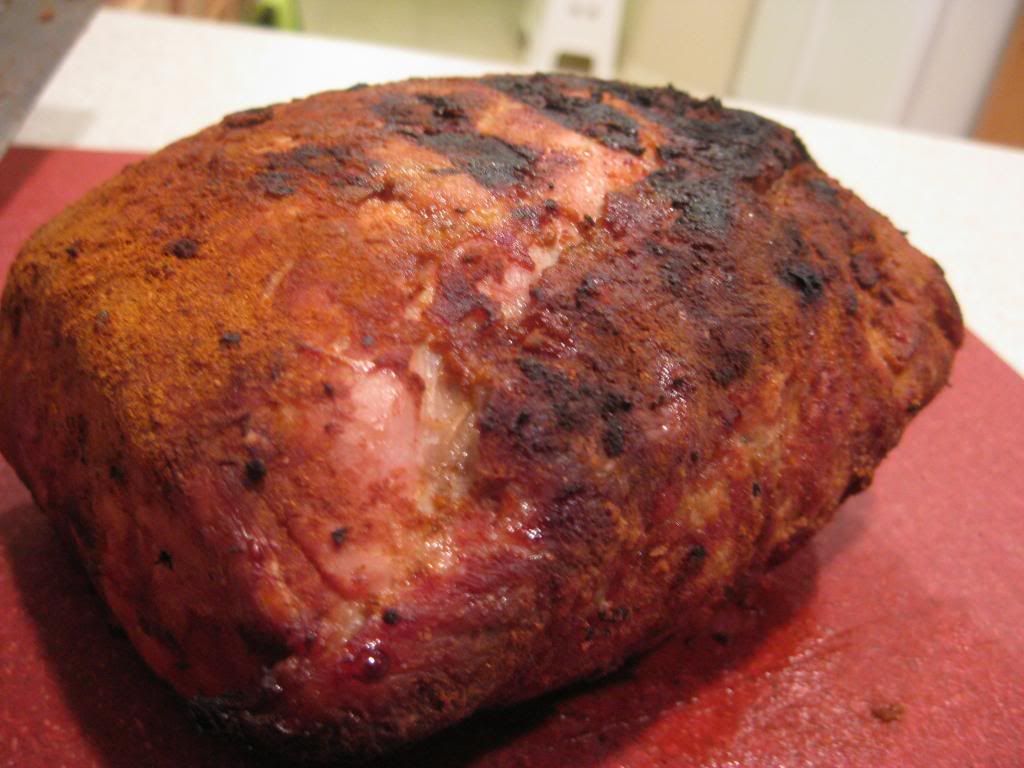
The rule of thumb with pork loins is 25 to 30 minutes of cook time per pound. Our loin was 2.5 pounds, so we're looking at 62 to 75 minutes. Determine your cook time, then cut that number in half. The first half of that cook time, the loin needs to be wrapped in the foil. Once you reach the halfway mark, remove the loin (still in the foil) from the grill, and carefully pull off the wrapping (removing it from the grill prevents the juices from falling onto the grill and creating flare ups - not fun!). Return the loin to the grill (sans foil) and allow it to cook for an additional 35-40 minutes (again, this depends on the size of your pork loin). I'd recommend turning the loin halfway through to ensure that all sides of the loin have equal opportunity to form a nice crust.

Once your pork reaches an internal temperature of 150 degrees (which you should have easily passed by now - but always check just to be safe) you're ready to serve. Remove the loin from the grill and allow it to rest for 5 minutes (so the juices return to the center of the meat) prior to cutting or shredding (your preference here - you can choose to thinly slice the roast or simply shred it with a couple of forks).


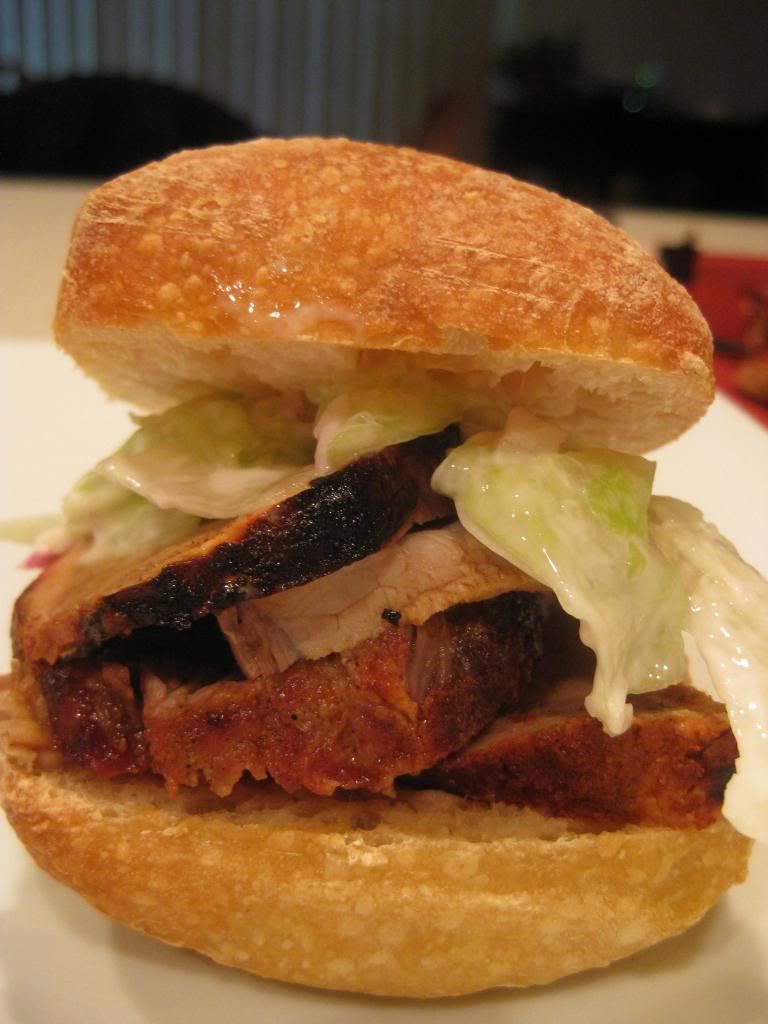
Once sliced or shredded, you're ready to begin assembling your sandwiches. Spread a thin layer of the refried beans (reheated if you made them earlier) on the bottom of the bun (in this case, a ciabatta roll sliced in half). Next, add a helping of the pork and top that with a portion of the iceberg slaw we prepared earlier. Top with the other half of the ciabatta roll and enjoy!


The Results:


Superb! There's few things that can top a roast (of any kind) with a good BBQ rub. The pork is absolutely outstanding with the great, smoky and savory rub from Jamie Oliver's cookbook. Even though this rub is intended for ribs, the basic components compliment pork so well you'll never ever notice that it was designed for beef!

The iceberg slaw and refried beans add a nice element to the sandwich as well. The slaw provides a little brightness and fresh flavor while the refried beans add a great level of depth to the final flavor. The beans are rich, yet heavy and compliment the BBQ savoriness  very well. However, without the slaw, I think the final dish would be a little too savory (IE heavy) so I recommend at the very least to top the sandwich with lettuce - but this slaw is pretty great - so make it if you can.

That's all we have for you this week. We're back again next week with brand new cooking adventures. Until then,

~Cheers


Tuesday, May 7, 2013

An Asian Inspired Dish...From A Grill?

Good evening everyone!  Grilling has quickly become the great medium for our kitchen and culinary adventures.  Not only can you whip up something real simple on the grill (like hot dogs and burgers,) but different culinary styles can also utilize a grill.  Last night, I tried my hand at Mexican by grilling quesadillas and it was incredible delicious.  Tonight, I'm trying an Asian inspired recipe, that will use a lot of flavors for something for a relatively simple dish.

The Recipe:  Pork and Sweet Pepper Kebabs
Original Recipe Found In:  Cooking Light, May 2013

What You'll Need:
1/4 Cup lower-sodium Soy Sauce
1 Tablespoon fresh Lemon Juice
1 Tablespoon Ketchup
2 Teaspoons Brown Sugar
1 Teaspoon Worcestershire sauce
1/4 Teaspoon crushed Red Pepper flakes
4 Garlic cloves, minced
1 (1 pound) Pork Tenderloin, trimmed and cut into 1/2 inch cubes
1/4 Teaspoon Kosher Salt
4-8 mini Red, Yellow, or Orange Bell Peppers
To start, place the soy sauce, lemon juice, ketchup, brown sugar, Worcestershire sauce, red pepper flakes, and minced garlic in a large bowl.  Mix all these ingredients until they are incorporated.  Pour the marinate into a ziplock bag and add the pork cubes.  Seal the bag and give it a quick shake.  Place the bag in the refrigerator and keep in for one hour, turning the bag on the other side after 30 minutes.

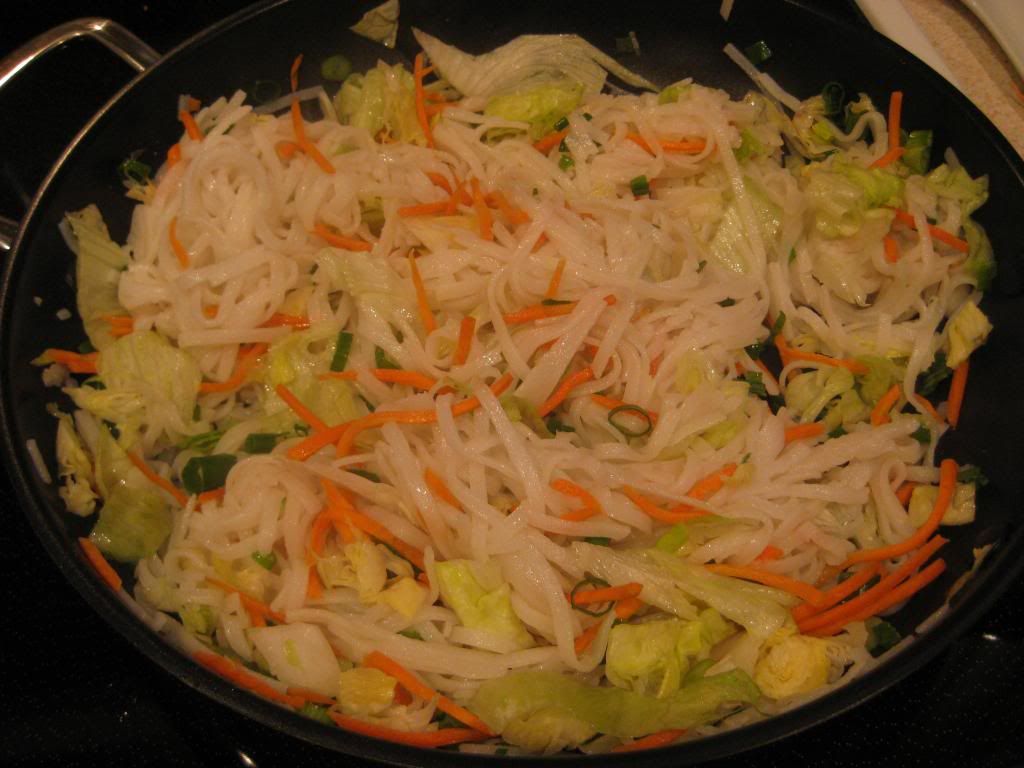
While the pork marinates, begin to create a pancit.  A pancit is like a stir fry, but more emphasis on the noodles, rather than the vegetables that they noodles are sauteed with.  Begin the pancit by taking a large bowl of warm water and placing 1 1/2 cups of rice noodles in the water.  Keep the noodles in the water for at least a half an hour, or until soft.  Drain the noodles in a colander.  Heat a large skillet over medium high heat with one tablespoon of dark sesame oil.  Once the skillet is hot, add the rice noodles, 1 cup thinly sliced iceberg lettuce, 1/3 cup shredded carrots, and 2 thinly sliced green onions.  Saute this mixture until everything is heated throughout and just softened, about 10 to 15 minutes.  Cover the skillet to keep warm and focus back on the pork.


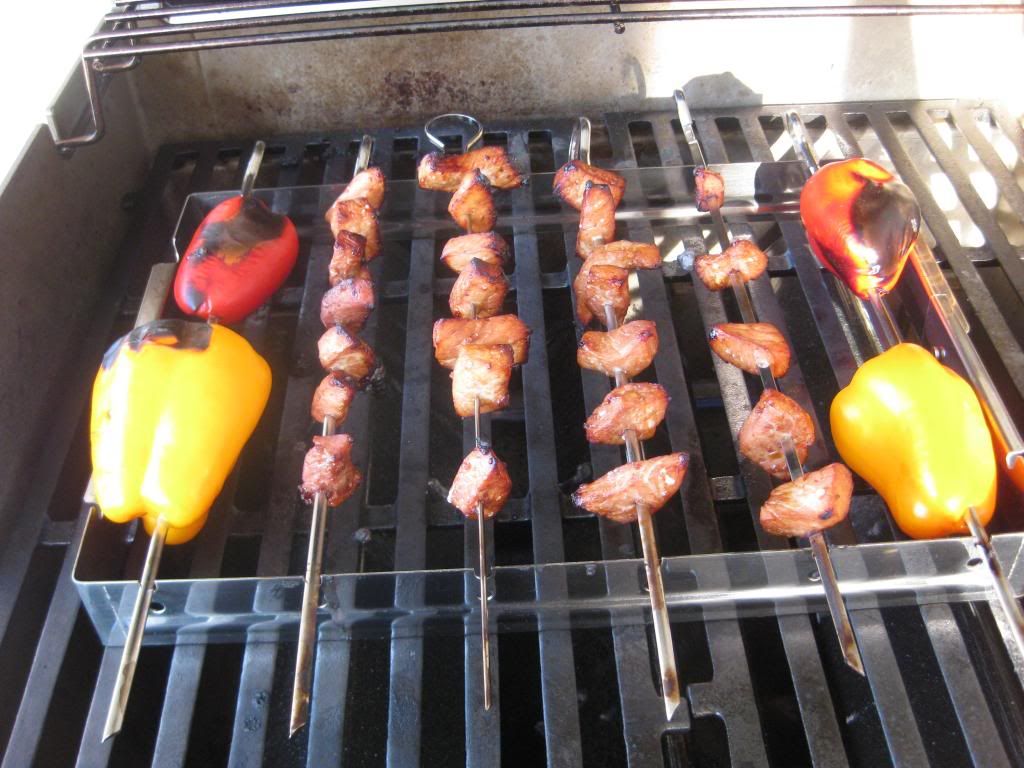
Heat a grill to medium-high heat.  Remove the pork from the ziplock bag and discard the marinade.  Thread the pork evenly onto two to four skewers and sprinkle with salt.  Thread four mini bell peppers onto one or two skewers.  Once the grill is heated, arrange the skewers in a single layers on a grill rack. Grill three minutes on each side or until desired degree of doneness (in our kitchen, meat has to be a cooked temperature to be done, in which case, pork is done at 150 degrees.)


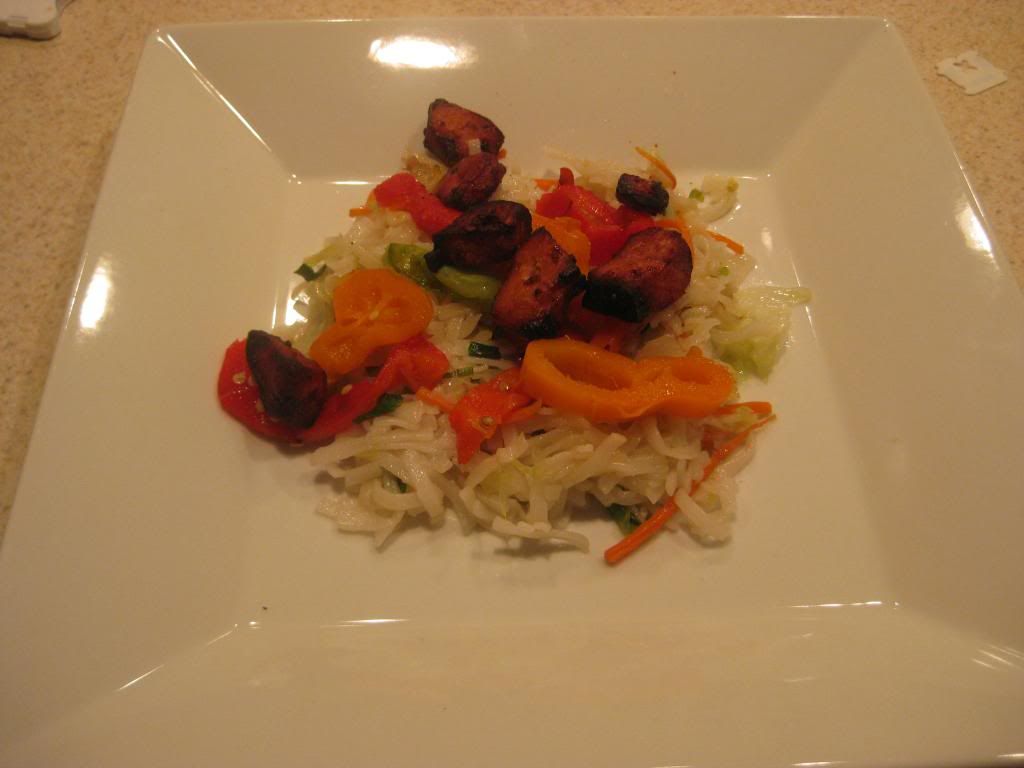
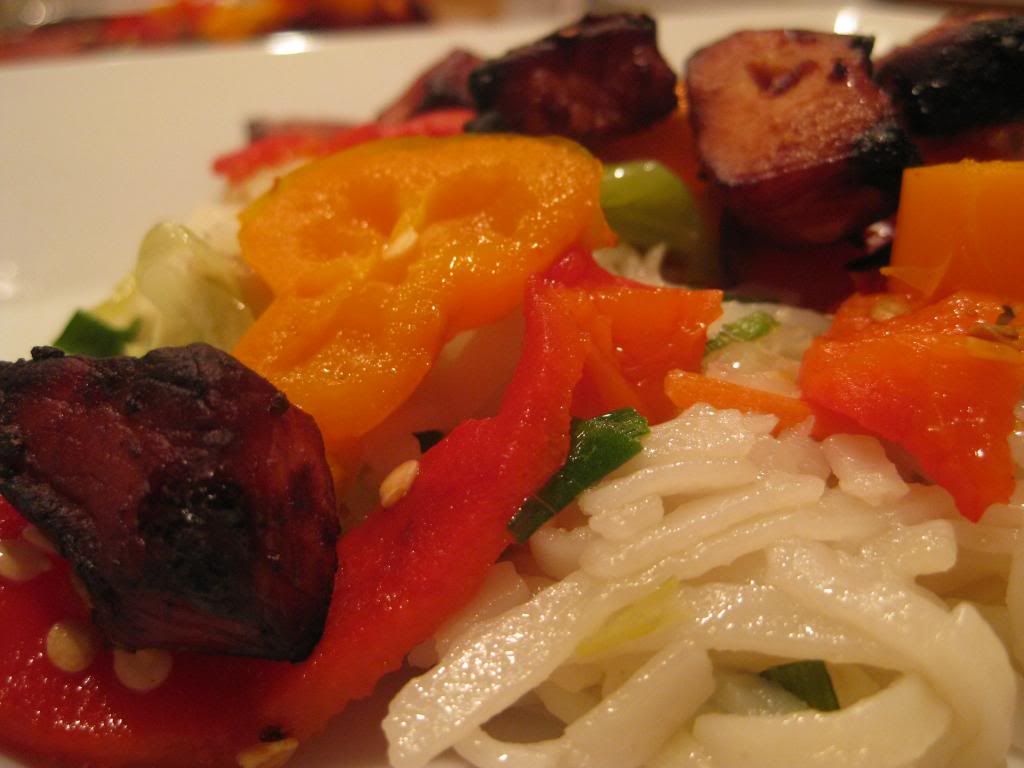
Slice the mini bell peppers and pork cubes to manageable pieces.  Sprinkle with the cooked pancit and toss.  Serve and enjoy!

The End Result:


The pork had an intense flavor, mostly from sitting in a bath of soy sauce and garlic for an hour, but that's also what made the pork sparkle.  Added with the smokey flavor from the grill, these were little bites of tasty heaven.  But the real star of this recipe was the pancit.  It was neutral enough to calm down that stark flavor from the pork, but added a well-rounded balance that you wouldn't get from serving just the pork and peppers.  I believe that pancit could be the base for any Asian inspired dish, whether using the grill or not, add any meat or vegetable combination, and the pancit will highlight any flavors you throw into it.  Overall, a wonderfully inspired cuisine that is easy on any pallet.

Join us tomorrow as Tyler takes to the kitchen with a brand new recipe.  Until then,

~Cheers!

Monday, May 6, 2013

Grilled Quesadillas

Good evening everyone!  The thing about cooking I love is that it really gives a person ingenuity to create something original from a classic dish.  Throwing in a new method of how to cook a classic dish, however, is definitely unique.  Tonight, I am tackling a traditional Mexican dish and amping up the flavors by using a spicy dry rub and grilled vegetables to produce one delicious dish. 

The Recipe:  Grilled Chicken and Vegetable Quesadillas
Original Recipe Found In:  Cooking Light, May 2013

What You'll Need:
1 1/2 Teaspoons Paprika
1/2 Teaspoon Garlic Powder
1/2 Teaspoon dried Oregano
1/2 Teaspoon ground Cumin
1/4 Teaspoon Kosher Salt
1/4 Teaspoon freshly ground Black Pepper
2 (6 Ounce) boneless, skinless Chicken Breast halves
1 small Onion, cut into 1/2-inch thick slices
1 small Orange Bell Pepper, cut into 1/2-inch thick wedges
3 Ounces shredded Monterey Jack cheese
4 (6 inch) Flour Tortillas

To start, preheat a grill to medium high heat.  While the grill preheats, prepare the chicken:  in a small bowl, mix the paprika, garlic powder, oregano, cumin, salt, and pepper until throughly mixed.  Rub the mixture evenly over both sides of the chicken and let stand for 10 minutes, or until the mix has just began to settle into the meat.

Once the grill is heated, arrange the chicken, onion, and bell pepper on the grill rack.  Cook the vegetables until tender, about four minutes on each side.  Flipping the vegetables, especially the onion might be a bit tricky.  Since there are small layers inside the onion, those small pieces might fall through the grates of the grill.  But, if you use a wide enough metal spatula, those pieces will stay with the rest of the onion.  You will have to be careful with the bell pepper too, since it has very thin slices.  Using the same metal spatula, carefully flip it over and make sure it lands on the grates.  It's very important to keep these vegetables (mostly) whole as they play a very tasty part to the quesadilla.


Cook the chicken on each side until done, about eight minutes, or until a meat thermometer reads 160 degrees.  While the chicken is cooking, coarsely chop the vegetables and keep warm with aluminum foil.  Once the chicken is done cooking, transfer to a chopping board and let stand for five minutes.  During which, a skillet over medium high heat can be preheated.


On clean plates, prepare the flour tortillas:  lightly sprinkle one half of the tortilla with the shredded cheese.  Once the chicken has reached its five minutes, thinly slice the meat and divide evenly over the cheese half of the tortilla.  Divide evenly the vegetables also and fold the non-cheese half over the filling.

By now, the skillet should be warmed and ready to use.  Place two quesadillas in the skilled and cook until the cheese begins to melt and the tortillas are lightly browned, about four minutes.  Carefully, sprinkle another thin layer of cheese over the filling and flip the quesadillas over, cooking on this side for another four minutes.  Cut each quesadilla into two wedges, serve, and enjoy!

The End Result:


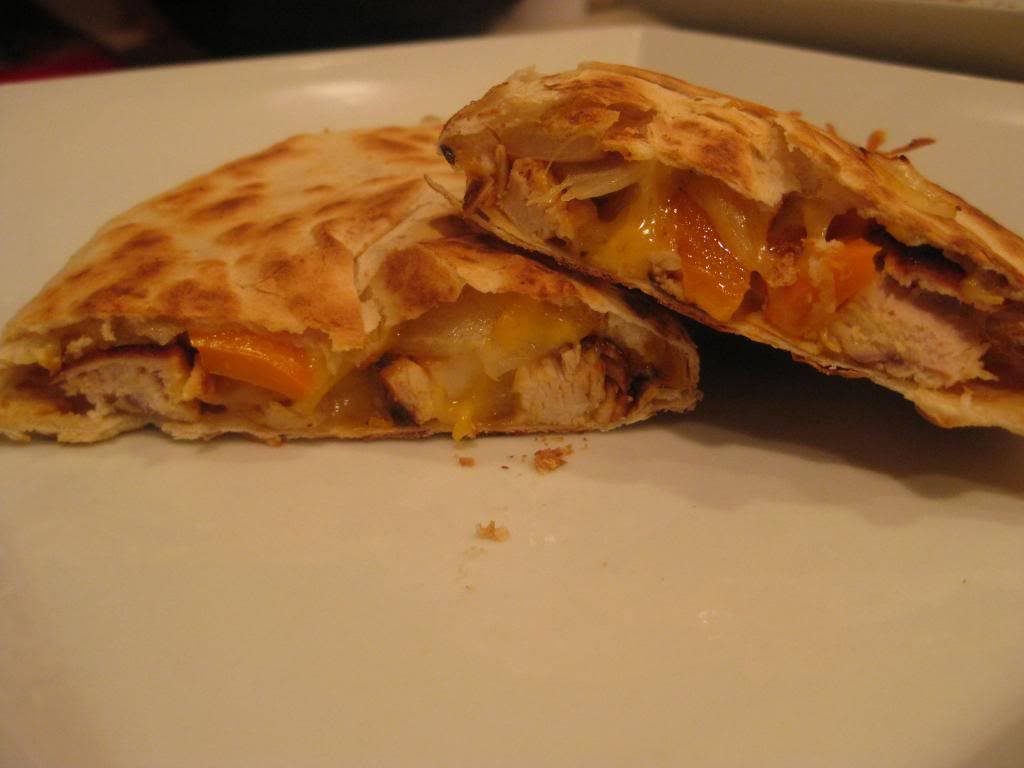
The flavors from the chicken are not only smoky from the grill, but have an intensely spicy notes.  The grilled orange pepper and onions are softened and bring another flavor realm to the quesadillas.  They do get quite tough to flip once on the grill, but if you can salvage the peppers and onions, it adds a nice depth.  Using the cheese only as a "glue" for the quesadillas (which was hard for me, considering I like cheese...a lot,) it cut down on the calorie intake, but having a hint of cheese flavor was a nice change of pace.  These quesadillas were under 350 calories, which is great when you want huge flavor from not a lot of ingredients.  

Come back tomorrow as I continue the grill theme, but completely change culinary styles.  Until then,

~Cheers!

Wednesday, May 1, 2013

Pork + Cylinder = Entertainment for All (Oh, and dinner)

Good evening everyone! Every now and again, I like to take on a recipe that's a little adventurous - a little out there if you will. Traditionally it's been a Jamie Oliver recipe or maybe something clever from an Alton Brown cookbook - so that gives you a good gauge of just how "adventurous" my adventurous has been on the blog so far. I do have one cookbook in my library that carries quite of bit of adventure, however, 'Guy Fieri Food' - by Guy Fieri of Food Network's Diners, Drive-Ins & Dives.

Guy has quite an eccentric collection of recipes in his cookbook - a collection we were hereto unable to tap as most of them required a grill or centered around sushi/crab/lobster (yuck). Now, armed with our already well used grill, I'm equipped to tackle most of Guy's recipes, and tonight, I picked a very unique and adventurous one to get us started.

The Recipe: Summer Grilled Pork
Original Recipe From: Guy Fieri Food

What You'll Need:
(Serves 4)

4 X Boneless, Skinless Pork Chops (1 inch thick)
10 Thick Cut Slices Applewood Smoked Bacon
3 Tablespoons Cream Cheese (Light)
2 Tablespoons Panko Bread Crumbs
1 Red Bell Pepper (Diced)
1/4 Artichoke Hearts (Jarred, drained of liquid)
1/4 Cup Honey
1/4 Dijon Mustard
1/2 Cup Beer (IPA or Pilsner)

I found it was much easier to toss the artichoke hearts and bell pepper into a food processor and simply pulse until everything was evenly blended and combined. You can certainly chop by hand and mix the two ingredients if you choose, I simply went with the time saving method!

Begin by using a large meat tenderizer to pound the pork chops to 1/4 inch thickness. Season both sides  of all the chops with a pinch of salt and pepper.

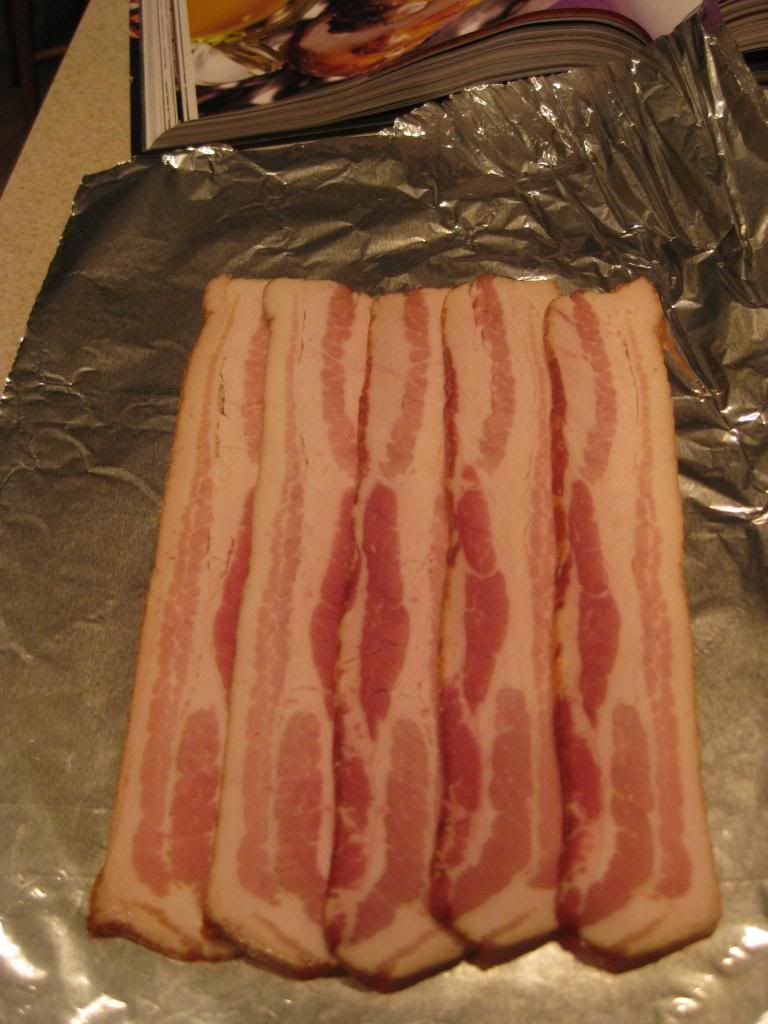
Next, lay a large sheet of heavy duty aluminum foil on the countertop and place your strips of bacon vertically in the center of the sheet, overlapping each slice of bacon by 1/4 of an inch (see picture).


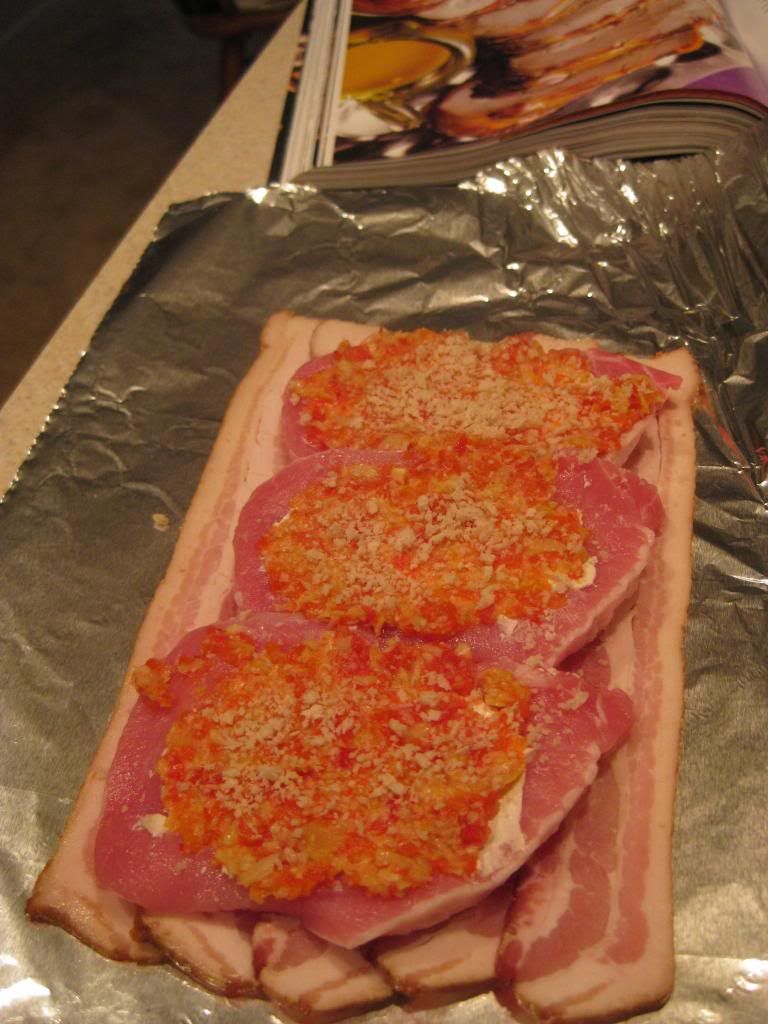
Next, lay the pork chops, horizontally across the bacon slices, making sure the chops don't overlap too much. Spread a thin layer of the cream cheese across the surface of each pork chop. Follow this with a helping of the red bell peppers and artichoke hearts, and top this layer with the panko bread crumbs.


Beginning with the edge that's closest to you, begin rolling the bacon/pork concoction in front of you into a cylinder. Try to keep the wrap as tight as possible, but make sure you're not bringing the aluminum foil with you as you roll (IE - don't wrap the foil with the food). Once you've created a tight roll (henceforth called the pork cylinder - because it makes me laugh), pull the foil around your pork cylinder and wrap it up tight.

Transfer the pork cylinder to a 350 degree grill and cook for 7 to 8 minutes per 'side' (rotating it four times). While your PC (pork cylinder) is cooking away, begin making the beer based sauce.

In a small saucepan, combine the mustard, honey and beer over medium high heat. Allow the mixture to simmer, stirring occasionally, until it reduces by about a third and thickens up. Set half of the sauce aside for serving, and reserve the other half for basting.

After your PC has cooked for about 30 minutes, remove the foil (carefully) and place the PC directly on the grill. (This is a huge scenario of 'easier said than done' - I recommend brining some toothpicks with you to skewer the PC - thus preventing it from flying open once the foil is off) Removing the foil will allow the bacon to crisp up (which it wasn't able to do inside the foil). At this time, you can apply the reserved sauce to each of the sides of the pork cylinder, effectively "basting" your pork.

Let the bacon cook up for 5 to 6 minutes per side and check the pork chops with an instant read thermometer to make sure they've hit 140 degrees. Let the PC rest for 5 minute prior to slicing it into 3/4 inch portions - serve and enjoy!

The Results:

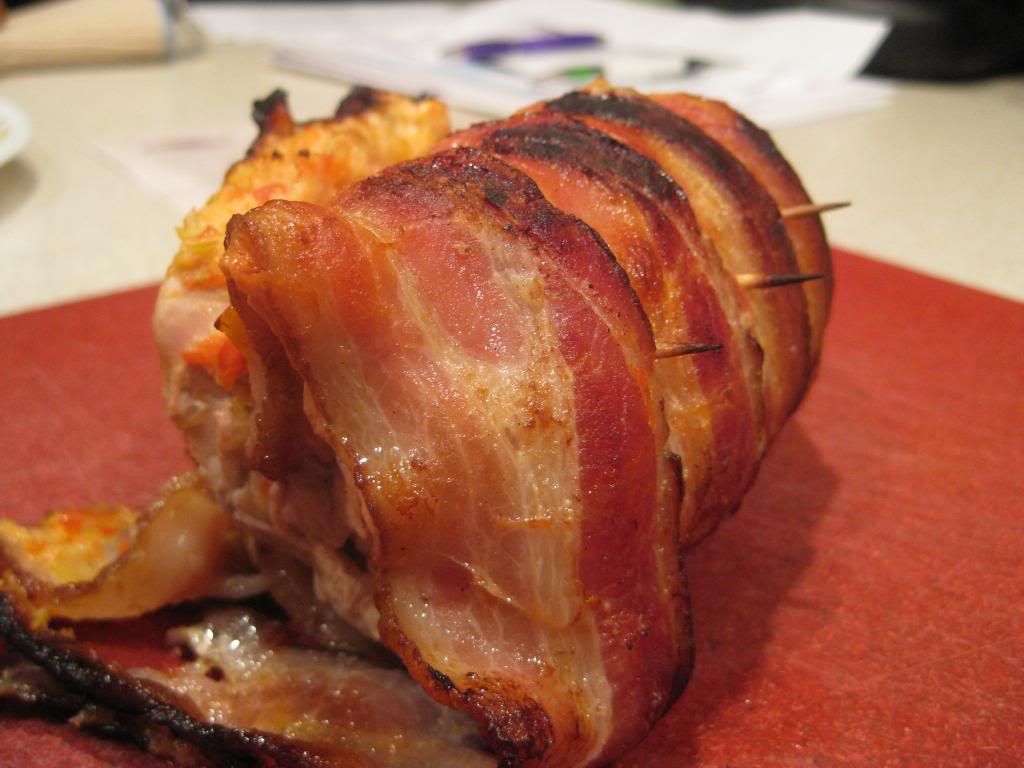
My slices weren't as pretty as I had hoped, so you get the pre-sliced pic 


This was certainly a little culinary adventure. I've never paired cream cheese with pork before nor have I tried essentially "stuffing" something on the grill. While the roll itself was a bit tricky to "unfold" and cook directly on the grill (this may be attributed to overly vague instructions from the cookbook itself - there's little in the way of detailed step-by-steps in this cookbook) the process was fairly straightforward and not as daunting as it seemed on paper.

Even better, the recipe itself was a pleasant surprise. The artichoke, red pepper, cream cheese center provided a nice 'sweet-yet-spicy' counter to the rich flavor of the bacon wrapped pork. (Seriously, pork covered pork is one of the best culinary guilty pleasures we've found). What results is a great, smoky pork flavor with a bright - not too sweet, not too hot center. This recipes weighs in a little higher on the calorie side at 450 calories per serving, but for a nice summertime treat - it's worth it!

That's all we have for you this week. We're back again next week with two brand new recipes. Until then,

~Cheers