Tuesday, August 6, 2013

A New Twist on a Summertime Favorite


Good evening everyone! In my opinion, summertime produces the world’s greatest vegetable – sweet corn. Sure, sweet corn may have nonexistent nutritional value but it’s loaded with delicious value (which is a metric I just made up). There are few things that can top freshly picked sweet corn, lightly glazed in butter, eaten right off the cob.

The only downside with sweet corn is from a culinary creativity standpoint. Other than wrapping it in bacon, throwing it on the grill or getting cute and slathering it in a medley of spices and herbs, you can’t really deviate from the norm of corn on the cob.  When I found this week’s recipe – corn chowder – I was intrigued; it took fresh summertime sweet corn and placed it in a form that I’ve yet to try (chowder) the only question is, would this new form still carry the great flavors of summer, or would we create something entirely different? Let’s get to cooking and find out!

The Recipe: Corn Chowder
Original Recipe From: Cooks Country Online

What You’ll Need:
(Serves 6)

8 Ears Sweet Corn (Husks, silk removed – washed, boiled and cut from cob)
3 Tablespoons Unsalted Butter
1 Onion (Finely chopped)
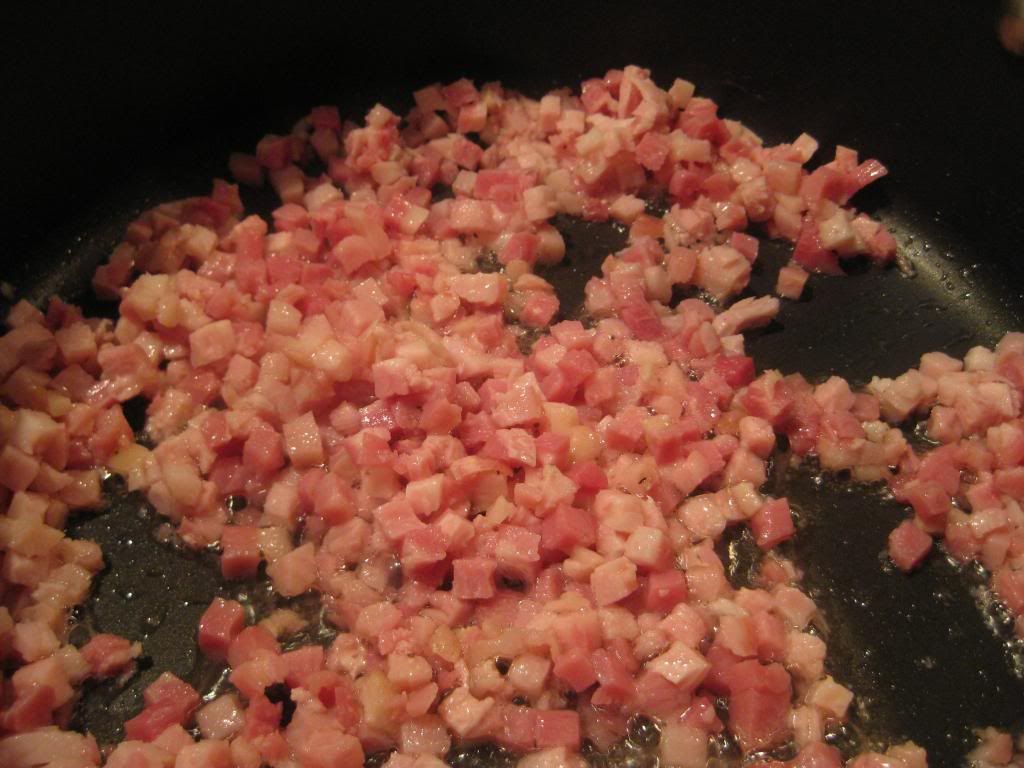
4 Slices Bacon (Halved lengthwise, then cut into ¼ inch pieces)
2 Teaspoons Fresh Thyme
¼ Cup All Purpose Flour
5 Cups Water
¾ Pound Red Potatoes (Diced into ½ inch pieces)
1 Cup Half and Half
Sugar
3 Tablespoons Chopped Fresh Basil

Begin by preparing your sweet corn the standard way (clean, boil for 5 to 7 minutes). Then, using a sharp chef’s knife or corn stripper, remove the kernels from the cob and transfer them to a large bowl. Don’t discard the cobs – instead transfer them to a plate until you’ve finished removing all of the kernels from all of the ears.

Once the kernels are removed, grab the cobs and use a butter knife to scrape off any of the remaining pulp left behind on each cob (scrape this pulp into a small bowl). Repeat this process on all 8 ears until you’ve gotten a nice amount of pulp (the recipe says you will get about 2 to 2 ½ cups of pulp but my experience yielded about ¼ to ½  of a cup). Next, take a kitchen towel or paper towel and wrap it around the pulp. Over a clean bowl, squeeze the towel until you’ve worked all of the moisture out of the pulp (once again the recipe claims 2/3 a cup of juice, I was closer to 1/8th of a cup). Set this juice aside.

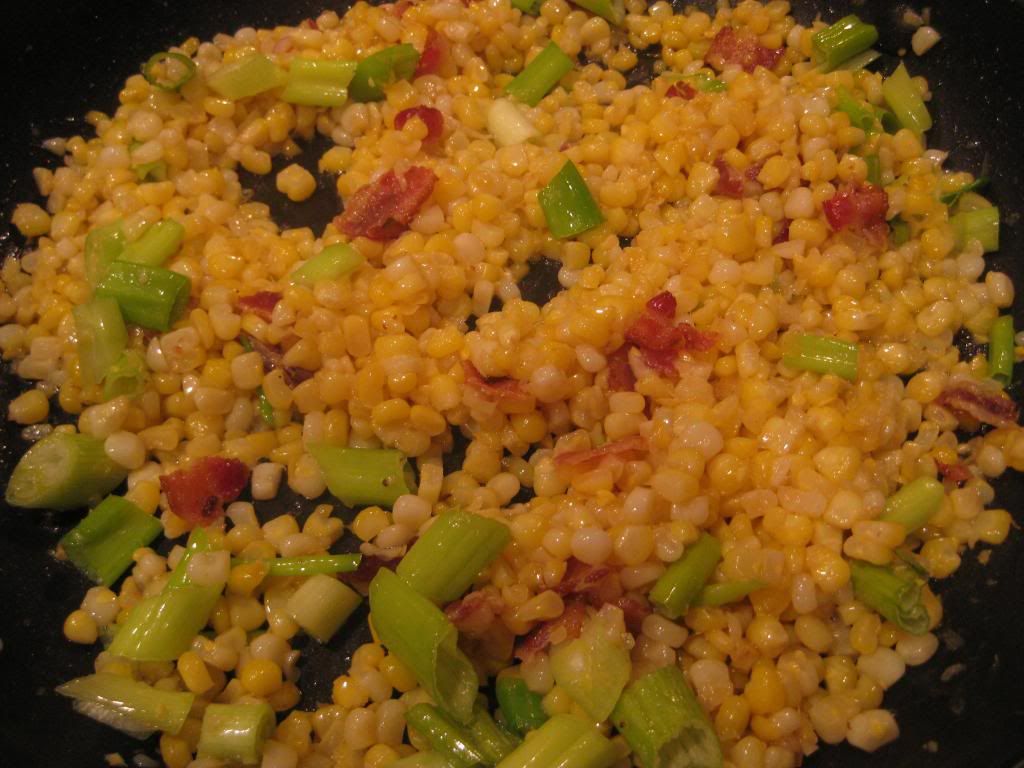
Next, melt the butter in a large dutch oven over medium high heat. Once melted, add the onion, bacon, thyme, 2 teaspoons salt and 1 teaspoon pepper and cook (stirring constantly) for 8 to 10 minutes or until the onions begin to brown along the edges. Stir in the flour and cook for an additional 1 to 2 minutes (be careful the flour doesn’t burn or brown too quickly – if it is cooking fast, move on to the next step regardless of the time). Whisk in the water slowly and bring the mixture to a boil. Once boiling, stir in the corn kernels and the red potatoes and return the mixture to a simmer. Reduce the heat to medium low and let the mixture simmer for 15 to 20 minutes, or until the potatoes have softened.

Remove 2 cups of the chowder from the dutch oven and process it in a food processor or blender until it becomes smooth. Then return this to the dutch oven. (This process creates a creamy base for the choweder, while keeping all of the great flavors we’ve been building). Add the half and half and return the mixture to a soft simmer. Once simmering, remove the pot from the heat and stir in the reserved corn juice from earlier along with a pinch of salt and pepper. Taste the chowder and add up to 1 tablespoon sugar as needed (don’t over sweeten if the corn has provided enough natural sweetness). Top with fresh basil, serve and enjoy!
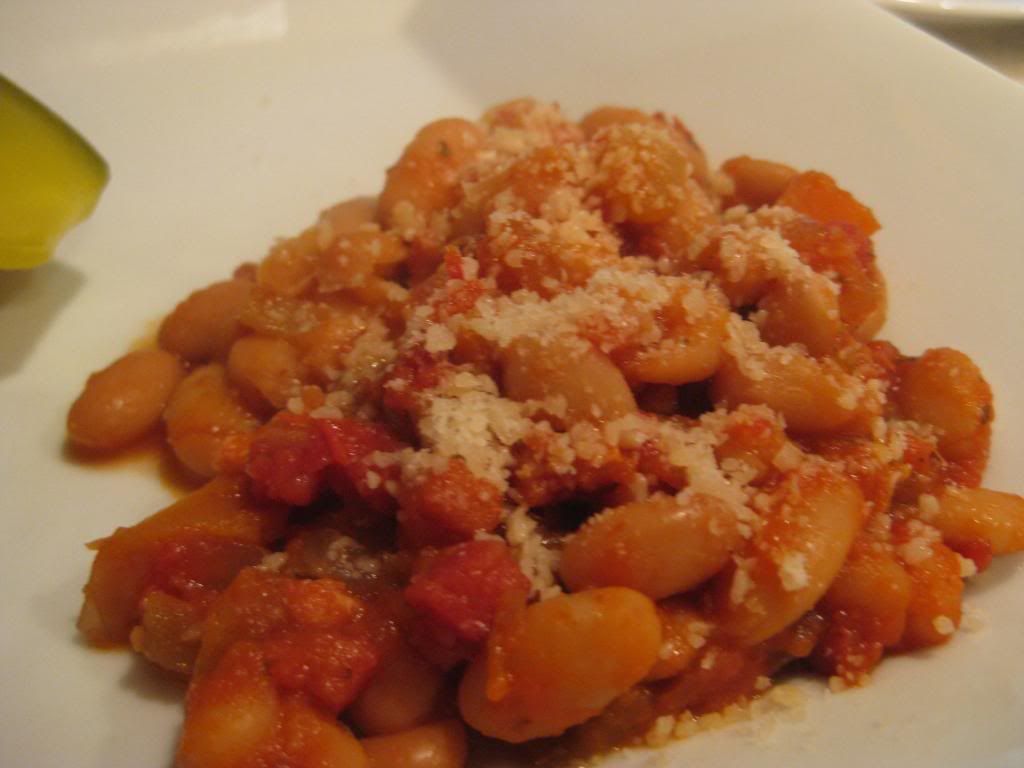
The Results:


This is one tasty chowder! The sweetcorn blends beautifully with the red potatoes to create a dish reminiscent of 'fresh of the grill' summer flavors. I found the chowder to be sweet enough without adding any extra sugar, but your results will vary based on how sweet your sweet corn actually is. The one tweak I would make to this recipe would be to cook the bacon before adding it in with the onions. It never fully browns while being cooked this way and great crispy bacon bits would be a better addition than bacon on its own. 

That's a minor gripe in what otherwise was a very tasty and easy recipe. If you're in the mood for summertime's greatest vegetable, but don't want to prepare it in the same old way - give this recipe a try. 

That's all we have for you this evening. We're back tomorrow night with a product review that just may make the life of the at home chef so much easier. Until then, 

~Cheers 

Monday, August 5, 2013

Pastry Perfection

Good evening everyone! Just because we focus on healthy eating doesn’t mean we can’t have a little not-so-healthy fun every now and again. No matter your diet regimen, everyone has a soft spot for pastries. Whether they’re soft, crispy, flaky, frosted, cream filled, or just laced with sugar the humble pastry is a classic guilty pleasure dish. When you can make this dish yourself (and avoid all the ‘extras’ that mass produced pastries have in them) you’re better off. Today we have a delectable morning bun recipe that will satisfy your sweet tooth. It isn’t health food, but if you’re going to deviate from healthy eating once in awhile, you might as well enjoy it!

The Recipe: Morning Buns
Original Recipe Found On: Cooks Country Online

What You’ll Need:
(Makes 12 rolls)

For the Dough:
3 Cups All Purpose Flour
1 Tablespoon Sugar
1 Envelope Instant or Active Rise Yeast
¾ Teaspoon Salt
24 Tablespoons Unsalted Butter (Cut into ¼ inch pieces – chilled)
1 Cup Sour Cream (Chilled)
¼ Cup Orange Juice (Typically this is the amount of juice you can get from one orange)
3 Tablespoons Ice Water
1 Large Egg Yolk

For the Filling:
½ Cup Granulated Sugar
½ Cup Packed Light Brown Sugar
1 Tablespoon Grated Orange Zest
2 Teaspoons Ground Cinnamon
1 Teaspoon Vanilla Extract

Begin by combining the flour, yeast, sugar and salt in a large (1 gallon) zipper baggy and tousle the bag to evenly distribute the ingredients. Next, add the butter slices into the bag, shaking the bag occasionally to work the butter into the flour. Once you have all the slices into the bag, give it a good toss to cover all the butter slices in flour.

Next, lay the bag on the counter and use a rolling pin to work the butter slices flat and flaky. I found that simply starting the pin in the center of the bag and rolling it towards the front, then the back and repeating 3-4 times worked well. Flip the bag and repeat the above process. Toss the bag a few times, repeat the rolling process again. Once your butter is thin and flaky (you should be able to feel it through the bag) transfer the dough to a large bowl.

Work in the wet ingredients (orange juice, egg yolk, sour cream and water) with a large spoon or your hands (I found using my hands was easiest – albeit a bit messy). Once the ingredients are worked in, turn the dough onto a floured surface and knead the dough with your hands until the dough becomes one smooth, cohesive ball.

Next, take a lightly floured rolling pin and work the dough into a rough 12 X 20 rectangle. Once flatted, prep a baking sheet with a piece of parchment paper and clear space in your freezer for the baking sheet. Beginning on the edge closest to you, roll the dough into a tight cylinder (use flour to clean up any sticky or soft spots in the dough). Pat the cylinder into a rectangular shape (essentially flattening the sides and top) then transfer it to the baking sheet and place it in the freezer for 15 minutes.


While the dough is “chilling out” (pastry humor!) you can begin working on your filling. In a medium bowl, combine the sugar and brown sugar and toss by hand to evenly incorporate. Next, add the orange zest and vanilla extract and toss to combine. Set this mixture aside.


Remove the dough from the freezer and transfer it to a lightly floured work surface. Use a rolling pin (reapply flour if it has worked off from the earlier rolling) to work the dough back into a 12 X 20 rectangle. I’ve never been able to get a perfectly even rectangle in the process, so I don’t have a lot of tips to help you form one either. Try to keep the shape as uniform as possible as it will make things much easier over the next few steps – but don’t fret if it isn’t perfect, mine certainly wasn’t and it all worked just fine.

Once you’ve formed a respectable rectangle, distribute the filling across the top of the pastry, leaving about ½ inch of space along all of the edges. Use your hand to make sure the filling is at even depth across the pastry – a thicket patch of sugar will make the next step harder than it needs to be and a bald spot (sugar free) will be disappointing to the final consumer!


Beginning on the short edge closest to you, roll the dough into a tight cylinder. Work slowly and diligently to make sure the roll is staying tight. Once you’ve made your cylinder, inspect it to see if there are any large bulges (thicker spots in the dough will yield to thicker portions of the cylinder) and work those out by hand.

Next, use a chef’s knife to cut the dough in 12 evenly spaced parts (you can trim ½ inch of dough off of each end and discard, that dough is likely free of any filling). Place 12 aluminum cupcake liners into a muffin tin and spray them lightly with cooking oil. Transfer each slice into a cupcake liner (you may have to squeeze, squish or otherwise manipulate your dough to get it to fit nicely in the liner – that’s okay). Once all 12 slices are in a liner and placed in a muffin tin, cover them loosely with plastic wrap and transfer the muffin tin to the refrigerator to rest for at least 4 hours (up to 24 hours).


After the 4 hours are up, preheat your oven to 200 degrees and then shut it off once it reaches 200. Remove the plastic wrap and place the muffin tin into the (off) oven for 20 minutes. This allows the rolls to nearly double in size. Once they’ve grown the oven, remove the muffin tin and preheat the oven to 425. Return the tin to the oven and allow the rolls to cook for 5 minutes before reducing the oven heat to 325. Allow the rolls to bake for 40 to 50 minutes at 325 or until they turn a deep golden brown color.


Remove the tin from the oven and let the rolls rest for 5 minutes. After resting, immediately remove the rolls from their liners and set them on a wire rack to cool. Serve warm and enjoy!

The Results:


These rolls are certainly not the easiest thing to make (they’re time consuming to say the least!) but the payoff is of-so-worth-it! Because we worked the butter into the dough and left it flaky, the final dough is crisp and flaky, much like a croissant. The filling caramelizes during cooking, creating a very ‘cinnamon roll’ like flavor in the center of the bun while the bright citrus from the orange juice and orange zest pops in every once in a while to keep the roll from being too sweet.

All in all, these delightful little buns make for a great weekend treat the whole family is sure to enjoy! That’s all we have for you this evening, but we’ve got a lot more planned for this coming week. I’ll be in the kitchen tomorrow night with a brand new recipe that features summertime’s greatest food item. We’ll follow that up with a product review on Wednesday (I didn’t forget last week’s promise, the weekend simply got away from us!) and then Maggie will close out the week with a new recipe of her own. It’s going to be a busy week of cooking her at Out of the Culinary! Be sure to stop in tomorrow night to see what’s on the menu. Until then,


~Cheers

Thursday, August 1, 2013

What Would Be Better with Fish? Bacon, of Course!

Welcome back everyone to another night of Out of the Culinary!  As we are still caught up in the bacon craze across this nation, there will always be new recipes using bacon to try out.  Some recipes make sense, like the sweet potato bacon hash - the sweet and smoky tastes amazing together.  But pairing sweet and savory flavors to bacon?  This definitely peaked my interest!

The Recipe:  Hailbut with Bacony Corn Saute
Original Recipe Found In:  Cooking Light, August 2013

What You'll Need:
1 Tablespoon Extra-Virgin Olive Oil
2 (6 Ounce) skinless Halibut fillets
2 slices center-cut applewood-smoked Bacon
2 1/4 Cups fresh Corn kernels (about 4 ears)
1 1/2 Tablespoons Butter
3/4 Cup (1 inch) sliced Green Onions
Lime Juice

To start, heat a large, nonstick skillet over medium-high heat.  Add oil to the pan and swirl to coat.  Sprinkle the fish evenly with salt and pepper.  Once the oil has begun to shimmer, add the fish to the pan.  Saute the fillets until completely cooked through, about four to five minutes on each side.  After the fish have cooked, remove the fillets from the pan and place on a plate.  Cover to keep warm.


Next, reduce the heat to medium and allow the pan to cool slightly.  Add the bacon to the pan.  Cook the strips until crisp, about four minutes total, two minutes on each side.  Remove the bacon from the pan and lay on a paper towel lined plate.  Once the bacon has cooled, crumble into small pieces.  Next, add the corn to the skillet and cook for three minutes or until the corn begins to brown, stirring to ensure no sticking to the skillet.  Add the butter and stir until the butter is mixed in and melted, about one minute.  Stir in the crumbled bacon and green onions until everything is heated through.  Serve a generous portion of the sauté with the fish, add a dash of lime juice over the fish and saute, serve, and enjoy!


The End Result:


The old adage, adding bacon to anything will make it better, is never more true than in this recipe.  While the halibut is fresh, it is quite plain.  The true star of this recipe is the sauté.  The sweetness from the corn, the crunch from the green onions, and the smoky flavor from the bacon, all cooked together, makes for one heavenly treat.  I mentioned to Tyler that I could have made a whole pan of the saute itself and it's wouldn't be enough.  All these ingredients alone don't make a whole lot of sense, but when they are mixed together, it sure is delicious!

Thanks for joining us tonight.  Check back tomorrow for a special quick hit from Tyler.  Until then,

~Cheers!

Wednesday, July 31, 2013

Super Sauce Free Steak

Good evening everyone! Sometimes, the "culinary world' just dictates which recipes we'll try in a given week. For example, as I perused my favorites spots for inspiration last weekend, I was finding little in the way new recipes. Digging a little deeper, I stumbled across a unique steak marinade featuring vegetable juice and vodka. I tabbed the page, essentially marking it as "come back to in the future". Further browsing into another source eventually lead me to ANOTHER steak marinade recipe featuring vodka, hot sauce and vegetable juice. That settled it - the culinary world was telling me to try this marinade, and I wasn't about to ignore that message.

So, armed with two "bloody mary" marinade recipes I combined the best parts of each and set out to try this idea on my own. Here's what I came up with: 

The Recipe: 'Bloody Mary' Steak 

What You'll Need: 
(Serves 2) 

1 Large Skirt Steak (1 - 1.5 Lbs) 
1 Cup Vegetable Juice 
1/2 Cup Vodka 
1 Teaspoon Hot Sauce 
1 Tablespoon Lemon Juice
1 Tablespoon Worcestershire Sauce 
2 Garlic Cloves (Crushed) 
Salt (Pinch)
Pepper (Pinch)


Begin by combining all of the ingredients in a large 1 gallon sealable bag or in a small glass dish with a lid. (I prefer the second option, as it makes for easier cleanup and it's easier to get the steak out when the marinating process is over). Mix the ingredients well until everything is evenly combined, then add the steak to the bag / dish and seal. Place the steak in the refrigerator for 8 to 24 hours prior to cooking.

When you're ready to cook, remove the steak from the marinade and allow the excess to liquid to drip off the steak (don't pat the steak dry, however). Place the steak on a grill set to medium high heat and cook for 10 to 12 minutes, making sure to flip halfway through the cooking process. This method will produce a medium rare steak, for those who prefer things a little more done, add a few minutes per 'level' of doneness (3 more minutes for medium, 6 minutes for medium well - etc.)

Allow the steak to rest for 3 to 5 minutes before slicing it and serving. Enjoy!

The Results:


The best testament I can give to this recipe is that you don't need a steak sauce. The steak is so full of great flavor that a steak sauce would only mask what the marinade created - even those that THINK they HAVE to have a sauce with every steak may find themselves surprised. Flank steak on its own is a relatively underwhelming steak. It gets the job done, but it's not typically going to be the star of the dish. (Most flank steak recipes feature a sauce or side to help "pick up" the steak) With this marinade, the typically ho-hum flank steak shines with great, rich flavor. You have to try it to fully believe it, but this marinade is certainly one to keep close by for a summertime cookout.

That's all we have for you this evening. Maggie takes to the kitchen tomorrow night for a brand new recipe of her own, and we'll close out the week with a product review that may help those of you who aspire to be at home chefs, but feel like you can't cook enough to justify buying the fresh ingredients. Intrigued? You should be!

Until then,

~Cheers 

Thursday, July 25, 2013

Delightful Delicious Cod Cakes

Good evening everyone!  It's always fascinating when one cooks to take an ingredient and mold it in such a way to make it familiar.  This is often done with fish and rightfully so.  If you are cooking for kids (and adults,) they recognize round patties and never think twice on what they are eating.  Tonight, I'm whipping up a batch of fish cakes that won't get confused with any kind of burger.

The Recipe:  Cod Cakes with Garlic-Basil Aioli
Original Recipe Found In:  America's Test Kitchen Simple Weeknight Favorites

What You'll Need:
1/2 Cup Mayonnaise
1/4 Cup chopped fresh Basil
2 Tablespoons Lemon Juice
1 Garlic clove, minced
1 Pound skinless Cod fillets, cut into 1 inch pieces
1 1/2 Cups Panko Bread Crumbs
1 large Egg
2 Scallions, finely chopped
1/4 Cup Olive Oil

To start, place the mayonnaise, basil, lemon juice, and garlic in a food processor.  Blend these ingredients until everything is smooth and lightly green, no more than 20 seconds.  Transfer this mixture to a serving bowl and season with salt and pepper to taste.  Clean the aioli remnants out of the food processor and begin to prepare the cod.

Place half of the cod in the food processor and process until the cod pieces are finely minced, about six pulses.  Transfer the cod into a large mixing bowl and repeat the process with the other half of the cod.  Add the previously processed cod back to the food processor.  Next, add 3/4 cup panko, 1/2 teaspoon salt, 1/4 teaspoon pepper, an egg, the scallions, and 3 tablespoons aioli.  Blend this mixture until all the ingredients are evenly mixed, between 10 to 15 pulses, depending on how well you want this mixture combined.

On a clean plate, place the remaining 3/4 cup panko and spread into a thin layer.  Reach into the food processor (with the blade out!) and form into 3 1/2 inch patties.  If there is any remaining liquid, gently squeeze out and reform the patties if necessary.  Lightly dredge the patty into the panko to adhere and place onto another plate.  Repeat this process until there are four patties.

Next, inn a nonstick skillet, heat the oil over medium high heat, until about shimmering.  Add the patties to the skillet and cook until golden brown and cooked through, about four to five minutes.  After they have cooked on the one side, carefully flip the patties over and cook for another four to five minutes.  Serve with the remaining aioli and enjoy!

The End Result:

We've said it once, we'll say it again:  cod is such a versatile fish.  It will absorb from any other flavors, mask its fishy flavor, and leave you completely surprised.  Biting into the cakes, I didn't get any overwhelming fish flavor, but instead, I got a little crunch from the panko and from the scallions.  Using the food processor to blend all the ingredients together is brilliant, because you will end up with a lifeless blob (trust me, I tried it.)  The garlic basil aioli is actually a great take on a tartar sauce.  The basil might be a bit much for those who aren't used to that basil flavor.  But it's a great topping over these delightful little cakes!

Thanks for joining us this week.  Check back again next week as we continue to explore our culinary creativity.  Until then,

~Cheers!

Wednesday, July 24, 2013

Sweet Potatoes + Bacon = Perfect Hash


Good evening everyone! If we had to make a short list of our favorite ingredients to use in a recipe, sweet potatoes would certainly be among the finalists. The sweet root is versatile, easily adaptable to most dishes and can even act as a sweetener and thickener for other recipes. We’ve used sweet potatoes in about every way imaginable, we’ve mashed them, baked them, cooked them into soups, paired them with chorizo, put them in pies – you name it, we’ve tried it. Or so we thought.

Last week I came across an America’s Test Kitchen recipe that paired the orange root with an ingredient I had yet to try – bacon. Following the philosophy that everything tastes better with bacon, I decided to tackle this dish and expand our sweet potato horizons. It didn’t hurt that the “star” of the dish was a variant of a maple glazed pork chop, which we’ve tried before and know to be a fantastic end result.

The Recipe: Maple Pork Chops with Sweet Potato Bacon Hash
What You’ll Need:
(Serves 4)

1 ¼ Pounds Sweet Potatoes (Peeled, cut into ½ inch chunks)
6 Slices Bacon (Chopped fine)
4 Bone-In pork chops (1 inch thick, 8 ounces)*
2 Teaspoons Minced Fresh Thyme
½ Cup Maple Syrup
1 Tablespoon Cider Vinegar
2 Teaspoons Dijon Mustard

* We have a large supply of boneless, thin cut pork chops that we use for most of our pork chop recipes. The instructions below are for the thicker cut chop (we’re adapting for our smaller chops, but leaving the recipe original).

Begin by placing the sweet potato in a large bowl and cover with a microwave safe lid (or use a microwave safe plate as the lid  if you don’t have a lid). Microwave for 4 to 7 minutes on high until the sweet potatoes are soft. Meanwhile, add the bacon to a large (12 inch) non stick skillet and cook over medium high heat until the bacon is golden brown. Remove the bacon with a slotted spoon and transfer them to a paper towel lined plate. Reserve 2 tablespoons of the bacon fact from the skillet before wiping it clean with a paper towel.

Pat the pork chops dry with a paper towel and lightly season them with salt and pepper. Score the outer surface of the pork chops lightly with a knife (this prevents the chop from ‘curling’ during cooking). Add 1 tablespoon of the reserved bacon fat to the same skillet you used before and bring it up to temperature over medium high heat. Add the pork chops to the skillet and cook for 4 minutes per side, or until the chops are golden brown and cooked through. Transfer the chops to plate and loosely tent with aluminum foil. Set aside.

Add the remaining tablespoon of bacon fat to the same skillet you’ve been using all along and set the temperature to medium. Add the sweet potatoes to the skillet and cook for 3 to 5 minutes, or until they become slightly crispy and browned. Once browned, stir in the bacon and thyme and season lightly with salt and pepper. Transfer this mixture to a serving bowl.

Finally, add the maple syrup, vinegar and mustard to the skillet (yes, the very same one we’ve been using all night) and cook over medium heat until the mixture thickens (make sure to stir occasionally to prevent sticking). Return the pork chops to the skillet and rotate the chops in the mixture for 2 minutes (flipping every 30 seconds or so) until the glaze begins to stick to the chops. Serve with the potato / bacon hash and enjoy!

The Results:


As I mentioned in the open, we’ve cooked a variant of this maple glazed pork chop before (it was actually our first ‘return’ to cooking with pork) so we knew the flavors here were going to be great. (Spoiler: it was)

The pork chop was great, but the sweet potato hash was something special. The perfect blend of the sweet potatoes with the rich, salty flavors of the bacon was one of those “wow!” moments of home cooking. The two ingredients blend so well, it’s hard to believe bacon / sweet potatoes aren’t mandated partners in every recipe. Okay, that may be overdoing it – but I want to convey just how good these two are together. This certainly won’t be the last time we combine these two ingredients! Do yourself a favor and give this a try at home (Oh, and at 300 calories per serving it’s easy on the diet too!)

That’s all we have for you this evening. Stop back tomorrow night for Maggie’s brand new recipe! Until then,

~Cheers

Wednesday, July 17, 2013

Grilling with Fruit, Take Two

Good evening everyone!  Since we have a grill, it's been delightful trying new ingredients to put on the grill to see if they stand up to the test.  So far, those ingredients haven't let us down, which is a good thing.  Tonight, we throw another ingredient on the grill, with another slice of meat heaven, to produce one sweet and savory dish.

The Recipe:  Grilled Pork and Mango with Rum Sauce
Original Recipe Found In:  Cooking Light, August 2013

What You'll Need:
1 Tablespoon Jamaican Jerk Seasoning
2 Tablespoons fresh Lime Juice, divided
1 1/2 Teaspoons Canola Oil, divided
1 (1 Pound) Pork Tenderloin, trimmed
2 ripe Mangos
1/4 Cup packed Dark Brown Sugar
1/4 Cup golden Rum
2 Teaspoons unsalted Butter
1/2 Teaspoon Kosher Salt

In a medium bowl, combine the jerk seasoning, one tablespoon lime juice, and one teaspoon oil.  Mix these ingredients until well combined.  Place the tenderloins on a plate and drizzle the seasoning mixture over the pork.  Rub the seasoning over the meat until everything is well coated on both sides.  Set the plate aside.  Next, peel the mangos and cut into 1/2 inch slices.  Place these slices on another plate.  Drizzle with 1/2 teaspoon of oil until all sides of the cut mango are coated with oil. 

Preheat a grill to medium high heat.  Add the pork to the grill and cook for four minutes on each side, or until the internal temperature reaches 145 degrees.  Take the pork off the grill and add the mango slices.  Cook for three minutes on each side, until grill marks are visible and some of the natural juice starts to come out.  Take the mango slices off the grill.

Next, on a stovetop, combine the brown sugar, rum, butter, and salt in a small saucepan.  Bring this mixture to a boil, which should take about two minutes (or shorter!)  Reduce the heat and simmer for four minutes or until thickened.  Stir in one tablespoon of lime juice to combine.  Drizzle the sauce over the pork and mangos, serve, and enjoy!

The End Result:


I expected the pork to have some out-there flavor, or have a kick of super spice, but it actually tasted very mild.  Granted the jerk seasoning has a whole lot of different flavor elements, the lime juice and the oil seemed to subdue that flavor.  Grilling the pork with that seasoned mixture was the ideal way to cook it.  The grilled mangos are quite flavorful too, although you want to be sure that you have ripe mangos, because it will make for one very chewy fruit.  The rum sauce was quite the show stopper.  Obviously, cooking the mixture to remove any of the booziness from the rum is a wise decision, but the flavor that is left behind is sweet, almost kind of nutty.  But it's perfect for this unique dish!

Thanks for joining us this week!  We will back next week, hopefully not melted, with brand new dishes for you to try at home.  Until then,

~Cheers!

Tuesday, July 16, 2013

The Magical (Flavor) Qualities of Pine Nuts

Good evening everyone! If you do any type of at home cooking (which, seeing as you're presently reading a cooking blog, I'd assume you'd at least dabble in) you've likely come across a recipe or two featuring pine nuts. These tasty little morsels are the main ingredient in many pesto recipes and feature as a key component in a lot of different breading dishes as well. Their flavorful, easy to work with and readily available at almost any grocery store. Their one drawback?

Those little suckers are expensive!

Our local grocery stores sell pine nuts in 4 ounce jars for $6.99. That usually results in me standing, staring at the shelf while I mumble something about checking into a career growing pine nuts, because that's clearly where the money is. I've never been able to justify $7 for such a small quantity of something, so we've used pine nuts VERY sparingly on the blog.

Enter: Trader Joes. Our newest grocery store of choice not only carries pine nuts, but they sell them in 8 ounce bags for - $6.99. Yup, twice the quantity, same price. They're still expensive, but with the small amount of pine nuts that most recipes call for, an 8 ounce bag will last you a good while.

Armed with our cost effective pine nuts, our blog will be an unstoppable culinary force!

Or...we will have some new recipes to dabble in. Same thing.


The Recipe: Pine Nut and Parmesan Crusted Chicken

Original Recipe Found In: America's Test Kitchen: Simple Weeknight Favorites


What You'll Need: 
(Serves 4) 

4 Boneless, Skinless Chicken Breasts (Trimmed of excess fat) 
1/3 Cup Panko Bread Crumbs 
1/3 Cup Toasted Pine Nuts 
1/3 Cup Grated Parmesan Cheese 
3 Garlic Cloves (Minced) 
3 Tablespoons Extra Virgin Olive Oil 
1/4 Cup Light Mayonnaise 
1/2 Cup Chopped Fresh Basil 


Begin by preheating your oven to 450 degrees and spraying a large rimmed baking sheet with non stick spray. 

The original recipe calls for you to toss the pine nuts, bread crumbs, oil, cheese, garlic and a pinch of salt and pepper together in a medium bowl until everything is homogenous. I found it was much easier to add all of the ingredients into a small food processor and simply pulse for 4 to 6 seconds until the mixture was blended nicely. This creates a more even breading as well (no large pine nut chunks or spaces where some ingredients don't appear). 

Next, combine the light mayo in a bowl with the basil. Stir until evenly blended. Pat you chicken breasts dry with a paper towel, then spread an even coating of the basil / mayo mixture over each breast (just the top). You don't need much, just a thin layer will suffice. This spread will both add flavor to the chicken breast and act as a 'food glue' to keep the breading in place. 

Speaking of the breading - it's time to spread it on! Set your chicken breasts on the baking sheet and then simply sprinkle the  mixture across all of the breasts, making sure to work it into any crevices of the chicken and making sure all the sides are covered (again, focus mainly on the top and do not bread the bottom).  

Once each breast is evenly covered, pop the baking sheet into the oven and let the chicken cook for 18 to 22 minutes, or until the chicken reaches an internal temperature of 165 degrees. Serve with a side of green beans or other veggie and enjoy! 


The Results: 


This dish hits all of the 'must haves' when it comes to weeknight cooking. Flavorful? Check - the panko / pine nut breading creates a beautiful crunchy crust that blends great with the juicy chicken and surprisingly fresh basil spread. Quick and easy? Check - at roughly 30 minutes start to finish, this dish can go from concept to reality in time to feed a hungry family (or just a family of one). Healthy? Check - at just under 350 calories per serving, this dish will deliver on the flavor while keeping your healthy eating goals a reality. This dish is a must try! 

That's all we have for you this evening, we're back tomorrow night with Maggie's turn in the kitchen. Until then, 

~Cheers 


Thursday, July 11, 2013

Wrapped Chicken Yields Super Delicious Results

Good evening everyone!  As Tyler mentioned earlier this week, sometimes we share simple recipes that are easily duplicated.  While elaborate recipes are mighty tasty and worth the extra effort, a quick recipe that looks simple enough can surprise with an outstanding flavor.  Tonight, I present to you a dish that fits those qualifiers and will make you want more.

The Recipe:  Prosciutto Pesto Chicken
Original Recipe Found In:  Grill This, Not That

What You'll Need:
4 boneless, skinless Chicken Thighs
1/2 Cup fresh Goat Cheese
2 Tablespoons store-bought Pesto
4 thin slices Prosciutto

To start, place the goat cheese on a clean plate.  Let the cheese soften at room temperature for at least 30 minutes, or until it is easy to spread.  Add the pesto and combine until well mixed.  Set this mixture aside.  Now, if you like the freshness of just prepared pesto, you are more than welcome to create this palate pleaser.  But, if you want a quick mix, store-bought pesto is your best bet.  Honestly, I couldn't tell the difference between freshly prepared and store-bought pesto.  The choice is yours!

Next, preheat a grill to medium-high heat.  On another clean plate, season the chicken with salt and pepper.  On the underside of the chicken, place a line of the pesto/cheese mixture down the middle.  It's just as easy to spread the entire mixture over the chicken, but, just so nothing runs out while cooking, stick to the middle.  Wrap each piece of chicken with a slice of prosciutto until snug.  If one piece of prosciutto doesn't fit, another piece or two won't harm the chicken.

After the chicken is wrapped in prosciutto, place each piece of chicken on the grill.  Cook on four minutes on each side, until the prosciutto is crispy and browned.  Be careful when flipping the chicken, because it might want to separate from the chicken.  Place the chicken on a serving plate and enjoy!

The End Result:


The chicken remains super moist around the coat of the prosciutto.  Four minutes on each side is a perfect amount of cooking time.  But of course, 160 degrees is the cooked time for the chicken, if you want to be safe.  The pesto and the cheese combination is something I've never tasted before.  The pesto will be the predominant flavor, which cheese playing second fiddle, but a creamier, herby flavor is not to be missed.  And finally, the prosciutto keeps all these flavors encased is a salty wrap.  The prosciutto almost tastes like bacon, but has a deeper flavor to it.  Overall, these are tasty little chicken numbers that are so easy to create, it'll become your next weeknight dinner!

Thanks for joining us this week.  We'll continue on our culinary journey next week with brand new recipes to share with you.  Until then,

~Cheers!

Monday, July 8, 2013

Simple Yet Savory Steak

Good evening everyone! If you're a regular watcher of any cooking related TV shows ('Chopped', 'Iron Chef America', 'Diners, Drive-Ins & Dives' or the like) you've likely seen more than a few interesting culinary trends when it comes to cooking the classic steak. I tackled one of those trends a couple of weeks ago, and this week I'm looking to take on another.

Whether it's in a high end restaurant or a small diner along the roadside, chances are if someone is cooking up a high quality steak, they're topping it with a butter infused sauce or simply topping it with butter by itself. At first this seems a bit odd, why top a perfectly good steak with a rich fat like butter? The answer is surprisingly simple, the butter becomes a beautiful glaze that adds just a bit of richness to the hearty steak. Even better, you can infuse butter with other flavors, such as garlic and onion, to further enchance the steak's flavor. The key to using a butter sauce, like anything in the culinary world, is moderation. Too much butter and you'll overwhelm the final dish.

With a bit of the background out of the way, let's get to cooking our own butter enhanced steak!

The Recipe: Grilled Steak with Vegetables and Lemon Herb Butter
Original Recipe Found In: Food Network Magazine (July, August 2013)

What You'll Need:
(Serves 4)

1.5 Pounds Sirloin Steak (About 1 inch thick)
1 Red Onion (Sliced into 1/2 inch rings)
2 Large Zucchini (Cut diagonally into 3/4 inch slices)
1/2 Cup BBQ Sauce (Your choice, we have recipes HERE & HERE)
1 Tablespoon Chili Powder
2 Teaspoons Worcestershire Sauce
2 Tablespoons Unsalted Butter (Room temperature)
2 Tablespoons Fresh Parsley (Chopped)
1/2 Teaspoon Lemon Zest

Preheat your grill to medium high heat.

Meanwhile, add the steaks, zucchini, onion, BBQ sauce, worcestershire sauce, chili powder and a pinch of salt and pepper into a large bowl. Toss everything until all the ingredients are evenly covered. Let everything rest for 5 minutes to allow the marinade to settle in.


While your steaks are resting, mash the butter with the parsley and lemon zest. (A fork works well here). Set this mixture aside.

Remove your steaks from the bowl and transfer them to the grill. Transfer your vegetables to a grill basket and add them to the grill as well. Cook the steaks for 4 to 5 minutes per side (for medium) and then move them to a cutting board and allow them to rest for 5 minutes.

Leave the vegetables on the grill for another few minutes (making sure to toss / stir them every couple of minutes) until they're nice and crispy.

Slice the steaks into a few pieces and top with the lemon herb butter. Serve with the vegetables and enjoy!


The Results:


True to the concept, the lemon herb butter adds just a touch of richness to the steak without overwhelming the flavor. The grilled vegetables complimented the steak beautifully (you really can't top fresh veggies off the grill) and the BBQ sauce 'marinade' ties everything together remarkably well. The best part is that this entire dish clocks in just under 330 calories. Low calorie and full of flavor, that's a win - win recipe!

That's all we have for you this evening. Maggie takes to the kitchen Thursday night with a brand new recipe of her own. Until then,

~Cheers

Wednesday, July 3, 2013

I Swear, I'm Almost Out of Burger Recipes

Good evening everyone!  As much as I love burgers and all the different variants between the kinds of meat and toppings, I realize that some of our followers are probably burnt out on all the burger recipes we've shared.  But since we went three and a half years without a grill, I'm bound to make up for lost time.  Tonight's burger recipe is quite a unique one, but also has every component to make a great American burger.

The Recipe:  New England Turkey Burger
Original Recipe Found In:  Cooking Light, July 2013

What You'll Need:
(Serves 4)

1 Tablespoon Olive Oil
2 Cups thinly sliced Onion
3/4 Cup Samuel Adams Summer Ale
1 Pound ground Turkey
1.5 Ounces reduced-fat Vermont White Cheddar Cheese, shaved
4 Teaspoons Canola Mayonnaise
2 Teaspoons Whole-Grain Mustard
4 Whole Wheat Hamburger Buns

To start, heat a large nonstick skillet over medium heat.  Once the pan is heated, add the oil and swirl to coat.  Once the oil is heated, add the sliced onion and cook until the onions are tender and slightly translucent, about seven minutes.  After the onions are cooked, slowly add the beer to the skillet.  Bring the heat of the skillet to a medium-high heat.  Once at a boil, reduce the heat of the skillet to a simmer and cook for 20 minutes, until the onions are golden and the liquid is nearly evaporated.  Stir occasionally to prevent the onions from sticking to the pan.  Remove the skillet from the heat and cover with a lid.

Next, preheat a grill to medium-high heat and clean with a grill brush once the grill is heated.  In a large mixing bowl, lightly toss the ground turkey to get it at a consistent mixture.  Remove 1/4 cup of onion from the skillet and finely chop the onion.  In the mixing bowl, stir the turkey and onion together until everything is well combined.  Divide the mixture into four equal parts and shape until the patties 1/2-inch thick.  Press a thumb-sized indentation in the center of each patty and season with salt and pepper.  Once the grill is heated, place each of the turkey patties in the grill.  Cook for five to eight minutes on each side.  On the second size, place a slice of the cheddar cheese on each patty.  Grill until the cheese is melted, about one minute.  By now, the turkey patties should be fully cooked, about 165 degrees.

While the burgers are cooking, combine the mayonnaise and mustard in a small bowl.  Spread the mixture evenly on the bottom half of each bun, along with the cooked burger, and reserved onions.  Top with the other halves of the buns, serve, and enjoy!

The End Result:


There are so many different flavor notes that are in this burger.  Immediately, the tang from the whole-grain mustard hits your tongue.  Although the mayonnaise cuts out almost all of the sharpness from the mustard, you can still taste it and it is delectable.  The sweetness of the caramelized onions is also very pronounced, but again, it definitely adds to this well-rounded dish.  The turkey meat isn't too heavy for the pallet (or the gut), and when cooked right, it can be very juicy.  If you want, adding a leaf or two of lettuce and a slice of tomato will only enhance the deliciousness of this burger.

That's all we have for you this evening.  Most of you will have a day off tomorrow (and possibly a long weekend.)  Enjoy our nation's holiday and remember to be safe!  Join us next week as we continue our culinary adventures.  Until then,

~Cheers!

Tuesday, July 2, 2013

Fish Tacos Meet a Unique Sauce

Good evening everyone! We're back after a bit of an unplanned hiatus. Maggie's birthday was last week and we took a few vacation days to celebrate. We had planned on returning to the blog on Thursday and Friday for our new recipes, but later in the week I came down with a bit of a bug (cold, sinus type thing) and that basically shut down any aspirations of cooking for the week.

One week later, we're healthy once again and ready to return to cooking. With the 4th of July nearly upon us, grilling season is in full bloom and the "grilling super bowl" is on our doorstep. Tonight's dish is a great option for those who want to grill out a nice, fresh evening meal, but don't want to rely on the usual grilling staples of burgers and hot dogs. Let's get cooking!

The Recipe: Grilled Fish Tacos with Tequila Lime Crema
Original Recipe Found On: Cacique.com

What You'll Need:
(Serves 4)

2 Tilapia Fillets
Corn tortillas (warmed)

(For the rub)

4 Tablespoons Chili Powder
2 Tablespoons Lime Juice
2 Tablespoons Olive Oil
1 Teaspoon Cumin
1 Teaspoon Garlic Powder
1 Teaspoon Salt
1/2 Teaspoon Black Pepper

(For the tequila lime crema)

1 Cup Crema Mexicana*
Juice from 1 Lime
1/4 Premium Tequila
1 Teaspoon Sugar
1/2 Teaspoon Salt
1/4 Teaspoon Black Pepper

*Crema Mexicana is essentially Mexican sour cream. You may not find something labeled exactly the same, but if you search out a sour cream that lists heavy cream as an ingredient, you've effectively found the same thing. Crema Mexican is a rich, creamy sour cream that doesn't have as much bite as traditional sour cream - even a mild sour cream would do well as a substitute for this recipe.

Begin by combining all of the rub ingredients together in a small bowl. Pat your fillets dry with a paper towel to remove any excess moisture before rubbing each fillet thoroughly in the spice mixture. Make sure each fillet is coated evenly and that all crevices are cracks have been covered by the rub. Place the fillets on a plate and store them in the regrigerator for 20 to 30 minutes prior to cooking. This gives the rub time to penetrate into the fillets, making sure this delicious flavor is present in every last bite of the final dish.

While your fillets are marinating, you can began preparing the tequila lime crema. In a small blender, combine all of the ingredients for the crema and pulse until everything is evenly blended and the mixture is smooth. Store the mixture in the refrigerator until you're ready to serve. You can prepare this sauce up to 24 hours in advance if you'd prefer.

Once your fillets have marinated for at least 20 minutes, preheat your grill and oil the grates. Place the fillets directly over the heat and cook for 3 to 5 minutes per side, or until the fish is cooked through and the meat is opaque and flaky.

Remove the fillets from the grill and thinly slice them. Serve on the warmed tortillas with a helping of the crema and other taco toppings such as fresh salsa, cabbage and red onion. Enjoy!


The Results:

The appeal of this dish, for me, was the tequila lime crema. I was intrigued to try such a unique sauce alongside the traditional 'hot and spicy' fish taco. The crema didn't disappoint, the mild sour cream becomes a great base (and neutralizer) for the bite of the tequila, and combined the two create a fresh, citrus sauce that compliments the heat of the tilapia fillets very nicely. We topped our tacos with fresh salsa, finishing the fresh, bright flavor profile of this dish. If you're in the market for something a little more fulfilling than the standard burger fare, these delicious little tacos are worth a shot!

(No photo tonight, we had a series of technical difficulties that kept us from posting pics...sorry!)

That's all we have for you tonight, stop by tomorrow night to see what Maggie has cooking. Until then,

~Cheers


Thursday, June 20, 2013

Mango Marinade Makes for a Marvelous Meal


Good evening everyone! We’re one day away from it “officially” being summer, but the weather in the greater Midwest has already taken a turn for the hot. While I’m not a big fan of hot weather, the warmer days do signal the return of some things I greatly enjoy – including tropical fruits that tend to make their best appearances in the summertime. One particular favorite of mine is the mango. We’ve used mango as an ingredient in previous recipes, and have even featured how to cut, slice and clean your very own mango. It’s somewhat surprising that I’ve never tried using this bright citrus in a marinade, since its flavors lend so well to grill season. Well, that trend ends tonight. Mangoes make it to the grill!

The Recipe: Mango Grill Chicken
Recipe (Heavily) Adapted From: Food Network Magazine, July 2012 Issue

What You’ll Need:
(Serves 4)

2 Mangoes, cleaned and diced (alternatively, buy a package of mango chunks from your grocer – it’s easier)
4 Bone in, skin-on chicken breasts
1 Cup Fresh Cilantro (stems, leaves  and all)
4 Tablespoons Chipotle Based Salsa

*The original version of this recipe appears in the July / August 2012 issue of Food Network Magazine as “Chipotle Mango Chicken with Chimichurri” and it differs greatly from the version I’m writing about tonight. I gave credit to the recipe for “inspiring” tonight’s dish, but if you want to try the original, understand it will be vastly different from what I’m sharing.

In a large food processor, add the mango, cilantro and chipotle based salsa (it doesn’t really matter what kind of salsa, just as long as it is tomato based and lists chipotle as it’s main pepper. You can increase or decrease the heat to your liking by choosing varying levels of salsa heat). Pulse the mixture until everything becomes a nice puree (there will be some chunks left behind, and that’s okay, but make sure the pieces are fairly small).

Pat your chicken breasts dry with a paper towel, then work about 1 tablespoon of the marinade under the skin of each chicken breasts. Next, scoop between three to four heaping tablespoons of the marinade into a plastic sealable baggy (repeat for each chicken breast you’re cooking). Place one breast into each bag, seal tightly, then jumble and jostle the chicken around until it is evenly coated in the marinade. Store the chicken in the baggies, in the refrigerator for at least 6 hours. It works best if you make this before you leave for work in the morning and let the little buggers marinate all day until you come home.

Next, preheat your grill to 350-400 degrees. Lightly oil the grates and place the chicken, skin side up, on the grates (directly over the heat) Cook for 5 minutes before turning the breasts (skin side now down) and allowing them to cook for an additional 5 to 7 minutes. Leaving the skin side down for so long is sacrilege to many ‘chicken skin aficionados’, but by doing this you’ll create a great crispy skin that crackles after you’ve pulled it off the grill. This skin almost becomes one with the marinade and produces a nice, lightly crispy exterior full of marinade flavor while allowing most of the fat to burn off on the direct heat.  

Check your chicken to make sure it registers 165 degrees at the thickest part of the breast. If not, turn it once more (skin side up) and allow it to cook for an additional 3 to 5 minutes, or until you reach the target temperature. Remove from the grill and serve immediately!


The Results


It’s a rare feat to create a BBQ style chicken, fresh off the grill, that doesn’t need BBQ sauce. This recipe manages to do just that. The chicken is moist and full of flavor, thanks to an all day session with the marinade – which is OUTSTANDING! The slight heat of the chipotle blends beautifully with the sweetness from the mango and everything is tied together wonderfully with the fresh undertones of cilantro. This dish is simple, looks great off the grill and is full of delicious flavor. That’s a win, win, win situation! Give this one a try at your next summer cookout – it’s sure to be a favorite.

That’s all we have for you this week. We’re back next week with two brand new recipes. Until then,

~Cheers

Tuesday, June 18, 2013

The Classic Tale of Pork and Fruit

Good evening everyone!  With grilling, the possibilities are endless.  It's great to know that cooking some variation of meat with a vegetable (or fruit,) will yield you with tasty end product that has a great smokey flavor to it that you wouldn't normally get with a dish cooked from an oven.  With that, tonight's dish has all those great qualities that you expect from a grilled dish, plus incorporating a new ingredient makes tonight's recipe all that more great.

The Recipe:  Grilled Pork Chops with Nectarines
Original Recipe Found In:  Cooking Light, June 2013

What You'll Need:
1 Tablespoon chopped fresh Thyme
3 1/2 Tablespoons Extra-Virgin Olive Oil, divided
2 Teaspoons minced Garlic
4 (6 ounce) bone-in center-cut Pork Chops
1/4 Teaspoon Salt
1/4 Teaspoon Black Pepper
2 ripe Nectarines
1/2 Teaspoon Sugar
1/4 Teaspoon ground Cumin
1/8 Teaspoon ground Red Pepper
4 Teaspoons Mascarpone Cheese

To start, preheat a grill to medium-high heat.  Once the grill begins to warm up, you can prepare the pork chops.  In a small bowl, combine the thyme, one tablespoon olive oil, and garlic; mix these ingredients until well-combined.  Place the pork chops on a clean plate and rub the oil mixture evenly over the pork chops until they are completely covered in the oil mixture.  Once the pork chops are seasoned, sprinkle with salt and pepper.

Once the grill is heated, place the pork chops directly on the grill rack.  Grill the pork chops for three to five minutes on each side, depending on desired degree of doneness and thickness of the chop.  We like to cook our meat until it is well done, with a little hint of pink.  Alternatively, you can cook it until the pork is at a cooked temperature, which is 145 degrees.  Once cooked, transfer the pork chops to a clean plate, cover with aluminum foil, and let stand for 10 minutes.

While the pork stands, transfer the nectarines to a clean plate.  Cut these in half and discard the pits.  In a small bowl, combine the sugar, remaining 1/2 teaspoon of oil, cumin, and red pepper until well mixed.  Rub the sugar mixture evenly over the cut halves of the nectarines.  Immediately transfer over to a grill.  Grill the nectarines for two to three minutes on each side or until tender.  Transfer the nectarines back to a clean plate and let cool.  Once cooled, cut the nectarines in wedges and serve with mascarpone cheese.  Serve the nectarines with the pork chops and enjoy!

The End Result:


The pork tastes great rubbed in olive oil, garlic, and thyme.  It creates a delicious flavor that is only enhanced by the grill.  Letting the pork stand keeps all those juices in the meat and gives it a really juicy texture.  The nectarines were also enhanced by the grill.  You can barely taste the sugar mixture that was rubbed before the grill, but by using the grill, it made the nectarines super tender, almost melt-in-your-mouth quality.  The nectarines also offset the pure power of the garlic and thyme in the pork, so it's a must have when cooking this dish.  

Thanks for joining us tonight.  Check back later this week when Tyler presents a brand new dish.  Until then,

~Cheers!

Tuesday, June 11, 2013

Marvelous Mahi-Mahi

Good evening everyone! We've often discussed how much we enjoy cooking with the ubiquitous 'white fish'. This generic term applies to a wide swath of the fish 'genre', including cod, halibut, swordfish, perch and much more. It came as a bit of a surprise, given how much we enjoy using white fish fillets, that we had not combined our summertime cooking method of choice (grilling) with our fondness for fish. Well, tonight that (culinary) atrocity ends!


The Recipe: Beer Marinaded Mahi-Mahi
Original Recipe From: Time To Grill (Weber Grill e-book)

What You'll Need:
(Serves 2)

1 Cup Beer
1 Medium jalapeños (Sliced thin)
3 Tablespoons Lime Juice
2 Boneless, Skinless Mahi-Mahi fillets


In a glass baking dish (preferably one that has a lid), combine the beer (you can use any variety you like - we opted to use Summit's extra pale ale - because it's one of the beers we had in the fridge...plus, you get to drink the 'extra' while you're preparing the recipe. Life's too short to use crummy beer, even if it's for a marinade) jalapeños and lime juice. Add the fillets, making sure to cover them as well as you can in the marinade. Cover the baking dish and allow the fillets to rest at room temperature for 15 minutes, making sure to turn them halfway through.


It's important to stick to that 15 minute marinade time, as the acidic lime juice will actual begin "cooking" the fish after 15 minutes - obviously leading to a dryer than desired fillet.


Remove the fillets from the marinade (discard the marinade) and season them lightly with salt and pepper. On a clean, preheated (400-450 degrees) grill, add the fillets and cook for 8 minutes, flipping them halfway through. Make sure the fillets have are nice and flaky before removing them from the grill by lightly prodding them with a metal spatula or fork.

Transfer the fillets to your serving platter and enjoy! These fillets pair nicely with a green veggie (brean beans or asparagus are the best choices). Since we were already using the grill, we opted to toss some asparagus in olive oil, sprinkle it with salt and grill it alongside the fillets (8 to 10 minutes). But the side dish is up to your personal preference!


The Results:


Delicious! The mahi-mahi was incredibly tender and juicy thanks in part to the marinade. The fish picked up a very small hint of heat from the jalapeños (slight - not enough to deter even those who HATE heat in their food) but was otherwise unaffected (flavor wise) from the marinade. In this case, that's a good thing as mahi-mahi has great flavor on its own. Clocking in at just under 150 calories, this delicious dish is PERFECT for summertime. Give it a shot today!


That's all we have for you this evening. Stop in later this week as Maggie takes to the kitchen with a brand new recipe, featuring a brand new ingredient! Until then,

~Cheers

Saturday, June 8, 2013

On The Sweeter Side

Hello again everyone! One of the perks of summertime cooking is the ability to grill fruit. If you've never tried a pineapple slice or watermelon chunk on the grill, you really should give it a shot. The natural sugars of the fruit caramelize, greatly intensifying the fruit's natural sweetness.

 As I mentioned in last week's post, we had a big grill out over the Memorial Day weekend. One of the dishes we tried involved grilling up pineapple slices and combining them with frozen yogurt. Intrigued? You should be!

The Recipe: Caramelized Pineapple Fro-Yo

What You'll Need:

1 Pineapple (Cored, peeled, sliced into rounds)
1/4 Cup Brown Sugar
1 Tablespoon Cinnamon
Vanilla Frozen Yogurt

In a small bowl, combine the brown sugar and cinnamon. Next, dip each pineapple slice into the brown sugar / cinnamon mixture. Make sure each slice has an even coating of the mixture before transferring them to a plate. Allow the slices to rest for 5 to 10 minutes before adding them to the grill.

Cover 1/2 of the grill with aluminum foil, and bring the temperature to 350 degrees. Add the pineapple slices to the foil and allow them to cook for 5 minutes per side. This allows the brown sugar to caramelize, creating a thick, sticky glaze on the pineapple. After both sides of the pineapple have been coated in this lovely glaze, transfer the slices directly onto the grates for 1 minute per side. This creates the great char lines on the pineapple slice and adds a little more depth to the final flavors.

Once charred, remove the pineapple from the grill and dice it into smaller pieces. Scoop a few pieces of the pineapple into the bottom of a bowl, top with vanilla frozen yogurt and scoop a few slices of pineapple on top of the frozen yogurt. Serve and enjoy!


The Results:


This is one sweet little treat! Pineapple is already packed with natural sugars, so caramelized pineapple is predictably sweet. (That's a subtle way of warning you that a little of this dish is better than a lot - good things come in small serving sizes). But warm pineapple blended with cool vanilla frozen yogurt is one of summertime's most simple and decadent flavors. The next time you're firing up the grill, throw a few slices of pineapple on there and give this dessert a try for yourself.

Thursday, June 6, 2013

Go a Bit on the Wild Side

Good evening everyone!  As we've mentioned here on the blog before that using a grill can transform a simple dish to something extraordinary.  We've done the grill trick for quite a few recipes already (and I'm sure we'll have more up our sleeve in the next coming months.)  Tonight, I'll take a type of meat that is ranked in the "non-traditional American" sense, but give it the grill technique and it's something completely different.

The Recipe:  Lamb with Tzatziki Sauce
Original Recipe Found In:  Eat This, Not That No-Diet Diet

What You'll Need:
1 Cucumber; peeled, halved, and seeded
1 Cup plain Greek Yogurt
Juice of 1 Lemon (about three tablespoons)
2 Tablespoons Olive Oil
2 Cloves Garlic, finely minced
2 Teaspoons fresh Dill
4 loin or shoulder Lamb Chops (about four ounces each)

To start, preheat a grill to medium-high temperature.  Once the grill begins to warm, make the Tzatziki sauce:  using a cheese grater, grate the cucumber halves into small pieces.  Once the cucumber is grated, wring out the excess liquid from the cucumber.  This can be done by squeezing the cucumber to the inside of the bowl and pouring the excess liquid into a sink.  Keep wringing out the cucumber until it is barely moist.  Next, in a medium mixing bowl, combine the cucumber, yogurt, lemon juice, one tablespoon of olive oil, garlic, dill, and a pinch of salt and pepper.  Mix all these ingredients until well combined, then set aside.


By the time the sauce is made, the grill will be ready to use.  On a clean plate, rub the remaining tablespoon of olive oil on the lamb chops and season with salt and pepper.  Once seasoned, lay the chops on the grill; cook them on five to six minutes on each side.  Using a meat thermometer, insert into the thickest part of the chop.  Once it reads 135 degrees, they are medium to well done.  Place the lamb chops on a serving plate, serve with the Tzatziki sauce, and enjoy!

The End Result:


Now, admittedly, not everyone is a fan of lamb.  I wasn't a fan until about ten years ago until I had my first gyro, and I had my reservations when someone told me that I was eating meat from a cute and fuzzy animal.  But I think grilling the lamb chops, like they were a piece of steak or a pork chop, would help those who are nervous about trying lamb.  The coat of olive oil, seasoned with salt and pepper, doesn't particularly enhance anything about the meat, but it gives an even playing field for the way its prepared.  The true winner of this dish is definitely the Tzatziki sauce.  There is something so incredibly fresh about this sauce and how well it pairs with lamb that cannot be missed.  You would think that one ingredient would stand out amongst the others, but everything works so well together that it's not hard to miss.  If you haven't tried lamb, I would recommend that this be the recipe to start enjoying this great grilled meat.

We didn't forget our dessert recipe!  It might have been a week, but we will showcase this fantastic dish.  Until then,

~Cheers!

Wednesday, June 5, 2013

Baked Beans Take Center Stage

Good evening everyone! Tonight we're taking a look at the unsung heroes of the grilling season - the side dishes. From veggies, to fruit to the classic beans, side dishes can really enhance the final meal. Traditional banked beans are sort of a ho-hum affair, but the recipe we're trying tonight puts a unique spin on the classic side. These aren't your father's baked beans.

The Recipe: Tuscan Stovetop Baked Beans
Original Recipe Found In: Food Network Magazine June 2013 Issue

What You'll Need
(Serves 8)

1/2 Pound Thick Cut Pancetta (Diced)
1 Medium Onion (Diced)
1 Stalk Celery (Diced)
1 Large Carrot (Diced)
1 Teaspoon Italian Seasoning
1/2 Teaspoon Red Pepper Flakes
4 Cloves Garlic (Minced)
3/4 Cup Dry White Wine
4 x 15 Ounce Cans Great Northern Beans (Drained, Rinsed)
15 Ounces Canned Crushed Tomatoes
2 Cups Low Sodium Chicken Broth
1 Tablespoon Fresh Lemon juice
1/2 Cup Shaved Parmesan Cheese


Begin by placing a large dutch oven over medium high heat and add the pancetta. Cook, stirring occasionally until the pancetta is crisp and lightly browned. Remove the pancetta with a slotted spoon and transfer the pieces to a plated lined with a paper towel. Leaving the grease in the dutch oven, add the carrot, onion and celery along with the italian seasoning and the red pepper flakes.


Cook, stirring occasionally until the vegetables have softened - this takes about 8 to 10 minutes. Next, add a dash of salt and pepper and the garlic and cook for 30 seconds to 1 minute. Add the white wine and deglaze the pan, working off any browned on bits from the bottom of the dutch oven. Allow the mixture to simmer until it reduces by half, then add the beans, tomatoes and chicken broth. Stir well and allow the mixture to simmer for 20 minutes. After 20 minutes, stir in the lemon juice and return the pancetta to the dutch oven.

Transfer the mixture to a serving dish and top with the parmesan cheese - serve and enjoy!

The Results:


Baked beans are a staple of summertime cookouts - but the traditional canned variety can be a bit bland and underwhelming. This recipe is essentially pork and beans, but kicked up to a whole new level of flavor. The pancetta adds a great, salty "bacon-like" flavor to the beans which are not as heavy as their canned cousins due to the chicken broth / white wine base. Paired with a good burger or pork chop - these beans will really shine.

That's all we have for you this evening, but be sure to stop back each night this week as we'll be featuring a brand new mini-recipe (plus Maggie has a full fledged recipe of her own). Until tomorrow,

~Cheers